| Oracle® Fusion Middleware Developer's Guide for Oracle Complex Event Processing 11g Release 1 (11.1.1.6.0) for Eclipse Part Number E14301-06 |
|
|
PDF · Mobi · ePub |
| Oracle® Fusion Middleware Developer's Guide for Oracle Complex Event Processing 11g Release 1 (11.1.1.6.0) for Eclipse Part Number E14301-06 |
|
|
PDF · Mobi · ePub |
This appendix provides a simple tutorial that illustrates the basics of using the Oracle CEP IDE for Eclipse to create, deploy, and debug a simple Oracle Complex Event Processing (Oracle CEP) application.
This tutorial assumes that you have installed an Oracle CEP server and Oracle CEP IDE for Eclipse on the local computer. For more information, see: http://www.oracle.com/technologies/soa/complex-event-processing.html.
Before beginning this tutorial it is a good idea to switch to the Java or the Java EE perspective: both of which are good starting points for using Oracle CEP IDE for Eclipse to develop Oracle CEP applications. Although Oracle CEP applications are not Java EE applications, many of the same views are useful between the two.
To change the perspective, select Window > Open Perspective menu, or use the perspective shortcut menu as shown in Figure J-1.
If you are in the Java perspective, you will want to open the Servers view by selecting Window > Show View > Servers.
Your Oracle CEP IDE for Eclipse should look like Figure J-2.
The first step is to tell the Oracle CEP IDE for Eclipse where your Oracle CEP server is installed on the local machine. To do this, follow the steps in the Section 5.2.1, "How to Create a Local Oracle CEP Server and Server Runtime".
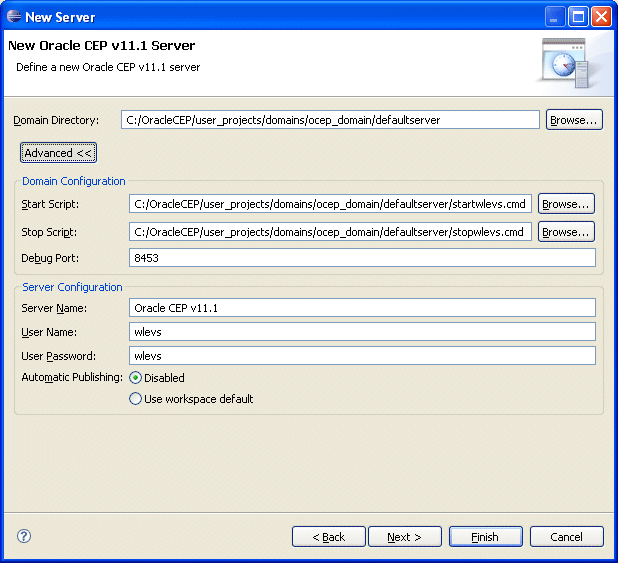
For this tutorial, enable automatic publishing on the server by selecting Use Workspace Default for the Automatic Publishing options on the second wizard page as Figure J-3 shows.
Figure J-3 Configuring the Oracle CEP Server for Automatic Publishing
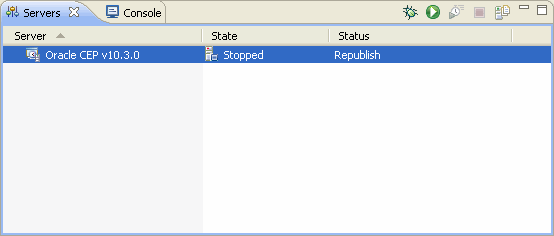
When finished, your Servers view should look as Figure J-4 shows.
Figure J-4 Oracle CEP IDE for Eclipse Server View
Next, create an Oracle CEP application. The basic the steps are described in Section 5.2.1, "How to Create a Local Oracle CEP Server and Server Runtime".
In this tutorial, select the File > New > Other, expand the Oracle CEP option and select Oracle CEP Application Project.
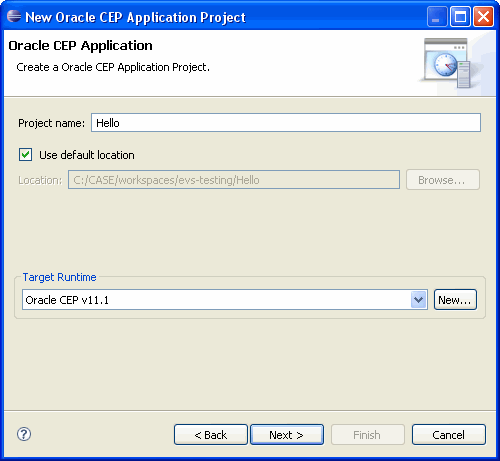
In the New Oracle CEP Application Project dialog, enter a project name of Hello and select the Oracle CEP v10.3.0 the Target Runtime (created in Appendix J, "Step 1: Create an Oracle CEP Definition") as Figure J-9 shows.
Figure J-5 New Oracle CEP Application Project Dialog
Click Next. Leave the Bundle Properties at their defaults and click Next again. The Templates dialog appears as Figure J-6 shows.
This page allows you to select what initial application files should be placed in the project. Check Create an Oracle CEP Application using one of these templates and select the Hello World template.
Click Finish.
The Project Explorer should contain the files shown in Figure J-7.
Now that the project is created and includes example content, it's time to start the server and deploy the project.
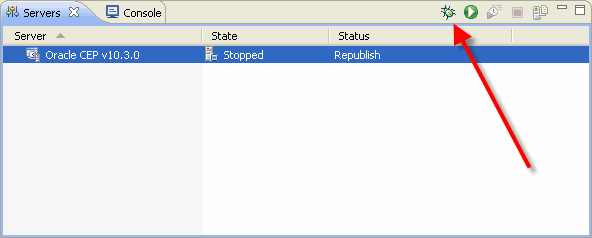
To start the server, click the Debug button on the Servers view as shown in Figure J-8. The debug icon looks like a bug on the view toolbar.
Figure J-8 Starting the Oracle CEP Server
In the Console view, some Oracle CEP server log messages will scroll by, followed by the server indicating that it has started, such as:
<Jan 22, 2009 4:59:41 PM EST> <Notice> <Server> <BEA-2046000> <Server STARTED>
Next, deploy the project to the server. In the Servers view, right-click the server and select Add/Remove Projects. The Add and Remove Projects dialog appears as shown in Figure J-9.
Figure J-9 Add and Remove Projects Dialog
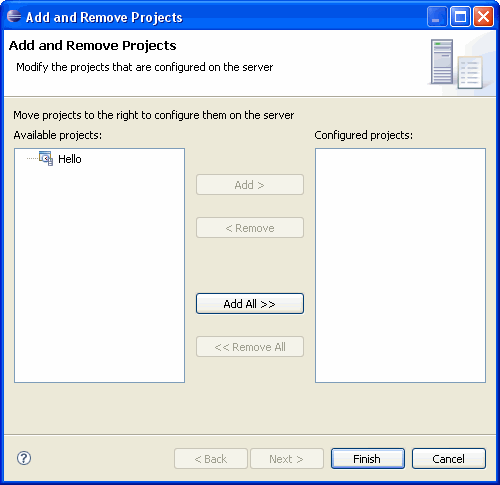
Select the Hello project from the Available projects list on the left and click Add to move the project to the Configured projects list on the right.
Click Finish. The Oracle CEP IDE for Eclipse deploys the project to the server.
In the Console view, the Oracle CEP server indicates that the application is deployed, such as (lines are broken for readability):
<Jan 23, 2009 9:24:13 AM EST> <Notice> <Spring> <BEA-2047000>
    <The application context for "com.bea.wlevs.monitor" was deployed successfully>
<Jan 23, 2009 9:24:17 AM EST> <Notice> <Spring> <BEA-2047000>
    <The application context for "com.bea.wlevs.dataservices" was deployed successfully>
<Jan 23, 2009 9:26:06 AM EST> <Notice> <Server> <BEA-2045000>
    <The application bundle "Hello" was deployed successfully to
        file:/C:/OracleCEP/user_projects/domains/ocep_domain/defaultserver/applications/Hello/Hello.jar
        with version 1232720766696>
<Jan 23, 2009 9:26:06 AM EST> <Notice> <Server> <BEA-2045000>
    <The application bundle "Hello" was deployed successfully to
        file [C:\OracleCEP\user_projects\domains\ocep_domain\defaultserver\applications\Hello\Hello.jar]
        with version 1232720766696>
<Jan 23, 2009 9:26:22 AM EST> <Notice> <Spring> <BEA-2047000>
    <The application context for "Hello" was deployed successfully>
Because the application is now deployed and running, you should see messages from your application being logged to the Console view
Message: HelloWorld - the current time is:9:26:22 AM
Message: HelloWorld - the current time is:9:26:23 AM
Message: HelloWorld - the current time is:9:26:23 AM
...
Next, we will change some code and redeploy the project to demonstrate the iterative development cycle.
Open the EPN (see Section 6.1, "Opening the EPN Editor").
In the EPN Editor, right click on helloworldAdapter and select Go to Java Source as shown in Figure J-10.
Figure J-10 Editing Java Source for an Adapter
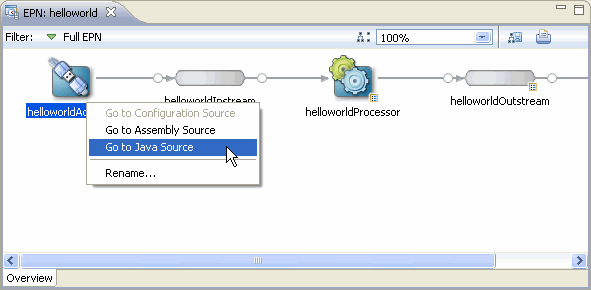
The Java editor opens as Figure J-11 shows.
Figure J-11 Java Editor for helloworldAdapter
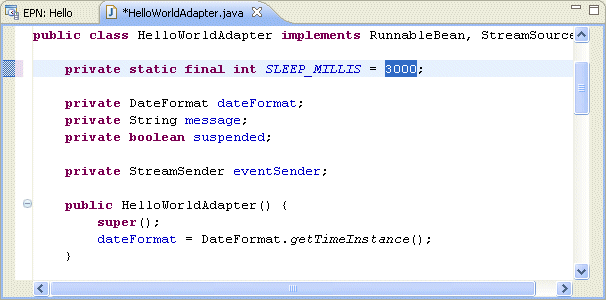
Using the Java editor, change the value of the SLEEP_MILLIS field to 3000 so that events only fire every 3 seconds. Select File > Save.
Because the default setting is to automatically redeploy projects, no further action is required. Oracle CEP IDE for Eclipse will redeploy the project after a few seconds and the rate of HelloWorld messages in the Console view will slow down to every 3 seconds as shown below (lines are broken for readability).
Message: HelloWorld - the current time is:9:37:41 AM
Message: HelloWorld - the current time is:9:37:41 AM
Message: HelloWorld - the current time is:9:37:41 AM
<Jan 23, 2009 9:37:42 AM EST> <Notice> <Spring> <BEA-2047001>
    <The application context "Hello" was undeployed successfully>
<Jan 23, 2009 9:37:42 AM EST> <Notice> <Server> <BEA-2045000>
    <The application bundle "Hello" was deployed successfully to
        file:/C:/OracleCEP/user_projects/domains/ocep_domain/defaultserver/applications/Hello/Hello.jar
        with version 1232721461898>
<Jan 23, 2009 9:37:43 AM EST> <Notice> <Spring> <BEA-2047000>
    <The application context for "Hello" was deployed successfully>
Message: HelloWorld - the current time is:9:37:43 AM
Message: HelloWorld - the current time is:9:37:46 AM
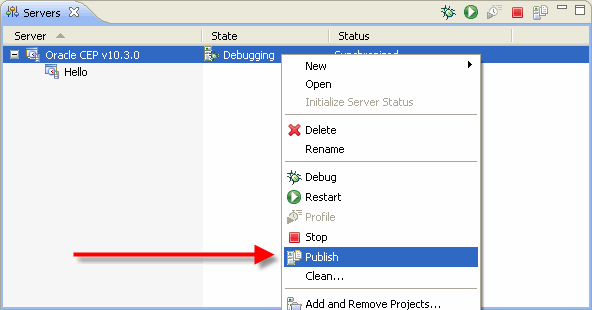
If automatic publishing is disabled, to republish the project, right-click on the server in the Servers view and select Publish as Figure J-12 shows.
Figure J-12 Manually Publishing a Project
Next, we will debug some code now that the application is up and running.
Open the EPN (see Section 6.1, "Opening the EPN Editor").
In the EPN Editor, right click on HelloWorldBean and select Go to Java Source as shown in Figure J-13.
Figure J-13 Java Editor for HelloWorldBean
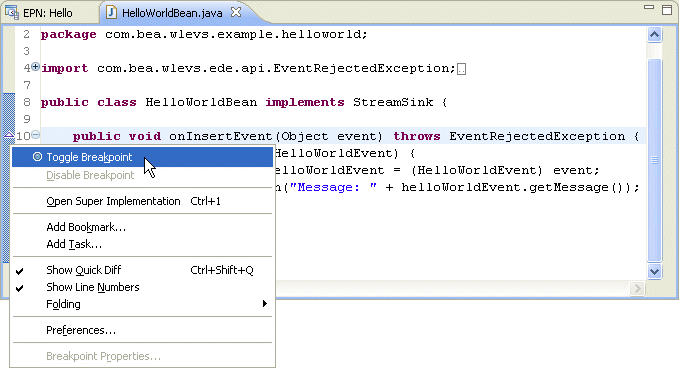
Right-click in the gutter on line 10 (to the left of the line number), and select Toggle Breakpoint.
The next time this StreamSink receives a message, it will stop at line 10 where the breakpoint was set and enter the Debug view as Figure J-14 shows.
Figure J-14 HelloWorldBean in the Debugger
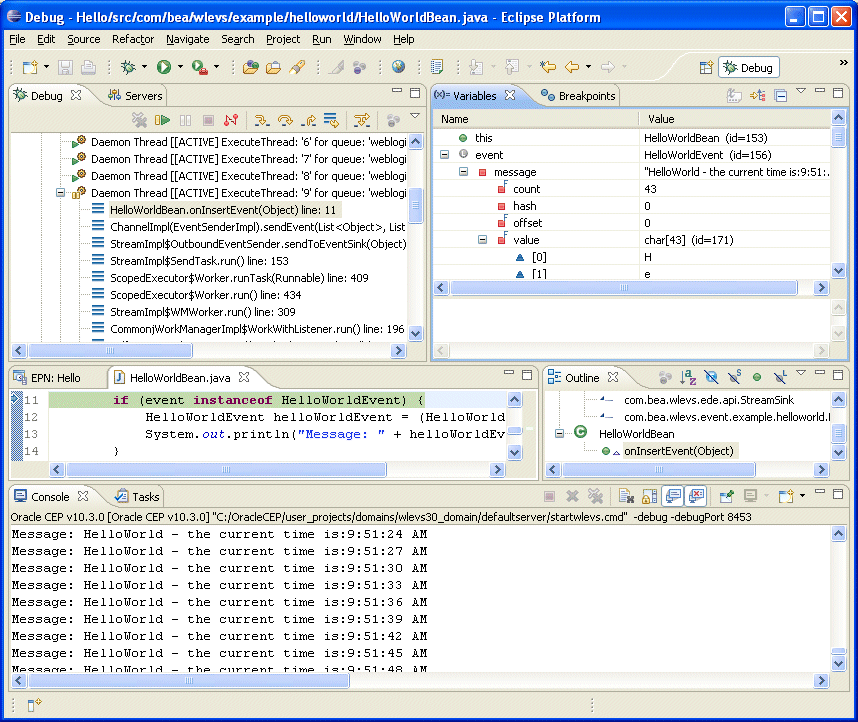
In the Variables view, you can expand the event variable and view the values of its attributes.
Examine the Oracle CEP examples available in the Oracle CEP server installer.
For more information, see "Oracle CEP Samples" in the Oracle Fusion Middleware Getting Started Guide for Oracle Complex Event Processing