| Oracle® Fusion Middleware Tutorial for Oracle WebCenter Developers 11g Release 1 (11.1.1) Part Number E10273-03 |
|
|
View PDF |
| Oracle® Fusion Middleware Tutorial for Oracle WebCenter Developers 11g Release 1 (11.1.1) Part Number E10273-03 |
|
|
View PDF |
Oracle WebCenter enables you design the look and feel of your application specifically for your organization at both design time (which you, as a developer, can do before deploying the application) and at runtime (which the application administrator or user can do after you have deployed the application).
At design time in JDeveloper, Oracle WebCenter enables you to use a "skin," which is essentially a global style sheet (based on CSS) that you can apply to your entire application. Once you apply the skin to your application, every layout component automatically uses the styles assigned by the skin. You cannot change this skin at runtime or post-deployment.
At runtime in your browser, Oracle WebCenter enables authenticated users (administrators, users, and so on) to personalize their view of their application using Oracle Composer. For example, if our sample user Lisa logs into the application at runtime, she can add, remove, or change the appearance of components or services that are available to the application. Only Lisa can view these modifications; if Dan or Alex log in, they see their own personal view of the application.
In this lesson, you, as a developer, will change the look and feel of your application at design time that all users can view at runtime. Then, to understand how your users can view and personalize the application, you will then log in as different users based on the roles you set in Chapter 4, "Adding Security to Your Application," and personalize the view of the application for that user at runtime.
Figure 7-1 shows how the application looks with the new skin.
Figure 7-1 Partial View of MyPage at Runtime with the New Skin
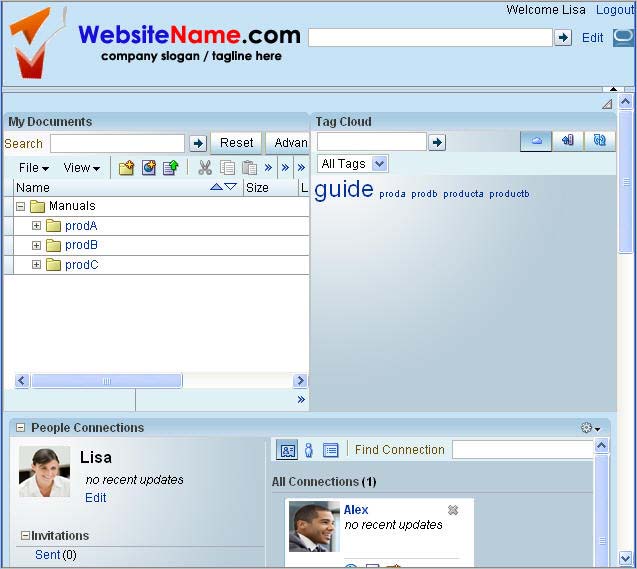
Figure 7-2 shows a partial view of Lisa's personalized page.
Figure 7-2 Partial View of Lisa's Personalized Page
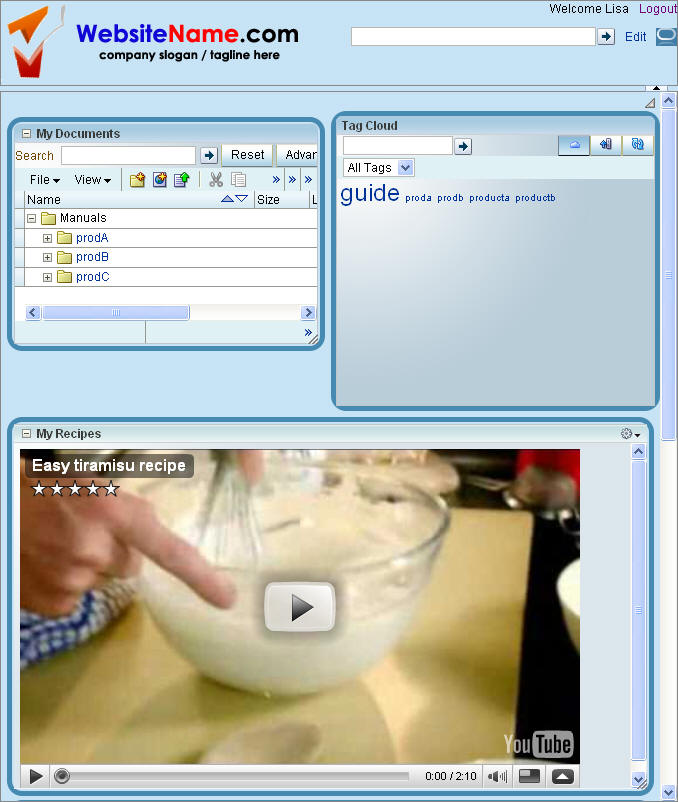
Figure 7-3 shows a partial view of Alex's personalized page.
Figure 7-3 Partial View of Alex's Personalized Page
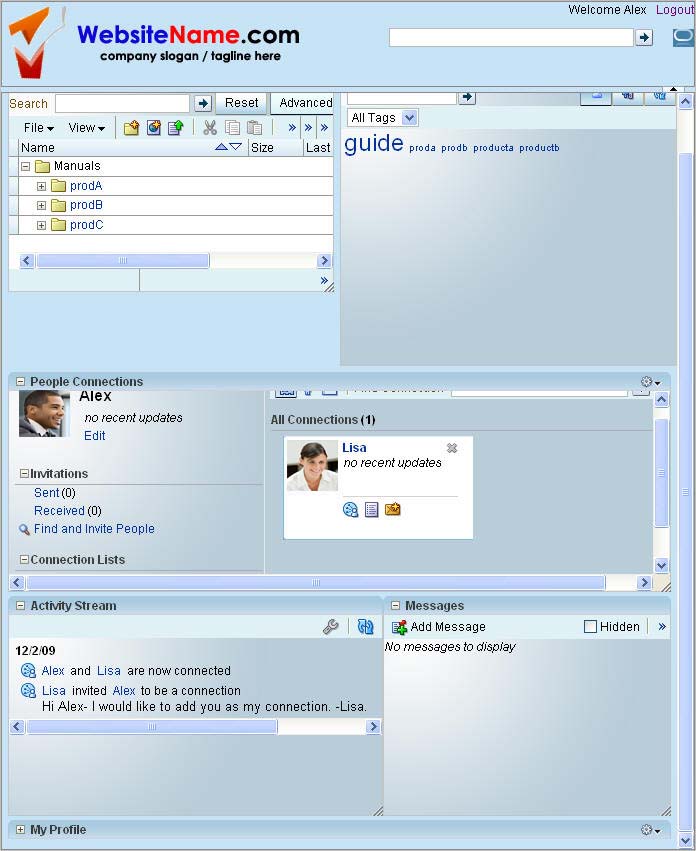
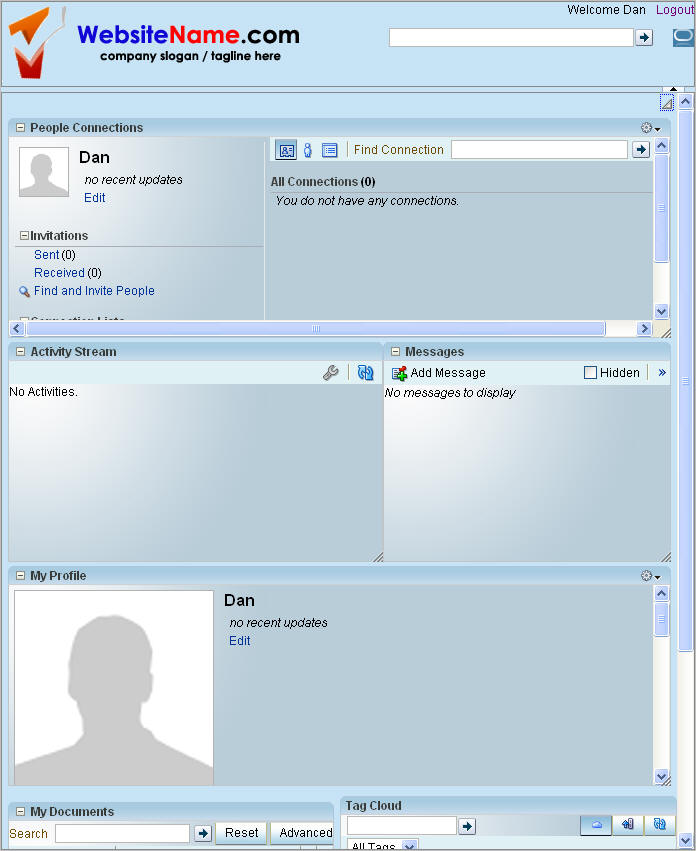
Figure 7-4 shows Dan's personalized page.
Figure 7-4 New Layout on Dan's Personalized Page
This lesson contains the following steps:
Before you begin the steps in this lesson, ensure you have followed the steps up to this point in the tutorial.
When you create a custom WebCenter application using the WebCenter Application template, the application includes a skin by default. You can extend this default skin with your own CSS file to change the look and feel of your application.
In this step, you will extend the default skin to change the look and feel of your application. First, you can either create a new CSS file or use an existing one; we've provided a CSS file you can use in this step. Next, you will create an XML file that tells the application to extend its default skin and use the CSS file you created to modify the appearance of the pages in your application. Finally, you will copy the CSS file into the directory that the XML file references.
Ensure you've followed the steps for adding the css and images folders from the Tutorial Sample Files to your application in Chapter 3, "Creating a WebCenter Application with a Customizable Page."
To change the application skin:
First, we need to create a configuration file, called trinidad-skins.xml, to tell the application to extend the default skin.
Make sure your page, MyPage.jspx, is open in JDeveloper and that MyTutorialApplication is in focus in the Application Navigator.
In the Application Navigator, under the ViewController project, open Web Content.
Right-click WEB-INF, then choose New to display the New Gallery.
In the New Gallery, under General in the left pane, select XML
In the right pane, select XML Document, then click OK (Figure 7-5).
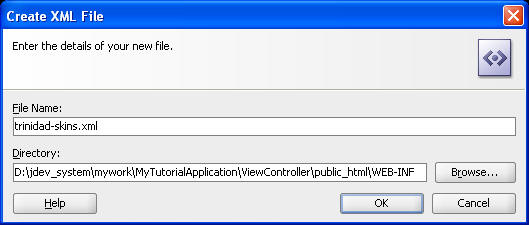
In the Create XML File dialog, in the File Name field, enter trinidad-skins.xml, then click OK (Figure 7-6). The new XML file displays in the Design view.
Figure 7-6 Creating the trinidad-skins.xml File
Delete the code in this editor, as shown in Figure 7-7.
Figure 7-7 Deleting the Default Code in the trinidad-skins.xml File
Paste the following code snippet into the trinidad-skins.xml file (Example 7-1):
Note:
If the formatting of the code in this text does not work, you can open theC:\TutorialContent\Portlets\trinidadskins.txt file and copy and paste the code from there.Example 7-1 Skin Code in the trinidad-skins.xml File
<?xml version="1.0" encoding="windows-1252" ?>
<skins xmlns="http://myfaces.apache.org/trinidad/skin">
       <skin>
              <id> TutorialSkin.desktop</id>
              <family>TutorialSkin</family>
              <extends>blafplus-rich.desktop</extends>
              <render-kit-id>org.apache.myfaces.trinidad.desktop</render-kit-id>
              <style-sheet-name>css/TutorialSkin.css</style-sheet-name>
       </skin>
</skins>
By creating trinidad-skin.xml file containing the code in Example 7-1, you created a new skin called TutorialSkin, which extends a default skin contained in the application called blafplus-rich. Every skin defined in this file must have a corresponding CSS file. In this case, the CSS file is called TutorialSkin.css. You already added the TutorialSkin.css file when you added the images and other resources to your application in Chapter 3, "Creating a WebCenter Application with a Customizable Page."
Refresh the Application Navigator by clicking the Refresh icon next to the Projects list (Figure 7-8).
Figure 7-8 The Refresh Icon in the Application Navigator

In the Application Navigator, under ViewController, WEB-INF, open the trinidad-config.xml file.
Find the following code:
<skin-family>fusion</skin-family>
In the code, replace fusion with TutorialSkin so the code looks like this:
<skin-family>TutorialSkin</skin-family>
Save the file.
Restart JDeveloper to apply your changes to the trinidad-skins.xml and trinidad-config.xml files.
Bring MyPage.jspx into focus.
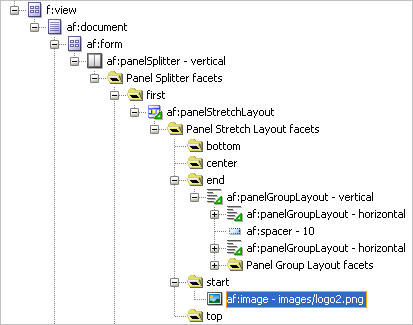
In the Structure window for MyPage.jspx, navigate to the start facet that contains the logo.png file you added in Chapter 3, "Creating a WebCenter Application with a Customizable Page." Figure 7-9 shows the logo file in the Structure window.
Replace this file with the logo2.png file located in the images directory. To do so, delete the af:image - images/logo.png from the Structure window (while it is selected, press the Delete key).
In the Application Navigator, navigate to the images directory under the ViewController, Web Content folders.
Drag and drop logo2.png onto the start facet and choose ADF Faces Image from the context menu (Figure 7-10).
Figure 7-10 Logo2.png in the Structure Window
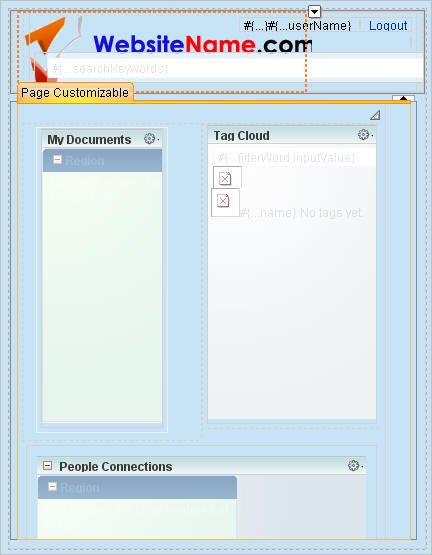
You should now see a visual change to the design time view of your page, as shown in Figure 7-11.
Figure 7-11 MyPage in the Design View with the New Skin
Let's make a few changes to the Show Detail Frames surrounding the services. Oracle WebCenter by default allows you to change the appearance of the layout components in your application with three settings: light, medium, and dark. These settings work with your CSS file to slightly alter the appearance of your page. Let's see how this works.
In the Structure window, select the Show Detail Frame labeled People Connections (Figure 7-12).
Figure 7-12 "My Documents" Show Detail Frame in the Structure Window

In the Property Inspector for the Show Detail Frame, expand the Appearance section.
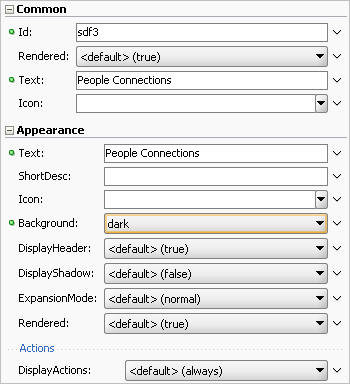
The Background property should currently be set to medium. Use the arrow to change this property to dark (Figure 7-13).
Figure 7-13 Setting the Background Property to dark
Perform the same steps to change the appearance of the Show Detail Frame of all the task flows to dark:
Activity Stream
Messages
My Profile
My Documents
Tag Cloud
Mail (optional)
In the Structure window, change the same Background property to dark for the two portlets.
MyPage should now look like Figure 7-14.
Figure 7-14 Changing the Background of the Show Detail Frames
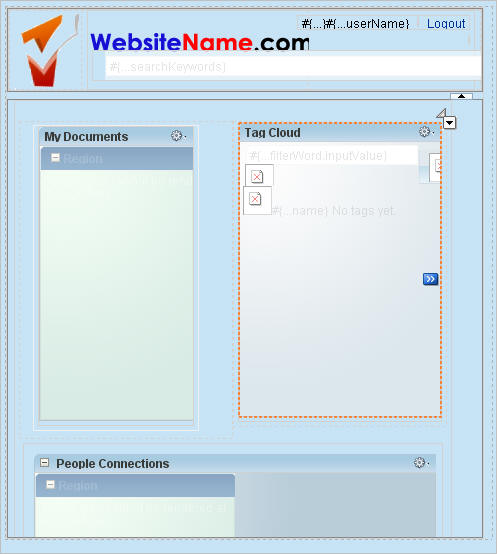
Run the page to your browser to view the new skin and log in as the user Lisa with the password welcome1 (Figure 7-15).
Figure 7-15 Partial View of MyPage at Runtime with the New Skin

Since you are still developing your application (and have not yet deployed it), you can continue to switch back and forth between the runtime view and design time in Oracle JDeveloper to modify the look and feel.
In Chapter 3, "Creating a WebCenter Application with a Customizable Page," you added Oracle Composer components to your page, including a Change Mode Link. You then worked a little with the Edit mode of the page at runtime to see how you can use Oracle Composer to modify your page at runtime.
Now that you've applied security and added content to the page, you can check out how you and your users can personalize their page (their own page) at runtime. For example, when Lisa logs in, she can change the look and feel of her page. When Dan logs into the same application, he does not see Lisa's changes; he only sees his own view. Remember that in Chapter 4, "Adding Security to Your Application," you assigned both the admin-role (which is assigned to Lisa) and the user-role (which is assigned to both Dan and Alex) privileges to View and Personalize MyPage. This section shows you how these privileges affect what actions a user can perform at runtime.
This step shows you a few tasks you can perform at runtime. You will log in as the three different users: Lisa, Dan, and Alex to see how the views change depending on the user and user privileges. Let's first play with some of the tasks you can perform to personalize Lisa's page.
To personalize Lisa's page:
If MyPage is not already displaying in your browser, run the page to your browser and log in as Lisa/welcome1.
One of the tasks Lisa can do at runtime is add a video, for example from YouTube, to her page. In the upper right corner of the page, click Edit.
Above the People Connections Show Detail Frame, click Add Content (Figure 7-16).
In the Catalog that displays, click ADF Faces Components to open the folder.
Next to Movable Box, click Add to add this component to the page. This box will contain the video component (Figure 7-17).
Click Close. The Movable Box displays on your page above the People Connections Show Detail Frame (Figure 7-18).
At the top of the page just below the company logo, notice the Composer toolbar. You'll see a View menu option on the right. Click View, then choose Source from the list to view the source of the page (Figure 7-19).
Figure 7-19 Viewing the Source of MyPage at Runtime
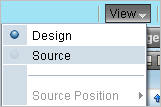
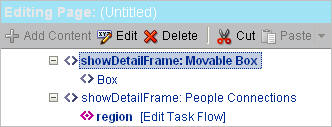
In the Source View, select the showDetailFrame:MovableBox.
From the menu, click Edit (Figure 7-20).
Figure 7-20 Movable Box in the Source View
In the Component Properties: Movable Box dialog, change the Text property to My Recipes, as shown in Figure 7-21.
Click Apply, then click OK.
Click Edit to re-enter the Edit mode of the page.
In the Catalog, click ADF Faces Components.
Figure 7-22 Add Content Button in the My Recipes Show Detail Frame
Next to HTML Markup, click Add, then click Close.
Since the Movable Box Show Detail Frame already contains a header called "My Recipes," you can delete the default header for the HTML Markup Show Detail Frame. Change to the Source view again by clicking View, then choosing Source in the context menu.
Select showDetailFrame:HTML Markup, then click Edit in the toolbar.
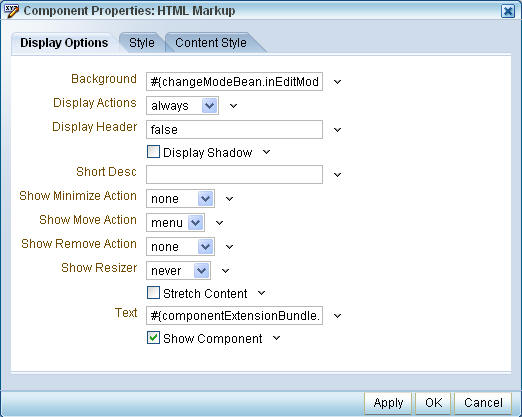
In the Component Properties:HTML Markup dialog, set the Display Header property to false (Figure 7-23).
Figure 7-23 Setting the Display Header Property
Click Apply, then click OK.
Close the Source view by clicking Close in the upper right corner of the application.
Next, add the video component. To do so, click Edit again in the upper right corner of MyPage to re-enter Edit mode.
In the My Recipes Show Detail Frame, next to the "New HTML Markup" text, hover under the pencil icon to view the toolbar for the component, then click the pencil (Edit) icon to edit the component (Figure 7-24).
Figure 7-24 Pencil Icon for Editing the HTML Markup Component

In the Component Properties:New HTML Markup dialog, change the Value property to the following code snippet, as shown in Figure 7-25.
Example 7-2 HTML Markup for the Video Component
<object width="560" height="340"><param name="movie"  name="allowFullScreen"
value="http://www.youtube.com/v/8HlqQqP6Mcw&hl=en_US&fs=1&"></param><param
value="true"></param><param name="allowscriptaccess" value="always"></param><embed
src="http://www.youtube.com/v/8HlqQqP6Mcw&hl=en_US&fs=1&"
type="application/x-shockwave-flash" allowscriptaccess="always"
allowfullscreen="true" width="560" height="340"></embed></object>
Figure 7-25 HTML Markup in the Value Field
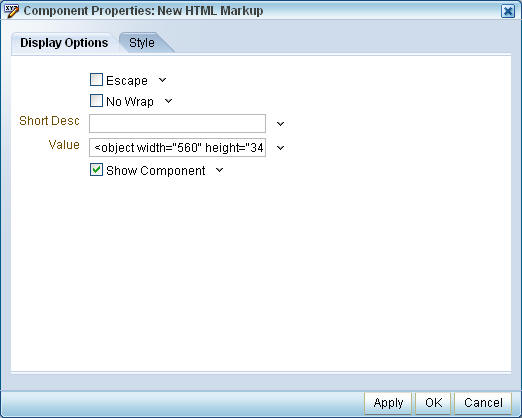
Click Apply, then click OK. You should now see a video component embedded on Lisa's page (Figure 7-26).
In addition to adding her favorite video to her page, suppose Lisa wants to change the appearance of her page. Specifically, she wants to see stronger borders around each component.
While in the Edit mode of the page, click the pencil (Edit) icon in the upper right corner of the My Documents Show Detail Frame.
In the Component Properties:My Documents dialog, click the Style tab.
On the Style tab, in the Other CSS field, enter the following code snippet:
Example 7-3 Changing the Style of the Show Detail Frame
padding:2px;border:5px solid
#468ab1;-moz-border-radius:15px;-webkit-border-radius:1 5px;style="
background-color:#ccc;
Figure 7-27 shows how the dialog appears after you enter this code.
Figure 7-27 New Border Style in the Component Properties:My Documents Dialog
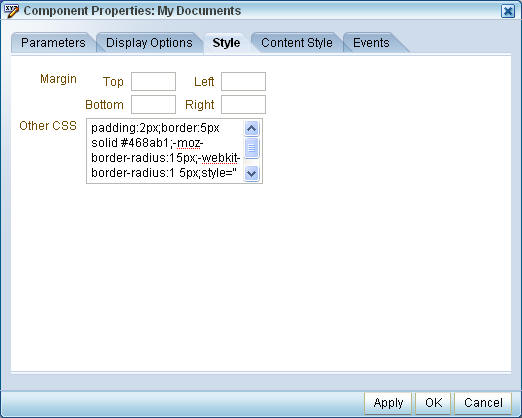
Click Apply, then click OK. Notice how the border of the My Documents Show Detail Frame changes.
Now that you've made a few changes to personalize Lisa's page, you can either perform steps 24 through 27 for all the other Show Detail Frames on the page, or continue to the next step ("Step 3: Personalizing a Second User's (Alex's) Page").
The purpose of switching users at runtime in the application is to show how one user (Lisa) can log in and personalize the application to accommodate her needs (adding the video component and changing the borders), and how these changes do not affect the other users' views of the application. Let's now take a look at Alex's page to see this in practice, as well as make a few changes to the page for Alex.
To personalize Alex's page:
While Lisa is still logged into the page, click Close to switch from Edit mode to View mode and take a look at Lisa's personalized page (Figure 7-29).
Click the Logout link in the upper right corner of MyPage, then log in as Alex/welcome1. Notice that the view of MyPage (Figure 7-30) does not contain any of the changes you made in "Step 2: Personalize One User's (Lisa's) Page".
Figure 7-30 Partial View of Alex's Page with No Personalizations
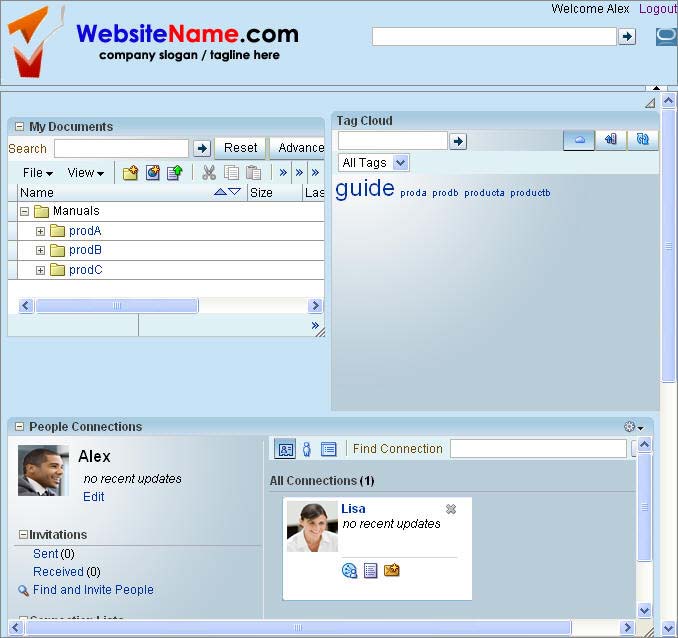
Suppose Alex does not want to track updates to the Tag Cloud and Profiles made by other users, but he wants to keep the Activity Stream task flow to track other changes made to the application.
In the upper right corner of the Activity Stream Show Detail Frame, click the tool (Change the source, filter, and display options) icon (Figure 7-31).
Figure 7-31 Activity Stream Show Detail Frame

In the Configure dialog that displays, expand the Filter category, then clear the Profiles and Tagging checkboxes (Figure 7-32).
Click Save. Notice that, to perform this operation, user Alex does not have to be in the Edit mode (which he doesn't have permission to do, anyway). Any user can perform this operation in the View mode; the changes are only visible to the current user.
Figure 7-33 shows the updated Activity Stream on Alex's page.
Figure 7-33 Alex's Updated View of the Activity Stream

While still logged in as user Alex, you can play around with some of the other options available. For example, you can minimize the My Profile Show Detail Frame if you do not wish to see your profile.
In the upper right corner of the page, click the Logout link. Now that you are finished personalizing Alex's page, take a look at Dan's page to see what options are available to him in the next step.
In Chapter 4, "Adding Security to Your Application," you assigned both users Alex and Dan to the user-role and gave the role the View and Personalize permissions. Both users, then, can only make minor modifications to the page that only they (while logged in) can see. They do not have the permission to edit the page, and thus cannot perform the same actions as Lisa, who is assigned to the admin-role (which can View and Customize the page).
In this step, you will log in as user Dan to verify that he cannot view the changes you made to the application as user Lisa or user Dan. You will also see what changes Dan can make to the application.
To personalize Dan's page:
Log into the application as Dan/welcome1. Notice that none of the changes you made to Lisa's or Alex's page display on Dan's page.
While Dan can perform the same actions as Alex, suppose he simply wants to change the layout of the page. Above the Tag Cloud, to the right, notice the change layout icon.
Figure 7-36 Change Layout Icon above the Tag Cloud

Click the icon to view the different layouts you can choose.
Try clicking one of the layouts, such as Two Columns Below Wide Area (the layout to the left of the current selection). Notice how the layout changes.
Figure 7-38 New Layout on Dan's Personalized Page

As with the changes you made while logged in as users Lisa and Alex, the layout change only displays for Dan. Additionally, Dan does not require Edit privileges to change the layout.
Click Logout.
Log in as Lisa or Alex to see that the changes you made in "Step 2: Personalize One User's (Lisa's) Page" and "Step 3: Personalizing a Second User's (Alex's) Page" are still saved, and that Dan's changes do not display for either user Lisa or Alex.
Now that you have had a short introduction to some of the ways users can personalize their pages, you can learn about more actions you can perform at runtime in Oracle Fusion Middleware User's Guide for Oracle WebCenter.
Congratulations! You've completed this lesson and changed the look and feel of the application by using a skin. You've also checked out how to use Oracle Composer at runtime to learn how to personalize your page at runtime, depending on your user privileges. Continue on to Chapter 8, "Conclusion" to review what you learned in this Tutorial, and where you can find more information about the features you used.