|
Apache Struts Web Application Framework
|
| How to setup a basic Struts project using Netbeans IDE | Contributors: |
| Legal Disclamer |
Please read this first.
* DISCLAIMER - This simple How-To shows you one of many ways to setup a working project using
the Struts framework. This is mainly geared toward struts users who are new to Netbeans, and
don't want to spend a lot of time figuring out the differences between their old IDE (if any)
and this one.
I will also apologize ahead of time for the formatting of this page.
In this How-To, I will demonstrate (using Netbeans 3.4) how to setup, compile, and build
a customized version of the struts-example.
|
| Let's get started |
-
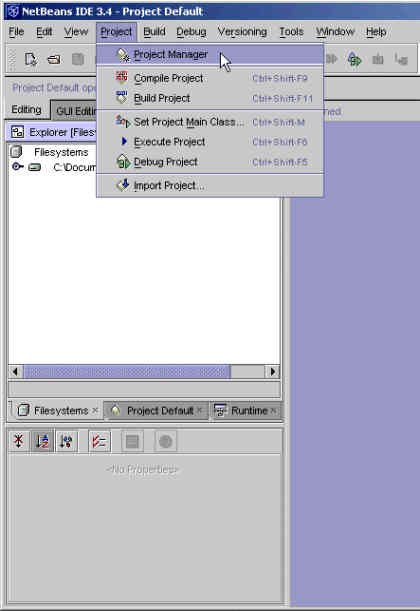
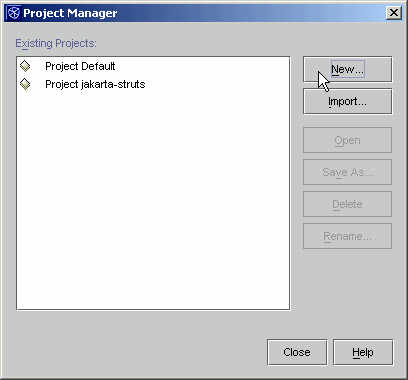
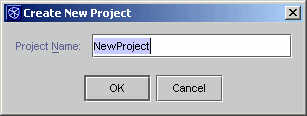
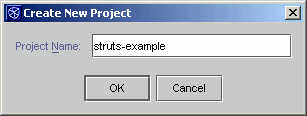
Create a new project.
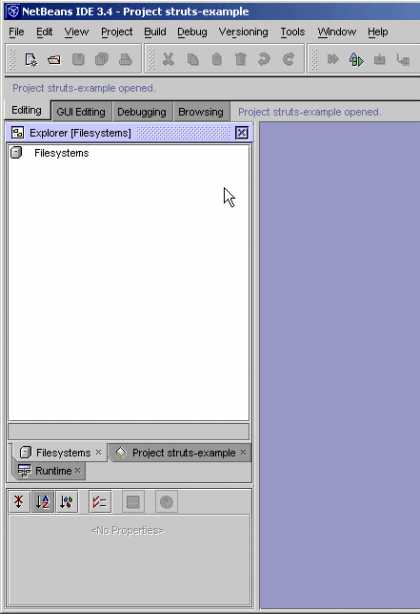
-
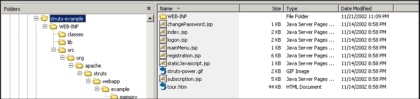
Now let's create (or reuse) a directory to hold the project.
What I did was copy the struts-example.war from the Struts distribution
and extracted it (using Winzip) like this:
-
Next we need to create a build.xml to build our project. This file will sit in the root
directory of your project. (Actually, it doesn't matter where sits so long as you make
the appropriate changes to directories and such.)
*Note - I will not spend any time here trying to convince you why you should be
using Ant to build your projects. I guess I consider this to be obvious.
Here is the build.xml file I use for this demonstration (you MUST modify this
to use your environment):
  <project name="Struts Example" default="main" basedir=".">

    <!--  This is a basic build script, only the minimums here -->

    <!-- Tell ant to use my environment variables -->
    <property environment="env"/>

    <property file="./build.properties"/>

      <property name="build.compiler"     value="modern"/>
      <property name="build.dir"          value="./WEB-INF/classes" />
      <property name="src.dir"            value="./WEB-INF/src"/>
    <property name="servlet.jar"        value="/Apache_Home/jakarta-servletapi-4/lib/servlet.jar"/>
      <property name="war.file"              value="struts-example"/>
      <property name="war.file.name"      value="${war.file}.war"/>
      <property name="tomcat.home"       value="${env.CATALINA_HOME}"/>
      <property name="deploy.dir"         value="${tomcat.home}/webapps"/>

    <path id="project.class.path">
        <fileset dir="./WEB-INF/lib/">
            <include name="**/*.jar"/>
        </fileset>
        <pathelement path="${src.dir}"/>
        <pathelement path="${servlet.jar}"/>
    </path>

      <target name="clean">
          <delete dir="${build.dir}" includeEmptyDirs="true" />
      </target>


      <target name="prep">
          <mkdir dir="${build.dir}"/>
      </target>

      <target name="compile">
        <javac   srcdir="${src.dir}"
                    destdir="${build.dir}"
                    debug="on"
                deprecation="on">
          <include name="**/*.java"/>
          <classpath refid="project.class.path"/>
        </javac>
      </target>

      <target name="cleanWebApp">
        <delete file="${deploy.dir}/${war.file.name}" />
          <delete  dir="${deploy.dir}/${war.file}" includeEmptyDirs="true" />
      </target>

      <target name="war">
          <war warfile="${war.file.name}" webxml="./WEB-INF/web.xml">
                 <fileset dir="./" includes="**/*.*" excludes="*.war, **/*.nbattrs, web.xml, **/WEB-INF/**/*.*, **/project-files/**/*.*"/>
                 <webinf  dir="./WEB-INF"    includes="**/*" excludes="web.xml, **/*.jar, **/*.class"/>
                 <lib     dir="./WEB-INF/lib"/>
                 <classes dir="${build.dir}" includes="**/*.properties" />
          </war>
      </target>

      <target name="deploy">
          <copy todir="${deploy.dir}">
            <fileset dir="./" includes="${war.file.name}"/>
          </copy>
      </target>

    <target name="main" depends="clean, prep, cleanWebApp, compile, war"/>

  </project>
-
Build the project using Ant from the command line.
Here's what I get:
  C:\personal\development\Projects\struts-examples\struts-example>ant
  Buildfile: build.xml

  clean:
     [delete] Deleting directory C:\personal\development\Projects\struts-examples\struts-example\WEB-INF\classes

  prep:
      [mkdir] Created dir: C:\personal\development\Projects\struts-examples\struts-example\WEB-INF\classes

  cleanWebApp:
     [delete] Deleting: C:\Apache_Home\jakarta-tomcat-4.0.6\webapps\struts-example.war
     [delete] Deleting directory C:\Apache_Home\jakarta-tomcat-4.0.6\webapps\struts-example

  compile:
      [javac] Compiling 22 source files to C:\personal\development\Projects\struts-examples\struts-example\WEB-INF\classes
      [javac] C:\personal\development\Projects\struts-examples\struts-example\WEB-INF\src\org\apache\struts\webapp\example\memory\MemoryDatabasePlugIn.java:78: warning: org.apache.struts.config.ApplicationConfig in org.apache.struts.config has been deprecated
      [javac] import org.apache.struts.config.ApplicationConfig;
      [javac]                                 ^
      [javac] C:\personal\development\Projects\struts-examples\struts-example\WEB-INF\src\org\apache\struts\webapp\example\memory\MemoryDatabasePlugIn.java:185: warning: org.apache.struts.config.ApplicationConfig in org.apache.struts.config has been deprecated
      [javac]     public void init(ActionServlet servlet, ApplicationConfig config)
      [javac]                                             ^
      [javac] C:\personal\development\Projects\struts-examples\struts-example\WEB-INF\src\org\apache\struts\webapp\example\memory\MemoryDatabasePlugIn.java:185: warning: init(org.apache.struts.action.ActionServlet,org.apache.struts.config.ApplicationConfig) in org.apache.struts.action.PlugIn has been deprecated
      [javac]     public void init(ActionServlet servlet, ApplicationConfig config)
      [javac]                 ^
      [javac] C:\personal\development\Projects\struts-examples\struts-example\WEB-INF\src\org\apache\struts\webapp\example\memory\MemoryDatabasePlugIn.java:185: warning: org.apache.struts.config.ApplicationConfig in org.apache.struts.config has been deprecated
      [javac]     public void init(ActionServlet servlet, ApplicationConfig config)
      [javac]                                             ^
      [javac] 4 warnings

  war:
        [war] Building war: C:\personal\development\Projects\struts-examples\struts-example\struts-example.war

  main:

  BUILD SUCCESSFUL
Total time: 11 seconds
-
If it did not build for you, verify that the external jars (external to this project) are
specified correctly.
-
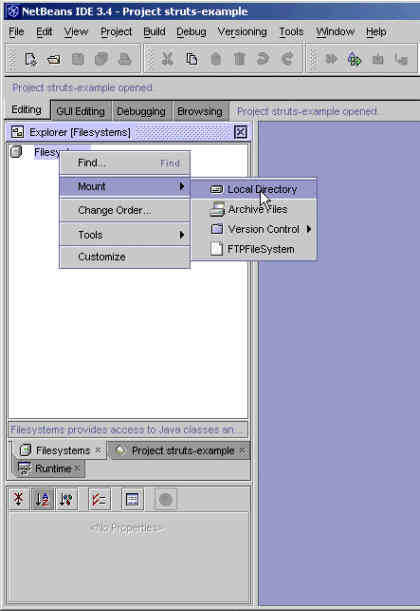
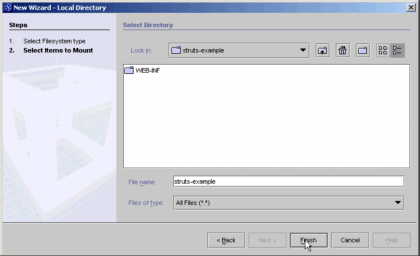
Now we can finish setting up our Netbeans project
Mount the directory where we extracted the example and where we ran the build:
-
If specified correctly, Netbeans will parse the build.xml automatically and will use
(mount jars) the resources that you've declared for building.
-
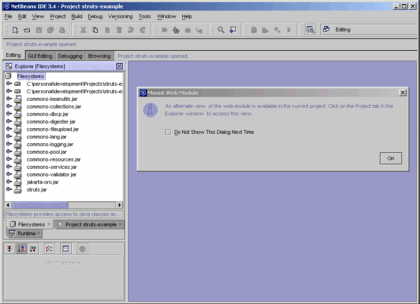
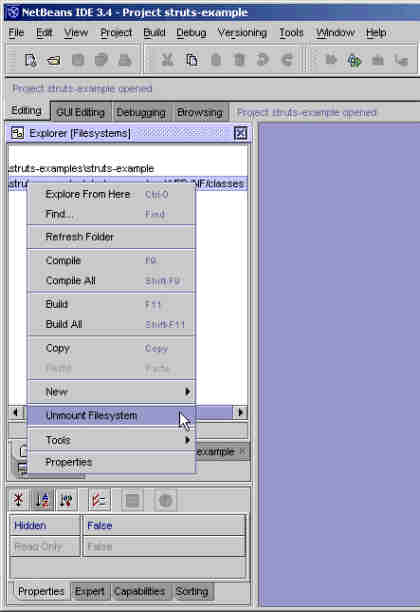
I usually get rid of the additional mounted directory under /WEB-INF/classes.
Since everything there gets overwritten with each build, I don't usually need to
see this (or possibly make changes in the wrong place)
-
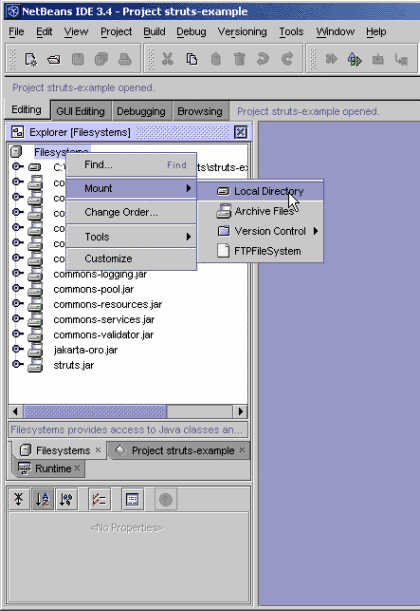
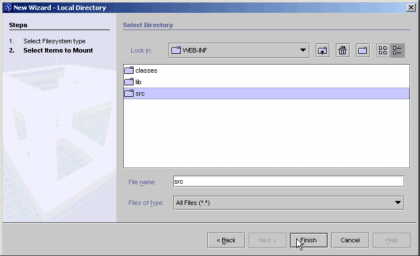
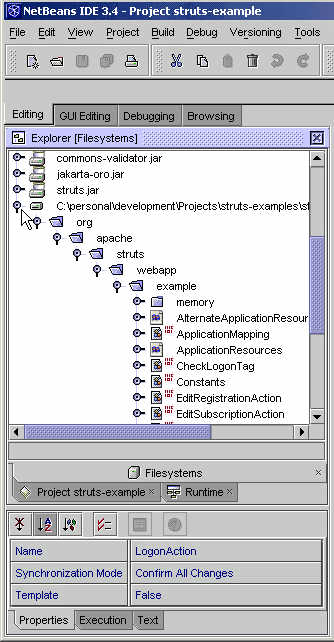
In order for Netbeans to understand the package structure for our source code, we need
to mount all source directories directly.
*Note - Some IDEs will do this automatically
(Eclipse) or can be configured from the project config file (JBuilder)
-
Use your source mount point to add/edit/delete your .java files
-
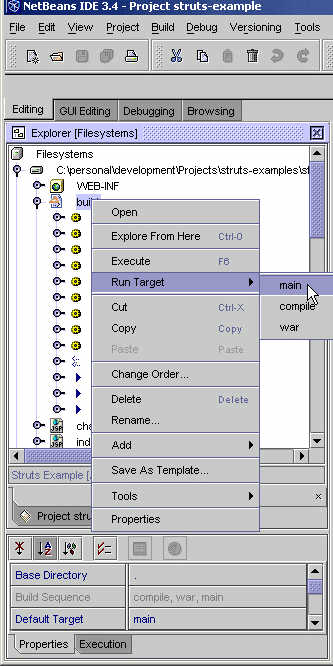
Using the initial mount point, expand until you can right-click on the build.xml file (or one
of the targets) and build the project
-
If you receive errors from Netbeans (choking on the XML parse), don't worry, I did too.
I always call ant on the command line anyway, so I don't worry too much about the IDE's
internal XML jars.
-
Feel free to change the code as you like, and then build and deploy your new app.
|
|