An Internet of Things OS is any Operating System specifically designed to work within the constraints that are particular to IoT devices which are typically limited in memory size, processing power, capacity, and built to enable swift data transfer over the Internet.
There are several (mostly Linux-based) Operating Systems that you can use for IoT but they wouldn’t allow you to get the best out of your setup and that’s the reason why IoT-focused distros exist.
Here are the list of top Operating Systems you can use for your Internet of Things projects.
Contents:
1. Zephyr (Operating System)
2. Ubuntu Core
3. RIOT OS
4. FreeRTOS
5. Mbed OS
6. Fuchsia OS
7. Contiki-NG
8. TinyOS
9. BalenaOS
10. MicroPython
11. Windows for IoT
12. OpenWrt
13. Embedded Linux
14. Fedora IoT
Conclusion
1. Zephyr (Operating System)
Zephyr is a small, scalable, open-source, and real-time operating system (RTOS) for connected devices, that provides modularity which allows developers to optimize the system for a specific use. It supports multiple architectures and offers features like Bluetooth, LoRa, and NFC.
Zephyr is designed to be easy to use and efficient, with a small memory footprint and low power consumption. It also includes a number of features that make it well-suited for IoT devices, such as support for networking, security, and power management.
Some of the key features of Zephyr include:
Small memory footprint and low power consumption.
Support for multiple hardware architectures.
Connectivity support for Wi-Fi, Bluetooth, and Ethernet.
Security features, such as encryption and authentication.
Power management features, such as dynamic voltage and frequency scaling.
A modular design that makes it easy to add new features and drivers.
Zephyr is used in a wide variety of IoT devices, including sensors, actuators, gateways, and wearables. It is also used in some industrial and automotive applications.
2. Ubuntu Core
Ubuntu Core is a robust version of Linux’s most popular distro, Ubuntu, made particularly for large container deployments and Internet of Things devices. It was built by Canonical to use the same kernel, system software, and libraries as Ubuntu but on a much smaller scale, and it is used to power robots, gateways, digital signs, etc.
Ubuntu Core is designed to provide users with a secure embedded Linux for IoT devices. All of its aspects are verified in order to maintain immutable packages and persistent digital signatures. It is also minimal and enterprise-ready.
3. RIOT OS
RIOT is a free, friendly, and open source Operating System designed for working with IoT devices with the aim of implementing all relevant open standards that support secure, durable, and privacy-friendly IoT connections.
RIOT‘s features include a minimum RAM and ROM size of ~1.5kB and ~5kB, full support for C and C++, multi-threading, modularity, and MCU without MMU.
Here are some of the features of RIOT OS:
Supports a wide range of hardware platforms, including 8-bit, 16-bit, and 32-bit microcontrollers.
Provides a real-time kernel with guaranteed response times.
It boasts a minimal memory footprint, ideal for devices with limited resources.
Is modular, making it easy to add or remove features.
Provides a uniform API for accessing hardware and services.
It is open source, allowing for free modification and redistribution.
RIOT OS is a popular choice for developing IoT applications by a wide range of companies and organizations, including Bosch, Siemens, and the European Space Agency.
If you are looking for an OS for your IoT project, RIOT OS is a good option to consider, It is a powerful, versatile, and open-source OS that can be used to develop a wide variety of applications.
4. FreeRTOS
FreeRTOS is an open-source, real-time operating system (RTOS) for microcontrollers, which is a lightweight kernel that offers basic functionality for task management, scheduling, and synchronization.
FreeRTOS is free to use and distribute, and it is supported by a large active community and used by a wide variety of embedded systems, including industrial automation, medical devices, consumer electronics, automotive, networking, smart home devices, and Internet of Things (IoT).
Here are some of the key features of FreeRTOS:
It is a small and efficient kernel that takes up minimal memory and processing resources.
It supports multiple tasks that can run concurrently.
It provides a variety of scheduling algorithms to choose from.
It provides a variety of synchronization mechanisms to ensure that tasks do not interfere with each other.
It provides a variety of memory management options, including static and dynamic allocation.
It has been ported to over 35 microcontroller platforms.
It provides a variety of security features, such as secure boot and over-the-air updates.
If you are developing an embedded system, FreeRTOS is a good choice for an RTOS. It is reliable, efficient, and easy to use.
5. Mbed OS
Mbed OS is an open-source, real-time operating system (RTOS) designed for embedded systems, specifically targeting Internet of Things (IoT) devices.
Developed by Arm, one of the industry leaders in microprocessor technology, Mbed OS offers a range of features and tools that make it easier for developers to produce efficient, secure, and scalable products.
Here are some of the key features of Mbed OS:
A lightweight operating system that takes up minimal memory and processing resources. This makes it ideal for resource-constrained IoT devices.
It is designed to be efficient in terms of power consumption and performance. This is important for IoT devices that need to operate on batteries or other limited power sources.
Provides a variety of security features to protect IoT devices from attack. This includes secure boot, over-the-air updates, and cryptography.
Portable to a wide range of Arm Cortex-M microcontrollers. This makes it easy to develop IoT devices that can run on a variety of hardware platforms.
Has a large and active community of developers and users. This means that there is a lot of support available, and you are more likely to find solutions to problems that you encounter.
If you are developing an IoT device, Mbed OS is a good choice for an operating system, as it is lightweight, efficient, secure, and portable, and it has a large and active community of support.
6. Fuchsia OS
Fuchsia is an open-source capability, real-time operating system created for the Internet of Things devices by Google. Unlike two of Google’s much-loved products, Chrome and Android, which are based on the Linux kernel, Fuchsia OS is based on the Zircon kernel.
It ships with Node.js which enables support for JavaScript and it is expected to be able to run on AMD devices as well as on phones and tablets with the ability to run Android apps.
Want to see Fuschia in action? Check out this demo link.
7. Contiki-NG
Contiki-NG (short for Contiki Next Generation) is an open-source operating system for resource-constrained, networked, Internet of Things (IoT) devices. It serves as the successor to the older Contiki OS and offers enhanced features, stability, and performance.
Designed with tiny devices in mind, Contiki-NG provides multitasking capabilities and a built-in Internet Protocol (IP) suite, making it suitable for a wide range of IoT applications.
Here are some of the key features of Contiki-NG:
Supports a variety of low-power communication protocols, including 6LoWPAN, IPv6, 6TiSCH, RPL, and CoAP.
It provides a variety of security features, including secure boot, over-the-air updates, and cryptography.
Portable to a wide range of hardware platforms, including 8-bit, 16-bit, and 32-bit microcontrollers.
Designed in a modular way, which makes it easy to add new features and adapt it to different applications.
Has a large and active community of developers and users, which means that there is a lot of support available.
8. TinyOS
Tiny OS is a free and open-source BSD-based Operating System aimed at low-power wireless devices e.g. devices used in sensor networks, Personal Area Networks, universal computing, smart meters, and smart buildings.
It initially started as a project hosted on Google Code where it was writeable by only selected core developers but it has since 2013, transitioned to GitHub where it is more open to the open-source community and is averaging at least 35,000 downloads per year.
Here are some of the key features of TinyOS:
It is designed to be lightweight and efficient, taking up minimal memory and processing resources.
It is based on a component-based architecture, which makes it easy to develop and maintain applications.
It uses an event-driven programming model, which means that applications are event-driven and do not have to worry about managing the underlying hardware.
It is designed to be network-aware, making it easy to develop applications that communicate with each other over a network.
An open-source operating system, which means that it is free to use and modify.
9. BalenaOS
BalenaOS is a Linux-based operating system optimized for running Docker containers on embedded devices. It is based on the Yocto Project, and it uses Docker as its container runtime, which is designed to be lightweight, secure, and easy to use.
Here are some of the key features of BalenaOS:
Designed to be lightweight and efficient, taking up minimal memory and processing resources.
It uses Docker as its container runtime, which makes it easy to deploy and manage applications.
Includes a variety of security features, such as secure boot and over-the-air updates.
Provides a variety of tools and documentation to help developers get started.
BalenaOS is used by a variety of companies, including Bosch, Intel, and Samsung. It is also used by a number of open-source projects, such as Home Assistant and OpenHAB.
10. MicroPython
MicroPython is a streamlined and optimized version of the Python 3 programming language, incorporating a minimal portion of the Python standard library and designed specifically for microcontrollers and resource-restricted settings.
It is a smaller and more lightweight version of Python that is designed to run on microcontrollers and other embedded systems with limited resources. It is based on the Python programming language, but it has been stripped down to the essentials to make it more efficient and portable.
MicroPython is a good choice for developing applications for embedded systems, such as IoT devices, robotics, educational projects and prototypes..
11. Windows for IoT
Windows for IoT represents Microsoft’s endeavor to carve out a place in the burgeoning Internet of Things (IoT) landscape. Specifically tailored for IoT devices, this platform offers developers and businesses a means to create smart, interconnected solutions with a familiar Windows framework.
The platform is split mainly into two primary editions Windows 10 IoT Core and Windows 10 IoT Enterprise and can be integrated seamlessly with Azure IoT Suite, Microsoft’s cloud solution for IoT, providing an end-to-end solution for businesses.
With the massive growth of IoT, Microsoft’s Windows for IoT is positioning itself as a reliable, scalable, and efficient platform, bridging the gap between everyday devices and the power of smart, interconnected technology.
12. OpenWrt
OpenWrt is an open-source firmware project aimed at embedded devices, particularly routers. Unlike many factory-default firmware that offer limited customization and functionality.
Originating from a firmware created for the Linksys WRT54G series in 2004, OpenWrt has evolved to support a vast array of hardware from various manufacturers. Its modular design enables users to personalize their device’s functionalities by choosing from a vast collection of available packages tailored for different needs.
One standout feature of OpenWrt is its package management system that allows for easy installation of software and extensions, providing enhanced functionalities beyond the capabilities of standard firmware.
13. Embedded Linux
Embedded Linux is a term used to describe the latest generation of embedded Linux operating systems, which is based on the Ubuntu Core distribution and features a number of improvements over previous versions, including:
It is designed to be more lightweight and efficient, making it ideal for resource-constrained devices.
Built on a modular architecture, which makes it easier to customize and update the operating system.
Built on a secure foundation, with features such as AppArmor and Seccomp to protect devices from cyberattacks.
Designed to be cloud-native, making it easy to develop, deploy, and manage applications on embedded devices.
14. Fedora IoT
Fedora IoT is a variant of the Fedora operating system, tailored for IoT devices that provides a robust, secure, and open-source platform for edge computing, ensuring consistent updates and strong community support.
With its modular design, Fedora IoT simplifies device management, making it an ideal choice for developers and enterprises venturing into the Internet of Things ecosystem.
Conclusion
Choosing the right IoT operating system is crucial in ensuring the functionality, efficiency, and security of connected devices. Factors like memory constraints, required connectivity protocols, and scalability need to be considered.
Do you already use any of the above-mentioned Operating Systems for your IoT projects? Or are you familiar with recommendable ones not on the list? Drop your comments in the discussion section.
2022 was an exceptional year for numerous applications, particularly those that are both free and open source. While various Linux distributions include a set of default apps, users have the freedom to replace them with any free or paid alternatives they prefer.
Today, we bring you a list of Linux applications that have been able to make it to users’ Linux installations almost all the time despite the butt-load of other alternatives.
Simply put, any app on this list is among the most used in its category, and if you haven’t already tried it out you are probably missing out.
Linux Backup Tools
Certainly, backing up data is crucial for any system, including Linux and there are various tools available for Linux that cater to different backup needs.
1. Rsync
rsync is one of the most popular open-source command-line-based bandwidth-friendly backup tools for performing swift incremental file transfers and synchronization.
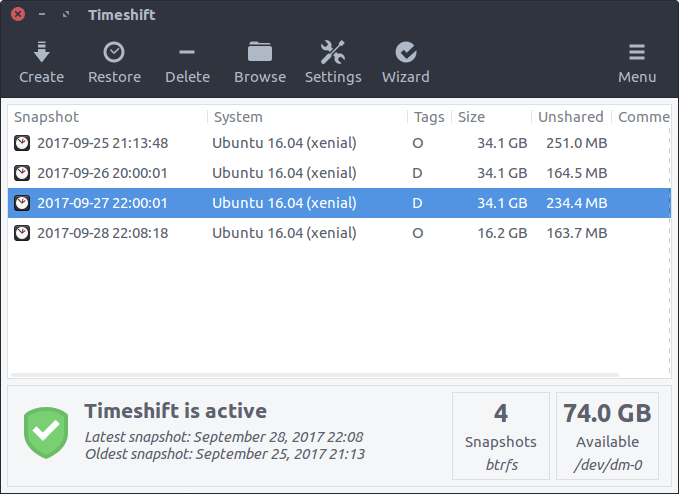
Timeshift provides users with the ability to protect their system by taking incremental snapshots which can be reverted to at a different date – similar to the function of Time Machine in Mac OS and System Restore in Windows.
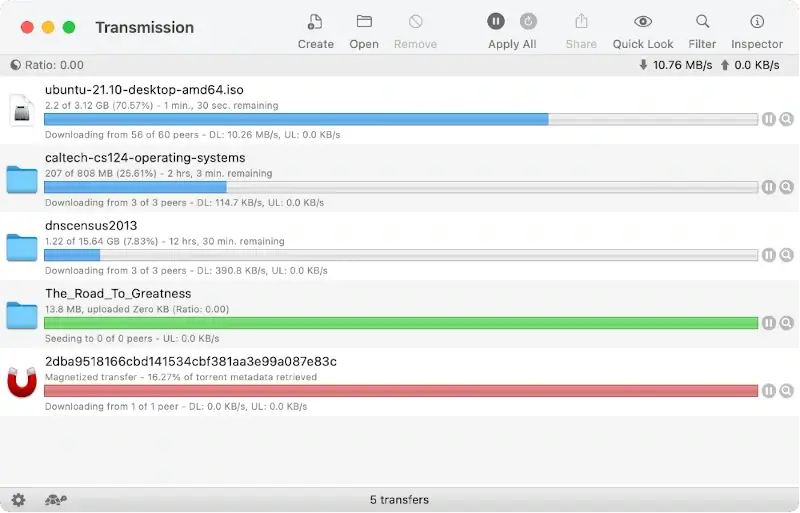
Transmission is also a BitTorrent client with awesome functionalities and a major focus on speed and ease of use. It comes preinstalled with many Linux distros.
Tixati is a distinctive Bittorrent client known for its detailed user interface, advanced bandwidth charting, and peer properties.
Free from spyware and ads, it offers a pure torrenting experience, prioritizing user privacy and efficient downloading capabilities.
To install Tixati in Linux, visit the official Tixati website to download the appropriate package for your Linux distribution (typically a .deb file for Debian/Ubuntu or a .rpm file for Fedora/RedHat) and install it.
Tixati Bittorrent Client
Linux Cloud Storage
Cloud storage solutions have become increasingly popular as they offer a convenient way to store, access, and share data across devices and locations.
Here’s a categorization of some of the popular Linux cloud storage solutions:
7. Dropbox
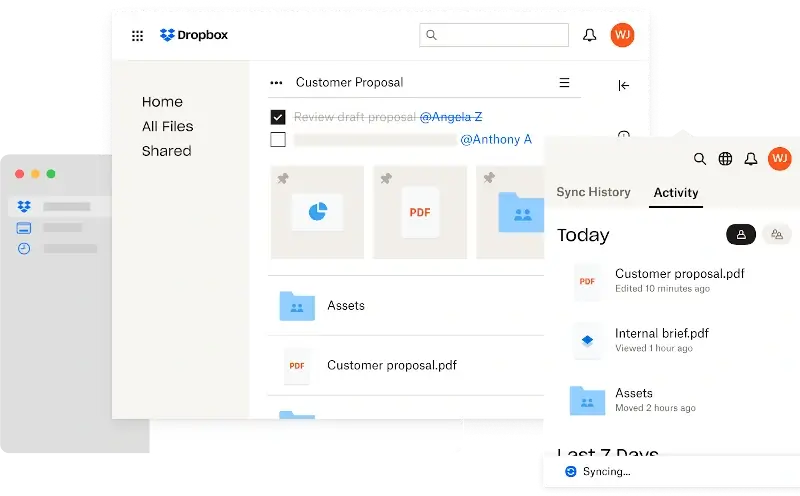
The Dropbox team rebranded its cloud service earlier this year to provide an even better performance and app integration for their clients. It starts with 2GB of storage for free.
To install Dropbox in Linux, run:
$ cd ~ && wget -O - "https://www.dropbox.com/download?plat=lnx.x86" | tar xzf -    [On 32-Bit]
$ cd ~ && wget -O - "https://www.dropbox.com/download?plat=lnx.x86_64" | tar xzf - [On 64-Bit]
$ ~/.dropbox-dist/dropboxd
Dropbox – Secure Cloud Storage
8. Google Drive
Google Drive is Google’s cloud service solution and my guess is that it needs no introduction. Just like with Dropbox, you can sync files across all your connected devices. It starts with 15GB of storage for free and this includes Gmail, Google Photos, Maps, etc.
Google Drive – Personal Cloud Storage
9. Mega
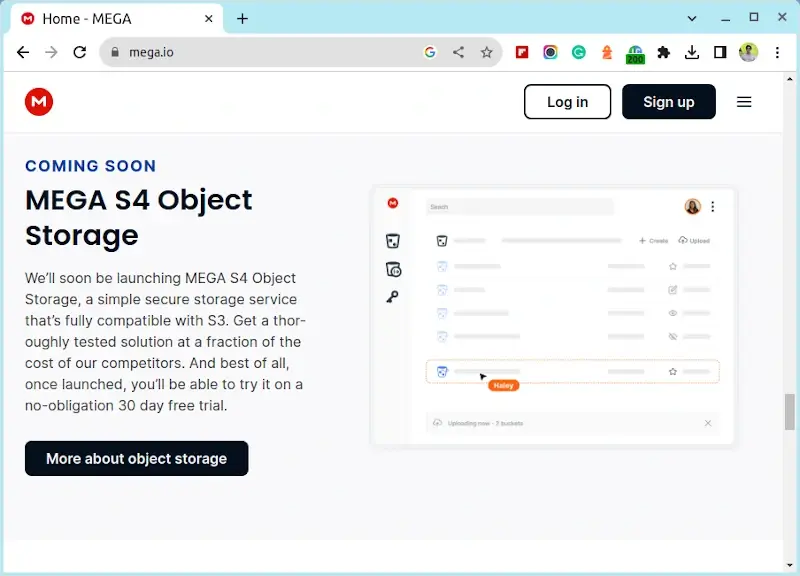
Mega stands out from the rest because apart from being extremely security-conscious, it gives free users 20GB to do as they wish! Its end-to-end encryption ensures that they can’t access your data, and if you forget your recovery key, you too wouldn’t be able to.
MEGA Cloud Storage
Linux Commandline Editors
10. Vim
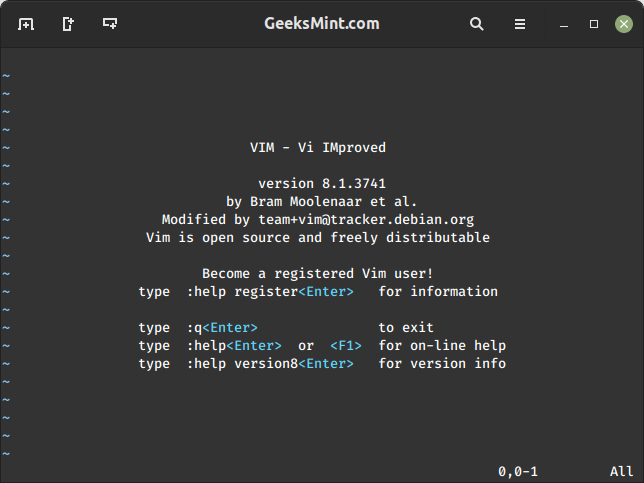
Vim is an open-source clone of a vi text editor developed to be customizable and able to work with any type of text.
To install Vim in Linux, run:
$ sudo apt install vim         [On Debian, Ubuntu and Mint]
$ sudo yum install vim         [On RHEL/CentOS/Fedora and Rocky/AlmaLinux]
$ sudo emerge -a sys-apps/vim  [On Gentoo Linux]
$ sudo apk add vim             [On Alpine Linux]
$ sudo pacman -S vim           [On Arch Linux]
$ sudo zypper install vim      [On OpenSUSE]
Vim Text Editor
11. Emacs
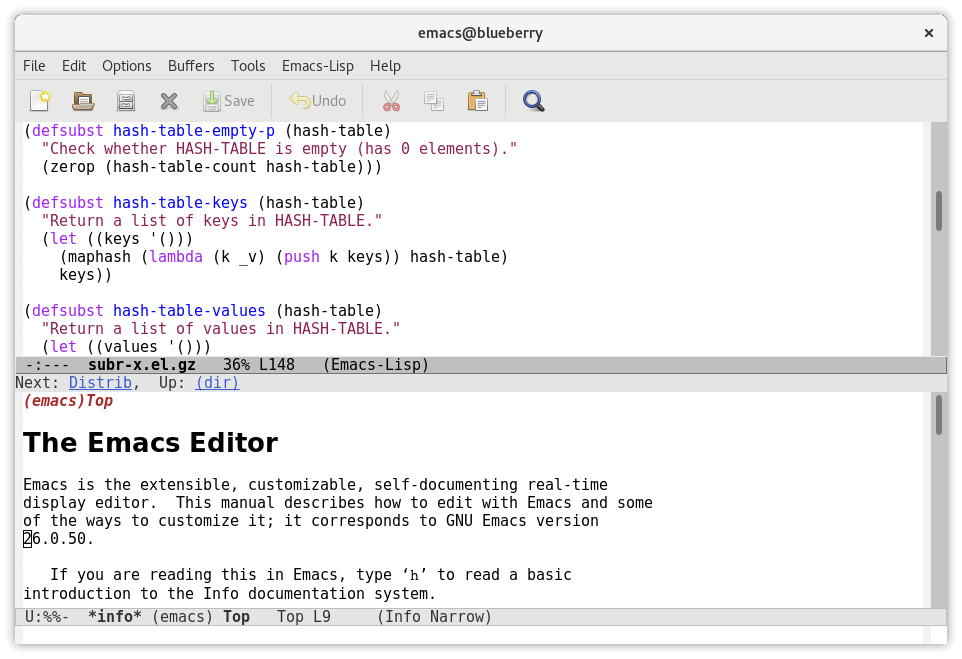
Emacs refers to a set of highly configurable text editors. The most popular variant, GNU Emacs, is written in Lisp and C to be self-documenting, extensible, and customizable.
Here’s a categorization of some of the popular Linux download managers:
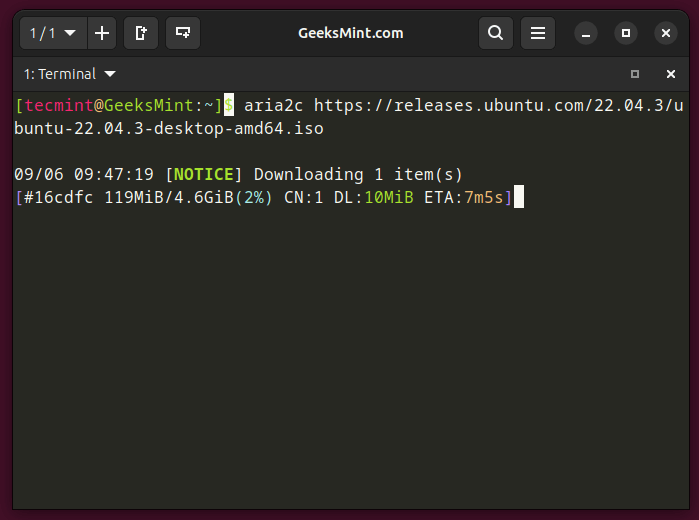
13. Aria2
Aria2 is an open-source lightweight multi-source and multi-protocol command line-based downloader with support for Metalinks, torrents, HTTP/HTTPS, SFTP, etc.
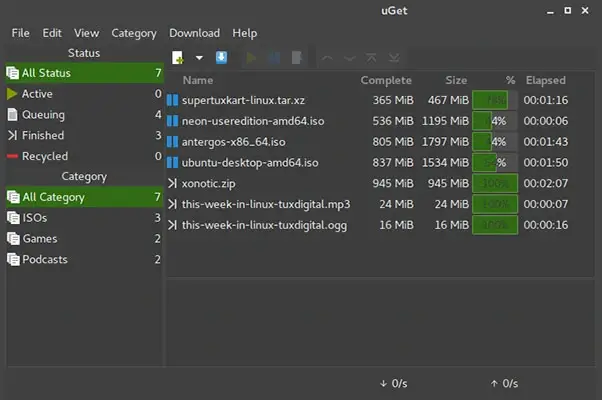
uGet has earned its title as the #1 open-source download manager for Linux distros and it features the ability to handle any downloading task you can throw at it including using multiple connections, using queues, categories, etc.
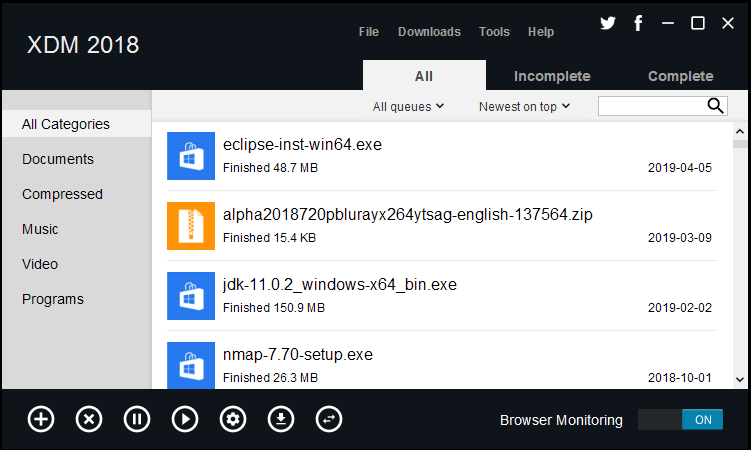
XDM, Xtreme Download Manager is an open-source downloader written in Java. Like any good download manager, it can work with queues, torrents, browsers, and it also includes a video grabber and a smart scheduler.
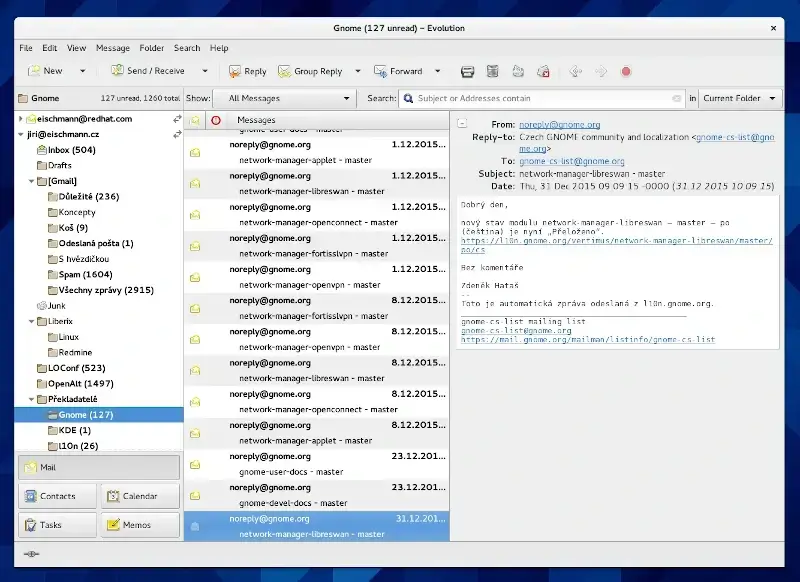
There’s a wide range of email clients available for managing, sending, and receiving emails. Here’s a categorization of some of the popular Linux email clients:
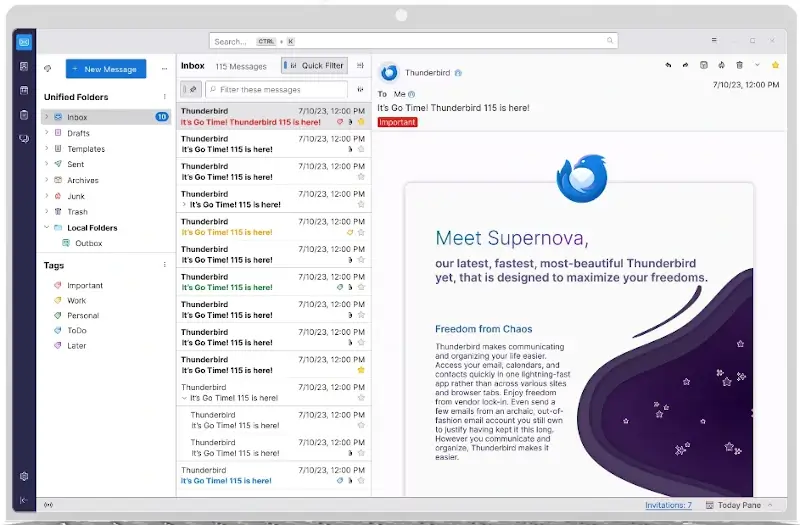
16. Thunderbird
Thunderbird is among the most popular email applications. It is free, open-source, customizable, feature-rich, and above all, easy to install.
Gaming on Linux has seen significant growth over the years, thanks to various tools and platforms that have made it easier for gamers to enjoy their favorite titles on this open-source OS.
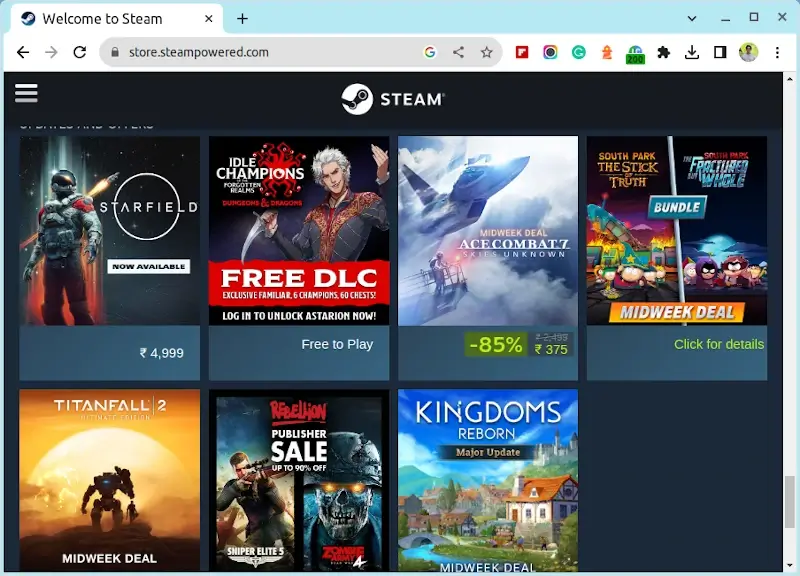
21. Steam
Steam is a video game digital distribution service responsible for thousands of gamers having access to the several now-available games for the Open Source community and gaming issues on Linux are virtually a thing of the past. If you’re a gamer, you can’t go wrong with Steam.
Integrated Development Environments (IDEs) and code editors are essential tools for developers, providing a comprehensive environment for coding, debugging, testing, and sometimes even deployment.
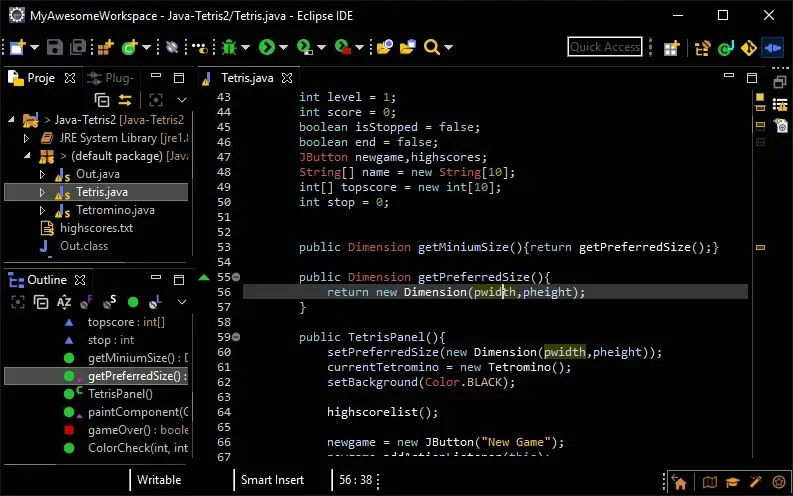
23. Eclipse IDE
Eclipse is the most widely used Java IDE containing a base workspace and an impossible-to-overemphasize configurable plug-in system for personalizing its coding environment.
Eclipse IDE Editor
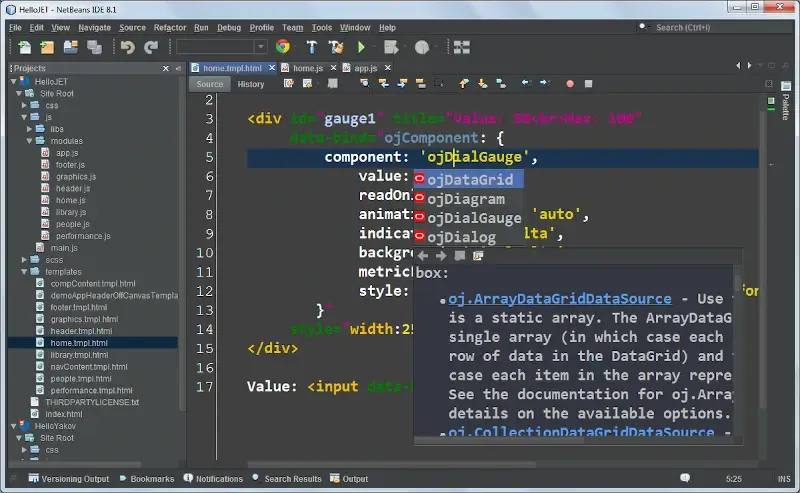
24. Netbeans IDE
A fan-favorite, Netbeans enables users to easily build applications for mobile, desktop, and web platforms using Java, PHP, HTML5, JavaScript, and C/C++, among other languages.
Netbeans IDE Editor
25. Brackets
Brackets is an advanced text editor developed by Adobe to feature visual tools, preprocessor support, and a design-focused user flow for web development. In the hands of an expert, it can serve as an IDE in its own right.
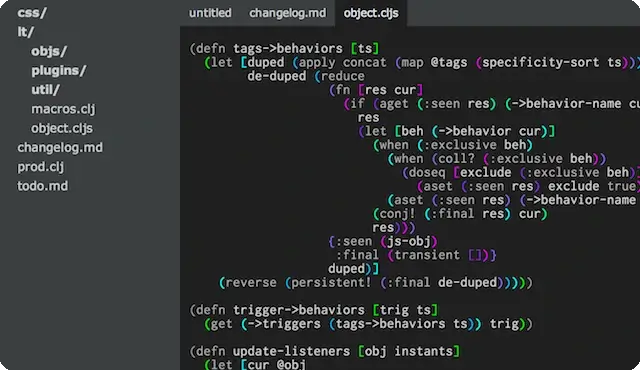
Light Table is a self-proclaimed next-generation IDE developed to offer awesome features like data value flow stats and coding collaboration.
Light Table – Code Editor
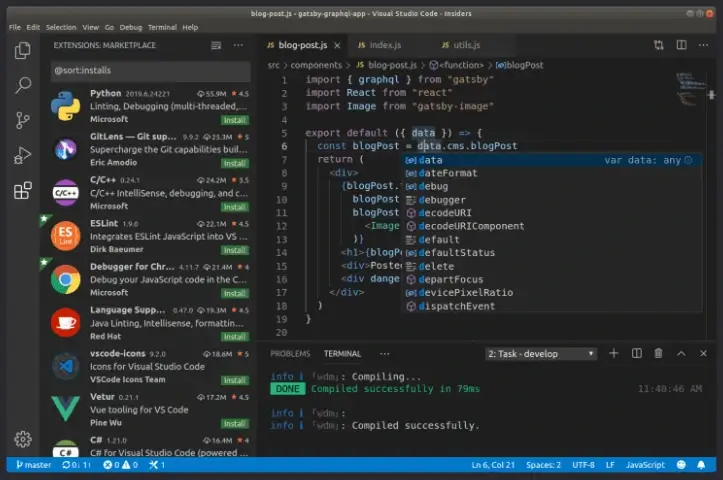
27. Visual Studio Code
Visual Studio Code is a source code editor created by Microsoft to offer users the best-advanced features in a text editor including syntax highlighting, code completion, debugging, performance statistics and graphs, etc.
Visual Studio Code
Linux Instant Messaging
Instant messaging (IM) on Linux has evolved over the years, and there are several applications and platforms available for users.
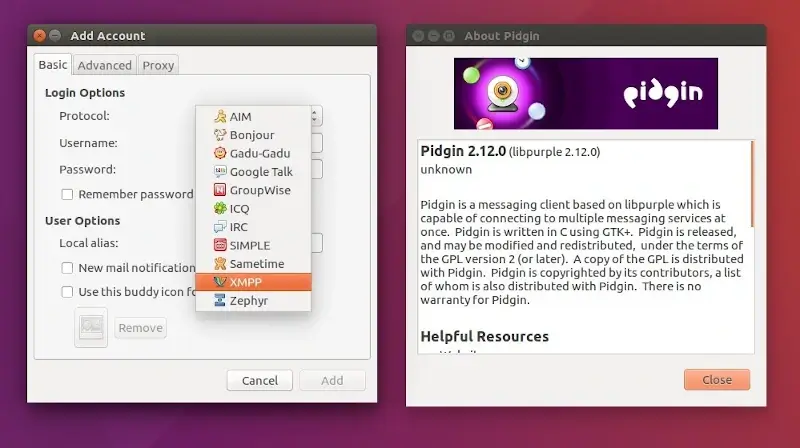
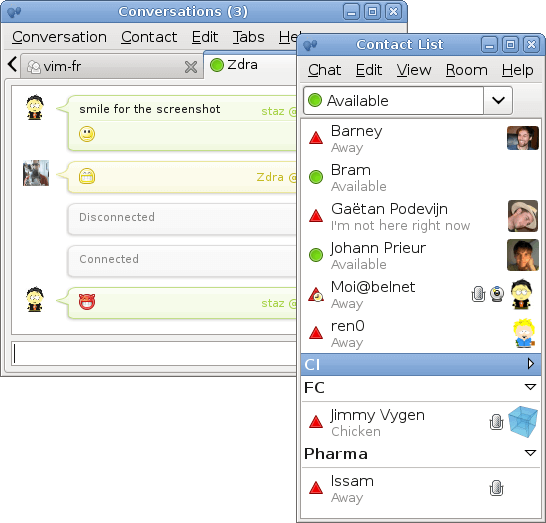
28. Pidgin
Pidgin is an open-source instant messaging app that supports virtually all chatting platforms and can have its abilities extended using extensions.
Skype is a telecommunications application offering video calls, voice chats, and instant messaging.
To install Skype in Linux, run:
$ sudo snap install skype --classic
Skype – Telecommunications Application
30. Empathy
Empathy is a messaging app with support for voice, video chat, text, and file transfers over multiple protocols. It also allows you to add other service accounts to it and interface with all of them through it.
Linux is generally considered more secure than some other operating systems, but it’s still important to be cautious, especially on shared or networked systems.
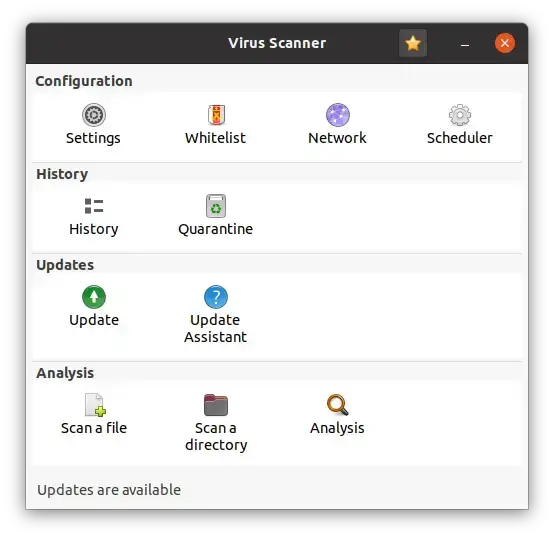
31. ClamAV/ClamTk
ClamAV is an open-source and cross-platform command-line antivirus app for detecting Trojans, viruses, and other malicious codes. ClamTk is its GUI front-end.
Linux offers a variety of desktop environments (DEs) that cater to different user preferences in terms of aesthetics, functionality, and resource consumption.
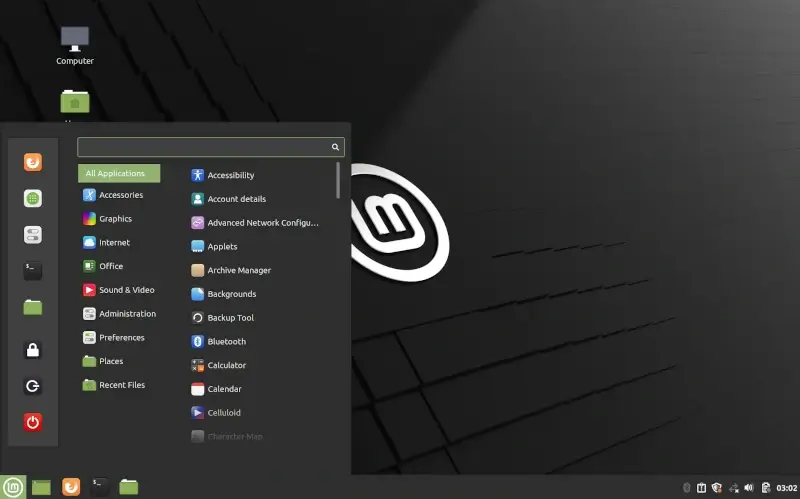
32. Cinnamon Desktop
Cinnamon is a free and open-source derivative of GNOME and it follows the traditional desktop metaphor conventions.
To install Cinnamon desktop on Ubuntu and Fedora, run.
$ sudo apt install cinnamon          [On Debian, Ubuntu and Mint]
$ sudo dnf install @cinnamon-desktop [On RHEL/CentOS/Fedora and Rocky/AlmaLinux]
Cinnamon Desktop
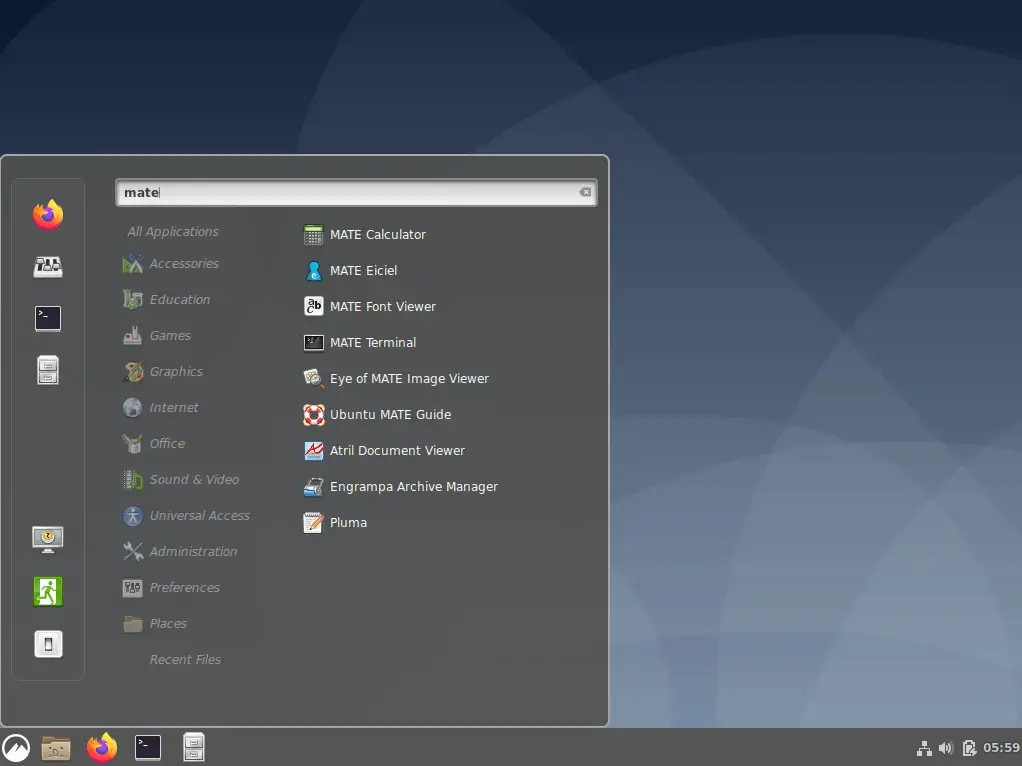
33. Mate Desktop
The Mate Desktop Environment is a derivative and continuation of GNOME developed to offer an attractive UI on Linux using traditional metaphors.
To install Mate desktop on Ubuntu and Fedora, run.
$ sudo apt install ubuntu-mate-desktop   [On Debian, Ubuntu and Mint]
$ sudo dnf install @mate-desktop         [On RHEL/CentOS/Fedora and Rocky/AlmaLinux]
Mate Desktop
34. GNOME Desktop
GNOME is a Desktop Environment comprised of several free and open-source applications and can run on any Linux distro and on most BSD derivatives.
Install Gnome desktop on Ubuntu, Debian and Fedora, use the following commands.
------ On Ubuntu and Linux Mint ------
$ sudo apt install tasksel
$ sudo apt update
$ sudo tasksel install ubuntu-desktop

------ On Fedora ------
$ sudo dnf group install “Fedora Workstation”
Gnome Desktop
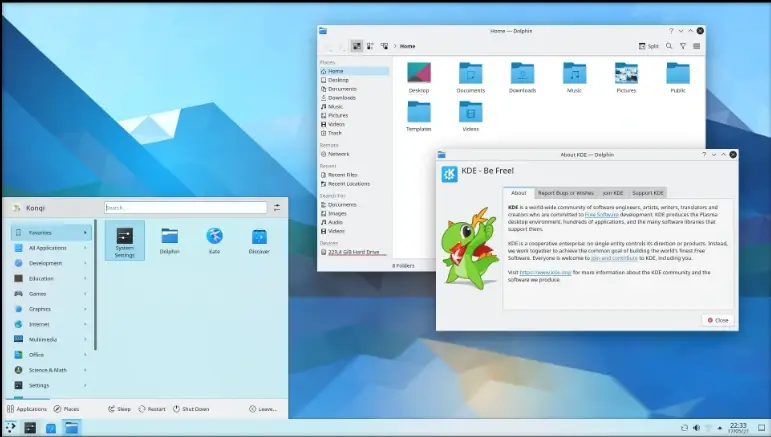
35. KDE Desktop
KDE is developed by the KDE community to provide users with a graphical solution for interfacing with their system and performing several computing tasks.
Install KDE desktop on Ubuntu, Debian and Fedora, use the following commands.
------ On Ubuntu and Linux Mint ------
$ sudo apt install tasksel
$ sudo apt update
$ sudo tasksel install kubuntu-desktop

------ On Fedora ------
$ sudo dnf -y group install "KDE Plasma Workspaces"
KDE Desktop
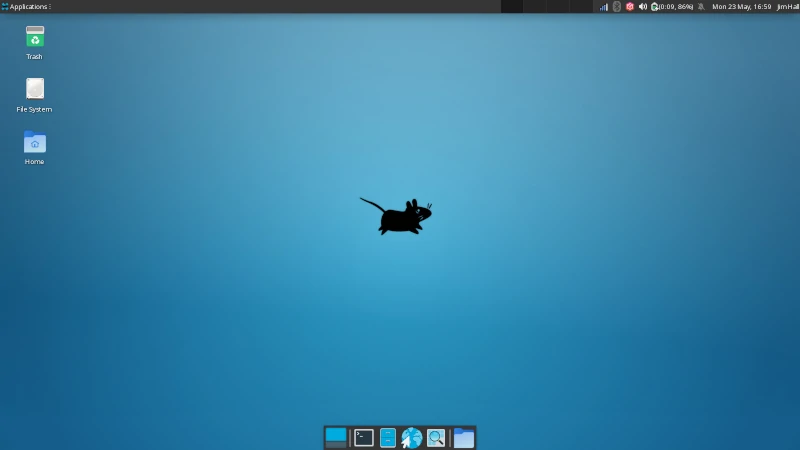
36. XFCE Desktop
XFCE is a lightweight desktop environment that offers simplicity, speed, and low resource usage, making it ideal for older hardware and performance-conscious users.
Install the XFCE desktop on Ubuntu, Debian, and Fedora, use the following commands.
$ sudo apt install xfce4                [On Debian, Ubuntu and Mint]
$ dnf install @xfce-desktop-environment [On RHEL/CentOS/Fedora and Rocky/AlmaLinux]
XFCE Desktop
Linux Maintenance Tools
Linux maintenance tools help in optimizing, diagnosing, repairing, and monitoring your Linux systems.
37. GNOME Tweak Tool
The GNOME Tweak Tool is the most popular tool for customizing and tweaking GNOME and GNOME Shell settings.
To install the GNOME Tweak Tool on Ubuntu and Fedora, run.
$ sudo apt install gnome-tweak-tool  [On Debian, Ubuntu and Mint]
$ sudo dnf install gnome-tweak-tool  [On RHEL/CentOS/Fedora and Rocky/AlmaLinux]
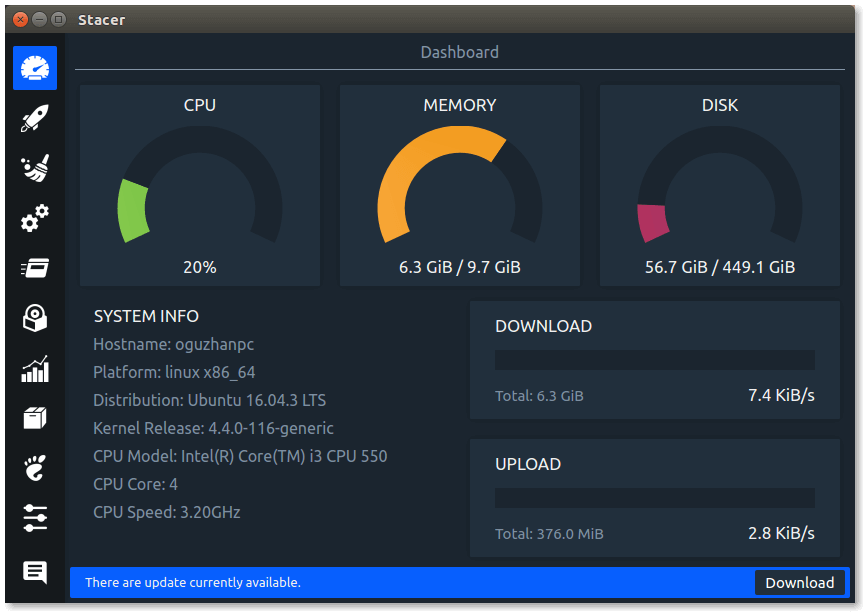
38. Stacer
Stacer is a free, open-source app for monitoring and optimizing Linux systems.
The terminal, often referred to as the command line or shell, is an essential tool for Linux users to interact with the operating system and execute commands.
40. GNOME Terminal
GNOME Terminal is GNOME’s default terminal emulator that comes with tabs, profiles, and a customizable user-friendly interface to execute shell commands on Linux systems.
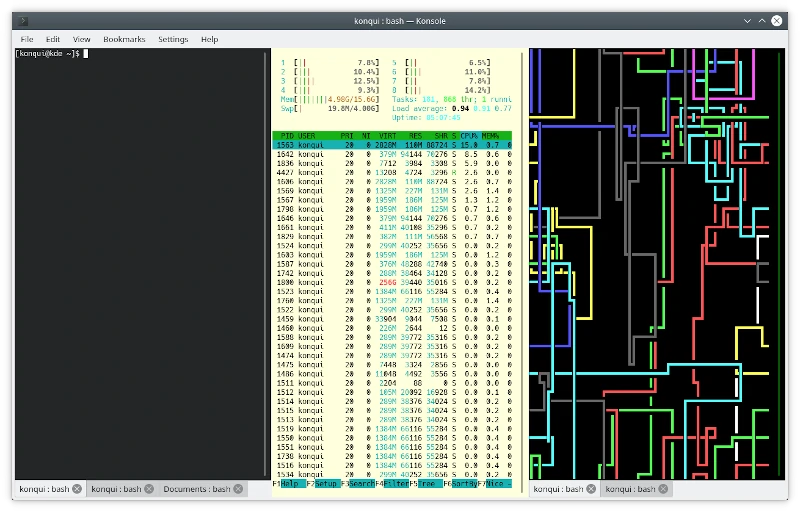
Konsole is the default terminal emulator for the KDE Plasma desktop environment that offers advanced features, multiple tabs, customizable profiles, and seamless integration with KDE applications.
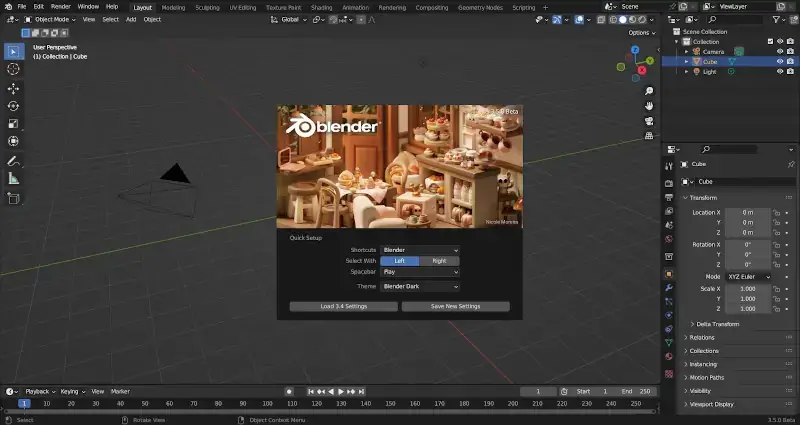
Blender is the free and open-source 3D creation suite that supports the complete 3D pipeline i.e. rigging, modeling, video editing, animation, simulation, motion tracking, rendering, compositing, and 2D animation pipeline.
GIMP is the most popular open-source Photoshop alternative and it is for a reason. It features various customization options, 3rd-party plugins, and a helpful user community.
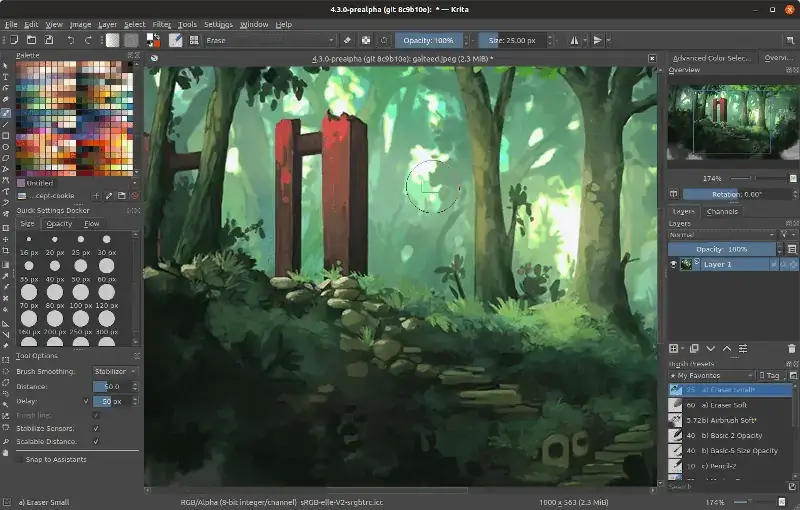
Krita is an open-source painting app that can also serve as an image-manipulating tool and it features a beautiful UI with reliable performance.
To install Krita in Linux, run:
$ sudo apt install krita         [On Debian, Ubuntu and Mint]
$ sudo yum install krita         [On RHEL/CentOS/Fedora and Rocky/AlmaLinux]
$ sudo emerge -a sys-apps/krita  [On Gentoo Linux]
$ sudo apk add krita             [On Alpine Linux]
$ sudo pacman -S krita           [On Arch Linux]
$ sudo zypper install krita      [On OpenSUSE]
Krita – Raster Graphics Editor
49. Lightworks
Lightworks is a powerful, flexible, and beautiful tool for editing videos professionally. It comes feature-packed with hundreds of amazing effects and presets that allow it to handle any editing task that you throw at it and it has 25 years of experience to back up its claims.
To install Lightworks in Linux, open your favorite browser go to the Lightworks download page choose the appropriate package for your system (DEB or RPM), and install it.
Lightworks – Pro Video Editing Software
50. Natron
Natron is a cross-platform open-source cross-platform application for video composition and editing as you would with Adobe After Effects.
Founded by Blackmagic Fusion to be free and portable, it offers sufficient tools for compositors to achieve high-quality results and fast rates.
To install Natron in Linux, you need to use the Snap Store by running the following command in the terminal.
$ sudo snap install natron
Natron Digital Compositor
51. OpenShot
OpenShot is an award-winning free and open-source video editor known for its excellent performance and powerful capabilities.
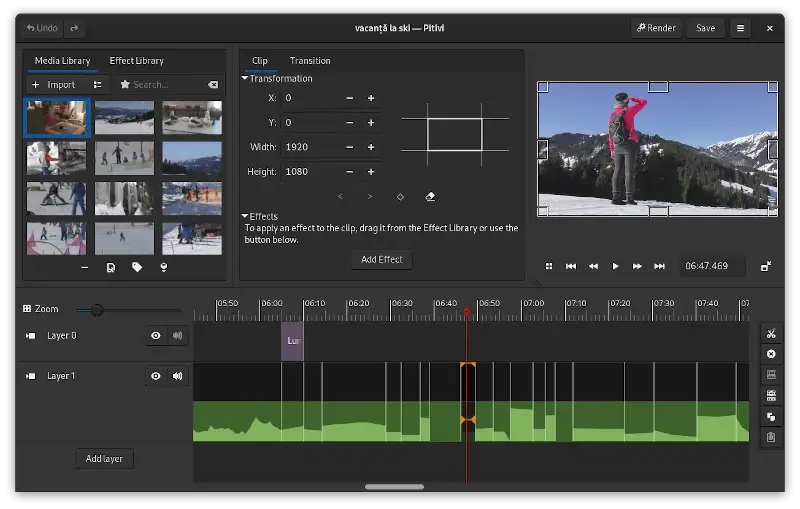
Pitivi is a beautiful video editor that features a beautiful code base, and an awesome community, is easy to use, and allows for hassle-free collaboration.
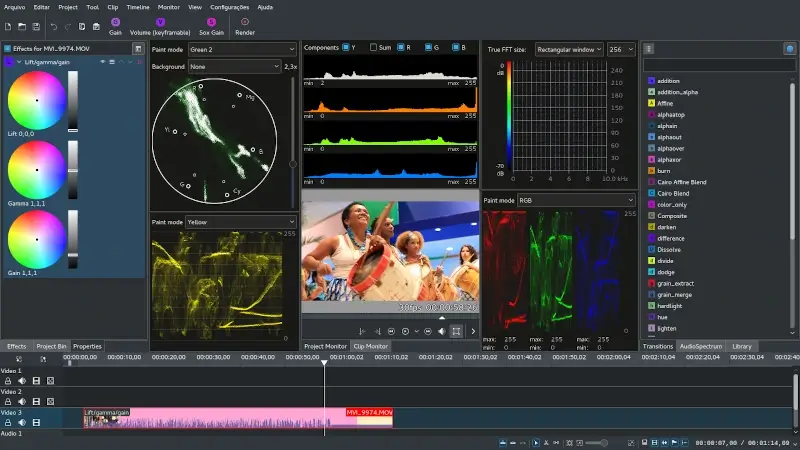
Kdenlive is a robust open-source video editor that supports multi-track editing, a wide range of video formats, and offers numerous effects and transitions.
With features like proxy editing, automatic backup, and a customizable interface, Kdenlive stands out as a comprehensive tool for video enthusiasts and professionals alike.
Linux Music Players encompass a diverse range of software tailored for the Linux operating system.
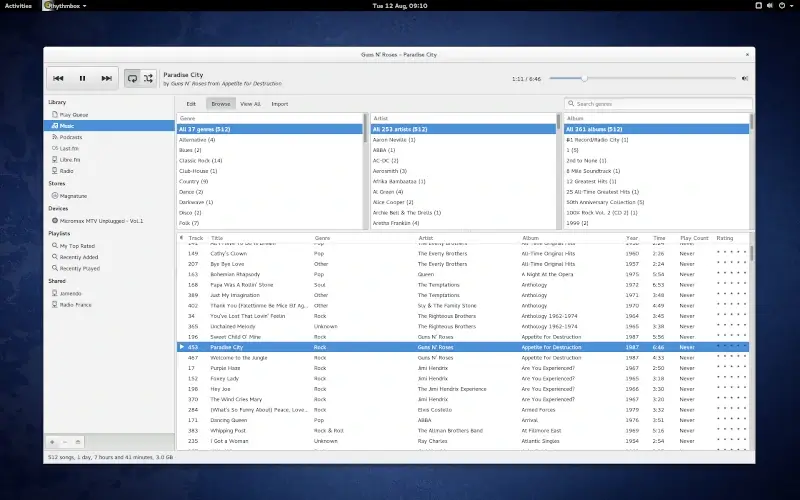
54. Rhythmbox
Rhythmbox possesses the ability to perform all music tasks you throw at it and has so far proved to be a reliable music player that it ships with Ubuntu.
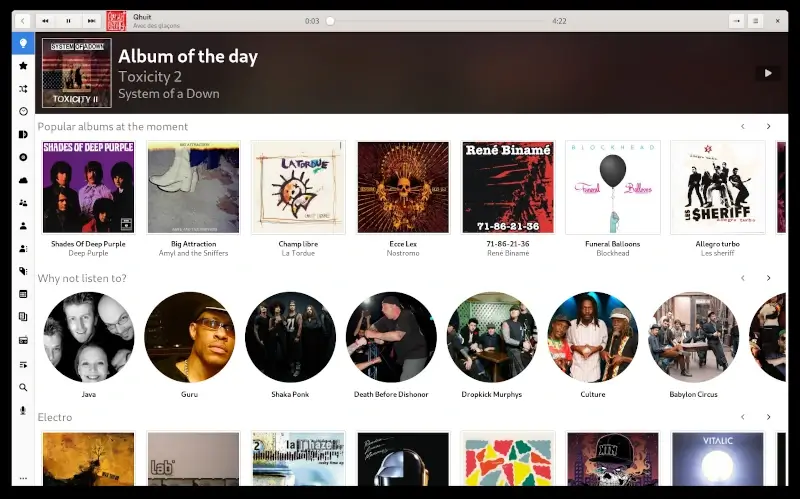
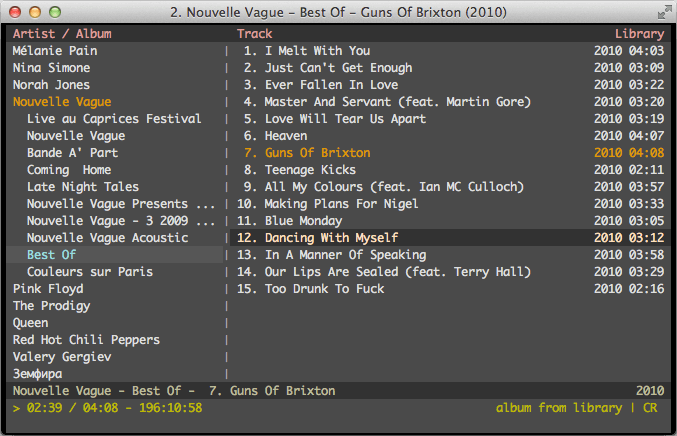
Lollypop is a beautiful, relatively new, open-source music player featuring a number of advanced options like online radio, scrubbing support, and party mode. Yet, it manages to keep everything simple and easy to manage.
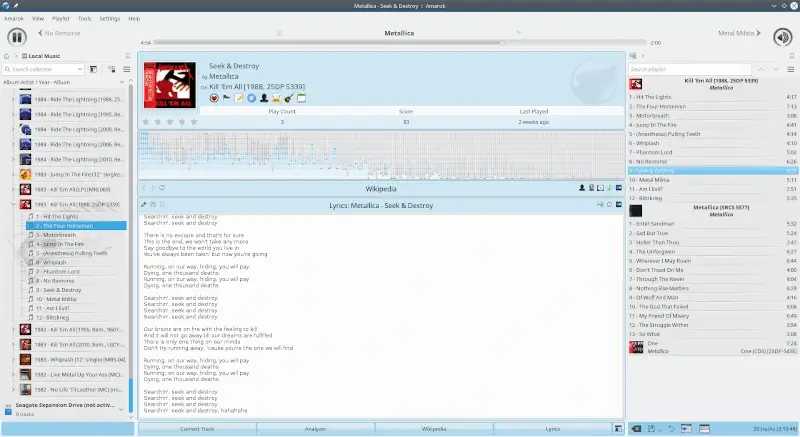
Amarok is a robust music player with an intuitive UI and tons of advanced features bundled into a single unit. It also allows users to discover new music based on their genre preferences.
Clementine is an Amarok-inspired music player that also features a straightforward UI, advanced control features, and the ability to let users search for and discover new music.
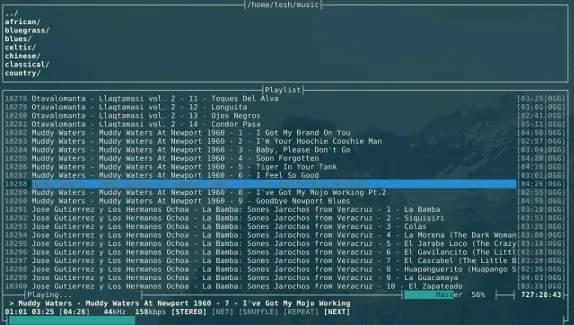
MOC (Music On Console) is a console audio player for Linux/Unix, designed to be both powerful and user-friendly.
To install Moc in Linux, run:
$ sudo apt install moc         [On Debian, Ubuntu and Mint]
$ sudo yum install moc         [On RHEL/CentOS/Fedora and Rocky/AlmaLinux]
$ sudo emerge -a sys-apps/moc  [On Gentoo Linux]
$ sudo apk add moc             [On Alpine Linux]
$ sudo pacman -S moc           [On Arch Linux]
$ sudo zypper install moc      [On OpenSUSE]
MOC – Music on Console
Linux Office Suites
Linux Office Suites provide a comprehensive range of productivity tools tailored to the Linux environment.
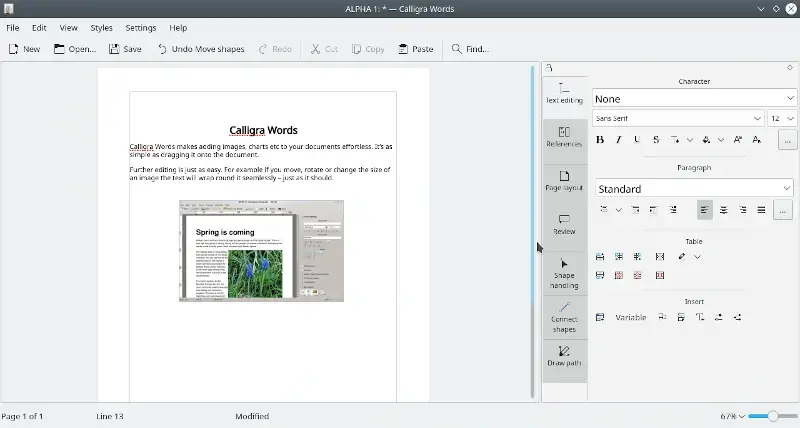
60. Calligra Suite
The Calligra Suite developed by KDE, is a versatile office and graphic design toolkit that boasts a rich array of tools, encompassing word processing, spreadsheet management, captivating presentations, intricate vector graphics creation, and comprehensive database editing.
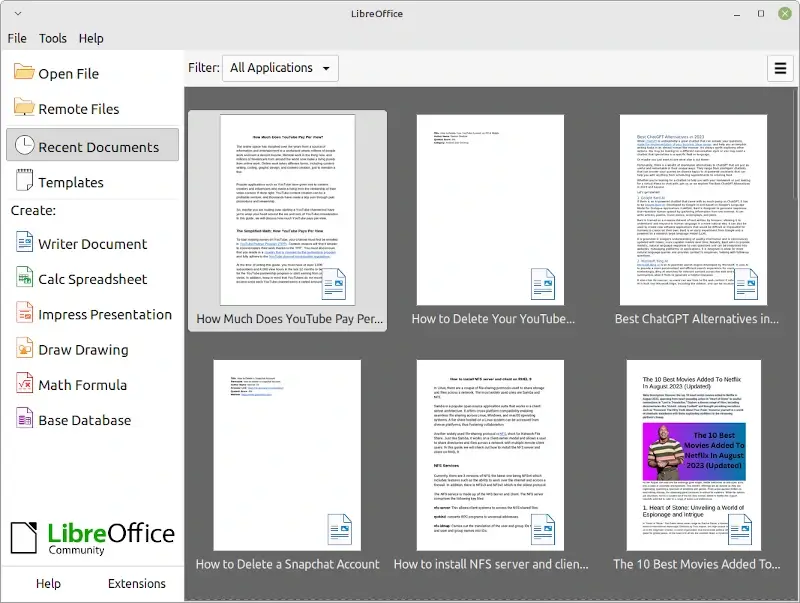
LibreOffice is the most actively developed office suite in the open-source community, LibreOffice is known for its reliability and its functions can be increased using extensions.
WPS Office stands out as a streamlined, yet robust office suite that enhances productivity with tools like Writer, Presentation, Spreadsheet, and a dedicated PDF editor, ensuring optimal work efficiency and seamless document management.
To install WPS Office in Linux, visit the official WPS Office website to download the appropriate package for your Linux distribution (typically a .deb file for Debian/Ubuntu or a .rpm file for Fedora/RedHat) and install it.
WPS Office
Linux Screenshot Tools
Linux Screenshot Tools offer a diverse array of utilities designed to capture, annotate, and manage screen captures within the Linux environment.
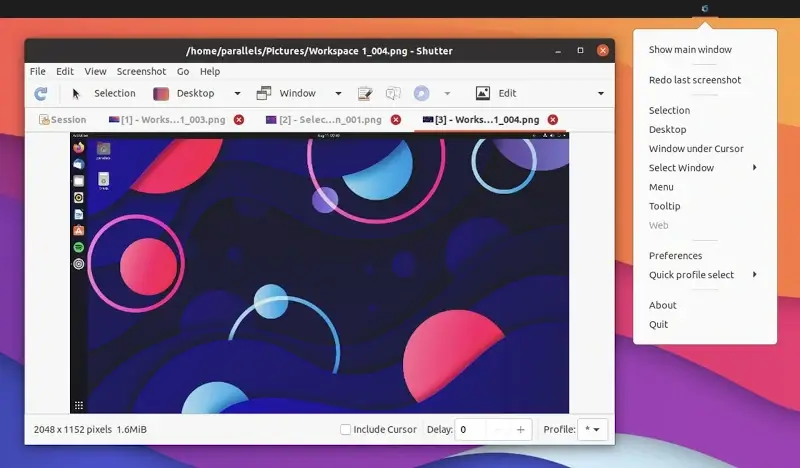
63. Shutter
Shutter allows users to take screenshots of their desktops and then edit them using filters and other effects coupled with the option to upload and share them online.
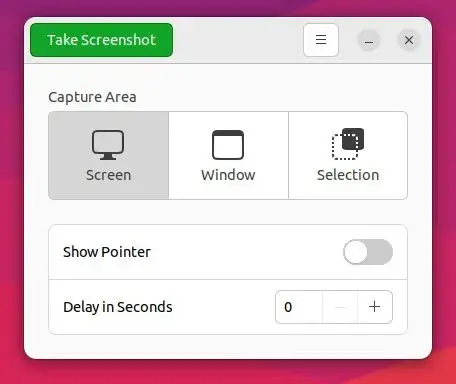
Gnome Screenshot was once bundled with Gnome utilities but is now a standalone app. It can be used to take screencasts in a format that is easily shareable.
Linux Screen Recorders offers a diverse set of tools designed specifically for capturing and recording content on your Linux desktop.
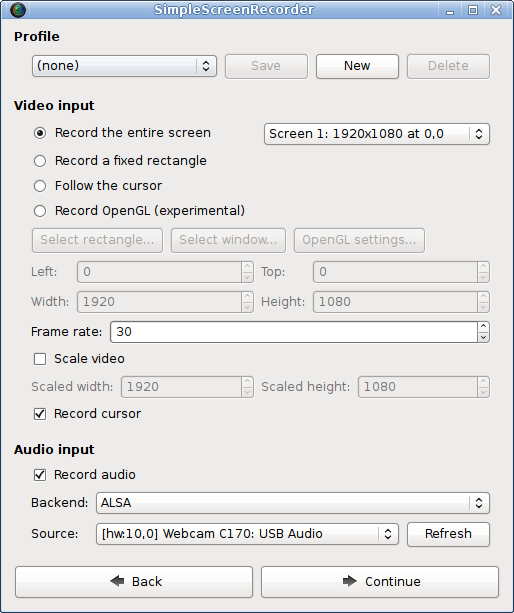
66. SimpleScreenRecorder
SimpleScreenRecorder was created to be better than the screen-recording apps available at the time of its creation and has now turned into one of the most efficient and easy-to-use screen recorders for Linux distros.
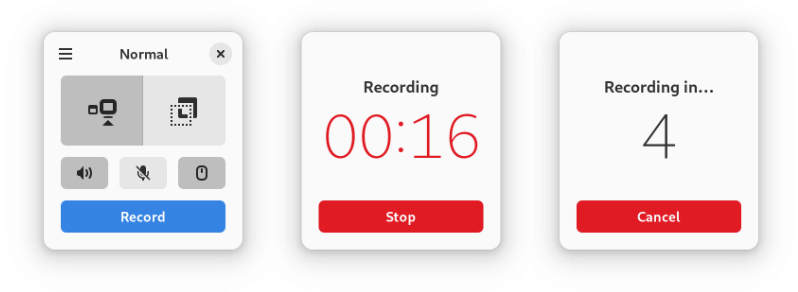
Kooha is a straightforward screen recording tool designed with an uncluttered interface. With Kooha, recording is a breeze, as you can initiate it with a single click, eliminating the need for extensive configurations.
Key features of Kooha include:
Capture microphone, desktop audio, or both simultaneously.
Support for various formats, including WebM, MP4, GIF, and Matroska.
Choose to record a specific monitor, window, or a defined screen area.
Multiple source selection options for added flexibility.
Configure saving locations, pointer visibility, frame rate, and delay settings.
Experimental support for hardware-accelerated encoding, enhancing performance.
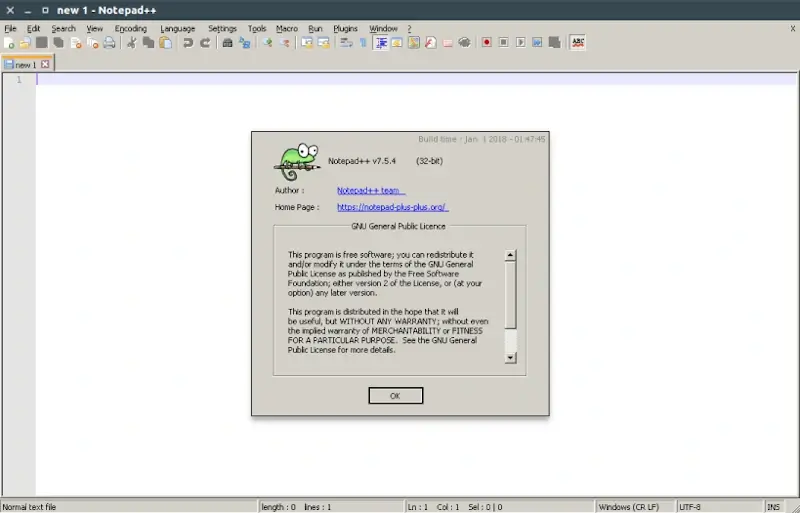
Notepad++ is a versatile text and source code editor that supports multiple programming languages, offers syntax highlighting, and boasts a plugin system for extended functionality, making it a favorite among developers.
To install Notepad++ in Linux, run:
$ sudo snap install notepad-plus-plus
Notepad++
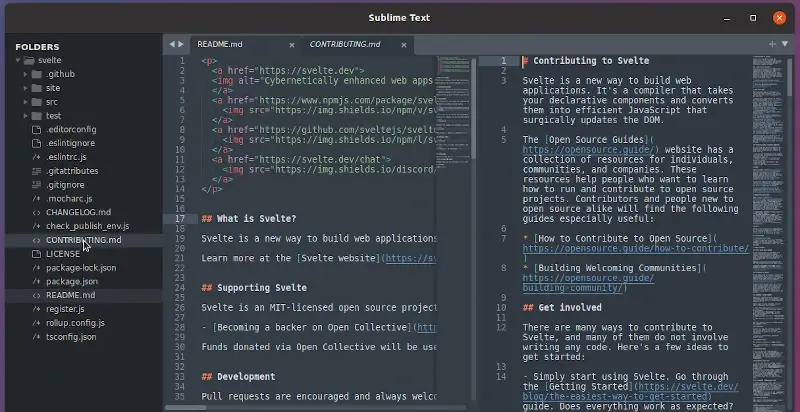
70. Sublime Text
Sublime Text is easily among the most awesome text editors to date. It is customizable, lightweight (even when bulldozed with a lot of data files and extensions), flexible, and remains free to use forever.
Gedit is famous for its simplicity and it comes preinstalled with many Linux distros because of its function as an excellent general-purpose text editor.
Linux To-Do List Apps are specialized software tools designed for the Linux operating system to help users manage, organize, and prioritize their tasks and daily activities.
73. Evernote
Evernote is a cloud-based note-taking productivity app designed to work perfectly with different types of notes including to-do lists and reminders.
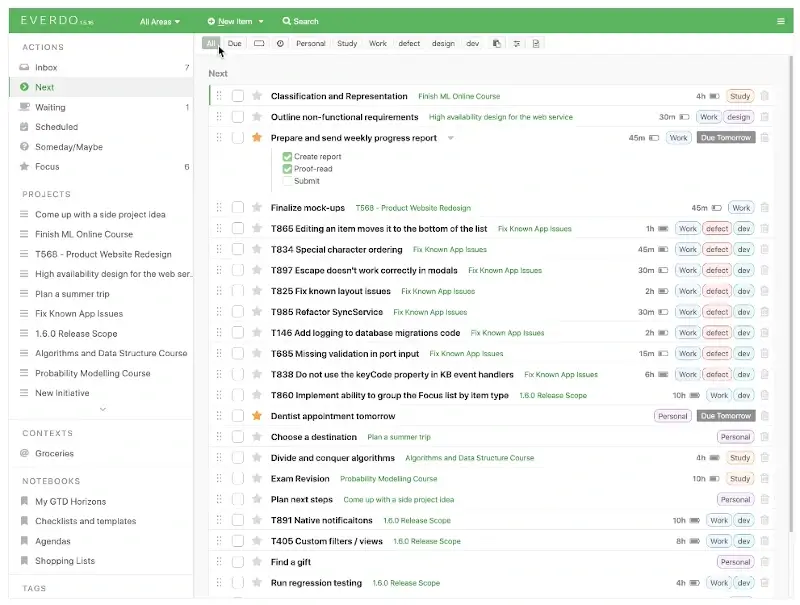
Everdo is a beautiful, security-conscious, low-friction Getting-Things-Done app productivity app for handling to-dos and other note types.
If Evernote comes off to you in an unpleasant way, Everdo is a perfect alternative.
To install Everdo in Linux, download the Everdo AppImage, make the file executable, and run it as shown.
$ chmod +x Everdo*.AppImage
$ ./Everdo*.AppImage
Everdo – Best GTD App
75. Org Mode
Org Mode is a GNU Emacs major mode for convenient plain-text markup and other tasks such as keeping notes, planning projects, authoring documents, maintaining to-do lists, etc., in a fast and effective plain-text system.
Org is bundled with GNU Emacs distributions, so most users can simply activate it without needing a separate installation and start exploring its features.
Org Mode for Emacs
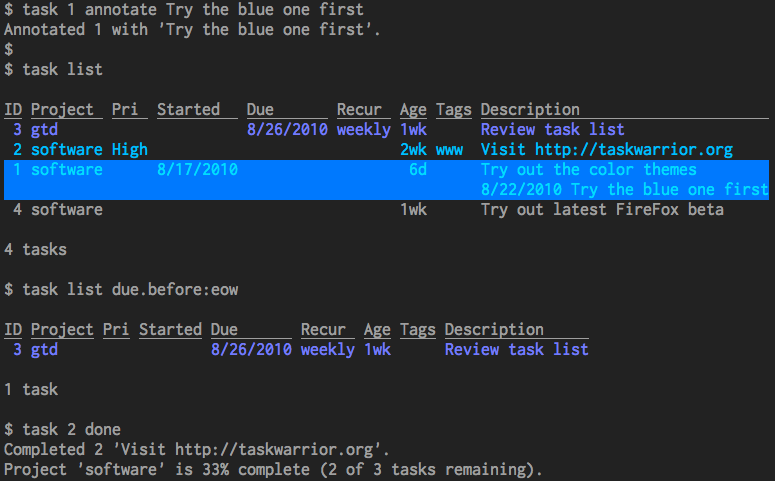
76. Taskwarrior
Taskwarrior is an open-source and cross-platform command-line app for managing tasks. It is famous for its speed and distraction-free environment.
Obsidian is a powerful note-taking software that emphasizes linking thoughts and building a knowledge base. Its unique graph view visualizes connections, while its markdown support ensures flexibility and longevity for your notes.
To install Obsidian in Linux, download the Obsidian AppImage, make the file executable, and run it as shown.
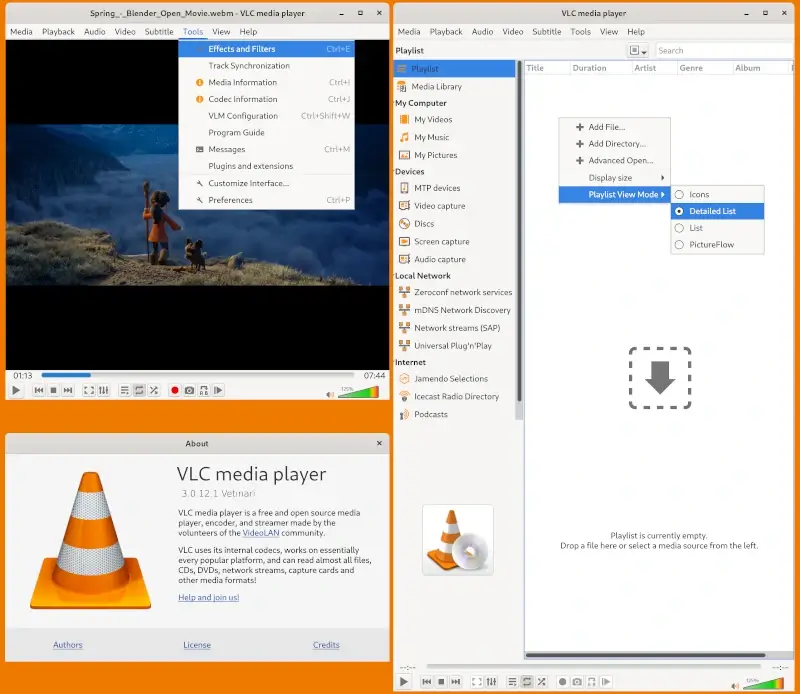
VLC is my favorite video player and it’s so awesome that it can play almost any audio and video format you throw at it. You can also use it to play internet radio, record desktop sessions, and stream movies online.
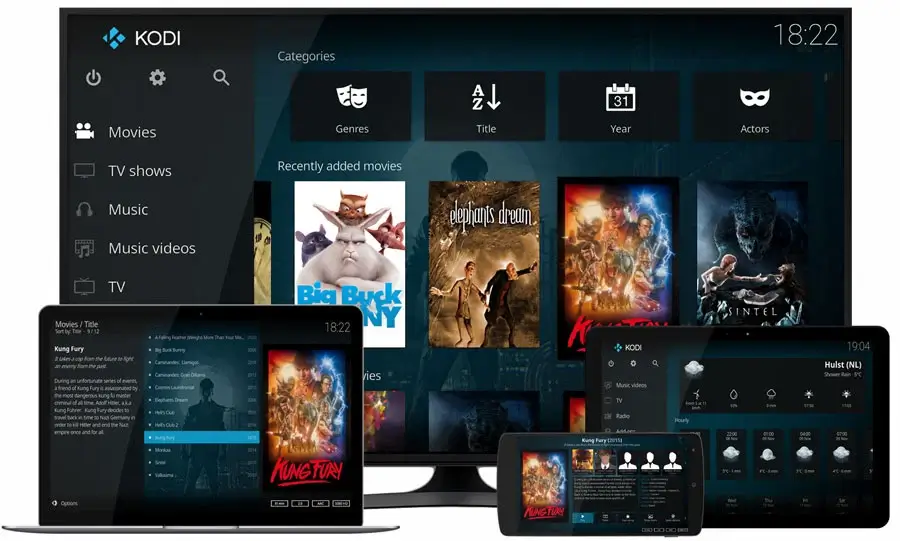
Kodi is among the world’s most famous media players and it comes as a full-fledged media center app for playing all things media whether locally or remotely.
Install Kodi on Ubuntu and Debian, using the following commands.
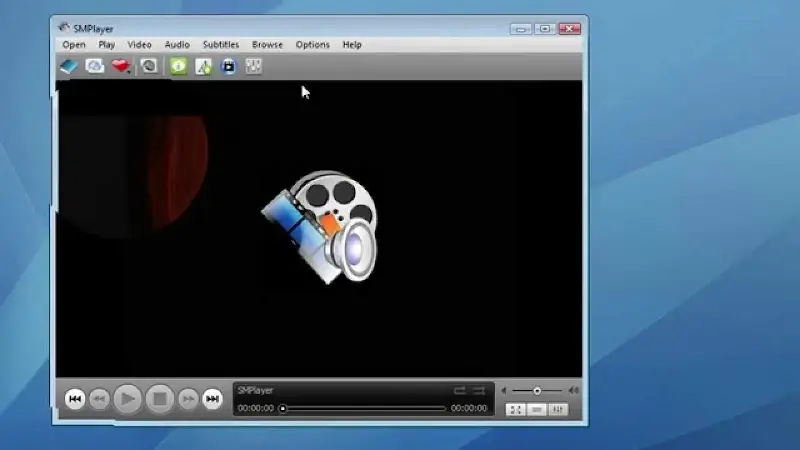
SMPlayer is a GUI for the award-winning MPlayer and it is capable of handling all popular media formats; coupled with the ability to stream from YouTube, Chromecast, and download subtitles.
Install SMPlayer on Ubuntu and Debian, using the following commands.
Linux Virtualization Tools are specialized software solutions designed for the Linux ecosystem to create, manage, and run virtual machines (VMs) on a host system.
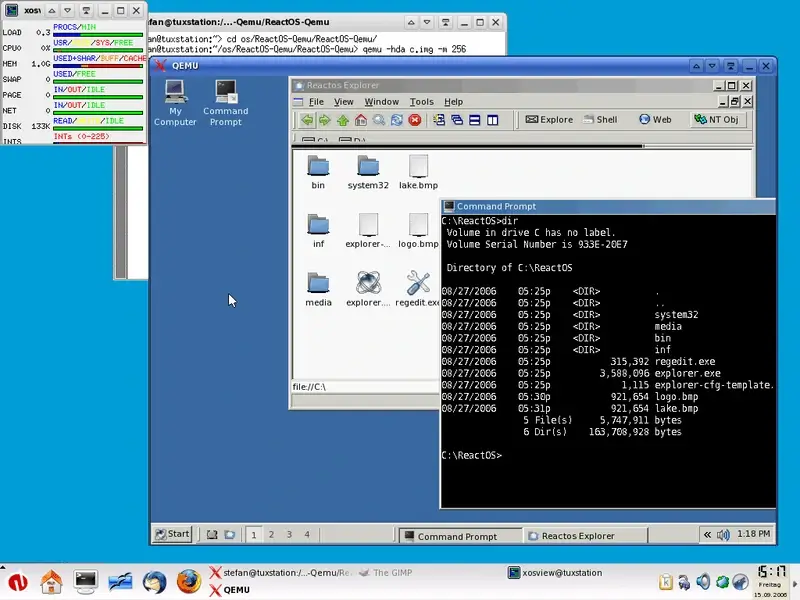
82. Qemu
Qemu is a generic, free, and open-source machine virtualizer and emulator that is capable of running any Operating System on any architecture that it supports.
It runs Xen and KVM virtual machines with near-native performance and enables users to run programs for another Linux/BSD on their machine.
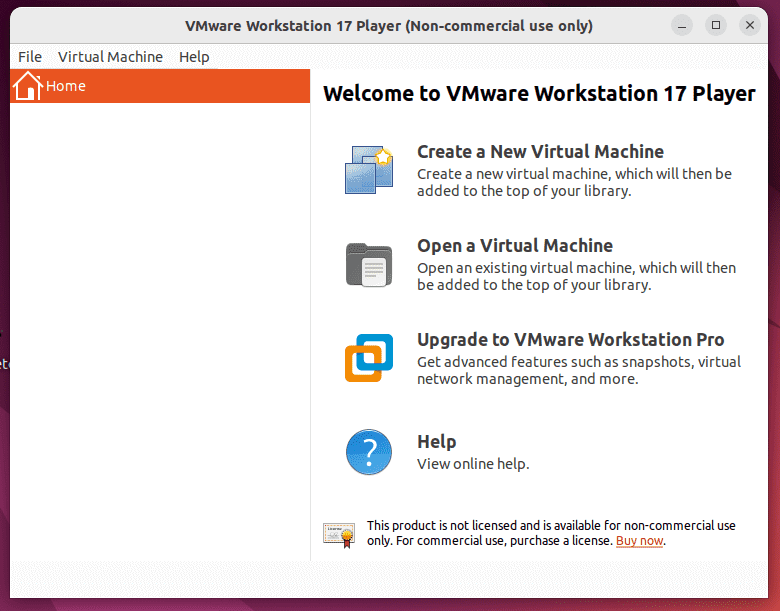
VMware is a digital workspace that provides platform virtualization and cloud computing services to customers and is reportedly the first to successfully virtualize x86 architecture systems. One of its products, VMware workstations allows users to run multiple OSes in virtual memory.
To install VMWare in Linux, download the VMware Workstation Player (.bundle) file, make the file executable, and run it as shown.
Linux Web Browsers are software applications tailored for the Linux operating system to access and navigate the World Wide Web.
85. Chrome
Google Chrome is undoubtedly the most popular browser. Known for its speed, simplicity, security, and beauty following Google’s Material Design trend, Chrome is a browser that web developers cannot do without. It is also free to use and open source.
Install Google Chrome on Ubuntu and Debian, using the following commands.
Firefox Quantum is a beautiful, speedy, task-ready, and customizable browser capable of any browsing task that you throw at it. It is also free, open-source, and packed with developer-friendly tools that are easy for even beginners to get up and running with.
Vivaldi is a free and open-source Chrome-based project that aims to perfect Chrome’s features with a couple of more feature additions. It is known for its colorful panels, memory-friendly performance, and flexibility.
To install Vivaldi in Linux, visit the official Vivaldi website and download the RPM or DEB package suitable for your system, and install it as shown.
Opera is a versatile and innovative web browser known for its speed, security, and unique features. Originating in Norway, it introduced innovations like built-in ad blocking and free VPN.
Opera emphasizes user-friendly design, and its mobile versions, like Opera Mini, optimize browsing for slower connections.
To install Opera in Linux, visit the official Opera website and download the RPM or DEB package suitable for your system, and install it as shown.
Linux media servers are specialized software solutions designed to store, manage, and stream multimedia content such as videos, music, photos, and more.
89. Plex
Plex is a free and open-source media server software that can stream your personal media library to any device.
To install Plex in Linux, visit the official Plex website download the RPM or DEB package suitable for your system, and install it as shown.
Emby is a versatile media solution that organizes and streams multimedia content. It offers a rich interface, live TV support, and mobile sync.
Emby ensures personalized experiences with user profiles and parental controls, bridging the gap between online content and personal media collections seamlessly.
To install Emby in Linux, visit the official Emby website download the RPM or DEB package suitable for your system, and install it as shown.
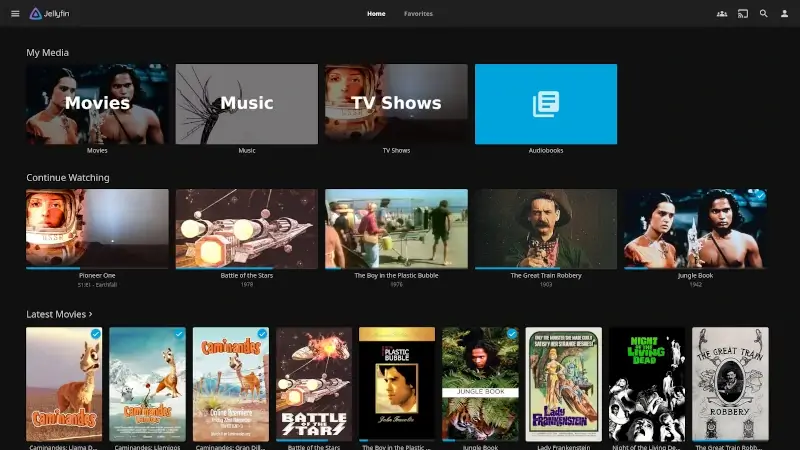
Jellyfin is an open-source alternative to proprietary media servers that allows users to organize, manage, and stream their multimedia collections.
Being community-driven, it ensures data privacy, offering a customizable interface and plugins. It’s a go-to for those seeking a free, transparent, and adaptable home entertainment solution.
To install Jellyfin in Linux, you can use Flatpak or Snap packages as shown.
$ flatpak install flathub com.github.iwalton3.jellyfin-media-player
$ flatpak run com.github.iwalton3.jellyfin-media-player
Or
$ snap install jellyfin
Jellyfin Media System
Miscellaneous Software
Explore a diverse selection of Linux tools and applications, spanning various categories and purposes.
92. Synergy (Mouse and Keyboard Sharing)
Synergy is ideal for computer users who enjoy using more than one screen. It’s neither open-source nor is it a free app but it is the best app in its category available for Linux as far as I know so you might want to check it out.
Synergy – Share one mouse & keyboard across computers
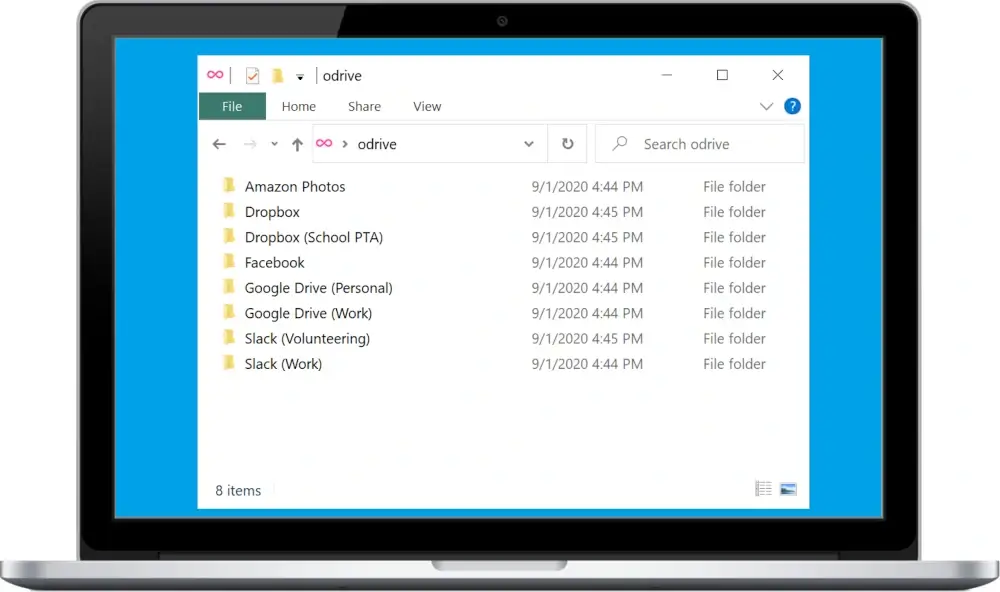
93. ODrive (Google Drive Client)
ODrive combines your cloud storage services into one shareable encrypted account that you can access with a single password. Changes are synced across all accounts automatically and you can share files with anyone using web links.
ODrive – Google Drive GUI
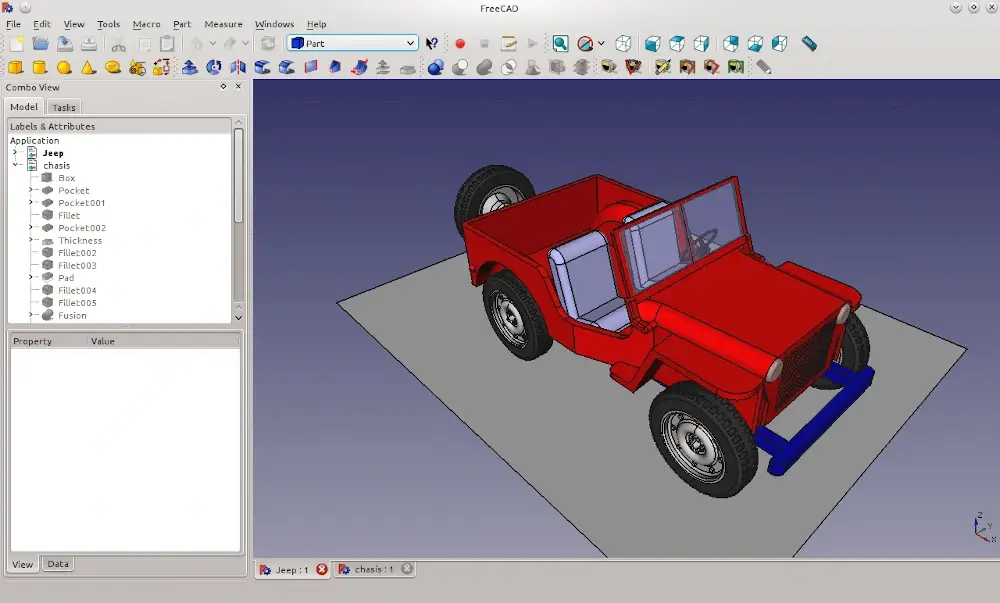
94. FreeCAD (3D Modelling & Design)
FreeCAD is a full-featured open-source OpenCasCade-based mechanical engineering and product design tool that is customizable and can have its functionality extended with the use of plugins.
FreeCAD – 3D Parametric Modeler
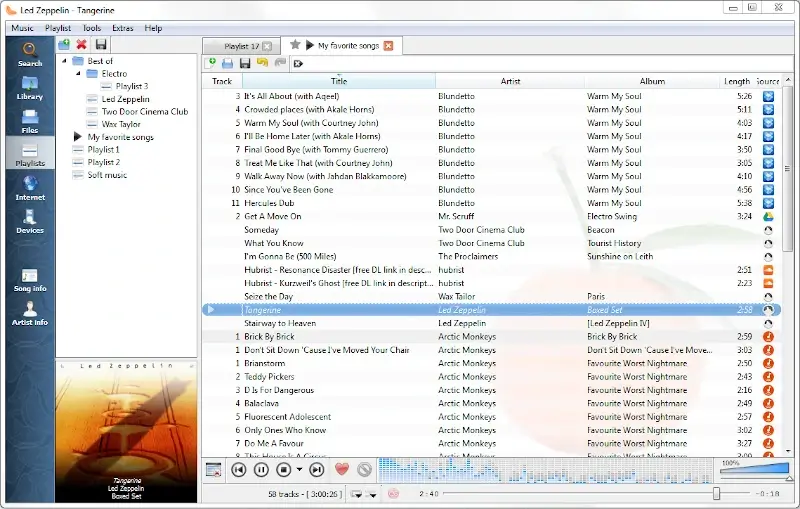
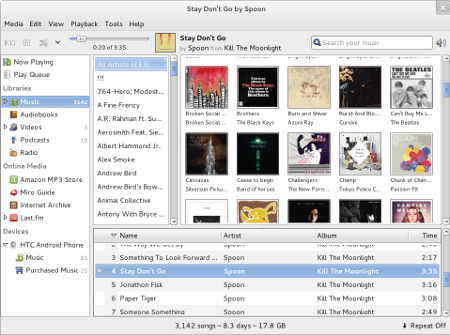
95. Exaile Music Player
Exaile offers a music player featuring an intuitive interface and robust music management functions. Enjoy automatic album art and lyrics retrieval, internet radio streaming, tabbed playlists, smart playlists with advanced filtering, and more.
Exaile – Music Player
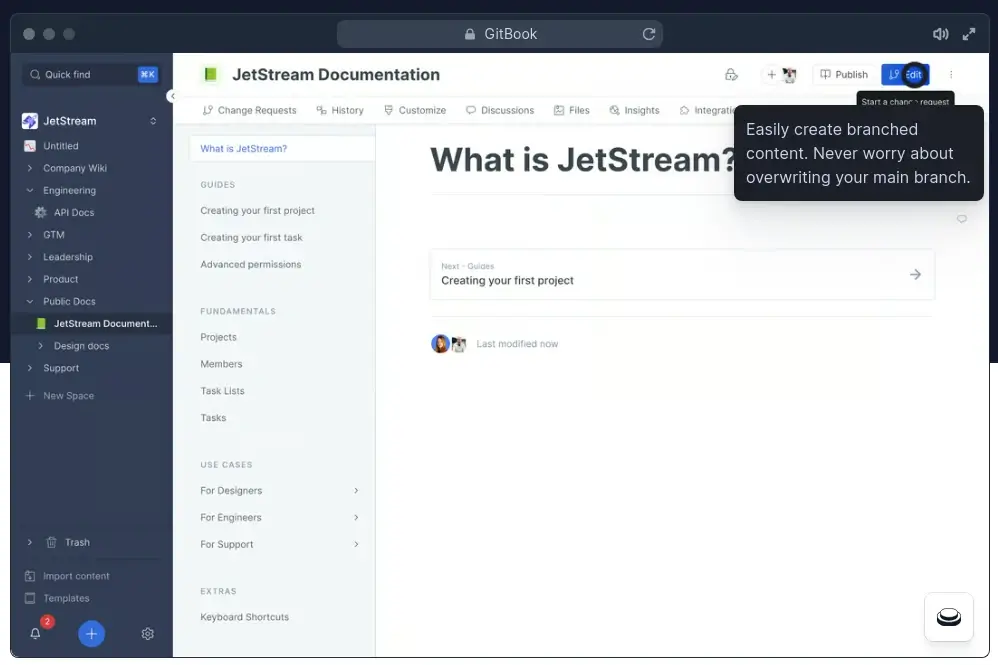
96. GitBook Editor
GitBook Editor is a well-designed free, open-source, and cross-platform desktop client developed for GitBook by GitHub. Try it out if you intend on using version control when you write your next publication.
GitBook Editor
Conclusion
That concludes our list for today. Did I skip a famous title? Tell me about it in the comments section below.
In Linux and other Unix-like operating systems, the init (initialization) process is the first process executed by the kernel at boot time, which has a process ID (PID) of 1, that is executed in the background until the system is shut down.
The init process starts all other Linux processes, that is daemons, services, and other background processes, therefore, it is the mother of all other processes on the system.
A process can start many other child processes on the system, but if a parent process dies, init becomes the parent of the orphan process.
Linux init Systems (1992-2015)
Over the years, many init systems have emerged in major Linux distributions and in this guide, we shall take a look at some of the best init systems you can work with on the Linux operating system.
1. System V Init
System V (SysV) is a mature and popular init scheme on Unix-like operating systems, it is the parent of all processes on a Unix/Linux system. SysV is the first commercial Unix operating system designed.
Almost all Linux distributions first used the SysV init scheme except Gentoo which has a custom init and Slackware which uses the BSD-style init scheme.
As years have passed by, due to some imperfections, several SysV init replacements have been developed in the quest to create more efficient and perfect init systems for Linux.
Although these alternatives seek to improve SysV and probably offer new features, they are still compatible with original SysV init scripts.
2. SystemD
SystemD is a relatively new init scheme on the Linux platform. Introduced in Fedora 15, it is an assortment of tools for easy system management. The main purpose is to initialize, manage, and keep track of all system processes in the boot process and while the system is running.
Systemd init is comprehensively distinct from other traditional Unix init systems, in the way it practically approaches system and services management. It is also compatible with SysV and LBS init scripts.
It has some of the following eminent features:
Clean, straightforward, and efficient design
Concurrent and parallel processing at bootup
Better APIv
Enables removal of optional processes
Supports event logging using journald
Supports job scheduling using systemd calendar timers
Storage of logs in binary files
Preservation of systemd state for future reference
Better integration with GNOME plus many more
3. Upstart
Upstart is an event-based init system developed by the makers of Ubuntu as a replacement for the SysV init system. It starts different system tasks and processes, inspects them while the system is running, and stops them during system shutdown.
It is a hybrid init system that uses both SysV startup scripts and Systemd scripts, some of the notable features of the Upstart init system include:
Originally developed for Ubuntu Linux but can run on all other distributions
Event-based starting and stopping of tasks and services
Events are generated during the starting and stopping of tasks and services
Events can be sent by other system processes
Communication with the init process through D-Bus
Users can start and stop their processes
Re-spawning of services that die abruptly and many more
4. OpenRC
OpenRC is a dependency-based init scheme for Unix-like operating systems, it is compatible with SysV init. As much as it brings some improvements to Sys V, you must keep in mind that OpenRC is not an absolute replacement for the /sbin/init file.
It offers some illustrious features including:
It can run on other many Linux distributions including Gentoo and also on BSD
Supports hardware-initiated init scripts
Supports a single configuration file
No per-service configurations supported
Runs as a daemon
Parallel services startup and many more
5. runit
runit is also a cross-platform init system that can run on GNU/Linux, Solaris, *BSD, and Mac OS X and it is an alternative to SysV init, which offers service supervision.
It comes with some benefits and remarkable components not found in SysV init and possibly other init systems in Linux and these include:
Service supervision, where each service is associated with a service directory
A clean process state guarantees each process a clean state
It has a reliable logging facility
Fast system boot-up and shutdown
It is also portable
Packaging friendly
Small code size and many more
6. s6
s6 offers a compact set of tools for UNIX, tailored for process supervision, similar to daemontools and runit. It facilitates operations on processes and daemons.
Designed as a low-level service administration toolkit, s6 provides diverse tools that can function independently or within its framework. These tools, when combined, deliver robust functionality with minimal code.
As I had earlier mentioned, the init system starts and manages all other processes on a Linux system. Additionally, SysV is the primary init scheme on Linux operating systems, but due to some performance weaknesses, system programmers have developed several replacements for it.
Here, we looked at a few of those replacements, but there could be other init systems that you think are worth mentioning.
kubectl describe [resource-type] [resource-name]: Get detailed information about a resource.
kubectl top [resource-type] [resource-name]: Display resource usage statistics.
Remember to replace placeholders like [resource-type], [resource-name], [pod-name], etc., with your actual resource and object names.
This cheatsheet should help you get started with Kubernetes and serve as a handy reference as you work with containers and orchestration in Kubernetes.
Understanding the number of CPUs on your Ubuntu system is essential for a variety of tasks, including performance optimization, troubleshooting, and knowledge of system capabilities.
This article will examine several techniques for determining Ubuntu’s CPU count without the use of any external programs. To accommodate various user preferences, we will put a priority on command-line strategies and graphical user interface (GUI) tools.
Using the terminal is one of the simplest ways to check the number of CPUs in your Ubuntu system using various commands.
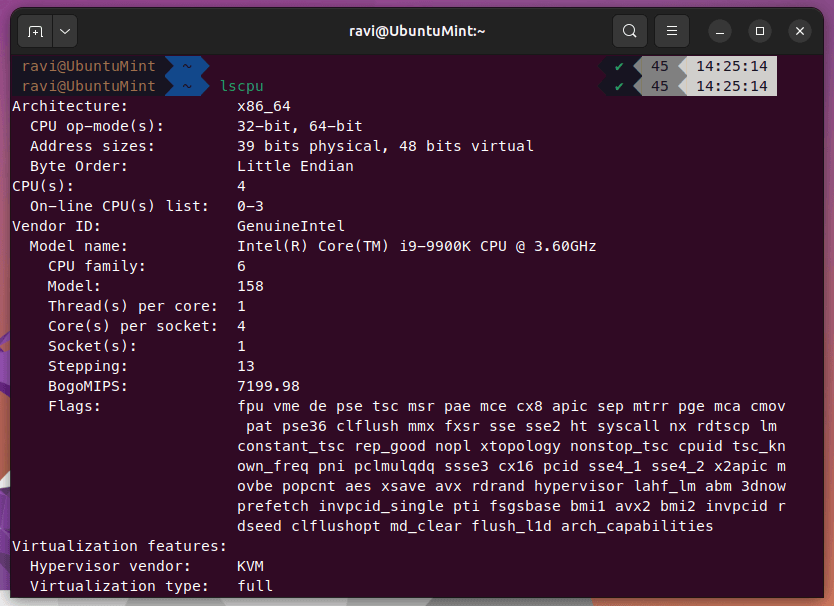
1. lscpu Command – Show CPU Architecture Information
The lscpu utility in Ubuntu is a useful command that offers comprehensive data on the CPU (Central Processing Unit) structure and its functionalities.
Users can acquire vital information like the number of CPUs or cores, CPU vendor details, cache dimensions, clock rates, and other essential details.
By employing the lscpu command, Ubuntu users can obtain valuable knowledge regarding their system’s CPU setup and utilize this information for diverse objectives such as system enhancement, performance assessment, and problem-solving.
You can install the lscpu tool with the help of the following command:
$ sudo apt-get install util-linux
$ lscpu
Ubuntu CPU Architecture Information
Look for the “CPU(s)” field to identify the number of CPUs.
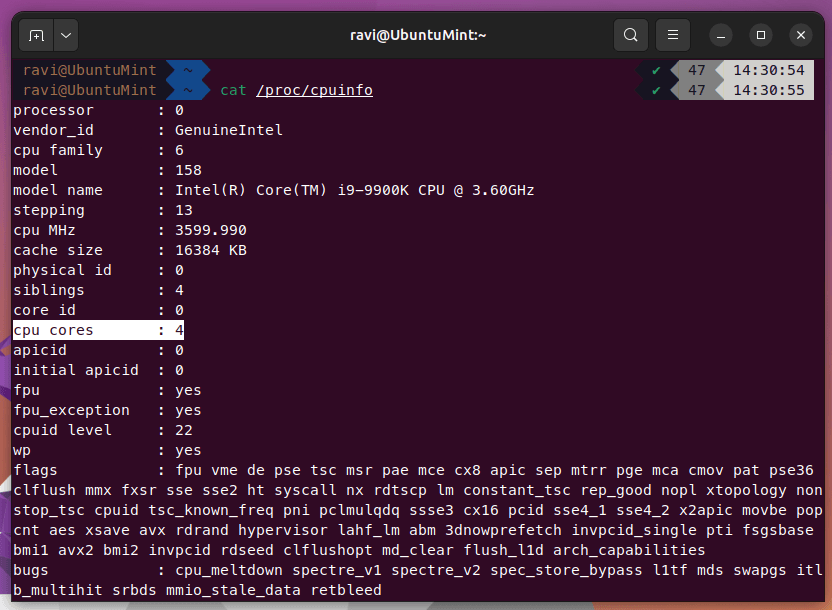
2. cat /proc/cpuinfo – Show CPU Processor Info
The cat /proc/cpuinfo command is another way to retrieve detailed information about the CPU(s) on a Ubuntu system. It reads the /proc/cpuinfo file, which contains information about each CPU core.
When you run this command, it displays a comprehensive list of CPU-related details, including hardware configuration, number of CPUs, cores, etc.
$ cat /proc/cpuinfo
Get Ubuntu CPU Core Information
In order to get the total number of CPUs, count the number of distinct processor fields in the output. Each processor field represents a separate CPU core.
For example, let’s say the output of the command contains the following information:
processor  : 0
vendor_id  : GenuineIntel
cpu family : 6
model  	: 158
...
processor  : 1
vendor_id  : GenuineIntel
cpu family : 6
model  	: 158
...
In this case, there are two distinct processor fields (processor 0 and processor 1), indicating that there are two CPUs or CPU cores in the system.
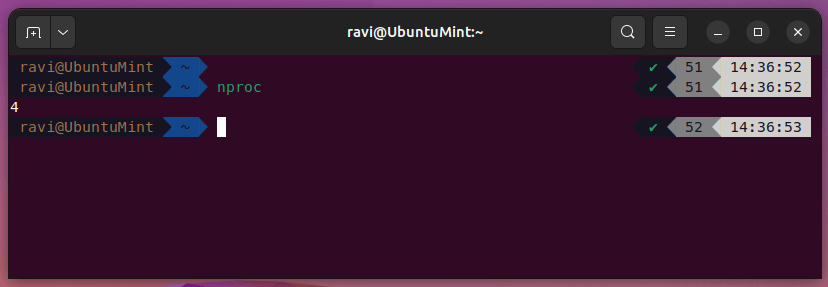
3. nproc Command – Show Processing Units or CPU Cores
Using the nproc command user can quickly display the number of CPUs or CPU cores present in their system. The output is simply numeric that represents the number of CPUs.
To install nproc you need the following package:
$ sudo apt install coreutils
$ nproc
Show Ubuntu CPU Cores
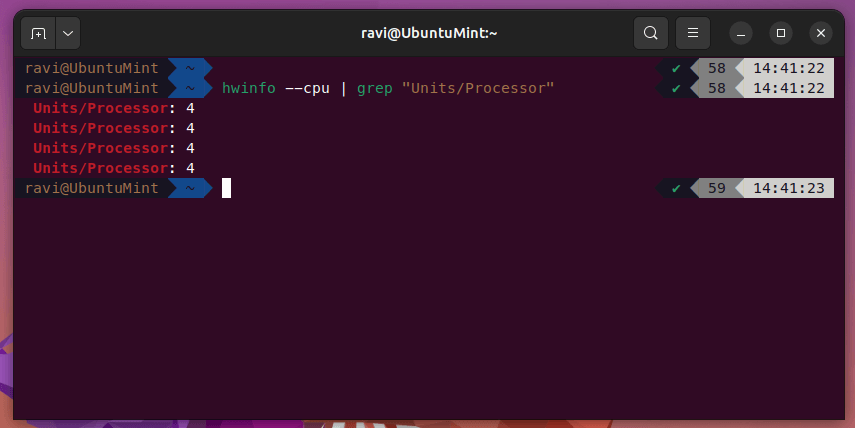
4. Hwinfo Command – Show CPU Hardware Components
The hwinfo command in Ubuntu is a strong utility that gives thorough hardware details about your system. You may learn more about numerous components, including CPUs, RAM, discs, network interfaces, and more, in-depth.
You can access a comprehensive report with hardware-related statistics by running the hwinfo command in the terminal. Understanding the setup of your system will help you fix hardware issues and improve performance.
To install hwinfo in Ubuntu:
$ sudo apt install hwinfo
Since the hwinfo provides detailed information about hardware components the output can be quite lengthy. Therefore we will filter the output by telling hwinfo to fetch only CPU-related information and filter it using the grep command in Linux.
$ hwinfo --cpu | grep "Units/Processor"
Show CPU Related Information
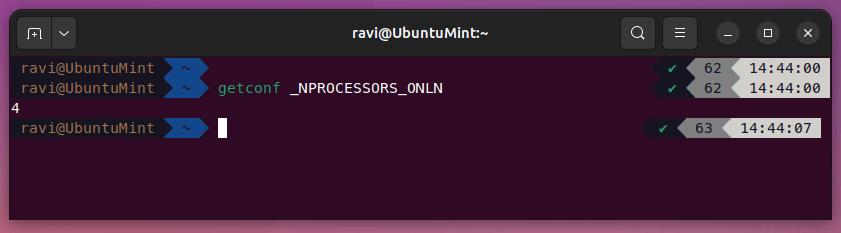
5. getconf _NPROCESSORS_ONLN Command
You can easily find out how many CPUs or online processors are currently in use on your system with Ubuntu’s “getconf _NPROCESSORS_ONLN” command. You may get an easy-to-understand numeric output showing the number of active CPUs by typing this command into the terminal.
getconf is mostly pre-installed in Ubuntu systems but if not you can install it:
$ sudo apt install libc-bin
To get the number of CPUs:
$ getconf _NPROCESSORS_ONLN
Find Number of Ubuntu CPUs
Numerous graphical user interfaces (GUI) tools provided by Ubuntu allow users to check the number of central processing units (CPUs) in their operating system.
These utilities present a user-friendly interface for showcasing system data, encompassing CPU specifications. Presented below is a selection of well-known GUI utilities that facilitate checking CPU quantity.
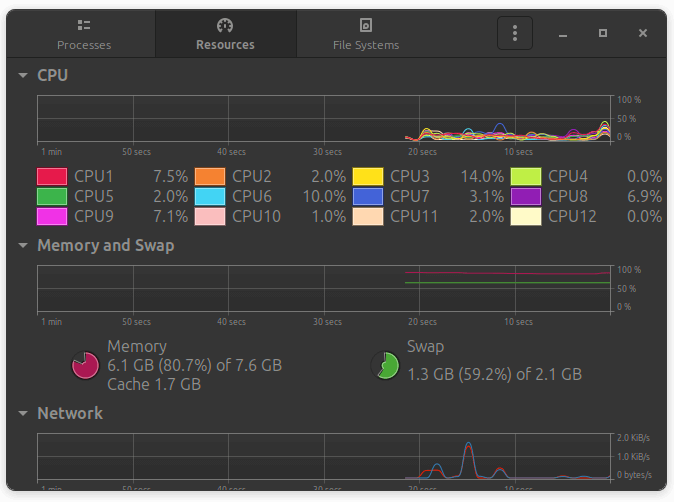
6. Gnome System Monitor
An elegant graphical program called GNOME System Monitor is included in Ubuntu and offers real-time resource management. The performance of your system’s CPU, memory, network, and disc utilization may be tracked and analyzed using its user-friendly interface.
You can simply monitor resource usage, spot any bottlenecks, and effectively manage activities with GNOME System Monitor.
If you have a Gnome environment then the Gnome system monitor is already installed. If not you can simply install it with the following command:
Head to the resources section to find out the number of CPUs and their usage.
Gnome System Monitor
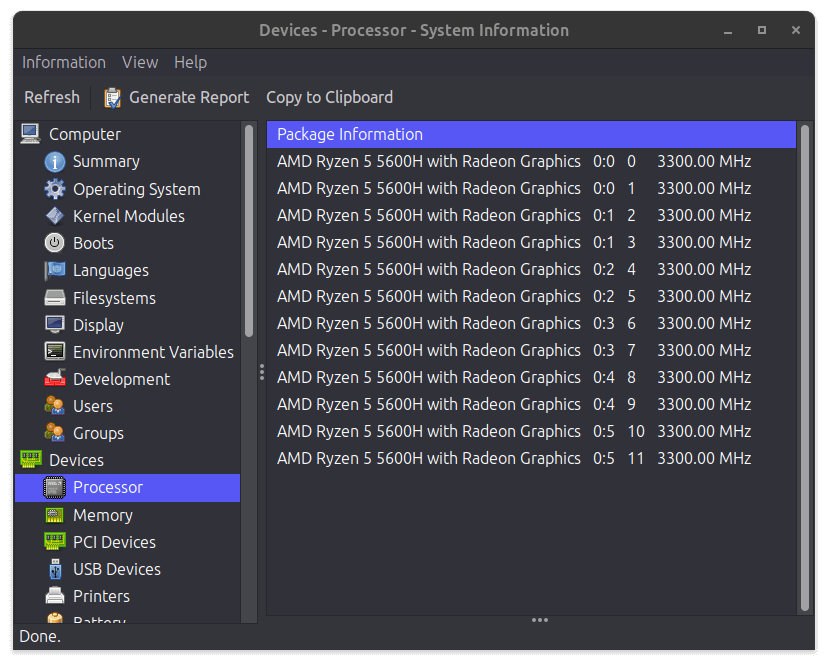
7. Hardinfo
Hardinfo is an extensive tool for Ubuntu that offers in-depth insights into various hardware components and system configurations. It has a very user-friendly interface which will help you gather information related to your system.
To install the hardinfo graphical tool run:
$ sudo apt install hardinfo
$ hardinfo

Then head towards the Processor tab on the left-hand side of the app:
HardInfo – Check Hardware Information in Ubuntu
Here you can view the number of CPUs in your system.
Conclusion
This article delved into different techniques for verifying the CPU count in Ubuntu. Whether you favor the terminal or a graphical interface, Ubuntu provides multiple pre-installed choices for obtaining CPU data. By grasping the CPU count in your system, you can efficiently oversee system performance, address problems, and enhance resource allocation. Keep in mind to select the approach that aligns with your inclination and relish the advantages of comprehending your Ubuntu system thoroughly. Have a delightful computing experience!
Whether you’re a programmer, creative professional, or someone who just wants to browse the web, there are times when you find yourself finding the differences between files.
There are two main tools that you can use for comparing files in Linux:
diff: A command line utility that comes preinstalled on most Linux systems. The diff command has a learning curve.
Meld: A GUI tool that you can install to compare files and directories. It is easier to use, especially for desktop users.
But there are several other tools with different features for comparing files. Here, let me mention some useful GUI and CLI tools for checking the differences between files and folders.
Note:The tools aren’t ranked in any particular order. Choose what you find the best for you.
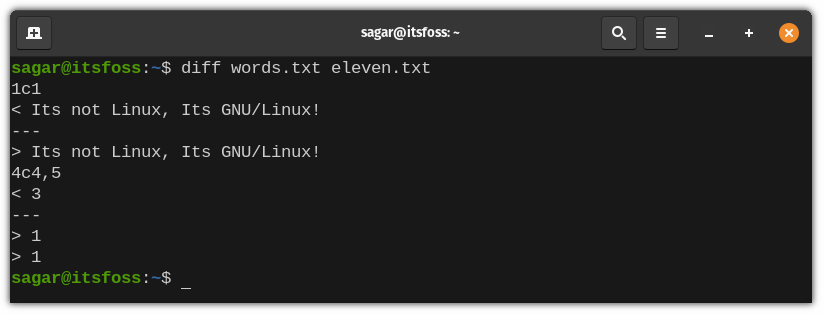
1. Diff command
Diff stands for difference (obviously!) and is used to find the difference between two files by scanning them line by line. It’s a core UNIX utility, developed in the 70s.
Diff will show you lines that are required to change in compared files to make them identical.
Key Features of Diff:
Uses special symbols and characters to indicate lines required to change to make both files identical.
Goes through line by line to provide the best possible result.
And, the best part is, diff comes pre-installed in every Linux distro.
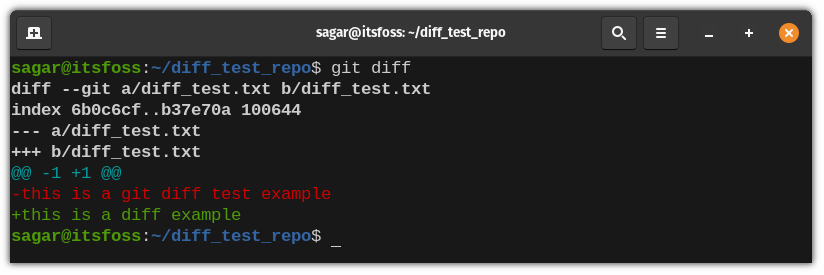
As you can see in the screenshot above, it’s not easy to understand the diff command output in the first attempt. Worry not. We have a detailed guide on using diff command for you to explore.
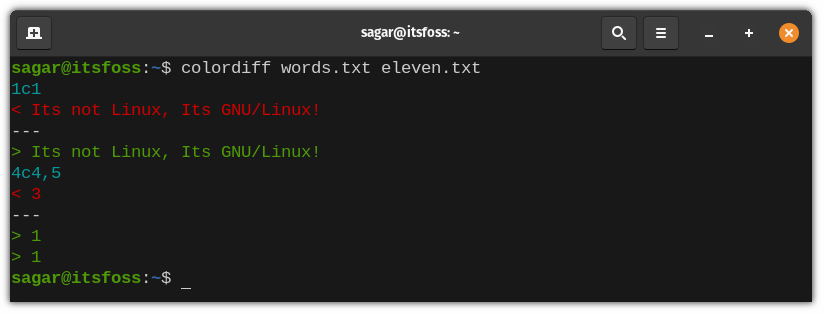
2. Colordiff command
For some reason, if you find Diff utility a bit bland in terms of colors, you can use Colordiff which is a modified version of the diff command utility with enhanced color and highlighting.
Key Features Colordiff:
Syntax highlighting with attractive colors.
Improved readability over the Diff utility.
Licensed under GPL and has digitally signed source code.
Customizable
Installation:
Colordiff is available in the default repository of almost every popular Linux distribution and if you’re using any Debian derivative, you can type in the following:
sudo apt install colordiff
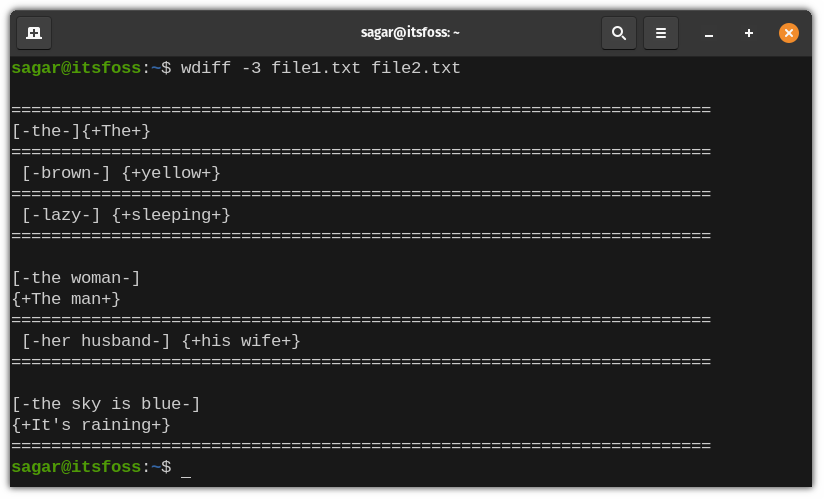
3. Wdiff command
Wdiff is the CLI front end of the Diff utility, and it has a different approach for comparing files i.e it scans on a word-per-word basis.
It starts by creating two temporary files and will run Diff over them. Finally, it collects the output from you’re met with word differences between two files.
Key Features of Wdiff:
Supports multiple languages.
Ability to add colorized output by integrating with Colordiff.
Installation:
Wdiff is available in the default repository of Debian derivatives and other distros. For Ubuntu-based distros, use the following command to get it installed:
sudo apt install wdiff
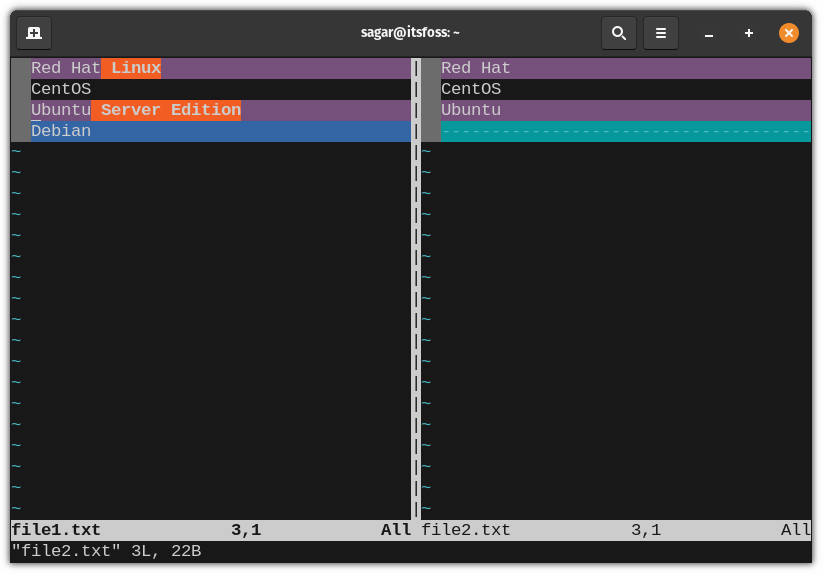
4. Vimdiff command
Key Features of Vimdiff:
Ability to export the results on an HTML web page.
Can also be used with Git.
Customization (of course).
Ability to use it as CLI and GUI tool.
It’s one of the most powerful features that you get with Vim editor. Whether you are using Vim in your terminal or the GUI version, you can use the vimdiff command.
Vimdiff works in a more advanced manner than the usual diff utility. For starters, when you enter vimdiff command, it starts the vim editor with your usual diff. However, if you know how to get around your way through Vim and its commands, you can perform a variety of tasks along with it.
You can use the command below to get it installed (if you’re not worried about the version you install):
sudo apt install vim
5. Gitdiff command
As its name suggests, this utility works over a Git repository.
This command will utilize the diff command we discussed earlier and will run over git data sources. That can be anything from commits, and branches to files and a lot more.
Key features of Gitdiff:
Ability to determine changes between multiple git data sources.
Can also be used with binary files.
Supports highlighting with colors.
Installation:
Gitdiff does not require any separate installation unless you don’t have Git installed on your system. And if you’re looking for the most recent version, we have a tutorial on how to install the latest Git version on Ubuntu.
Or, you can just follow the given command to install Git on your Ubuntu-based distro:
sudo apt install git
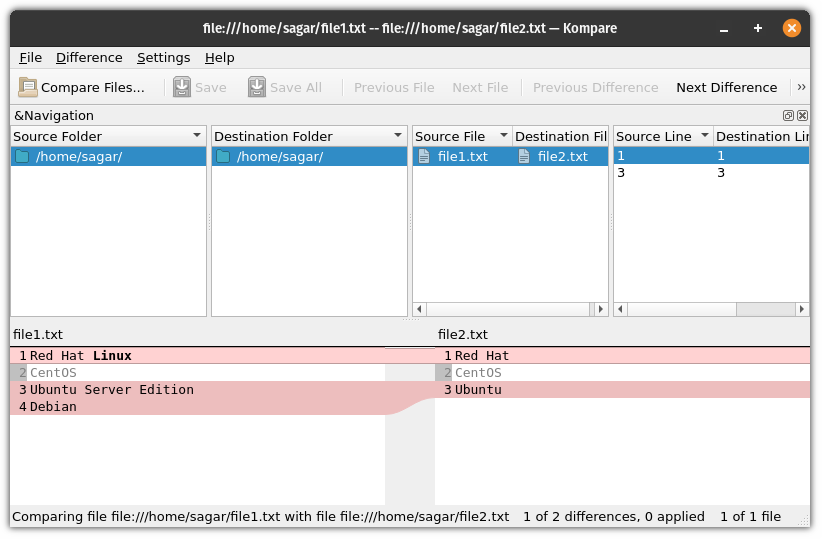
6. Kompare
Looking for a GUI tool that not just differentiates files, but also allows you to create and apply patches to them?
Then Kompare by KDE will be an interesting choice!
Primarily, it is used to view source files to compare and merge. But, you can get creative with it!
Kompare can be used over multiple files, and directories and supports multiple Diff formats.
Key Features of Kompare:
Offers statistics of differences found between compared files.
Bézier-based connection widget shows the source and destination of files.
Source and destination can also be changed with commands.
Easy to navigate UI.
Allows to create and apply patches.
Support for various Diff formats.
Appearance can be customized to some extent.
Installation:
Being part of the KDE family, Kompare can be found easily on the default repository of popular Linux distros and the software center. But, if you prefer the command-line, here’s the command:
sudo apt install kompare
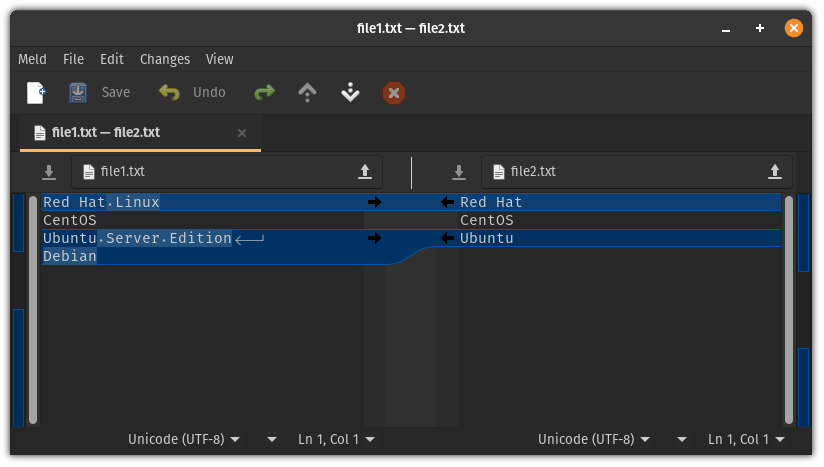
7. Meld
Tools like Kompare may overwhelm new users as they offer a plethora of features, but if you’re looking for simple, Meld is a good pick.
Meld provides up to three-way comparison for files and directories and has built-in support for version control systems. You can also refer to a detailed guide on how to compare files using Meld to know more about it.
Key Features of Meld:
Supports up to 3-way file comparison.
Syntax highlighting.
Support for version control systems.
Simple text filtering.
Minimal and easy-to-understand UI.
Installation:
Meld is popular software and can be found easily on the default repository of almost any Linux distro. And for installation on Ubuntu, you can use this command:
sudo apt install meld
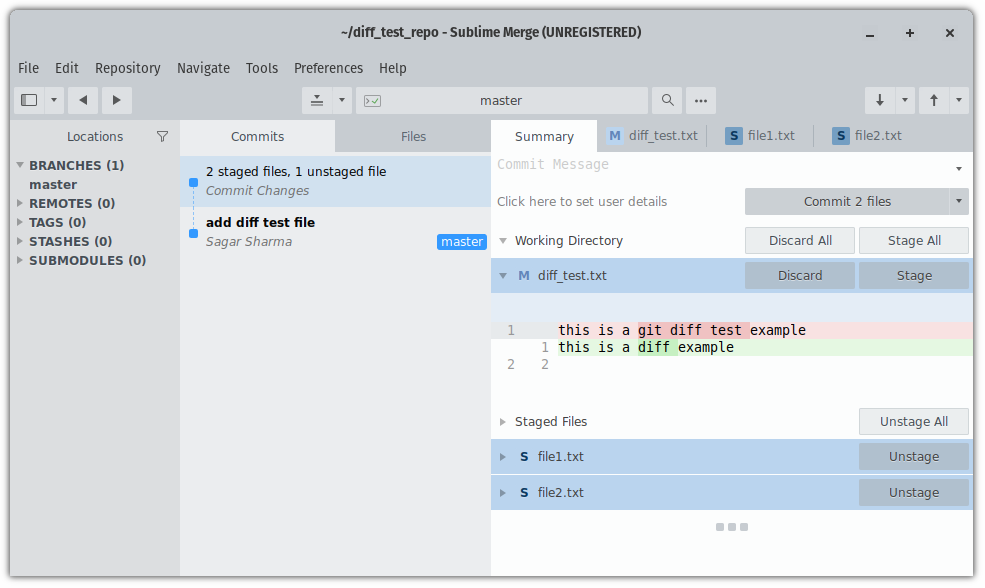
Additional: Sublime Merge (Non-FOSS)
Coming from the developers of the famed Sublime Text editor, Sublime Merge is targeted at programmers who are constantly dealing with version control systems, especially Git, as having the best workflow with Git is its primary focus.
From command line integration, powerful search, and flexibility to Git flow integration, anything that powers your workflow comes with it.
Like Sublime Text, Sublime Merge is also not open source. Similarly, it is also free but encourages you to buy a license for continuous use. However, you can continue using it without purchasing the license forever.
There are a few more tools like Sublime Merge. P4Merge and Beyond Compare come to my mind. These are not open source software but they are available for the Linux platform.
In my opinion, the diff command and Meld tools are enough for most of your file comparison needs. Specific scenarios like dealing with Git could benefit from specialized tools like GitDiff.
Docker has thrown its support behind Microsoft’s latest rev of the Windows Subsystem for Linux, promising a technical review of Docker Desktop for WSL-2 next month.
In a blog post yesterday, Docker’s Simon Ferquel, wrote that while the original WSL was “an impressive effort to emulate a Linux Kernel on top of Windows”, the fundamental differences were such that “it was impossible to run the Docker Engine and Kubernetes directly inside WSL.”
Docker had, consequently, developed “an alternative solution” using Hyper-V and LinuxKit.
However, the container innovator said that the new version, unveiled last month, delivered “a real Linux Kernel running inside a lightweight VM. This approach is architecturally very close to what we do with LinuxKit and Hyper-V today, with the additional benefit that it is more lightweight and more tightly integrated with Windows than Docker can provide alone.”
Consequently, wrote Ferquel, “We will replace the Hyper-V VM we currently use by a WSL 2 integration package.” He said this approach would provide the same features as the current approach: “Kubernetes 1-click setup, automatic updates, transparent HTTP proxy configuration, access to the daemon from Windows, transparent bind mounts of Windows files, and more.”
When it came to running Linux, he continued, “With WSL 2 integration, you will still experience the same seamless integration with Windows, but Linux programs running inside WSL will also be able to do the same.”
This would remove the need for running separate Linux and Windows build scripts, he continued, and “a developer at Docker can now work on the Linux Docker daemon on Windows, using the same set of tools and scripts as a developer on a Linux machine.”
The technical preview, “will run side by side with the current version of Docker Desktop, so you can continue to work safely on your existing projects. If you are running the latest Windows Insider build, you will be able to experience this first hand.”
Further features will be added over the coming months, “until the WSL 2 architecture is used in Docker Desktop for everyone running a compatible version of Windows.”
Microsoft and Docker have gotten steadily closer over the last year. The container outfit’s Docker Enterprise product has been tweaked to support ageing Windows architectures, giving Redmond’s customers a reason NOT to consider alternative platforms. At the same time, they have collaborated on specifications for running distributed applications.
MySQL is an open source free relational database management system (RDBMS) released under GNU (General Public License). It is used to run multiple databases on any single server by providing multi-user access to each created database.
This article will walk through you the process of installing and updating latest MySQL 8.0 version on RHEL/CentOS 7/6/ and Fedora 28-26 using MySQL Yum repository via YUM utility.
Step 1: Adding the MySQL Yum Repository
1. We will use official MySQL Yum software repository, which will provides RPM packages for installing the latest version of MySQL server, client, MySQL Utilities, MySQL Workbench, Connector/ODBC, and Connector/Python for the RHEL/CentOS 7/6/ and Fedora 28-26.
Important: These instructions only works on fresh installation of MySQL on the server, if there is already a MySQL installed using a third-party-distributed RPM package, then I recommend you to upgrade or replace the installed MySQL package using the MySQL Yum Repository”.
Before Upgrading or Replacing old MySQL package, don’t forget to take all important databases backup and configuration files.
2. Now download and add the following MySQL Yum repository to your respective Linux distribution system’s repository list to install the latest version of MySQL (i.e. 8.0 released on 27 July 2018).
--------------- On RHEL/CentOS 7 ---------------
# wget https://repo.mysql.com/mysql80-community-release-el7-1.noarch.rpm
--------------- On RHEL/CentOS 6 ---------------
# wget https://dev.mysql.com/get/mysql80-community-release-el6-1.noarch.rpm
--------------- On Fedora 28 ---------------
# wget https://dev.mysql.com/get/mysql80-community-release-fc28-1.noarch.rpm
--------------- On Fedora 27 ---------------
# wget https://dev.mysql.com/get/mysql80-community-release-fc27-1.noarch.rpm
--------------- On Fedora 26 ---------------
# wget https://dev.mysql.com/get/mysql80-community-release-fc26-1.noarch.rpm
3. After downloading the package for your Linux platform, now install the downloaded package with the following command.
--------------- On RHEL/CentOS 7 ---------------
# yum localinstall mysql80-community-release-el7-1.noarch.rpm
--------------- On RHEL/CentOS 6 ---------------
# yum localinstall mysql80-community-release-el6-1.noarch.rpm
--------------- On Fedora 28 ---------------
# dnf localinstall mysql80-community-release-fc28-1.noarch.rpm
--------------- On Fedora 27 ---------------
# dnf localinstall mysql80-community-release-fc27-1.noarch.rpm
--------------- On Fedora 26 ---------------
# yum localinstall mysql80-community-release-fc26-1.noarch.rpm
The above installation command adds the MySQL Yum repository to system’s repository list and downloads the GnuPG key to verify the integrity of the packages.
4. You can verify that the MySQL Yum repository has been added successfully by using following command.
The above command installs all the needed packages for MySQL server mysql-community-server, mysql-community-client, mysql-community-common and mysql-community-libs.
Step 3: Installing MySQL Release Series
6. You can also install different MySQL version using different sub-repositories of MySQL Community Server. The sub-repository for the recent MySQL series (currently MySQL 8.0) is activated by default, and the sub-repositories for all other versions (for example, the MySQL 5.x series) are deactivated by default.
To install specific version from specific sub-repository, you can use --enable or --disable options using yum-config-manager or dnf config-manager as shown:
7. After successful installation of MySQL, it’s time to start the MySQL server with the following command:
# service mysqld start
You can verify the status of the MySQL server with the help of following command.
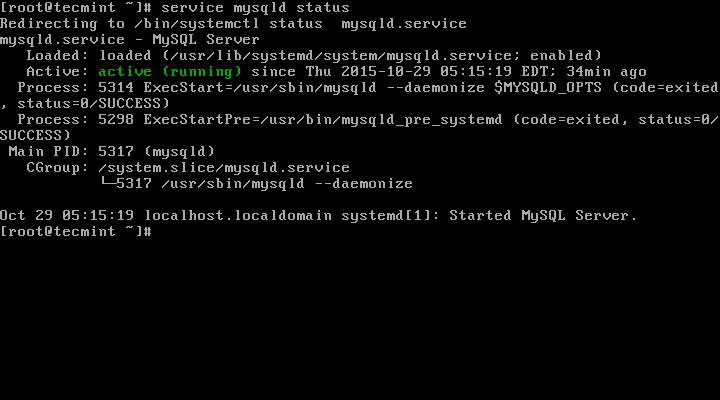
# service mysqld status
This is the sample output of running MySQL under my CentOS 7 box.
Redirecting to /bin/systemctl status  mysqld.service
mysqld.service - MySQL Server
   Loaded: loaded (/usr/lib/systemd/system/mysqld.service; enabled)
   Active: active (running) since Thu 2015-10-29 05:15:19 EDT; 4min 5s ago
  Process: 5314 ExecStart=/usr/sbin/mysqld --daemonize $MYSQLD_OPTS (code=exited, status=0/SUCCESS)
  Process: 5298 ExecStartPre=/usr/bin/mysqld_pre_systemd (code=exited, status=0/SUCCESS)
 Main PID: 5317 (mysqld)
   CGroup: /system.slice/mysqld.service
           └─5317 /usr/sbin/mysqld --daemonize

Oct 29 05:15:19 localhost.localdomain systemd[1]: Started MySQL Server.
Check Mysql Status
8. Now finally verify the installed MySQL version using following command.
# mysql --version

mysql  Ver 8.0.12 for Linux on x86_64 (MySQL Community Server - GPL)
Check MySQL Installed Version
Step 5: Securing the MySQL Installation
9. The command mysql_secure_installation allows you to secure your MySQL installation by performing important settings like setting the root password, removing anonymous users, removing root login, and so on.
Note: MySQL version 8.0 or higher generates a temporary random password in /var/log/mysqld.log after installation.
Use below command to see the password before running mysql secure command.
# grep 'temporary password' /var/log/mysqld.log
Once you know the password you can now run following command to secure your MySQL installation.
# mysql_secure_installation
Note: Enter new Root password means your temporary password from file /var/log/mysqld.log.
Now follow the onscreen instructions carefully, for reference see the output of the above command below.
Sample Output
Securing the MySQL server deployment.

Enter password for user root: Enter New Root Password

VALIDATE PASSWORD PLUGIN can be used to test passwords
and improve security. It checks the strength of password
and allows the users to set only those passwords which are
secure enough. Would you like to setup VALIDATE PASSWORD plugin?

Press y|Y for Yes, any other key for No: y

There are three levels of password validation policy:

LOW    Length >= 8
MEDIUM Length >= 8, numeric, mixed case, and special characters
STRONG Length >= 8, numeric, mixed case, special characters and dictionary                  file

Please enter 0 = LOW, 1 = MEDIUM and 2 = STRONG: 2
Using existing password for root.

Estimated strength of the password: 50
Change the password for root ? ((Press y|Y for Yes, any other key for No) : y

New password: Set New MySQL Password

Re-enter new password: Re-enter New MySQL Password

Estimated strength of the password: 100
Do you wish to continue with the password provided?(Press y|Y for Yes, any other key for No) : y
By default, a MySQL installation has an anonymous user,
allowing anyone to log into MySQL without having to have
a user account created for them. This is intended only for
testing, and to make the installation go a bit smoother.
You should remove them before moving into a production
environment.

Remove anonymous users? (Press y|Y for Yes, any other key for No) : y
Success.


Normally, root should only be allowed to connect from
'localhost'. This ensures that someone cannot guess at
the root password from the network.

Disallow root login remotely? (Press y|Y for Yes, any other key for No) : y
Success.

By default, MySQL comes with a database named 'test' that
anyone can access. This is also intended only for testing,
and should be removed before moving into a production
environment.

Remove test database and access to it? (Press y|Y for Yes, any other key for No) : y
 - Dropping test database...
Success.

 - Removing privileges on test database...
Success.

Reloading the privilege tables will ensure that all changes
made so far will take effect immediately.

Reload privilege tables now? (Press y|Y for Yes, any other key for No) : y
Success.

All done!
Step 6: Connecting to MySQL Server
10. Connecting to newly installed MySQL server by providing username and password.
# mysql -u root -p
Sample Output:
Welcome to the MySQL monitor.  Commands end with ; or \g.
Your MySQL connection id is 19
Server version: 8.0.1 MySQL Community Server (GPL)

Copyright (c) 2000, 2015, Oracle and/or its affiliates. All rights reserved.

Oracle is a registered trademark of Oracle Corporation and/or its
affiliates. Other names may be trademarks of their respective
owners.

Type 'help;' or '\h' for help. Type '\c' to clear the current input statement.
mysql>
Step 7: Updating MySQL with Yum
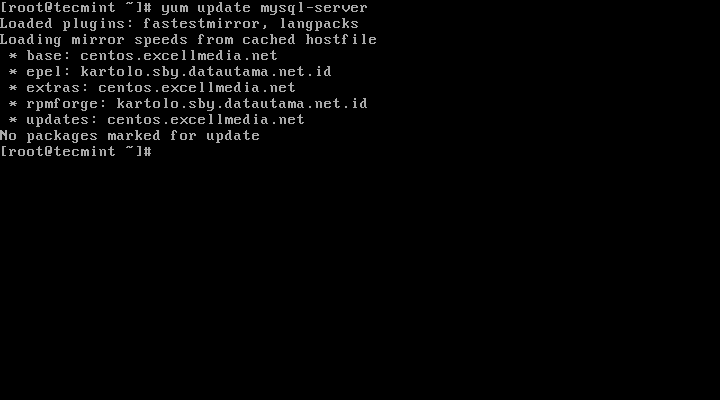
11. Besides fresh installation, you can also do updates for MySQL products and components with the help of following command.
When new updates are available for MySQL, it will auto install them, if not you will get a message saying NO packages marked for updates.
That’s it, you’ve successfully installed MySQL 8.0 on your system. If you’re having any trouble installing feel free to use our comment section for solutions.
In this article, I will show you how to check the size of MySQL/MariaDB databases and tables via the MySQL shell. You will learn how to determine the real size of a database file on the disk as well as size of data that it present in a database.
By default MySQL/MariaDB stores all the data in the file system, and the size of data that exists on the databases may differ from the actual size of Mysql data on the disk that we will see later on.
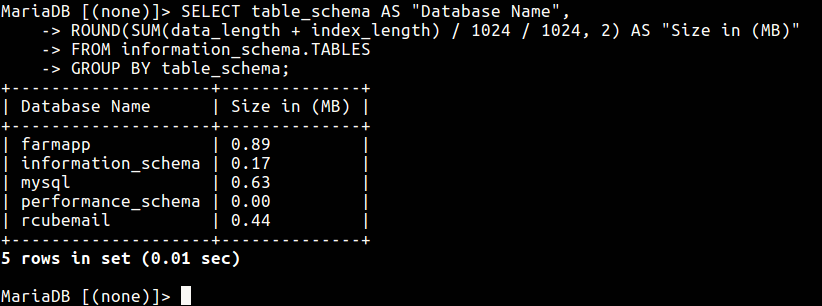
In addition, MySQL uses the information_schema virtual database to store information about your databases and other settings. You can query it to gather information about size of databases and their tables as shown.
# mysql -u root -p
MariaDB [(none)]> SELECT table_schema AS "Database Name",
ROUND(SUM(data_length + index_length) / 1024 / 1024, 2) AS "Size in (MB)"
FROM information_schema.TABLES
GROUP BY table_schema;
Check MySQL Database Size
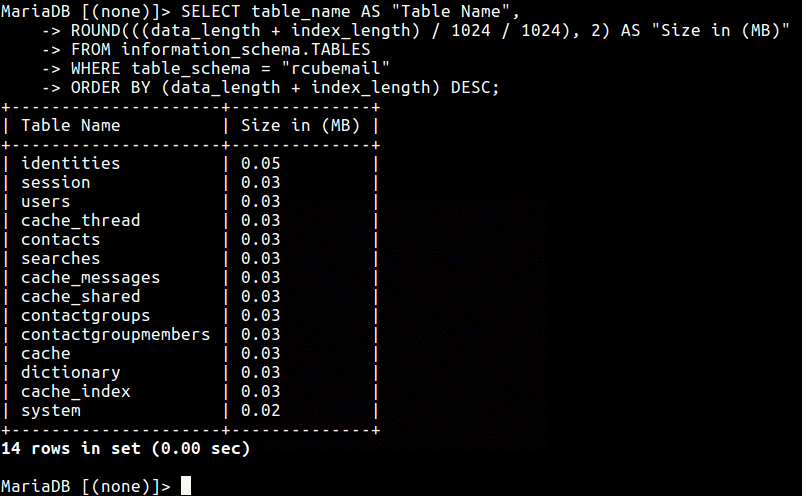
To find out the size of a single MySQL database called rcubemail (which displays the size of all tables in it) use the following mysql query.
MariaDB [(none)]> SELECT table_name AS "Table Name",
ROUND(((data_length + index_length) / 1024 / 1024), 2) AS "Size in (MB)"
FROM information_schema.TABLES
WHERE table_schema = "rcubemail"
ORDER BY (data_length + index_length) DESC;
Check Size of MySQL Database
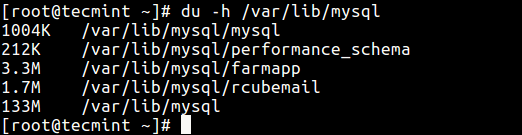
Finally, to find out the actual size of all MySQL database files on the disk (filesystem), run the du commandbelow.
# du -h /var/lib/mysql
Check MySQL Size on Disk
You might also like to read these following MySQL related articles.