DVD Creator
is an excellent software that offers great flexibility and features as a fine and powerful DVD creator. The tool is very simplistic to use. According to the developer – Wondershare, this tool is able to fulfill all your requirements for managing your DVD. It’s available on both Windows and Mac.
You can directly just select all the media contents you want to write to your DVD and let the tool do the job for you. There are a number of options you can change, for example, the writing speed and the DVD format. Got an image (ISO/IMG or similar) file? Let DVD Creator do the job. It burns the image file without any issue.
There are a number of available tools on the internet that can perform similar jobs. Some are premium, others are free. DVD Creator from Wondershare is a freemium tool that can do a lot of things. Let’s find out if it can be a worthy component to have at disposal.
Interface
When you start up the app, this is the first screen you’ll get:
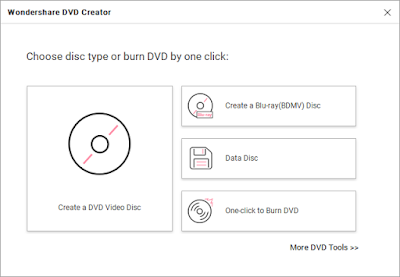
This is a quick toolset screen for performing the most common tasks with your DVD creation.
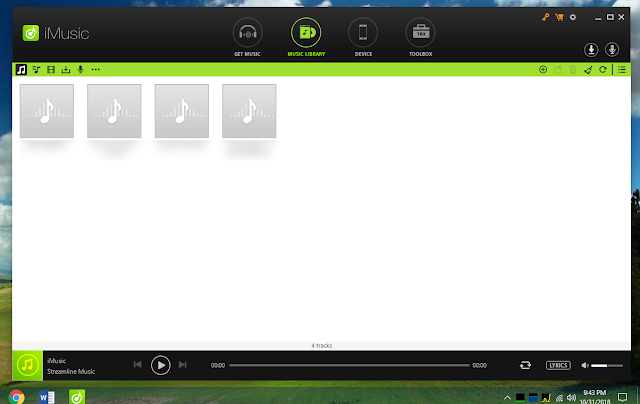
Once you open the real software, you’ll get the following look:
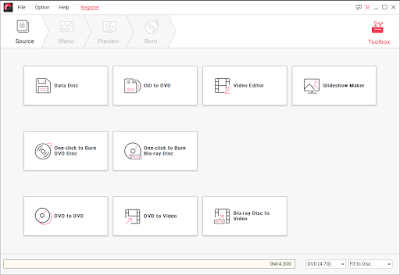
The interface is clean and free of any confusion and complexity. All the options are self-explanatory. On the first page, every single option is situated. All you have to do is select the right one and follow your way to the next steps. Very clean workflow arrangement that any new user can enjoy.
Features
- Create DVDs with any video
There are a number of available video file formats out there. The most popular ones are MP4, MOV, and MKV etc. while some unpopular file formats include AVI, FLV, and WMV etc. DVD Creator supports a large number of video file formats.
Is your video a couple gigabytes large? Or, you need some extra care for that specific video? No need to worry. All you need is feed the tool with your video collection and enjoy your time with a cup of coffee.
- Burn videos in 150 formats
One of the finest things about Wondershare DVD Creator is the support of formats. It can directly burn your content in a ton of formats. The current list of supported file formats includes 150+ file formats!
Feel free to check out whether your rare “file format” specimen matches the supported formats.
- Support for popular disc types
When you’re going to burn a DVD, there are a few options that you must choose consciously. The most important part is choosing the disc type. There are a large number of supported formats to choose from.
Some of the most popular disc types include DVD-5, DVD-9, DVD+R/RW, DVD-R/RW, DVD-RAM, DVD-R DL, DVD+R DL, BD-25, BD-50, BD-100 and a lot more.
Check out all the supported disc types of DVD Creator.
- Burn multiple videos of different formats
Not all the video files you have at hand can be of MP4 or MKV format. If you got a number of various formats mixed up, don’t fear. DVD Creator can easily handle everything you throw at it.
- Burn data disc from any file
Not looking for creating a media disc? Then you should consider the data disc. This will use the DVD as a storage and burn any type of data you select onto the storage. With higher accuracy in burning, there’s absolutely no chance of any missing bits and corrupted files.
This method can be useful if you’re looking for keeping a number of your precious documents safe at a place.
-
- A powerful collection of tools
DVD Creator offers a lot of built-in tools at your disposal. Here are some of them.
-
- ISO to DVD – Various OS vendors release their installation media as ISO files. Use this tool for burning the ISO to your DVD for a bootable media.
- Video editor – DVD Creator is not only a DVD burner but also a nice, handy video editor. Make the changes in your video without the help of software like Adobe Premiere.
- Slideshow maker – Create a slideshow using your collection of images.
Exploring the app
Now, it’s time for a quick tour with all the available options.
Let’s start with the “Data Disc”.

When you click the option, you’ll be presented on a screen where you can add all the audio and video files you want that doesn’t exceed the limit of your DVD.
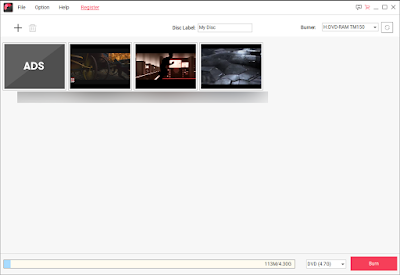
After adding audio/video file is complete, hit “Burn”.
Follow the on-screen options to complete the burning process.
This option is for burning any of your ISO files, especially the OS images, into your DVD. You just can’t directly extract the file on the DVD and boot it properly. The image has to be written properly in a proper order for the DVD being bootable.
No need for loading all the heavy tools now. Launch the “Video editor” and add the finishing on your video collection.

For a slide show, you need a bunch of images.

After you successfully added the images, the tool will turn the collection into an MP4 file.
There are a number of other features like “Video editor”, “Slideshow maker” etc. that are only accessible to premium users.
Premium is available for a very reasonable price. For just about $46, you can get a lifetime product subscription. The most beneficial option is getting permanent licenses for 6-10 or more users at once.
Conclusion
Overall, DVD Creator is a really powerful app that offers a number of advantages over the other DVD creator apps out there. With the handy video editing tool and other pro features, this tool really stands out.
Out of all the features, the most valuable one is probably the video editing. For just about $50, you get an absolute beast editor for some heavy editing and adding some final touches.

Source


 EFCO’s fanless “SmartSL Plus” embedded box computer is built around a Intel Bay Trail based Congatec Qseven module. The system features 3x GbE ports with PoE, mini-PCIe and mSATA, dual displays, and isolated GPIO.