Understand Linux Shell and Basic Shell Scripting Language Tips – Part I
Picture speak more than words and the below picture says all about the working of Linux.

Understanding Linux Shell
Read Also
- 5 Shell Scripts to Learn Shell Programming – Part II
- Sailing Through The World of Linux BASH Scripting – Part III
Understanding Linux Shell
- Shell: A Command-Line Interpretor that connects a user to Operating System and allows to execute the commands or by creating text script.
- Process: Any task that a user run in the system is called a process. A process is little more complex than just a task.
- File: It resides on hard disk (hdd) and contains data owned by a user.
- X-windows aka windows: A mode of Linux where screen (monitor) can be split in small “parts” called windows, that allow a user to do several things at the same time and/or switch from one task to another easily and view graphics in a nice way.
- Text terminal: A monitor that has only the capability of displaying text stuff, no graphics or a very basic graphics display.
- Session: Time between logging on and logging out of the system.
Types of Shell on a Standard Linux Distribution
Bourne shell : The Bourne shell was one of the major shells used in early versions and became a de facto standard. It was written by Stephen Bourne at Bell Labs. Every Unix-like system has at least one shell compatible with the Bourne shell. The Bourne shell program name is “sh” and it is typically located in the file system hierarchy at /bin/sh.
C shell: The C shell was developed by Bill Joy for the Berkeley Software Distribution. Its syntax is modelled after the C programming language. It is used primarily for interactive terminal use, but less frequently for scripting and operating system control. C shell has many interactive commands.
Beginning the Fun! (Linux Shell)
There exist thousands of commands for command-line user, how about remembering all of them? Hmmm! Simply you can not. The real power of computer is to ease the ease your work, you need to automate the process and hence you need scripts.
Scripts are collections of commands, stored in a file. The shell can read this file and act on the commands as if they were typed at the keyboard. The shell also provides a variety of useful programming features to make scripts truly powerful.
Basics of Shell Programming
- To get a Linux shell, you need to start a terminal.
- To see what shell you have, run: echo $SHELL.
- In Linux, the dollar sign ($) stands for a shell variable.
- The ‘echo‘ command just returns whatever you type in.
- The pipeline instruction (|) comes to rescue, when chaining several commands.
- Linux commands have their own syntax, Linux won’t forgive you whatsoever is the mistakes. If you get a command wrong, you won’t flunk or damage anything, but it won’t work.
- #!/bin/sh – It is called shebang. It is written at the top of a shell script and it passes the instruction to the program /bin/sh.
About shell Script
Shell script is just a simple text file with “.sh” extension, having executable permission.
Process of writing and executing a script
- Open terminal.
- Navigate to the place where you want to create script using ‘cd‘ command.
- Cd (enter) [This will bring the prompt at Your home Directory].
- touch hello.sh (Here we named the script as hello, remember the ‘.sh‘ extension is compulsory).
- vi hello.sh (nano hello.sh) [You can use your favourite editor, to edit the script].
- chmod 744 hello.sh (making the script executable).
- sh hello.sh or ./hello.sh (running the script)
Writing your First Script
#!/bin/bash
# My first script

echo "Hello World!"
Save the above lines on a text file, make it executable and run it, as described above.
Sample Output
Hello World!
In the above code.
#!/bin/bash (is the shebang.)
# My first script (is comment, anything following '#' is a comment)
echo “Hello World!” (is the main part of this script)
Writing your Second Script
OK time to move to the next script. This script will tell you, your’s “username” and list the running processes.
#! /bin/bash
echo "Hello $USER"
echo "Hey i am" $USER "and will be telling you about the current processes"
echo "Running processes List"
ps
Create a file with above codes, save it to anything you want, but with extension “.sh“, make it executable and run it, from you terminal.
Sample Output
Hello tecmint
Hey i am tecmint and will be telling you about the current processes
Running processes List
  PID TTY          TIME CMD
 1111 pts/0    00:00:00 bash
 1287 pts/0    00:00:00 sh
 1288 pts/0    00:00:00 ps
Was this cool? Writing script is as simple as getting an idea and writing pipelined commands. There are some restrictions, too. Shell scripts are excellent for concise filesystem operations and scripting the combination of existing functionality in filters and command line tools via pipes.
When your needs are greater – whether in functionality, robustness, performance, efficiency etc – then you can move to a more full-featured language.
If you already know C/Perl/Python programming language or any other programming language, learning the scripting language won’t be much difficult.
Writing your Third Script
Moving to, write our third and last script for this article. This script acts as an interactive script. Why don’t you, yourself execute this simple yet interactive script and tell us how you felt.
#! /bin/bash
echo "Hey what's Your First Name?";
read a;
echo "welcome Mr./Mrs. $a, would you like to tell us, Your Last Name";
read b;
echo "Thanks Mr./Mrs. $a $b for telling us your name";
echo "*******************"
echo "Mr./Mrs. $b, it's time to say you good bye"
Sample Output
Hey what's Your First Name?
Avishek
welcome Mr./Mrs. Avishek, would you like to tell us, Your Last Name
Kumar
Thanks Mr./Mrs. Avishek Kumar for telling us your name
******************************************************
Mr./Mrs. Kumar, it's time to say you good bye
Well this is not an end. We tried to bring a taste of scripting to you. In our future article we will elaborate this scripting language topic, rather a never ending scripting language topic, to be more perfect. Your valuable thoughts in comments is highly appreciated, Like and share us and help us to spread. Till then just chill, keep connected, stay tuned.
Read Also : 5 Shell Scripts to Learn Shell Programming – Part II
5 Shell Scripts for Linux Newbies to Learn Shell Programming – Part II
To Learn something you need to do it, without the fear of being unsuccessful. I believe in practicality and hence will be accompanying you to the practical world of Scripting Language.

Learn Basic Shell Scripting
This article is an extension of our First article Understand Linux Shell and Basic Shell Scripting – Part I, where we gave you a taste of Scripting, continuing that we won’t disappoint you in this article.
Script 1: Drawing a Special Pattern
#!/bin/bash
MAX_NO=0
echo -n "Enter Number between (5 to 9) : "
read MAX_NO
if ! [ $MAX_NO -ge 5 -a $MAX_NO -le 9 ] ; then
   echo "WTF... I ask to enter number between 5 and 9, Try Again"
   exit 1
fi
clear
for (( i=1; i<=MAX_NO; i++ )) do     for (( s=MAX_NO; s>=i; s-- ))
    do
       echo -n " "
    done
    for (( j=1; j<=i;  j++ ))     do      echo -n " ."      done     echo "" done ###### Second stage ###################### for (( i=MAX_NO; i>=1; i-- ))
do
    for (( s=i; s<=MAX_NO; s++ ))
    do
       echo -n " "
    done
    for (( j=1; j<=i;  j++ ))
    do
     echo -n " ."
    done
    echo ""
done
echo -e "\n\n\t\t\t Whenever you need help, Tecmint.com is always there"
Most of the above ‘key words‘ would be known to you and most of them are self explanatory. e.g., MAX sets the maximum value of the variable, for is a loop and anything within the loop gets on executing again and again till the loop is valid for given value of input.
Sample Output
[root@tecmint ~]# chmod 755 Special_Pattern.sh
[root@tecmint ~]# ./Special_Pattern.sh
Enter Number between (5 to 9) : 6
       .
      . .
     . . .
    . . . .
   . . . . .
  . . . . . .
  . . . . . .
   . . . . .
    . . . .
     . . .
      . .
       .

                         Whenever you need help, Tecmint.com is always there
If you are a little aware of any programming language, learning the above script is not difficult, even if you are new to computation, programming and Linux it is not going to be much difficult.
Download Special_Pattern.sh
Script 2: Creating Colorful Script
Who says, Linux is colorless and boring, save the codes below to anything [dot] sh, make it executable and Run it, don’t forget to tell me how it was, Think what you can achieve, implementing it somewhere.
#!/bin/bash
clear
echo -e "33[1m Hello World"
# bold effect
echo -e "33[5m Blink"
# blink effect
echo -e "33[0m Hello World"
# back to normal
echo -e "33[31m Hello World"
# Red color
echo -e "33[32m Hello World"
# Green color
echo -e "33[33m Hello World"
# See remaining on screen
echo -e "33[34m Hello World"
echo -e "33[35m Hello World"
echo -e "33[36m Hello World"
echo -e -n "33[0m"
# back to normal
echo -e "33[41m Hello World"
echo -e "33[42m Hello World"
echo -e "33[43m Hello World"
echo -e "33[44m Hello World"
echo -e "33[45m Hello World"
echo -e "33[46m Hello World"
echo -e "33[0m Hello World"
Note: Don’t bother about the color code now, Those important to you will be at your tongue, gradually.
Warning: Your terminal might not have the facility of blinking.
Sample Output
[root@tecmint ~]# chmod 755 Colorfull.sh
[root@tecmint ~]# ./Colorfull.sh

Hello World
Blink
Hello World
Hello World
Hello World
Hello World
Hello World
Hello World
Hello World
Hello World
Hello World
Hello World
Hello World
Hello World
Hello World
Hello World
Download Colorfull.sh
Script 3: Encrypt a File/Directory
This script will encrypt a file (remember? directory/driver/…. everything is treated as file, in Linux). The current limitation of the above script is that it don’t support auto completion of name using TAB. Moreover, you need to place the script and file to be encrypted in the same folder. You may need to install “pinentry-gui”, using yum or apt the package, if required.
[root@midstage ~]# yum install pinentry-gui
[root@midstage ~]# apt-get install pinentry-gui
Crete a file called “Encrypt.sh” and place the following script, make it executable and run it as shown.
#!/bin/bash
echo "Welcome, I am ready to encrypt a file/folder for you"
echo "currently I have a limitation, Place me to thh same folder, where a file to be
encrypted is present"
echo "Enter the Exact File Name with extension"
read file;
gpg -c $file
echo "I have encrypted the file successfully..."
echo "Now I will be removing the original file"
rm -rf $file
Sample Output
[root@tecmint ~]# chmod 755 Encrypt.sh
[root@tecmint ~]# ./Encrypt.sh

Welcome, I am ready to encrypt a file/folder for you
currently I have a limitation, Place me to the same folder, where a file to be

encrypted is present
Enter the Exact File Name with extension

package.xml

                                                   ┌─────────────────────────────────────────────────────┐
                                                   │ Enter passphrase                                    │
                                                   │                                                     │
                                                   │                                                     │
                                                   │ Passphrase *******_________________________________ │
                                                   │                                                     │
                                                   │       <OK>                             <Cancel>     │
                                                   └─────────────────────────────────────────────────────┘

Please re-enter this passphrase

                                                   ┌─────────────────────────────────────────────────────┐
                                                   │ Please re-enter this passphrase                     │
                                                   │                                                     │
                                                   │ Passphrase ********________________________________ │
                                                   │                                                     │
                                                   │       <OK>                             <Cancel>     │
                                                   └─────────────────────────────────────────────────────┘

I have encrypted the file successfully...
Now I will be removing the original file
</pre>
gpg -c : This will encrypt your file, using a passkey aka password. In this process of learning you would have never thought that the actual process of learning could be that much easy. So after encrypting a file what you need? Obviously! decrypting the file. And I want you – the learner, the reader to write the decryption script yourself, don’t worry I am not leaving you in the middle, I just want you to gain something out of this article.
Note: gpg -d filename.gpg > filename is what you need to implement in your decryption script. You may post you script in comment if successful, if not you may ask me to write it for you.
Download Encrypt.sh
Script 4: Checking Server Utilization
Checking the server utilization is one of the important task of an administrator, and a good administrator is one who knows how to automate his day to day task. Below is the script that will give many such information about your server. Check it yourself.
#!/bin/bash
    date;
    echo "uptime:"
    uptime
    echo "Currently connected:"
    w
    echo "--------------------"
    echo "Last logins:"
    last -a |head -3
    echo "--------------------"
    echo "Disk and memory usage:"
    df -h | xargs | awk '{print "Free/total disk: " $11 " / " $9}'
    free -m | xargs | awk '{print "Free/total memory: " $17 " / " $8 " MB"}'
    echo "--------------------"
    start_log=`head -1 /var/log/messages |cut -c 1-12`
    oom=`grep -ci kill /var/log/messages`
    echo -n "OOM errors since $start_log :" $oom
    echo ""
    echo "--------------------"
    echo "Utilization and most expensive processes:"
    top -b |head -3
    echo
	top -b |head -10 |tail -4
    echo "--------------------"
    echo "Open TCP ports:"
    nmap -p- -T4 127.0.0.1
    echo "--------------------"
    echo "Current connections:"
    ss -s
    echo "--------------------"
    echo "processes:"
    ps auxf --width=200
    echo "--------------------"
    echo "vmstat:"
    vmstat 1 5
Sample Output
[root@tecmint ~]# chmod 755 Server-Health.sh
[root@tecmint ~]# ./Server-Health.sh

Tue Jul 16 22:01:06 IST 2013
uptime:
 22:01:06 up 174 days,  4:42,  1 user,  load average: 0.36, 0.25, 0.18
Currently connected:
 22:01:06 up 174 days,  4:42,  1 user,  load average: 0.36, 0.25, 0.18
USER     TTY      FROM              LOGIN@   IDLE   JCPU   PCPU WHAT
tecmint   pts/0    116.72.134.162   21:48    0.00s  0.03s  0.03s sshd: tecmint [priv]
--------------------
Last logins:
tecmint   pts/0        Tue Jul 16 21:48   still logged in    116.72.134.162
tecmint   pts/0        Tue Jul 16 21:24 - 21:43  (00:19)     116.72.134.162
--------------------
Disk and memory usage:
Free/total disk: 292G / 457G
Free/total memory: 3510 / 3838 MB
--------------------
OOM errors since Jul 14 03:37 : 0
--------------------
Utilization and most expensive processes:
top - 22:01:07 up 174 days,  4:42,  1 user,  load average: 0.36, 0.25, 0.18
Tasks: 149 total,   1 running, 148 sleeping,   0 stopped,   0 zombie
Cpu(s):  0.1%us,  0.0%sy,  0.0%ni, 99.3%id,  0.6%wa,  0.0%hi,  0.0%si,  0.0%st

  PID USER      PR  NI  VIRT  RES  SHR S %CPU %MEM    TIME+  COMMAND
    1 root      20   0  3788 1128  932 S  0.0  0.0   0:32.94 init
    2 root      20   0     0    0    0 S  0.0  0.0   0:00.00 kthreadd
    3 root      RT   0     0    0    0 S  0.0  0.0   0:14.07 migration/0
Note: I have given you the script that gives the output in the terminal itself, how about getting the output in a file for future reference. Implement it using redirect operator.
- ‘>‘ : the redirection operator causes a file creation, and if it does exist, the contents are overwritten.
- ‘>>‘ : when you use >>, you are adding information, rather than replacing it.
- ‘>>‘ is safe, as compared to ‘>‘
Download Server-Health.sh
Script 5: Check Disk Space and Sends an Email Alert
How about getting an email when disk use in partition PART is bigger than Maximum allowed, it is a life saver script for web administrators with little modification.
MAX=95
EMAIL=USER@domain.com
PART=sda1
USE=`df -h |grep $PART | awk '{ print $5 }' | cut -d'%' -f1`
if [ $USE -gt $MAX ]; then
  echo "Percent used: $USE" | mail -s "Running out of disk space" $EMAIL
fi
Note: Remove “USER” with your user name. You can check mail using using ‘mail‘ command.
Download Check-Disk-Space.sh
Script writing and programming is beyond boundaries, anything and everything could be implemented as required. That’s all for now, In my very next article I will be giving your some different flavors of scripting. Till then stay cool and tuned, enjoy.
Sailing Through The World of Linux BASH Scripting – Part III
The Previous following articles of ‘Shell Scripting‘ series were highly appreciated and hence I am writing this article to extend the never ending process of learning.

Basic Shell Scripting Part-3
- Understand Basic Linux Shell Scripting Language Tips – Part I
- 5 Shell Scripts for Linux Newbies to Learn Shell Programming – Part II
Bash Keywords
A keyword is a word or symbol that has a special meaning to a computer language. The following symbols and words have special meanings to Bash when they are unquoted and the first word of a command.
! 			esac 			select 		}
case 			fi 			then 		[[
do 			for 			until 		]]
done 			function 		while 		elif
if 			time 			else 		in 		{
Unlike most computer languages, Bash allows keywords to be used as variable names even though this can make scripts difficult to read. To keep scripts understandable, key-words should not be used for variable names.
A command is implemented in shell as $(command). You might have to include the full path of command. e.g., $(/bin/date), for correct execution.
You may know the path of specific program using ‘whereis‘ command. e.g., whereis date
[root@tecmint /]# whereis date
date: /bin/date /usr/share/man/man1/date.1.gz
That’s enough for now. We won’t be talking much about these theory now. Coming to Scripts.
Move Current Working Directory
Move from current working directory to any level up by just providing the numerical value at the end of script while executing.
#! /bin/bash
LEVEL=$1
for ((i = 1; i <= LEVEL; i++))
do
CDIR=../$CDIR
done
cd $CDIR
echo "You are in: "$PWD
exec /bin/bash
Save the above codes as “up.sh“, on your desktop. Make it executable (chmod 755 up.sh). Run:
./up.sh 2 (will Move the current working directory to two level up).
./up.sh 4 (will Move the current working directory to four level up).
Use and Area of Application
In larger scripts which contains folder inside folder inside… containing libraries, binaries, icons, executables, etc at different location, You as a developer can implement this script to move to the desired location in a very automated fashion.
Note: For is a loop in the above script and it will continue to execute till the values are true for the loop.
Sample Output
[root@tecmint /]# chmod 755 up
[root@tecmint /]# ./up.sh 2
You are in: /

[root@tecmint /]# ./up.sh 4
You are in: /

[root@tecmint /]#
Download up.sh
Create a Random File or Folder
Create a random file (folder) with no chance of duplication.
#! /bin/bash

echo "Hello $USER";
echo "$(uptime)" >> "$(date)".txt
echo "Your File is being saved to $(pwd)"
This is a Simple script but it’s working is not that much simple.
- ‘echo‘ : Prints everything written within the quotes.
- ‘$‘ : Is a shell variable.
- ‘>>‘ : The output is redirected to the output of date command followed by txt extension.
We know the output of date command is date, and time in hour, minute, second along with year. Hence we could get output on an organised file name without the chance of filename duplication. It could be very much useful when user needs the file created with time stamp for future reference.
Sample Output
[root@tecmint /]# ./randomfile.sh
Hello server
Your File is being saved to /home/server/Desktop
You can view the file which is created on desktop with Today’s Date and current time.
[root@tecmint /]# nano Sat\ Jul\ 20\ 13\:51\:52\ IST\ 2013.txt
13:51:52 up  3:54,  1 user,  load average: 0.09, 0.12, 0.08
A more detailed implementation of the above script is given below, which works on the above principle and is very useful in gathering the network information of a Linux server.
Download randomfile.sh
Script to Collect Network Information
Gathers network information on a Linux server. The script is too large and it’s not possible to post the whole code and output of the script here. So, it’s better you can download the script using below download link and test it yourself.
Note: You might need to install lsb-core package and other required packages and dependency. Apt or Yum the required packages. Obviously you need to be root to run the script because most of the commands used here are configured to be run as root.
Sample Output
[root@tecmint /]# ./collectnetworkinfo.sh

The Network Configuration Info Written To network.20-07-13.info.txt. Please email this file to your_name@service_provider.com. ktop
You can change the above email address in your script to get it being mailed to you. The Automatically generated file can be viewed.
Download collectnetworkinfo.sh
Script to Converts UPPERCASE to lowercase
A script that converts UPPERCASE to lowercase and redirects the output to a text file “small.txt” which can be modified as required.
#!/bin/bash

echo -n "Enter File Name : "
read fileName

if [ ! -f $fileName ]; then
  echo "Filename $fileName does not exists"
  exit 1
fi

tr '[A-Z]' '[a-z]' < $fileName >> small.txt
This above script can convert the case of a file of any length with a single click from uppercase to lowercaseand vice-versa if required, with little modification.
Sample Output
[root@tecmint /]# ./convertlowercase.sh
Enter File Name : a.txt

Initial File:
A
B
C
D
E
F
G
H
I
J
K
...
New File (small.txt) output:
a
b
c
d
e
f
g
h
i
j
k
...
Download convertlowercase.sh
Simple Calculator Program
#! /bin/bash
clear
sum=0
i="y"

echo " Enter one no."
read n1
echo "Enter second no."
read n2
while [ $i = "y" ]
do
echo "1.Addition"
echo "2.Subtraction"
echo "3.Multiplication"
echo "4.Division"
echo "Enter your choice"
read ch
case $ch in
    1)sum=`expr $n1 + $n2`
     echo "Sum ="$sum;;
        2)sum=`expr $n1 - $n2`
     echo "Sub = "$sum;;
    3)sum=`expr $n1 \* $n2`
     echo "Mul = "$sum;;
    4)sum=`expr $n1 / $n2`
     echo "Div = "$sum;;
    *)echo "Invalid choice";;
esac
echo "Do u want to continue (y/n)) ?"
read i
if [ $i != "y" ]
then
    exit
fi
done
Sample Output
[root@tecmint /]# ./simplecalc.sh

Enter one no.
12
Enter second no.
14
1.Addition
2.Subtraction
3.Multiplication
4.Division
Enter your choice
1
Sum =26
Do u want to continue (y/n)) ?
y
1.Addition
2.Subtraction
3.Multiplication
4.Division
Enter your choice
3
mul = 14812
Do u want to continue (y/n)) ?
n
Download simplecalc.sh
So did you saw how easy it was to create a powerful program as calculations such a simple way. Its’ not the end. We will be comping up with at least one more article of this series, covering broad perspective from administration view.
That’s all for now. Being the reader and the best critic don’t forget to tell us how much and what you enjoyed in this article and what you want to see in the future article. Any question is highly welcome in comment. Till then stay healthy, safe and tuned. Like and Share us and help us spread.
Mathematical Aspect of Linux Shell Programming – Part IV
In this post I will be discussing the Scripts from the Mathematical and Number point of view. Although I have posted a more complex script (Simple Calculator) in the previous post, but on a user part it was difficult to understand and hence I thought to make you people learn the other useful side of learning in small packets.

Shell Scripting Part 4
Prior to this article, three article of Shell Scripting Series are published and they are:
- Understand Linux Shell and Basic Shell Scripting – Part I
- 5 Shell Scripts to Learn Shell Programming – Part II
- Sailing Through The World of Linux BASH Scripting – Part III
Let’s start the further learning process with some new exciting scripts, start with Mathematics scripts:
Script 1: Additions
Create a file “Addition.sh” and chmod 755 to the script as described in previous post and run it.
#!/bin/bash
echo “Enter the First Number: ”
read a
echo “Enter the Second Number: ”
read b
x=$(expr "$a" + "$b")
echo $a + $b = $x
Sample Output
[root@tecmint ~]# vi Additions.sh
[root@tecmint ~]# chmod 755 Additions.sh
[root@tecmint ~]# ./Additions.sh

“Enter the First Number: ”
12
“Enter the Second Number: ”
13
12 + 13 = 25
Download Additions.sh
Script 2: Substraction
#!/bin/bash
echo “Enter the First Number: ”
read a
echo “Enter the Second Number: ”
read b
x=$(($a - $b))
echo $a - $b = $x
Note: Here we replaced the expr and let the mathematical calculation be performed in shell.
Sample Output
[root@tecmint ~]# vi Substraction.sh
[root@tecmint ~]# chmod 755 Substraction.sh
[root@tecmint ~]# ./Substraction.sh

“Enter the First Number: ”
13
“Enter the Second Number: ”
20
13 - 20 = -7
Download Substraction.sh
Script 3: Multiplication
So far you would be enjoying a lot, learning scripts in such an easy way, so the next in chronological order is Multiplication.
#!/bin/bash
echo “Enter the First Number: ”
read a
echo “Enter the Second Number: ”
read b
echo "$a * $b = $(expr $a \* $b)"
Note: Yup! Here we didn’t put the value of multiplication in a variable but performed it directly in output statement.
Sample Output
[root@tecmint ~]# vi Multiplication.sh
[root@tecmint ~]# chmod 755 Multiplication.sh
[root@tecmint ~]# ./Multiplication.sh

“Enter the First Number: ”
11
“Enter the Second Number: ”
11
11 * 11 = 121
Download Multiplication.sh
Script 4: Division
Right! Next is Division, and again it is a very simple script. Check it Yourself.
#!/bin/bash
echo “Enter the First Number: ”
read a
echo “Enter the Second Number: ”
read b
echo "$a / $b = $(expr $a / $b)"
Sample Output
[root@tecmint ~]# vi Division.sh
[root@tecmint ~]# chmod 755 Division.sh
[root@tecmint ~]# ./Division.sh

“Enter the First Number: ”
12
“Enter the Second Number: ”
3
12 / 3 = 4
Download Division.sh
Script 5: Table
Fine! What after these basic mathematical operation. Lets write a script that prints table of any number.
#!/bin/bash
echo “Enter The Number upto which you want to Print Table: ”
read n
i=1
while [ $i -ne 10 ]
do
i=$(expr $i + 1)
table=$(expr $i \* $n)
echo $table
done
Sample Output
[root@tecmint ~]# vi Table.sh
[root@tecmint ~]# chmod 755 Table.sh
[root@tecmint ~]# ./Table.sh

“Enter The Number upto which you want to Print Table: ”
29
58
87
116
145
174
203
232
261
290
Download Table.sh
Script 6: EvenOdd
We as a child always have carried out calculation to find if the number is odd or even. Won’t it be a good idea to implement it in script.
#!/bin/bash
echo "Enter The Number"
read n
num=$(expr $n % 2)
if [ $num -eq 0 ]
then
echo "is a Even Number"
else
echo "is a Odd Number"
fi
Sample Output
[root@tecmint ~]# vi EvenOdd.sh
[root@tecmint ~]# chmod 755 EvenOdd.sh
[root@tecmint ~]# ./EvenOdd.sh

Enter The Number
12
is a Even Number
[root@tecmint ~]# ./EvenOdd.sh

Enter The Number
11
is a Odd Number
Download EvenOdd.sh
Script 7: Factorial
Next is to find the Factorial.
#!/bin/bash
echo "Enter The Number"
read a
fact=1
while [ $a -ne 0 ]
do
fact=$(expr $fact \* $a)
a=$(expr $a - 1)
done
echo $fact
Sample Output
[root@tecmint ~]# vi Factorial.sh
[root@tecmint ~]# chmod 755 Factorial.sh
[root@tecmint ~]# ./Factorial.sh

Enter The Number
12
479001600
You may now relax with a feeling that calculating 12*11*10*9*7*7*6*5*4*3*2*1 would be more difficult than a simple script as produced above. Think of the situation where you require to find 99! or something like that. Sure! This script will be very much handy in that situation.
Download Factorial.sh
Script 8: Armstrong
Armstrong Number! Ohhh You forget what an Armstrong Number is. Well an Armstrong number of three digits is an integer such that the sum of the cubes of its digits is equal to the number itself. For example, 371 is an Armstrong number since 3**3 + 7**3 + 1**3 = 371.
#!/bin/bash
echo "Enter A Number"
read n
arm=0
temp=$n
while [ $n -ne 0 ]
do
r=$(expr $n % 10)
arm=$(expr $arm + $r \* $r \* $r)
n=$(expr $n / 10)
done
echo $arm
if [ $arm -eq $temp ]
then
echo "Armstrong"
else
echo "Not Armstrong"
fi
Sample Output
[root@tecmint ~]# vi Armstrong.sh
[root@tecmint ~]# chmod 755 Armstrong.sh
[root@tecmint ~]# ./Armstrong.sh

Enter A Number
371
371
Armstrong
[root@tecmint ~]# ./Armstrong.sh

Enter A Number
123
36
Not Armstrong
Download Armstrong.sh
Script 9: Prime
The last script is to distinguish whether a number is prime or not.
#!/bin/bash
echo “Enter Any Number”
read n
i=1
c=1
while [ $i -le $n ]
do
i=$(expr $i + 1)
r=$(expr $n % $i)
if [ $r -eq 0 ]
then
c=$(expr $c + 1)
fi
done
if [ $c -eq 2 ]
then
echo “Prime”
else
echo “Not Prime”
fi
Sample Output
[root@tecmint ~]# vi Prime.sh
[root@tecmint ~]# chmod 755 Prime.sh
[root@tecmint ~]# ./Prime.sh

“Enter Any Number”
12

“Not Prime”
Download Prime.sh
That’s all for now. In our very next article we will be covering other mathematical programs in the shell Scripting programming language. Don’t forget to mention your views regarding article in the Comment section. Like and share us and help us spread. Come Visiting tecmint.com for News and articles relating to FOSS. Till then Stay tuned.
Calculating Mathematical Expressions in Shell Scripting Language – Part V
You People would be feeling comfortable, understanding Shell Scripts and writing them fluently, as per your need. This is the last post of this tutorial series, where we will be carrying out a bit complex Mathematical Operations using scripting language. The last four articles of Shell Scripting series which are chronologically.

Learn Shell Scripting Part – V
- Understand Basic Linux Shell Scripting Language Tips – Part I
- 5 Shell Scripts for Linux Newbies to Learn Shell Programming – Part II
- Sailing Through The World of Linux BASH Scripting – Part III
- Mathematical Aspect of Linux Shell Programming – Part IV
Lets start with Fibonacci Series
A pattern of numbers where each number is the sum of two preceding numbers. The series is 0, 1, 1, 2, 3, 5, 8…… By definition, the first two numbers in the Fibonccai sequence are 0 and 1.
Script 1: Fibonacci.sh
#!/bin/bash
echo "How many numbers do you want of Fibonacci series ?"
  read total
  x=0
  y=1
  i=2
  echo "Fibonacci Series up to $total terms :: "
  echo "$x"
  echo "$y"
  while [ $i -lt $total ]
  do
      i=`expr $i + 1 `
      z=`expr $x + $y `
      echo "$z"
      x=$y
      y=$z
  done
Sample Output
[root@tecmint ~]# chmod 755 Fibonacci.sh
[root@tecmint ~]# ./Fibonacci.sh

How many numbers do you want of Fibonacci series ?
10
Fibonacci Series up to 10 terms ::
0
1
1
2
3
5
8
13
21
34
Download Fibonacci.sh
You are Familiar with the fact that computer understand only in the Binary Format, i.e., ‘0‘ and ‘1‘ and most of us have enjoyed learning the conversion of Decimal to Binary. How about writing a simple script for this complex operation.
Script 2: Decimal2Binary.sh
#!/bin/bash

for ((i=32;i>=0;i--)); do
        r=$(( 2**$i))
        Probablity+=( $r  )
done

[[ $# -eq 0 ]] &echo -en "Decimal\t\tBinary\n"
for input_int in $@; do
s=0
test ${#input_int} -gt 11 &printf "%-10s\t" "$input_int"

        for n in ${Probablity[@]}; do

                if [[ $input_int -lt ${n} ]]; then
                        [[ $s = 1 ]] && printf "%d" 0
                else
                        printf "%d" 1 ; s=1
                        input_int=$(( $input_int - ${n} ))
                fi
        done
echo -e
done
Sample Output
[root@tecmint ~]# chmod 755 Decimal2Binary.sh
[root@tecmint ~]# ./Decimal2Binary.sh 1121

Decimal		Binary
1121      	10001100001
Note: The above script accept Input at run time, which obviously is an aid.
Download Decimal2Binary.sh
Well the inbuilt ‘bc‘ command can convert a decimal to binary in a script of single line. Run, at your terminal.
[root@tecmint ~]# echo "obase=2; NUM" | bc
Replace ‘NUM‘ with the number, which you want to convert from Decimal to Binary. For example,
[root@tecmint ~]# echo "obase=2; 121" | bc

1111001
Next we will be writing a script which function just opposite of the above script, Converting Binary Values to Decimal.
Script 3: Binary2Decimal.sh
#!/bin/bash
echo "Enter a number :"
read Binary
if [ $Binary -eq 0 ]
then
echo "Enter a valid number "
else
while [ $Binary -ne 0 ]
do
Bnumber=$Binary
Decimal=0
power=1
while [ $Binary -ne 0 ]
do
rem=$(expr $Binary % 10 )
Decimal=$((Decimal+(rem*power)))
power=$((power*2))
Binary=$(expr $Binary / 10)
done
echo  " $Decimal"
done
fi
Sample Output
[root@tecmint ~]# chmod 755 Binary2Decimal.sh
[root@tecmint ~]# ./Binary2Decimal.sh

Enter a number :
11
3
Note: The above function can be performed in terminal using ‘bc‘ command as.
[root@tecmint ~]# echo "ibase=2; BINARY" | bc
Replace ‘BINARY‘ with the Binary number, viz.,
[root@tecmint ~]# echo "ibase=2; 11010101" | bc

213
Download Binary2Decimal.sh
Similarly you can write conversion from octal, hexadecimal to decimal and vice-versa yourself. Accomplishing the above result in terminal using ‘bc‘ command is.
Decimal to Octal
[root@tecmint ~]# echo "obase=8; Decimal" | bc
Decimal to Hexadecimal
[root@tecmint ~]# echo "obase=16; Decimal" | bc
Octal to Decimal
[root@tecmint ~]# echo "ibase=8; Octal" | bc
Hexadecimal to Decimal
[root@tecmint ~]# echo "ibase=16; Hexadecimal" | bc
Binary to Octal
[root@tecmint ~]# echo "ibase=2;obase=8 Binary" | bc
Some of the Common Numeric tests used in shell scripting language with description is.
Test : INTEGER1 -eq INTEGER2
Meaning: INTEGER1 is equal to INTEGER2
Test : INTEGER1 -ge INTEGER2
Meaning: INTEGER1 is greater than or equal to INTEGER2
Test: INTEGER1 -gt INTEGER2
Meaning: INTEGER1 is greater than INTEGER2
Test:INTEGER1 -le INTEGER2
Meaning: INTEGER1 is less than or equal to INTEGER2
Test: INTEGER1 -lt INTEGER2
Meaning: INTEGER1 is less than INTEGER2
Test: INTEGER1 -ne INTEGER2
Meaning: INTEGER1 is not equal to INTEGER2
That’s all for this article, and the article series. This is the last article of Shell Script Series and it does not means that no article on Scripting language will be here again, it only means the shell scripting tutorial is over and whenever we find an interesting topic worth knowing or a query from you people, we will be happy to continue the series from here.
Stay healthy, tuned and connected to Tecmint. Very soon I will be coming with another interesting topic, you people will love to read. Share your valuable thoughts in Comment Section.
Learning Shell Scripting Language: A Guide from Newbies to System Administrator
Linux is built with certain powerful tools, which are unavailable in Windows. One of such important tool is Shell Scripting. Windows however comes with such a tool but as usual it is much weak as compared to it’s Linux Counterpart. Shell scripting/programming makes it possible to execute command(s), piped to get desired output in order to automate day-to-day usages. In-fact automating these day-to-day task on server is an important task, system administrator has to perform and most of the admins achieve this by writing scripts to be executed as and when required.

Linux Shell Script Guide
The most commonly used shell in Linux is BASH which stands for Bourne Again Shell. Other Shell commonly found in Linux are:
- Almquist shell (ash)
- Bourne shell (sh)
- Debian Almquist shell (dash)
- korn shell (ksh)
- Public domain korn shell (pdksh)
- MirBSD korn shell (mksh)
- Z shell (zsh)
- Busybox, etc.
We have tried to cover a large variety of shell programming on a number of aspect in 5 different posts.
Understand Linux Shell and Basic Shell Scripting – Part I
I was a bit hesitating to write on scripting Language, as I was not sure if the users were going to accept it or not, but the response received is a history, in itself. We tried to provide you with the basic knowledge of scripting Language and how to use it, writing basic commands, Need of comment lines and how to write it, talking shebang, making a script executable and its’ execution.
Hello.sh
The first and the introductory script was aimed to get a simple output, thus making you comfortable with the world of shell scripting.
Process.sh
The second script was there, to tell you how you can execute more than one command in a script, however not piped, at this stage.
Interactive.sh
The third and last script of this post was a simple but very much interactive script which ask for you first name, store it, again ask for your last name, store it and address you with your full name, and last name in different lines of output.
At the end of this post you were supposed to know how to execute Linux commands independently from a shell script, storing and manipulating data, as required and store data at the run-time.
Shell Script Part I : Understand Linux Shell and Basic Shell Scripting Language
Feeling proud with the response received on first article, writing next article of the series was the first thought, that hit my mind and hence the second article of the series was:
5 Shell Scripts for Linux Newbies to Learn Scripting – Part II
Very much clear from the caption, here 5-Shell Scripts were listed. But to list which kind of script here, was a cumbersome job for us. We thought to dedicate this post to design and colours in shell. Our principal thinking behind this was to tell you that Linux terminal is not boring and colourless and you can perform your task in a very much colourful manner.
Special_patter.sh
The first script of this post draws a special pattern, say a diamond pattern with dots(.), the implementation of for loop here was what you learned from this specific script.
Colourfull.sh
The second script of this post, provided you with the output of several colours. You learned certain colour codes (not necessary to memorise) changing the text and background colour individually and the learning process was very much colourful
Encrypt.sh
The third article of this post was a script of less than 10 lines, but was a very useful script which encrypts a file/folder with password. Security implementation was never so easy ever. We didn’t write a decryption script here, but provided you with the command you need to decrypt a file/folder and ask you to write the decryption script yourself.
Server-Health.sh
The fourth script of this post was a bit long script (long, at this point of learning) which reports server related information and can be redirected to a file for future reference. We utilised Linux commands in a pipelined fashion to get desired result and thus pipeline an important tool in scripting language, was in your knowledge.
Disk_space.sh
The fifth and the last script of this post was a very useful script specially for web administrator, where automatic email will be send to user if the disk space crosses the limit. Let a user registered for 5 GB of web space and as soon as his web upload limit counts reaches 4.75 GB, an automatic email will be send to user for web space increment.
Shell Script Part II : 5 Shell Scripts to Learn Shell Programming
Sailing Through The World of Linux BASH Scripting – Part III
It was time to tell you about certain key words used and reserved in Scripting Language, so that we could refine our scripts in a very much professional manner. We discussed here, the implementation of Linux commands in shell script.
up.sh
The first script of this post aimed to tell you how to move up a directory in shell script. Well during Linux package installation you would have seen that the file gets stored at several location, automatically and this script comes handy if you need any such task.
Randomfile.sh
The second script of this post is a very useful script, and useful to Administrators. It can create unique file/folder automatically with date and time stamp, so as to remove any chance of overwriting data.
Collectnetworkinfo.sh
The third article of this post gathers information related to server and stores it into a text file, so that it could be sent/stored for future references.
Convertlowercase.sh
The fourth article of this post converts data either from the file or standard input to lowercase in a one go.
Simplecacl.sh
The last article of this post is a simple calculator which is capable of doing four basic Mathematical operation interactively.
Shell Script Part III : Sailing Through The World of Linux BASH Scripting
Mathematical Aspect of Linux Shell Programming – Part IV
The mathematical theme based article is the result of an email I received, where a Linux Enthusiastic didn’t understood the last script of the third post, yup! The calculator script. Well to simplify the mathematical operations, we created independent scripts for individual mathematical operation.
Addition.sh
Very much clear from the name this script performs addition of two numbers. We have used ‘expr’ to perform the operation.
Subtraction.sh, Multiplication.sh, Division.sh are second, third and fourth script of the post respectively which performs mathematical operations according to their name.
Table.sh
The fifth script of this post generates table of a number, which can be provided at run-time.
EvenOdd.sh
The next script of the post checks if a number input from standard input is odd or even and prints the result on standard output.
Factorial.sh
The seventh script of this post generates the factorial of a number. Calculating factorial on black and white (paper) is a painful task, but here it is a fun.
Armstrong.sh
The script checks if a provided number is Armstrong or not.
Prime.sh
The last script of this post check if a number is prime or not and generates the corresponding output.
Shell Script Part IV : Mathematical Aspect of Linux Shell Programming
Calculating Mathematical Expressions in Scripting – Part V
Fibonacci.sh
The first script of this post test if a number being entered is a Fibonacci or not.
Decimal2Binary.sh
The second script of this post converts Decimal Number to Binary. This is one of the most common project you would have had in your summer vacation assignments.
Binry2Decimal.sh
The third script of this post converts Binary Number back to decimal, just vice-versa of above process.
However, we didn’t wrote proper script for the below mathematical conversions but provided one liner command, so that you yourself can implement it in your own script.
- Decimal to octal
- Decimal to Hexadecimal
- Octal to Decimal
- Hexadecimal to Decimal
- Binary to Octal , falls into the above category.
Shell Script Part V : Calculating Mathematical Expressions in Shell Scripting Language
We have tested all the scripts, ourselves to ensure, every script you get runs 100% perfectly in your terminal. Moreover, we have included sample output in most of the scripts, so that you don’t gets confused.
Well that’s all for now, from me. I will be here again with an interesting article, you people will love to read. Till then keep connected to Tecmint. Stay Fit, Healthy and Tuned. Don’t forget to provide us with your valuable thoughts in comment, which is highly appreciated.
10 Useful Chaining Operators in Linux with Practical Examples
Chaining of Linux commands means, combining several commands and make them execute based upon the behaviour of operator used in between them. Chaining of commands in Linux, is something like you are writing short shell scripts at the shell itself, and executing them from the terminal directly. Chaining makes it possible to automate the process. Moreover, an unattended machine can function in a much systematic way with the help of chaining operators.

10 Chaining Operators in Linux
Read Also: How to Use Awk and Regular Expressions to Filter Text in Files
This Article aims at throwing light on frequently used command-chaining operators, with short descriptions and corresponding examples which surely will increase your productivity and lets you write short and meaningful codes beside reducing system load, at times.
1. Ampersand Operator (&)
The function of ‘&‘ is to make the command run in background. Just type the command followed with a white space and ‘&‘. You can execute more than one command in the background, in a single go.
Run one command in the background:
tecmint@localhost:~$ ping c5 www.tecmint.com &
Run two command in background, simultaneously:
root@localhost:/home/tecmint# apt-get update & apt-get upgrade &
2. semi-colon Operator (;)
The semi-colon operator makes it possible to run, several commands in a single go and the execution of command occurs sequentially.
root@localhost:/home/tecmint# apt-get update ; apt-get upgrade ; mkdir test
The above command combination will first execute update instruction, then upgrade instruction and finally will create a ‘test‘ directory under the current working directory.
3. AND Operator (&&)
The AND Operator (&&) would execute the second command only, if the execution of first command SUCCEEDS, i.e., the exit status of the first command is 0. This command is very useful in checking the execution status of last command.
For example, I want to visit website tecmint.com using links command, in terminal but before that I need to check if the host is live or not.
root@localhost:/home/tecmint# ping -c3 www.tecmint.com && links www.tecmint.com
4. OR Operator (||)
The OR Operator (||) is much like an ‘else‘ statement in programming. The above operator allow you to execute second command only if the execution of first command fails, i.e., the exit status of first command is ‘1‘.
For example, I want to execute ‘apt-get update‘ from non-root account and if the first command fails, then the second ‘links www.tecmint.com‘ command will execute.
tecmint@localhost:~$ apt-get update || links tecmint.com
In the above command, since the user was not allowed to update system, it means that the exit status of first command is ‘1’ and hence the last command ‘links tecmint.com‘ gets executed.
What if the first command is executed successfully, with an exit status ‘0‘? Obviously! Second command won’t execute.
tecmint@localhost:~$ mkdir test || links tecmint.com
Here, the user creates a folder ‘test‘ in his home directory, for which user is permitted. The command executed successfully giving an exit status ‘0‘ and hence the last part of the command is not executed.
5. NOT Operator (!)
The NOT Operator (!) is much like an ‘except‘ statement. This command will execute all except the condition provided. To understand this, create a directory ‘tecmint‘ in your home directory and ‘cd‘ to it.
tecmint@localhost:~$ mkdir tecmint
tecmint@localhost:~$ cd tecmint
Next, create several types of files in the folder ‘tecmint‘.
tecmint@localhost:~/tecmint$ touch a.doc b.doc a.pdf b.pdf a.xml b.xml a.html b.html
See we’ve created all the new files within the folder ‘tecmint‘.
tecmint@localhost:~/tecmint$ ls

a.doc  a.html  a.pdf  a.xml  b.doc  b.html  b.pdf  b.xml
Now delete all the files except ‘html‘ file all at once, in a smart way.
tecmint@localhost:~/tecmint$ rm -r !(*.html)
Just to verify, last execution. List all of the available files using ls command.
tecmint@localhost:~/tecmint$ ls

a.html  b.html
6. AND – OR operator (&& – ||)
The above operator is actually a combination of ‘AND‘ and ‘OR‘ Operator. It is much like an ‘if-else‘ statement.
For example, let’s do ping to tecmint.com, if success echo ‘Verified‘ else echo ‘Host Down‘.
tecmint@localhost:~/tecmint$ ping -c3 www.tecmint.com && echo "Verified" || echo "Host Down"
Sample Output
PING www.tecmint.com (212.71.234.61) 56(84) bytes of data.
64 bytes from www.tecmint.com (212.71.234.61): icmp_req=1 ttl=55 time=216 ms
64 bytes from www.tecmint.com (212.71.234.61): icmp_req=2 ttl=55 time=224 ms
64 bytes from www.tecmint.com (212.71.234.61): icmp_req=3 ttl=55 time=226 ms

--- www.tecmint.com ping statistics ---
3 packets transmitted, 3 received, 0% packet loss, time 2001ms
rtt min/avg/max/mdev = 216.960/222.789/226.423/4.199 ms
Verified
Now, disconnect your internet connection, and try same command again.
tecmint@localhost:~/tecmint$ ping -c3 www.tecmint.com && echo "verified" || echo "Host Down"
Sample Output
ping: unknown host www.tecmint.com
Host Down
7. PIPE Operator (|)
This PIPE operator is very useful where the output of first command acts as an input to the second command. For example, pipeline the output of ‘ls -l‘ to ‘less‘ and see the output of the command.
tecmint@localhost:~$ ls -l | less
8. Command Combination Operator {}
Combine two or more commands, the second command depends upon the execution of the first command.
For example, check if a directory ‘bin‘ is available or not, and output corresponding output.
tecmint@localhost:~$ [ -d bin ] || { echo Directory does not exist, creating directory now.; mkdir bin; } && echo Directory exists.
9. Precedence Operator ()
The Operator makes it possible to execute command in precedence order.
Command_x1 &&Command_x2 || Command_x3 && Command_x4.
In the above pseudo command, what if the Command_x1 fails? Neither of the Command_x2, Command_x3, Command_x4 would executed, for this we use Precedence Operator, as:
(Command_x1 &&Command_x2) || (Command_x3 && Command_x4)
In the above pseudo command, if Command_x1 fails, Command_x2 also fails but Still Command_x3 and Command_x4 executes depends upon exit status of Command_x3.
10. Concatenation Operator (\)
The Concatenation Operator (\) as the name specifies, is used to concatenate large commands over several lines in the shell. For example, The below command will open text file test(1).txt.
tecmint@localhost:~/Downloads$ nano test\(1\).txt
That’s all for now. I am coming up with another interesting article very soon.
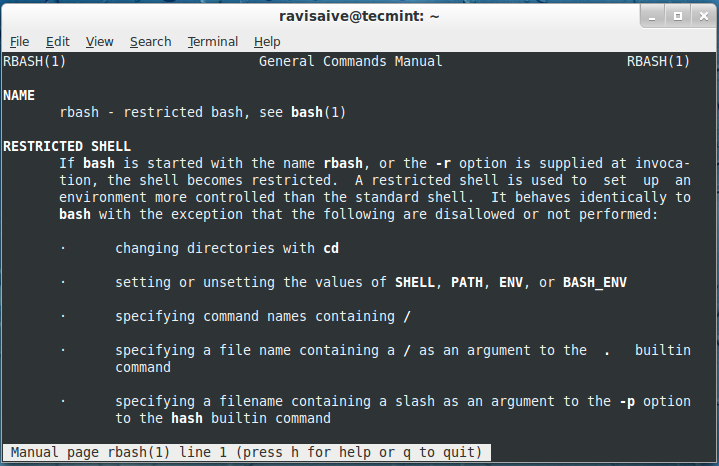
rbash – A Restricted Bash Shell Explained with Practical Examples
Linux Shell is one of the most fascinating and powerful GNU/Linux powered tool. All the application, including X, is built over shell and Linux shell is so powerful that the whole Linux system can be controlled precisely, using it. The other aspect of Linux shell is that, it can be potentially harmful, when you executed a system command, without knowing its consequence or unknowingly.
Restricted Bash Shell
Being an ignorant user. For this purpose we are introducing restricted shell. We will be discussing restricted shell in details, the restrictions implemented, and a lot more.
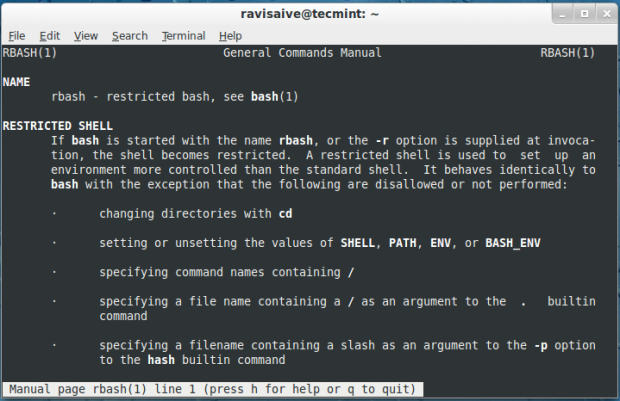
What is rbash?
The Restricted Shell is a Linux Shell that restrict some of the features of bash shell, and is very clear from the name. The restriction is well implemented for the command as well as script running in restricted shell. It provides an additional layer for security to bash shell in Linux.
Restrictions Implemented in rbash
- cd command (Change Directory)
- PATH (setting/ unsetting)
- ENV aka BASH_ENV (Environment Setting/ unsetting)
- Importing Function
- Specifying file name containing argument ‘/’
- Specifying file name containing argument ‘-‘
- Redirecting output using ‘>‘, ‘>>‘, ‘>|‘, ‘<>‘, ‘>&‘, ‘&>‘
- turning off restriction using ‘set +r‘ or ‘set +o‘
Note: Restrictions of rbash is enforced after any startup files are read.
Enabling Restricted Shell
In some version of GNU/Linux viz., Red Hat/CentOS, rbash may not be implemented directly and needs symbolic links to be created.
# cd /bin

# ln -s bash rbash
In most of the today’s GNU/Linux standard distributions, rbash is available by default. If not, you can download source tarball and install it from source in your system.
Starting rbash
To start rbash restricted shell in Linux, execute the following command.
# bash -r

OR

# rbash
Note: If rbash is started successfully, it returns 0.
Testing a Few Restrictions
Here, we executing few commands on the rbash shell to check restrictions.
# cd

rbash: cd: restricted
# pwd > a.txt

bash: a.txt: restricted: cannot redirect output
Pros of Restricted Shell
- Restricted shell is used in conjunction with a chroot jail, in a further attempt to limit access to the system as a whole.
Cons of Restricted Shell
- Insufficient to allow execution of entirely untrusted software.
- When a command that is found to be a shell script is executed, rbash turns off any restrictions in the shell spawned to execute the script.
- When users run bash or dash from rbash then they got unrestricted shells.
- rbash should only be used within a chroot unless you know what you are doing.
- There are many ways to break out a restricted bash shell that are not easy to predict in advance.
Conclusion
rbash is a fantastic tool to work on, within restricted environment and works brilliant. You must give it a try and you wont be disappointed.
That’s all for now. I’ll soon be here again here with another interesting and knowledgeable topic you people would love to read. Don’t forget to provide us with your valuable feedback in our comment section.
Accessing Clipboard Contents Across Multiple Instances of Vim from Terminal
Vim (Vi IMproved) is one of the most favourite text editors among programmers. It has its own specialities in performing different operations with short hand commands.
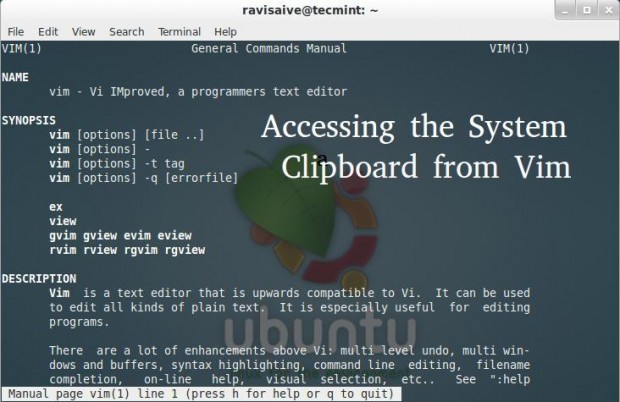
Accessing Clipboard Contents from Vim
For example, to copy the highlighted text we use the ‘y‘ command and ‘x‘ to cut the same. But, by default vim(and not gVim) clipboard contents cannot be accessed after closing vim instances.
Vim uses the ‘+‘ register to refer to the system clipboard. You can run ‘vim –version‘ and if you cannot see something like “+xterm_clipboard” and instead “xterm_clipboard“, then internal clipboard contents will not be available outside vim.
Install gvim and parcellite
In order to access the vim clipboard contents, you need to install gvim package. The gVim is a GUI mode for vim editor where clipboard option is enabled by default.
# yum install -y gvim
Next, enable RPMForge Repository to install parcellite package. The Parcellite is a lightweight, tiny and free clipboard manager for Linux.
# yum install -y parcellite
Once installed, run the following command. Where argument ‘&’ is used to send parcellite for running as a background process.
# parcellite &
Check whether the option is enabled in gvim.
# gvim --version
Make sure you have the “+xterm_clipboard” option displayed in the output as shown below.
VIM - Vi IMproved 7.2 (2008 Aug 9, compiled Apr  5 2012 10:12:08)
Included patches: 1-411
Modified by <bugzilla@redhat.com>
Compiled by <bugzilla@redhat.com>
Huge version with GTK2 GUI.  Features included (+) or not (-):
+arabic +autocmd +balloon_eval +browse ++builtin_terms +byte_offset +cindent
+clientserver +clipboard +cmdline_compl +cmdline_hist +cmdline_info +comments
+cryptv +cscope +cursorshape +dialog_con_gui +diff +digraphs +dnd -ebcdic
+emacs_tags +eval +ex_extra +extra_search +farsi +file_in_path +find_in_path
+float +folding -footer +fork() +gettext -hangul_input +iconv +insert_expand
+jumplist +keymap +langmap +libcall +linebreak +lispindent +listcmds +localmap
+menu +mksession +modify_fname +mouse +mouseshape +mouse_dec +mouse_gpm
-mouse_jsbterm +mouse_netterm -mouse_sysmouse +mouse_xterm +multi_byte
+multi_lang -mzscheme +netbeans_intg -osfiletype +path_extra +perl +postscript
+printer +profile +python +quickfix +reltime +rightleft -ruby +scrollbind
+signs +smartindent -sniff +startuptime +statusline -sun_workshop +syntax
+tag_binary +tag_old_static -tag_any_white -tcl +terminfo +termresponse
+textobjects +title +toolbar +user_commands +vertsplit +virtualedit +visual
+visualextra +viminfo +vreplace +wildignore +wildmenu +windows +writebackup
+X11 -xfontset +xim +xsmp_interact +xterm_clipboard -xterm_save
Open up user’s .bashrc file.
# vim ~/.bashrc
And add the alias and save the file (press ‘i’ to insert line and press ESC, then run :wq to save and exit).
# .bashrc

# User specific aliases and functions

alias rm='rm -i'
alias cp='cp -i'
alias mv='mv -i'
alias vim='gvim -v'
# Source global definitions
if [ -f /etc/bashrc ]; then
        . /etc/bashrc
fi
This alias is a built-in used to bypass some command to another. Thus every time when vim command is issued, the corresponding alias goes to gvim with clipboard enabled by default.
Now edit your ‘.vimrc‘ file in a similar way (In case if you don’t have a .vimrc file, generate one such file through and then get back here.
# vim ~/.vimrc
Append the following line and save the file.
autocmd VimLeave * call system("echo -n $'" . escape(getreg(), "'") . "' | xsel -ib")
Now open any file in vim and highlight the portion of text (using ‘v‘ command) and press “+y. Try to paste anywhere outside vim (after closing or without closing vim) and you are done.
Generating .vimrc File
Run the following command to generate .vimrc file (skip this part if you already have one).
# cd   [This will put you in home directory]
# vim .vimrc
In vim run the following after pressing the ESC key (In vim every command is run after pressing ESC key which puts you in command mode).
:r $VIMRUNTIME/vimrc_example.vim
:w
Understanding and Writing functions in Shell Scripts – Part VI
Functions play an important role in any programming language. Like many real programming languages, bash has functions which are used with limited implementation.

Understanding Linux Shell Script Functions
What are functions?
In programming, functions are named sections of a program that performs a specific task. In this sense, a function is a type of procedure or routine. When a function is called the program leaves the current section of code and begins to execute the first line inside the function. Whenever there is repetitive code or when a task repeats, consider using a function instead.
For example, consider the case where we need to find the factorial of a number at several stages of a particular program. Instead of writing the whole code (for calculating the factorial) each and every time, we can write that part of code which calculates the factorial once inside a block and reuse the same at multiple occasions.
Why do we write functions?
- It helps us to reuse the code.
- Improve the readability of program.
- Efficient use of variables inside the program.
- Allows us to test the program part by part.
- Displays program as a bunch of sub-steps.
Functions in shell scripts
The general syntax for writing functions in shell script includes the following ways.
function func_name {
	. . .
	commands
	. . .
}

or

func_name ( ) {
	. . .
	commands
	. . .
}

Opening curly braces can also be used in the second line as well.

func_name ( )
{
	. . .
	commands
	. . .
}
You are always free to write valid commands inside these function blocks as we do normally in shell scripts. Now let’s try to write one simple script with a small function inside it.
#!/bin/bash

call_echo ( ) {
	echo ‘This is inside function’
}

op=$1

if [ $# -ne 1 ]; then
	echo "Usage: $0 <1/0>"
else
	if [ $1 = 0 ] ; then
		echo ‘This is outside function’
	elif [ $1 = 1 ] ; then
		call_echo
	else
		echo ‘Invalid argument’
	fi
fi

exit 0
The function definition must precede the first call to it. There is nothing like ‘declaring the function’ before calling it. And we can always nest functions inside functions.
Note:- Writing empty functions always results in syntax errors.
When same function is defined multiple times, the final version is what is invoked. Let’s take an example.
#!/bin/bash

func_same ( ) {
	echo ‘First definition’
}

func_same ( ) {
	echo ‘Second definition’
}

func_same

exit 0
Functions taking parameters and returning values
Let’s get deeper by considering functions taking parameters and returning values. To return a value from a function we use the ‘return’ shell built-in. Syntax is as follows.
func_name ( ) {
	. . .
	commands
	. . .
	return $ret_val
}
Similarly we can pass arguments to the functions separated with spaces as given below.
func_name $arg_1 $arg_2 $arg_3
Inside the function we can access the arguments in order as $1, $2, $3 and so on. Look at the following example script to find the maximum of two integers using function to add more clarity.
#!/bin/bash

USG_ERR=7

max_two ( ) {
	if [ "$1" -eq "$2" ] ; then
		echo 'Equal'
		exit 0
	elif [ "$1" -gt "$2" ] ; then
		echo $1
	else
		echo $2
	fi
}

err_str ( ) {
	echo "Usage: $0 <number1>  <number2>"
	exit $USG_ERR
}

NUM_1=$1
NUM_2=$2
x
if [ $# -ne 2 ] ; then
	err_str
elif [ `expr $NUM_1 : '[0-9]*'` -eq ${#NUM_1} ] ; then
	if [ `expr $NUM_2 : '[0-9]*'` -eq ${#NUM_2} ] ; then
		max_two $NUM_1 $NUM_2
	else
		err_str
	fi
else
	err_str
fi

exit 0
The above looks like a bit complex, but it’s simple if we read through the lines. First nested if-else if lines for validation purposes i.e., to check number and type of arguments with the help of regular expressions. After that we call the function with two command line arguments and displays the result there itself. This is because we cannot return large integers from a function. Another way to work around this problem is to use global variables to store the result inside function. The script below explains this method.
#!/bin/bash

USG_ERR=7
ret_val=

max_two ( ) {
	if [ "$1" -eq "$2" ] ; then
		echo 'Equal'
		exit 0
	elif [ "$1" -gt "$2" ] ; then
		ret_val=$1
	else
		ret_val=$2
	fi
}

err_str ( ) {
	echo "Usage: $0 <number1>  <number2>"
	exit $USG_ERR
}

NUM_1=$1
NUM_2=$2

if [ $# -ne 2 ] ; then
	err_str
elif [ `expr $NUM_1 : '[0-9]*'` -eq ${#NUM_1} ] ; then
	if [ `expr $NUM_2 : '[0-9]*'` -eq ${#NUM_2} ] ; then
		max_two $NUM_1 $NUM_2
		echo $ret_val
	else
		err_str
	fi
else
	err_str
fi

exit 0
Now try out some exciting problems that were explained in the previous shell scripting series using functions as follows.
- Understand Basic Linux Shell Scripting Language Tips – Part I
- 5 Shell Scripts for Linux Newbies to Learn Shell Programming – Part II
- Sailing Through The World of Linux BASH Scripting – Part III
- Mathematical Aspect of Linux Shell Programming – Part IV
- Calculating Mathematical Expressions in Shell Scripting Language – Part V
I will get back with more insight to functional features like using local variables, recursion etc in the next part. Stay updated with comments.
Deeper into Function Complexities with Shell Scripting – Part VII
My previous article on “Understanding and Writing functions in Shell Scripts” might have given you a basic idea on how to write functions under shell scripts. Now it is time to get deeper into functional features like the usage of local variables and recursion.

Function Complexities with Shell Scripting
Local Variables
What makes a variable local? It depends on that particular block where the variable is declared. A variable declared as local will be accessible from that block of code where it appears i.e. its scope is local. In order to explain this thing let’s look into one example below.
#!/bin/bash

func( ) {
	local i=10
	j=20
	echo "i from func = $i"
	echo "j from func = $j"
}

echo "i outside func = $i"
echo "j outside func = $j"

func

echo "i outside func = $i"
echo "j outside func = $j"

exit 0
On executing the above script the output will be.
i outside func =
j outside func =
i from func = 10
j from func = 20
i outside func =
j outside func = 20
This is because the function func has not yet called while the first 2 echo statements were executed. After calling the function func the same 2 echo statements produce a different result. Now the variable j, which was declared inside func and not local, could be accessed afterwards.
Thus value for j becomes 20. What about the local variable i? Since its scope was inside the function func, value 10 could not be accessed from outside. Note that the variable j normally declared inside func is global by default.
Now you are familiar with local variables and how to use them inside function blocks. Let us move on to the most interesting section under functions, the recursion.
What is Recursion?
A function calling itself is generally termed as the recursion procedure. Or it can be defined as expressing an algorithm by using a simpler version of that same algorithm. Consider the example of finding factorial of a number. We know that n! = 1 x 2 x 3 x … x (n-1) x n. Thus we can write a recurrence relation as:
n! = (n-1)! x n
So its easy for us to recursively call the same function and use the return value from each call to multiply with the previous result, i.e.
5! = 4! x 5
4! = 3! x 4
3! = 2! x 3
2! = 1! x 2
1! = 0! x 1
Recursion using Local Variables
Here we try to write a script for finding factorial of a number using local variables and recursion.
#!/bin/bash

fact( ) {
	local num=$1
	if [ $num -eq 0 ]; then
		ret=1
	else
		temp=$((num-1))
		fact $temp
		ret=$((num*$?))
	fi
	return $ret
}

fact 5

echo "Factorial of 5 = $?"

exit 0
num is a local variable used to store each n-1 value on each call. Here the base condition checks whether the number is equal to zero or not (since 0! = 1 and factorial is not defined for negative numbers). On arriving this base condition it returns the value 1 to its caller. Now num = 1 and ret = 1 x 1.
At this instant it returns 1 to its caller. Now num = 2 and ret = 2 x 1 and so on. Finally when num = 5 return value will be 24 and final result is ret = 5 x 24. The final result 120 is passed down to the initial caller statement and is displayed.
There is one problem in the above script. As I explained in the previous article, functions cannot return large integers. So its left to users to find a solution for the above issue.
Q. Can we perform recursion without using local variables? Answer is Yes.
Recursion without Local Variables
Look at the following example for displaying the Fibonacci series using recursion. The basic recurrence relation is:
fib(0) = 0
fib(1) = 1
else
	fib(n) = fib(n-1) + fib(n-2)

Fibonacci series using recursion

#!/bin/bash

fib( ) {
	a=$1
	if [ $a -lt 2 ]; then
		echo $a
	else
		((--a))
		b=$(fib $a)

		((--a))
		c=$(fib $a)

		echo $((b+c))
	fi
}

for i in $(seq 0 15)
do
	out=$(fib $i)
	echo $out
done

exit 0
No local variables are used in the above script. I hope you can understand the flow of script during execution.
Here the value 15 represents the number of terms in the Fibonacci series to be displayed. Did you notice anything special regarding the execution of above script. It takes a while, doesn’t it? Recursion in a script is slower than a recursion in programming languages like C.
With this article, I plan to conclude the functions part in shell scripting. Stay updated with the upcoming articles on arrays and much more…
Working with Arrays in Linux Shell Scripting – Part 8
We cannot imagine a programming language without the concept of arrays. It doesn’t matter how they are implemented among various languages. Instead arrays help us in consolidating data, similar or different, under one symbolic name.

Working With Arrays in Shell Scripting
Here as we are concerned about shell scripting, this article will help you in playing around with some shell scripts which make use of this concept of arrays.
Array Initialization and Usage
With newer versions of bash, it supports one-dimensional arrays. An array can be explicitly declared by the declare shell-builtin.
declare -a var
But it is not necessary to declare array variables as above. We can insert individual elements to array directly as follows.
var[XX]=<value>
where ‘XX’ denotes the array index. To dereference array elements use the curly bracket syntax, i.e.
${var[XX]}
Note: Array indexing always start with 0.
Another convenient way of initializing an entire array is by using the pair of parenthesis as shown below.
var=( element1 element2 element3 . . . elementN )
There is yet another way of assigning values to arrays. This way of initialization is a sub-category of the previously explained method.
array=( [XX]=<value> [XX]=<value> . . . )
We can also read/assign values to array during the execution time using the read shell-builtin.
read -a array
Now upon executing the above statement inside a script, it waits for some input. We need to provide the array elements separated by space (and not carriage return). After entering the values press enter to terminate.
To traverse through the array elements we can also use for loop.
for i in “${array[@]}”
do
	#access each element as $i. . .
done
The following script summarizes the contents of this particular section.
#!/bin/bash

array1[0]=one
array1[1]=1
echo ${array1[0]}
echo ${array1[1]}

array2=( one two three )
echo ${array2[0]}
echo ${array2[2]}

array3=( [9]=nine [11]=11 )
echo ${array3[9]}
echo ${array3[11]}

read -a array4
for i in "${array4[@]}"
do
	echo $i
done

exit 0
Various Operations on Arrays
Many of the standard string operations work on arrays . Look at the following sample script which implements some operations on arrays (including string operations).
#!/bin/bash

array=( apple bat cat dog elephant frog )

#print first element
echo ${array[0]}
echo ${array:0}

#display all elements
echo ${array[@]}
echo ${array[@]:0}

#display all elements except first one
echo ${array[@]:1}

#display elements in a range
echo ${array[@]:1:4}

#length of first element
echo ${#array[0]}
echo ${#array}

#number of elements
echo ${#array[*]}
echo ${#array[@]}

#replacing substring
echo ${array[@]//a/A}

exit 0
Following is the output produced on executing the above script.
apple
apple
apple bat cat dog elephant frog
apple bat cat dog elephant frog
bat cat dog elephant frog
bat cat dog elephant
5
5
6
6
Apple bAt cAt dog elephAnt frog
I think there is no significance in explaining the above script in detail as it is self-explanatory. If necessary I will dedicate one part in this series exclusively on string manipulations.
Command Substitution with Arrays
Command substitution assigns the output of a command or multiple commands into another context. Here in this context of arrays we can insert the output of commands as individual elements of arrays. Syntax is as follows.
array=( $(command) )
By default the contents in the output of command separated by white spaces are plugged into array as individual elements. The following script list the contents of a directory, which are files with 755 permissions.
#!/bin/bash

ERR=27
EXT=0

if [ $# -ne 1 ]; then
	echo "Usage: $0 <path>"
	exit $ERR
fi

if [ ! -d $1 ]; then
	echo "Directory $1 doesn't exists"
	exit $ERR
fi

temp=( $(find $1 -maxdepth 1 -type f) )

for i in "${temp[@]}"
do
	perm=$(ls -l $i)
	if [ `expr ${perm:0:10} : "-rwxr-xr-x"` -eq 10 ]; then
		echo ${i##*/}
	fi
done

exit $EXT
Simulating Two-dimensional Arrays
We can easily represent a 2-dimensional matrix using a 1-dimensional array. In row major order representation elements in each row of a matrix are progressively stored in array indexes in a sequential manner. For an mXn matrix, formula for the same can be written as.
matrix[i][j]=array[n*i+j]
Look at another sample script for adding 2 matrices and printing the resultant matrix.
#!/bin/bash

read -p "Enter the matrix order [mxn] : " t
m=${t:0:1}
n=${t:2:1}

echo "Enter the elements for first matrix"
for i in `seq 0 $(($m-1))`
do
	for j in `seq 0 $(($n-1))`
	do
		read x[$(($n*$i+$j))]
	done
done

echo "Enter the elements for second matrix"
for i in `seq 0 $(($m-1))`
do
	for j in `seq 0 $(($n-1))`
	do
		read y[$(($n*$i+$j))]
		z[$(($n*$i+$j))]=$((${x[$(($n*$i+$j))]}+${y[$(($n*$i+$j))]}))
	done
done

echo "Matrix after addition is"
for i in `seq 0 $(($m-1))`
do
	for j in `seq 0 $(($n-1))`
	do
		echo -ne "${z[$(($n*$i+$j))]}\t"
	done
	echo -e "\n"
done

exit 0
Even though there are limitations for implementing arrays inside shell scripting, it becomes useful in a handful of situations, especially when we handle with command substitution. Looking from an administrative point of view, the concept of arrays paved the way for development of many background scripts in GNU/Linux systems.
An Insight of Linux “Variables” in Shell Scripting Language – Part 9
We already have written a series of articles on Linux Shell Scripting which was warm welcomed that time and it was much relevant even now. Here is the link to the collection of articles on shell scripting.
- Learn Linux Shell Scripting
Here in this article we will see the variables, its execution and its implementation in shell script.

Linux Variables Shell Scripting
Saving an Output
The output of a command can be redirected to standard output or a file and can be stored in a variable, as well. If the output of a command is large enough such that it does not fit the screen we are left only with the option of saving output to a file to in a variable. One advantage of saving output to variable is faster examination speed. Variables are saved into memory and hence it tends to be fast as compared to retrieval from file.
Variables in scripting Language
Variables are an important component used in Shell scripting and are declared using bash command “Declare”. To declare a variable say ‘level‘, we need to execute the below command.
$ declare LEVEL
Note: We need to use “typecast”, a built in statement for korn shell compatibility. The ‘declare’ is more advanced and contains all the features, hence is recommended when using BASH.
Rules
- A variable name must justify, the use of variable in the script.
- Using the same variable name throughout the program is strongly advised.
- Variables name can be uppercase as well as lowercase but by convention shell commands are in lowercase and hence we should use variables name in uppercase, so as to remove any confusion. e.g., TOTAL_BILLED_AMOUNT, SELL_REPORT, ORDER_RECEIPT, etc.
Implementation
A variable can be assigned a value using an equal sign (=). To assign an empty string to a variable we must not supply any value after equal sign.
$ LEVEL =
Check the value stored in variable ‘LEVEL’ as.
$ printf "%i" $LEVEL
printf, the command most of ‘C‘ programmers are aware of, prints data. %i – Represents Integer. We can replace it with %c for Character or %c for string, as and when required.
$LEVEL: Note the ‘$‘ which works as value substituter for the variable ‘LEVEL’.
Sample Output
$ printf "%i" $LEVEL
0
Assign a value to the variable.
$ LEVEL=0
Check the stored data in variable.
$ printf "%i" $LEVEL
0
NOTE: It is interesting to note that in both the cases, when we didn’t assigned the value to variable and when we assigned the value ‘0‘ to the variable ‘LEVEL‘ outputs 0. Although the output are same in both the cases but shell script handles both the variable declaration differently.
Assign a new value to the variable.
$ LEVEL=121
Check the stored data in variable.
$ printf "%i" $LEVEL
121
Unset a Variable
Declare is a BASH command and it creates variable only when executed. The variable so created remains in memory till the script stops or the variable is destroyed.
$ unset LEVEL
Predefined Variables in BASH
BASH has over 50 variables predefined. Some of these variables has a special meaning attached to BASH e.g., a variable RANDOM outputs a random number. If it is unset and then defined again, the original variable value is lost forever. Hence it is advised not to use any system defined variable.
Here is a list of some useful BASH variables.
- BASH—The full pathname of Bash.
- BASH_ENV—In a shell script, the name of the profile file executed before the script was started.
- BASH_VERSION—The version of Bash (for example, 2.04.0(1)-release).
- COLUMNS—The number of characters per line on your display (for example, 80).
- HOSTNAME—The name of the computer. Under some versions of Linux, this can be the machine name. On others, it can be a fully qualified domain name.
- HOSTTYPE—Type of computer.
- HOME—The name of your home directory.
- OSTYPE—The name of the operating system.
- PATH—Colon-separated list of search paths to find a command to execute.
- PPID—The process ID of the shell’s parent process.
- PROMPT_COMMAND—Command to execute before the setting of the PS1 primary prompt string.
- PWD—The current working directory (as set by the cd command).
- RANDOM—Returns a random number between 0 and 32767 each time it is referenced.
- SHELL—The preferred shell to use; for programs that start a shell for you.
- TERM—The terminal emulation type (for example, console).
The Rule of Word Splitting.
$ LEVEL=0
$ printf "%i" $LEVEL
0

AND

$ LEVEL=”0”
$ printf "%i" $LEVEL
0
In both the cases output remains same. So what’s the difference in result while using quotation?
Lets check the same with different variable data.
$ LEVEL=0 ; 1 ; 2 ; 3 ; 4 ; 5
bash: 1: command not found
bash: 2: command not found
bash: 3: command not found
bash: 4: command not found
bash: 5: command not found
$ printf "%i" $LEVEL
0
Not to mention, the output is not correct. BASH is taking the space after ‘0‘ as termination and hence the value of variable is set as ‘0‘. Now we try to use quotation for variables as below.
$ LEVEL=”0 ; 1 ; 2 ; 3 ; 4 ; 5”
$ printf "%s" $LEVEL
0;1;2;3;4;5
Still the result is not correct. BASH took the variable values and removed all the spaces in between them. Hence printf didn’t interpreted 0,1,2,3,4,5 as distinct values. So what’s the solution?
printf "%s" "$LEVEL"
0 ; 1 ; 2 ; 3 ; 4 ; 5
Yeah! Putting the Variable substitution under quotes is the solution. Quotations groups characters in shell and interpret the special characters in a meaningful way.
Quotations can be used back-to-back and it is a good idea to enclose variable substitutions with quotes. Moreover it can be used to separate overall text from quotations. Here is an example.
$ LEVEL=5
$ FLAG_MESSAGE="I HAVE CLEARED LEVEL""$LEVEL"". I Deserve appreciation."
$ printf “%s” “$FLAG_MESSAGE”
“I HAVE CLEARED LEVEL5. I Deserve appreciation.”
Separating chunks of quoted text with space will result into the same problem as discussed above. The bash will treat white space as termination. Another way of variable substitution is.
$ LEVEL=5

$ FLAG_MESSAGE="I HAVE CLEARED LEVEL ${LEVEL}. I Deserve appreciation."

$ printf “%s” "$FLAG_MESSAGE"
“I HAVE CLEARED LEVEL 5. I Deserve appreciation.”
Single quotes restricts BASH from printing Special characters.
$ printf “%s” '$FLAG_MESSAGE'
“$FLAG_MESSAGE”
The Backslash (/)
Backslash works like single quote for one character. Have you thought how will you print (“)?
$ printf "%c" "\""
When %q grouped with printf, provides backslash after every word to ensure word spacing.
$ LEVEL=5

$ FLAG_MESSAGE="I HAVE CLEARED LEVEL ${LEVEL}. I Deserve appreciation."

$ printf “%q” "$FLAG_MESSAGE"
“I\ HAVE\ CLEARED\ LEVEL\ 5.\ I\ Deserve\ appreciation.”
That’s all for now. We always try to provide our readers with articles that are useful for them every now and then. The above covered article is vast hence rest of the topics with examples will be produced in the next article which will include ‘Attributes of variable’, ‘Variable exporting’ etc.
Understanding and Writing ‘Linux Variables’ in Shell Scripting – Part 10
The Linux shell scripting language has always been a hot topic and will always be in the future. The Shell Scripting Language is magical and its so easy to do a program in scripting language as in any other Language. However, it needs an in-depth knowledge of what we are doing and what the result is expected.

Understanding Variables in Shell Scripting
All the shell scripting articles we have written for our readers are highly appreciated including the last one “An Insight of Linux Variables”. We are extending the last article to a new Level.
Variable Attributes
Each Variable in Linux Environment has certain options, and those are called ‘attributes’. These options or attributes can be turned On and Off, when required according to the situation using a command “declare”.
An Example of variable attribute is using a switch say ‘-i‘ which will turn on the integer attribute for the corresponding variable. Even if a non-numeric value is passed to switch ‘-i‘ it won’t throw an error message and output ‘0‘ as integer interpretation. Here it becomes more clear from the example below.
Declare a variable Integer, bill = 121
avi@localhost:~$ declare -i bill=121
Printf the value of variable bill.
avi@localhost:~$ printf "%d\n" "$bill"

121
Let the variable value be a string. The variable bill is already declared, no need to declare it second time. Just change the value of variable as.
avi@localhost:~$ bill=tecmint
Now, again printf the value of variable bill.
avi@localhost:~$ printf "%d\n" "$bill"

0
Notice ‘0‘ in the place of error message.
Now, the question is, how to know the attributes of already declared variables?
avi@localhost:~$ declare -p bill

declare -i bill="121"
Here, a -p (stands for print) switch comes to rescue.
Again, what should I do to switch off the attributes of a variable?
In order to switch Off the attributes of a variable what we need all is to put a + (plus) sign just before the switch. Here it is more clear from the example below.
Switch Off the integer attribute for the above variable.
avi@localhost:~$ declare +i bill
Check the value of the variable.
avi@localhost:~$ printf "%d\n" "$bill"

bash: printf: bill: invalid number
0
Now print the value of variable using switch string.
avi@localhost:~$ printf "%s\n" "$bill"

tecmint
Here in the above example, bash could not judge non-numeric value as error, however printf is interpreting, what could be a number and what could not be.
Read-only Variables
You might have heard Read Only Memory (ROM), but what is Read-only Variable? Has it any similarity with ROM?
Well Read-only Variables like Read-only Memory is something the value of which can’t be change once it is assigned. Hence it is called Read-only. You can’t write, edit or modify a new value for that variable. Here is an illustration using example.
Decalre a read only (-r) variable name, the value of which is “Tecmint.com”.
avi@localhost:~$ declare -r name="Tecmint.com"
Printf the value of above declared variable.
avi@localhost:~$ printf "%s\n" "$name"

Tecmint.com
Try to change the value of variable.
avi@localhost:~$ declare -r name="Avishek"

bash: declare: name: readonly variable
As discussed above the attributes of a read-only Variable can be changed using ‘+‘ sign.
Exporting Variables in Linux
All the shell variables declared in a shell script are available till the script is running. Outside of the script the variable from the script does not exist. The process of making variables available outside of the script is called exporting variables.
A Variable can be exported outside of the shell using switch declare -x (export), which acknowledge the shell what you wanted to export. A declare export switch can be used as.
avi@localhost:~$ declare -x variable=”Constant_Value”
All the changes made to the variable while the script is running, is lost when the variable is exported outside of the script. Exporting variable is very important in shell scripting.
We want to have a variable that should be read-only and available outside of the script, we need to use switch -rand switch -x at the same time.
avi@localhost:~$ declare -rx variable=”Constant_Value”
Environment Variables
The variables that are shared between the program and the program that execute them. Environment variables can be exported but the attributes can’t be assigned to it.
Understanding the above theory practically. Here we have two scripts 0.sh and 1.sh.
# 0.sh
#!/bin/bash
declare -rx name=Tecmint
bash 0.sh
exit 0
And the second script is.
# 1.sh
#!/bin/bash
printf "%s\n" "$name"
name=Tecmint.com
printf "%s\n" "$name"
exit 0
Here what is going on, is a variable (name) is declared as read only and exported and immediately after that second script is called.
The second script just printed the variable from the first script that was exported in the first printf statement. In the second printf statement it shows the new value assigned to variable ‘name‘.
No need to worry, that the variable was read-only, how can it be reassigned. Don’t you remember that “All the changes made to the variable while the script is running, is lost when the variable is exported outside of the script.”
References
The declare command allows all the switches below along with their combination.
- -a : Declares an array.
- -f : Display Function and Definition.
- -F : Display Function Name.
- -r : Declare variable as read-only.
- -x : Declare Variable as Exportable.
- -I : Declare variable as Integer.
That’s all for now. In the very next article we will be discussing ways to substitute variables using ‘eval‘ command and the variables already defined in bash before closing this topic.
Nested Variable Substitution and Predefined BASH Variables in Linux – Part 11
The last two article on BASH Shell, where we discussed variables in detail were highly appreciated among our readers. We as Tecmint-Team are very keen to provide you with Latest, Up-to-date and relevant topics covered in details. Moreover we always try to touch major perspectives of the corresponding topics.

Nested Variables in Shell Scripting
Here is the last article on Linux Variables where we are going to see variables substitution and variables defined in Shell before closing this topic.
Bash performs variable substitution before the command is really executed. The Linux Bash Shell searches for all the ‘$’ sign before executing the command and replace it with the value of variable. The process of Bash Variable substitution is performed only once. What if we have nested variables?
Note: By nested variable we mean, variable declared inside variable. Lets see the above scenario in the example below.
Declare a variable which is Read-Only and Executable as below.
avi@localhost:~$ declare -rx Linux_best_website="www.tecmint.com"
Check the value of variable stored.
avi@localhost:~$ printf "%s" "$Linux_best_website"

www.tecmint.com
Now declare another variable which again is Read-Only and Executable.
avi@localhost:~$ declare -rx Linux_website="Linux_best_website"
Now the situation is, we have defined two variables.
‘Linux_best_website’, the value of which is “www.tecmint.com”
and, ‘Linux_website’, the value of which is “Linux_best_website”
What would be the result, if we run the below one-line command?
avi@localhost:~$ printf "%s" "$Linux_website"
It should first replace the variable ‘$Linux_website‘, with value “Linux_best_website” and then “$Linux_best_website” is again a variable the value of which is “www.tecmint.com”. So the final output of running the below command should be.
avi@localhost:~$ printf "%s" "$Linux_website"

www.tecmint.com
But unfortunately, this is not the situation, the output we are getting is Linux_best_website.
Reason? Yup! Bash substitute the value of variable only once. What about complex scripts and programs where we need to substitute variables frequently as well as needs to substitute the variable more than once?
Here comes the command ‘eval‘ which performs additional work of variable substitution more than once in a script. Here is an example to make the whole working as clear as glass.
Declare a variable x, the value of which is 10.
avi@localhost:~/Desktop$ declare x=10
Check the value of variable x, we just defined.
avi@localhost:~/Desktop$ echo $yx

x10
Declare a variable y, the value of which is x.
avi@localhost:~/Desktop$ declare y=x
Check the value of variable y, we just defined.
avi@localhost:~/Desktop$ echo $y

x
Here is the problem of BASH one time variable substitution, which don’t performs an extra round of variable substitution. We are using ‘eval‘ command to fix this.
avi@localhost:~/Desktop$ eval y=$x
Now check the Value of variable ‘y‘.
avi@localhost:~/Desktop$ echo $y

10
Hurrah! The issue was fixed and ‘eval‘ command won the race 🙂
Not to mention, ‘eval‘ command is very helpful in large script programs and is a very handy tool.
The last but not the least part of this post is BASH predefined variables. No! Don’t get panic seeing this list. You never need to remember the whole list before you start writing scripts except a few. As a part of learning process, we are presenting the BASH predefined variable List.
| No. |
BASH VARIABLE |
RESULT |
| 1 |
auto_resume |
Process command completion for the stopped jobs. |
| 2 |
BASH |
PATH of the shell. |
| 3 |
BASH_ENV |
Shows the name of the profile file |
| 4 |
BASH_VERSION |
Shows the version of Bash |
| 5 |
BASH_VERSINFO |
Shows Detailed version information. |
| 6 |
BASH_VERSINFO[0] |
The major version number (the release). |
| 7 |
BASH_VERSINFO[1] |
The minor version number (the version). |
| 8 |
BASH_VERSINFO[2] |
The patch level. |
| 9 |
BASH_VERSINFO[3] |
The build version. |
| 10 |
BASH_VERSINFO[4] |
The release status (for example, beta1 ). |
| 11 |
BASH_VERSINFO[5] |
The value of MACHTYPE . |
| 12 |
CDPATH |
List of directories separated by colon. |
| 13 |
COLUMNS |
Number of Characters per line on Standard Output. |
| 14 |
EUID |
User ID of the current user. |
| 15 |
FCEDIT |
The default text editor for the fc command. |
| 16 |
FUNCNAME |
The name of the fun |
| 17 |
GROUPS |
Groups of which the user is a Member. |
| 18 |
HISTFILE |
The file containing the command history. |
| 19 |
HOME |
The name of your home directory. |
| 20 |
LINES |
Number of horizontal lines on Standard Output. |
| 21 |
MAIL |
Name of a file to check for incoming mail |
| 22 |
OSTYPE |
Name of the operating system. |
| 23 |
OLDPWD |
The previous working directory |
| 24 |
PWD |
The current working directory |
| 25 |
RANDOM |
Prints a random number |
| 26 |
SHELL |
The preferred shell to use |
| 27 |
TIMEFORMAT |
The format for the time command. |
| 28 |
UID |
The ID of the current user |
There are a huge list of Predefined BASH Variable. We have tried to produce a list of most frequently used.
That’s all for now.
SSH Passwordless Login Using SSH Keygen in 5 Easy Steps
SSH (Secure SHELL) is an open source and most trusted network protocol that is used to login into remote servers for execution of commands and programs. It is also used to transfer files from one computer to another computer over the network using secure copy (SCP) Protocol.
In this article we will show you how to setup password-less login on RHEL/CentOS 7.x/6.x/5.x and Fedora using ssh keys to connect to remote Linux servers without entering password. Using Password-less login with SSH keys will increase the trust between two Linux servers for easy file synchronization or transfer.

Setup SSH Passwordless Login
My Setup Environment
SSH Client : 192.168.0.12 ( Fedora 21 )
SSH Remote Host : 192.168.0.11 ( CentOS 7 )
If you are dealing with number of Linux remote servers, then SSH Password-less login is one of the best way to automate tasks such as automatic backups with scripts, synchronization files using scp and remote command execution.
In this example we will setup SSH password-less automatic login from server 192.168.0.12 as user tecmint to 192.168.0.11 with user sheena.
Step 1: Create Authentication SSH-Kegen Keys on – (192.168.0.12)
First login into server 192.168.0.12 with user tecmint and generate a pair of public keys using following command.
[tecmint@tecmint.com ~]$ ssh-keygen -t rsa

Generating public/private rsa key pair.
Enter file in which to save the key (/home/tecmint/.ssh/id_rsa): [Press enter key]
Created directory '/home/tecmint/.ssh'.
Enter passphrase (empty for no passphrase): [Press enter key]
Enter same passphrase again: [Press enter key]
Your identification has been saved in /home/tecmint/.ssh/id_rsa.
Your public key has been saved in /home/tecmint/.ssh/id_rsa.pub.
The key fingerprint is:
5f:ad:40:00:8a:d1:9b:99:b3:b0:f8:08:99:c3:ed:d3 tecmint@tecmint.com
The key's randomart image is:
+--[ RSA 2048]----+
|        ..oooE.++|
|         o. o.o  |
|          ..   . |
|         o  . . o|
|        S .  . + |
|       . .    . o|
|      . o o    ..|
|       + +       |
|        +.       |
+-----------------+

Create SSH RSA Key
Step 2: Create .ssh Directory on – 192.168.0.11
Use SSH from server 192.168.0.12 to connect server 192.168.0.11 using sheena as user and create .sshdirectory under it, using following command.
[tecmint@tecmint ~]$ ssh sheena@192.168.0.11 mkdir -p .ssh

The authenticity of host '192.168.0.11 (192.168.0.11)' can't be established.
RSA key fingerprint is 45:0e:28:11:d6:81:62:16:04:3f:db:38:02:la:22:4e.
Are you sure you want to continue connecting (yes/no)? yes
Warning: Permanently added '192.168.0.11' (ECDSA) to the list of known hosts.
sheena@192.168.0.11's password: [Enter Your Password Here]

Create SSH Directory Under User Home
Step 3: Upload Generated Public Keys to – 192.168.0.11
Use SSH from server 192.168.0.12 and upload new generated public key (id_rsa.pub) on server 192.168.0.11under sheena‘s .ssh directory as a file name authorized_keys.
[tecmint@tecmint ~]$ cat .ssh/id_rsa.pub | ssh sheena@192.168.0.11 'cat >> .ssh/authorized_keys'

sheena@192.168.1.2's password: [Enter Your Password Here]

Upload RSA Key
Step 4: Set Permissions on – 192.168.0.11
Due to different SSH versions on servers, we need to set permissions on .ssh directory and authorized_keys file.
[tecmint@tecmint ~]$ ssh sheena@192.168.0.11 "chmod 700 .ssh; chmod 640 .ssh/authorized_keys"

sheena@192.168.0.11's password: [Enter Your Password Here]

Set Permission on SSH Key
Step 5: Login from 192.168.0.12 to 192.168.0.11 Server without Password
From now onwards you can log into 192.168.0.11 as sheena user from server 192.168.0.12 as tecmint user without password.
[tecmint@tecmint ~]$ ssh sheena@192.168.0.11

SSH Remote Passwordless Login
4 Free Shell Scripting eBooks for Linux Newbies and Administrators
System Administration is a branch of Information Technology that deals with reliable operation of multi-user computer systems and servers. A person who is responsible for reliable operation of multiuser computer system and server is called System Administrator.
A System Administrator whose area of expertise is Linux is called Linux System Administrator. A typical Linux System Administrator role may vary over a large aspect of things which may include but not restricted to – Hardware Maintenance, System Maintenance, User Administration, Network Administration, System Performance, Resource utilization Monitoring, Backup, Ensure Security, Update System, Implement Policies, Documentation, Application Installation and blah, blah, blah…
There is a Quote in Information Technology Field – “A Programmer is known when he/she do something good while an Administrator is known if he/she does something bad.” It is always good to be an unknown administrator than a known administrator. Why? because if you are known, it means your setup don’t work as it should and you are called often for assistance and fixing.
There are three rules that every System Administrator must follow and should never break.
- Rule 1 : Backup Everything
- Rule 2 : Master Command Line
- Rule 3 : Automate task probably using any Scripting Language or Shell Script
Analyze # Rule 1
Why Backup Everything? Well you never know when the server or a file system may start acting strange or the storage unit just collapse. You must have backup of everything so that if something goes wrong you don’t have to break a sweat, just restore.
Analyze # Rule 2
If you are a true Linux Administrator and Understand Linux System you know that you get immense power while using Command Line. While using command Line you have direct access to system calls. Most of the admin work on a headless server (no-GUI) and then Linux Command Line is your only friend and mind it it is more powerful than you believe.
Analyze # Rule 3
Automate task, but why? well an administrator at the first point is lazy and he want to perform various attended task like backup automatically. An Intelligent Administrator would like to automate all his work using some kind of script so that he don’t need to intervene every time. He would schedule backup, log and every other thing possible. As you move up in the levels of System Administration you need scripting not only for automating task but also for looking inside the configuration files and other. Shell Scripting is a Computer Program which can run on UNIX/Linux Shell.
Learning Scripting
The Shell Scripting (bash scripting) Language is easy and fun. If you know any other Programming Language you would probably understand most of the Shell Scripts and may start writing your’s own very soon. Even if you don’t have knowledge of any programming Language, learning Scripting won’t be any difficult.
There are other Scripting Language like Python, Perl, Ruby etc which provides you with more function and helps you achieve the result easily. But if you are novice and want to start from shell scripting.
Where to Learn Shell Scripting Language?
We have already posted a series of easy to understand articles on shell scripting which you may find in the link below.
- Learn Linux Shell Scripting
We will be extending this series very soon, before that we’ve compiled a list of 4 books on Shell Scripting. These books are free to download and will help you mentoring your shell scripting skills. No matter you are experienced or newbie you must have these handy documents with you if you are in the field of Linux.
1. Bash Guide for Beginners
This book contains a total of 12 chapters spread over 165 pages. This book is written by Machtelt Garrels. This book is must for anyone working on UNIX and like environment. If you are a System Administrator and want to make your life easier this resource is for you. If you are experienced Linux User, this book aims at giving you an insight of the System. The documents are very encouraging and it will help you writing your own scripts. Detailed and wide list of topics covered in easy to understand language is another plus point of this guide.
 Download – Bash Guide for Beginners
2. Advanced Bash-Scripting Guide
This book contains 38 chapters and spread over 901 pages. Having detailed description of everything you may need to learn yet in language that is easy to understand. This book is written by Mendel Cooper and it contains plenty of practical examples. The tutorial in the book assumes that you don’t have any previous knowledge of scripting and Programming but progress rapidly to intermediate and advanced level of Instruction. The detailed description in the book makes it a self study guide.
 Download – Advanced Bash-Scripting Guide
3. Shell Scripting: Expert Recipes for Linux
This book is written by Steve Parker. Though you can not download this book completely for free, the first 40 pages are free. It is sufficient to know what the book contains. Personally I am an admirer of Steve for this wonderful piece of guide. His skills and writing style is awesome. Plenty of practical examples, easy to understand theory and his style of presenting adds to the list. The original book is voluminous. You may download the 40 page guide to learn and see if you are going to get around scripting.
 Download – Shell Scripting: Expert Recipes for Linux
4. Linux Shell Scripting Cookbook, Second Edition
This book contains a total of 9 chapters spread over 40 pages. This book is written by Shantanu Tushar who is a GNU/Linux user since his early days. This guide contains a balanced combination of theory and practical. I don’t want you to loose your interest for this 40 page guide which may be life Saviour for you. Download and see how this is useful for you.
 Download – Linux Shell Scripting Cookbook, Second Edition
In order to download any book from our partner site you need to fill a small form. All your information are safe with our partner site and we won’t SPAM you. Even we hate SPAM. Fill the form with relevant information so that you may get notification and Information from time-to-time. You may opt out to receive any information. You just have to register once and you may Download any books for any number of times and that too free.
It has lots of books on different domains and by registering once you are entitled to download the whole library and be choosy what you want to have in your library. The above shell scripting books will bring a huge change in your skill and will take you to the next level. So what are you waiting for? Want a career in Linux, want to revamp your skill sets, learn something new and interesting, Download the books, have fun!
A Shell Script to Monitor Network, Disk Usage, Uptime, Load Average and RAM Usage in Linux
The duty of System Administrator is really tough as he/she has to monitor the servers, users, logs, create backup and blah blah blah. For the most repetitive task most of the administrator write a script to automate their day-to-day repetitive task. Here we have written a shell Script that do not aims to automate the task of a typical system admin, but it may be helpful at places and specially for those newbies who can get most of the information they require about their System, Network, Users, Load, Ram, host, Internal IP, External IP, Uptime, etc.
We have taken care of formatting the output (to certain extent). The Script don’t contains any Malicious contents and it can be run using Normal user Account. In-fact it is recommended to run this script as user and not as root.
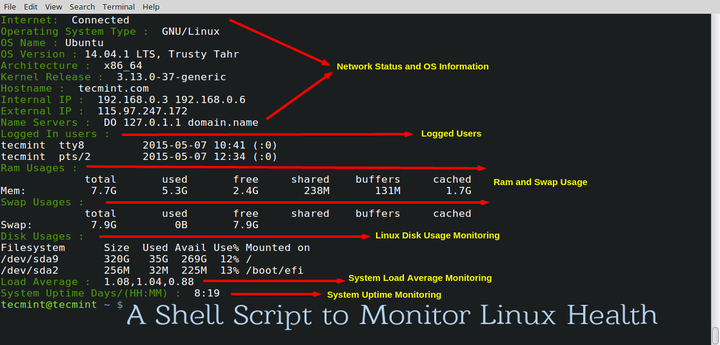
Shell Script to Monitor Linux System Health
You are free to use/modify/redistribute the below piece of code by giving proper credit to Tecmint and Author. We have tried to customize the output to the extent that nothing other than the required output is generated. We have tried to use those variables which are generally not used by Linux System and are probably free.
Minimum System Requirement
All you need to have is a working Linux box.
DependencY
There is no dependency required to use this package for a standard Linux Distribution. Moreover the script don’t requires root permission for execution purpose. However if you want to Install it, you need to enter root password once.
Security
We have taken care to ensure security of the system. Nothing additional package is required/installed. No root access required to run. Moreover code has been released under Apache 2.0 License, that means you are free to edit, modify and re-distribute by keeping Tecmint copyright.
How Do I Install and Run Script?
First, use following wget command to download the monitor script "tecmint_monitor.sh" and make it executable by setting appropriate permissions.
# wget https://tecmint.com/wp-content/scripts/tecmint_monitor.sh
# chmod 755 tecmint_monitor.sh
It is strongly advised to install the script as user and not as root. It will ask for root password and will install the necessary components at required places.
To install "tecmint_monitor.sh" script, simple use -i (install) option as shown below.
./tecmint_monitor.sh -i
Enter root password when prompted. If everything goes well you will get a success message like shown below.
Password:
Congratulations! Script Installed, now run monitor Command
After installation, you can run the script by calling command 'monitor' from any location or user. If you don’t like to install it, you need to include the location every-time you want to run it.
# ./Path/to/script/tecmint_monitor.sh
Now run monitor command from anywhere using any user account simply as:
$ monitor
As soon as you run the command you get various System related information which are:
- Internet Connectivity
- OS Type
- OS Name
- OS Version
- Architecture
- Kernel Release
- Hostname
- Internal IP
- External IP
- Name Servers
- Logged In users
- Ram Usages
- Swap Usages
- Disk Usages
- Load Average
- System Uptime
Check the installed version of script using -v (version) switch.
$ monitor -v

tecmint_monitor version 0.1
Designed by Tecmint.com
Released Under Apache 2.0 License
Conclusion
This script is working out of the box on a few machines I have checked. It should work the same for you as well. If you find any bug let us know in the comments. This is not the end. This is the beginning. You can take it to any level from here.
We’ve received few complaints that the script is not working on the few Linux distributions, and one of our regular reader Mr. Andres Tarallo, has taken the initiative and made the script compatible with all Linux distributions, you can find the updated script on GitHub at https://github.com/atarallo/TECMINT_MONITOR/.
If you feel like editing the script and carry it further you are free to do so giving us proper credit and also share the updated script with us so that we can update this article by giving you proper credit.
Don’t forget to share your thoughts or your script with us. We will be here to help you. Thank you for all the love you have given us. Keep Connected! Stay tuned.
Powerline – Adds Powerful Statuslines and Prompts to Vim Editor and Bash Terminal
Powerline is a great statusline plugin for Vim editor, which is developed in Python and provides statuslines and prompts for many other applications such as bash, zsh, tmux and many more.

Add Power to Linux Terminal with Powerline Tool
Features
- It is written in Python, which makes it extensible and feature rich.
- Stable and testable code base, which works well with Python 2.6+ and Python 3.
- It also supports prompts and statuslines in several Linux utilities and tools.
- It has configurations and decorator colors developed using JSON.
- Fast and lightweight, with daemon support, which provides even more better performance.
Powerline Screenshots

Powerline Vim Statuslines
In this article, I will show you how to install Powerline and Powerline fonts and how to use with Bash and Vimunder RedHat and Debian based systems.
Step 1: Installing Generic Requirements for Powerline
Due to a naming conflict with some other unrelated projects, powerline program is available on PyPI (Python Package Index) under the package name as powerline-status.
To install packages from PyPI, we need a ‘pip‘ (package management tool for installing Python packages). So, let’s first install pip tool under our Linux systems.
Install Pip on Debian, Ubuntu and Linux Mint
# apt-get install python-pip
Sample Output
Reading package lists... Done
Building dependency tree
Reading state information... Done
Recommended packages:
  python-dev-all python-wheel
The following NEW packages will be installed:
  python-pip
0 upgraded, 1 newly installed, 0 to remove and 533 not upgraded.
Need to get 97.2 kB of archives.
After this operation, 477 kB of additional disk space will be used.
Get:1 http://archive.ubuntu.com/ubuntu/ trusty-updates/universe python-pip all 1.5.4-1ubuntu3 [97.2 kB]
Fetched 97.2 kB in 1s (73.0 kB/s)
Selecting previously unselected package python-pip.
(Reading database ... 216258 files and directories currently installed.)
Preparing to unpack .../python-pip_1.5.4-1ubuntu3_all.deb ...
Unpacking python-pip (1.5.4-1ubuntu3) ...
Processing triggers for man-db (2.6.7.1-1ubuntu1) ...
Setting up python-pip (1.5.4-1ubuntu3) ...
Install Pip on CentOS, RHEL and Fedora
Under Fedora-based systems, you need to first enable epel-repository and then install pip package as shown.
# yum install python-pip
# dnf install python-pip                     [On Fedora 22+ versions]
Sample Output
Installing:
 python-pip          noarch          7.1.0-1.el7             epel          1.5 M

Transaction Summary
=================================================================================
Install  1 Package

Total download size: 1.5 M
Installed size: 6.6 M
Is this ok [y/d/N]: y
Downloading packages:
python-pip-7.1.0-1.el7.noarch.rpm                         | 1.5 MB  00:00:01
Running transaction check
Running transaction test
Transaction test succeeded
Running transaction
  Installing : python-pip-7.1.0-1.el7.noarch                                 1/1
  Verifying  : python-pip-7.1.0-1.el7.noarch                                 1/1

Installed:
  python-pip.noarch 0:7.1.0-1.el7

Complete!
Step 2: Installing Powerline Tool in Linux
Now it’s’ time to install Powerline latest development version from the Git repository. For this, your system must have git package installed in order to fetch the packages from Git.
# apt-get install git
# yum install git
# dnf install git
Next you can install Powerline with the help of pip command as shown.
# pip install git+git://github.com/Lokaltog/powerline
Sample Output
 Cloning git://github.com/Lokaltog/powerline to /tmp/pip-WAlznH-build
  Running setup.py (path:/tmp/pip-WAlznH-build/setup.py) egg_info for package from git+git://github.com/Lokaltog/powerline

    warning: no previously-included files matching '*.pyc' found under directory 'powerline/bindings'
    warning: no previously-included files matching '*.pyo' found under directory 'powerline/bindings'
Installing collected packages: powerline-status
  Found existing installation: powerline-status 2.2
    Uninstalling powerline-status:
      Successfully uninstalled powerline-status
  Running setup.py install for powerline-status

    warning: no previously-included files matching '*.pyc' found under directory 'powerline/bindings'
    warning: no previously-included files matching '*.pyo' found under directory 'powerline/bindings'
    changing mode of build/scripts-2.7/powerline-lint from 644 to 755
    changing mode of build/scripts-2.7/powerline-daemon from 644 to 755
    changing mode of build/scripts-2.7/powerline-render from 644 to 755
    changing mode of build/scripts-2.7/powerline-config from 644 to 755
    changing mode of /usr/local/bin/powerline-config to 755
    changing mode of /usr/local/bin/powerline-lint to 755
    changing mode of /usr/local/bin/powerline-render to 755
    changing mode of /usr/local/bin/powerline-daemon to 755
Successfully installed powerline-status
Cleaning up...
Step 3: Installing Powerline Fonts in Linux
Powerline uses special glyphs to show special arrow effect and symbols for developers. For this, you must have a symbol font or a patched font installed on your systems.
Download the most recent version of the symbol font and fontconfig configuration file using following wget command.
# wget https://github.com/powerline/powerline/raw/develop/font/PowerlineSymbols.otf
# wget https://github.com/powerline/powerline/raw/develop/font/10-powerline-symbols.conf
Then you need to move the font to your fonts directory, /usr/share/fonts/ or /usr/local/share/fonts as follows or you can get the valid font paths by using command xset q.
# mv PowerlineSymbols.otf /usr/share/fonts/
Next, you need to update your system’s font cache as follows.
# fc-cache -vf /usr/share/fonts/
Now install the fontconfig file.
# mv 10-powerline-symbols.conf /etc/fonts/conf.d/
Note: If custom symbols doesn’t appear, then try to close all terminal sessions and restart X window for the changes to take effect.
Step 4: Setting Powerline for Bash Shell and Vim Statuslines
In this section we shall look at configuring Powerline for bash shell and vim editor. First make your terminal to support 256color by adding the following line to ~/.bashrc file as follows.
export TERM=”screen-256color”
Enable Powerline on Bash Shell
To enable Powerline in bash shell by default, you need to add the following snippet to your ~/.bashrc file.
First get the location of installed powerline using following command.
# pip show powerline-status

Name: powerline-status
Version: 2.2.dev9999-git.aa33599e3fb363ab7f2744ce95b7c6465eef7f08
Location: /usr/local/lib/python2.7/dist-packages
Requires:
Once you know the actual location of powerline, make sure to replace the location in the below line as per your system suggested.
powerline-daemon -q
POWERLINE_BASH_CONTINUATION=1
POWERLINE_BASH_SELECT=1
. /usr/local/lib/python2.7/dist-packages/powerline/bindings/bash/powerline.sh
Now try to logout and login back again, you will see powerline statuesline as shown below.

Try changing or switching to different directories and keep a eye on “breadcrumb” prompt changes to show your current location.
You will also be able to watch pending background jobs and if powerline is installed on a remote Linux machine, you can notice that the prompt adds the hostname when you connect via SSH.
Enable Powerline for Vim
If vim is your favorite editor, luckily there is a powerful plugin for vim, too. To enable this plugin, add these lines to ~/.vimrc file.
set  rtp+=/usr/local/lib/python2.7/dist-packages/powerline/bindings/vim/
set laststatus=2
set t_Co=256
Now you can launch vim and see a spiffy new status line:

Summary
Powerline helps to set colorful and beautiful statuslines and prompts in several applications, good for coding environments. I hope you find this guide helpful and remember to post a comment if you need any help or have additional ideas.
How To Enable Shell Script Debugging Mode in Linux
A script is simply a list of commands stored in a file. Instead of running a sequence of commands by typing them one by one all the time on the terminal, a system user can store all of them (commands) in a file and repeatedly invokes the file to re-execute the commands several times.
While learning scripting or during the early stages of writing scripts, we normally start by writing small or short scripts with a few lines of commands. And we usually debug such scripts by doing nothing more than looking at their output and ensuring that they work as we intended.
However, as we begin to write very long and advanced scripts with thousands of lines of commands, for instance scripts that modify system settings, perform critical backups over networks and many more, we will realize that only looking at the output of a script is not enough to find bugs within a script.
Therefore, in this shell script debugging in Linux series, we will walk through how to enable shell script debugging, move over to explain the different shell script debugging modes and how to use them in the subsequent series.
How To Start A Script
A script is distinguished from other files by its first line, that contains a #! (She-bang – defines the file type) and a path name (path to interpreter) which informs the system that the file is a collection of commands that will be interpreted by the specified program (interpreter).
Below are examples of the “first lines” in different types of scripts:
#!/bin/sh          [For sh scripting]
#!/bin/bash        [For bash scripting]
#!/usr/bin/perl    [For perl programming]
#!/bin/awk -f      [For awk scripting]
Note: The first line or #! can be left out if a script contains only of a set of standard system commands, without any internal shell directives.
How To Execute A Shell Script in Linux
The conventional syntax for invoking a shell script is:
$ script_name argument1 ... argumentN
Another possible form is by clearly specifying the shell that will execute the script as below:
$ shell script_name argument1 ... argumentN
For example:
$ /bin/bash script_name argument1 ... argumentN     [For bash scripting]
$ /bin/ksh script_name argument1 ... argumentN      [For ksh scripting]
$ /bin/sh script_name argument1 ... argumentN       [For sh scripting]
For scripts that do not have #! as the first line and only contain basic system commands such as the one below:
#script containing standard system commands
cd /home/$USER
mkdir tmp
echo "tmp directory created under /home/$USER"
Simply make it executable and run it as follows:
$ chmod +x  script_name
$ ./script_name
Methods of Enabling Shell Script Debugging Mode
Below are the primary shell script debugging options:
-v (short for verbose) – tells the shell to show all lines in a script while they are read, it activates verbose mode.-n (short for noexec or no ecxecution) – instructs the shell read all the commands, however doesn’t execute them. This options activates syntax checking mode.-x (short for xtrace or execution trace) – tells the shell to display all commands and their arguments on the terminal while they are executed. This option enables shell tracing mode.
1. Modifying the First Line of a Shell Script
The first mechanism is by altering the first line of a shell script as below, this will enable debugging of the whole script.
#!/bin/sh option(s)
In the form above, option can be one or combination of the debugging options above.
2. Invoking Shell With Debugging Options
The second is by invoking the shell with debugging options as follows, this method will also turn on debugging of the entire script.
$ shell option(s) script_name argument1 ... argumentN
For example:
$ /bin/bash option(s) script_name argument1 ... argumentN
3. Using set Shell Built-in Command
The third method is by using the set built-in command to debug a given section of a shell script such as a function. This mechanism is important, as it allows us to activate debugging at any segment of a shell script.
We can turn on debugging mode using set command in form below, where option is any of the debugging options.
$ set option
To enable debugging mode, use:
$ set -option
To disable debugging mode, use:
$ set +option
In addition, if we have enabled several debugging modes in different segments of a shell script, we can disable all of them at once like so:
$ set -
That is it for now with enabling shell script debugging mode. As we have seen, we can either debug an entire shell script or a particular section of a script.
In the next two episode of this series, we will cover how to use the shell script debugging options to explain verbose, syntax checking and shell tracing debugging modes with examples.
Importantly, do not forget to ask any questions about this guide or perhaps provide us feedback through the comment section below.
How to Perform Syntax Checking Debugging Mode in Shell Scripts
We started the shell script debugging series by explaining the different debugging options and how to enable shell script debugging modes.
After writing your shell scripts, it is recommended that we practically check the syntax in the scripts before running them, as opposed to looking at their output to confirm that they are working correctly.
In this part of the series, we will go through how to use syntax checking debugging mode. Remember we explained the different debugging options in the first part of this series and here, we will use them to perform script debugging.
Enabling Verbose Debugging Mode
Before we move to the primary focus of this guide, let us briefly explore the verbose mode. It is enabled by the -v debugging option, which tells the shell to display all lines in a script while they are read.
To demonstrate how this works, below is a sample shell script to batch convert PNG images to JPG format.
Type ( or copy and paste) it in a file.
#!/bin/bash
#convert
for image in *.png; do
        convert  "$image"  "${image%.png}.jpg"
        echo "image $image converted to ${image%.png}.jpg"
done
exit 0
Then save the file and make the script executable using the command below:
$ chmod +x script.sh
We can invoke the script and display all the lines in it as they are read by the shell like so:
$ bash -v script.sh
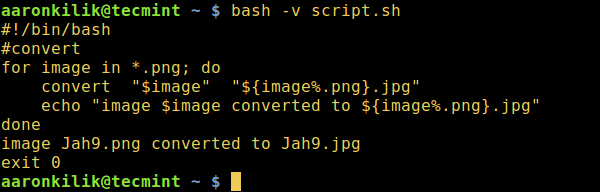
Display All Lines in Shell Script
Enabling Syntax Checking Debugging Mode in Shell Scripts
Coming back to our topic of emphasis, The -n activates syntax checking mode. It instructs the shell to basically read all the commands, however doesn’t execute them, it (shell) only examines the syntax used.
In case there are errors in your shell script, the shell will output the errors on the terminal, otherwise, it displays nothing.
The syntax for activating syntax checking is as follows:
$ bash -n script.sh
Because the syntax in the script is correct, the command above will not display any output. Therefore, let us try to remove the done word that closes the for loop and see if it shows an error:
Below is the modified shell script to batch convert png images to jpg format that contains a bug.
#!/bin/bash
#script with a bug
#convert
for image in *.png; do
        convert  "$image"  "${image%.png}.jpg"
        echo "image $image converted to ${image%.png}.jpg"

exit 0
Save the file, then run it while performing syntax checking in it:
$ bash -n script.sh

Check Syntax in Shell Script
From the output above, we can see that there is a syntax problem with our script, the for loop is missing a closing done keyword word. And the shell looked for it up to the end of the file and once it did not find it (done), the shell printed a syntax error:
script.sh: line 11: syntax error: unexpected end of file
We can as well combine the verbose mode and syntax checking mode together:
$ bash -vn script.sh

Enable Verbose and Syntax Checking in Script
Alternatively, we can enable syntax checking by modifying the first line of the script above as in the next example.
#!/bin/bash -n
#altering the first line of a script to enable syntax checking

#convert
for image in *.png; do
    convert  "$image"  "${image%.png}.jpg"
    echo "image $image converted to ${image%.png}.jpg"

exit 0
As before, save the file and run it while performing syntax checking:
$ ./script.sh

script.sh: line 12: syntax error: unexpected end of file
In addition, we can employ the set shell built-in command to enable debugging mode in the script above.
In the example below, we are only checking the syntax of the for loop in our script.
#!/bin/bash
#using set shell built-in command to enable debugging
#convert

#enable debugging
set -n
for image in *.png; do
    convert  "$image"  "${image%.png}.jpg"
    echo "image $image converted to ${image%.png}.jpg"

#disable debugging
set +n
exit 0
Once again, save the file and invoke the script:
$ ./script.sh
In summary, we should always ensure that we syntactically check our shell scripts to capture any error before executing them.
To send us any questions or feedback concerning this guide, use the response form below. In the third part of this series, we shall move to explaining and using shell tracing debugging mode.
How to Trace Execution of Commands in Shell Script with Shell Tracing
In this article of the shell script debugging series, we will explain the third shell script debugging mode, that is shell tracing and look at some examples to demonstrate how it works, and how it can be used.
The previous part of this series clearly throws light upon the two other shell script debugging modes: verbose mode and syntax checking mode with easy-to-understand examples of how to enable shell script debugging in these modes.
- How To Enable Shell Script Debugging Mode in Linux – Part 1
- How to Perform Syntax Checking Debugging Mode in Shell Scripts – Part 2
Shell tracing simply means tracing the execution of the commands in a shell script. To switch on shell tracing, use the -x debugging option.
This directs the shell to display all commands and their arguments on the terminal as they are executed.
We will use the sys_info.sh shell script below, which briefly prints your system date and time, number of users logged in and the system uptime. However, it contains syntax errors that we need to find and correct.
#!/bin/bash
#script to print brief system info

ROOT_ID="0"

DATE=`date`
NO_USERS=`who | wc -l`
UPTIME=`uptime`

check_root(){
    if [ "$UID" -ne "$ROOT_ID" ]; then
        echo "You are not allowed to execute this program!"
        exit 1;
}

print_sys_info(){
    echo "System Time    : $DATE"
    echo "Number of users: $NO_USERS"
    echo "System Uptime  : $UPTIME
}

check_root
print_sys_info

exit 0
Save the file and make the script executable. The script can only be run by root, therefore employ the sudo command to run it as below:
$ chmod +x sys_info.sh
$ sudo bash -x sys_info.sh

Shell Tracing – Show Error in Script
From the output above, we can observe that, a command is first executed before its output is substituted as the value of a variable.
For example, the date was first executed and the its output was substituted as the value of the variable DATE.
We can perform syntax checking to only display the syntax errors as follows:
$ sudo bash -n sys_info.sh

Syntax Checking in Script
If we look at the shell script critically, we will realize that the if statement is missing a closing fi word. Therefore, let us add it and the new script should now look like below:
#!/bin/bash
#script to print brief system info

ROOT_ID="0"

DATE=`date`
NO_USERS=`who | wc -l`
UPTIME=`uptime`

check_root(){
    if [ "$UID" -ne "$ROOT_ID" ]; then
        echo "You are not allowed to execute this program!"
        exit 1;
   fi
}

print_sys_info(){
    echo "System Time    : $DATE"
    echo "Number of users: $NO_USERS"
    echo "System Uptime  : $UPTIME
}

check_root
print_sys_info

exit 0
Save the file again and invoke it as root and do some syntax checking:
$ sudo bash -n sys_info.sh

Perform Syntax Check in Shell Scripts
The result of our syntax checking operation above still shows that there is one more bug in our script on line 21. So, we still have some syntax correction to do.
If we look through the script analytically one more time, the error on line 21 is due to a missing closing double quote (”) in the last echo command inside the print_sys_info function.
We will add the closing double quote in the echo command and save the file. The changed script is below:
#!/bin/bash
#script to print brief system info

ROOT_ID="0"

DATE=`date`
NO_USERS=`who | wc -l`
UPTIME=`uptime`

check_root(){
    if [ "$UID" -ne "$ROOT_ID" ]; then
        echo "You are not allowed to execute this program!"
        exit 1;
    fi
}

print_sys_info(){
    echo "System Time    : $DATE"
    echo "Number of users: $NO_USERS"
    echo "System Uptime  : $UPTIME"
}

check_root
print_sys_info

exit 0
Now syntactically check the script one more time.
$ sudo bash -n sys_info.sh
The command above will not produce any output because our script is now syntactically correct. We can as well trace the execution of the script all for a second time and it should work well:
$ sudo bash -x sys_info.sh

Trace Shell Script Execution
Now run the script.
$ sudo ./sys_info.sh

Shell Script to Show Date, Time and Uptime
Importance of Shell Script Execution Tracing
Shell script tracing helps us identify syntax errors and more importantly, logical errors. Take for instance the check_root function in the sys_info.sh shell script, which is intended to determine if a user is root or not, since the script is only allowed to be executed by the superuser.
check_root(){
    if [ "$UID" -ne "$ROOT_ID" ]; then
        echo "You are not allowed to execute this program!"
        exit 1;
    fi
}
The magic here is controlled by the if statement expression [ "$UID" -ne "$ROOT_ID" ], once we do not use the suitable numerical operator (-ne in this case, which means not equal ), we end up with a possible logical error.
Assuming that we used -eq ( means equal to), this would permit any system user as well as the root user to run the script, hence a logical error.
check_root(){
    if [ "$UID" -eq "$ROOT_ID" ]; then
        echo "You are not allowed to execute this program!"
        exit 1;
    fi
}
Note: As we looked at before at the start of this series, the set shell built-in command can activate debugging in a particular section of a shell script.
Therefore, the line below will help us find this logical error in the function by tracing its execution:
The script with a logical error:
#!/bin/bash
#script to print brief system info

ROOT_ID="0"

DATE=`date`
NO_USERS=`who | wc -l`
UPTIME=`uptime`

check_root(){
    if [ "$UID" -eq "$ROOT_ID" ]; then
        echo "You are not allowed to execute this program!"
        exit 1;
    fi
}

print_sys_info(){
    echo "System Time    : $DATE"
    echo "Number of users: $NO_USERS"
    echo "System Uptime  : $UPTIME"
}

#turning on and off debugging of check_root function
set -x ; check_root;  set +x ;
print_sys_info

exit 0
Save the file and invoke the script, we can see that a regular system user can run the script without sudo as in the output below. This is because the value of USER_ID is 100 which is not equal to root ROOT_ID which is 0.
$ ./sys_info.sh

Run Shell Script Without Sudo
Well, that is it for now, we have come to the end of the shell script debugging series, the response form below can be used to address any questions or feedback to us, concerning this guide or the whole 3-part series.
How to Customize Bash Colors and Content in Linux Terminal Prompt
Today, Bash is the default shell in most (if not all) modern Linux distributions. However, you may have noticed that the text color in the terminal and the prompt content can be different from one distro to another.
Suggested Read: 5 Most Frequently Used Open Source Shells for Linux
In case you have been wondering how to customize this for better accessibility or mere whim, keep reading – in this article we will explain how to do just that.
The PS1 Bash Environment Variable
The command prompt and terminal appearance are governed by an environment variable called PS1. According to the Bash man page, PS1 represents the primary prompt string which is displayed when the shell is ready to read a command.
The allowed content in PS1 consists of several backslash-escaped special characters whose meaning is listed in the PROMPTING section of the man page.
To illustrate, let’s display the current content of PS1 in our system (this may be somewhat different in your case):
$ echo $PS1

[\u@\h \W]$
We will now explain how to customize PS1 as per our needs.
Customizing the PS1 Format
According to the PROMPTING section in the man page, this is the meaning of each special character:
\u: the username of the current user.\h: the hostname up to the first dot (.) in the Fully-Qualified Domain Name.\W: the basename of the current working directory, with $HOME abbreviated with a tilde (~).\$: If the current user is root, display #, $ otherwise.
For example, we may want to consider adding \! If we want to display the history number of the current command, or \H if we want to display the FQDN instead of the short server name.
In the following example we will import both into our current environment by executing this command:
PS1="[\u@\H \W \!]$"
When you press Enter you will see that the prompt content changes as shown below. Compare the prompt before and after executing the above command:

Customize Linux Terminal Prompt PS1
Now let’s go one step further and change the color of the user and hostname in command prompt – both the text and its surrounding background.
Actually, we can customize 3 aspects of the prompt:
| Text Format |
Foreground (text) color |
Background color |
| 0: normal text |
30: Black |
40: Black |
| 1: bold |
31: Red |
41: Red |
| 4: Underlined text |
32: Green |
42: Green |
|
33: Yellow |
43: Yellow |
|
34: Blue |
44: Blue |
|
35: Purple |
45: Purple |
|
36: Cyan |
46: Cyan |
|
37: White |
47: White |
We will use the \e special character at the beginning and an m at the end to indicate that what follows is a color sequence.
In this sequence the three values (background, format, and foreground) are separated by commas (if no value is given the default is assumed).
Suggested Read: Learn Bash Shell Scripting in Linux
Also, since the value ranges are different, it does not matter which one (background, format, or foreground) you specify first.
For example, the following PS1 will cause the prompt to appear in yellow underlined text with red background:
PS1="\e[41;4;33m[\u@\h \W]$ "

Change Linux Terminal Color Prompt PS1
As good as it looks, this customization will only last for the current user session. If you close your terminal or exit the session, the changes will be lost.
In order to make these changes permanent, you will have to add the following line to ~/.bashrc or ~/.bash_profile depending on your distribution:
PS1="\e[41;4;33m[\u@\h \W]$ "
Feel free to play around with the colors to find what works best for you.
Summary
In this article we have explained how to customize the color and content of your Bash prompt. If you have questions or suggestions about this post, feel free to use the comment form below to reach us. We look forward to hearing from you!
How To Write and Use Custom Shell Functions and Libraries
In Linux, shell scripts help us in so many different ways including performing or even automating certain system administration tasks, creating simple command line tools and many more.
In this guide, we will show new Linux users where to reliably store custom shell scripts, explain how to write custom shell functions and libraries, use functions from libraries in other scripts.
Where to Store Shell Scripts
In order to run your scripts without typing a full/absolute path, they must be stored in one of the directories in the $PATH environment variable.
To check your $PATH, issues the command below:
$ echo $PATH

/usr/local/sbin:/usr/local/bin:/usr/sbin:/usr/bin:/sbin:/bin:/usr/games:/usr/local/games
Normally, if the directory bin exists in a users home directory, it is automatically included in his/her $PATH. You can store your shell scripts here.
Therefore, create the bin directory (which may also store Perl, Awk or Python scripts or any other programs):
$ mkdir ~/bin
Next, create a directory called lib (short for libraries) where you’ll keep your own libraries. You can also keep libraries for other languages such as C, Python and so on, in it. Under it, create another directory called sh; this will particularly store you shell libraries:
$ mkdir -p ~/lib/sh
Create Your Own Shell Functions and Libraries
A shell function is a group of commands that perform a special task in a script. They work similarly to procedures, subroutines and functions in other programming languages.
The syntax for writing a function is:
function_name() { list of commands }
For example, you can write a function in a script to show the date as follows:
showDATE() {date;}
Every time you want to display date, simply invoke the function above using its name:
$ showDATE
A shell library is simply a shell script, however, you can write a library to only store your functions that you can later call from other shell scripts.
Below is an example of a library called libMYFUNCS.sh in my ~/lib/sh directory with more examples of functions:
#!/bin/bash

#Function to clearly list directories in PATH
showPATH() {
        oldifs="$IFS"   #store old internal field separator
        IFS=:              #specify a new internal field separator
        for DIR in $PATH ;  do echo $DIR ;  done
        IFS="$oldifs"    #restore old internal field separator
}

#Function to show logged user
showUSERS() {
        echo -e “Below are the user logged on the system:\n”
        w
}

#Print a user’s details
printUSERDETS() {
        oldifs="$IFS"    #store old internal field separator
        IFS=:                 #specify a new internal field separator
        read -p "Enter user name to be searched:" uname   #read username
        echo ""
       #read and store from a here string values into variables using : as  a  field delimiter
    read -r username pass uid gid comments homedir shell <<< "$(cat /etc/passwd | grep   "^$uname")"
       #print out captured values
        echo  -e "Username is            : $username\n"
        echo  -e "User's ID                 : $uid\n"
        echo  -e "User's GID              : $gid\n"
        echo  -e "User's Comments    : $comments\n"
        echo  -e "User's Home Dir     : $homedir\n"
        echo  -e "User's Shell             : $shell\n"
        IFS="$oldifs"         #store old internal field separator
}
Save the file and make the script executable.
How To Invoke Functions From a Library
To use a function in a lib, you need to first of all include the lib in the shell script where the function will be used, in the form below:
$ ./path/to/lib
OR
$ source /path/to/lib
So you would use the function printUSERDETS from the lib ~/lib/sh/libMYFUNCS.sh in another script as shown below.
You do not have to write another code in this script to print a particular user’s details, simply call an existing function.
Open a new file with the name test.sh:
#!/bin/bash

#include lib
.  ~/lib/sh/libMYFUNCS.sh

#use function from lib
printUSERDETS

#exit script
exit 0
Save it, then make the script executable and run it:
$ chmod 755 test.sh
$ ./test.sh
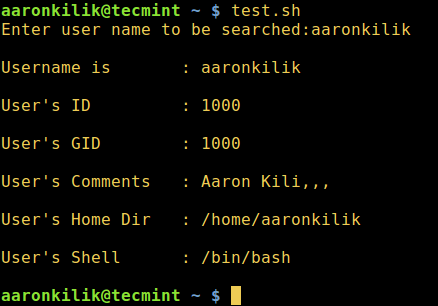
Write Shell Functions
In this article, we showed you where to reliably store shell scripts, how to write your own shell functions and libraries, invoke functions from libraries in normal shell scripts.
Next, we will explain a straight forward way of configuring Vim as an IDE for Bash scripting. Until then, always stay connected to TecMint and also share your thoughts about this guide via the feedback form below.
Understanding Shell Initialization Files and User Profiles in Linux
Linux is a multi-user, time sharing system, implying that more than one user can log in and use a system. And system administrators have the task of managing various aspects of how different users can operate a system in terms of installing/updating/removing software, programs they can run, files they can view/edit and so on.
Linux also allows users’ environments to be created or maintained in two major ways: using system-wide (global) and user-specific (personal) configurations. Normally, the basic method of working with a Linux system is the shell, and the shell creates an environment depending on certain files it reads during its initialization after a successful user login.
Suggested Read: How to Set Environment Variables in Linux
In this article, we will explain shell initialization files in relation to user profiles for local user management in Linux. We will let you know where to keep custom shell functions, aliases, variables as well as startup programs.
Important: For the purpose of this article, we will focus on bash, a sh compatible shell which is the most popular/used shell on Linux systems out there.
If you are using a different shell (zsh, ash, fish etc..) program, read through its documentation to find out more about some of the related files we will talk about here.
Shell Initialization in Linux
When the shell is invoked, there are certain initialization/startup files it reads which help to setup an environment for the shell itself and the system user; that is predefined (and customized) functions, variables, aliases and so on.
There are two categories of initialization files read by the shell:
- system-wide startup files – theses contain global configurations that apply to all users on the system, and are usually located in the /etc directory. They include: /etc/profiles and /etc/bashrc or /etc/bash.bashrc.
- user-specific startup files – these store configurations that apply to a single user on the system and are normally located in the users home directory as dot files. They can override the system-wide configurations. They include: .profiles, .bash_profile, .bashrc and .bash_login.
Again, the shell can be invoked in three possible modes:
1. Interactive Login Shell
The shell is invoked after a user successfully login into the system, using /bin/login, after reading credentials stored in the /etc/passwd file.
When the shell is started as an interactive login shell, it reads the /etc/profile and its user-specific equivalent ~/.bash_profile.
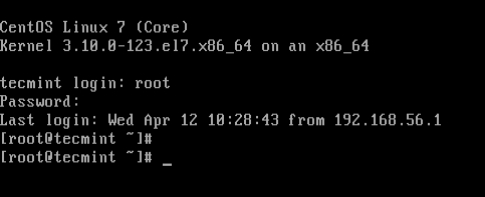
Linux Interactive Login Shell
2. Interactive non-login Shell
The shell is started at the command-line using a shell program for example $/bin/bash or $/bin/zsh. It can as well be started by running the /bin/su command.
Additionally, an interactive non-login shell can as well be invoked with a terminal program such as konsole, terminator or xterm from within a graphical environment.
When the shell is started in this state, it copies the environment of the parent shell, and reads the user-specific ~/.bashrc file for additional startup configuration instructions.
$ su
# ls -la
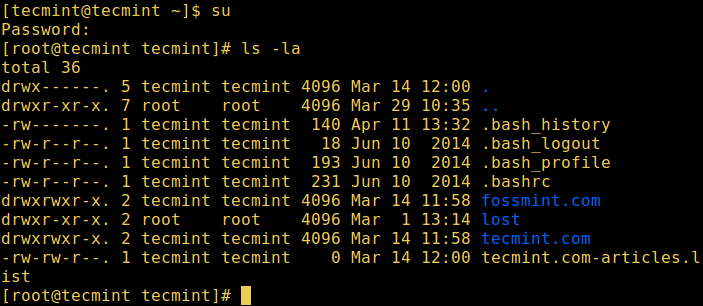
Interactive Non-Login Shell
3. Non-interactive Shell
The shell is invoked when a shell script is running. In this mode, it’s processing a script (set of shell or generic system commands/functions) and doesn’t require user input between commands unless otherwise. It operates using the environment inherited from the parent shell.
Understanding System-wide Shell Startup Files
In this section, we will shade more light on shell startup files that store configurations for all users on the system and these include:
The /etc/profile file – it stores system-wide environment configurations and startup programs for login setup. All configurations that you want to apply to all system users’ environments should be added in this file.
For instance, you can set your the global PATH environment variable here.
# cat /etc/profile
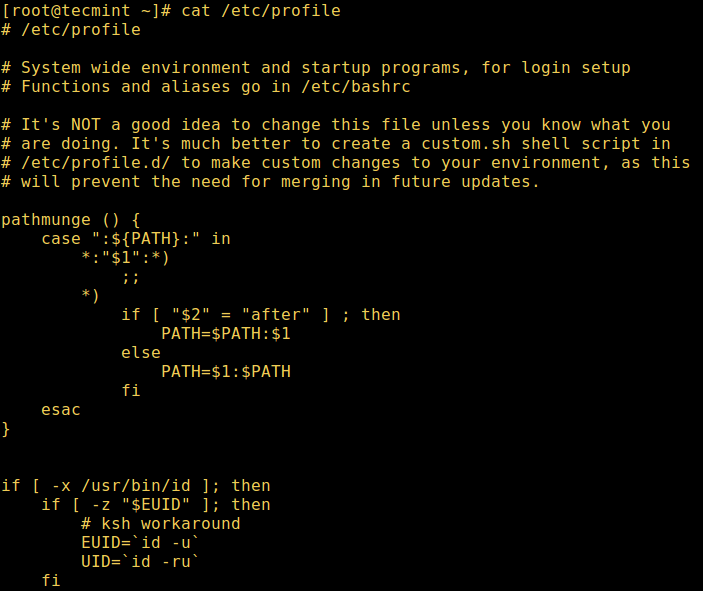
System Wide Configuration File
Note: In certain systems like RHEL/CentOS 7, you’ll get such warnings as “It’s not recommended to change this file unless you know what you are doing. It’s much better to create a custom .sh shell script in /etc/profile.d/ to make custom changes to your environment, as this will prevent the need for merging in future updates”.
The /etc/profile.d/ directory – stores shell scripts used to make custom changes to your environment:
# cd /etc/profile.d/
# ls  -l

Stores Custom Shell Scripts
The /etc/bashrc or /etc/bash.bashrc file – contains system-wide functions and aliases including other configurations that apply to all system users.
If your system has multiple types of shells, it is a good idea to put bash-specific configurations in this file.
# cat /etc/bashrc
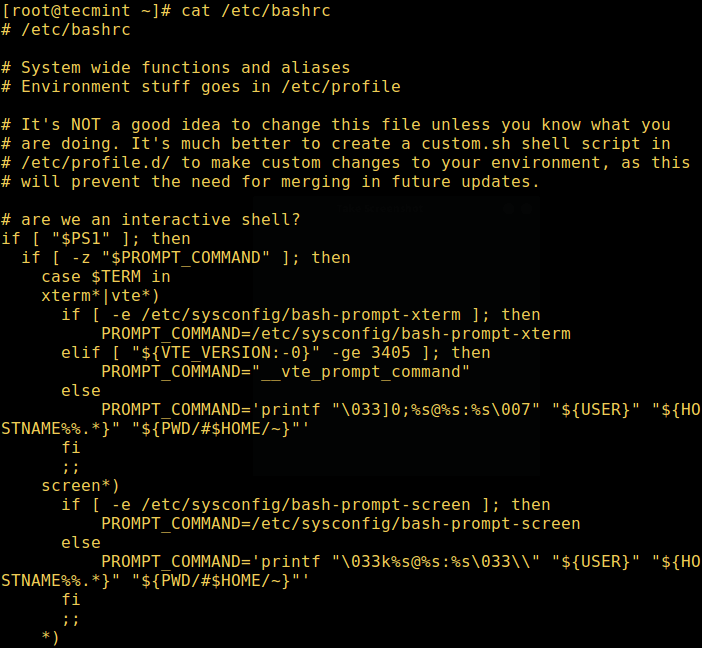
System Wide Functions and Aliases
Understanding User-specific Shell Startup Files
Next, we will explain more concerning user-specific shell (bash) startup dot files, that store configurations for a particular user on the system, they are located in a user’s home directory and they include:
# ls -la
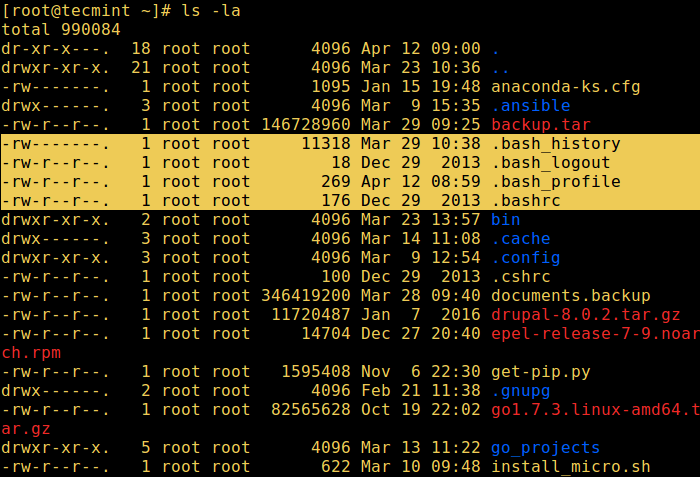
User Specific Configuration Files
The ~/.bash_profile file – this stores user specific environment and startup programs configurations. You can set your custom PATH environment variable here, as shown in the screenshot below:
# cat ~/.bash_profile
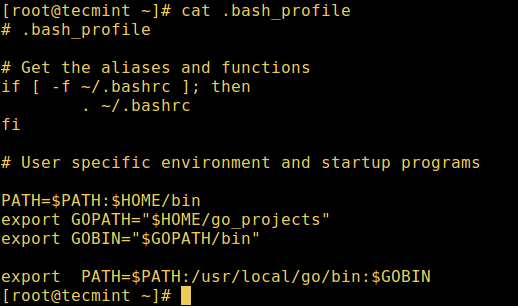
User Bash Profile
The ~/.bashrc file – this file stores user specific aliases and functions.
# cat ~/.bashrc
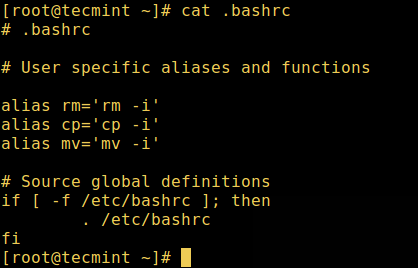
User Bashrc File
The ~/.bash_login file – it contains specific configurations that are normally only executed when you log in to the system. When the ~/.bash_profile is absent, this file will be read by bash.
The ~/.profile file – this file is read in the absence of ~/.bash_profile and ~/.bash_login; it can store the same configurations, which are can also be accessible by other shells on the system. Because we have mainly talked about bash here, take note that other shells might not understand the bash syntax.
Next, we will also explain two other important user specific files which are not necessarily bash initialization files:
The ~/.bash_history file – bash maintains a history of commands that have been entered by a user on the system. This list of commands is kept in a user’s home directory in the ~/.bash_history file.
To view this list, type:
$ history
or
$ history | less
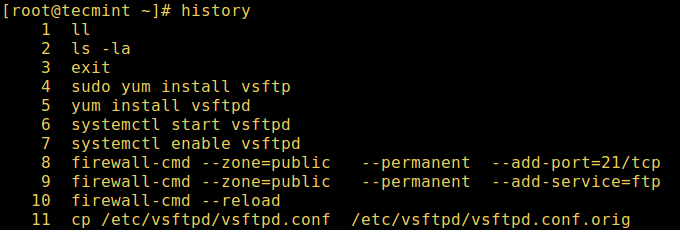
View Last Executed Commands
The ~/.bash_logout file – it’s not used for shell startup, but stores user specific instructions for the logout procedure. It is read and executed when a user exits from an interactive login shell.
One practical example would by clearing the terminal window upon logout. This is important for remote connections, which will leave a clean window after closing them:
# cat bash_logout
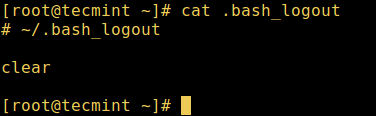
Clear History After Logout
For additional insights, checkout the contents of these shell initialization files on various Linux distros and also read through the bash man page:
That’s all for now! In this article, we explained shell startup/initialization files in Linux. Use the comment form below to write back to us.
ShellCheck – A Tool That Shows Warnings and Suggestions for Shell Scripts
ShellCheck is a static analysis tool that shows warnings and suggestions concerning bad code in bash/sh shell scripts. It can be used in several ways: from the web by pasting your shell script in an online editor (Ace – a standalone code editor written in JavaScript) in https://www.shellcheck.net (it is always synchronized to the latest git commit, and is the simplest way to give ShellCheck a go) for instant feedback.
Alternatively, you can install it on your machine and run it from the terminal, integrate it with your text editor as well as in your build or test suites.
There are three things ShellCheck does primarily:
- It points out and explains typical beginner’s syntax issues that cause a shell to give cryptic error messages.
- It points out and explains typical intermediate level semantic problems that cause a shell to behave strangely and counter-intuitively.
- It also points out subtle caveats, corner cases and pitfalls that may cause an advanced user’s otherwise working script to fail under future circumstances.
In this article, we will show how to install and use ShellCheck in the various ways to find bugs or bad code in your shell scripts in Linux.
How to Install and Use ShellCheck in Linux
ShellCheck can be easily installed locally through your package manager as shown.
On Debian/Ubuntu
# apt-get install shellcheck
On RHEL/CentOS
# yum -y install epel-release
# yum install ShellCheck
On Fedora
# dnf install ShellCheck
Once ShellCheck installed, let’s take a look at how to use ShellCheck in the various methods we mentioned before.
Using ShellCheck From the Web
Go to https://www.shellcheck.net and paste your script in the Ace editor provided, you will view the output at the bottom of the editor as shown in the screen shot below.
In the following example, the test shell script consists of the following lines:
#!/bin/bash
#declare variables
MINARGS=2
E_NOTROOT=50
E_MINARGS=100

#echo values of variables
echo $MINARGS
echo $E_NONROOT
exit 0;
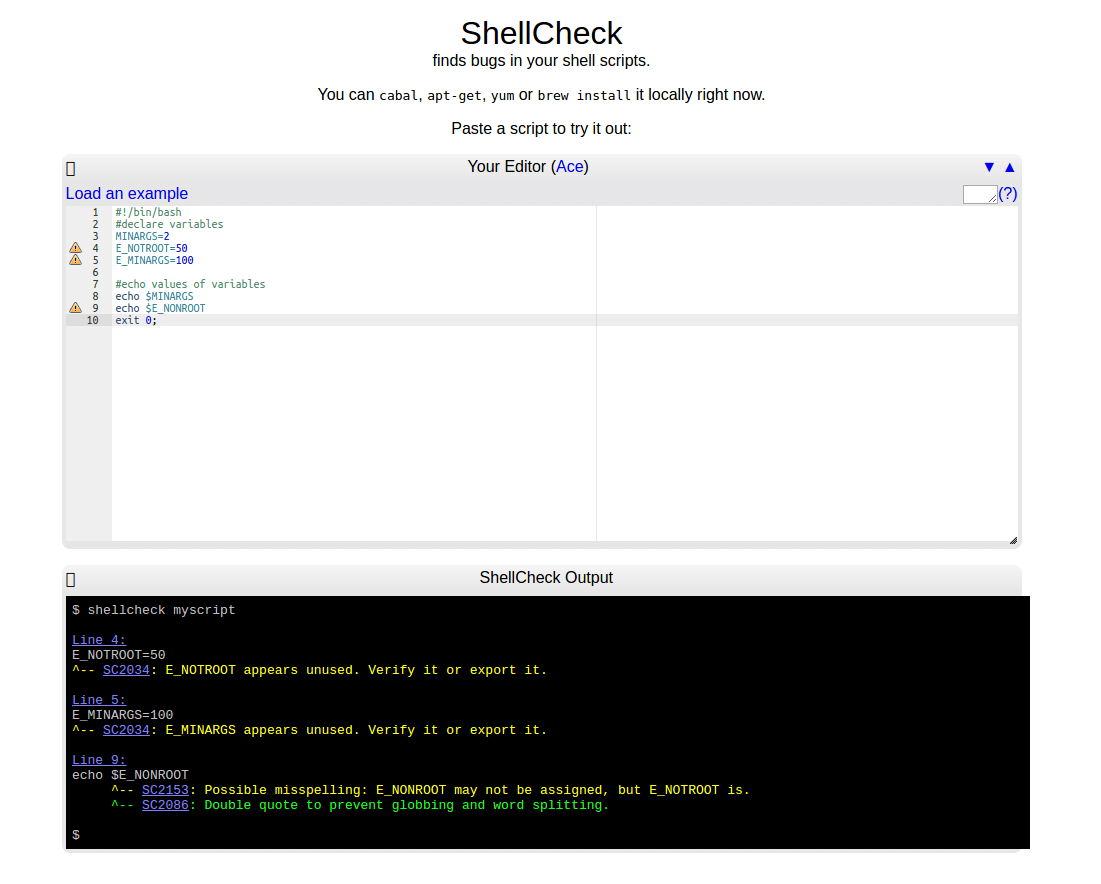
ShellCheck – Online Shell Script Analysis Tool
From the screenshot above, the first two variables E_NOTROOT and E_MINARGS have been declared but are unused, ShellCheck reports these as “suggestive errors”:
SC2034: E_NOTROOT appears unused. Verify it or export it.
SC2034: E_MINARGS appears unused. Verify it or export it.
Then secondly, the wrong name (in the statement echo $E_NONROOT) was used to echo variable E_NOTROOT, that is why ShellCheck shows the error:
SC2153: Possible misspelling: E_NONROOT may not be assigned, but E_NOTROOT is
Again when you look at the echo commands, the variables have not been double quoted (helps to prevent globbing and word splitting), therefore Shell Check shows the warning:
SC2086: Double quote to prevent globbing and word splitting.
Using ShellCheck From the Terminal
You can also run ShellCheck from the command-line, we’ll use the same shell script above as follows:
$ shellcheck test.sh
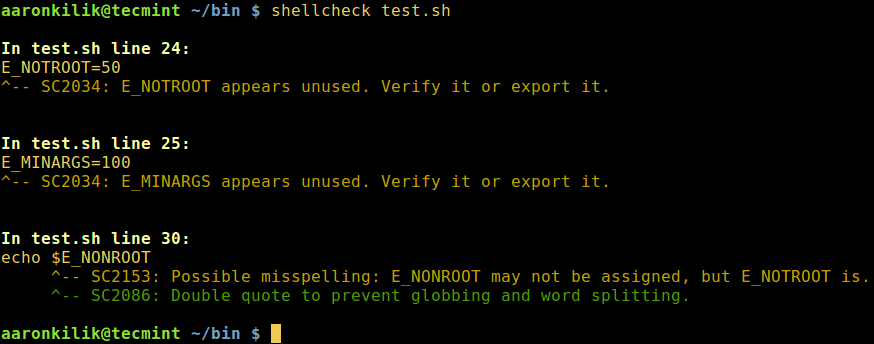
ShellCheck – Checks Bad Code in Shell Scripts
Using ShellCheck From the Text Editor
You can also view ShellCheck suggestions and warnings directly in a variety of editors, this is probably a more efficient way of using ShellCheck, once you save a files, it shows you any errors in the code.
In Vim, use ALE or Syntastic (we will use this):
Start by installing Pathogen so that it’s easy to install syntastic. Run the commands below to get the pathogen.vim file and the directories it needs:
# mkdir -p ~/.vim/autoload ~/.vim/bundle && curl -LSso ~/.vim/autoload/pathogen.vim https://tpo.pe/pathogen.vim
Then add this to your ~/.vimrc file:
execute pathogen#infect()
Once you have installed pathogen, and you now can put syntastic into ~/.vim/bundle as follows:
# cd ~/.vim/bundle && git clone --depth=1 https://github.com/vim-syntastic/syntastic.git
Next, close vim and start it back up to reload it, then type the command below:
:Helptags
If all goes well, you should have ShellCheck integrated with Vim, the following screenshots show how it works using the same script above.
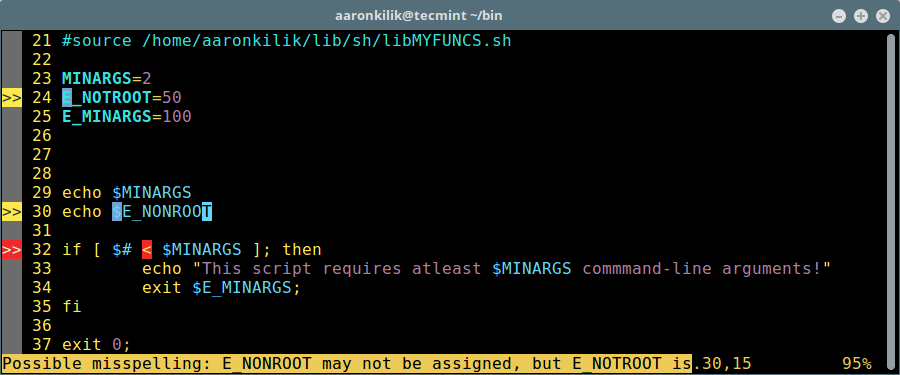
Check Bad Shell Script Code in Vim
In case you get an error after following the steps above, then you possibly didn’t install Pathogen correctly. Redo the steps but this ensure that you did the following:
- Created both the ~/.vim/autoload and ~/.vim/bundle directories.
- Added the execute pathogen#infect() line to your ~/.vimrc file.
- Did the git clone of syntastic inside ~/.vim/bundle.
- Use appropriate permissions to access all of the above directories.
You can also use other editors to check bad code in shell scripts like:
- In Emacs, use Flycheck.
- In Sublime, employ SublimeLinter.
- In Atom, make use of Linter.
- In most other editors, use GCC error compatibility.
Note: Use the gallery of bad code to carry out more ShellChecking.
ShellCheck Github Repository: https://github.com/koalaman/shellcheck
That’s it! In this article, we showed how to install and use ShellCheck to finds bugs or bad code in your shell scripts in Linux. Share your thoughts with us via the comment section below.
Do you know of any other similar tools out there? If yes, then share info about them in the comments as well.
10 Useful Tips for Writing Effective Bash Scripts in Linux
Shell scripting is the easiest form of programming you can learn/do in Linux. More so, it is a required skill for system administration for automating tasks, developing new simple utilities/tools just to mention but a few.
In this article, we will share 10 useful and practical tips for writing effective and reliable bash scripts and they include:
1. Always Use Comments in Scripts
This is a recommended practice which is not only applied to shell scripting but all other kinds of programming. Writing comments in a script helps you or some else going through your script understand what the different parts of the script do.
For starters, comments are defined using the # sign.
#TecMint is the best site for all kind of Linux articles
2. Make a Script exit When Fails
Sometimes bash may continue to execute a script even when a certain command fails, thus affecting the rest of the script (may eventually result in logical errors). Use the line below to exit a script when a command fails:
#let script exit if a command fails
set -o errexit
OR
set -e
3. Make a Script exit When Bash Uses Undeclared Variable
Bash may also try to use an undeclared script which could cause a logical error. Therefore use the following line to instruct bash to exit a script when it attempts to use an undeclared variable:
#let script exit if an unsed variable is used
set -o nounset
OR
set -u
4. Use Double Quotes to Reference Variables
Using double quotes while referencing (using a value of a variable) helps to prevent word splitting (regarding whitespace) and unnecessary globbing (recognizing and expanding wildcards).
Check out the example below:
#!/bin/bash
#let script exit if a command fails
set -o errexit

#let script exit if an unsed variable is used
set -o nounset

echo "Names without double quotes"
echo
names="Tecmint FOSSMint Linusay"
for name in $names; do
        echo "$name"
done
echo

echo "Names with double quotes"
echo
for name in "$names"; do
        echo "$name"
done

exit 0
Save the file and exit, then run it as follows:
$ ./names.sh
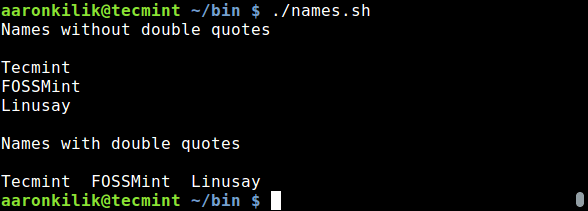
Use Double Quotes in Scripts
5. Use functions in Scripts
Except for very small scripts (with a few lines of code), always remember to use functions to modularize your code and make scripts more readable and reusable.
The syntax for writing functions is as follows:
function check_root(){
	command1;
	command2;
}

OR
check_root(){
	command1;
	command2;
}
For single line code, use termination characters after each command like this:
check_root(){ command1; command2; }
6. Use = instead of == for String Comparisons
Note that == is a synonym for =, therefore only use a single = for string comparisons, for instance:
value1=”tecmint.com”
value2=”fossmint.com”
if [ "$value1" = "$value2" ]
7. Use $(command) instead of legacy ‘command’ for Substitution
Command substitution replaces a command with its output. Use $(command) instead of backquotes `command` for command substitution.
This is recommended even by shellcheck tool (shows warnings and suggestions for shell scripts). For example:
user=`echo “$UID”`
user=$(echo “$UID”)
8. Use Read-only to Declare Static Variables
A static variable doesn’t change; its value can not be altered once it’s defined in a script:
readonly passwd_file=”/etc/passwd”
readonly group_file=”/etc/group”
9. Use Uppercase Names for ENVIRONMENT Variables and Lowercase for Custom Variables
All bash environment variables are named with uppercase letters, therefore use lowercase letters to name your custom variables to avoid variable name conflicts:
#define custom variables using lowercase and use uppercase for env variables
nikto_file=”$HOME/Downloads/nikto-master/program/nikto.pl”
perl “$nikto_file” -h  “$1”
10. Always Perform Debugging for Long Scripts
If you are writing bash scripts with thousands of lines of code, finding errors may become a nightmare. To easily fix things before executing a script, perform some debugging. Master this tip by reading through the guides provided below:
- How To Enable Shell Script Debugging Mode in Linux
- How to Perform Syntax Checking Debugging Mode in Shell Scripts
- How to Trace Execution of Commands in Shell Script with Shell Tracing
That’s all! Do you have any other best bash scripting practices to share? If yes, then use the comment form below to do that.
How to Install and Enable Bash Auto Completion in CentOS/RHEL
Bash (Bourne Again Shell) is undoubtedly the most popular Linux shell out there, no wonder it is the default shell on many Linux distributions. One of its most charming features is the built-in “auto-completion” support.
Sometimes referred to as TAB completion, this feature permits you to easily complete a command structure. It allows typing a partial command, then pressing the [Tab] key to auto-complete the command and it arguments. It lists all multiple completions, where possible.
Just like Bash, nearly all modern Linux shells ship in with command completion support. In this short guide, we will show you how to turn on the Bash auto-completion feature in CentOS and RHEL systems.
To make working on the command line super easy for you, this is one of the many things you ought to do while performing:
- Initial Server Setup and Configurations on RHEL 7
- Initial Server Setup and Configurations on CentOS 7
First, you need to enable the EPEL repository on your system, then install the bash-completion package plus some extras using YUM package manager, like this.
# yum install bash-completion bash-completion-extras
Now that you have installed bash completion, you should enable it to start working. First source the bash_completion.sh file. You can use the locate command below to find it:
$ locate bash_completion.sh
$ source /etc/profile.d/bash_completion.sh

Find and Source Bash-Completion
Alternatively, logout of your current login current session and re-login.
$ logout
Now the auto-completion feature should be working on your system, you can try it out as shown below.
$ lo[TAB]
$ ls .bash[TAB]
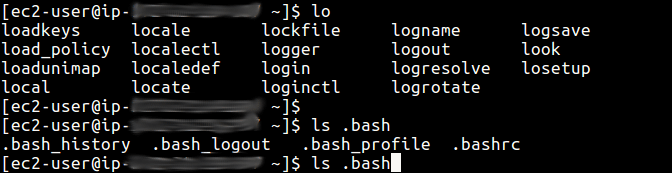
Check Bash Auto-Completion
Note: TAB completion works for path names and variables names as well, and it is programmable.
That’s all! In this guide, we showed how to install and enable the Bash auto-completion feature, also known as TAB completion in CentOS/RHEL. You can ask any questions via the comment section below.
A Shell Script to Send Email Alert When Memory Gets Low
A powerful aspect of Unix/Linux shell programs such as bash, is their amazing support for common programming constructs that enable you to make decisions, execute commands repeatedly, create new functions, and so much more. You can write commands in a file known as a shell script and execute them collectively.
This offers you a reliable and effective means of system administration. You can write scripts to automate tasks, for instance daily back ups, system updates etc; create new custom commands/utilities/tools and beyond. You can write scripts to help you keep up with what’s unfolding on a server.
One of the critical components of a server is memory (RAM), it greatly impacts on overall performance of a system.
In this article, we will share a small but useful shell script to send an alert email to one or more system administrator(s), if server memory is running low.
This is script is particularly useful for keeping an eye on Linux VPS (Virtual Private Servers) with small amount of memory, say of about 1GB (approximately 990MB).
Testing Environment Setup
- A CentOS/RHEL 7 production server with mailx utility installed with working postfix mail server.
This is how the alertmemory.sh script works: first it checks the free memory size, then determines if amount of free memory is less or equal to a specified size (100 MB for the purpose of this guide), used as a bench mark for the least acceptable free memory size.
If this condition is true, it will generate a list of the top 10 processes consuming server RAM and sends an alert email to specified email addresses.
Note: You will have to make a few changes to script (especially the mail sender utility, use the appropriate flags) to meet your Linux distributions requirements.
Shell Script to Check Server Memory
#!/bin/bash
#######################################################################################
#Script Name    :alertmemory.sh
#Description    :send alert mail when server memory is running low
#Args           :
#Author         :Aaron Kili Kisinga
#Email          :aaronkilik@gmail.com
#License       : GNU GPL-3
#######################################################################################
## declare mail variables
##email subject
subject="Server Memory Status Alert"
##sending mail as
from="server.monitor@example.com"
## sending mail to
to="admin1@example.com"
## send carbon copy to
also_to="admin2@example.com"

## get total free memory size in megabytes(MB)
free=$(free -mt | grep Total | awk '{print $4}')

## check if free memory is less or equals to  100MB
if [[ "$free" -le 100  ]]; then
        ## get top processes consuming system memory and save to temporary file
        ps -eo pid,ppid,cmd,%mem,%cpu --sort=-%mem | head >/tmp/top_proccesses_consuming_memory.txt

        file=/tmp/top_proccesses_consuming_memory.txt
        ## send email if system memory is running low
        echo -e "Warning, server memory is running low!\n\nFree memory: $free MB" | mailx -a "$file" -s "$subject" -r "$from" -c "$to" "$also_to"
fi

exit 0
After creating your script /etc/scripts/alertmemory.sh, make it executable and symlink to cron.hourly.
# chmod +x /etc/scripts/alertmemory.sh
# ln -s -t /etc/cron.hourly/alertmemory.sh /etc/scripts/alertmemory.sh
This means that the above script will be run after every 1 hour as long as the server is running.
Tip: You can test if it is working as intended, set the bench mark value a little high to easily trigger an email to be sent, and specify a small interval of about 5 minutes.
Then keep on checking from the command line using the free command provided in the script. Once you confirm that it is working, define the actual values you would like to use.
Below is a screenshot showing a sample alert email.
Linux Memory Email Alert
That’s all! In this article, we explained how to use shell script to send alert emails to system administrators in case server memory (RAM) is running low. You can share any thoughts relating to this topic, with us via the feedback form below.
How to Create Custom Header Template for Shell Scripts in Vim
In this article, we will show you a simple way to configure a custom header for all newly created bash scripts in Vim editor. This means that every time you open a new .sh file using vi/vim editor, the custom header will be automatically added to the file.
How to Create Custom Bash Script Header Template File
First start by creating the template file called sh_header.temp, which contains your custom bash script header, possibly under ~/.vim/ directory under your home.
$ vi ~/.vim/sh_header.temp
Next add the following lines in it (feel free to set your own template file location and custom header) and save the file.
Custom Header Template for Scripts
#!/bin/bash

###################################################################
#Script Name	:
#Description	:
#Args           	:
#Author       	:Aaron Kili Kisinga
#Email         	:aaronkilik@gmail.com
###################################################################
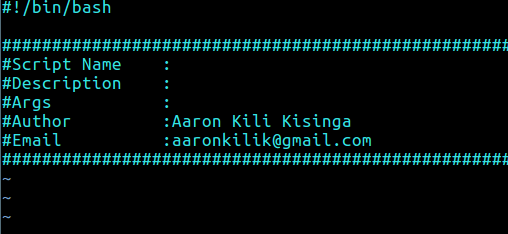
Create Custom Header Template for Scripts
The template above will automatically add the required “shebang” line: “#!/bin/bash” and your other custom headers. Note that in this example, you will manually add the script name, description and arguments when editing your script content.
Configure autocmd in Vimrc File
Now open your vim initialization file ~/.vimrc for editing and add the following line to it.
au bufnewfile *.sh 0r /home/aaronkilik/.vim/sh_header.temp
Where:
- au – means autocmd
- bufnewfile – event for opening a file that doesn’t exist for editing.
- *.sh – consider all files with .sh extension.
So the above line instructs vi/vim editor to read the contents of the template file (/home/aaronkilik/.vim/sh_header.temp) and insert it into every new .sh file opened by a user.
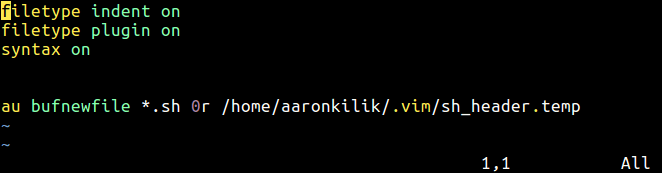
Configure Vimrc File
Test Custom Bash Script Header in New Script File
Now you can test if all is working by opening a new .sh file using vi/vim editor, and your custom header should be auto-added there.
$ vi test.sh
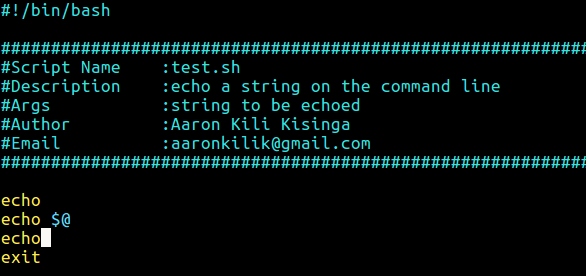
Verify Custom Header in New Scripts
For more information, see the Vim autocmd documentation.
Lastly, here are some useful guides concerning bash scripting and vim editor:
- 10 Useful Tips for Writing Effective Bash Scripts in Linux
- 10 Reasons Why You Should Use Vi/Vim Text Editor in Linux
- How to Password Protect a Vim File in Linux
- How to Enable Syntax Highlighting in Vi/Vim Editor
That’s all! If you have any questions or useful bash scripting tips and tricks to share, use the comment form below.
jm-shell – A Highly Informative and Customized Bash Shell
jm-shell is a free open source, small, highly informative and customized Bash shell, that gives you a great wealth of information about your shell activity as well as certain useful system information such as system load average, battery status of laptops/computers and much more.
Importantly, unlike Bash which only stores unique commands in a history file, for searching previously run commands – jm-shell records each and every shell activity in a log file.
Read Also: The Power of Linux “History Command” in Bash Shell
In addition, if your current directory is a code repository for any version control systems such as Git, Subversion, or Mercurial, it will provide information about your repositories (such as active branch).
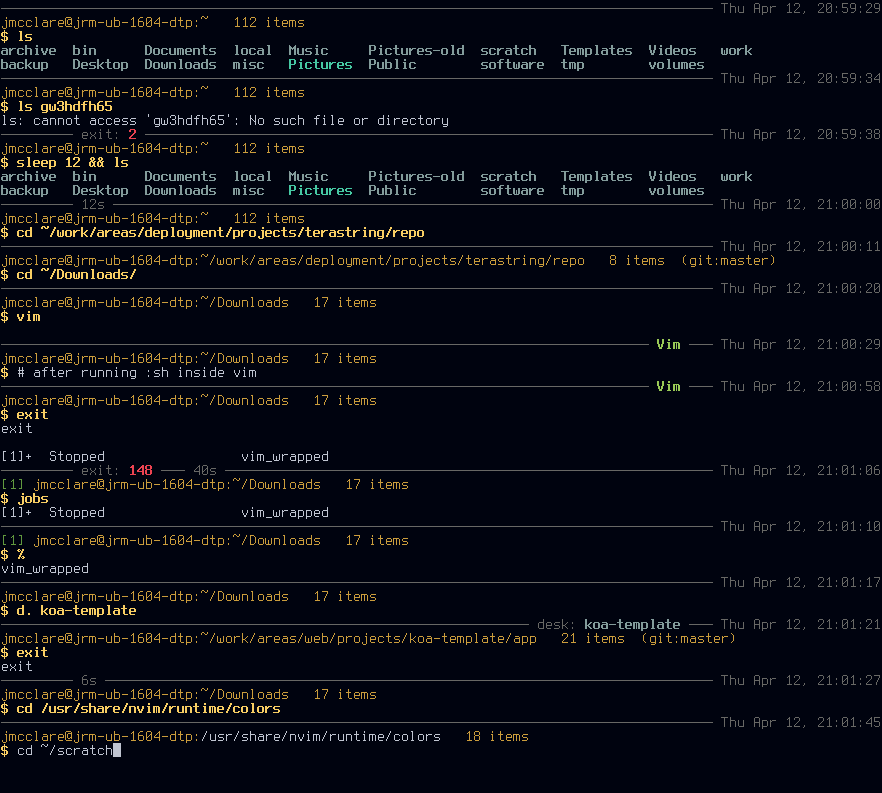
jm-shell Preview
Jm-shell Features
- Has a status line (divider) to separate commands.
- Displays the number of items in current directory.
- Shows current location in the filesystem.
- It maintains a shell log file – full history of your shell activity.
- Displays current system load average if higher than, in red if critical (higher than 2).
- Shows the time last command finished.
- It prints an error code of last command, if any.
- Displays total time of last command if higher than 4 seconds.
- Has a prompt in the form; username@hostname:path.
- Supports multiple prompt styles.
- Supports background jobs.
- It also displays laptop battery charge status, in case it’s not full and many other features.
How to Install jm-shell in Linux Systems
To install most recent version of jm-shell, you need to clone git repository of jm-shell sources to your system and move into the local repository using following commands.
$ git clone https://github.com/jmcclare/jm-shell.git
$ cd jm-shell
Next, configure Bash to use jm-shell by creating or copying a symlink from ps1, colors.sh, and color_unset.sh to the directory ~/.local/lib/bash (you need to create this directory if it doesn’t exist) as shown.
$ mkdir ~/.local/lib/bash	#create the directory if it doesn’t exist
$ cp -v colors.sh colors_unset.sh ps1 -t ~/.local/lib/bash/

Configure Bash to Use jm-shell
Then source the ps1 file by adding the following line in your ~/.bashrc shell initialization file.
source ~/.local/lib/bash/ps1
Then use the prompt_style variable in your ~/.bashrc to set your prompt styles (available styles include standard, tweaked, extensive, minimal or kirby) as shown.
prompt_style=extensive

Source PS1 and Set Prompt Style
Save and close ~/bashrc file, then source it to see the changes.
$ source ~/.bashrc
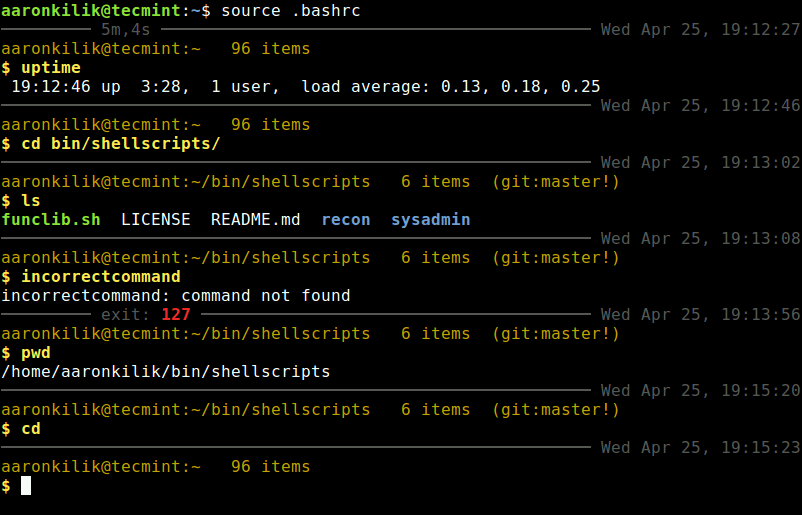
jm-shell for Linux
To change the shell log file location (default is ~/.local/share/bash/shell.log), use the BASHSHELLLOGFILEvariable in ~/.bashrc file.
BASHSHELLLOGFILE=~/.bash-shell.log
For more information, go to the jm-shell Github Repository: https://github.com/jmcclare/jm-shell
jm-shell is a highly informative tool that includes set of scripts for customizing your Bash shell, with numerous practical and informative features for daily usage. Try it out and give us your feedback via the comment section below.
Useful Linux Command Line Bash Shortcuts You Should Know
In this article, we will share a number of Bash command-line shortcuts useful for any Linux user. These shortcuts allow you to easily and in a fast manner, perform certain activities such as accessing and running previously executed commands, opening an editor, editing/deleting/changing text on the command line, moving the cursor, controlling processes etc. on the command line.
Although this article will mostly benefit Linux beginners getting their way around with command line basics, those with intermediate skills and advanced users might also find it practically helpful. We will group the bash keyboard shortcuts according to categories as follows.
Launch an Editor
Open a terminal and press Ctrl+X and Ctrl+E to open an editor (nano editor) with an empty buffer. Bash will try to launch the editor defined by the $EDITOR environment variable.
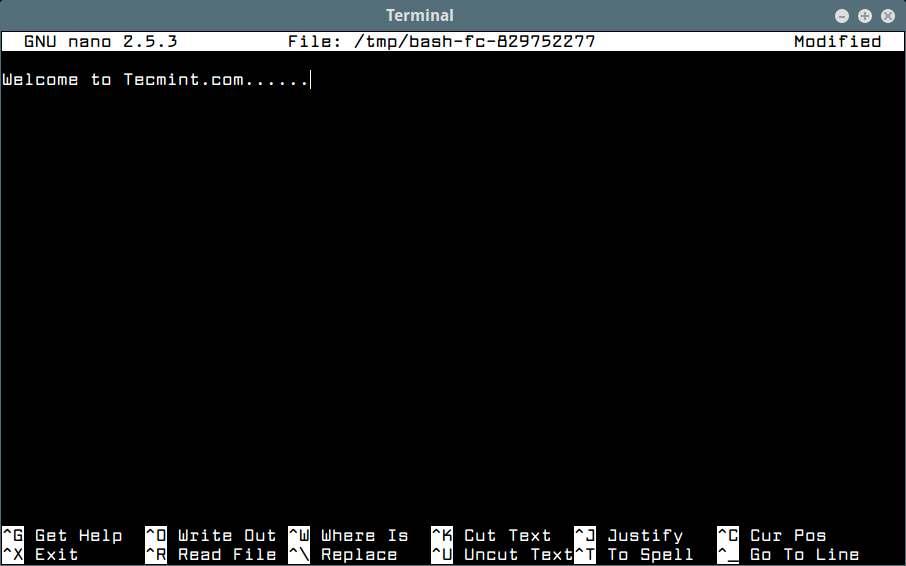
Nano Editor
Controlling The Screen
These shortcuts are used to control terminal screen output:
Ctrl+L – clears the screen (same effect as the “clear” command).Ctrl+S – pause all command output to the screen. If you have executed a command that produces verbose, long output, use this to pause the output scrolling down the screen.Ctrl+Q – resume output to the screen after pausing it with Ctrl+S.
Move Cursor on The Command Line
The next shortcuts are used for moving the cursor within the command-line:
Ctrl+A or Home – moves the cursor to the start of a line.Ctrl+E or End – moves the cursor to the end of the line.Ctrl+B or Left Arrow – moves the cursor back one character at a time.Ctrl+F or Right Arrow – moves the cursor forward one character at a time.Ctrl + Left Arrow or Alt+B or Esc and then B – moves the cursor back one word at a time.Ctrl + Right Arrow or Alt+C or Esc and then F – moves the cursor forward one word at a time.
Search Through Bash History
The following shortcuts are used for searching for commands in the bash history:
Up arrow key – retrieves the previous command. If you press it constantly, it takes you through multiple commands in history, so you can find the one you want. Use the Down arrow to move in the reverse direction through the history.Ctrl+P and Ctrl+N – alternatives for the Up and Down arrow keys, respectively.Ctrl+R – starts a reverse search, through the bash history, simply type characters that should be unique to the command you want to find in the history.Ctrl+S – launches a forward search, through the bash history.Ctrl+G – quits reverse or forward search, through the bash history.
Delete Text on the Command Line
The following shortcuts are used for deleting text on the command line:
Ctrl+D or Delete – remove or deletes the character under the cursor.Ctrl+K – removes all text from the cursor to the end of the line.Ctrl+X and then Backspace – removes all the text from the cursor to the beginning of the line.
Transpose Text or Change Case on the Command Line
These shortcuts will transpose or change the case of letters or words on the command line:
Ctrl+T – transposes the character before the cursor with the character under the cursor.Esc and then T – transposes the two words immediately before (or under) the cursor.Esc and then U – transforms the text from the cursor to the end of the word to uppercase.Esc and then L – transforms the text from the cursor to the end of the word to lowercase.Esc and then C – changes the letter under the cursor (or the first letter of the next word) to uppercase, leaving the rest of the word unchanged.
Working With Processes in Linux
The following shortcuts help you to control running Linux processes.
Ctrl+Z – suspend the current foreground process. This sends the SIGTSTP signal to the process. You can get the process back to the foreground later using the fg process_name (or %bgprocess_number like %1, %2 and so on) command.Ctrl+C – interrupt the current foreground process, by sending the SIGINT signal to it. The default behavior is to terminate a process gracefully, but the process can either honor or ignore it.Ctrl+D – exit the bash shell (same as running the exit command).
Learn more about: All You Need To Know About Processes in Linux [Comprehensive Guide]
Bash Bang (!) Commands
In the final part of this article, we will explain some useful ! (bang) operations:
!! – execute last command.!top – execute the most recent command that starts with ‘top’ (e.g. !).!top:p – displays the command that !top would run (also adds it as the latest command in the command history).!$ – execute the last word of the previous command (same as Alt +., e.g. if last command is ‘cat tecmint.txt’, then !$ would try to run ‘tecmint.txt’).!$:p – displays the word that !$ would execute.!* – displays the last word of the previous command.!*:p – displays the last word that !* would substitute.
For more information, see the bash man page:
$ man bash
That’s all for now! In this article, we shared some common and useful Bash command-line shortcuts and operations. Use the comment form below to make any additions or ask questions.
Bash-it – Bash Framework to Control Your Scripts and Aliases
Bash-it is a bundle of community Bash commands and scripts for Bash 3.2+, which comes with autocompletion, themes, aliases, custom functions, and more. It offers a useful framework for developing, maintaining and using shell scripts and custom commands for your daily work.
If you are using the Bash shell on a daily basis and looking for an easy way to keep track of all your scripts, aliases and functions, then Bash-it is for you! Stop polluting your ~/bin directory and .bashrc file, fork/clone Bash-it and begin hacking away.
How to Install Bash-it in Linux
To install Bash-it, first you need to clone the following repository to a location of your choice, for example:
$ git clone --depth=1 https://github.com/Bash-it/bash-it.git ~/.bash_it
Then run the following command to install Bash-it (it automatically backup your ~/.bash_profile or ~/.bashrc, depending on your OS). You will be asked “Would you like to keep your .bashrc and append bash-it templates at the end? [y/N]”, answer according to your preference.
$ ~/.bash_it/install.sh
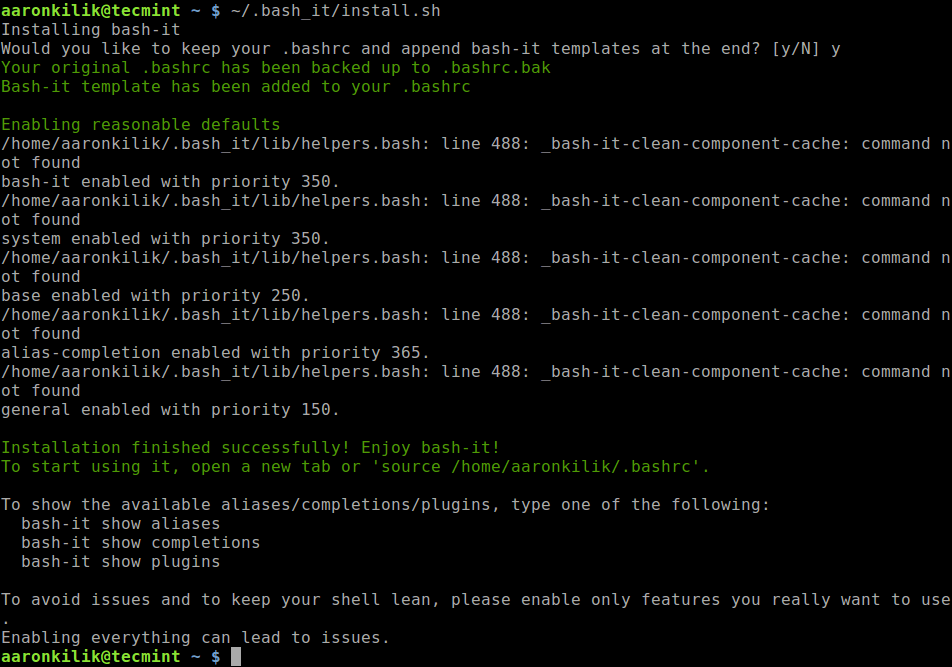
Install Bash-It in Linux
After installation, you can use
ls command to verify the
bash-it installation files and directories as shown.
$ ls .bash_it/

Verify Bash-It Installation
To start using Bash-it, open a new tab or run:
$ source $HOME/.bashrc
How to Customize Bash-it in Linux
To customize Bash-it, you need to edit your modified ~/.bashrc shell startup file. To list all installed and available aliases, completions, and plugins run the following commands, which should also shows you how to enable or disable them:
$ bash-it show aliases
$ bash-it show completions
$ bash-it show plugins
Next, we will demonstrate how to enable aliases, but before that, first list the current aliases with the following command.
$ alias
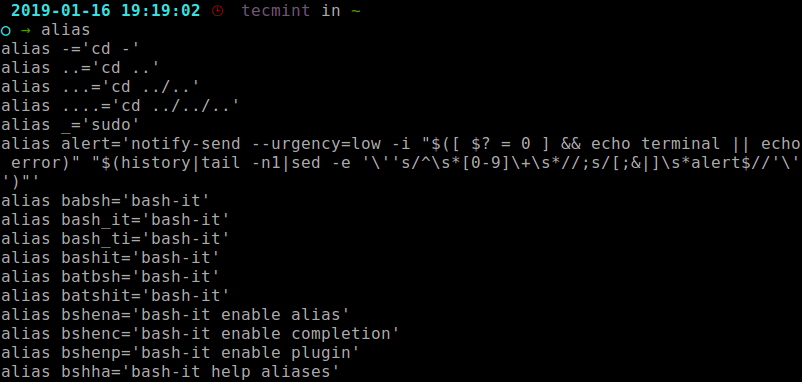
View Current Aliases in Linux
All the aliases are located in the $HOME/.bash_it/aliases/ directory. Now let’s enable the apt aliases as shown.
$ bash-it enable alias apt

Enable Alias in Linux
Then reload bash-it configs and check the current aliases once more.
$ bash-it reload
$ alias
From the output of the alias command, the apt aliases are now enabled.
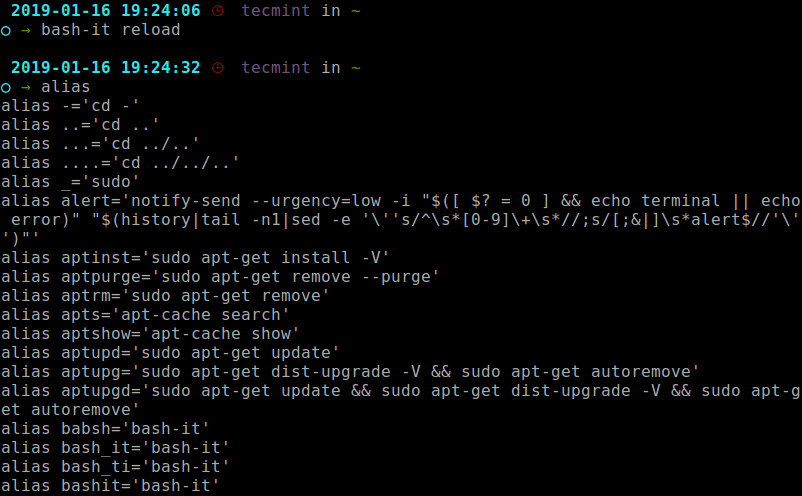
Check Current Aliases in Linux
You can disable newly enabled alias with the following commands.
$ bash-it disable alias apt
$ bash-it reload

Disable Aliases in Linux
In the next section, we will use similar steps to enable or disable completions ($HOME/.bash_it/completion/) and plugins ($HOME/..bash_it/plugins/). All enabled features are located in the $HOME/.bash_it/enableddirectory.
How to Manage Bash-it Theme
The default theme for bash-it is bobby; you can check this using the BASH_IT_THEME env variable as shown.
echo $BASH_IT_THEME

Check Bash-it Theme
You can find over 50+ Bash-it themes in the $BASH_IT/themes directory.
$ ls $BASH_IT/themes
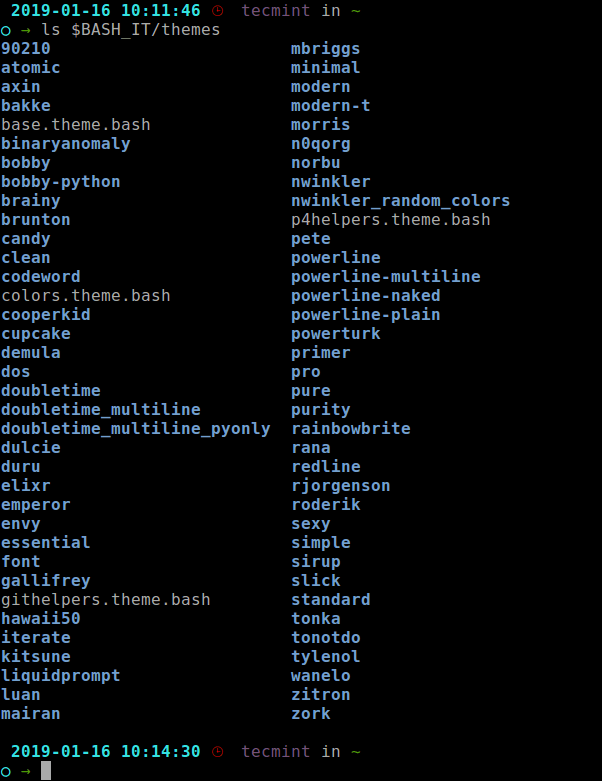
View Bash-It Themes
To preview all the themes in your shell before using any, run the following command.
$ BASH_PREVIEW=true bash-it reload
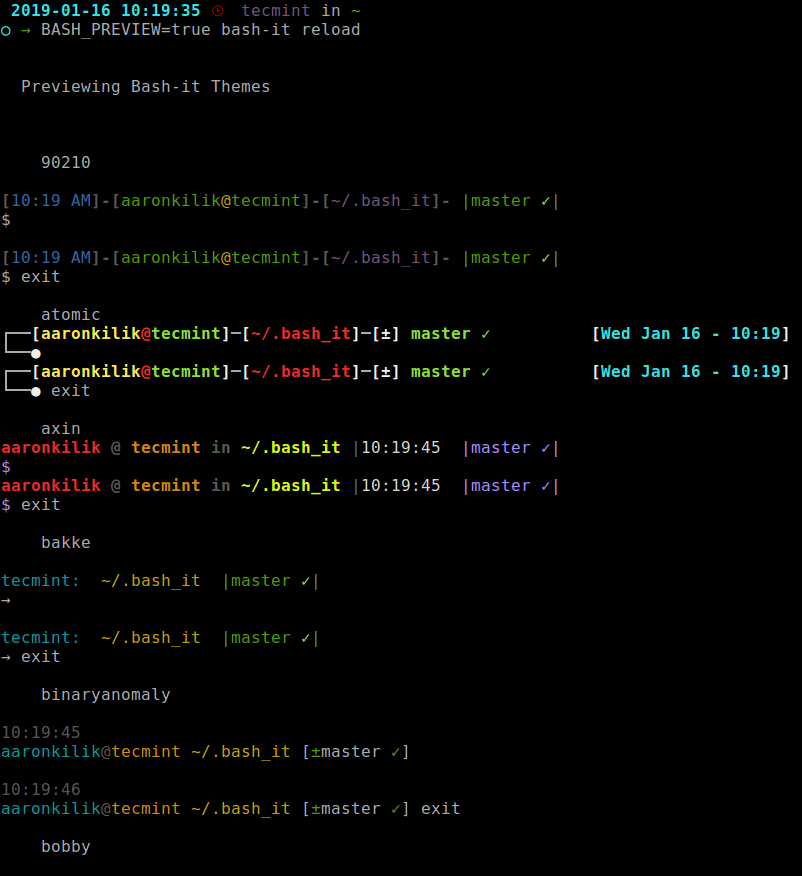
Preview All Bash-It Themes
Once you have identified a theme to use, open your .bashrc file and find the following line in it and change it value to the name of the theme you want, for example:
$ export BASH_IT_THEME='essential'

Change Bash-It Theme
Save the file and close, and source it as shown before.
$ source $HOME/.bashrc
Note: In case you have built a your own custom themes outside of $BASH_IT/themes directory, point the BASH_IT_THEME variable directly to the theme file:
export BASH_IT_THEME='/path/to/your/custom/theme/'
And to disable theming, leave the above env variable empty.
export BASH_IT_THEME=''
How to Search Plugins, Aliases or Completions
You can easily check out which of the plugins, aliases or completions are available for a specific programming language, framework or an environment.
The trick is simple: just search for multiple terms related to some of the commands you use frequently, for example:
$ bash-it search python pip pip3 pipenv
$ bash-it search git

Search in Bash-It
To view help messages for the aliases, completions and plugins, run:
$ bash-it help aliases
$ bash-it help completions
$ bash-it help plugins
You can create you own custom scripts, and aliases, in the following files in the respective directories:
aliases/custom.aliases.bash
completion/custom.completion.bash
lib/custom.bash
plugins/custom.plugins.bash
custom/themes//<custom theme name>.theme.bash
Updating and Uninstalling Bash-It
To update Bash-it to the latest version, simply run:
$ bash-it update
If you don’t like Bash-it anymore, you can uninstall it by running the following commands.
$ cd $BASH_IT
$ ./uninstall.sh
The uninstall.sh script will restore your previous Bash startup file. Once it has completed the operation, you need to remove the Bash-it directory from your machine by running.
$ rm -rf $BASH_IT
And remember to start a new shell for the recent changes to work or source it again as shown.
$ source $HOME/.bashrc
You can see all usage options by running:
$ bash-it help
Finally, Bash-it comes with a number of cool features related to Git.
For more information, see the Bash-it Github repository: https://github.com/Bash-it/bash-it.
That’s all! Bash-it is an easy and productive way to keep all your bash scripts and aliases under control. If you have any questions to ask, use the feedback form below.
Source