| Oracle® Fusion Middleware User's Guide for the Oracle Java CAPS Migration Tool 11g Release 1 (11.1.1.6.0) Part Number E24884-01 |
|
|
PDF · Mobi · ePub |
| Oracle® Fusion Middleware User's Guide for the Oracle Java CAPS Migration Tool 11g Release 1 (11.1.1.6.0) Part Number E24884-01 |
|
|
PDF · Mobi · ePub |
This chapter provides instructions on how to perform an Oracle Java CAPS to Oracle SOA Suite migration using the provided migration tool.
This chapter includes the following topics:
You can run the migration tool in either wizard mode or command-line mode. Wizard mode provides more visibility into the migration process by letting you view the Oracle Java CAPS components and file content that will be migrated and the Oracle SOA Suite files and content that will be generated. The migration tool uses the generated project EAR or ZIP file from the Oracle Java CAPS project in order to determine how to generate the Oracle SOA Suite project.
The output of the migration tool includes the necessary project components along with the Oracle JDeveloper project file (a JPR file). These artifacts include the composite.xml file, and can also include Spring component files, BPEL business process files, WSDL files, schema definitions, JAR files, Java classes, and so on.
Certain projects will require manual changes to the migration tool output, such as projects with outbound adapters other than File or JMS that would require you to replace the generated placeholders with Oracle SOA Suite adapters. Changes that you might need to make to the migration tool output are described in Chapter 4, "Post-Migration Tasks."
This section describes running the migration tool in both wizard and command-line modes. Make sure to complete the steps listed in Section 3.2.1, "Before you Begin" prior to running the migration tool
The Oracle Java CAPS files to be migrated need to be configured correctly and then rebuilt and redeployed with the new debug options described in the installation instructions. Perform the following before running the migration tool. The first two steps are optional, depending on the type of project you are migration, but the final step must be performed in order for the migration to process correctly.
While most JBI BPEL projects can be successfully migrated, you should verify the project components for compliance with Oracle SOA Suite supported standards. For information about the differences between Oracle Java CAPS JBI and Oracle SOA Suite and any changes you might need to make, see Section 1.2.5, "Support for JBI Project Migration."
If you are migrating a project that includes multiple business processes, the target namespace and business process name cannot be the same in order for the migration to process correctly. If you have multiple business processes with the same namespace, modify one of the names prior to the migration.
Oracle SOA Suite requires that the start activity be a message activity, while Oracle Java CAPS allows an assign activity to be the first activity. If you have any projects in which the start activity is not a message activity in a business process, modify the business process prior to beginning the migration.
If the prefixes in the assign activities have duplicate definitions with different namespaces, you need to resolve the ambiguity and assign the mapping with the correct prefix.
Some older Oracle Java CAPS projects have a File Write operation with no output container. These projects will not build in Oracle SOA Suite. If you have any projects with this condition, set the output variable before performing the migration.
In order to perform the migration for Repository projects, you need to rebuild and redeploy the projects using the updated debug flags, as described in To set up the Oracle Java CAPS environment. You then need to make the generated EAR file from the project accessible from the location of the migration tool. For JBI projects, the generated Composite Application Service Assembly (CASA) ZIP file needs to be made available. Both Repository and JBI projects need to be rebuilt and redeployed with the updated flags.
You can configure how much of the migration processing information is logged in the migration log files and is written to the console where you run the migration tool. Logging levels are set on three levels: global, per handler, and for the migration tool itself. The handler settings override the global settings.
You can specify the following log levels, listed in order from least information given to most:
SEVERE (failure messages only)
WARNING
INFO
CONFIG
FINE
FINER
FINEST (most detailed logging)
To configure the migration logging properties
Navigate to the location where you installed the Oracle Java CAPS Migration Tool.
Open logging.properties in a text editor.
Modify any of the properties listed in the following table, and then save and close the file.
| Property | Description |
|---|---|
| handlers | A comma-delimited list of log handler classes to use for the migration. The default is java.util.logging.FileHandler, java.util.logging.ConsoleHandler. This sends log messages to both the log file in the migration tool folder and to the console from which you run the migration tool. |
| level (global) | An indicator of the granularity of log messages across all loggers. This value is overridden by the log levels you specify for each logger later in the file. By default, it is commented out and not used. |
| FileHandler Properties | |
| pattern | A pattern indicating the name given to each log file. The default value is migrationtool_%u.log, which creates log files name migrationtool##.log where ## indicates a number that is incremented for each log file. |
| level | An indicator of the granularity of log messages for the events logged in the log file. |
| limit | The maximum number of bytes logged in each file. If this value is 0 (zero), there is no limit. |
| count | The number of output files to cycle through. |
| formatter | The name of the Java formatter class to use to format the messages in the log file. The default is java.util.logging.SimpleFormatter. |
| ConsoleHandler Properties | |
| level | An indicator of the granularity of log messages for the events displayed on the console. |
| formatter | The name of the Java formatter class to use to format the messages on the console. The default is java.util.logging.SimpleFormatter. |
| Migration Tool Properties | |
| level | An indicator of the granularity of log messages for the migration tool in general. |
The migration tool wizard provides a graphical view of the project components from the original Oracle Java CAPS project and the components generated by the migration tool for the Oracle SOA Suite project.
To migrate a project using the wizard
From a command line, run the following command:
java -jar MigrationTool.jar -soahome middleware_home -wizard
Note:
If the project being migrated includes JCDs that are either invoked by a business process or that are exposed as web services, add the-usejaxb option to the end of the command. The middleware_home directory is the path to oracle_common in your Oracle Fusion Middleware installation. For more information about these options, see Section 3.2.4.1, "Migration Tool Usage."On the migration wizard, enter the following information:
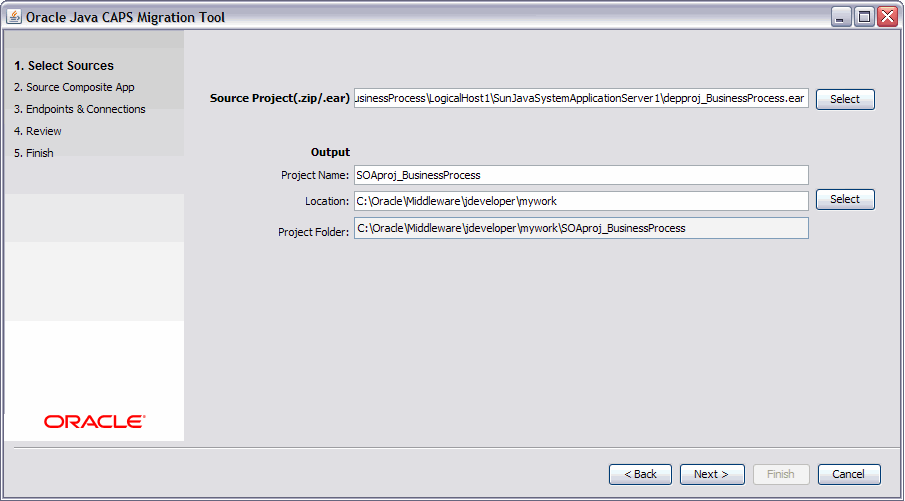
Source Folder: The path and filename of the Oracle Java CAPS EAR (Repository project) or ZIP (JBI project) file to migrate.
Project Name: This is automatically populated with the name of the EAR file or composite application.
Location: The directory where the migration tool will place the generated Oracle SOA Suite project. If not supplied, the current working directory is used.
Project Folder: This is automatically populated with the full path where the migrated Oracle SOA Suite project will be placed.
Figure 3-1 Oracle Java CAPS Migration Tool - Select Sources Page

Click Next.
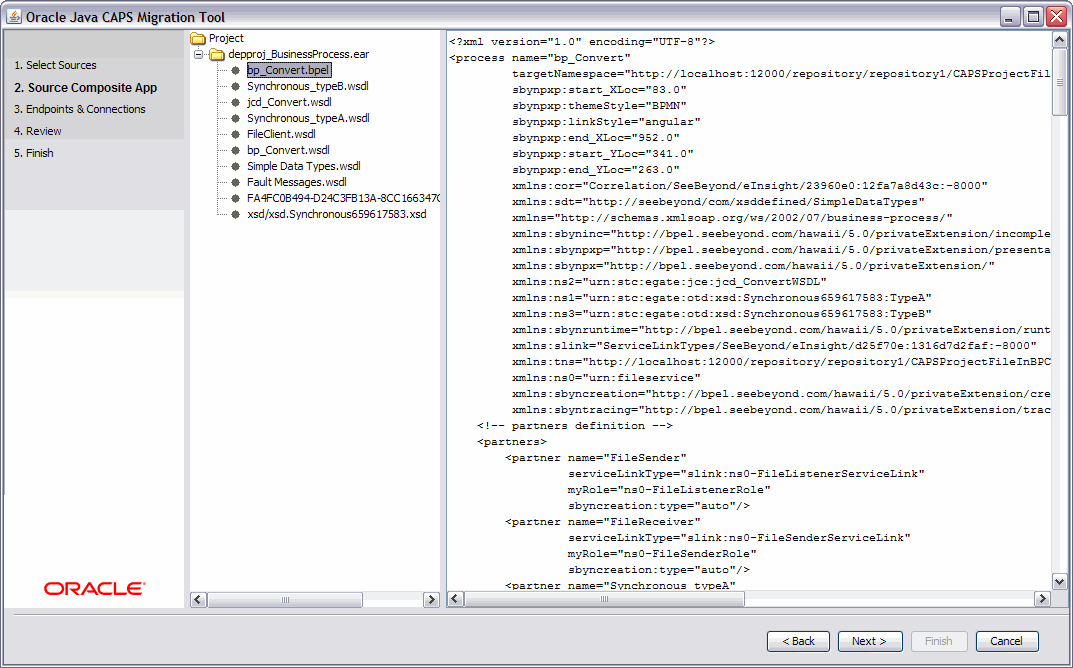
The migration tool parses through the project's ZIP or EAR file, extracts the required artifacts, and, if there are any business processes in the project, displays the artifacts in the wizard.
Figure 3-2 Oracle Java CAPS Migration Tool - Source Composite App Page

Do one of the following:
If there are no business processes in the project, skip to step 8.
If there are business processes in the project, verify the contents of the artifacts by clicking on the name in the canvas on the right.project explorer.
Click Next.
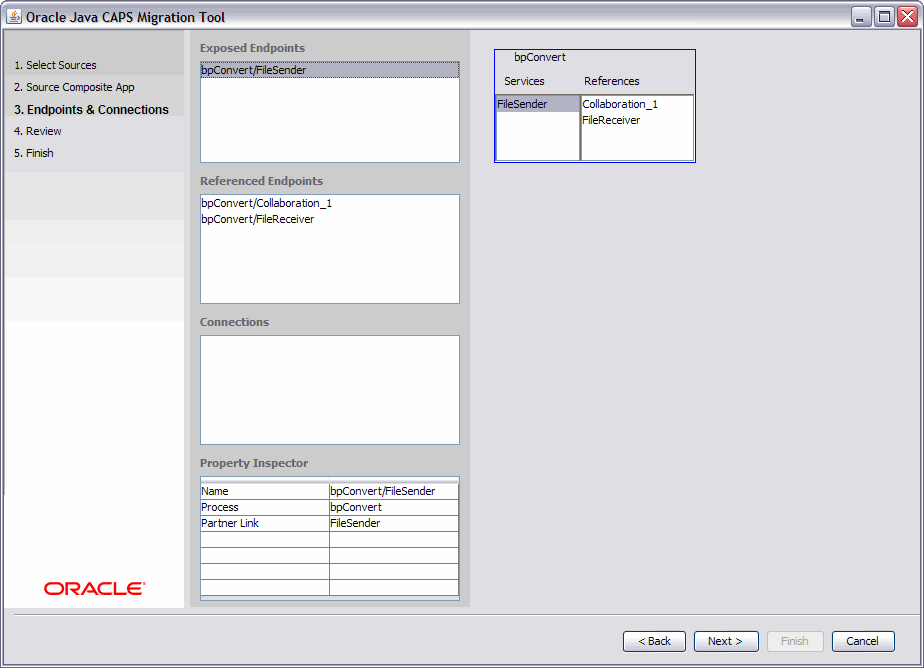
The wizard renders the parsing results to display the services, references, connections, and properties for the project (again for business processes only).
Figure 3-3 Oracle Java CAPS MIgration Tool - Endpoints & Connections

Click on any of the exposed or referenced endpoints to view their associated partner links. Click on a connection to highlight the two partner links for the connected components (this represents a "wire" in the Oracle SOA Suite composite).
Click Next.
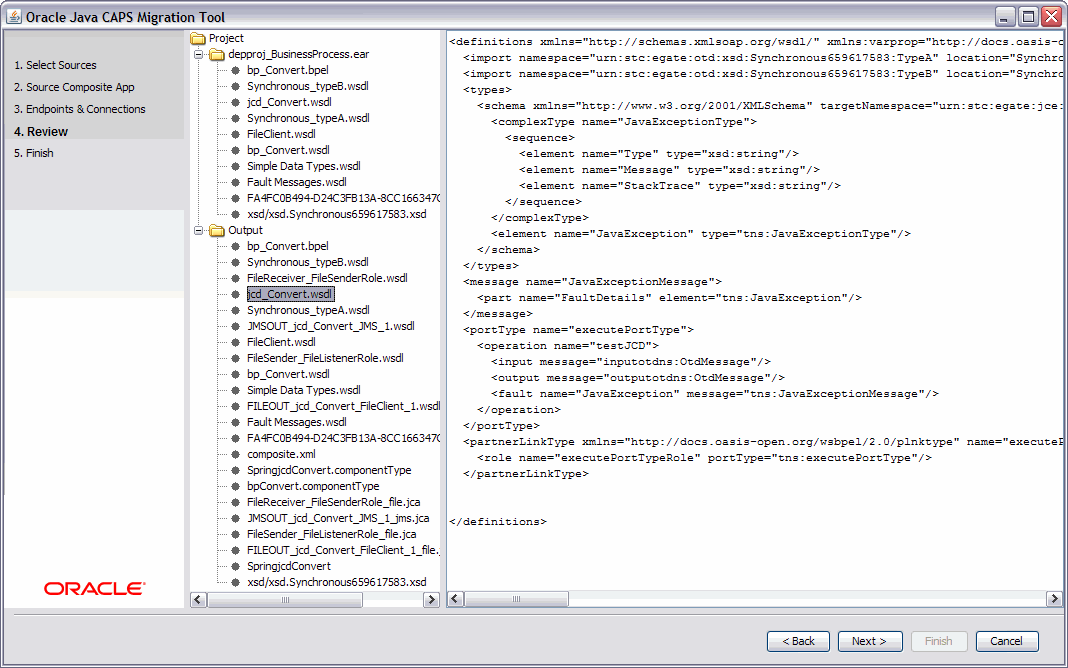
The migration tool generates the Oracle SOA Suite files and presents them to you for review. You can check the console window for processing messages and status. If an error or exception occurs, the migration process stops and the console displays the cause of the error.
On the Review page, review the content of the migrated artifacts and check the output project location for the files.
Figure 3-4 Oracle Java CAPS MIgration Tool - Review Page

When you are ready, click Next.
On the Finish page, click Finish.
When the migration process is complete, the wizard returns to the Select Sources page so you can begin migrating another project if desired. You can check the log files in the migration tool directory to review the migration process.
Certain components require manual changes or manual migration. For more information and instructions, see the following:
When you migrate an Oracle Java CAPS project using the command line mode instead of the wizard mode, you specify all of the required information in the command, and do not see a preview of the components and files that will be migrated or the components and files that will be generated. The console displays the processing status of the migration along with any warnings or errors that occur.
Syntax
java -jar MigrationTool.jar <-soahome parent_directory_of_oracle_common>

 [-archive path_of_input_file] [-projectname output_project]

 [-output output_folder] [-wizard] [-usejaxb]
Table 3-1 Command Line Options and Flags
| Option/Flag | Description |
|---|---|
|
-soahome |
The path to the Oracle Fusion Middleware Home directory. This is the parent directory to the This option is required for both command-line and wizard modes. |
|
-archive |
The path and filename of the Oracle Java CAPS EAR or ZIP file to migrate. |
|
-projectname |
The name of the Oracle SOA Suite project that the migration tool will generate. |
|
-output |
The directory where the migration tool will place the generated Oracle SOA Suite project. If not supplied, the current working directory is used. |
|
-wizard |
A flag that starts the migration tool in wizard mode, launching a graphical interface where you can specify migration options and view project components. When the command is run in this mode, all other options except |
|
-usejaxb |
A flag that modifies the original JCD interfaces to use JAXB objects directly to avoid copying them to and from Oracle Java CAPS OTD objects in the migrated code. This flag is only valid for migrating projects with JCDs that are invoked by a BPEL business process, and with standalone JCDs that are exposed as web services. The tool automatically enables this option when the JCD uses First Class (FCX) OTDs and replaces the FCX OTDs (XMLBeans) with the JAXB objects. When migrating projects that have HL7 OTDs as input and output in a JCD, do not use the this option. Caution: When the migration tool is run using the |
The migration tool converts most of the OTDs during the migration process. For any OTDs that are not automatically converted, the migration tool provides an option, -otd2xsd, that generates an XSD file based on the provided OTD class. The generated XSD file can then be used in a migrated BPEL business process or to generate JAXB objects using -xsd2jaxb option as describes in Section 3.4, "Converting XSD to JAXB Format." Use this method when an OTD does not have a corresponding schema definition.
Running the following command generates XSD files for the specified OTD. The XSDs are made available to the JAR files supplied with the -otdclasspath option.
java -jar MigrationTool.jar <-soahome parent_directory_of_oracle_common>

 <-otd2xsd> <-otdclass OTD class name to search in the supplied jar files>

 <-otdclasspath comma separated list of OTD and dependent jar files>
Table 3-2 Command Line Options and Flags
| Option/Flag | Description |
|---|---|
|
-soahome |
The path to the Oracle Fusion Middleware Home directory. This is the parent directory to the |
|
-otd2xsd |
An indicator to the migration tool to run in OTD to XSD conversion mode. |
|
-otdclass |
The class name of the OTD to be converted to XSD. |
|
-otdclasspath |
A comma-separated list of the absolute paths and filenames of the OTD and dependent JAR files. |
Example 3-2 Converting OTD to XSD
java -jar MigrationTool.jar -soahome C:\Oracle\Middleware\ -otd2xsd -otdclass

 xsd.xsdICP_ICPOutput.ICPOutput -otdclasspath

 C:/migration_projects/xsdICP_ICPOutput.jar,

 C:/migration_projects/xsdICP_ICPOutput2.jar
The above text is wrapped for readability; enter the command all in one line with no spaces between the JAR file names. After running the OTD to XSD conversion, you can either convert the XSD to JAXB objects, as described in Section 3.4, "Converting XSD to JAXB Format," or add the XSD files to the migrated projects in Oracle JDeveloper.
If you use the migration tool to convert a project that uses Java Collaboration Definitions with FCX OTDs used as other OTDs, the migrated project fails at runtime because the FCX OTDs generated by Oracle Java CAPS are not compatible with Oracle SOA Suite. You need to run the migration tool again in XSD to JAXB conversion mode, which converts the FCX OTDs to JAXB objects.
Running the following command generates a JAXB object using the existing FCX OTD XML schema:
java -jar MigrationTool.jar <-soahome parent_directory_of_oracle_common>

 <-xsd2jaxb> <-jaxboutput JAXB output folder> <-schema XSD schema location>

 [-jaxbpackage package for generated JAXB objects]
Table 3-3 Command Line Options and Flags
| Option/Flag | Description |
|---|---|
|
-soahome |
The path to the Oracle Fusion Middleware Home directory. This is the parent directory to the |
|
-xsd2jaxb |
An indicator to the migration tool to run in XSD to JAXB conversion mode. |
|
-jaxboutput |
The absolute path to the location where you want the generated JAXB objects to be stored. |
|
-schema |
The absolute path and file name of the XSD file to use for the conversion. |
|
-jaxbpackage |
The Java package for the generated JAXB objects. This parameter is optional. |
Example 3-3 Converting FCX OTDs to JAXB
java -jar MigrationTool.jar -soahome C:\Oracle\Middleware\ -xsd2jaxb -jaxboutput

 C:\javacaps\migration_projects\FCX_JAXB -schema

 C:\javacaps\migration_projects\JavaCAPS_FCX.xsd -jaxbpackage

 com.oracle.caps.conversion
The above text is wrapped for readability. After running the XSD to JAXB conversion, you need to add the JAXB objects to the migrated Oracle SOA Suite project and then modify the Spring components that contain the migrated JCD code to use the JAXB objects in place of the FCX OTD.