
2 Getting Started - Reference Documentation
Authors: Graeme Rocher, Peter Ledbrook, Marc Palmer, Jeff Brown, Luke Daley, Burt Beckwith, Lari Hotari
Version: 3.0.1
Table of Contents
2 Getting Started
2.1 Installation Requirements
Before installing Grails 3.0 you will need as a minimum a Java Development Kit (JDK) installed version 1.7 or above. Download the appropriate JDK for your operating system, run the installer, and then set up an environment variable calledJAVA_HOME pointing to the location of this installation.To automate the installation of Grails we recommend the GVM tool which greatly simplifies installing and managing multiple Grails versions.For manual installation, we recommend the video installation guides from grailsexample.net:
These will show you how to install Grails too, not just the JDK.A JDK is required in your Grails development environment. A JRE is not sufficient.On some platforms (for example OS X) the Java installation is automatically detected. However in many cases you will want to manually configure the location of Java. For example:
export JAVA_HOME=/Library/Java/Home
export PATH="$PATH:$JAVA_HOME/bin"2.2 Downloading and Installing
The first step to getting up and running with Grails is to install the distribution.The best way to install Grails on *nix systems is with the GVM tool which greatly simplifies installing and managing multiple Grails versions.For manual installation follow these steps:- Download a binary distribution of Grails and extract the resulting zip file to a location of your choice
- Set the GRAILS_HOME environment variable to the location where you extracted the zip
- On Unix/Linux based systems this is typically a matter of adding something like the following
export GRAILS_HOME=/path/to/grailsto your profile - On Windows this is typically a matter of setting an environment variable under
My Computer/Advanced/Environment Variables - Then add the
bindirectory to yourPATHvariable: - On Unix/Linux based systems this can be done by adding
export PATH="$PATH:$GRAILS_HOME/bin"to your profile - On Windows this is done by modifying the
Pathenvironment variable underMy Computer/Advanced/Environment Variables
grails -version in the terminal window and see output similar to this:bc.
Grails version: 3.0.0
2.3 Creating an Application
To create a Grails application you first need to familiarize yourself with the usage of thegrails command which is used in the following manner:grails [command name]
grails create-app helloworldcd helloworld
2.4 A Hello World Example
Let's now take the new project and turn it into the classic "Hello world!" example. First, change into the "helloworld" directory you just created and start the Grails interactive console:
$ cd helloworld
$ grails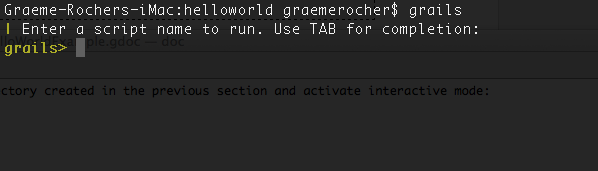 What we want is a simple page that just prints the message "Hello World!" to the browser. In Grails, whenever you want a new page you just create a new controller action for it. Since we don't yet have a controller, let's create one now with the create-controller command:
grails> create-controller hellocreate-* commands. Type a few more letters of the command name and then <tab> again to finish.The above command will create a new controller in the grails-app/controllers/helloworld directory called HelloController.groovy. Why the extra helloworld directory? Because in Java land, it's strongly recommended that all classes are placed into packages, so Grails defaults to the application name if you don't provide one. The reference page for create-controller provides more detail on this.We now have a controller so let's add an action to generate the "Hello World!" page. The code looks like this:package helloworldclass HelloController { def index() { render "Hello World!" } }
grails> run-appgrails-app/conf/application.yml:server:
'context-path': '/helloworld'
If you see the error "Server failed to start for port 8080: Address already in use", then it means another server is running on that port. You can easily work around this by running your server on a different port using run-app -port=9090. '9090' is just an example: you can pretty much choose anything within the range 1024 to 49151.
The result will look something like this: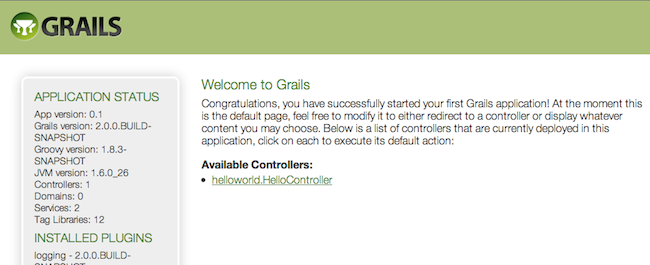 This is the Grails intro page which is rendered by the
 grails-app/view/index.gsp file. It detects the presence of your controllers and provides links to them. You can click on the "HelloController" link to see our custom page containing the text "Hello World!". Voila! You have your first working Grails application.One final thing: a controller can contain many actions, each of which corresponds to a different page (ignoring AJAX at this point). Each page is accessible via a unique URL that is composed from the controller name and the action name: /<appname>/<controller>/<action>. This means you can access the Hello World page via /helloworld/hello/index, where 'hello' is the controller name (remove the 'Controller' suffix from the class name and lower-case the first letter) and 'index' is the action name. But you can also access the page via the same URL without the action name: this is because 'index' is the default action . See the end of the controllers and actions section of the user guide to find out more on default actions.
2.5 Using Interactive Mode
Grails 3.0 features an interactive mode which makes command execution faster since the JVM doesn't have to be restarted for each command. To use interactive mode simple type 'grails' from the root of any projects and use TAB completion to get a list of available commands. See the screenshot below for an example: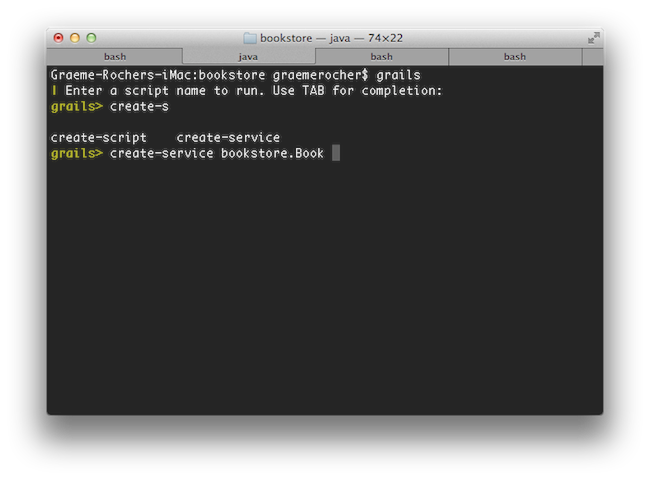 For more information on the capabilities of interactive mode refer to the section on Interactive Mode in the user guide.
2.6 Getting Set Up in an IDE
IntelliJ IDEA
IntelliJ IDEA is an excellent IDE for Grails 3.0 development. It comes in 2 editions, the free community edition and the paid-for ultimate edition.The community edition can be used for most things, although GSP syntax higlighting is only part of the ultimate edition. To get started with Intellij IDEA and Grails 3.0 simply go toFile / Import Project and point IDEA at your build.gradle file to import and configure the project.Eclipse
We recommend that users of Eclipse looking to develop Grails application take a look at Groovy/Grails Tool Suite, which offers built in support for Grails including automatic classpath management, a GSP editor and quick access to Grails commands.Like Intellij you can import a Grails 3.0 project using the Gradle project integration.NetBeans
NetBeans provides a Groovy/Grails plugin that automatically recognizes Grails projects and provides the ability to run Grails applications in the IDE, code completion and integration with the Glassfish server. For an overview of features see the NetBeans Integration guide on the Grails website which was written by the NetBeans team.TextMate, Sublime, VIM etc.
There are several excellent text editors that work nicely with Groovy and Grails. See below for references:- A TextMate bundle exists Groovy / Grails support in Textmate
- A Sublime Text plugin can be installed via Sublime Package Control for the Sublime Text Editor.
- See this post for some helpful tips on how to setup VIM as your Grails editor of choise.
- An Atom Package is available for use with the Atom editor
2.7 Convention over Configuration
Grails uses "convention over configuration" to configure itself. This typically means that the name and location of files is used instead of explicit configuration, hence you need to familiarize yourself with the directory structure provided by Grails.Here is a breakdown and links to the relevant sections:grails-app- top level directory for Groovy sourcesconf- Configuration sources.controllers- Web controllers - The C in MVC.domain- The application domain.i18n- Support for internationalization (i18n).services- The service layer.taglib- Tag libraries.utils- Grails specific utilities.views- Groovy Server Pages - The V in MVC.scripts- Code generation scripts.src/main/groovy- Supporting sourcessrc/test/groovy- Unit and integration tests.
2.8 Running an Application
Grails applications can be run with the built in Tomcat server using the run-app command which will load a server on port 8080 by default:grails run-app
server.port argument:grails -Dserver.port=8090 run-app
$ grails
grails> run-app
| Server running. Browse to http://localhost:8080/helloworld
| Application loaded in interactive mode. Type 'stop-app' to shutdown.
| Downloading: plugins-list.xml
grails> stop-app
| Stopping Grails server
grails> run-app
| Server running. Browse to http://localhost:8080/helloworld
| Application loaded in interactive mode. Type 'stop-app' to shutdown.
| Downloading: plugins-list.xml
2.9 Testing an Application
Thecreate-* commands in Grails automatically create unit or integration tests for you within the src/test/groovy directory. It is of course up to you to populate these tests with valid test logic, information on which can be found in the section on Testing.To execute tests you run the test-app command as follows:grails test-app
2.10 Deploying an Application
Grails applications can be deployed in a number of different ways.If you are deploying to a traditional container (Tomcat, Jetty etc.) you can create a Web Application Archive (WAR file), and Grails includes the war command for performing this task:grails war
build/libs directory which can then be deployed as per your container's instructions.Note that by default Grails will include an embeddable version of Tomcat inside the WAR file, this can cause problems if you deploy to a different version of Tomcat. If you don't intend to use the embedded container then you should change the scope of the Tomcat dependencies to provided prior to deploying to your production container in build.gradle:provided "org.springframework.boot:spring-boot-starter-tomcat"development environment unless overridden, the war command runs in the production environment by default. You can override this like any script by specifying the environment name, for example:grails dev war
grails war
java -Dgrails.env=prod -jar build/libs/mywar-0.1.war
-server option and with sufficient memory allocation. A good set of VM flags would be:-server -Xmx768M -XX:MaxPermSize=256m
2.11 Supported Java EE Containers
Grails runs on any container that supports Servlet 3.0 and above and is known to work on the following specific container products:- Tomcat 7
- GlassFish 3 or above
- Resin 4 or above
- JBoss 6 or above
- Jetty 8 or above
- Oracle Weblogic 12c or above
- IBM WebSphere 8.0 or above
It's required to set "-Xverify:none" in "Application servers > server > Process Definition > Java Virtual Machine > Generic JVM arguments" for older versions of WebSphere. This is no longer needed for WebSphere version 8 or newer.Some containers have bugs however, which in most cases can be worked around. A list of known deployment issues can be found on the Grails wiki.
2.12 Creating Artefacts
Grails ships with a few convenience targets such as create-controller, create-domain-class and so on that will create Controllers and different artefact types for you.These are just for your convenience and you can just as easily use an IDE or your favourite text editor.For example to create the basis of an application you typically need a domain model:
grails create-app helloworld
cd helloworld
grails create-domain-class book
grails-app/domain/helloworld/Book.groovy such as:package helloworldclass Book {
}create-* commands that can be explored in the command line reference guide.To decrease the amount of time it takes to run Grails scripts, use the interactive mode.
2.13 Generating an Application
To get started quickly with Grails it is often useful to use a feature called Scaffolding to generate the skeleton of an application. To do this use one of thegenerate-* commands such as generate-all, which will generate a controller (and its unit test) and the associated views:grails generate-all helloworld.Book