
PgAdmin4 is a easy to use web interface for managing PostgreSQL databases. It can be used on multiple platforms such as Linux, Windows and Mac OS X. In pgAdmin 4 there is migration from bootstrap 3 to bootstrap 4.
In this tutorial we are going to install pgAdmin 4 on a CentOS 7 system.
Note: This tutorial assumes that you already have PostgreSQL 9.2 or above installed on your CentOS 7. For instructions how to install it, you can follow our guide: How to install PostgreSQL 10 on CentOS and Fedora.
How to Install pgAdmin 4 in CentOS 7
This step should have been completed upon the installation of PostgreSQL, but if you haven’t, you can complete it with:
# yum -y install https://download.postgresql.org/pub/repos/yum/11/redhat/rhel-7-x86_64/pgdg-centos11-11-2.noarch.rpm
# yum -y install pgadmin4
During the installation, due to dependencies, the following two will be installed as well – pgadmin4-web and httpd web server.
How to Configure pgAdmin 4 in CentOS 7
There are few minor configuration changes that need to be done to have pgAdmin4 running. First we will rename the sample conf file from pgadmin4.conf.sample to pgadmin4.conf:
# mv /etc/httpd/conf.d/pgadmin4.conf.sample /etc/httpd/conf.d/pgadmin4.conf
Adjust the file so it looks like this:
<VirtualHost *:80>
LoadModule wsgi_module modules/mod_wsgi.so
WSGIDaemonProcess pgadmin processes=1 threads=25
WSGIScriptAlias /pgadmin4 /usr/lib/python2.7/site-packages/pgadmin4-web/pgAdmin4.wsgi

<Directory /usr/lib/python2.7/site-packages/pgadmin4-web/>
        WSGIProcessGroup pgadmin
        WSGIApplicationGroup %{GLOBAL}
        <IfModule mod_authz_core.c>
                # Apache 2.4
                Require all granted
        </IfModule>
        <IfModule !mod_authz_core.c>
                # Apache 2.2
                Order Deny,Allow
                Deny from All
                Allow from 127.0.0.1
                Allow from ::1
        </IfModule>
</Directory>
</VirtualHost>
Next we will create logs and lib directories for pgAdmin4 and set their ownership:
# mkdir -p /var/lib/pgadmin4/
# mkdir -p /var/log/pgadmin4/
# chown -R apache:apache /var/lib/pgadmin4
# chown -R apache:apache /var/log/pgadmin4
And then we can extend the contents of our config_distro.py.
# vi /usr/lib/python2.7/site-packages/pgadmin4-web/config_distro.py
And add the following lines:
LOG_FILE = '/var/log/pgadmin4/pgadmin4.log'
SQLITE_PATH = '/var/lib/pgadmin4/pgadmin4.db'
SESSION_DB_PATH = '/var/lib/pgadmin4/sessions'
STORAGE_DIR = '/var/lib/pgadmin4/storage'
Finally we will create our user account, with which we will authenticate in the web interface. To do this, run:
# python /usr/lib/python2.7/site-packages/pgadmin4-web/setup.py
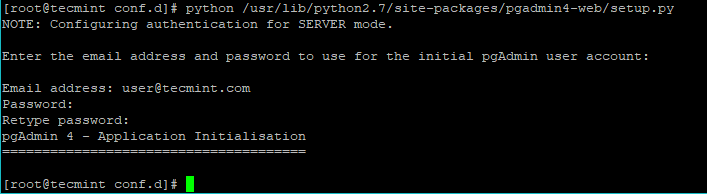
Create PgAdmin4 User
Now you can access your server’s http://ip-address/pgadmin4 or http://localhost/pgadmin4 to reach the pgAdmin4 interface:
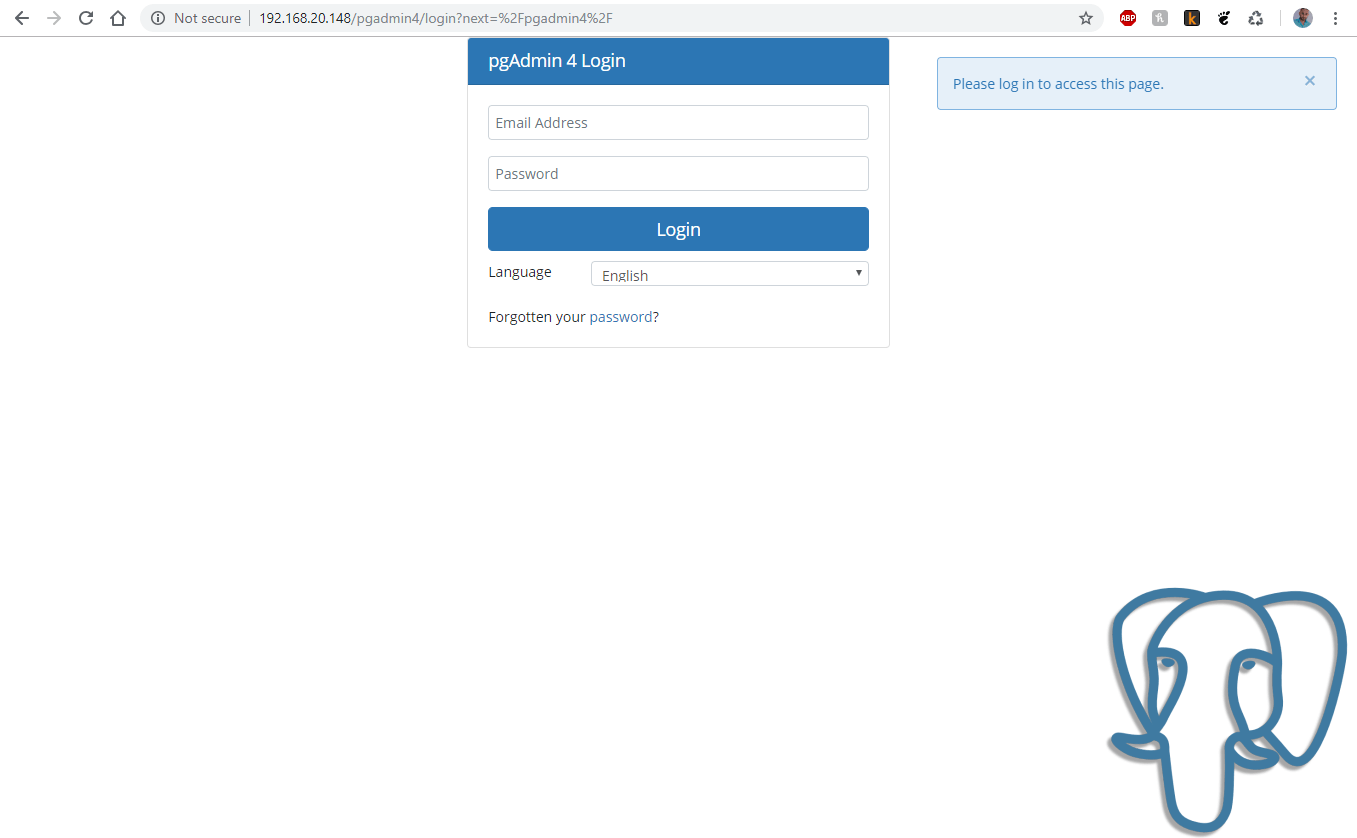
PgAdmin4 Login
To authenticate, use the email address and password that you have used earlier. Once authenticate, you should see the pgAdmin4 interface:
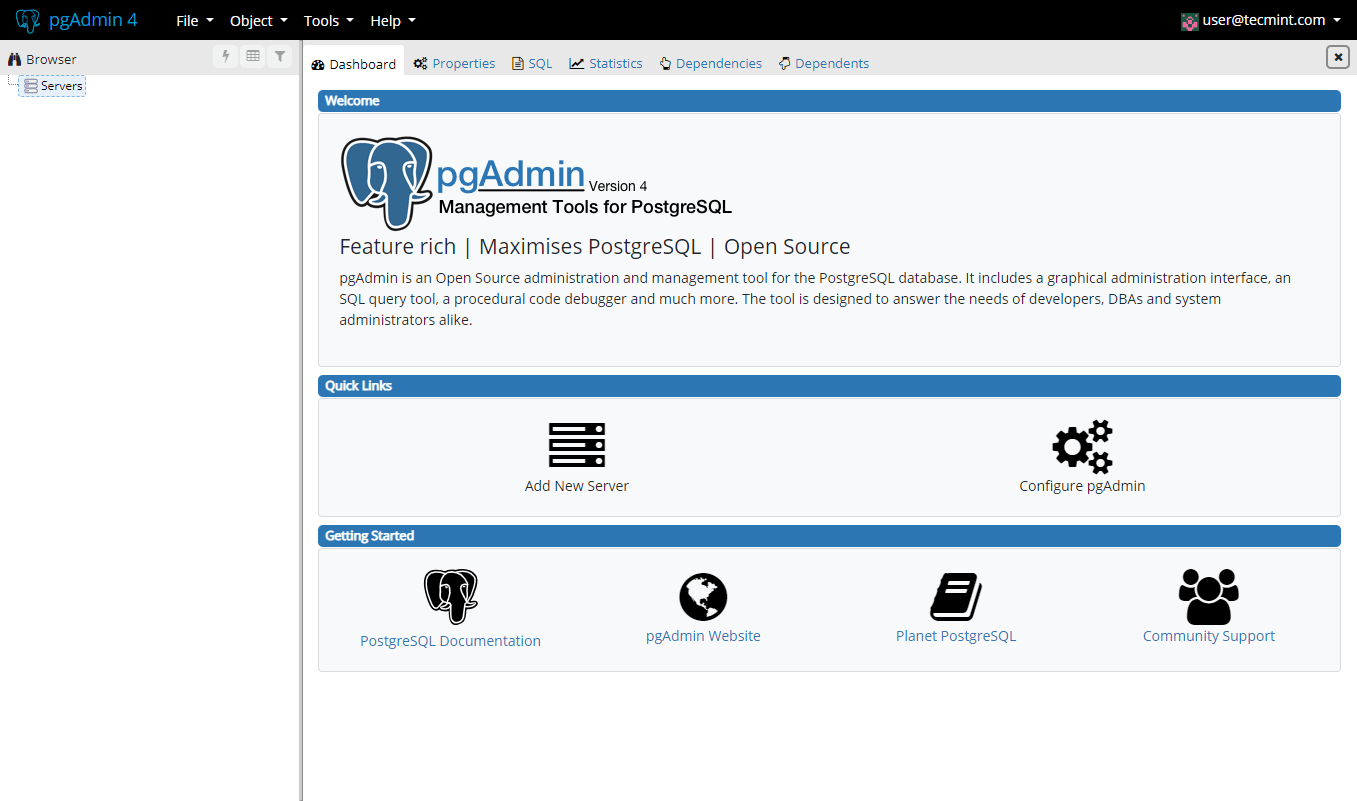
PgAdmin4 Dashboard
At your first login, you will need to add a new server to manage. Click on “Add New Server”. You will need to configure the PostgresQL connection. In the first tab “General”, enter the following settings:
- Name – give name of the server you are configuring.
- Comment – leave a comment to give description of the instance.
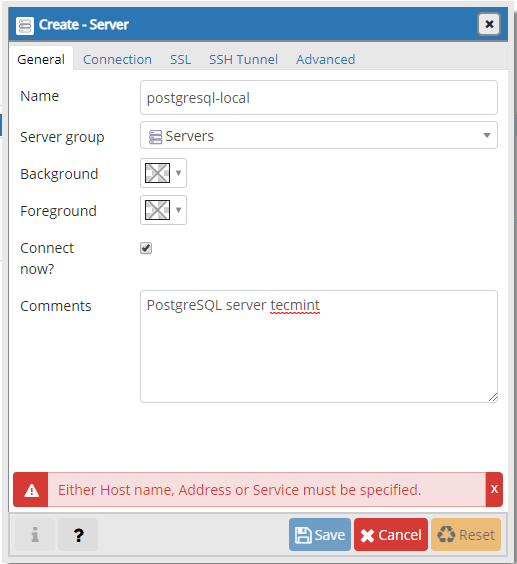
Add New Server to PgAdmin4
The second tab “Connection” is more important one, as you will have to enter:
- Host – host/IP address of the PostgreSQL instance.
- Port – default port is 5432.
- Maintenance database – this should be postgres.
- Username – the username which will be connecting. You can use postgres user.
- Password – password for the above user.
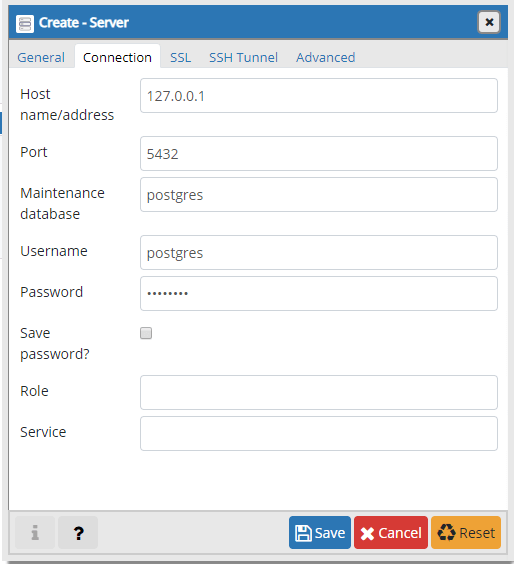
PgAdmin4 Server Connection Settings
When you have filled everything, Save the changes. If the connection was successful, you should see the following page:
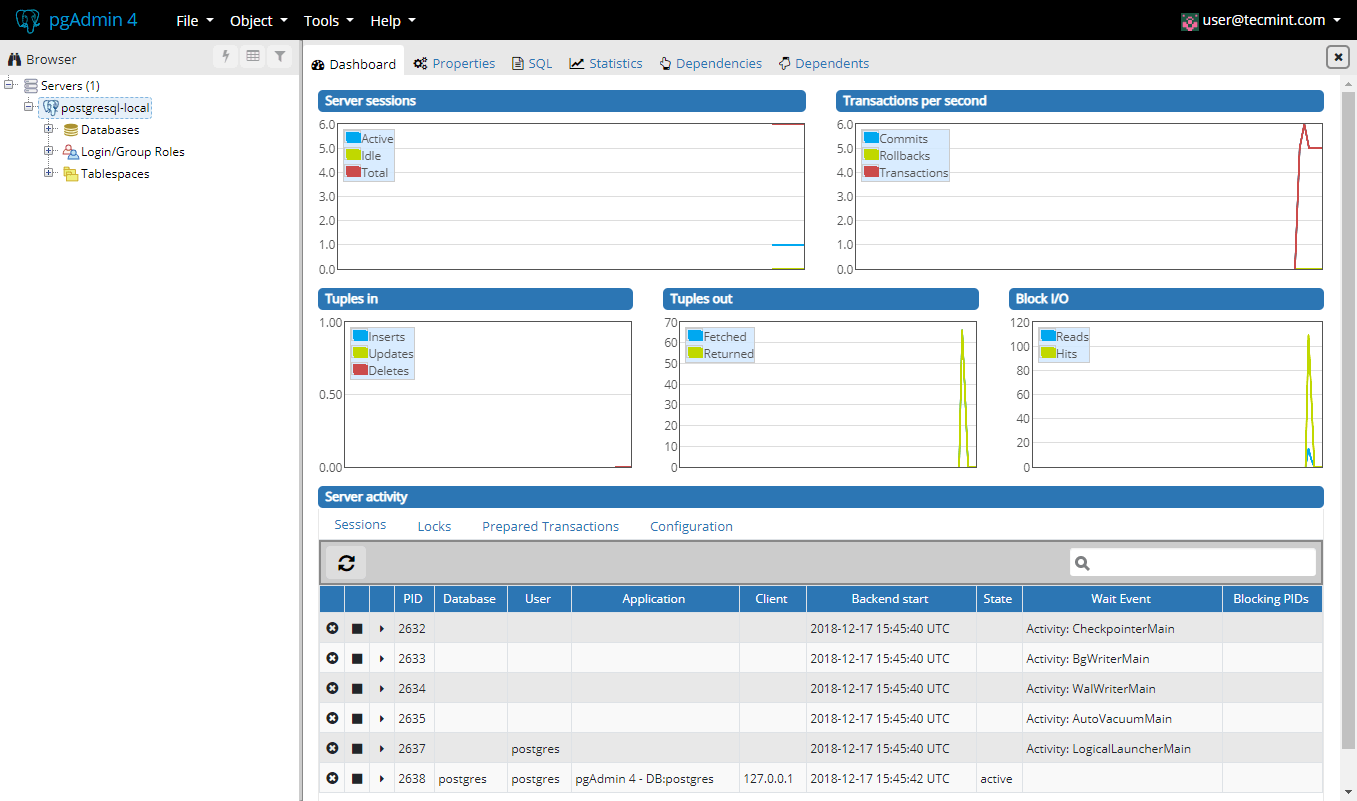
PgAdmin4 Database Summary
This was it. Your pgAdmin4 installation is complete and you can start managing your PostgreSQL database.