
This tutorial will guide you on how to install Java 9 Standard Edition Development Kit (JDK) in Debian and Ubuntu based Linux distributions using PPA and from sources.
Installing Java 9 Using PPA
To install latest Java 9 version, first add following webupd8team/java PPA to your system and update the repository package database as shown.
$ sudo add-apt-repository ppa:webupd8team/java
$ sudo apt-get update
Once PPA has been added and updated, now search for the packages with name oracle-java9 as shown.
$ apt-cache search oracle-java9

Search Java Packages
The above output confirms that the Java 9 is available to install using the following command.
$ sudo apt-get install oracle-java9-installer
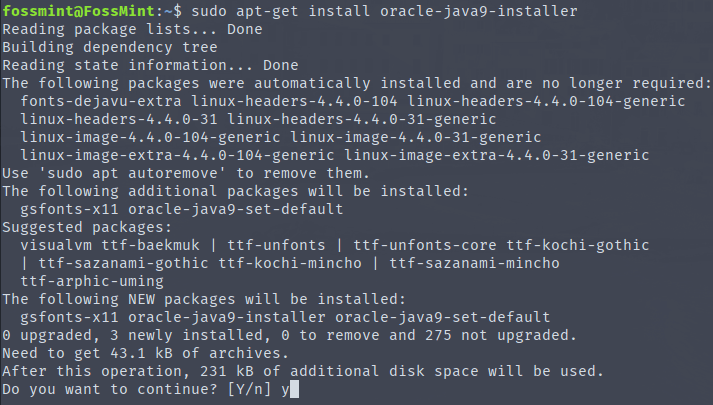
Install Java 9 in Ubuntu
If you have more than one Java installed on your system, you can install oracle-java9-set-default package to set Java 9 as default as shown.
$ sudo apt-get install oracle-java9-set-default
Please note that the same webupd8team/java PPA also offers older versions of Java packages like Java 8 and Java 7.
Installing Java 9 from Sources
In order to install Java 9 SE SDK in your system, on a Desktop Linux machine, first open a browser and navigate to Java SE official download page.
Here, select Java SE Development Kit 9, hit on Downloads link and check Accept License Agreement in order to start the download process of the latest version of the tarball package.
Java offers no pre-compiled packages in the form of .deb packages for Debian based Linux distributions, so we need to use the gzipped tarball file to perform the installation.
If you install Java on a headless machine or in servers, download Java 9 SE JDK archive via wget command line utility, by issuing the below command.
$ wget --no-cookies --no-check-certificate --header "Cookie: oraclelicense=accept-securebackup-cookie" http://download.oracle.com/otn-pub/java/jdk/9.0.4+11/c2514751926b4512b076cc82f959763f/jdk-9.0.4_linux-x64_bin.tar.gz
After the download completes, navigate to the directory where Java package has been downloaded and issue the below commands to start installing Java software.
The commands executed below will decompress Java tarball archive directly into /opt directory. Enter java extracted path from /opt directory and issue ls command to list the content of the directory. Java executable files are located in bin directory.
$ sudo tar xfz jdk-9.0.4_linux-x64_bin.tar.gz -C /opt/
$ cd /opt/jdk-9.0.4/
$ ls

Java Executable Files
Next, insert Java environment variables and the executable files path into your system $PATH variable, by issuing the below commands that will create a new file named java.sh into system profile.
This method ensures that Java environment variables and executables will be accessible system-wide.
$ sudo echo 'export JAVA_HOME=/opt/jdk-9.0.4/' | sudo tee /etc/profile.d/java.sh
$ sudo echo 'export PATH=$PATH:/opt/jdk-9.0.4/bin' | sudo tee -a /etc/profile.d/java.sh

Set Java Environment Variables
Finally, log out and log in back again to apply the settings and issue the below command to verify Java installed version on your system.
$ java --version

Verify Java Version
Congratulations! The latest version of Java 9 SE SDK is now installed in your Debian based Linux machine.