
Lychee is a free, open source, elegant and easy-to-use photo-management system, which comes with all the necessary features you need for securely managing and sharing photos on your server. It allows you to easily manage (upload, move, rename, describe, delete or search) your photos in seconds from a simple web application.
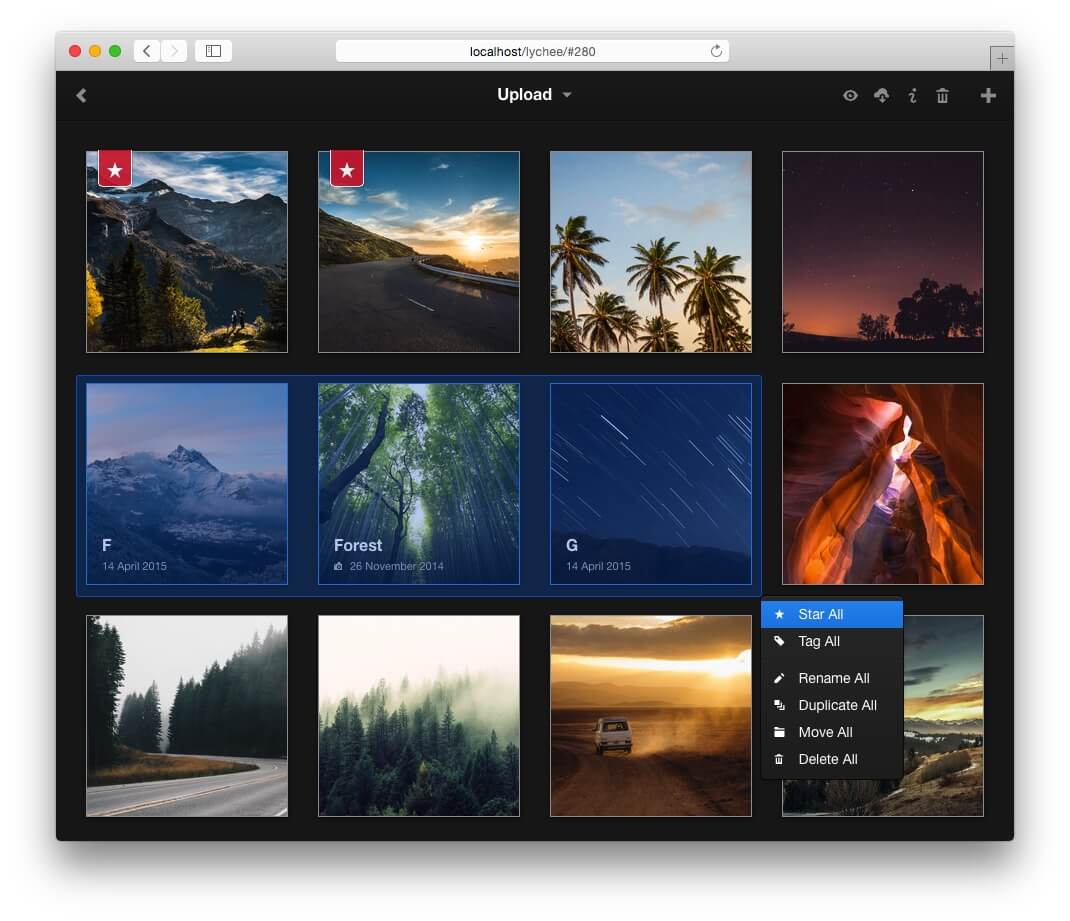
Lychee Photo Management Tool
Lychee Features
- A stunning, beautiful interface to manage all your photos in one place, right from your browser.
- One click photo and album sharing with password protection.
- View all your images in full-screen mode with forward and backward navigation using your keyboard or let others browse your photos by making them public.
- Supports importing of photos from various sources: localhost, Dropbox, remote server, or using a link.
To install Lychee, everything you need is a running web-server such as Apache or Nginx with PHP 5.5 or later and a MySQL-Database.
For the purpose of this article, I will be installing Lychee photo-management system with Nginx, PHP-FPM 7.0and MariaDB on a CentOS 7 VPS with domain name lychee.example.com.
Step 1: Install Nginx, PHP and MariaDB
1. First start by installing Nginx, PHP with needed extensions and MariaDB database to setup a hosting environment to run Lychee.
On Cent/RHEL 7
# yum install https://dl.fedoraproject.org/pub/epel/epel-release-latest-7.noarch.rpm
# yum install http://rpms.remirepo.net/enterprise/remi-release-7.rpm
# yum install yum-utils
# yum-config-manager --enable remi-php70   [Install PHP 7.0]
# yum install nginx php php-fpm php-mysqli php-exif php-mbstring php-json php-zip php-gd php-imagick mariadb-server mariadb-client
On Ubuntu 16.04 and 18.04
$ sudo apt install nginx php php-fpm php-mysqli php-exif php-mbstring php-json php-zip php-gd php-imagick mariadb-server mariadb-client
2. Once you have installed the necessary packages, start nginx, php-fpm and mariadb services, enable them at boot time and check if these services are up and running.
------------ CentOS/RHEL ------------
# systemctl start nginx php-fpm mariadb
# systemctl status nginx php-fpm mariadb
# systemctl enable nginx php-fpm mariadb
------------ Debian/Ubuntu ------------
$ sudo systemctl start nginx php7.0-fpm mysql
$ sudo systemctl status nginx php7.0-fpm mysql
$ sudo systemctl enable nginx php7.0-fpm mysql
3. Next, if you have a firewall enabled on your system, you need to open the port 80 and 443 in the firewall to allow client requests to the Nginx web server on the HTTP and HTTPS respectively, as shown.
------------ Debian/Ubuntu ------------
$ sudo  ufw  allow 80/tcp
$ sudo  ufw  allow 443/tcp
$ sudo  ufw  reload
------------ CentOS/RHEL ------------
# firewall-cmd --zone=public --permanent --add-port=80/tcp
# firewall-cmd --zone=public --permanent --add-port=443/tcp
# firewall-cmd --reload
4. In order to run Lychee effectively, it is recommended to increase the values of the following properties in php.ini file.
# vim /etc/php/php.ini			#CentOS/RHEL
$ sudo vim /etc/php/7.0/fpm/php.ini     #Ubuntu/Debian
Search for these PHP parameters and change their values to:
max_execution_time = 200
post_max_size = 100M
upload_max_size = 100M
upload_max_filesize = 20M
memory_limit = 256M
5. Now configure PHP-FPM to set the user and group, listen socket www.conf file as explained.
# vim /etc/php-fpm.d/www.conf		        #CentOS/RHEL
$ sudo vim /etc/php/7.0/fpm/pool.d/www.conf	#Ubuntu/Debian
Look for the directives below to set the Unix user/group of processes (change www-data to nginx on CentOS).
user = www-data
group = www-data
Also change the listen directive on which to accept FastCGI requests to a Unix socket.
listen = /run/php/php7.0-fpm.sock
And set the appropriate ownership permissions for the Unix socket using the directive (change www-data to nginx on CentOS/RHEL).
listen.owner = www-data
listen.group = www-data
Save the file and restart the nginx and php-fpm services.
# systemctl restart nginx php-fpm              #CentOS/RHEL
$ sudo systemctl restart nginx php7.0-fpm      #Ubuntu/Debian
Step 2: Secure MariaDB Installation
6. In this step, you should secure the MariaDB database installation (which is unsecured by default if installed on a fresh system), by running the security script which comes with the binary package.
Run the following command as root, to launch the the script.
$ sudo mysql_secure_installation
You will be prompted to set a root password, remove anonymous users, disable root login remotely and remove test database. After creating a root password, and answer yes/y to the rest of questions.
Enter current password for root (enter for none): Set root password? [Y/n]yRemove anonymous users? [Y/n]yDisallow root login remotely? [Y/n]yRemove test database and access to it? [Y/n]yReload privilege tables now? [Y/n]y
Step 3: Install Lychee Photo Management System
7. To install Lychee, first you need to create a database for it with appropriate permissions using following commands.
$ sudo mysql -u root -p
MariaDB [(none)]> CREATE DATABASE lychee;
MariaDB [(none)]> CREATE USER 'lycheeadmin'@'localhost' IDENTIFIED BY '=@!#@%$Lost';
MariaDB [(none)]> GRANT ALL PRIVILEGES ON  lychee.* TO 'lycheeadmin'@'localhost';
MariaDB [(none)]> FLUSH PRIVILEGES;
MariaDB [(none)]> exit
8. Next, move into the web document root and grab the latest version of Lychee using the git command line tool, as shown.
$ cd /var/www/html/
$ sudo git clone --recurse-submodules https://github.com/LycheeOrg/Lychee.git
9. Then set the correct permissions and ownership on the installation directory as shown (replace admin with a username on your system).
------------ CentOS/RHEL ------------
# chown admin:nginx -R /var/www/html/Lychee
# chmod 775 -R /var/www/html/Lychee
------------ Debian/Ubuntu ------------
$ sudo chown admin:www-data -R /var/www/html/Lychee
$ sudo chmod 775  -R /var/www/html/Lychee
10. In this step, you need to setup composer in the lychee installation directory, which will be used to install PHP dependencies.
# cd Lychee/
# php -r "copy('https://getcomposer.org/installer', 'composer-setup.php');"
# php -r "if (hash_file('sha384', 'composer-setup.php') === '93b54496392c062774670ac18b134c3b3a95e5a5e5c8f1a9f115f203b75bf9a129d5daa8ba6a13e2cc8a1da0806388a8') { echo 'Installer verified'; } else { echo 'Installer corrupt'; unlink('composer-setup.php'); } echo PHP_EOL;"
# php composer-setup.php
# php -r "unlink('composer-setup.php');"
# php composer.phar update
Step 4: Configure Nginx Server Block for Lychee
12. Next, you need to create and configure a Nginx server block for the Lychee application under /etc/nginx/conf.d/.
# vim /etc/nginx/conf.d/lychee.conf
Add the following configuration in the above file, remember to use your own domain name instead of lychee.example.com (this is just a dummy domain).
server {
	listen      80;
	server_name	 lychee.example.com;
	root         	/var/www/html/Lychee/;
	index       	index.html;

	charset utf-8;
	gzip on;
	gzip_types text/css application/javascript text/javascript application/x-javascript 	image/svg+xml text/plain text/xsd text/xsl text/xml image/x-icon;
	location / {
		try_files $uri $uri/ /index.php?$query_string;
	}
	location ~ \.php {
		include fastcgi.conf;
		fastcgi_split_path_info ^(.+\.php)(/.+)$;
		fastcgi_pass unix:/run/php/php7.0-fpm.sock;
	}
	location ~ /\.ht {
		deny all;
	}
}
Then save the file and restart the Nginx web server and PHP-FPM to apply the recent changes.
# systemctl restart nginx php-fpm              #CentOS/RHEL
$ sudo systemctl restart nginx php7.0-fpm      #Ubuntu/Debian
Step 5: Complete Lychee Installation Via Web Browser
13. Now use the URL lychee.example.com to open Lychee web installer in your browser and provide your database connection settings and enter the name of the database you created for lychee and click Connect.
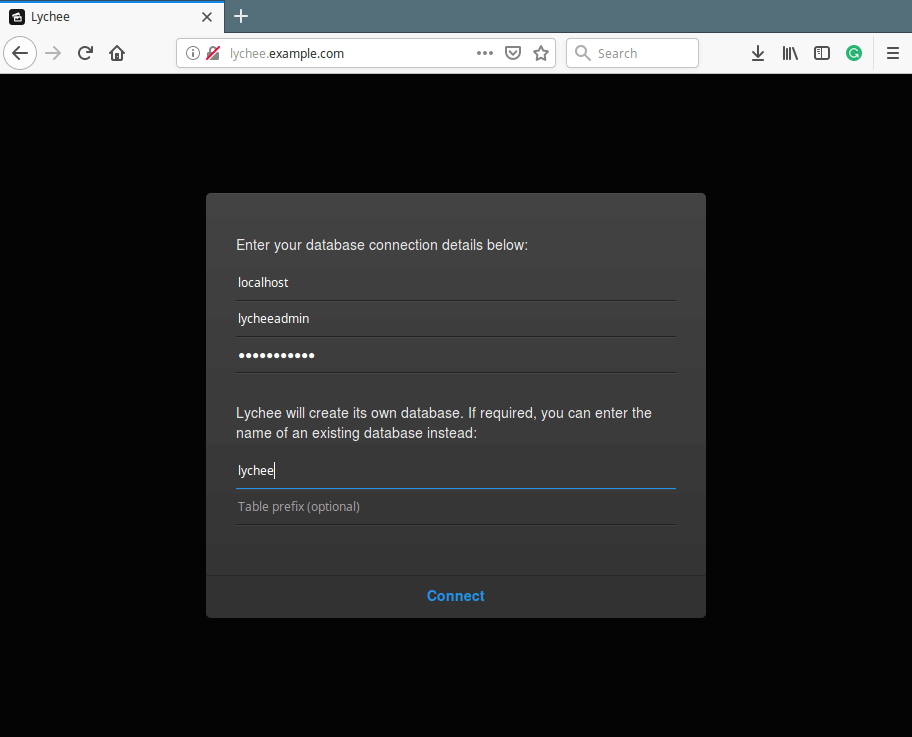
Lychee Database Settings
14. Next, enter a username and password for your installation and click Create Login. After login, you will land in the admin dashboard which contains the default Albums as shown in the following screenshot.
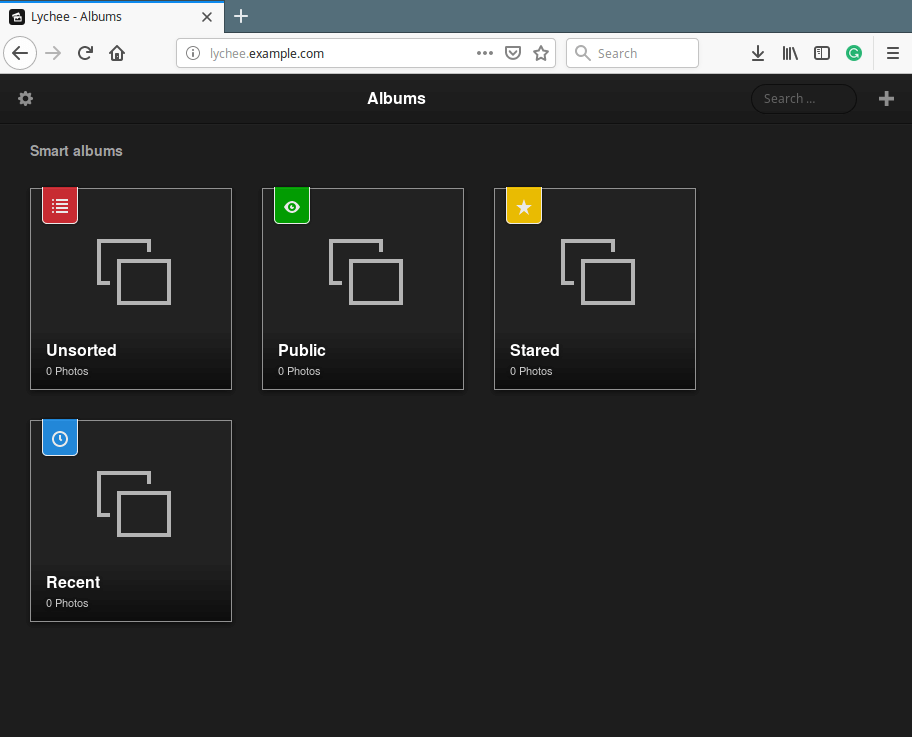
Lychee Admin Dashboard
To upload a photo or import from a link or import from Dropbox or from another server or add an album, click the + sign. And to view photos in an album, simply click on it.
For more information, visit Lychee Homepage: https://lycheeorg.github.io/
Lychee is an open source, easy-to-use and elegant PHP photo-management system to manage and share photos. If you have any questions or comments, use the form below to write to us.