How to Install and Use Chrony in Linux

Chrony is a flexible implementation of the Network Time Protocol (NTP). It is used to synchronize the system clock from different NTP servers, reference clocks or via manual input.

It can also be used NTPv4 server to provide time service to other servers in the same network. It is meant to operate flawlessly under different conditions such as intermittent network connection, heavily loaded networks, changing temperatures which may affect the clock of ordinary computers.

Chrony comes with two programs:

  • chronyc – command line interface for chrony
  • chronyd – daemon that can be started at boot time

In this tutorial we are going to show you how to install and use Chrony on your Linux system.

Install Chrony in Linux

On some systems, chrony may be installed by default. Still if the package is missing, you can easily install it. using your default package manager tool on your respective Linux distributions using following command.

# yum -y install chrony    [On CentOS/RHEL]
# apt install chrony       [On Debian/Ubuntu]
# dnf -y install chrony    [On Fedora 22+]

To check the status of chronyd use the following command.

# systemctl status chronyd      [On SystemD]
# /etc/init.d/chronyd status    [On Init]

If you want to enable chrony daemon upon boot, you can use the following command.

 
# systemctl enable chrony       [On SystemD]
# chkconfig --add chronyd       [On Init]

Check Chrony Synchronization in Linux

To check if chrony is actually synchronized, we will use it’s command line program chronyc, which has the tracking option which will provide relevant information.

# chronyc tracking

Check Chrony Synchronization in Linux

Check Chrony Synchronization in Linux

The listed files provide the following information:

  • Reference ID – the reference ID and name to which the computer is currently synced.
  • Stratum – number of hops to a computer with an attached reference clock.
  • Ref time – this is the UTC time at which the last measurement from the reference source was made.
  • System time – delay of system clock from synchronized server.
  • Last offset – estimated offset of the last clock update.
  • RMS offset – long term average of the offset value.
  • Frequency – this is the rate by which the system’s clock would be wrong if chronyd is not correcting it. It is provided in ppm (parts per million).
  • Residual freq – residual frequency indicated the difference between the measurements from reference source and the frequency currently being used.
  • Skew – estimated error bound of the frequency.
  • Root delay – total of the network path delays to the stratum computer, from which the computer is being synced.
  • Leap status – this is the leap status which can have one of the following values – normal, insert second, delete second or not synchronized.

To check information about chrony’s sources, you can issue the following command.

# chronyc sources

Check Chrony Sources

Check Chrony Sources

Configure Chrony in Linux

The configuration file of chrony is located at /etc/chrony.conf or /etc/chrony/chrony.conf and sample configuration file may look something like this:

server 0.rhel.pool.ntp.org iburst
server 1.rhel.pool.ntp.org iburst
server 2.rhel.pool.ntp.org iburst
server 3.rhel.pool.ntp.org iburst

stratumweight 0
driftfile /var/lib/chrony/drift
makestep 10 3
logdir /var/log/chrony

The above configuration provide the following information:

  • server – this directive used to describe a NTP server to sync from.
  • stratumweight – how much distance should be added per stratum to the sync source. The default value is 0.0001.
  • driftfile – location and name of the file containing drift data.
  • Makestep – this directive causes chrony to gradually correct any time offset by speeding or slowing down the clock as required.
  • logdir – path to chrony’s log file.

If you want to step the system clock immediately and ignoring any adjustments currently being in progress, you can use the following command:

# chronyc makestep

If you decide to stop chrony, you can use the following commands.

# systemctl stop chrony          [On SystemD]
# /etc/init.d/chronyd stop       [On Init]
Conclusion

This was a show presentation of the chrony utility and how it can be used on your Linux system. If you wish to check more details about chrony, do review chrony documentation.

Source

Pssh – Execute Commands on Multiple Remote Linux Servers Using Single Terminal

No doubt, that OpenSSH is one of the most widely used and powerful tool available for Linux, that allows you to connect securely to remote Linux systems via a shell and allows you to transfer files securely to and from remote systems.

Run Commands on Multiple Linux Servers

Pssh – Run Commands on Multiple Linux Servers

But the biggest disadvantages of OpenSSH is that, you cannot execute same command on multiple hosts at one go and OpenSSH is not developed to perform such tasks. This is where Parallel SSH or PSSH tool comes in handy, is a python based application, which allows you to execute commands on multiple hosts in parallel at the same time.

Don’t MissExecute Commands on Multiple Linux Servers Using DSH Tool

PSSH tool includes parallel versions of OpenSSH and related tools such as:

  1. pssh – is a program for running ssh in parallel on a multiple remote hosts.
  2. pscp – is a program for copying files in parallel to a number of hosts.
    1. Pscp – Copy/Transfer Files Two or More Remote Linux Servers
  3. prsync – is a program for efficiently copying files to multiple hosts in parallel.
  4. pnuke – kills processes on multiple remote hosts in parallel.
  5. pslurp – copies files from multiple remote hosts to a central host in parallel.

These tools are good for System Administrators who find themselves working with large collections of nodes on a network.

Install PSSH or Parallel SSH on Linux

In this guide, we shall look at steps to install the latest version of PSSH (i.e. version 2.3.1) program on Fedorabased distributions such as CentOS/RedHat and Debian derivatives such as Ubuntu/Mint using pip command.

The pip command is a small program (replacement of easy_install script) for installing and managing Python software packages index.

On Fedora based Distributions

On CentOS/RHEL distributions, you need to first install pip (i.e. python-pip) package under your system, in order to install PSSH program.

# yum install python-pip

On Fedora 21+, you need to run dnf command instead yum (dnf replaced yum).

# dnf install python-pip

Once you’ve install pip tool, you can install the pssh package with the help of pip command as shown.

# pip install pssh  
Sample Output
/usr/lib/python2.6/site-packages/pip/_vendor/requests/packages/urllib3/util/ssl_.py:90: InsecurePlatformWarning: A true SSLContext object is not available. This prevents urllib3 from configuring SSL appropriately and may cause certain SSL connections to fail. For more information, see https://urllib3.readthedocs.org/en/latest/security.html#insecureplatformwarning.
  InsecurePlatformWarning
You are using pip version 7.1.0, however version 7.1.2 is available.
You should consider upgrading via the 'pip install --upgrade pip' command.
Collecting pssh
/usr/lib/python2.6/site-packages/pip/_vendor/requests/packages/urllib3/util/ssl_.py:90: InsecurePlatformWarning: A true SSLContext object is not available. This prevents urllib3 from configuring SSL appropriately and may cause certain SSL connections to fail. For more information, see https://urllib3.readthedocs.org/en/latest/security.html#insecureplatformwarning.
  InsecurePlatformWarning
  Downloading pssh-2.3.1.tar.gz
Installing collected packages: pssh
  Running setup.py install for pssh
Successfully installed pssh-2.3.1

On Debian Derivatives

On Debian based distributions it takes a minute to install pssh using pip command.

$ sudo apt-get install python-pip
$ sudo pip install pssh
Sample Output
Downloading/unpacking pssh
  Downloading pssh-2.3.1.tar.gz
  Running setup.py (path:/tmp/pip_build_root/pssh/setup.py) egg_info for package pssh
    
Installing collected packages: pssh
  Running setup.py install for pssh
    changing mode of build/scripts-2.7/pssh from 644 to 755
    changing mode of build/scripts-2.7/pnuke from 644 to 755
    changing mode of build/scripts-2.7/prsync from 644 to 755
    changing mode of build/scripts-2.7/pslurp from 644 to 755
    changing mode of build/scripts-2.7/pscp from 644 to 755
    changing mode of build/scripts-2.7/pssh-askpass from 644 to 755
    
    changing mode of /usr/local/bin/pscp to 755
    changing mode of /usr/local/bin/pssh-askpass to 755
    changing mode of /usr/local/bin/pssh to 755
    changing mode of /usr/local/bin/prsync to 755
    changing mode of /usr/local/bin/pnuke to 755
    changing mode of /usr/local/bin/pslurp to 755
Successfully installed pssh
Cleaning up...

As you can see from the output above, the latest version of pssh is already installed on the system.

How do I Use pssh?

When using pssh you need to create a host file with the number of hosts along with IP address and port number that you need to connect to remote systems using pssh.

The lines in the host file are in the following form and can also include blank lines and comments.

pssh hosts file
192.168.0.10:22
192.168.0.11:22
Executing single command on multiple server using pssh

You can execute any single command on different or multiple Linux hosts on a network by running a psshcommand. There are many options to use with pssh as described below:

We shall look at a few ways of executing commands on a number of hosts using pssh with different options.

  1. To read hosts file, include the -h host_file-name or –hosts host_file_name option.
  2. To include a default username on all hosts that do not define a specific user, use the -l username or –user username option.
  3. You can also display standard output and standard error as each host completes. By using the -i or –inlineoption.
  4. You may wish to make connections time out after the given number of seconds by including the -t number_of_seconds option.
  5. To save standard output to a given directory, you can use the -o /directory/path option.
  6. To ask for a password and send to ssh, use the -A option.

Let’s see few examples and usage of pssh commands:

1. To execute echo “Hello TecMint” on the terminal of the multiple Linux hosts by root user and prompt for the root user’s password, run this command below.

Important: Remember all the hosts must be included in the host file.

# pssh -h pssh-hosts -l root -A echo "Hello TecMint"

Warning: do not enter your password if anyone else has superuser
privileges or access to your account.
Password: 
[1] 15:54:55 [SUCCESS] 192.168.0.10:22
[2] 15:54:56 [SUCCESS] 192.168.0.11:22

Note: In the above command “pssh-hosts” is a file with list of remote Linux servers IP address and SSH port number that you wish to execute commands.

2. To find out the disk space usage on multiple Linux servers on your network, you can run a single command as follows.

# pssh -h pssh-hosts -l root -A -i "df -hT"

Warning: do not enter your password if anyone else has superuser
privileges or access to your account.
Password: 
[1] 16:04:18 [SUCCESS] 192.168.0.10:22
Filesystem     Type   Size  Used Avail Use% Mounted on
/dev/sda3      ext4    38G  4.3G   32G  12% /
tmpfs          tmpfs  499M     0  499M   0% /dev/shm
/dev/sda1      ext4   190M   25M  156M  14% /boot

[2] 16:04:18 [SUCCESS] 192.168.0.11:22
Filesystem              Type      Size  Used Avail Use% Mounted on
/dev/mapper/centos-root xfs        30G  9.8G   20G  34% /
devtmpfs                devtmpfs  488M     0  488M   0% /dev
tmpfs                   tmpfs     497M  148K  497M   1% /dev/shm
tmpfs                   tmpfs     497M  7.0M  490M   2% /run
tmpfs                   tmpfs     497M     0  497M   0% /sys/fs/cgroup
/dev/sda1               xfs       497M  166M  332M  34% /boot

3. If you wish to know the uptime of multiple Linux servers at one go, then you can run the following command.

# pssh -h pssh-hosts -l root -A -i "uptime"
Warning: do not enter your password if anyone else has superuser
privileges or access to your account.
Password: 
[1] 16:09:03 [SUCCESS] 192.168.0.10:22
 16:09:01 up  1:00,  2 users,  load average: 0.07, 0.02, 0.00

[2] 16:09:03 [SUCCESS] 192.168.0.11:22
 06:39:03 up  1:00,  2 users,  load average: 0.00, 0.06, 0.09

You can view the manual entry page for the pssh command to get many other options to find out more ways of using pssh.

# pssh --help

pssh commands and usages

pssh commands and usages

Summary

Parallel SSH or PSSH is a good tool to use for executing commands in an environment where a System Administrator has to work with many servers on a network. It will make it easy for commands to be executed remotely on different hosts on a network.

Hope you find this guide useful and incase of any additional information about pssh or errors while installing or using it, feel free to post a comment.

Source

How to Optimize and Compress JPEG or PNG Images in Linux Commandline

You have a lot of images, and want to optimize and compress the images without losing its original quality before uploading them to any cloud or local storages? There are plenty of GUI applications available which will help you to optimize the images. However, here are two simple command line utilities to optimize images and they are:

  1. jpegoptim – is a utility to optimize/compress JPEG files without loosing quality.
  2. OptiPNG – is a small program that optimize PNG images to smaller size without losing any information.

Compress and Optimize Images in Linux

Compress and Optimize JPEG and PNG Images in Linux

Using these two tools, you can either optimize a single or multiple images at a time.

Compress or Optimize JPEG Images from Command Line

jpegoptim is a command line tool that can be used to optimize and compress JPEG, JPG and JFIF files without losing its actual quality. This tool supports lossless optimization, which is based on optimizing the Huffman tables.

Install jpegoptim in Linux

To install jpegoptim on your Linux systems, run the following command from your terminal.

On Debian and it’s Derivatives
# apt-get install jpegoptim
or
$ sudo apt-get install jpegoptim
On RedHat based Systems

On RPM based systems like RHELCentOSFedora etc., you need to install and enable EPEL repository or alternatively, you can install the epel repository directly from the commandline as shown:

# yum install epel-release
# dnf install epel-release    [On Fedora 22+ versions]

Next install jpegoptim program from the repository as shown:

# yum install jpegoptim
# dnf install jpegoptim    [On Fedora 22+ versions]

How to Use Jpegoptim Image Optimizer

The syntax of jpegoptm is:

$ jpegoptim filename.jpeg
$ jpegoptim [options] filename.jpeg

Let’s now compress the following tecmint.jpeg image, but before optimizing the image, first find out the actual size of the image using du command as shown.

$ du -sh tecmint.jpeg 

6.2M	tecmint.jpeg

Here the actual file size is 6.2MB, now compress this file by running:

$ jpegoptim tecmint.jpeg 

Optimize JPEG Image in Linux

Optimize JPEG Image in Linux

Open the compressed image in any image viewer application, you will not find any major differences. The source and compressed images will have the same quality.

The above command optimizes the images to the maximum possible size. However, you can compress the given image to a specific size to, but it disables the lossless optimization.

For example, let us compress above the image from 5.6MB to around 250k.

$ jpegoptim --size=250k tecmint.jpeg

Optimize Image Fix Size

Optimize Image Fix Size

Batch JPEG Image Compression and Optimization

You might ask how to compress the images in the entire directory, that’s not difficult too. Go to the directory where you have the images.

tecmint@tecmint ~ $ cd img/
tecmint@tecmint ~/img $ ls -l
total 65184
-rwxr----- 1 tecmint tecmint 6680532 Jan 19 12:21 DSC_0310.JPG
-rwxr----- 1 tecmint tecmint 6846248 Jan 19 12:21 DSC_0311.JPG
-rwxr----- 1 tecmint tecmint 7174430 Jan 19 12:21 DSC_0312.JPG
-rwxr----- 1 tecmint tecmint 6514309 Jan 19 12:21 DSC_0313.JPG
-rwxr----- 1 tecmint tecmint 6755589 Jan 19 12:21 DSC_0314.JPG
-rwxr----- 1 tecmint tecmint 6789763 Jan 19 12:21 DSC_0315.JPG
-rwxr----- 1 tecmint tecmint 6958387 Jan 19 12:21 DSC_0316.JPG
-rwxr----- 1 tecmint tecmint 6463855 Jan 19 12:21 DSC_0317.JPG
-rwxr----- 1 tecmint tecmint 6614855 Jan 19 12:21 DSC_0318.JPG
-rwxr----- 1 tecmint tecmint 5931738 Jan 19 12:21 DSC_0319.JPG

And then run the following command to compress all images at once.

tecmint@tecmint ~/img $ jpegoptim *.JPG
DSC_0310.JPG 6000x4000 24bit N Exif  [OK] 6680532 --> 5987094 bytes (10.38%), optimized.
DSC_0311.JPG 6000x4000 24bit N Exif  [OK] 6846248 --> 6167842 bytes (9.91%), optimized.
DSC_0312.JPG 6000x4000 24bit N Exif  [OK] 7174430 --> 6536500 bytes (8.89%), optimized.
DSC_0313.JPG 6000x4000 24bit N Exif  [OK] 6514309 --> 5909840 bytes (9.28%), optimized.
DSC_0314.JPG 6000x4000 24bit N Exif  [OK] 6755589 --> 6144165 bytes (9.05%), optimized.
DSC_0315.JPG 6000x4000 24bit N Exif  [OK] 6789763 --> 6090645 bytes (10.30%), optimized.
DSC_0316.JPG 6000x4000 24bit N Exif  [OK] 6958387 --> 6354320 bytes (8.68%), optimized.
DSC_0317.JPG 6000x4000 24bit N Exif  [OK] 6463855 --> 5909298 bytes (8.58%), optimized.
DSC_0318.JPG 6000x4000 24bit N Exif  [OK] 6614855 --> 6016006 bytes (9.05%), optimized.
DSC_0319.JPG 6000x4000 24bit N Exif  [OK] 5931738 --> 5337023 bytes (10.03%), optimized.

You can also compress multiple selected images at once:

$ jpegoptim DSC_0310.JPG DSC_0311.JPG DSC_0312.JPG 
DSC_0310.JPG 6000x4000 24bit N Exif  [OK] 6680532 --> 5987094 bytes (10.38%), optimized.
DSC_0311.JPG 6000x4000 24bit N Exif  [OK] 6846248 --> 6167842 bytes (9.91%), optimized.
DSC_0312.JPG 6000x4000 24bit N Exif  [OK] 7174430 --> 6536500 bytes (8.89%), optimized.

For more details about jpegoptim tool, check out the man pages.

$ man jpegoptim 

Compress or Optimize PNG Images from Command Line

OptiPNG is a command line tool used to optimize and compress PNG (portable network graphics) files without losing its original quality.

The installation and usage of OptiPNG is very similar to jpegoptim.

Install OptiPNG in Linux

To install OptiPNG on your Linux systems, run the following command from your terminal.

On Debian and it’s Derivatives
# apt-get install optipng
or
$ sudo apt-get install optipng
On RedHat based Systems
# yum install optipng
# dnf install optipng    [On Fedora 22+ versions]

Note: You must have epel repository enabled on your RHEL/CentOS based systems to install optipng program.

How to Use OptiPNG Image Optimizer

The general syntax of optipng is:

$ optipng filename.png
$ optipng [options] filename.png

Let us compress the tecmint.png image, but before optimizing, first check the actual size of the image as shown:

tecmint@tecmint ~/img $ ls -lh tecmint.png 
-rw------- 1 tecmint tecmint 350K Jan 19 12:54 tecmint.png

Here the actual file size of above image is 350K, now compress this file by running:

tecmint@tecmint ~/img $ optipng tecmint.png 
OptiPNG 0.6.4: Advanced PNG optimizer.
Copyright (C) 2001-2010 Cosmin Truta.

** Processing: tecmint.png
1493x914 pixels, 4x8 bits/pixel, RGB+alpha
Reducing image to 3x8 bits/pixel, RGB
Input IDAT size = 357525 bytes
Input file size = 358098 bytes

Trying:
  zc = 9  zm = 8  zs = 0  f = 0		IDAT size = 249211
                               
Selecting parameters:
  zc = 9  zm = 8  zs = 0  f = 0		IDAT size = 249211

Output IDAT size = 249211 bytes (108314 bytes decrease)
Output file size = 249268 bytes (108830 bytes = 30.39% decrease)

As you see in the above output, the size of the tecmint.png file has been reduced up to 30.39%. Now verify the file size again using:

tecmint@tecmint ~/img $ ls -lh tecmint.png 
-rw-r--r-- 1 tecmint tecmint 244K Jan 19 12:56 tecmint.png

Open the compressed image in any image viewer application, you will not find any major differences between the original and compressed files. The source and compressed images will have the same quality.

Batch PNG Image Compression and Optimization

To compress batch or multiple PNG images at once, just go the directory where all images resides and run the following command to compress.

tecmint@tecmint ~ $ cd img/
tecmint@tecmint ~/img $ optipng *.png

OptiPNG 0.6.4: Advanced PNG optimizer.
Copyright (C) 2001-2010 Cosmin Truta.

** Processing: Debian-8.png
720x345 pixels, 3x8 bits/pixel, RGB
Input IDAT size = 95151 bytes
Input file size = 95429 bytes

Trying:
  zc = 9  zm = 8  zs = 0  f = 0		IDAT size = 81388
                               
Selecting parameters:
  zc = 9  zm = 8  zs = 0  f = 0		IDAT size = 81388

Output IDAT size = 81388 bytes (13763 bytes decrease)
Output file size = 81642 bytes (13787 bytes = 14.45% decrease)

** Processing: Fedora-22.png
720x345 pixels, 4x8 bits/pixel, RGB+alpha
Reducing image to 3x8 bits/pixel, RGB
Input IDAT size = 259678 bytes
Input file size = 260053 bytes

Trying:
  zc = 9  zm = 8  zs = 0  f = 5		IDAT size = 222479
  zc = 9  zm = 8  zs = 1  f = 5		IDAT size = 220311
  zc = 1  zm = 8  zs = 2  f = 5		IDAT size = 216744
                               
Selecting parameters:
  zc = 1  zm = 8  zs = 2  f = 5		IDAT size = 216744

Output IDAT size = 216744 bytes (42934 bytes decrease)
Output file size = 217035 bytes (43018 bytes = 16.54% decrease)
....

For more details about optipng check man pages.

$ man optipng

Conclusion

If you’re a webmaster and wants to serve optimized images over your website or a blog, these tools can be very handy. These tools not only saves the disk space, but also the reduces the bandwidth while uploading the images.

If you know any other better way to achieve same thing, do let us know via comments and don’t forget to share this article on your social networks and support us.

Source

60 Commands of Linux : A Guide from Newbies to System Administrator

For a person new to Linux, finding Linux functional is still not very easy even after the emergence of user friendly Linux distribution like Ubuntu and Mint. The thing remains that there will always be some configuration on user’s part to be done manually.

Linux Administration Commands

60 Linux Commands

Just to start with, the first thing a user should know is the basic commands in terminal. Linux GUI runs on Shell. When GUI is not running but Shell is running, Linux is running. If Shell is not running, nothing is running. Commands in Linux is a means of interaction with Shell. For a beginners some of the basic computational task is to:

  1. View the contents of a directory : A directory may contains visible and invisible files with different file permissions.
  2. Viewing blocks, HDD partition, External HDD
  3. Checking the integrity of Downloaded/Transferred Packages
  4. Converting and copying a file
  5. Know your machine name, OS and Kernel
  6. Viewing history
  7. Being root
  8. Make Directory
  9. Make Files
  10. Changing the file permission
  11. Own a file
  12. Install, Update and maintain Packages
  13. Uncompressing a file
  14. See current date, time and calendar
  15. Print contents of a file
  16. Copy and Move
  17. See the working directory for easy navigation
  18. Change the working directory, etc…

And we have described all of the above basic computational task in our First Article.

This was the first article of this series. We tried to provide you with detailed description of these commands with explicit examples which was highly appreciated by our reader in terms of likescomments and traffic.

What after these initial commands? Obviously we moved to the next part of this article where we provided commands for computational tasks like:

  1. Finding a file in a given directory
  2. Searching a file with the given keywords
  3. Finding online documentation
  4. See the current running processes
  5. Kill a running process
  6. See the location of installed Binaries
  7. Starting, Ending, Restarting a service
  8. Making and removing of aliases
  9. View the disk and space usages
  10. Removing a file and/or directory
  11. Print/echo a custom output on standard output
  12. Changing password of on-self and other’s, if you are root.
  13. View Printing queue
  14. Compare two files
  15. Download a file, the Linux way (wget)
  16. Mount a block / partition / external HDD
  17. Compile and Run a code written in ‘C’, ‘C++’ and ‘Java’ Programming Language

This Second Article was again highly appreciated by the readers of Tecmint.com. The article was nicely elaborated with suitable examples and output.

After providing the users with the glimpse of Commands used by a Middle Level User we thought to give our effort in a nice write-up for a list of command used by an user of System Administrator Level.

In our Third and last article of this series, we tried to cover the commands that would be required for the computational task like:

  1. Configuring Network Interface
  2. Viewing custom Network Related information
  3. Getting information about Internet Server with customisable switches and Results
  4. Digging DNS
  5. Knowing Your System uptime
  6. Sending an occasional Information to all other logged-in users
  7. Send text messages directly to a user
  8. Combination of commands
  9. Renaming a file
  10. Seeing the processes of a CPU
  11. Creating newly formatted ext4 partition
  12. Text File editors like vi, emacs and nano
  13. Copying a large file/folder with progress bar
  14. Keeping track of free and available memory
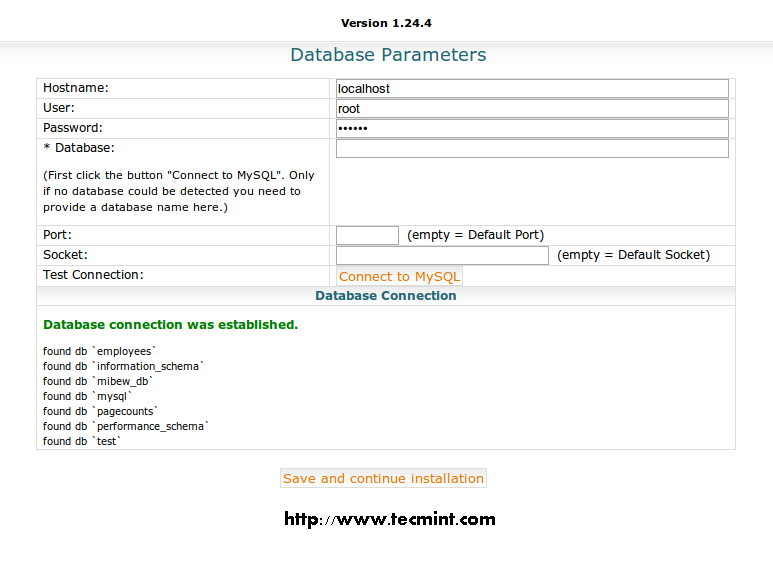
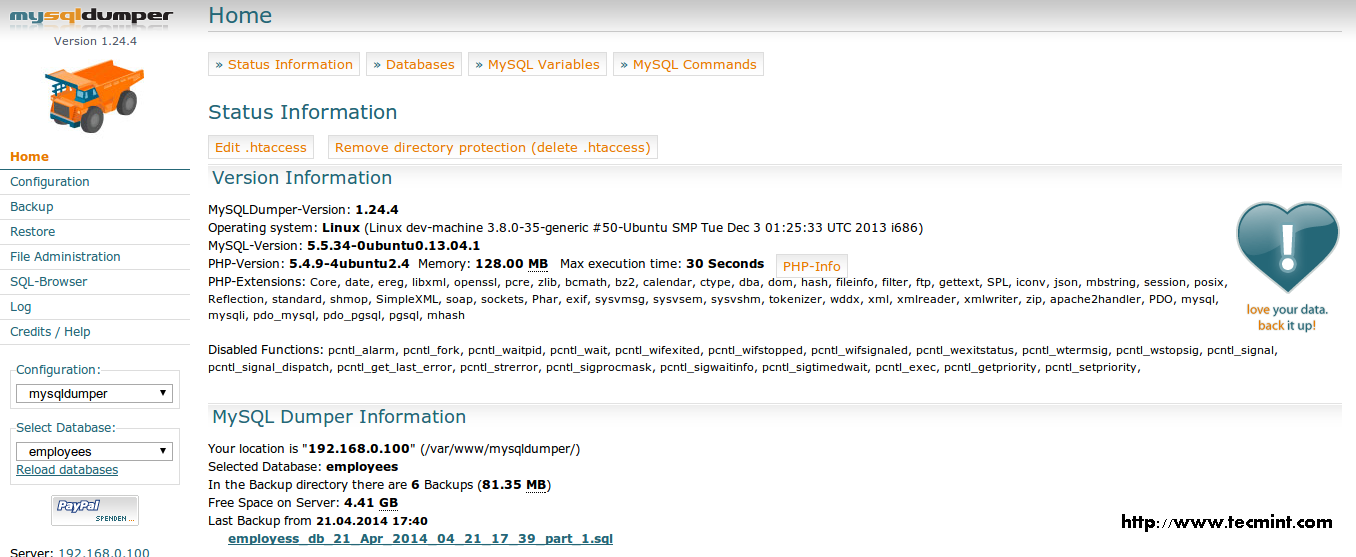
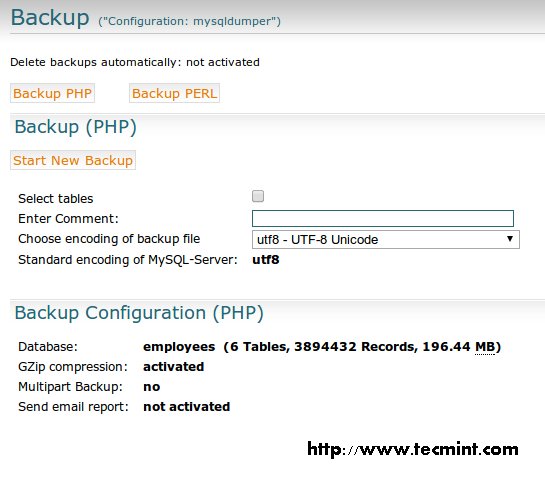
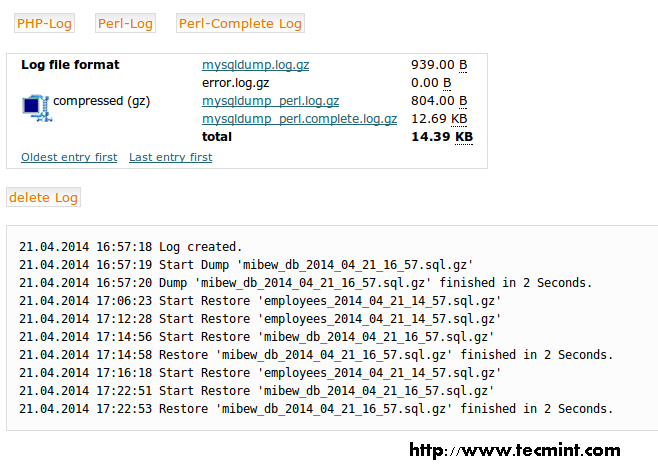
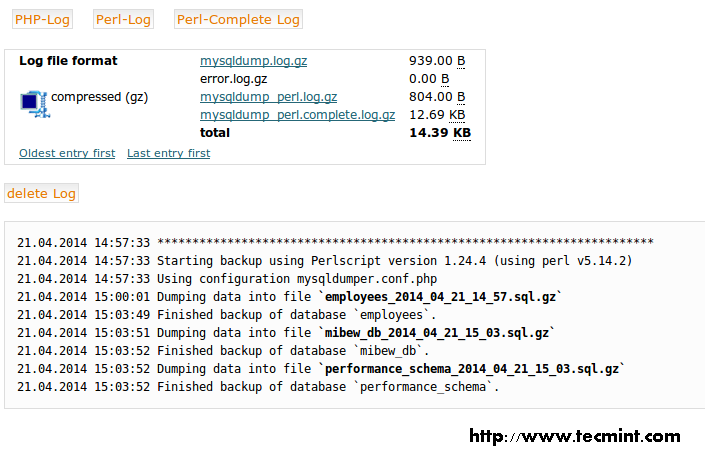
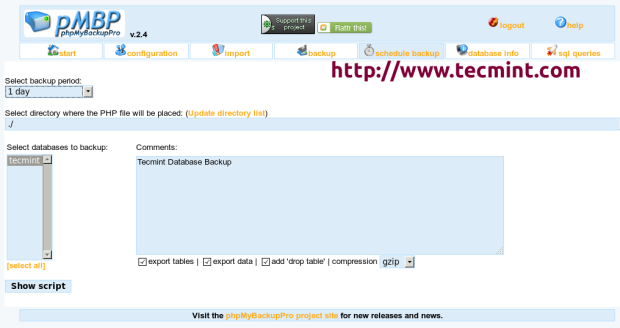
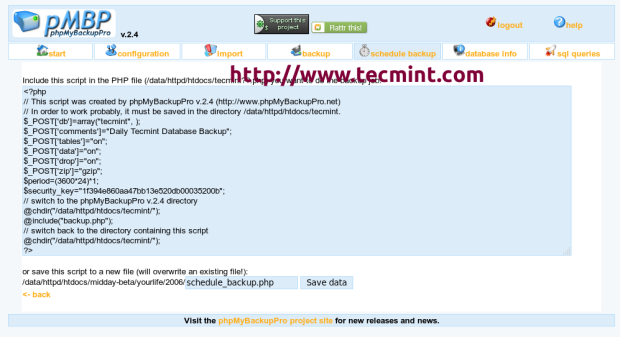
  15. Backup a mysql database
  16. Make difficult to guess – random password
  17. Merge two text files
  18. List of all the opened files

Writing this article and the list of command that needs to go with the article was a little cumbersome. We chose 20 commands with each article and hence gave a lot of thought for which command should be included and which should be excluded from the particular post. I personally selected the commands on the basis of their usability (as I use and get used to) from an user point of view and an Administrator point of view.

This Articles aims to concatenate all the articles of its series and provide you with all the functionality in commands you can perform in our this very series of articles.

There are too long lists of commands available in Linux. But we provided the list of 60 commands which is generally and most commonly used and a user having knowledge of these 60 commands as a whole can work in terminal very much smoothly.

That’s all for now from me. I will soon be coming up with another tutorial, you people will love to go through. Till then Stay Tuned!

Switching From Windows to Nix or a Newbie to Linux – 20 Useful Commands for Linux Newbies

So you are planning to switch from Windows to Linux, or have just switched to Linux? Oops!!! what I am asking! For what else reason would you have been here. From my past experience when I was new to Nux, commands and terminal really scared me, I was worried about the commands, as to what extent I have to remember and memorise them to get myself fully functional with Linux. No doubt online documentation, books, man pages and user community helped me a lot but I strongly believed that there should be an article with details of commands in easy to learn and understand language.These Motivated me to Master Linux and to make it easy-to-use. My this article is a step towards it.

Newbies Linux Commands

20 Linux Commands for Newbies

1. Command: ls

The command “ls” stands for (List Directory Contents), List the contents of the folder, be it file or folder, from which it runs.

root@tecmint:~# ls

Android-Games                     Music
Pictures                          Public
Desktop                           Tecmint.com
Documents                         TecMint-Sync
Downloads                         Templates

The command “ls -l” list the content of folder, in long listing fashion.

root@tecmint:~# ls -l

total 40588
drwxrwxr-x 2 ravisaive ravisaive     4096 May  8 01:06 Android Games
drwxr-xr-x 2 ravisaive ravisaive     4096 May 15 10:50 Desktop
drwxr-xr-x 2 ravisaive ravisaive     4096 May 16 16:45 Documents
drwxr-xr-x 6 ravisaive ravisaive     4096 May 16 14:34 Downloads
drwxr-xr-x 2 ravisaive ravisaive     4096 Apr 30 20:50 Music
drwxr-xr-x 2 ravisaive ravisaive     4096 May  9 17:54 Pictures
drwxrwxr-x 5 ravisaive ravisaive     4096 May  3 18:44 Tecmint.com
drwxr-xr-x 2 ravisaive ravisaive     4096 Apr 30 20:50 Templates

Command “ls -a“, list the content of folder, including hidden files starting with ‘.’.

root@tecmint:~# ls -a

.			.gnupg			.dbus			.goutputstream-PI5VVW		.mission-control
.adobe                  deja-dup                .grsync                 .mozilla                 	.themes
.gstreamer-0.10         .mtpaint                .thumbnails             .gtk-bookmarks          	.thunderbird
.HotShots               .mysql_history          .htaccess		.apport-ignore.xml      	.ICEauthority           
.profile                .bash_history           .icons                  .bash_logout                    .fbmessenger
.jedit                  .pulse                  .bashrc                 .liferea_1.8             	.pulse-cookie            
.Xauthority		.gconf                  .local                  .Xauthority.HGHVWW		.cache
.gftp                   .macromedia             .remmina                .cinnamon                       .gimp-2.8
.ssh                    .xsession-errors 	.compiz                 .gnome                          teamviewer_linux.deb          
.xsession-errors.old	.config                 .gnome2                 .zoncolor

Note: In Linux file name starting with ‘.‘ is hidden. In Linux every file/folder/device/command is a file. The output of ls -l is:

  1. d (stands for directory).
  2. rwxr-xr-x is the file permission of the file/folder for owner, group and world.
  3. The 1st ravisaive in the above example means that file is owned by user ravisaive.
  4. The 2nd ravisaive in the above example means file belongs to user group ravisaive.
  5. 4096 means file size is 4096 Bytes.
  6. May 8 01:06 is the date and time of last modification.
  7. And at the end is the name of the File/Folder.

For more “ls” command examples read 15 ‘ls’ Command Examples in Linux.

2. Command: lsblk

The “lsblk” stands for (List Block Devices), print block devices by their assigned name (but not RAM) on the standard output in a tree-like fashion.

root@tecmint:~# lsblk

NAME   MAJ:MIN RM   SIZE RO TYPE MOUNTPOINT
sda      8:0    0 232.9G  0 disk 
├─sda1   8:1    0  46.6G  0 part /
├─sda2   8:2    0     1K  0 part 
├─sda5   8:5    0   190M  0 part /boot
├─sda6   8:6    0   3.7G  0 part [SWAP]
├─sda7   8:7    0  93.1G  0 part /data
└─sda8   8:8    0  89.2G  0 part /personal
sr0     11:0    1  1024M  0 rom

The “lsblk -l” command list block devices in ‘list‘ structure (not tree like fashion).

root@tecmint:~# lsblk -l

NAME MAJ:MIN RM   SIZE RO TYPE MOUNTPOINT
sda    8:0    0 232.9G  0 disk 
sda1   8:1    0  46.6G  0 part /
sda2   8:2    0     1K  0 part 
sda5   8:5    0   190M  0 part /boot
sda6   8:6    0   3.7G  0 part [SWAP]
sda7   8:7    0  93.1G  0 part /data
sda8   8:8    0  89.2G  0 part /personal
sr0   11:0    1  1024M  0 rom

Note: lsblk is very useful and easiest way to know the name of New Usb Device you just plugged in, especially when you have to deal with disk/blocks in terminal.

3. Command: md5sum

The “md5sum” stands for (Compute and Check MD5 Message Digest), md5 checksum (commonly called hash) is used to match or verify integrity of files that may have changed as a result of a faulty file transfer, a disk error or non-malicious interference.

root@tecmint:~# md5sum teamviewer_linux.deb 

47790ed345a7b7970fc1f2ac50c97002  teamviewer_linux.deb

Note: The user can match the generated md5sum with the one provided officially. Md5sum is considered less secure than sha1sum, which we will discuss later.

4. Command: dd

Command “dd” stands for (Convert and Copy a file), Can be used to convert and copy a file and most of the times is used to copy a iso file (or any other file) to a usb device (or any other location), thus can be used to make a ‘Bootlable‘ Usb Stick.

root@tecmint:~# dd if=/home/user/Downloads/debian.iso of=/dev/sdb1 bs=512M; sync

Note: In the above example the usb device is supposed to be sdb1 (You should Verify it using command lsblk, otherwise you will overwrite your disk and OS), use name of disk very Cautiously!!!.

dd command takes some time ranging from a few seconds to several minutes in execution, depending on the size and type of file and read and write speed of Usb stick.

5. Command: uname

The “uname” command stands for (Unix Name), print detailed information about the machine name, Operating System and Kernel.

root@tecmint:~# uname -a

Linux tecmint 3.8.0-19-generic #30-Ubuntu SMP Wed May 1 16:36:13 UTC 2013 i686 i686 i686 GNU/Linux

Note: uname shows type of kernel. uname -a output detailed information. Elaborating the above output of uname -a.

  1. Linux“: The machine’s kernel name.
  2. tecmint“: The machine’s node name.
  3. 3.8.0-19-generic“: The kernel release.
  4. #30-Ubuntu SMP“: The kernel version.
  5. i686“: The architecture of the processor.
  6. GNU/Linux“: The operating system name.

6. Command: history

The “history” command stands for History (Event) Record, it prints the history of long list of executed commands in terminal.

root@tecmint:~# history

 1  sudo add-apt-repository ppa:tualatrix/ppa
 2  sudo apt-get update
 3  sudo apt-get install ubuntu-tweak
 4  sudo add-apt-repository ppa:diesch/testing
 5  sudo apt-get update
 6  sudo apt-get install indicator-privacy
 7  sudo add-apt-repository ppa:atareao/atareao
 8  sudo apt-get update
 9  sudo apt-get install my-weather-indicator
 10 pwd
 11 cd && sudo cp -r unity/6 /usr/share/unity/
 12 cd /usr/share/unity/icons/
 13 cd /usr/share/unity

Note: Pressing “Ctrl + R” and then search for already executed commands which lets your command to be completed with auto completion feature.

(reverse-i-search)`if': ifconfig

7. Command: sudo

The “sudo” (super user do) command allows a permitted user to execute a command as the superuser or another user, as specified by the security policy in the sudoers list.

root@tecmint:~# sudo add-apt-repository ppa:tualatrix/ppa

Note: sudo allows user to borrow superuser privileged, while a similar command ‘su‘ allows user to actually log in as superuser. Sudo is safer than su.
It is not advised to use sudo or su for day-to-day normal use, as it can result in serious error if accidentally you did something wrong, that’s why a very popular saying in Linux community is:

“To err is human, but to really foul up everything, you need root password.”

8. Command: mkdir

The “mkdir” (Make directory) command create a new directory with name path. However is the directory already exists, it will return an error message “cannot create folder, folder already exists”.

root@tecmint:~# mkdir tecmint

Note: Directory can only be created inside the folder, in which the user has write permission. mkdir: cannot create directory `tecmint‘: File exists
(Don’t confuse with file in the above output, you might remember what i said at the beginning – In Linux every file, folder, drive, command, scripts are treated as file).

9. Command: touch

The “touch” command stands for (Update the access and modification times of each FILE to the current time). touch command creates the file, only if it doesn’t exist. If the file already exists it will update the timestamp and not the contents of the file.

root@tecmint:~# touch tecmintfile

Note: touch can be used to create file under directory, on which the user has write permission, only if the file don’t exist there.

10. Command: chmod

The Linux “chmod” command stands for (change file mode bits). chmod changes the file mode (permission) of each given file, folder, script, etc.. according to mode asked for.

There exist 3 types of permission on a file (folder or anything but to keep things simple we will be using file).

Read (r)=4
Write(w)=2
Execute(x)=1

So if you want to give only read permission on a file it will be assigned a value of ‘4‘, for write permission only, a value of ‘2‘ and for execute permission only, a value of ‘1‘ is to be given. For read and write permission 4+2 = ‘6‘ is to be given, ans so on.

Now permission need to be set for 3 kinds of user and usergroup. The first is owner, then usergroup and finally world.

rwxr-x--x   abc.sh

Here the root’s permission is rwx (readwrite and execute).
usergroup to which it belongs, is r-x (read and execute only, no write permission) and
for world is –x (only execute).

To change its permission and provide readwrite and execute permission to owner, group and world.

root@tecmint:~# chmod 777 abc.sh

only read and write permission to all three.

root@tecmint:~# chmod 666 abc.sh

readwrite and execute to owner and only execute to group and world.

root@tecmint:~# chmod 711 abc.sh

Note: one of the most important command useful for sysadmin and user both. On a multi-user environment or on a server, this command comes to rescue, setting wrong permission will either makes a file inaccessible or provide unauthorized access to someone.

11. Command: chown

The Linux “chown” command stands for (change file owner and group). Every file belongs to a group of user and a owner. It is used Do ‘ls -l‘ into your directory and you will see something like this.

root@tecmint:~# ls -l 

drwxr-xr-x 3 server root 4096 May 10 11:14 Binary 
drwxr-xr-x 2 server server 4096 May 13 09:42 Desktop

Here the directory Binary is owned by user “server” and it belongs to usergroup “root” where as directory “Desktop” is owned by user “server” and belongs to user group “server“.

This “chown” command is used to change the file ownership and thus is useful in managing and providing file to authorised user and usergroup only.

root@tecmint:~# chown server:server Binary

drwxr-xr-x 3 server server 4096 May 10 11:14 Binary 
drwxr-xr-x 2 server server 4096 May 13 09:42 Desktop

Note: “chown” changes the user and group ownership of each given FILE to NEW-OWNER or to the user and group of an existing reference file.

12. Command: apt

The Debian based “apt” command stands for (Advanced Package Tool). Apt is an advanced package manager for Debian based system (UbuntuKubuntu, etc.), that automatically and intelligently searchinstallupdate and resolves dependency of packages on Gnu/Linux system from command line.

root@tecmint:~# apt-get install mplayer

Reading package lists... Done
Building dependency tree       
Reading state information... Done
The following package was automatically installed and is no longer required:
  java-wrappers
Use 'apt-get autoremove' to remove it.
The following extra packages will be installed:
  esound-common libaudiofile1 libesd0 libopenal-data libopenal1 libsvga1 libvdpau1 libxvidcore4
Suggested packages:
  pulseaudio-esound-compat libroar-compat2 nvidia-vdpau-driver vdpau-driver mplayer-doc netselect fping
The following NEW packages will be installed:
  esound-common libaudiofile1 libesd0 libopenal-data libopenal1 libsvga1 libvdpau1 libxvidcore4 mplayer
0 upgraded, 9 newly installed, 0 to remove and 8 not upgraded.
Need to get 3,567 kB of archives.
After this operation, 7,772 kB of additional disk space will be used.
Do you want to continue [Y/n]? y
root@tecmint:~# apt-get update

Hit http://ppa.launchpad.net raring Release.gpg                                           
Hit http://ppa.launchpad.net raring Release.gpg                      
Get:1 http://security.ubuntu.com raring-security Release.gpg [933 B] 
Hit http://in.archive.ubuntu.com raring Release.gpg                                                   
Hit http://ppa.launchpad.net raring Release.gpg                      
Get:2 http://security.ubuntu.com raring-security Release [40.8 kB]   
Ign http://ppa.launchpad.net raring Release.gpg                                                  
Get:3 http://in.archive.ubuntu.com raring-updates Release.gpg [933 B]                            
Hit http://ppa.launchpad.net raring Release.gpg                                                                
Hit http://in.archive.ubuntu.com raring-backports Release.gpg

Note: The above commands results into system-wide changes and hence requires root password (Check ‘#‘ and not ‘$’ as prompt). Apt is considered more advanced and intelligent as compared to yum command.

As the name suggest, apt-cache search for package containing sub package mpalyerapt-get install, update all the packages, that are already installed, to the newest one.

Read more about apt-get and apt-cache commands at 25 APT-GET and APT-CACHE Commands

13. Command: tar

The “tar” command is a Tape Archive is useful in creation of archive, in a number of file format and their extraction.

root@tecmint:~# tar -zxvf abc.tar.gz (Remember 'z' for .tar.gz)
root@tecmint:~# tar -jxvf abc.tar.bz2 (Remember 'j' for .tar.bz2)
root@tecmint:~# tar -cvf archieve.tar.gz(.bz2) /path/to/folder/abc

Note: A ‘tar.gz‘ means gzipped. ‘tar.bz2‘ is compressed with bzip which uses a better but slower compression method.

Read more about “tar command” examples at 18 Tar Command Examples

14. Command: cal

The “cal” (Calendar), it is used to displays calendar of the present month or any other month of any year that is advancing or passed.

root@tecmint:~# cal 

May 2013        
Su Mo Tu We Th Fr Sa  
          1  2  3  4  
 5  6  7  8  9 10 11  
12 13 14 15 16 17 18  
19 20 21 22 23 24 25  
26 27 28 29 30 31

Show calendar of year 1835 for month February, that already has passed.

root@tecmint:~# cal 02 1835

   February 1835      
Su Mo Tu We Th Fr Sa  
 1  2  3  4  5  6  7  
 8  9 10 11 12 13 14  
15 16 17 18 19 20 21  
22 23 24 25 26 27 28

Shows calendar of year 2145 for the month of July, that will advancing

root@tecmint:~# cal 07 2145

     July 2145        
Su Mo Tu We Th Fr Sa  
             1  2  3  
 4  5  6  7  8  9 10  
11 12 13 14 15 16 17  
18 19 20 21 22 23 24  
25 26 27 28 29 30 31

Note: You need not to turn the calendar of 50 years back, neither you need to make complex mathematical calculation to know what day you were worn or your coming birthday will fall on which day.

15. Command: date

The “date” (Date) command print the current date and time on the standard output, and can further be set.

root@tecmint:~# date

Fri May 17 14:13:29 IST 2013
root@tecmint:~# date --set='14 may 2013 13:57' 

Mon May 13 13:57:00 IST 2013

Note: This Command will be very use-full in scripting, time and date based scripting, to be more perfect. Moreover changing date and time using terminal will make you feel GEEK!!!. (Obviously you need to be root to perform this operation, as it is a system wide change).

16. Command: cat

The “cat” stands for (Concatenation). Concatenate (join) two or more plain file and/or print contents of a file on standard output.

root@tecmint:~# cat a.txt b.txt c.txt d.txt >> abcd.txt
root@tecmint:~# cat abcd.txt
....
contents of file abcd 
...

Note: “>>” and “>” are called append symbol. They are used to append the output to a file and not on standard output. “>” symbol will delete a file already existed and create a new file hence for security reason it is advised to use “>>” that will write the output without overwriting or deleting the file.

Before Proceeding further, I must let you know about wildcards (you would be aware of wildcard entry, in most of the Television shows) Wildcards are a shell feature that makes the command line much more powerful than any GUI file managers. You see, if you want to select a big group of files in a graphical file manager, you usually have to select them with your mouse. This may seem simple, but in some cases it can be very frustrating.

For example, suppose you have a directory with a huge amount of all kinds of files and subdirectories, and you decide to move all the HTML files, that have the word “Linux” somewhere in the middle of their names, from that big directory into another directory. What’s a simple way to do this? If the directory contains a huge amount of differently named HTML files, your task is everything but simple!

In the Linux CLI that task is just as simple to perform as moving only one HTML file, and it’s so easy because of the shell wildcards. These are special characters that allow you to select file names that match certain patterns of characters. This helps you to select even a big group of files with typing just a few characters, and in most cases it’s easier than selecting the files with a mouse.

Here’s a list of the most commonly used wildcards :

Wildcard			Matches
   *			zero or more characters
   ?			exactly one character
[abcde]			exactly one character listed
 [a-e]			exactly one character in the given range
[!abcde]		any character that is not listed
 [!a-e]			any character that is not in the given range
{debian,linux}		exactly one entire word in the options given

! is called not symbol, and the reverse of string attached with ‘!’ is true.

Read more examples of Linux “cat command” at 13 Cat Command Examples in Linux

17. Command: cp

The “copy” stands for (Copy), it copies a file from one location to another location.

root@tecmint:~# cp /home/user/Downloads abc.tar.gz /home/user/Desktop (Return 0 when sucess)

Note: cp is one of the most commonly used command in shell scripting and it can be used with wildcard characters (Describe in the above block), for customised and desired file copying.

18. Command: mv

The “mv” command moves a file from one location to another location.

root@tecmint:~# mv /home/user/Downloads abc.tar.gz /home/user/Desktop (Return 0 when sucess)

Note: mv command can be used with wildcard characters. mv should be used with caution, as moving of system/unauthorised file may lead to security as well as breakdown of system.

19. Command: pwd

The command “pwd” (print working directory), prints the current working directory with full path name from terminal.

root@tecmint:~# pwd 

/home/user/Desktop

Note: This command won’t be much frequently used in scripting but it is an absolute life saver for newbie who gets lost in terminal in their early connection with nux. (Linux is most commonly referred as nux or nix).

20. Command: cd

Finally, the frequently used “cd” command stands for (change directory), it change the working directory to execute, copy, move write, read, etc. from terminal itself.

root@tecmint:~# cd /home/user/Desktop
server@localhost:~$ pwd

/home/user/Desktop

Note: cd comes to rescue when switching between directories from terminal. “Cd ~” will change the working directory to user’s home directory, and is very useful if a user finds himself lost in terminal. “Cd ..” will change the working directory to parent directory (of current working directory).

These commands will surely make you comfortable with Linux. But it’s not the end. Very soon I will be coming with other commands which will be useful for ‘Middle Level User‘ i.e., You! No don’t exclaim, if you get used-to these commands, You will notice promotion in user-level from newbie to Middle-level-user. In the next article, I will be coming up with commands like ‘Kill‘, ‘Ps‘, ‘grep‘,….Wait for the article and I don’t want to spoil your interest.

20 Advanced Commands for Middle Level Linux Users

You might have found the first article very much useful, this article is an extension of the 20 Useful Commands for Linux Newbies. The first article was intended for newbies and this article is for Middle-Level-User and Advanced Users. Here you will find how to customise search, know the processes running guide to kill them, how to make your Linux terminal productive is an important aspect and how to compile cc++java programs in nix.

Linux Advanced & Expert Commands

20 Linux Advanced & Expert Commands

21. Command: Find

Search for files in the given directory, hierarchically starting at the parent directory and moving to sub-directories.

root@tecmint:~# find -name *.sh 

./Desktop/load.sh 
./Desktop/test.sh 
./Desktop/shutdown.sh 
./Binary/firefox/run-mozilla.sh 
./Downloads/kdewebdev-3.5.8/quanta/scripts/externalpreview.sh 
./Downloads/kdewebdev-3.5.8/admin/doxygen.sh 
./Downloads/kdewebdev-3.5.8/admin/cvs.sh 
./Downloads/kdewebdev-3.5.8/admin/ltmain.sh 
./Downloads/wheezy-nv-install.sh

Note: The `-name‘ option makes the search case sensitive. You can use the `-iname‘ option to find something regardless of case. (* is a wildcard and searches all the file having extension ‘.sh‘ you can use filename or a part of file name to customise the output).

root@tecmint:~# find -iname *.SH ( find -iname *.Sh /  find -iname *.sH)

./Desktop/load.sh 
./Desktop/test.sh 
./Desktop/shutdown.sh 
./Binary/firefox/run-mozilla.sh 
./Downloads/kdewebdev-3.5.8/quanta/scripts/externalpreview.sh 
./Downloads/kdewebdev-3.5.8/admin/doxygen.sh 
./Downloads/kdewebdev-3.5.8/admin/cvs.sh 
./Downloads/kdewebdev-3.5.8/admin/ltmain.sh 
./Downloads/wheezy-nv-install.sh
root@tecmint:~# find -name *.tar.gz 

/var/www/modules/update/tests/aaa_update_test.tar.gz 
./var/cache/flashplugin-nonfree/install_flash_player_11_linux.i386.tar.gz 
./home/server/Downloads/drupal-7.22.tar.gz 
./home/server/Downloads/smtp-7.x-1.0.tar.gz 
./home/server/Downloads/noreqnewpass-7.x-1.2.tar.gz 
./usr/share/gettext/archive.git.tar.gz 
./usr/share/doc/apg/php.tar.gz 
./usr/share/doc/festival/examples/speech_pm_1.0.tar.gz 
./usr/share/doc/argyll/examples/spyder2.tar.gz 
./usr/share/usb_modeswitch/configPack.tar.gz

Note: The above command searches for all the file having extension ‘tar.gz‘ in root directory and all the sub-directories including mounted devices.

Read more examples of Linux ‘find‘ command at 35 Find Command Examples in Linux
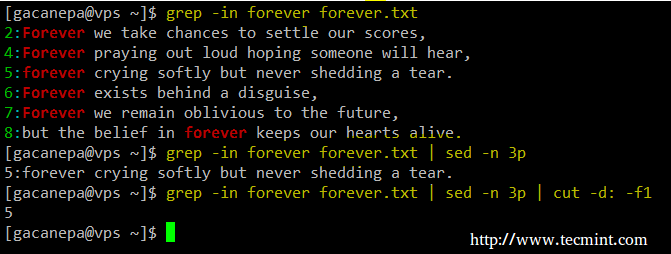
22. Command: grep

The ‘grep‘ command searches the given file for lines containing a match to the given strings or words. Search ‘/etc/passwd‘ for ‘tecmint‘ user.

root@tecmint:~# grep tecmint /etc/passwd 

tecmint:x:1000:1000:Tecmint,,,:/home/tecmint:/bin/bash

Ignore word case and all other combination with ‘-i‘ option.

root@tecmint:~# grep -i TECMINT /etc/passwd 

tecmint:x:1000:1000:Tecmint,,,:/home/tecmint:/bin/bash

Search recursively (-ri.e. read all files under each directory for a string “127.0.0.1“.

root@tecmint:~# grep -r "127.0.0.1" /etc/ 

/etc/vlc/lua/http/.hosts:127.0.0.1
/etc/speech-dispatcher/modules/ivona.conf:#IvonaServerHost "127.0.0.1"
/etc/mysql/my.cnf:bind-address		= 127.0.0.1
/etc/apache2/mods-available/status.conf:    Allow from 127.0.0.1 ::1
/etc/apache2/mods-available/ldap.conf:    Allow from 127.0.0.1 ::1
/etc/apache2/mods-available/info.conf:    Allow from 127.0.0.1 ::1
/etc/apache2/mods-available/proxy_balancer.conf:#    Allow from 127.0.0.1 ::1
/etc/security/access.conf:#+ : root : 127.0.0.1
/etc/dhcp/dhclient.conf:#prepend domain-name-servers 127.0.0.1;
/etc/dhcp/dhclient.conf:#  option domain-name-servers 127.0.0.1;
/etc/init/network-interface.conf:	ifconfig lo 127.0.0.1 up || true
/etc/java-6-openjdk/net.properties:# localhost & 127.0.0.1).
/etc/java-6-openjdk/net.properties:# http.nonProxyHosts=localhost|127.0.0.1
/etc/java-6-openjdk/net.properties:# localhost & 127.0.0.1).
/etc/java-6-openjdk/net.properties:# ftp.nonProxyHosts=localhost|127.0.0.1
/etc/hosts:127.0.0.1	localhost

Note: You can use these following options along with grep.

  1. -w for word (egrep -w ‘word1|word2‘ /path/to/file).
  2. -c for count (i.e., total number of times the pattern matched) (grep -c ‘word‘ /path/to/file).
  3. –color for coloured output (grep –color server /etc/passwd).

23. Command: man

The ‘man‘ is the system’s manual pager. Man provides online documentation for all the possible options with a command and its usages. Almost all the command comes with their corresponding manual pages. For example,

root@tecmint:~# man man

MAN(1)                                                               Manual pager utils                                                              MAN(1)

NAME
       man - an interface to the on-line reference manuals

SYNOPSIS
       man  [-C  file]  [-d]  [-D]  [--warnings[=warnings]]  [-R  encoding]  [-L  locale]  [-m  system[,...]]  [-M  path]  [-S list] [-e extension] [-i|-I]
       [--regex|--wildcard] [--names-only] [-a] [-u] [--no-subpages] [-P pager] [-r prompt] [-7] [-E encoding] [--no-hyphenation] [--no-justification]  [-p
       string] [-t] [-T[device]] [-H[browser]] [-X[dpi]] [-Z] [[section] page ...] ...
       man -k [apropos options] regexp ...
       man -K [-w|-W] [-S list] [-i|-I] [--regex] [section] term ...
       man -f [whatis options] page ...
       man -l [-C file] [-d] [-D] [--warnings[=warnings]] [-R encoding] [-L locale] [-P pager] [-r prompt] [-7] [-E encoding] [-p string] [-t] [-T[device]]
       [-H[browser]] [-X[dpi]] [-Z] file ...
       man -w|-W [-C file] [-d] [-D] page ...
       man -c [-C file] [-d] [-D] page ...
       man [-hV]

Manual page for man page itself, similarly ‘man cat‘ (Manual page for cat command) and ‘man ls‘ (Manual page for command ls).

Note: man page is intended for command reference and learning.

24. Command: ps

ps (Process) gives the status of running processes with a unique Id called PID.

root@tecmint:~# ps

 PID TTY          TIME CMD
 4170 pts/1    00:00:00 bash
 9628 pts/1    00:00:00 ps

To list status of all the processes along with process id and PID, use option ‘-A‘.

root@tecmint:~# ps -A

 PID TTY          TIME CMD
    1 ?        00:00:01 init
    2 ?        00:00:00 kthreadd
    3 ?        00:00:01 ksoftirqd/0
    5 ?        00:00:00 kworker/0:0H
    7 ?        00:00:00 kworker/u:0H
    8 ?        00:00:00 migration/0
    9 ?        00:00:00 rcu_bh
....

Note: This command is very useful when you want to know which processes are running or may need PIDsometimes, for process to be killed. You can use it with ‘grep‘ command to find customised output. For example,

root@tecmint:~# ps -A | grep -i ssh

 1500 ?        00:09:58 sshd
 4317 ?        00:00:00 sshd

Here ‘ps‘ is pipelined with ‘grep‘ command to find customised and relevant output of our need.

25. Command: kill

OK, you might have understood what this command is for, from the name of the command. This command is used to kill process which is not relevant now or is not responding. It is very useful command, rather a very very useful command. You might be familiar with frequent windows restarting because of the fact that most of the time a running process can’t be killed, and if killed it needs windows to get restart so that changes could be taken into effect but in the world of Linux, there is no such things. Here you can kill a process and start it without restarting the whole system.

You need a process’s pid (ps) to kill it.

Let suppose you want to kill program ‘apache2‘ that might not be responding. Run ‘ps -A‘ along with grepcommand.

root@tecmint:~# ps -A | grep -i apache2

1285 ?        00:00:00 apache2

Find process ‘apache2‘, note its pid and kill it. For example, in my case ‘apache2‘ pid is ‘1285‘.

root@tecmint:~# kill 1285 (to kill the process apache2)

Note: Every time you re-run a process or start a system, a new pid is generated for each process and you can know about the current running processes and its pid using command ‘ps‘.

Another way to kill the same process is.

root@tecmint:~# pkill apache2

Note: Kill requires job id / process id for sending signals, where as in pkill, you have an option of using pattern, specifying process owner, etc.

26. Command: whereis

The ‘whereis‘ command is used to locate the BinarySources and Manual Pages of the command. For example, to locate the BinarySources and Manual Pages of the command ‘ls‘ and ‘kill‘.

root@tecmint:~# whereis ls 

ls: /bin/ls /usr/share/man/man1/ls.1.gz
root@tecmint:~# whereis kill

kill: /bin/kill /usr/share/man/man2/kill.2.gz /usr/share/man/man1/kill.1.gz

Note: This is useful to know where the binaries are installed for manual editing sometimes.

27. Command: service

The ‘service‘ command controls the StartingStopping or Restarting of a ‘service‘. This command make it possible to startrestart or stop a service without restarting the system, for the changes to be taken into effect.

Startting an apache2 server on Ubuntu

root@tecmint:~# service apache2 start

 * Starting web server apache2                                                                                                                                 apache2: Could not reliably determine the server's fully qualified domain name, using 127.0.1.1 for ServerName
httpd (pid 1285) already running						[ OK ]

Restarting a apache2 server on Ubuntu

root@tecmint:~# service apache2 restart

* Restarting web server apache2                                                                                                                               apache2: Could not reliably determine the server's fully qualified domain name, using 127.0.1.1 for ServerName
 ... waiting .apache2: Could not reliably determine the server's fully qualified domain name, using 127.0.1.1 for ServerName  [ OK ]

Stopping a apache2 server on Ubuntu

root@tecmint:~# service apache2 stop

 * Stopping web server apache2                                                                                                                                 apache2: Could not reliably determine the server's fully qualified domain name, using 127.0.1.1 for ServerName
 ... waiting                                                           		[ OK ]

Note: All the process script lies in ‘/etc/init.d‘, and the path might needs to be included on certain system, i.e., in spite of running “service apache2 start” you would be asked to run “/etc/init.d/apache2 start”.

28. Command: alias

alias is a built in shell command that lets you assign name for a long command or frequently used command.

I uses ‘ls -l‘ command frequently, which includes 5 characters including space. Hence I created an alias for this to ‘l‘.

root@tecmint:~# alias l='ls -l'

check if it works or not.

root@tecmint:~# l

total 36 
drwxr-xr-x 3 tecmint tecmint 4096 May 10 11:14 Binary 
drwxr-xr-x 3 tecmint tecmint 4096 May 21 11:21 Desktop 
drwxr-xr-x 2 tecmint tecmint 4096 May 21 15:23 Documents 
drwxr-xr-x 8 tecmint tecmint 4096 May 20 14:56 Downloads 
drwxr-xr-x 2 tecmint tecmint 4096 May  7 16:58 Music 
drwxr-xr-x 2 tecmint tecmint 4096 May 20 16:17 Pictures 
drwxr-xr-x 2 tecmint tecmint 4096 May  7 16:58 Public 
drwxr-xr-x 2 tecmint tecmint 4096 May  7 16:58 Templates 
drwxr-xr-x 2 tecmint tecmint 4096 May  7 16:58 Videos

To remove alias ‘l‘, use the following ‘unalias‘ command.

root@tecmint:~# unalias l

check, if ‘l‘ still is alias or not.

root@tecmint:~# l

bash: l: command not found

Making a little fun out of this command. Make alias of certain important command to some other important command.

alias cd='ls -l' (set alias of ls -l to cd)
alias su='pwd' (set alias of pwd to su)
....
(You can create your own)
....

Now when your friend types ‘cd‘, just think how funny it would be when he gets directory listing and not directory changing. And when he tries to be ‘su‘ the all he gets is the location of working directory. You can remove the alias later using command ‘unalias‘ as explained above.

29. Command: df

Report disk usages of file system. Useful for user as well as System Administrator to keep track of their disk usages. ‘df‘ works by examining directory entries, which generally are updated only when a file is closed.

root@tecmint:~# df

Filesystem     1K-blocks    Used Available Use% Mounted on
/dev/sda1       47929224 7811908  37675948  18% /
none                   4       0         4   0% /sys/fs/cgroup
udev             1005916       4   1005912   1% /dev
tmpfs             202824     816    202008   1% /run
none                5120       0      5120   0% /run/lock
none             1014120     628   1013492   1% /run/shm
none              102400      44    102356   1% /run/user
/dev/sda5         184307   79852     94727  46% /boot
/dev/sda7       95989516   61104  91045676   1% /data
/dev/sda8       91953192   57032  87218528   1% /personal

For more examples of ‘df‘ command, read the article 12 df Command Examples in Linux.

30. Command: du

Estimate file space usage. Output the summary of disk usages by ever file hierarchically, i.e., in recursive manner.

root@tecmint:~# du

8       ./Daily Pics/wp-polls/images/default_gradient
8       ./Daily Pics/wp-polls/images/default
32      ./Daily Pics/wp-polls/images
8       ./Daily Pics/wp-polls/tinymce/plugins/polls/langs
8       ./Daily Pics/wp-polls/tinymce/plugins/polls/img
28      ./Daily Pics/wp-polls/tinymce/plugins/polls
32      ./Daily Pics/wp-polls/tinymce/plugins
36      ./Daily Pics/wp-polls/tinymce
580     ./Daily Pics/wp-polls
1456    ./Daily Pics
36      ./Plugins/wordpress-author-box
16180   ./Plugins
12      ./May Articles 2013/Xtreme Download Manager
4632    ./May Articles 2013/XCache

Note: ‘df‘ only reports usage statistics on file systems, while ‘du‘, on the other hand, measures directory contents. For more ‘du‘ command examples and usage, read 10 du (Disk Usage) Commands.

31. Command: rm

The command ‘rm‘ stands for remove. rm is used to remove files (s) and directories.

Removing a directory

root@tecmint:~# rm PassportApplicationForm_Main_English_V1.0

rm: cannot remove `PassportApplicationForm_Main_English_V1.0': Is a directory

The directory can’t be removed simply by ‘rm‘ command, you have to use ‘-rf‘ switch along with ‘rm‘.

root@tecmint:~# rm -rf PassportApplicationForm_Main_English_V1.0

Warning: “rm -rf” command is a destructive command if accidently you make it to the wrong directory. Once you ‘rm -rf‘ a directory all the files and the directory itself is lost forever, all of a sudden. Use it with caution.

32. Command: echo

echo as the name suggest echoes a text on the standard output. It has nothing to do with shell, nor does shell reads the output of echo command. However in an interactive script, echo passes the message to the user through terminal. It is one of the command that is commonly used in scripting, interactive scripting.

root@tecmint:~# echo "Tecmint.com is a very good website" 

Tecmint.com is a very good website
creating a small interactive script

1. create a file, named ‘interactive_shell.sh‘ on desktop. (Remember ‘.sh‘ extension is must).
2. copy and paste the below script, exactly same, as below.

#!/bin/bash 
echo "Please enter your name:" 
   read name 
   echo "Welcome to Linux $name"

Next, set execute permission and run the script.

root@tecmint:~# chmod 777 interactive_shell.sh
root@tecmint:~# ./interactive_shell.sh

Please enter your name:
Ravi Saive
Welcome to Linux Ravi Saive

Note: ‘#!/bin/bash‘ tells the shell that it is an script an it is always a good idea to include it at the top of script. ‘read‘ reads the given input.

33. Command: passwd

This is an important command that is useful for changing own password in terminal. Obviously you need to know your current passowrd for Security reason.

root@tecmint:~# passwd 

Changing password for tecmint. 
(current) UNIX password: ******** 
Enter new UNIX password: ********
Retype new UNIX password: ********
Password unchanged   [Here was passowrd remians unchanged, i.e., new password=old password]
Enter new UNIX password: #####
Retype new UNIX password:#####

34. Command: lpr

This command print files named on command line, to named printer.

root@tecmint:~# lpr -P deskjet-4620-series 1-final.pdf

Note: The ‘lpq‘ command lets you view the status of a printer (whether it’s up or not), and the jobs (files) waiting to be printed.

35. Command: cmp

compare two files of any type and writes the results to the standard output. By default, ‘cmp‘ Returns 0 if the files are the same; if they differ, the byte and line number at which the first difference occurred is reported.

To provide examples for this command, lets consider two files:

file1.txt
root@tecmint:~# cat file1.txt

Hi My name is Tecmint
file2.txt
root@tecmint:~# cat file2.txt

Hi My name is tecmint [dot] com

Now, let’s compare two files and see output of the command.

root@tecmint:~# cmp file1.txt file2.txt 

file1.txt file2.txt differ: byte 15, line 1

36. Command: wget

Wget is a free utility for non-interactive (i.e., can work in background) download of files from the Web. It supports HTTPHTTPSFTP protocols and HTTP proxies.

Download ffmpeg using wget

root@tecmint:~# wget http://downloads.sourceforge.net/project/ffmpeg-php/ffmpeg-php/0.6.0/ffmpeg-php-0.6.0.tbz2

--2013-05-22 18:54:52--  http://downloads.sourceforge.net/project/ffmpeg-php/ffmpeg-php/0.6.0/ffmpeg-php-0.6.0.tbz2
Resolving downloads.sourceforge.net (downloads.sourceforge.net)... 216.34.181.59
Connecting to downloads.sourceforge.net (downloads.sourceforge.net)|216.34.181.59|:80... connected.
HTTP request sent, awaiting response... 302 Found
Location: http://kaz.dl.sourceforge.net/project/ffmpeg-php/ffmpeg-php/0.6.0/ffmpeg-php-0.6.0.tbz2 [following]
--2013-05-22 18:54:54--  http://kaz.dl.sourceforge.net/project/ffmpeg-php/ffmpeg-php/0.6.0/ffmpeg-php-0.6.0.tbz2
Resolving kaz.dl.sourceforge.net (kaz.dl.sourceforge.net)... 92.46.53.163
Connecting to kaz.dl.sourceforge.net (kaz.dl.sourceforge.net)|92.46.53.163|:80... connected.
HTTP request sent, awaiting response... 200 OK
Length: 275557 (269K) [application/octet-stream]
Saving to: ‘ffmpeg-php-0.6.0.tbz2’

100%[===========================================================================>] 2,75,557    67.8KB/s   in 4.0s   

2013-05-22 18:55:00 (67.8 KB/s) - ‘ffmpeg-php-0.6.0.tbz2’ saved [275557/275557]

37. Command: mount

Mount is an important command which is used to mount a filesystem that don’t mount itself. You need root permission to mount a device.

First run ‘lsblk‘ after plugging-in your filesystem and identify your device and note down you device assigned name.

root@tecmint:~# lsblk 

NAME   MAJ:MIN RM   SIZE RO TYPE MOUNTPOINT 
sda      8:0    0 931.5G  0 disk 
├─sda1   8:1    0 923.6G  0 part / 
├─sda2   8:2    0     1K  0 part 
└─sda5   8:5    0   7.9G  0 part [SWAP] 
sr0     11:0    1  1024M  0 rom  
sdb      8:16   1   3.7G  0 disk 
└─sdb1   8:17   1   3.7G  0 part

From this screen it was clear that I plugged in a 4 GB pendrive thus ‘sdb1‘ is my filesystem to be mounted. Become a root to perform this operation and change to /dev directory where all the file system is mounted.

root@tecmint:~# su
Password:
root@tecmint:~# cd /dev

Create a directory named anything but should be relevent for reference.

root@tecmint:~# mkdir usb

Now mount filesystem ‘sdb1‘ to directory ‘usb‘.

root@tecmint:~# mount /dev/sdb1 /dev/usb

Now you can navigate to /dev/usb from terminal or X-windows system and acess file from the mounted directory.

Time for Code Developer to know how rich Linux environment is

38. Command: gcc

gcc is the in-built compiler for ‘c‘ language in Linux Environment. A simple c program, save it on ur desktop as Hello.c (remember ‘.c‘ extension is must).

#include <stdio.h>
int main()
{
  printf("Hello world\n");
  return 0;
}
Compile it
root@tecmint:~# gcc Hello.c
Run it
root@tecmint:~# ./a.out 

Hello world

Note: On compiling a c program the output is automatically generated to a new file “a.out” and everytime you compile a c program same file “a.out” gets modified. Hence it is a good advice to define a output file during compile and thus there is no risk of overwrite to output file.

Compile it this way
root@tecmint:~# gcc -o Hello Hello.c

Here ‘-o‘ sends the output to ‘Hello‘ file and not ‘a.out‘. Run it again.

root@tecmint:~# ./Hello 

Hello world

39. Command: g++

g++ is the in-built compiler for ‘C++‘ , the first object oriented programming language. A simple c++ program, save it on ur desktop as Add.cpp (remember ‘.cpp‘ extension is must).

#include <iostream>

using namespace std;

int main() 
    {
          int a;
          int b;
          cout<<"Enter first number:\n";
          cin >> a;
          cout <<"Enter the second number:\n";
          cin>> b;
          cin.ignore();
          int result = a + b;
          cout<<"Result is"<<"  "<<result<<endl;
          cin.get();
          return 0;
     }
Compile it
root@tecmint:~# g++ Add.cpp
Run it
root@tecmint:~# ./a.out

Enter first number: 
...
...

Note: On compiling a c++ program the output is automatically generated to a new file “a.out” and everytime you compile a c++ program same file “a.out” gets modified. Hence it is a good advice to define a output file during compile and thus there is no risk of overwrite to output file.

Compile it this way
root@tecmint:~# g++ -o Add Add.cpp
Run it
root@tecmint:~# ./Add 

Enter first number: 
...
...

40. Command: java

Java is one of the world’s highly used programming language and is considered fast, secure, and reliable. Most of the the web based service of today runs on java.

Create a simple java program by pasting the below test to a file, named tecmint.java (remember ‘.java‘ extension is must).

class tecmint {
  public static void main(String[] arguments) {
    System.out.println("Tecmint ");
  }
}
compile it using javac
root@tecmint:~# javac tecmint.java
Run it
root@tecmint:~# java tecmint

Note: Almost every distribution comes packed with gcc compiler, major number of distros have inbuilt g++ and java compiler, while some may not have. You can apt or yum the required package.

Don’t forget to mention your valueable comment and the type of article you want to see here. I will soon be back with an interesting topic about the lesser known facts about Linux.

20 Advanced Commands for Linux Experts

Thanks for all the likes, good words and support you gave us in the first two part of this article. In the first article we discussed commands for those users who have just switched to Linux and needed the necessary knowledge to start with.

  1. 20 Useful Commands for Linux Newbies

In the second article we discussed the commands which a middle level user requires to manage his own system.

  1. 20 Advanced Commands for Middle Level Linux Users

What Next? In this article I will be explaining those commands required for administrating the Linux Server.

Linux System Admin Commands

Linux Expert Commands

41. Command: ifconfig

ifconfig is used to configure the kernel-resident network interfaces. It is used at boot time to set up interfaces as necessary. After that, it is usually only needed when debugging or when system tuning is needed.

Check Active Network Interfaces
[avishek@tecmint ~]$ ifconfig 

eth0      Link encap:Ethernet  HWaddr 40:2C:F4:EA:CF:0E  
          inet addr:192.168.1.3  Bcast:192.168.1.255  Mask:255.255.255.0 
          inet6 addr: fe80::422c:f4ff:feea:cf0e/64 Scope:Link 
          UP BROADCAST RUNNING MULTICAST  MTU:1500  Metric:1 
          RX packets:163843 errors:0 dropped:0 overruns:0 frame:0 
          TX packets:124990 errors:0 dropped:0 overruns:0 carrier:0 
          collisions:0 txqueuelen:1000 
          RX bytes:154389832 (147.2 MiB)  TX bytes:65085817 (62.0 MiB) 
          Interrupt:20 Memory:f7100000-f7120000 

lo        Link encap:Local Loopback  
          inet addr:127.0.0.1  Mask:255.0.0.0 
          inet6 addr: ::1/128 Scope:Host 
          UP LOOPBACK RUNNING  MTU:16436  Metric:1 
          RX packets:78 errors:0 dropped:0 overruns:0 frame:0 
          TX packets:78 errors:0 dropped:0 overruns:0 carrier:0 
          collisions:0 txqueuelen:0 
          RX bytes:4186 (4.0 KiB)  TX bytes:4186 (4.0 KiB)
Check All Network Interfaces

Display details of All interfaces including disabled interfaces using “-a” argument.

[avishek@tecmint ~]$ ifconfig -a

eth0      Link encap:Ethernet  HWaddr 40:2C:F4:EA:CF:0E  
          inet addr:192.168.1.3  Bcast:192.168.1.255  Mask:255.255.255.0 
          inet6 addr: fe80::422c:f4ff:feea:cf0e/64 Scope:Link 
          UP BROADCAST RUNNING MULTICAST  MTU:1500  Metric:1 
          RX packets:163843 errors:0 dropped:0 overruns:0 frame:0 
          TX packets:124990 errors:0 dropped:0 overruns:0 carrier:0 
          collisions:0 txqueuelen:1000 
          RX bytes:154389832 (147.2 MiB)  TX bytes:65085817 (62.0 MiB) 
          Interrupt:20 Memory:f7100000-f7120000 

lo        Link encap:Local Loopback  
          inet addr:127.0.0.1  Mask:255.0.0.0 
          inet6 addr: ::1/128 Scope:Host 
          UP LOOPBACK RUNNING  MTU:16436  Metric:1 
          RX packets:78 errors:0 dropped:0 overruns:0 frame:0 
          TX packets:78 errors:0 dropped:0 overruns:0 carrier:0 
          collisions:0 txqueuelen:0 
          RX bytes:4186 (4.0 KiB)  TX bytes:4186 (4.0 KiB) 

virbr0    Link encap:Ethernet  HWaddr 0e:30:a3:3a:bf:03  
          inet addr:192.168.122.1  Bcast:192.168.122.255  Mask:255.255.255.0
          UP BROADCAST MULTICAST  MTU:1500  Metric:1
          RX packets:0 errors:0 dropped:0 overruns:0 frame:0
          TX packets:0 errors:0 dropped:0 overruns:0 carrier:0
          collisions:0 txqueuelen:0 
          RX bytes:0 (0.0 B)  TX bytes:0 (0.0 B)
Disable an Interface
[avishek@tecmint ~]$ ifconfig eth0 down
Enable an Interface
[avishek@tecmint ~]$ ifconfig eth0 up
Assign IP Address to an Interface

Assign “192.168.1.12” as the IP address for the interface eth0.

[avishek@tecmint ~]$ ifconfig eth0 192.168.1.12
Change Subnet Mask of Interface eth0
[avishek@tecmint ~]$ ifconfig eth0 netmask 255.255.255.
Change Broadcast Address of Interface eth0
[avishek@tecmint ~]$ ifconfig eth0 broadcast 192.168.1.255
Assign IP Address, Netmask and Broadcast to Interface eth0
[avishek@tecmint ~]$ ifconfig eth0 192.168.1.12 netmask 255.255.255.0 broadcast 192.168.1.255

Note: If using a wireless network you need to use command “iwconfig“. For more “ifconfig” command examples and usage, read 15 Useful “ifconfig” Commands.

42. Command: netstat

netstat command displays various network related information such as network connections, routing tables, interface statistics, masquerade connections, multicast memberships etc..,

List All Network Ports
[avishek@tecmint ~]$ netstat -a

Active UNIX domain sockets (servers and established)
Proto RefCnt Flags       Type       State         I-Node   Path
unix  2      [ ACC ]     STREAM     LISTENING     741379   /run/user/user1/keyring-I5cn1c/gpg
unix  2      [ ACC ]     STREAM     LISTENING     8965     /var/run/acpid.socket
unix  2      [ ACC ]     STREAM     LISTENING     18584    /tmp/.X11-unix/X0
unix  2      [ ACC ]     STREAM     LISTENING     741385   /run/user/user1/keyring-I5cn1c/ssh
unix  2      [ ACC ]     STREAM     LISTENING     741387   /run/user/user1/keyring-I5cn1c/pkcs11
unix  2      [ ACC ]     STREAM     LISTENING     20242    @/tmp/dbus-ghtTjuPN46
unix  2      [ ACC ]     STREAM     LISTENING     13332    /var/run/samba/winbindd_privileged/pipe
unix  2      [ ACC ]     STREAM     LISTENING     13331    /tmp/.winbindd/pipe
unix  2      [ ACC ]     STREAM     LISTENING     11030    /var/run/mysqld/mysqld.sock
unix  2      [ ACC ]     STREAM     LISTENING     19308    /tmp/ssh-qnZadSgJAbqd/agent.3221
unix  2      [ ACC ]     STREAM     LISTENING     436781   /tmp/HotShots
unix  2      [ ACC ]     STREAM     LISTENING     46110    /run/user/ravisaive/pulse/native
unix  2      [ ACC ]     STREAM     LISTENING     19310    /tmp/gpg-zfE9YT/S.gpg-agent
....
List All TCP Ports
[avishek@tecmint ~]$ netstat -at

Active Internet connections (servers and established)
Proto Recv-Q Send-Q Local Address           Foreign Address         State      
tcp        0      0 localhost:mysql         *:*                     LISTEN     
tcp        0      0 *:5901                  *:*                     LISTEN     
tcp        0      0 *:5902                  *:*                     LISTEN     
tcp        0      0 *:x11-1                 *:*                     LISTEN     
tcp        0      0 *:x11-2                 *:*                     LISTEN     
tcp        0      0 *:5938                  *:*                     LISTEN     
tcp        0      0 localhost:5940          *:*                     LISTEN     
tcp        0      0 ravisaive-OptiPl:domain *:*                     LISTEN     
tcp        0      0 localhost:ipp           *:*                     LISTEN     
tcp        0      0 ravisaive-OptiPle:48270 ec2-23-21-236-70.c:http ESTABLISHED
tcp        0      0 ravisaive-OptiPle:48272 ec2-23-21-236-70.c:http TIME_WAIT  
tcp        0      0 ravisaive-OptiPle:48421 bom03s01-in-f22.1:https ESTABLISHED
tcp        0      0 ravisaive-OptiPle:48269 ec2-23-21-236-70.c:http ESTABLISHED
tcp        0      0 ravisaive-OptiPle:39084 channel-ecmp-06-f:https ESTABLISHED
...
Show Statistics for All Ports
[avishek@tecmint ~]$ netstat -s

Ip:
    4994239 total packets received
    0 forwarded
    0 incoming packets discarded
    4165741 incoming packets delivered
    3248924 requests sent out
    8 outgoing packets dropped
Icmp:
    29460 ICMP messages received
    566 input ICMP message failed.
    ICMP input histogram:
        destination unreachable: 98
        redirects: 29362
    2918 ICMP messages sent
    0 ICMP messages failed
    ICMP output histogram:
        destination unreachable: 2918
IcmpMsg:
        InType3: 98
        InType5: 29362
        OutType3: 2918
Tcp:
    94533 active connections openings
    23 passive connection openings
    5870 failed connection attempts
    7194 connection resets received
....

OK! For some reason if you want not to resolve host, port and user name as a output of netstat.

[avishek@tecmint ~]$ netstat -an

Fine, you may need to get the output of netstat continuously till interrupt instruction is passed (ctrl+c).

[avishek@tecmint ~]$ netstat -c

For more “netstat” command examples and usage, see the article 20 Netstat Command Examples.

43. Command: nslookup

A network utility program used to obtain information about Internet servers. As its name suggests, the utility finds name server information for domains by querying DNS.

[avishek@tecmint ~]$ nslookup tecmint.com 

Server:		192.168.1.1 
Address:	192.168.1.1#53 

Non-authoritative answer: 
Name:	tecmint.com 
Address: 50.16.67.239
Query Mail Exchanger Record
[avishek@tecmint ~]$ nslookup -query=mx tecmint.com 

Server:		192.168.1.1 
Address:	192.168.1.1#53 

Non-authoritative answer: 
tecmint.com	mail exchanger = 0 smtp.secureserver.net. 
tecmint.com	mail exchanger = 10 mailstore1.secureserver.net. 

Authoritative answers can be found from:
Query Name Server
[avishek@tecmint ~]$ nslookup -type=ns tecmint.com 

Server:		192.168.1.1 
Address:	192.168.1.1#53 

Non-authoritative answer: 
tecmint.com	nameserver = ns3404.com. 
tecmint.com	nameserver = ns3403.com. 

Authoritative answers can be found from:
Query DNS Record
[avishek@tecmint ~]$ nslookup -type=any tecmint.com 

Server:		192.168.1.1 
Address:	192.168.1.1#53 

Non-authoritative answer: 
tecmint.com	mail exchanger = 10 mailstore1.secureserver.net. 
tecmint.com	mail exchanger = 0 smtp.secureserver.net. 
tecmint.com	nameserver = ns06.domaincontrol.com. 
tecmint.com	nameserver = ns3404.com. 
tecmint.com	nameserver = ns3403.com. 
tecmint.com	nameserver = ns05.domaincontrol.com. 

Authoritative answers can be found from:
Query Start of Authority
[avishek@tecmint ~]$ nslookup -type=soa tecmint.com 

Server:		192.168.1.1 
Address:	192.168.1.1#53 

Non-authoritative answer: 
tecmint.com 
	origin = ns3403.hostgator.com 
	mail addr = dnsadmin.gator1702.hostgator.com 
	serial = 2012081102 
	refresh = 86400 
	retry = 7200 
	expire = 3600000 
	minimum = 86400 

Authoritative answers can be found from:
Query Port Number

Change the port number using which you want to connect

[avishek@tecmint ~]$ nslookup -port 56 tecmint.com

Server:		tecmint.com
Address:	50.16.76.239#53

Name:	56
Address: 14.13.253.12

Read Also : 8 Nslookup Commands

44. Command: dig

dig is a tool for querying DNS nameservers for information about host addresses, mail exchanges, nameservers, and related information. This tool can be used from any Linux (Unix) or Macintosh OS X operating system. The most typical use of dig is to simply query a single host.

[avishek@tecmint ~]$ dig tecmint.com

; <<>> DiG 9.8.2rc1-RedHat-9.8.2-0.17.rc1.el6 <<>> tecmint.com 
;; global options: +cmd 
;; Got answer: 
;; ->>HEADER<
Turn Off Comment Lines
[avishek@tecmint ~]$ dig tecmint.com +nocomments 

; <<>> DiG 9.8.2rc1-RedHat-9.8.2-0.17.rc1.el6 <<>> tecmint.com +nocomments 
;; global options: +cmd 
;tecmint.com.			IN	A 
tecmint.com.		14400	IN	A	40.216.66.239 
;; Query time: 418 msec 
;; SERVER: 192.168.1.1#53(192.168.1.1) 
;; WHEN: Sat Jun 29 13:53:22 2013 
;; MSG SIZE  rcvd: 45
Turn Off Authority Section
[avishek@tecmint ~]$ dig tecmint.com +noauthority 

; <<>> DiG 9.8.2rc1-RedHat-9.8.2-0.17.rc1.el6 <<>> tecmint.com +noauthority 
;; global options: +cmd 
;; Got answer: 
;; ->>HEADER<
Turn Off Additional Section
[avishek@tecmint ~]$ dig  tecmint.com +noadditional 

; <<>> DiG 9.9.2-P1 <<>> tecmint.com +noadditional
;; global options: +cmd
;; Got answer:
;; ->>HEADER<
Turn Off Stats Section
[avishek@tecmint ~]$ dig tecmint.com +nostats 

; <<>> DiG 9.8.2rc1-RedHat-9.8.2-0.17.rc1.el6 <<>> tecmint.com +nostats 
;; global options: +cmd 
;; Got answer: 
;; ->>HEADER<
Turn Off Answer Section
[avishek@tecmint ~]$ dig tecmint.com +noanswer 

; <<>> DiG 9.8.2rc1-RedHat-9.8.2-0.17.rc1.el6 <<>> tecmint.com +noanswer 
;; global options: +cmd 
;; Got answer: 
;; ->>HEADER<
Disable All Section at Once
[avishek@tecmint ~]$ dig tecmint.com +noall 

; <<>> DiG 9.8.2rc1-RedHat-9.8.2-0.17.rc1.el6 <<>> tecmint.com +noall 
;; global options: +cmd

Read Also : 10 Linux Dig Command Examples
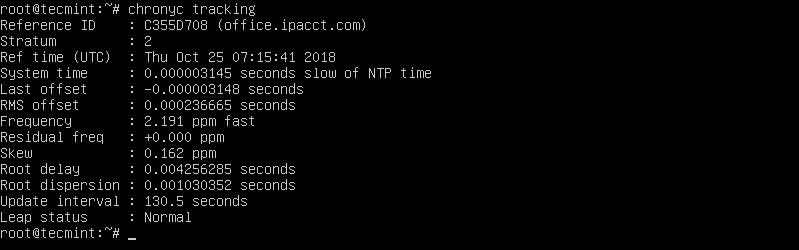
45. Command: uptime

You have just connected to your Linux Server Machine and founds Something unusual or malicious, what you will do? Guessing…. NO, definitely not you could run uptime to verify what happened actually when the server was unattended.

[avishek@tecmint ~]$ uptime

14:37:10 up  4:21,  2 users,  load average: 0.00, 0.00, 0.04

46. Command: wall

one of the most important command for administrator, wall sends a message to everybody logged in with their mesg permission set to “yes“. The message can be given as an argument to wall, or it can be sent to wall’s standard input.

[avishek@tecmint ~]$ wall "we will be going down for maintenance for one hour sharply at 03:30 pm"

Broadcast message from root@localhost.localdomain (pts/0) (Sat Jun 29 14:44:02 2013): 

we will be going down for maintenance for one hour sharply at 03:30 pm

47. command: mesg

Lets you control if people can use the “write” command, to send text to you over the screen.

mesg [n|y]
n - prevents the message from others popping up on the screen.
y – Allows messages to appear on your screen.

48. Command: write

Let you send text directly to the screen of another Linux machine if ‘mesg’ is ‘y’.

[avishek@tecmint ~]$ write ravisaive

49. Command: talk

An enhancement to write command, talk command lets you talk to the logged in users.

[avishek@tecmint ~]$ talk ravisaive

Note: If talk command is not installed, you can always apt or yum the required packages.

[avishek@tecmint ~]$ yum install talk
OR
[avishek@tecmint ~]$ apt-get install talk

50. Command: w

what command ‘w’ seems you funny? But actually it is not. t’s a command, even if it’s just one letter long! The command “w” is a combination of uptime and who commands given one immediately after the other, in that order.

[avishek@tecmint ~]$ w

15:05:42 up  4:49,  3 users,  load average: 0.02, 0.01, 0.00 
USER     TTY      FROM              LOGIN@   IDLE   JCPU   PCPU WHAT 
server   tty7     :0               14:06    4:43m  1:42   0.08s pam: gdm-passwo 
server   pts/0    :0.0             14:18    0.00s  0.23s  1.65s gnome-terminal 
server   pts/1    :0.0             14:47    4:43   0.01s  0.01s bash

51. Command: rename

As the name suggests, this command rename files. rename will rename the specified files by replacing the first occurrence from the file name.

Give the file names a1, a2, a3, a4.....1213

Just type the command.

 rename a1 a0 a?
 rename a1 a0 a??

52. Command: top

Displays the processes of CPU. This command refresh automatically, by default and continues to show CPUprocesses unless interrupt-instruction is given.

[avishek@tecmint ~]$ top

top - 14:06:45 up 10 days, 20:57,  2 users,  load average: 0.10, 0.16, 0.21
Tasks: 240 total,   1 running, 235 sleeping,   0 stopped,   4 zombie
%Cpu(s):  2.0 us,  0.5 sy,  0.0 ni, 97.5 id,  0.0 wa,  0.0 hi,  0.0 si,  0.0 st
KiB Mem:   2028240 total,  1777848 used,   250392 free,    81804 buffers
KiB Swap:  3905532 total,   156748 used,  3748784 free,   381456 cached

  PID USER      PR  NI  VIRT  RES  SHR S  %CPU %MEM    TIME+ COMMAND                                                                                                            
23768 ravisaiv  20   0 1428m 571m  41m S   2.3 28.9  14:27.52 firefox                                                                                                            
24182 ravisaiv  20   0  511m 132m  25m S   1.7  6.7   2:45.94 plugin-containe                                                                                                    
26929 ravisaiv  20   0  5344 1432  972 R   0.7  0.1   0:00.07 top                                                                                                                
24875 ravisaiv  20   0  263m  14m  10m S   0.3  0.7   0:02.76 lxterminal                                                                                                         
    1 root      20   0  3896 1928 1228 S   0.0  0.1   0:01.62 init                                                                                                               
    2 root      20   0     0    0    0 S   0.0  0.0   0:00.06 kthreadd                                                                                                           
    3 root      20   0     0    0    0 S   0.0  0.0   0:17.28 ksoftirqd/0                                                                                                        
    5 root       0 -20     0    0    0 S   0.0  0.0   0:00.00 kworker/0:0H                                                                                                       
    7 root       0 -20     0    0    0 S   0.0  0.0   0:00.00 kworker/u:0H                                                                                                       
    8 root      rt   0     0    0    0 S   0.0  0.0   0:00.12 migration/0                                                                                                        
    9 root      20   0     0    0    0 S   0.0  0.0   0:00.00 rcu_bh                                                                                                             
   10 root      20   0     0    0    0 S   0.0  0.0   0:26.94 rcu_sched                                                                                                          
   11 root      rt   0     0    0    0 S   0.0  0.0   0:01.95 watchdog/0                                                                                                         
   12 root      rt   0     0    0    0 S   0.0  0.0   0:02.00 watchdog/1                                                                                                         
   13 root      20   0     0    0    0 S   0.0  0.0   0:17.80 ksoftirqd/1                                                                                                        
   14 root      rt   0     0    0    0 S   0.0  0.0   0:00.12 migration/1                                                                                                        
   16 root       0 -20     0    0    0 S   0.0  0.0   0:00.00 kworker/1:0H                                                                                                       
   17 root       0 -20     0    0    0 S   0.0  0.0   0:00.00 cpuset                                                                                                             
   18 root       0 -20     0    0    0 S   0.0  0.0   0:00.00 khelper                                                                                                            
   19 root      20   0     0    0    0 S   0.0  0.0   0:00.00 kdevtmpfs                                                                                                          
   20 root       0 -20     0    0    0 S   0.0  0.0   0:00.00 netns                                                                                                              
   21 root      20   0     0    0    0 S   0.0  0.0   0:00.04 bdi-default                                                                                                        
   22 root       0 -20     0    0    0 S   0.0  0.0   0:00.00 kintegrityd                                                                                                        
   23 root       0 -20     0    0    0 S   0.0  0.0   0:00.00 kblockd                                                                                                            
   24 root       0 -20     0    0    0 S   0.0  0.0   0:00.00 ata_sff

Read Also : 12 TOP Command Examples

53. Command: mkfs.ext4

This command create a new ext4 file system on the specified device, if wrong device is followed after this command, the whole block will be wiped and formatted, hence it is suggested not to run this command unless and until you understand what you are doing.

Mkfs.ext4 /dev/sda1 (sda1 block will be formatted)
mkfs.ext4 /dev/sdb1 (sdb1 block will be formatted)

Read MoreWhat is Ext4 and How to Create and Convert

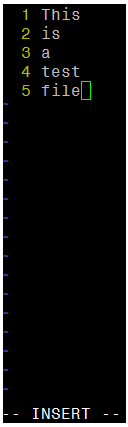
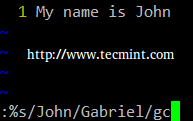
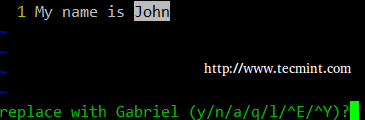
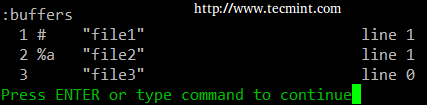
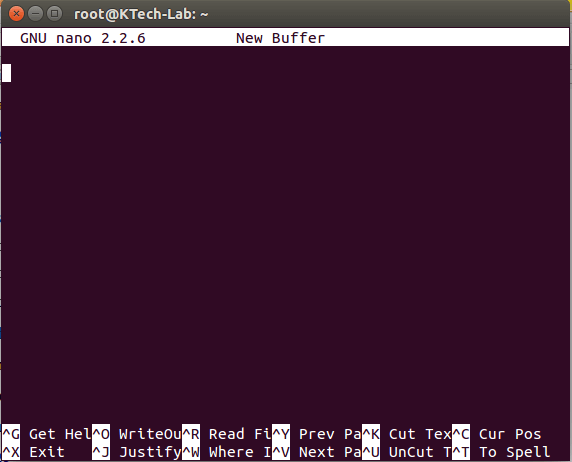
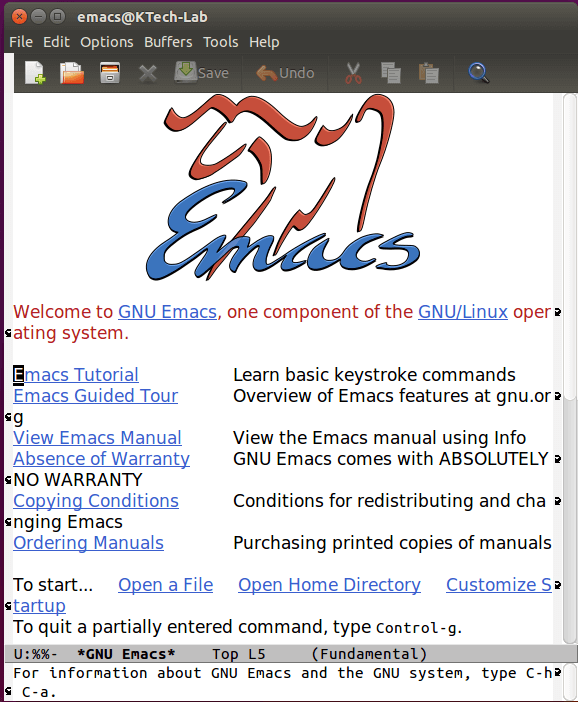
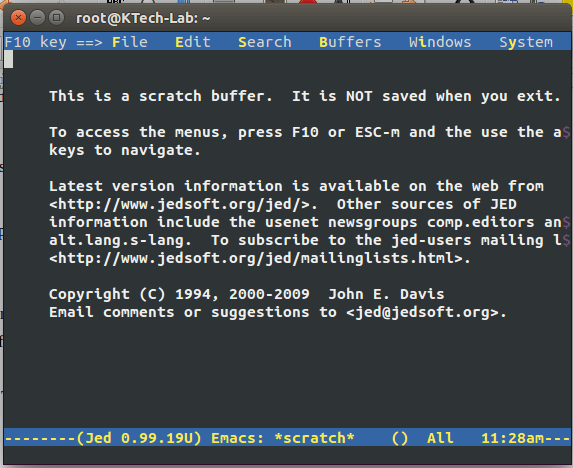
54. Command: vi/emacs/nano

vi (visual), emacsnano are some of the most commonly used editors in Linux. They are used oftenly to edit text, configuration,… files. A quick guide to work around vi and nano is, emacs is a.

vi-editor
[avishek@tecmint ~]$ touch a.txt (creates a text file a.txt) 
[avishek@tecmint ~]$ vi a.txt (open a.txt with vi editor)

[press ‘i’ to enter insert mode, or you won’t be able to type-in anything]

echo "Hello"  (your text here for the file)
  1. alt+x (exit insert mode, remember to keep some space between the last letter.
  2. ctrl+x command or your last word will be deleted).
  3. :wq! (saves the file, with the current text, remember ‘!’ is to override).
nano editor
[avishek@tecmint ~]$ nano a.txt (open a.txt file to be edited with nano)
edit, with the content, required

ctrl +x (to close the editor). It will show output as:

Save modified buffer (ANSWERING "No" WILL DESTROY CHANGES) ?                    
 Y Yes 
 N No           ^C Cancel

Click ‘y’ to yes and enter file name, and you are done.

55. Command: rsync

Rsync copies files and has a -P switch for a progress bar. So if you have rsync installed, you could use a simple alias.

alias cp='rsync -aP'

Now try to copy a large file in terminal and see the output with remaining items, similar to a progress bar.

Moreover, Keeping and Maintaining backup is one of the most important and boring work a system administrator, needs to perform. Rsync is a very nice tool (there exists, several other) to create and maintain backup, in terminal.

[avishek@tecmint ~]$ rsync -zvr IMG_5267\ copy\=33\ copy\=ok.jpg ~/Desktop/ 

sending incremental file list 
IMG_5267 copy=33 copy=ok.jpg 

sent 2883830 bytes  received 31 bytes  5767722.00 bytes/sec 
total size is 2882771  speedup is 1.00

Note-z for compression, -v for verbose and -r for recursive.

56. Command: free

Keeping track of memory and resources is as much important, as any other task performed by an administrator, and ‘free‘ command comes to rescue here.

Current Usage Status of Memory
[avishek@tecmint ~]$ free

             total       used       free     shared    buffers     cached
Mem:       2028240    1788272     239968          0      69468     363716
-/+ buffers/cache:    1355088     673152
Swap:      3905532     157076    3748456
Tuned Output in KB, or MB, or GB
[avishek@tecmint ~]$ free -b

             total       used       free     shared    buffers     cached
Mem:    2076917760 1838272512  238645248          0   71348224  372670464
-/+ buffers/cache: 1394253824  682663936
Swap:   3999264768  160845824 3838418944
[avishek@tecmint ~]$ free -k

             total       used       free     shared    buffers     cached
Mem:       2028240    1801484     226756          0      69948     363704
-/+ buffers/cache:    1367832     660408
Swap:      3905532     157076    3748456
[avishek@tecmint ~]$ free -m

             total       used       free     shared    buffers     cached
Mem:          1980       1762        218          0         68        355
-/+ buffers/cache:       1338        641
Swap:         3813        153       3660
[avishek@tecmint ~]$ free -g

             total       used       free     shared    buffers     cached
Mem:             1          1          0          0          0          0
-/+ buffers/cache:          1          0
Swap:            3          0          3
Check Current Usage in Human Readable Format
[avishek@tecmint ~]$ free -h

             total       used       free     shared    buffers     cached
Mem:          1.9G       1.7G       208M         0B        68M       355M
-/+ buffers/cache:       1.3G       632M
Swap:         3.7G       153M       3.6G
Check Status Contineously After Regular Interval
[avishek@tecmint ~]$ free -s 3

             total       used       free     shared    buffers     cached
Mem:       2028240    1824096     204144          0      70708     364180
-/+ buffers/cache:    1389208     639032
Swap:      3905532     157076    3748456

             total       used       free     shared    buffers     cached
Mem:       2028240    1824192     204048          0      70716     364212
-/+ buffers/cache:    1389264     638976
Swap:      3905532     157076    3748456

Read Also : 10 Examples of Free Command

57. Command: mysqldump

Ok till now you would have understood what this command actually stands for, from the name of this command.mysqldump commands dumps (backups) all or a particular database data into a given a file.For example,

[avishek@tecmint ~]$ mysqldump -u root -p --all-databases > /home/server/Desktop/backupfile.sql

Notemysqldump requires mysql to be running and correct password for authorisation. We have covered some useful “mysqldump” commands at Database Backup with mysqldump Command

58. Command: mkpasswd

Make a hard-to-guess, random password of the length as specified.

[avishek@tecmint ~]$ mkpasswd -l 10

zI4+Ybqfx9
[avishek@tecmint ~]$ mkpasswd -l 20 

w0Pr7aqKk&hmbmqdrlmk

Note-l 10 generates a random password of 10 characters while -l 20 generates a password of character 20, it could be set to anything to get desired result. This command is very useful and implemented in scripting language oftenly to generate random passwords. You might need to yum or apt the ‘expect’ package to use this command.

[root@tecmint ~]# yum install expect 
OR
[root@tecmint ~]# apt-get install expect

59. Command: paste

Merge two or more text files on lines using. Example. If the content of file1 was:

1 
2 
3 

and file2 was: 

a 
b 
c 
d 
the resulting file3 would be: 

1    a 
2    b 
3    c 
     d

60.Command: lsof

lsof stands for “list open files” and displays all the files that your system has currently opened. It’s very useful to figure out which processes uses a certain file, or to display all the files for a single process. Some useful 10 lsof Command examples, you might be interested in reading.

[avishek@tecmint ~]$ lsof 

COMMAND     PID   TID            USER   FD      TYPE     DEVICE SIZE/OFF       NODE NAME
init          1                  root  cwd       DIR        8,1     4096          2 /
init          1                  root  rtd       DIR        8,1     4096          2 /
init          1                  root  txt       REG        8,1   227432     395571 /sbin/init
init          1                  root  mem       REG        8,1    47080     263023 /lib/i386-linux-gnu/libnss_files-2.17.so
init          1                  root  mem       REG        8,1    42672     270178 /lib/i386-linux-gnu/libnss_nis-2.17.so
init          1                  root  mem       REG        8,1    87940     270187 /lib/i386-linux-gnu/libnsl-2.17.so
init          1                  root  mem       REG        8,1    30560     263021 /lib/i386-linux-gnu/libnss_compat-2.17.so
init          1                  root  mem       REG        8,1   124637     270176 /lib/i386-linux-gnu/libpthread-2.17.so
init          1                  root  mem       REG        8,1  1770984     266166 /lib/i386-linux-gnu/libc-2.17.so
init          1                  root  mem       REG        8,1    30696     262824 /lib/i386-linux-gnu/librt-2.17.so
init          1                  root  mem       REG        8,1    34392     262867 /lib/i386-linux-gnu/libjson.so.0.1.0
init          1                  root  mem       REG        8,1   296792     262889 /lib/i386-linux-gnu/libdbus-1.so.3.7.2
init          1                  root  mem       REG        8,1    34168     262840 /lib/i386-linux-gnu/libnih-dbus.so.1.0.0
init          1                  root  mem       REG        8,1    95616     262848 /lib/i386-linux-gnu/libnih.so.1.0.0
init          1                  root  mem       REG        8,1   134376     270186 /lib/i386-linux-gnu/ld-2.17.so
init          1                  root    0u      CHR        1,3      0t0       1035 /dev/null
init          1                  root    1u      CHR        1,3      0t0       1035 /dev/null
init          1                  root    2u      CHR        1,3      0t0       1035 /dev/null
init          1                  root    3r     FIFO        0,8      0t0       1714 pipe
init          1                  root    4w     FIFO        0,8      0t0       1714 pipe
init          1                  root    5r     0000        0,9        0       6245 anon_inode
init          1                  root    6r     0000        0,9        0       6245 anon_inode
init          1                  root    7u     unix 0xf5e91f80      0t0       8192 @/com/ubuntu/upstart
init          1                  root    8w      REG        8,1     3916        394 /var/log/upstart/teamviewerd.log.1 (deleted)

This is not the end, a System Administrator does a lot of stuff, to provide you such a nice interface, upon which you work. System Administration is actually an art of learning and implementing in a very much perfect way. We will try to get you with all other necessary stuff which a linux professional must learn, linux in its basic actually itself, is a process of learning and learning. Your good words are always sought, which encourages us to put in more effort to give you a knowledgeable article. “Like and share Us, to help Us Spread”.

Source

Download Rapid Photo Downloader Linux 0.9.14

As its name suggests, Rapid Photo Downloader is a photo downloader application. It provides users with a user-friendly interface written with the GTK+ toolkit and compatible mainly with the GNOME desktop environment.

Features at a glance

Its top features are the ability to download recorded videos and images from multiple devices at the same time, download and backup images simultaneously, as well as to generate user-configurable and human readable folder and file names.

Supports a wide range of images

At the moment it supports a wide range of image formats, including CR2, NEF, RAW, ARW, CRW, DNG, DCR, MEF, MRW, MOS, PEF, ORF, RAF, RW2, SRW, and SR2. In addition, a vast amount of video formats are supported, such as 3GP, AVI, MPG, M2T, MP4, MOV, MPEG, MOD, TOD, and MTS.

Translated in over 30 languages

Being translated in over 30 languages, the application is very well documented, easy to configure and use, fas, and supported on a wide range of open source desktop environments, including KDE, LXDE and Xfce.

One of the best photo and video downloader

As the developer describes, the application’s main goal is to become one of the best photo and video downloader software for Linux-based operating systems. It can automatically generate metadata for image and video files, including date, time, shutter speed, aperture and codec, allows users to rename camera generated file names, and automagically creates folders for downloaded files.

The perfect tool for professional and amateur photographers alike

Another interesting feature is the ability to synchronize the sequence numbers of both RAW and JPEG files (only available for cameras that support this function). The truth is that there aren’t many open source applications in this category, which makes Rapid Photo Downloader the perfect tool for professional and amateur photographers alike. You should definitely download and install this application if your main hobby happens to be photography.

What’s new in Rapid Photo Downloader 0.9.14:

  • This version contains several bug fixes and some translation updates.

Source

Vi/Vim editors

Learn Useful ‘Vi/Vim’ Editor Tips and Tricks to Enhance Your Skills – Part 1

The need to learn how to use text editors in Linux is indisputable. Every system administrator and engineer deal with configuration (plain text) files on a daily basis, and most times this is done purely using one or more tools from a command-line interface (such as nanovim, or emacs).

Linux Vi and Vim Tricks and Tips

Learn Linux Vi and Vim Tricks and Tips – Part 1

While nano is perhaps more suitable for new users, vim or emacs are the tool of choice for more experienced users due to its advanced capabilities.

But there is yet another reason why learning how to use one of this text editors should be a top priority for you: you may either bump into a CLI-only server or run into an issue with the desktop manager in your GUI-based Linux server or desktop and the only resource to examine it and edit configuration files is the command line.

Between this article and the next of this 2-article series, we will review 15 tips and tricks for enhancing your vimskills. It is assumed that you are already familiar with this text editor. If not, do yourself a favor and become acquainted with vim before proceeding further: you may want to refer to How to Use vi/vim as a Full Text Editorfor a very detailed guide on starting with vim.

Part 28 Interesting ‘Vi/Vim’ Editor Tips and Tricks

TIP #1: Using the online help

After you launch vim, press F1 or use :h in ex mode to enter the online help. You can jump to a specific section or topic by placing the cursor upon it and then pressing Ctrl+] (Ctrl, then the closing square bracket).

After you’re done, press Ctrl+t to return to the previous screen. Alternatively, you can look up a specific subject or command with :h <topic or command>.

For example,

:h x 

will display the help for the x (delete) command:

Vi Editor Online Help

Vi Editor Online Help

and

:h substitute

will bring up the help about the substitute command (our final tip in this article).

TIP #2: Jump back and forth using marks

If you find yourself editing a file that is larger than one screen, you will appreciate the functionality provided by marks. You can think of a mark in vim as a bookmark – once you place it somewhere, you can go back to it quickly and easily. Suppose you are editing a 300-word configuration file and for some reason need to repeatedly switch between lines 30 and 150 for example.

First, go to line #30 by entering :30 in ex mode, then return to command mode and hit ma (m, then a) to create a mark named “a” in line 30.

Then go to line 250 (with :250 in ex mode) and hit `a (backtick, then a) to return to mark a in line 30. You can use lowercase and uppercase letters to identify marks in vim (now repeat the process to create a mark named Ain line #250).

You can view your marks with

:marks aA

Marks Usage in Vim Editor

Marks Usage in Vim Editor

As you can see, each mark is referenced by a specific line / column position on the file, not just by line.

TIP #3: Repeat the last command

Suppose you’re editing a shell script and realize the previous developer was rather lousy when it comes to indentation. Let’s see how you can fix it with a couple of vim commands.

First, select a visual block by placing the cursor at the start of the block, then pressing Ctrl+v (Ctrl, then v).

  1. To indentate to the left: press <j
  2. To indentate to the right: press <j

Then press the . (dot) command to repeat either indentation. The selected block will either move to the right or to the left with only one keystroke.

Another classic example of using the dot command is when you need to delete a series of words: place the cursor on the first word you want to delete, then press dw. To continue deleting the next words, just press .(shorter and easier than repeating dw several times).

TIP #4: Inserting special Unicode characters

If your keyboard layout does not allow to easily insert special Unicode characters in a file, or if you find yourself in front of a server with different language settings than the one you are used to, this trick will come in handy.

To do this, press Ctrl+v in insert mode followed by the letter u and the hexadecimal numeric code for the character you want to insert. You can check the Unicode charts for a list of special characters and their corresponding numeric codes.

For example,

Ctrl+v followed by returns
u0040 @
u00B5 μ
u20AC

TIP #5: Invoke external binaries from within vim

There will be times when you will need to insert the output of external commands directly into a file being edited with vim. For example, I often create a variable named DIR in my scripts to store the absolute path to the directory where the script resides in order to use it later in the script. To do that, I use:

:r! pwd 

in ex mode. Thus, the current working directory is inserted.

Another example: if you’re required to use the default gateway somewhere in a script, you can easily insert it in the current file without exiting vim as follows:

:!r ip route show | grep default | cut -f 3 -d " "

TIP #6: Insert existing file

If you need to append the contents of a separate file into the one you are currently editing, the syntax is similar to the previous tip. Just omit the exclamation sign and you’re good to go.

For example, to copy the contents of /etc/passwd:

:r /etc/passwd

You may found this tip useful when you need to modify configuration files but want to keep the original ones to roll back to “factory settings” so to speak.

TIP #7: Search and substitute (replace)

True story. Once during an exam, I was asked to open a large text file containing random data. The assigned task consisted of replacing each occurrence of the word Globe with Earth (yes, I still remember the exact words). For those familiar with sed, this will ring a bell – in ex mode, type:

:%s/old/new/g

where old is the pattern to search for and new is the string that will replace it.

In the case described above, I used:

:%s/Globe/Earth/g

to get the job done.

So what about you want to be prompted before making substitutions? Easy. Just add a c at the end of the above command, as follows:

:%s/old/new/gc

The occurrences of the pattern will be highlighted and you will be asked whether you want to replace it with the new string:

:%s/gacanepa/me/gc

Search and Replace String in Vim

Search and Replace String in Vim

where

  1. y: yes
  2. n: no
  3. a: substitute all
  4. q: quit
  5. l: substitute this occurrence and quit
  6. ^E (Ctrl+E): Scroll up one screen
  7. ^Y (Ctrl+Y): Scroll down one screen

Summary

In this article we have started reviewing some vim tips and tricks to add to your text editing skills. You will probably think of several others, so please share them using the form below and I will consider covering them in the next and final article of this vim series. I look forward to hearing from you.

Addings: LFCS: How to Install and Use vi/vim as a Full Text Editor – Part 2

A couple of months ago, the Linux Foundation launched the LFCS (Linux Foundation Certified Sysadmin) certification in order to help individuals from all over the world to verify they are capable of doing basic to intermediate system administration tasks on Linux systems: system support, first-hand troubleshooting and maintenance, plus intelligent decision-making to know when it’s time to raise issues to upper support teams.

Learning VI Editor in Linux

Learning VI Editor in Linux

Please take a look at the below video that explains The Linux Foundation Certification Program.

This post is Part 2 of a 10-tutorial series, here in this part, we will cover the basic file editing operations and understanding modes in vi/m editor, that are required for the LFCS certification exam.

Perform Basic File Editing Operations Using vi/m

Vi was the first full-screen text editor written for Unix. Although it was intended to be small and simple, it can be a bit challenging for people used exclusively to GUI text editors, such as NotePad++, or gedit, to name a few examples.

To use Vi, we must first understand the 3 modes in which this powerful program operates, in order to begin learning later about the its powerful text-editing procedures.

Please note that most modern Linux distributions ship with a variant of vi known as vim (“Vi improved”), which supports more features than the original vi does. For that reason, throughout this tutorial we will use vi and vim interchangeably.

If your distribution does not have vim installed, you can install it as follows.

  1. Ubuntu and derivatives: aptitude update && aptitude install vim
  2. Red Hat-based distributions: yum update && yum install vim
  3. openSUSE: zypper update && zypper install vim

Why should I want to learn vi?

There are at least 2 good reasons to learn vi.

1. vi is always available (no matter what distribution you’re using) since it is required by POSIX.

2. vi does not consume a considerable amount of system resources and allows us to perform any imaginable tasks without lifting our fingers from the keyboard.

In addition, vi has a very extensive built-in manual, which can be launched using the :help command right after the program is started. This built-in manual contains more information than vi/m’s man page.

vi Man Pages

vi Man Pages

Launching vi

To launch vi, type vi in your command prompt.

Start vi Editor

Start vi Editor

Then press i to enter Insert mode, and you can start typing. Another way to launch vi/m is.

# vi filename

Which will open a new buffer (more on buffers later) named filename, which you can later save to disk.

Understanding Vi modes

1. In command mode, vi allows the user to navigate around the file and enter vi commands, which are brief, case-sensitive combinations of one or more letters. Almost all of them can be prefixed with a number to repeat the command that number of times.

For example, yy (or Y) copies the entire current line, whereas 3yy (or 3Y) copies the entire current line along with the two next lines (3 lines in total). We can always enter command mode (regardless of the mode we’re working on) by pressing the Esc key. The fact that in command mode the keyboard keys are interpreted as commands instead of text tends to be confusing to beginners.

2. In ex mode, we can manipulate files (including saving a current file and running outside programs). To enter this mode, we must type a colon (:) from command mode, directly followed by the name of the ex-mode command that needs to be used. After that, vi returns automatically to command mode.

3. In insert mode (the letter i is commonly used to enter this mode), we simply enter text. Most keystrokes result in text appearing on the screen (one important exception is the Esc key, which exits insert mode and returns to command mode).

vi Insert Mode

vi Insert Mode

Vi Commands

The following table shows a list of commonly used vi commands. File edition commands can be enforced by appending the exclamation sign to the command (for example, <b.:q! enforces quitting without saving).

 Key command  Description
 h or left arrow  Go one character to the left
 j or down arrow  Go down one line
 k or up arrow  Go up one line
 l (lowercase L) or right arrow  Go one character to the right
 H  Go to the top of the screen
 L  Go to the bottom of the screen
 G  Go to the end of the file
 w  Move one word to the right
 b  Move one word to the left
 0 (zero)  Go to the beginning of the current line
 ^  Go to the first nonblank character on the current line
 $  Go to the end of the current line
 Ctrl-B  Go back one screen
 Ctrl-F  Go forward one screen
 i  Insert at the current cursor position
 I (uppercase i)  Insert at the beginning of the current line
 J (uppercase j)  Join current line with the next one (move next line up)
 a  Append after the current cursor position
 o (lowercase O)  Creates a blank line after the current line
 O (uppercase o)  Creates a blank line before the current line
 r  Replace the character at the current cursor position
 R  Overwrite at the current cursor position
 x  Delete the character at the current cursor position
 X  Delete the character immediately before (to the left) of the current cursor position
 dd  Cut (for later pasting) the entire current line
 D  Cut from the current cursor position to the end of the line (this command is equivalent to d$)
 yX  Give a movement command X, copy (yank) the appropriate number of characters, words, or lines from the current cursor position
 yy or Y  Yank (copy) the entire current line
 p  Paste after (next line) the current cursor position
 P  Paste before (previous line) the current cursor position
 . (period)  Repeat the last command
 u  Undo the last command
 U  Undo the last command in the last line. This will work as long as the cursor is still on the line.
 n  Find the next match in a search
 N  Find the previous match in a search
 :n  Next file; when multiple files are specified for editing, this commands loads the next file.
 :e file  Load file in place of the current file.
 :r file  Insert the contents of file after (next line) the current cursor position
 :q  Quit without saving changes.
 :w file  Write the current buffer to file. To append to an existing file, use :w >> file.
 :wq  Write the contents of the current file and quit. Equivalent to x! and ZZ
 :r! command  Execute command and insert output after (next line) the current cursor position.

Vi Options

The following options can come in handy while running vim (we need to add them in our ~/.vimrc file).

# echo set number >> ~/.vimrc
# echo syntax on >> ~/.vimrc
# echo set tabstop=4 >> ~/.vimrc
# echo set autoindent >> ~/.vimrc

vi Editor Options

vi Editor Options

  1. set number shows line numbers when vi opens an existing or a new file.
  2. syntax on turns on syntax highlighting (for multiple file extensions) in order to make code and config files more readable.
  3. set tabstop=4 sets the tab size to 4 spaces (default value is 8).
  4. set autoindent carries over previous indent to the next line.

Search and replace

vi has the ability to move the cursor to a certain location (on a single line or over an entire file) based on searches. It can also perform text replacements with or without confirmation from the user.

a). Searching within a line: the f command searches a line and moves the cursor to the next occurrence of a specified character in the current line.

For example, the command fh would move the cursor to the next instance of the letter h within the current line. Note that neither the letter f nor the character you’re searching for will appear anywhere on your screen, but the character will be highlighted after you press Enter.

For example, this is what I get after pressing f4 in command mode.

Search String in Vi

Search String in Vi

b). Searching an entire file: use the / command, followed by the word or phrase to be searched for. A search may be repeated using the previous search string with the n command, or the next one (using the N command). This is the result of typing /Jane in command mode.

Vi Search String in File

Vi Search String in File

c). vi uses a command (similar to sed’s) to perform substitution operations over a range of lines or an entire file. To change the word “old” to “young” for the entire file, we must enter the following command.

 :%s/old/young/g 

Notice: The colon at the beginning of the command.

Vi Search and Replace

Vi Search and Replace

The colon (:) starts the ex command, s in this case (for substitution), % is a shortcut meaning from the first line to the last line (the range can also be specified as n,m which means “from line n to line m”), old is the search pattern, while young is the replacement text, and g indicates that the substitution should be performed on every occurrence of the search string in the file.

Alternatively, a c can be added to the end of the command to ask for confirmation before performing any substitution.

:%s/old/young/gc

Before replacing the original text with the new one, vi/m will present us with the following message.

Replace String in Vi

Replace String in Vi

  1. y: perform the substitution (yes)
  2. n: skip this occurrence and go to the next one (no)
  3. a: perform the substitution in this and all subsequent instances of the pattern.
  4. q or Esc: quit substituting.
  5. l (lowercase L): perform this substitution and quit (last).
  6. Ctrl-eCtrl-y: Scroll down and up, respectively, to view the context of the proposed substitution.

Editing Multiple Files at a Time

Let’s type vim file1 file2 file3 in our command prompt.

# vim file1 file2 file3

First, vim will open file1. To switch to the next file (file2), we need to use the :n command. When we want to return to the previous file, :N will do the job.

In order to switch from file1 to file3.

a). The :buffers command will show a list of the file currently being edited.

:buffers

Edit Multiple Files

Edit Multiple Files

b). The command :buffer 3 (without the s at the end) will open file3 for editing.

In the image above, a pound sign (#) indicates that the file is currently open but in the background, while %amarks the file that is currently being edited. On the other hand, a blank space after the file number (3 in the above example) indicates that the file has not yet been opened.

Temporary vi buffers

To copy a couple of consecutive lines (let’s say 4, for example) into a temporary buffer named a (not associated with a file) and place those lines in another part of the file later in the current vi section, we need to…

1. Press the ESC key to be sure we are in vi Command mode.

2. Place the cursor on the first line of the text we wish to copy.

3. Type “a4yy” to copy the current line, along with the 3 subsequent lines, into a buffer named a. We can continue editing our file – we do not need to insert the copied lines immediately.

4. When we reach the location for the copied lines, use “a before the p or P commands to insert the lines copied into the buffer named a:

  1. Type “ap to insert the lines copied into buffer a after the current line on which the cursor is resting.
  2. Type “aP to insert the lines copied into buffer a before the current line.

If we wish, we can repeat the above steps to insert the contents of buffer a in multiple places in our file. A temporary buffer, as the one in this section, is disposed when the current window is closed.

Summary

As we have seen, vi/m is a powerful and versatile text editor for the CLI. Feel free to share your own tricks and comments below.

Reference Links
  1. About the LFCS
  2. Why get a Linux Foundation Certification?
  3. Register for the LFCS exam

Update: If you want to extend your VI editor skills, then I would suggest you read following two guides that will guide you to some useful VI editor tricks and tips.

Part 1Learn Useful ‘Vi/Vim’ Editor Tips and Tricks to Enhance Your Skills

Part 28 Interesting ‘Vi/Vim’ Editor Tips and Tricks

8 Interesting ‘Vi/Vim’ Editor Tips and Tricks for Every Linux Administrator – Part 2

In the previous article of this series we reviewed 7 tips and tricks to add to your vi/m skills set. Besides the reasons given previously, learning how to use effectively a text editor in Linux in an essential ability for a system administrator or engineer and is a required competency to pass any major Linux certification program (such as LFCSLFCERHCSA, and RHCE).

Learn Vi/Vim Editor in Linux

8 Interesting ‘Vi/Vim’ Editor Tips and Tricks – Part 2

That said, let’s get started.

TIP #8: Create horizontal or vertical windows

This tip was shared by Yoander, one of our readers, in Part 1. You can launch vi/m with multiple horizontal or vertical divisions to edit separate files inside the same main window:

Launch vi/m with two horizontal windows, with test1 at the top and test2 at the bottom

# vim -o test1 test2 

Launch Vim Editor in Horizontal Windows

Launch Vim Editor in Horizontal Windows

Launch vi/m with two vertical windows, with test3 on the left and test4 on the right:

# vim -O test3 test4 

Launch Vim Editor in Vertical Windows

Launch Vim Editor in Vertical Windows

You can switch the cursor from one window to another with the usual vi/m movement routine (h: right, l: left, j:bottom, k: top):

  1. Ctrl+w k – top
  2. Ctrl+w j – bottom
  3. Ctrl+w l – left
  4. Ctrl+w h – right

TIP #9: Change letters, words, or entire lines to UPPERCASE or lowercase

Please note that this tip only works in vim. In the next examples, X is an integer number.

  1. To change a series of letters to uppercase, position the cursor on the first letter, then type gUX in ex mode, and finally press the right arrow on the keyboard.
  2. To change X number of words, place the cursor at the beginning of the word, and type gUXw in ex mode.
  3. To change an entire line to uppercase, place the cursor anywhere on the line and type gUU in ex mode.

For example, to convert an entire lowercase line to uppercase, you should place the cursor anywhere on the line and type gUU:

Change String to Uppercase in Vim Editor

Change String to Uppercase in Vim Editor

For example, to convert 2 uppercase words to lowercase, you should place the cursor at the beginning of the first word and type gu2w:

Convert String to Lowercase in Vim Editor

Convert String to Lowercase in Vim Editor

TIP #10: Delete characters, words, or to the beginning of a line in INSERT mode

While you can delete characters or several words at once in ex mode (i.e. dw to delete a word), you can also do so in Insert mode as follows:

  1. Ctrl + h: delete the previous character to the place where the cursor is currently located.
  2. Ctrl + w: delete the previous word to the place where the cursor is currently located. For this to work correctly, the cursor must be placed in an empty space after the word that you need to delete.
  3. Ctrl + u: delete the current line beginning at the character immediately to the left of the place where the cursor is.

TIP #11: Move or copy existing lines to another line of the document

While it is true that you can use the well-known dd, yy, and p commands in ex mode to delete, yank (copy) and paste lines, respectively, that only works when the cursor is placed where you want to perform those operations. The good news is that with the copy and move commands you can do the same regardless of where the cursor is currently placed.

For the next example we will use a short poem titled “Forever” by Terri Nicole Tharrington. To begin, we will have vim display the line numbers (:set nu in Command mode – consider this an extra tip). We will use :3copy5 (also in Command mode) to copy line 3 below line 5:

Move Copy Existing Lines in Vim

Move Copy Existing Lines in Vim

Now, undo last change (Esc + u – another bonus tip!) and type :1move7 to replace line 7 with line 1. Please note how lines 2 through 7 are shifted up and former line 1 now occupies line 7:

Move Lines in Vim Editor

Move Lines in Vim Editor

TIP #12: Count matches resulting from a search by pattern and move from one occurrence to another

This tip is based on the substitute command (tip #7 in Part 1 of this series), with the exception that it will not remove anything since the substitute behavior is overridden by the n option, resulting in the count of occurrences of the specified pattern:

Make sure that you don’t omit any of the forward slashes!

:%s/pattern//gn 

For example,

:%s/libero//gn

Count Matches by Search Pattern in Vim

Count Matches by Search Pattern in Vim

To move from one occurrence of the pattern to the next in ex mode, press n (lowercase N). To move to the previous instance, press N.

TIP #13: Directly open vi/m in a specified line

By default, when you launch vi/m, the cursor is initially placed in the last line that was edited. If you want to open the program and have the cursor be directly placed on a specified line, you can use the following trick:

# vim filename +line_number

For example, open forever.txt and place the cursor in line 6:

# vim forever.txt +6

Let’s tweak this example a little bit. Suppose we want to open the file on the line where the 3rd occurrence of the pattern appears:

# vim filename +$(grep -in pattern filename | sed -n 3p | cut -d: -f1)

Let’s take a closer look at what the above command does:

  1. grep -in pattern filename – displays all lines from filename where pattern occurs, with the line number at the beginning of each output line.
  2. sed -n 3p – displays the 3rd line from the preceding pipeline’s output.

Finally,

  1. cut -d: -f1 returns the first field of the previous pipeline with the colon (:) is the field separator.
# grep -in forever forever.txt
# grep -in forever forever.txt | sed -n 3p
# grep -in forever forever.txt | sed -n 3p | cut -d: -f1

Open Vim Editor in Specified Line

Open Vim Editor in Specified Line

The result of the previous command is then passed to vi/m to open the program at the specified line.

TIP #14: Customizing your vi/m environment

If you use vi/m to edit configuration files or to write code, you will want to be able to display the line numbers when you first open the program and to set automatic indentation so that when you press the Enter key, the cursor will be automatically placed at the proper position. In addition, you may want to customize the number of white spaces a tab occupies.

While you can do that each time you launch vi/m, it’s easier to set these options in ~/.vimrc so that they will be automatically applied:

set number
set autoindent
set shiftwidth=4
set softtabstop=4
set expandtab

For further options to customize your vi/m environment, you can refer to the online vim documentation.

TIP #15: Get General Vim Help/Options with vimtutor

If at any time you need to brush up your general vi/m skills, you can launch vimtutor from the command line which will display a full vi/m help that you can refer to as often as you wish without the need to fire up a web browser to search how to accomplish a certain task in vi/m.

# vimtutor

Vim Editor Help and Options

Vim Editor Help and Options

Note that you can navigate or search the contents of vimtutor as if you were navigating a regular file in vi/m.

Summary

In this 2-article series I’ve shared several vi/m tips and tricks that should help you to be more effective when it comes to editing text using command line tools. I’m sure you must have other ones – so feel free to share them with the rest of the community by using the form below. As always, questions and comments are also welcome.

Source

12 Best Open Source Text Editors (GUI + CLI) I Found

Best Open Source Text Editors for Linux

12 Best Open Source Text Editors for Linux

Text editors can be used for writing code, editing text files such as configuration files, creating user instruction files and many more. In Linux, text editor are of two kinds that is graphical user interface (GUI) and command line text editors (console or terminal).

Don’t Miss:

 My Favorite Command Line Editors for Linux – What’s Your Editor?

In this article I am taking a look at some of the best 12 open source commonly used text editors in Linux on both server and desktops.

1. Vi/Vim Editor

Vim is a powerful command line based text editor that has enhanced the functionalities of the old Unix Vi text editor. It is one the most popular and widely used text editors among System Administrators and programmers that is why many users often refer to it as a programmer’s editor. It enables syntax highlighting when writing code or editing configuration files.

If you want to see our complete series on vi(m), please refer the links below:

  1. Learn and Use Vi/Vim as a Full Text Editor in Linux
  2. Learn ‘Vi/Vim’ Editor Tips and Tricks to Enhance Your Skills
  3. 8 Interesting ‘Vi/Vim’ Editor Tips and Tricks
Vi/Vim Linux Editor

Vi/Vim Linux Editor

2. Gedit

This is a general purpose GUI based text editor and is installed by default text editor on Gnome desktop environment. It is simple to use, highly pluggable and a powerful editor with the following features:

  1. Support for UTF-8
  2. Use of configurable font size and colors
  3. Highly customizable syntax highlighting
  4. Undo and redo functionalities
  5. Reverting of files
  6. Remote editing of files
  7. Search and replace text
  8. Clipboard support functionalities and many more
Gedit Editor

Gedit Editor

3. Nano Editor

Nano is an easy to use text editor especially for both new and advanced Linux users. It enhances usability by providing customizable key binding.

Nano has the following features:

  1. Highly customizable key bindings
  2. Syntax highlighting
  3. Undo and redo options
  4. Full line display on the standard output
  5. Pager support to read form standard input
Nano Editor

Nano Editor

You can check our complete guide for editing files with Nano editor at:

  1. How to Use Nano Editor in Linux

4. GNU Emacs

This is a highly extensible and customizable text editor that also offers interpretation of the Lisp programming language at its core. Different extensions can be added to support text editing functionalities.

Emacs has the following features:

  1. User documentation and tutorials
  2. Syntax highlighting using colors even for plain text.
  3. Unicode supports many natural languages.
  4. Various extension including mail and news, debugger interface, calender and many more
Emacs Editor

Emacs Editor

5. Kate/Kwrite

Kate is a feature rich and highly pluggable text editor that comes with KDesktop Environment (KDE). The Kate project aims at development of two main products that is: KatePart and Kate.

KatePart is an advanced text editor component included in many KDE applications which may require users to edit text whereas Kate is an multiple document interface(MDI) text editor.

The following are some of its general features:

  1. Extensible through scripting
  2. Encoding support such as unicode mode
  3. Text rendering in bi-directional mode
  4. Line ending support with auto detection functionalities

Also remote file editing and many other features including advanced editor features, applications features, programming features, text highlighting features, backup features and search and replace features.

Kate Editor

Kate Editor

6. Lime Text

This is a powerful IDE-like text editor which is free and open-source successor of popular Sublime Text. It has a few frontends such as command-line interface that you can use with the pluggable backend.

Lime Editor

Lime Editor

7. Pico Editor

Pico is also a command line based text editor that comes with the Pine news and email client. It is a good editor for new Linux users because of its simplicity in relation to many GUI text editors.

Pico Editor

Pico Editor

8. Jed Editor

This is also another command line editor with support for GUI like features such as dropdown menus. It is developed purposely for software development and one of its important features is support of unicode mode.

Jed Editor

Jed Editor

9. gVim Editor

It is a GUI version of the popular Vim editor and it has similar functionalities as the command line Vim.

Gvim Editor

Gvim Editor

10. Geany Editor

Geany offers basic IDE-like features with a focus on software development using the GTK+ toolkit.

It has some basic features as listed below:

  1. Syntax highlighting
  2. Pluggable interface
  3. Supports many file types
  4. Enables code folding and code navigation
  5. Symbol name and construct auto-completion
  6. Supports auto-closing of HTML and XML tags
  7. Elementary project management functionality plus many more
Geany Editor

Geany Editor

11. Leaf Pad

This is a GTK+ based, lightweight GUI based text editor which is also popular among Linux users today. It is easy to use by new Linux users.

It has the following features:

  1. Codeset option
  2. Allows auto detection of codeset
  3. Options of undo and redo
  4. Display file line numbers
  5. Supports Drag and Drop options
  6. Printing support
Leafpad Editor

Leafpad Editor

12. Bluefish

Bluefish is an easy-to-install and use text editor targeting Linux programmers and web developers. It offers a wide set of features as listed below:

  1. Lightweight and fast
  2. Integrates external Linux programs such as lint, weblint, make and many others and filters, piping such as sed, sort, awk and many more
  3. Spelling check feature
  4. Supports working on multiple projects
  5. Remote file editing
  6. Search and replace support
  7. Undo and redo option
  8. Auto-recovery of modified files
Bluefish Editor

Bluefish Editor

Concluding

I believe the list is more than what we have looked at, therefore if you have used other free and open source text editors, let us know by posting a comment.

 
Source

10 Best Markdown Editors for Linux

In this article, we shall review some of the best Markdown editors you can install and use on your Linux desktop. There are numerous Markdown editors you can find for Linux but here, we want to unveil possibly the best you may choose to work with.

Best Linux Markdown Editors

Best Linux Markdown Editors

For starters, Markdown is a simple and lightweight tool written in Perl, that enables users to write plain text format and covert it to valid HTML (or XHTML). It is literally an easy-to-read, easy-to-write plain text language and a software tool for text-to-HTML conversion.

Don’t Miss: 18 Best IDEs Programming or Source Code Editors on Linux

Don’t Miss: 12 Best Open Source Text Editors (GUI + CLI) I Found in 2015

Hoping that you have a slight understanding of what Markdown is, let us proceed to list the editors.

1. Atom

Atom is a modern, cross-platform, open-source and very powerful text editor that can work on Linux, Windows and Mac OS X operating systems. Users can customize it down to its base, minus altering any configuration files.

It is designed with some illustrious features and these include:

  1. Comes with a built-in package manager
  2. Smart auto-completion functionality
  3. Offers multiple panes
  4. Supports find and replace functionality
  5. Includes a file system browser
  6. Easily customizable themes
  7. Highly extensible using open-source packages and many more

Atom Markdown Editor for Linux

Atom Markdown Editor for Linux

Visit Homepagehttps://atom.io/

2. GNU Emacs

Emacs is one of the popular open-source text editors you can find on the Linux platform today. It is a great editor for Markdown language, which is highly extensible and customizable.

It’s comprehensively developed with the following amazing features:

  1. Comes with an extensive built-in documentation including tutorials for beginners
  2. Full Unicode support for probably all human scripts
  3. Supports content-aware text-editing modes
  4. Includes syntax coloring for multiple file types
  5. Its highly customizable using Emacs Lisp code or GUI
  6. Offers a packaging system for downloading and installing various extensions plus so much more

Emacs Markdown Editor for Linux

Emacs Markdown Editor for Linux

Visit Homepagehttps://www.gnu.org/software/emacs/

3. Remarkable

Remarkable is possibly the best Markdown editor you can find on Linux, it also works on Windows operating system. It is indeed a remarkable and fully featured Markdown editor that offers users some exciting features.

Some of its remarkable features include:

  1. Supports live preview
  2. Supports exporting to PDF and HTML
  3. Also offers Github Markdown
  4. Supports custom CSS
  5. It also supports syntax highlighting
  6. Offers keyboard shortcuts
  7. Highly customizable plus and many more

Remarkable Markdown Editor for Linux

Remarkable Markdown Editor for Linux

Visit Homepagehttps://remarkableapp.github.io

4. Haroopad

Haroopad is an extensively built, cross-platform Markdown document processor for Linux, Windows and Mac OS X. It enables users to write expert-level documents of numerous formats including email, reports, blogs, presentations, blog posts and many more.

It is fully featured with the following notable features:

  1. Easily imports content
  2. Also exports to numerous formats
  3. Broadly supports blogging and mailing
  4. Supports several mathematical expressions
  5. Supports Github flavored Markdown and extensions
  6. Offers users some exciting themes, skins and UI components plus so much more

Haroopad Markdown Editor for Linux

Haroopad Markdown Editor for Linux

Visit Homepagehttp://pad.haroopress.com/

5. ReText

ReText is a simple, lightweight and powerful Markdown editor for Linux and several other POSIX-compatible operating systems. It also doubles as a reStructuredText editor, and has the following attributes:

  1. Simple and intuitive GUI
  2. It is highly customizable, users can customize file syntax and configuration options
  3. Also supports several color schemes
  4. Supports use of multiple mathematical formulas
  5. Enables export extensions and many more

ReText Markdown Editor for Linux

ReText Markdown Editor for Linux

Visit Homepagehttps://github.com/retext-project/retext

6. UberWriter

UberWriter is a simple and easy-to-use Markdown editor for Linux, it’s development was highly influenced by iAwriter for Mac OS X. It is also feature rich with these remarkable features:

  1. Uses pandoc to perform all text-to-HTML conversions
  2. Offers a clean UI
  3. Offers a distraction free mode, highlighting a users last sentence
  4. Supports spellcheck
  5. Also supports full screen mode
  6. Supports exporting to PDF, HTML and RTF using pandoc
  7. Enables syntax highlighting and mathematical functions plus many more

UberWriter Markdown Editor for Linux

UberWriter Markdown Editor for Linux

Visit Homepagehttp://uberwriter.wolfvollprecht.de/

7. Mark My Words

Mark My Words is a also lightweight yet powerful Markdown editor. It’s a relatively new editor, therefore offers a handful of features including syntax highlighting, simple and intuitive GUI.

The following are some of the awesome features yet to be bundled into the application:

  1. Live preview support
  2. Markdown parsing and file IO
  3. State management
  4. Support for exporting to PDF and HTML
  5. Monitoring files for changes
  6. Support for preferences

MarkMyWords Markdown Editor for-Linux

MarkMyWords Markdown Editor for-Linux

Visit Homepagehttps://github.com/voldyman/MarkMyWords

8. Vim-Instant-Markdown Plugin

Vim is a powerful, popular and open-source text editor for Linux that has stood the test of time. It is great for coding purposes. It is also highly pluggable to enable users add several other functionalities to it, including Markdown preview.

There are multiple Vim Markdown preview plugins, but you can use Vim-Instant-Markdown which offers the best performance.

9. Bracket-MarkdownPreview Plugin

Brackets is a modern, lightweight, open source and also cross-platform text editor. Built specifically for web designing and development purposes. Some of its notable features include: support for inline editors, live preview, preprocessor support and many more.

It is also highly extensible through plugins and you can use the Bracket-MarkdownPreview plugin to write and preview Markdown documents.

Brackets Markdown Plugin Preview

Brackets Markdown Plugin Preview

10. SublimeText-Markdown Plugin

Sublime Text is a refined, popular and cross-platform text editor for code, markdown and prose. It has a high performance enabled by the following exciting features:

  1. Simple and slick GUI
  2. Supports multiple selections
  3. Offers a distraction free mode
  4. Supports split editing
  5. Highly pluggable through Python plugin API
  6. Fully customizable and offers a command palette

SublimeText-Markdown plugin is a package that supports syntax highlighting and comes with some good color schemes.

SublimeText Markdown Plugin Preview

SublimeText Markdown Plugin Preview

Conclusion

Having walked through the list above, you probably know what Markdown editors and document processors to download and install on your Linux desktop for now.

Note that what we consider to be the best here may reasonably not be the best for you, therefore, you can reveal to us exciting Markdown editors that you think are missing in the list and have earned the right to be mentioned here by sharing your thoughts via the feedback section below.

Source

MySQLDumper: A PHP and Perl Based MySQL Database Backup Tool

MySQL is one of the most popular database in the world. This database can be installed on the Microsoft Windows platform besides of Linux platform. Why this database is so popular? It may caused by its powerful feature and its free to use. As a database administrator, a database backup is really crucial to maintain the availability of the data. It will minimize the risk if something happens to our database.

Install MySQLDumper in Linux

Install MySQLDumper in Linux

Since MySQL is a popular database, there are many software that we can use to backup it. From the console mode to the web based software. Now we will give you a look of MySQLDumper as a tool for backup MySQL Database.

What is MySQLDumper?

MySQLDumper is a another open source web based tool for backing up MySQL databases. It built from PHP and Perl and can be easily dump and restore your MySQL data. It is especially suitable for shared hosting, where we don’t have access to Linux shell.

MySQLDumper Features

There are a lot of MySQLDumper features, but here are some features that may interest you.

  1. Easy installation; just make sure that you have a working web server and point your browser to MySQLDumper installation file.
  2. All parameters is shown before the backup is started; so you are sure what you are doing.
  3. Database-Overview; look at running processes/
  4. SQL-Browser: Access to your MySQL-Tables, delete tables, edit or insert data.
  5. Two type of backup method, using PHP or Perl.
  6. Complete log files.
  7. Automatic file-deletion of your old backups.
  8. Create directory protection.

Installation of MySQLDumper in Linux

Installing MySQLDumper is so easy. First we can download MySQLDumper from the following link.

  1. Download MySQLDumper

At the time of writing this article, the latest version is 1.24. So, download latest version under your working web server directory (i.e. /var/www or /var/www/html). Once you have it, you can extract MySQLDumper1.24.4.zip.

$ unzip MySQLDumper1.24.4.zip

Then you will find a ‘msd1.24.4‘ folder. This folder contain all MySQLDumper files. The next step, you just need to point your browser to MySQLDumper installation file. The file is ‘msd1.24.4/install.php’. Here are the steps of super easy MySQLDumper.

1. We need to choose installation Language.

Select Language

Select Language

2. We need to fill some credentials such as hostname, user and MySQL password.

Database Parameters

Database Parameters

3. We can test the connection to the database by clicking Connect to MySQL button. If it succeed, then we will see a message saying that “Database connection was established”.

Test Database Connection

Test Database Connection

4. Once you got the message, click the ‘Save‘ and continue installation button. You will be taken into the home screen.

Home Screen

Home Screen

How to use MySQLDumper

As we can guess from its name, MySQLDumper main function is to backup your MySQL database. With this application, backup (and restore) MySQL database is very easy. Let’s start to take a look.

Backup Process using PHP

The function menu is located on the panel navigation on the left. First we need to select which database that we want to backup. We can see the option on the left menu.

Select Database

Select Database

In the screenshot above, we choose to backup a database named ‘employees‘.

Then we can select ‘Backup‘ menu on the left. Then choose ‘Backup PHP‘ on the top area. We will have a screen like this.

Select Backup PHP

Select Backup PHP

Then click on ‘Start New Backup‘. A progress of backup activity will show to you.

Database Backup Progress

Database Backup Progress

Once backup progress is finish, we can see the notification.

Backup Done

Backup Done

Backup Process using Perl

Another backup method that is supported by MySQLDumper is ‘Backup Perl’. With this method, we will use Perl as the backup engine.

Please notice that your web server must support ‘Perl/CGI‘ script before running this backup method. Otherwise, you will see an error like this when you click on Test Perl button.

Test Perl Support

Test Perl Support

Same with PHP backup method, we need to select which database that we want to backup. Then choose Backup menu from the left navigation panel. Then click Backup Perl button.

Select Backup Perl

Select Backup Perl

MySQLDumper will show you some active parameters on the bottom area. Then we can click ‘Run the Perl Cron‘ script button. Using this method, we will not see any progress bar appear. The duration of this backup process will be depend on the database which we are going to backup. If no error, then we will see a notification like this.

Perl CronDump Details

Perl CronDump Details

Restore Process

Restoring a backup is also easy using MySQLDumper. You can click on ‘Restore‘ menu from the navigation panel in the left. Unlike Backup activity, all backups are available at the bottom area of restore page.

Restore Database Backup

Restore Database Backup

When we need to select a backup, we can choose from there. At the above area is the selected backup which are ready to restore. If you want to do full restore, then click on the ‘Restore‘ button above. While if you want to restore some tables only, click on the ‘Choose tables‘ to be restored above.

Restore Database Tables

Restore Database Tables

Once it done, click ‘Restore‘. Just wait for a moment to complete the restore progress.

Restore Progress

Restore Progress

Create a Directory Protection

By default, the home page of MySQLDumper can be accessed by anyone who know its URL. Using Directory Protection, we can create a this home screen protected by password. This Directory Protection utilizes ‘.htaccess‘ function on Apache web server.

To create it, just click Create directory protection button on the home screen.

Protect MySQLDumper

Protect MySQLDumper

Then you will ask to provide some credential.

Enter Login Credentials

Enter Login Credentials

Once you finish with that, click Create directory protection button. After that, you will have a confirmation page about it.

Protect Confirmation

Protect Confirmation

If there is no error, a success message will be displayed.

Protection Success

Protection Success

Next time you visit the page, MySQLDumper will ask you a password before you see its home screen.

Enter Password

Enter Password

File Administration

This menu is used to maintain all available backups and restore.

All Database Backups

All Database Backups

Here are some activity that can be done in this page.

  1. Delete backup(s) ; use the Delete buttons at the top area.
  2. Download backup(s) ; click the backup name.
  3. Select backup(s) ; click the Database name in the All Backups area.
  4. Upload a big backup(s) to be restored.
  5. Convert database into MySQLDumper (MSD) format.

Note: When we tried to convert database without using any compression, we found that MySQLDumper create a database with ‘part_1.sql’ name. The size is smaller than the original source.

SQL-Browser

If you want to run specific SQL command, you can do it in this SQL-Browser page. But please you should know what you are doing.

SQL Browser

SQL Browser

Configuration

All function above can be configured from Configuration menu. Here are some sections that we can configure.

General

General Configuration

General Configuration

Interface

Interface Configuration

Interface Configuration

Autodelete

Autodelete Details

Autodelete Details

Email

Email Notification

Email Notification

FTP

FTP Backup Transfer

FTP Backup Transfer

Cronscript

Crondump Settings

Crondump Settings

Log Management

MySQLDumper also provide basic logs for us. So we can know when the backup-restore activity occurred. To access log page, just click ‘Log’ menu from the navigation panel on the left.

There are 3 kind of logs. PHP-LogPerl-Log and Perl-Complete Log.

PHP Log

PHP Log

Perl Log

Perl Log

Perl Complete Log

Perl Complete Log

Conclusion

MySQLDumper may not the best backup tool for MySQL. But with the ease of use of this application, people may start using this application. Unfortunately, I found that MySQLDumper is not equipped with offline documentation. But still, it is a great alternative tool for backup MySQL database.

http://www.mysqldumper.net/

Source

phpMyBackupPro – A Web Based MySQL Backup Tool for Linux

phpMyBackupPro is an open source very easy to use web based MySQL backup application, written in PHPlanguage released under the GNU GPL. It allows you to create schedule backupsrestore and manage them, downloademail, or upload backups to any FTP server and lot more. It also takes File directories backup and upload them on a FTP Server.

It supports three compression levels of backups (No compressionzip or gzip compression). It also supports two alternative security login methods, HTTP or HTML authentication.

Features

Following are some major key features of “phpMyBackupPro“.

  1. Single or Multiple database backup support with or without data, table structure.
  2. Three level of compression supported are no compressiongzip or zip compression.
  3. Create scheduled backups without cron jobs using small PHP script.
  4. Upload backups directly onto FTP server and posting of backups by email.
  5. Only Apache and PHP needed to run on  platforms like LinuxMac or Windows.
  6. Shell interface to take backups manually or by using cron script.
  7. Whole File directory backup and move them to any FTP server.
  8. Take databases backup from different accounts on several MySQL servers.
  9. Two security authentication methods supported HTTP or HTML login authentication.
  10. Friendly interface and very easy to install and setup.
  11. Multiple language supported.

Taking MySQL backups and restoring them from command line is always a good practice, but if what when you don’t have physical access to server. In that, situation phpMyBackupPro tool comes in handy.

How to Install phpMyBackupPro in RHEL/CentOS/Fedora and Debian/Ubuntu

For installing phpMyBackupPro application, you must have running Apache web server and PHP installed on the server. Let’s install these required packages on the server.

Install Apache and PHP

Install on Red Hat based systems using yum command.

# yum install httpd 
# yum install php php-mysql
# service httpd start

Install on Debian based systems using apt-get command.

# apt-get install apache2 
# apt-get install php5 libapache2-mod-auth-mysql php5-mysql
# service apache2 start

The newest phpMyBackupPro version can be downloaded from phpMyBackupPro website or you may use following “wget” command to download.

# cd /usr/share
# wget http://kaz.dl.sourceforge.net/project/phpmybackup/phpMyBackupPro/phpmyBackupPro%202.4/phpMyBackupPro-2.4.zip

Unzip the phpMyBackupPro zip file under /usr/share/ directory.

# unzip phpMyBackupPro-2.4.zip

For security reasons, it’s better to place the content of the folder under /usr/share/phpmybackup directory.

# cd phpMyBackupPro-2.4
# mv phpMyBackupPro/ /usr/share/phpmybackup
# mv documentation/ /usr/share/phpmybackup/

Next go to Apache “conf.d” directory and create a file named “phpmybackup.conf” under it. For Red Hat based systems path should be (/etc/httpd/conf.d/) and for Debain (/etc/apache2/conf.d).

# vi phpmybackup.conf

Append the following lines to it. Save and close. The below rules by default enable access to all, if you want to restrict the access to specific IP. Replace “all” with your IP address”. For example, the line should be “allow from 172.16.25.125“.

Alias /phpmybackup /usr/share/phpmybackup
<Directory /usr/share/phpmybackup>
   Options None
   Order allow,deny
   allow from all
</Directory>

Restart Apache service.

# /etc/init.d/httpd restart (On Red Hat systems)

# /etc/init.d/apache2 restart (On Debian systems)

On some systems, certain files must have write permissions for the file “global_conf.php” and for the “export” directory.

# cd /usr/share/

# chown -R root:apache phpmybackup (On Red Hat systems)

# chown -R root:www-data phpmybackup (On Debian systems)

# cd /usr/share/phpmybackup/
# chmod 0777 global_conf.php
# chmod 0777 export

Now you are almost ready to start phpMyBackupPro. Navigate to the browser and load the config.php file like this.

http://localhost/phpmybackup/config.php
OR
http://ip-address/phpmybackup/config.php

In the configuration tab insert your MySQL details, like hostnameusernamepassword and database name. If you would like to setup FTP to save backups, enter FTP login details as shown below.

phpMyBackupPro Configuration

Configuration Panel

Next, click on “backup” tab to see list of your MySQL database and select the database name that you wish to take backup.

phpMyBackupPro Backup

Backup Panel

Schedule backup has two popular ways to schedule backups:

  1. By including the schedule script into existing application.
  2. By using a hidden frame in a HTML frameset.

To schedule a backup, you must first create a schedule script. Go to “schedule backup” tab.

phpMyBackupPro Schedule Backup

Schedule Backup

Select how often you want a backup to be generated. Then you have to choose the directory of that PHP script which will include the schedule script later. After that select the name of the database to backup, enter a comment, select compression type and finally click on “Show script” button. On the next page you will see the newly created schedule script.

Instead of copying generated code to new file, you can save the code by giving a filename like “schedule_backup.php” in the text box and click on “Save data” to save. For more information read “SCHEDULED_BACKUPS.txt” file under documentation directory.

phpMyBackupPro Backup Script

Backup Script

The “sql queries” tab build to run simple sql queries to the databases or import databases from the local computer.

phpMyBackupPro SQL Query

SQL Query Shell

The “start” tab display your current ApachePHP and MySQL version information.

phpMyBackupPro System Information

Version Information

phpMyBackupPro is by far the easiest backup solution for MySQL. If you are handling MySQL server, then pMBP is a must needed application that can help you to save your precious data with minimum effort.

Reference Links

phpMyBackupPro Homepage

Source

WP2Social Auto Publish Powered By : XYZScripts.com