Askbot – Create Your Own Q&A Forum Like Stack Overflow

Askbot is an open source, simple yet powerful, fast and highly-customizable software for creating a question and answer (Q&A) forum. It is inspired by StackOverflow and YahooAnswers, and written in Python on top of the Django web framework.

It allows for efficient question and answer knowledge management, thus organizations such as Fedora’s Q&A forums and LibreOffice’s Q&A Forums are making good use of it. Askbot can work as a standalone application or can be integrated with your existing Django apps or other web platforms.

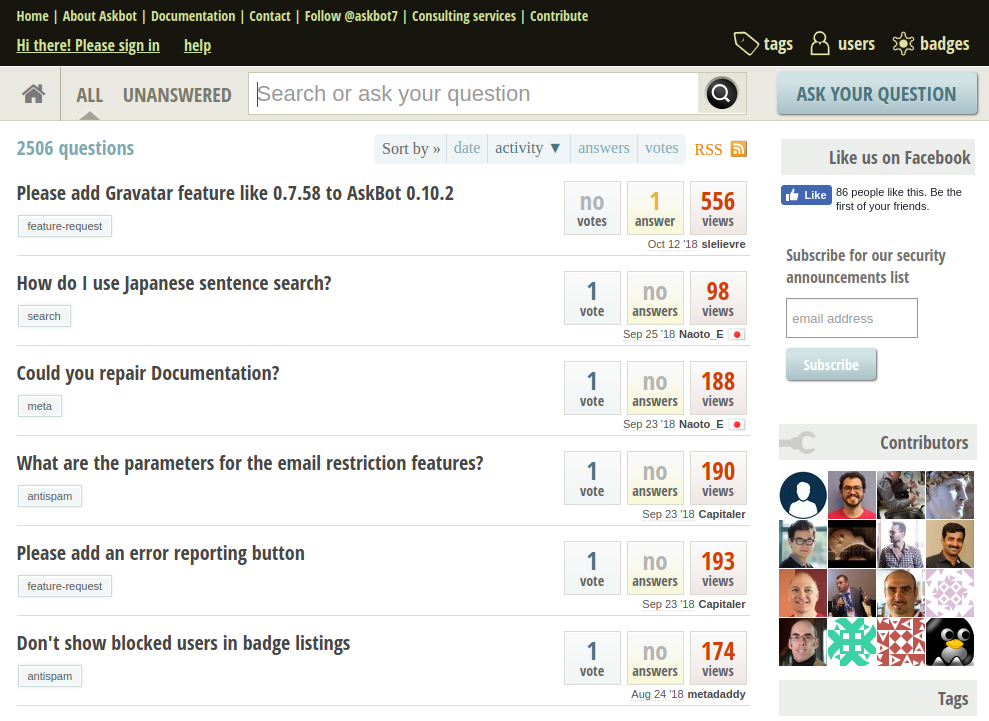
Askbot Question and Answers Forum

Askbot Question and Answers Forum

In this tutorial you will learn how to install AskBot on CentOS 7. In order to complete the tutorial, you will need to have a CentOS 7 server minimal installation with root access.

Step 1: Install Required Dependencies

We will start by installing the required dependencies such as development tools by using the following command in a terminal.

# yum group install 'Development Tools'

After that we will install Epel repository, if it hasn’t already been installed on your system.

# yum install epel-release

Lastly, we will install some of the python dependencies required to later run AskBot.

# yum install python-pip python-devel python-six

In case python-pip is not installed with the above command, you can install it with by using the following command.

# curl "https://bootstrap.pypa.io/get-pip.py" -o "get-pip.py" && python get-pip.py

Step 2: Install PostgreSQL Database

AskBot requires a database where it will store its data. It uses PostgreSQL, so we will need to install it and configure it on our system.

You can use the following command to complete the installation.

# yum -y install postgresql-server postgresql-devel postgresql-contrib

When the installation is complete, initialize PostgreSQL with.

# postgresql-setup initdb

If everything goes normally, you should see the following:

Initializing database ... OK

Our next step is to start PostgreSQL and enable it to start on boot:

# systemctl start postgresql
# systemctl enable postgresql

Now that our database server is up and running, we will login as postgres user to create a database for our AskBot installation.

# su - postgres

Then use to:

$ psql

Now you are the PostgreSQL prompt, ready to create our database, database user and grant the user privileges on the new database. Create the database by using the command below, feel free to change the database name per your preferences:

postgres=# create database askbot_db;

Next create the database user. Replace “password_here” with a strong password:

postgres=# create user askbot_user with password 'password_here';

Grant the user privileges on the askbot_db:

postgres=# grant all privileges on database askbot_db to askbot_user;

Next we will need to edit the PostgreSQL configuration to change our authentication method to md5. To do this, use your favorite text editor and edit /var/lib/pgsql/data/pg_hba.conf file:

# vim /var/lib/pgsql/data/pg_hba.conf

The configurations should look like this:

PostgreSQL Configuration

PostgreSQL Configuration

Next save the changes and restart PostgreSQL:

# systemctl restart postgresql

Step 3: Install AskBot Forum

Finally we can proceed with the installation of AskBot. Start by creating new user on your system. We will call it askbot:

# useradd -m -s /bin/bash askbot

Setup password for the new user:

# passwd askbot

Next we will need to add the user to the wheel group on the system:

# usermod -a -G wheel askbot

Now we will use pip to install virtualenv package:

# pip install virtualenv six

Now we will log as the askbot user and create new virtual environment:

# su - askbot
$ virtualenv tecmint/
Sample Output
New python executable in /home/askbot/tecmint/python
Installing setuptools, pip, wheel...
done.

Next step is to activate the virtual environment with the following command:

# source tecmint/bin/activate

Now we are ready to install AskBot via pip.

# pip install six askbot psycopg2

The installation may take a couple of minutes. Once it is complete, we can test our installation in a temporary directory. Make sure NOT to name that directory askbot.

# mkdir forum_test && cd forum_test

Next we will initialize a new AskBot project with:

# askbot-setup

You will be asked a few question where you will have to select the installation directory – use “.” (without quotes) to choose the current directory. Next you will need to enter the earlier prepared database name, database user and its password.

Next we will generate the static files for Django with:

# python manage.py collectstatic

Next we generate the database:

# python manage.py syncdb

And finally start the server with:

# python manage.py runserver 127.0.0.1:8080

When you go to your browser to http://127.0.0.1:8080 – you should see the askbot interface.

That’s all! Askbot is an open source, simple, fast and highly-customizable question and answer (Q&A) forum software. It supports efficient question and answer knowledge management. If you encountered any errors during the installation or have any other related queries, use the feedback form below to reach us.

Source

Piwigo – Create Your Own Photo Gallery Website

Piwigo is an open source project which allows you to create your own photo gallery on the web and upload photos and create new albums. The platform includes some powerful features built-in, such as albums, tags, watermark, geolocation, calendars, system notifications, access control levels, themes and statistics.

Piwigo has a huge amount of available plugins (over 200) and a great collection of themes. It is also translated in more than 50 languages. Its core functions are written in PHP programming language and requires a RDBMS database backend, such as MySQL database.

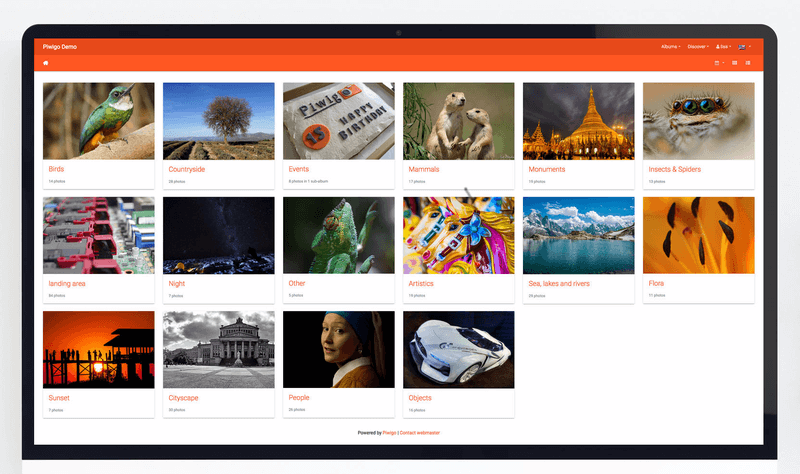
Piwigo Photo Gallery

Piwigo Photo Gallery

This fact makes it easy to deploy Piwigo on top of a LAMP (LinuxApacheMySQL and PHP) stack installed on your own server, VPS or on shared hosted environments.

An online demo is available for you to try before installing Piwigo on CentOS system.

Demo URL: http://piwigo.org/demo/

Requirements:

  1. A dedicated VPS with a registered domain name
  2. A CentOS 7 Server with Minimal Install
  3. LAMP stack installed in CentOS 7

Piwigo is an open source project which can be deployed on a VPS server of your choice.

You can get a 2GB RAM VPS from Linode for $10, but it’s unmanaged. If you want a Managed VPS, then use our new BlueHost Promotion Offer, you will get upto 40% OFF on hosting with one Free Domain for Life. If you get a Managed VPS, they will probably install Piwigo for you.

In this guide we’ll learn how to install and configure Piwigo image gallery software on top of a LAMP stack in a CentOS 7 VPS server.

Setting Up Pre-requirements for Piwigo

1. After you’ve installed LAMP stack on your VPS by following the guide in the article description, make sure you also install the below PHP extensions required by Piwigo to properly run on your server.

# yum install php php-xml php-mbstring php-gd

2. Next, install the following command line utilities on your VPS server in order to download and extract Piwigoarchive sources in your system.

# yum install unzip zip wget 

3. Next, log in to MySQL database and execute the below command in order to create Piwigo database and the user which will be used to manage the database. Replace the database name and credentials used in this tutorial with your own settings.

# mysql -u root -p
MariaDB [(none)]> create database piwigo;
MariaDB [(none)]>grant all privileges on piwigo.* to 'piwigouser'@'localhost' identified by 'pass123';
MariaDB [(none)]>flush privileges;
MariaDB [(none)]>exit

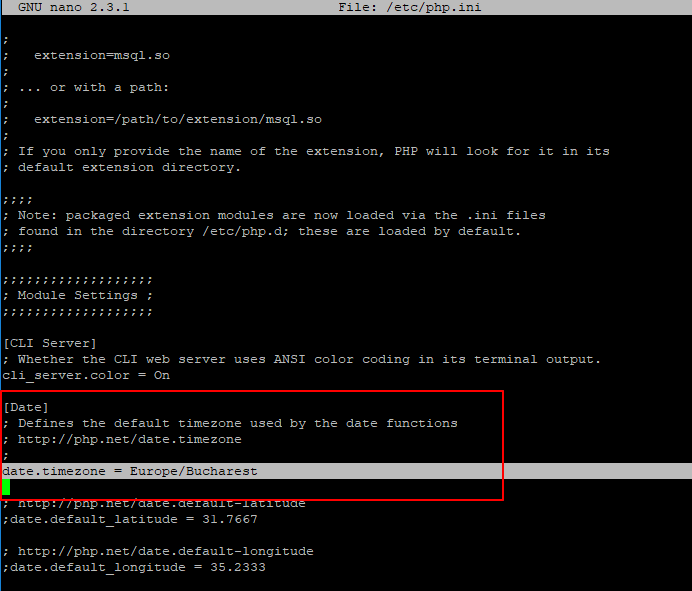
4. Next, open end edit PHP configuration file and set the correct timezone settings for your server. Use PHP docs to get the timezone settings list.

# nano /etc/php.ini

Locate and Insert the below line after [Date] statement.

date.timezone = Europe/Your_city

Set Timezone in PHP Configuration

Set Timezone in PHP Configuration

Save and close the file and restart Apache HTTP server to apply all changes, by issuing the below command.

# systemctl restart httpd

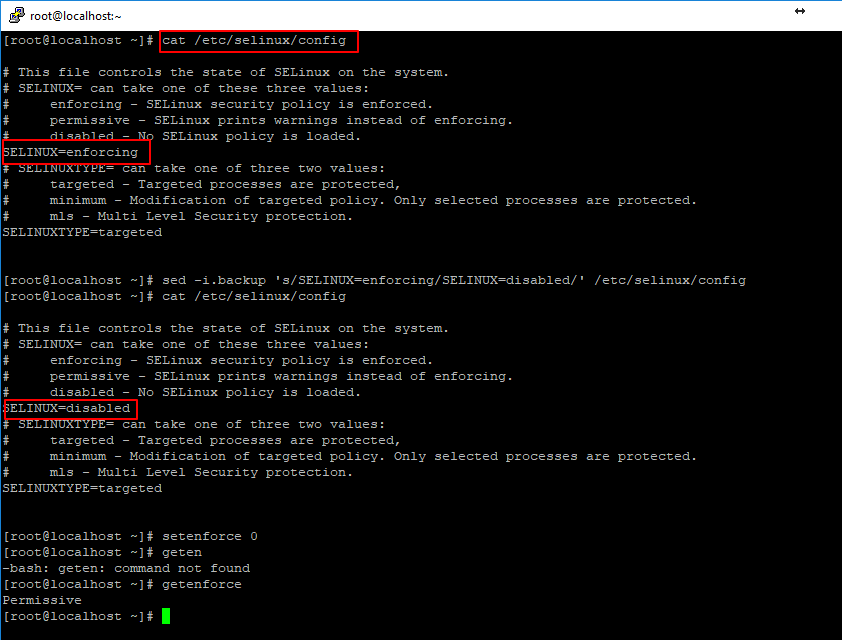
5. Next, completely disable SELinux in your CentOS system by executing the below commands. Use cat command to show Selinux configuration file.

# cat /etc/selinux/config 
# sed -i.backup 's/SELINUX=enforcing/SELINUX=disabled/' /etc/selinux/config 
# cat /etc/selinux/config 
# setenforce 0
# getenforce

Disable SELinux in CentOS 7

Disable SELinux in CentOS 7

Install Piwigo in CentOS 7

6. On the next step, visit Piwigo official download page and grab the latest installer zip sources on your system using wget utility by issuing the below command. After download completes, extract Piwigo zip archive in your current working directory.

# wget http://piwigo.org/download/dlcounter.php?code=latest -O piwigo.zip
# ls 
# unzip piwigo.zip 

Download Piwigo Software

Download Piwigo Software

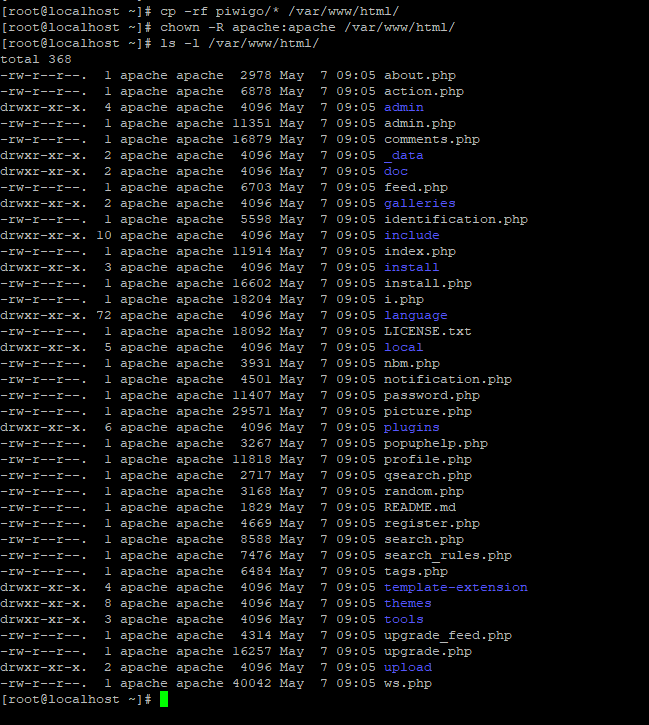
7. After you’ve extracted the zip archive, copy Piwigo sources files into your domain webroot path by issuing the below command. Afterwards, grant Apache account full privileges to webroot files and list the content of your web server document root path.

# cp -rf piwigo/* /var/www/html/
# chown -R apache:apache /var/www/html/
# ls -l /var/www/html/

Setting Up Piwigo Under Apache

Setting Up Piwigo Under Apache

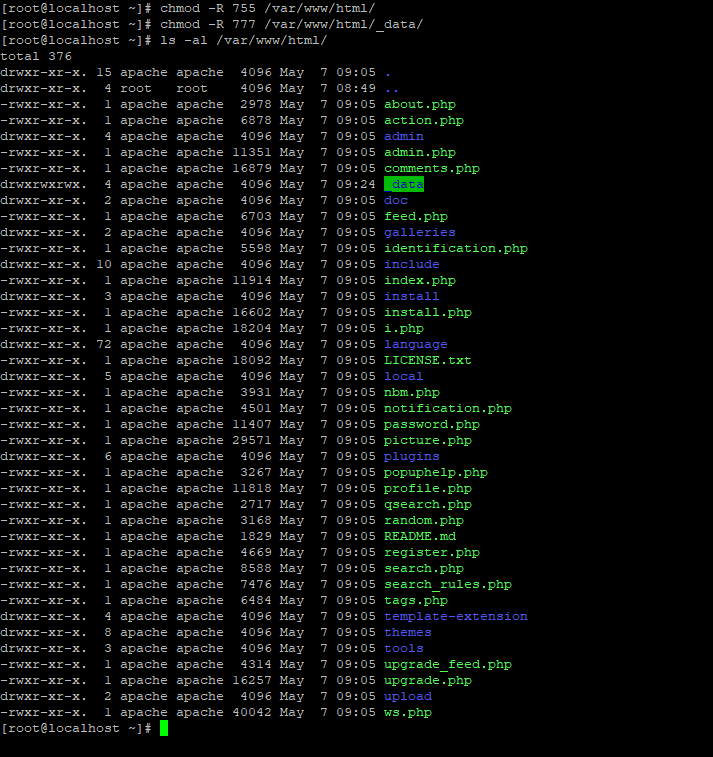
8. Next, change the webroot file permissions for Piwigo installed files and grant _data directory full write permissions for other system users, by issuing the below commands.

# chmod -R 755 /var/www/html/
# chmod -R 777 /var/www/html/_data/
# ls -al /var/www/html/

Setting Permissions on Piwigo

Setting Permissions on Piwigo

9. Now, start the installation process of Piwigo. Open a browser and navigate to your server IP address or domain name.

http://192.168.1.164
OR
http://your-domain.com

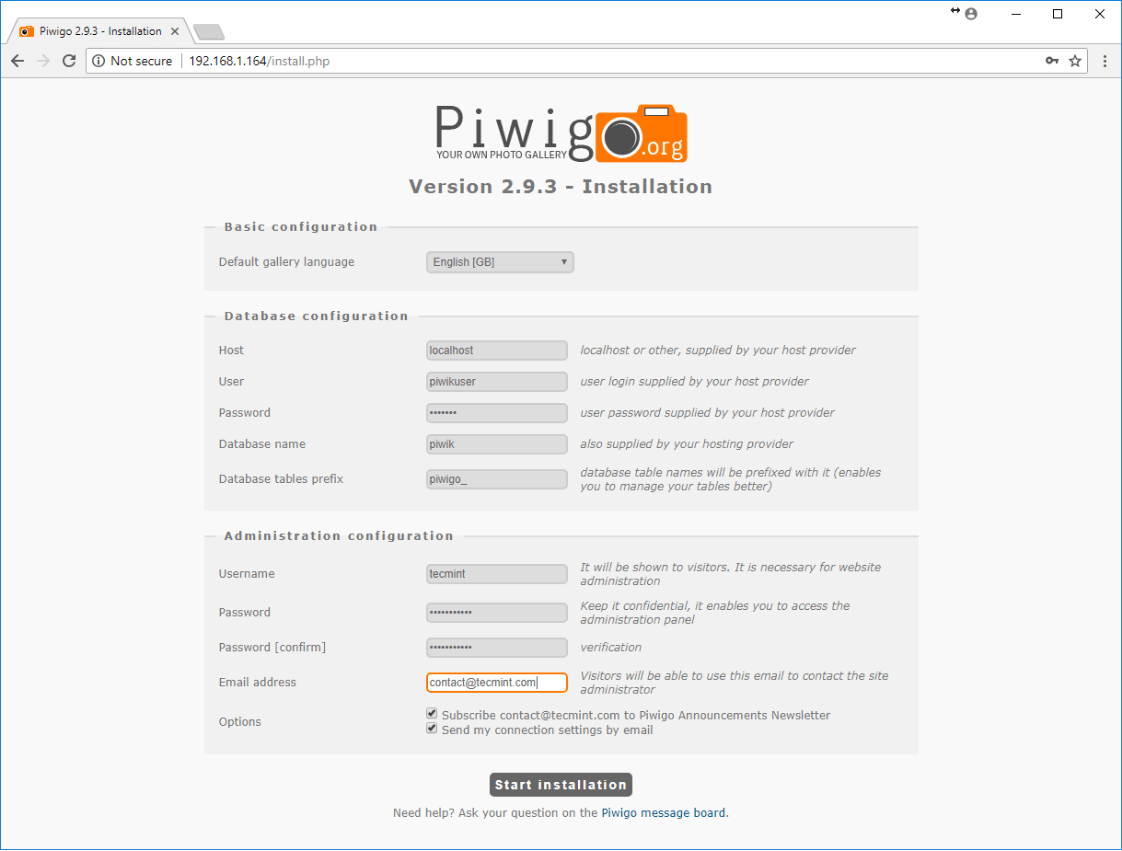
On the first installation screen, select Piwigo language and insert MySQL database settings: host, user, password and table prefix. Also, add a Piwigo admin account with a strong password and the email address of the admin account. Finally, hit on Start installation button to install Piwigo.

Piwigo Installation Configuration

Piwigo Installation Configuration

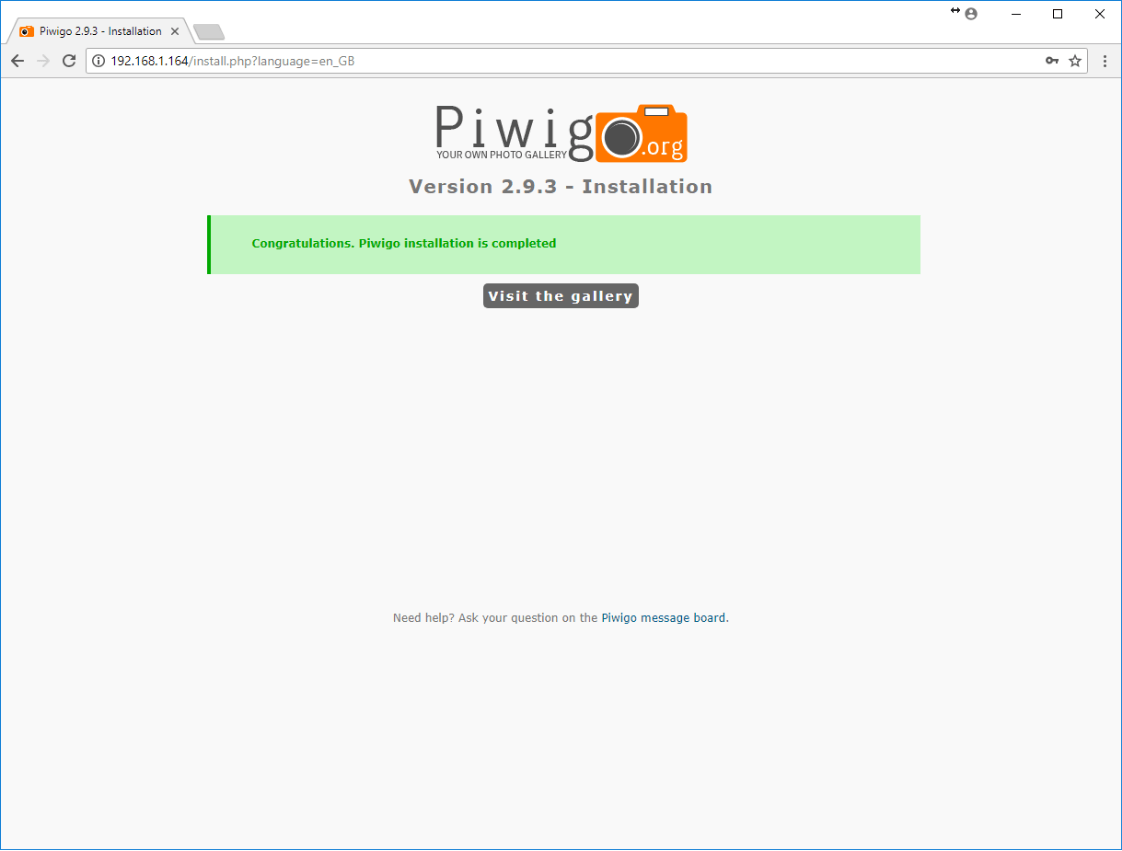
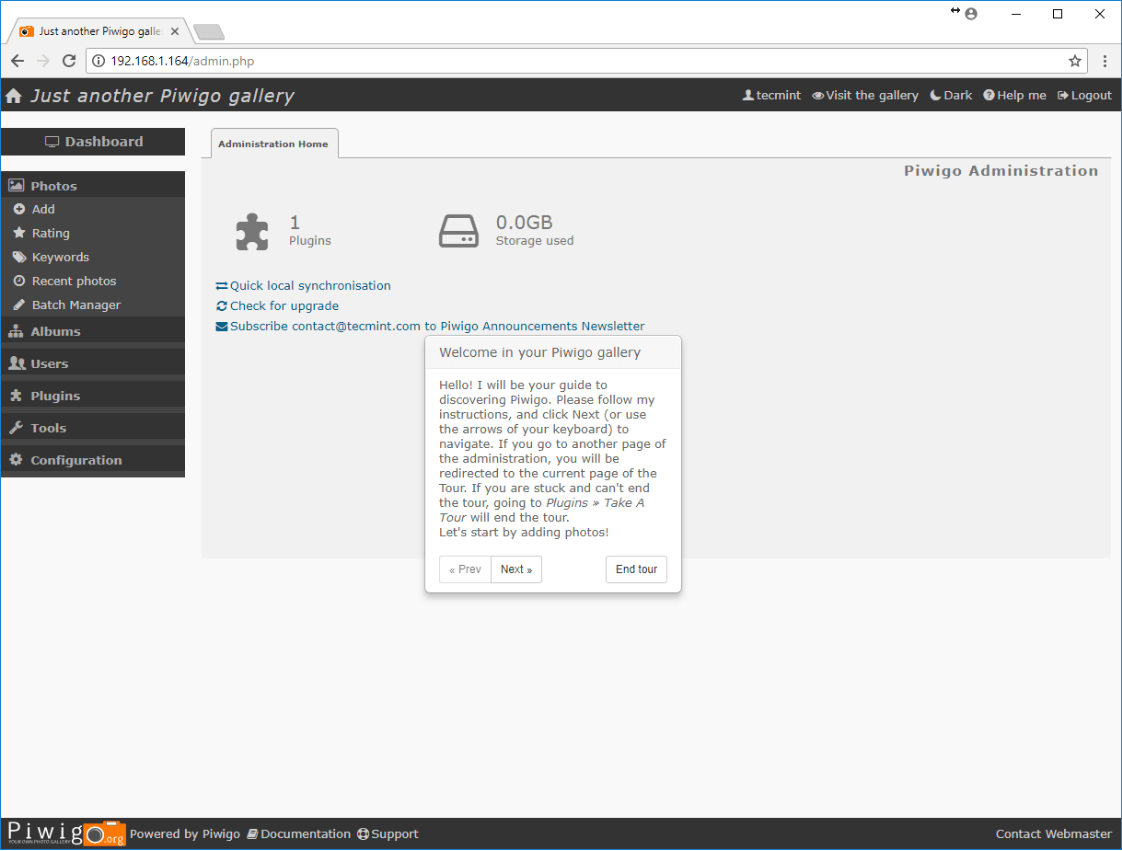
10. After the installation has been completed, hit on Visit the gallery button in order to be redirected to Piwigo admin panel.

Piwigo Installation Completed

Piwigo Installation Completed

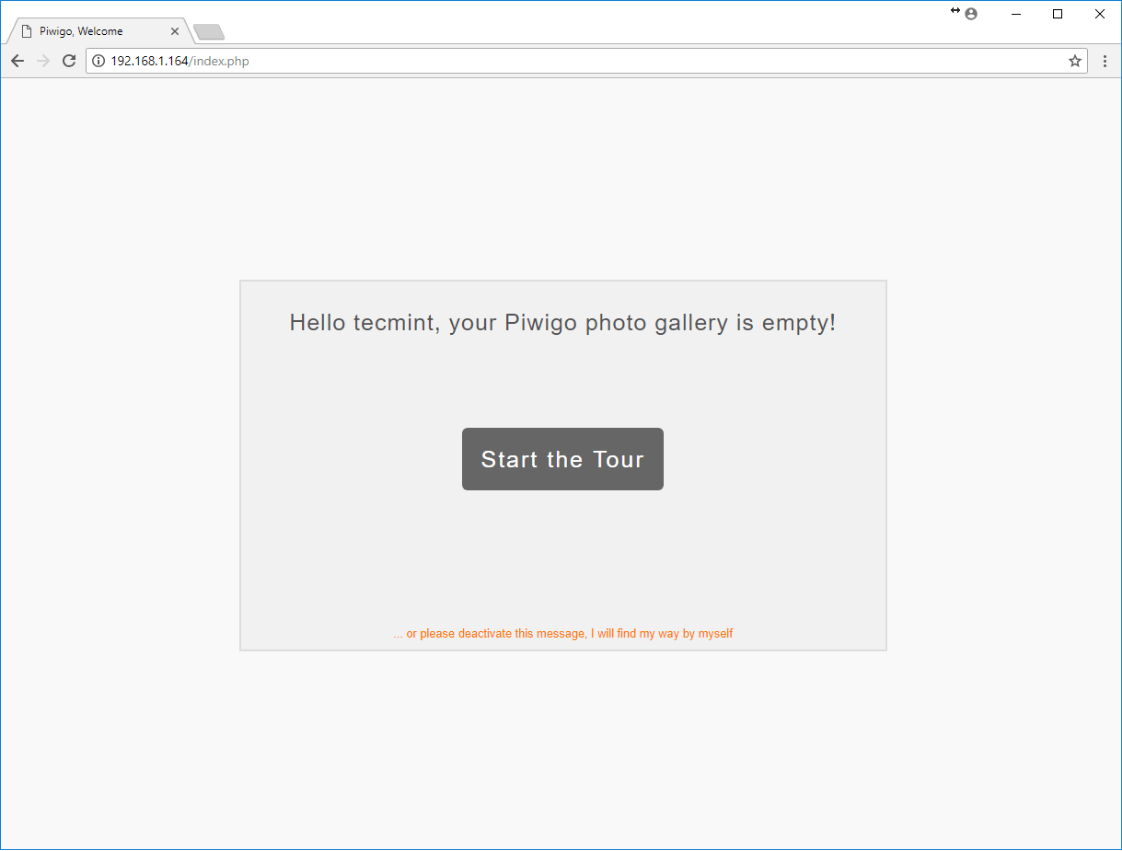
11. On the next screen, because no image has been uploaded to the server yet, hit on Start the Tour button in order to display the software guidance window and review all step required to upload your photos and use Piwigo image gallery.

Start Piwigo Tour

Start Piwigo Tour

Piwigo Admin Dashboard

Piwigo Admin Dashboard

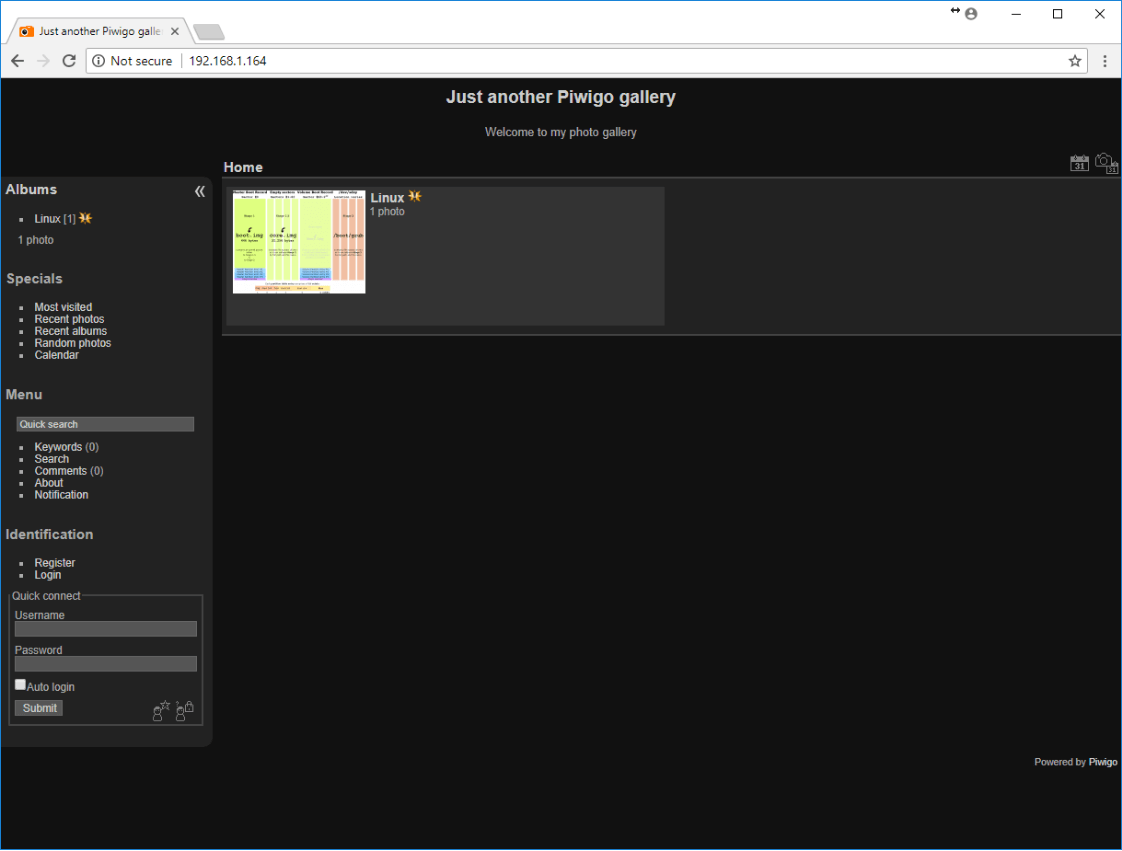
That’s all! Now you can start creating image galleries and upload your image files to the server using one of the most flexible open source solutions to host your photos.

Piwigo Image Gallery

Piwigo Image Gallery

Source

Trouble Maker – Breaks Your Linux Machine and Ask You to Fix Broken Linux

Fixing a broken Linux System can be a cumbersome job if you don’t have the idea of what exactly is going on. What most of us do when we gets a broken Linux system? Most of us searches the forum and/or google about the problem. While we hate troubles, how about installing a ‘Trouble Maker‘ application, which essentially creates troubles, gives you hard time and want you to fix broken system.

This is a nice way of learning to fix a broken Linux System. For this purpose, there is a special Linux Distroavailable called ‘Damn Vulnerable Linux’ (DVL), it’s bundled with ill-configured, outdated and exploitable tools which trains administrators to industry standard.

Install Trouble Maker in Linux

Trouble-Maker – We break it and You fix it

However, no any distribution or tool is a replacement for clearly understanding the Linux and experience in dealing with unknown problems. This is where, Trouble-Maker comes into the picture. With this “Trouble Maker” you can train Yourself on any standard Linux distribution and hence no specific distro is required.

In fact, you will never underestimate DVL distribution. The DVL distro contains a lot of broken applications and bugs whereas “Trouble Maker”, will provide you with 16 different modules.

Trouble Maker Components

Trouble Maker consists of three main components and they are:

  1. The trouble-engine is developed in a cross platform way, so it can run on as many target platforms as feasible .
  2. The trouble-modules are developed so as to denote which machines they apply to, and what requirements they have.
  3. The trouble-module-builder is an extra module (optional) system designed to clarify packaging trouble-module files into certain modules. Currently not implemented.

At this time, only RedHat Enterprise LinuxCentOSFedora and SUSE Linux Enterprise Server are supported. When you install and run the “Trouble Maker” first time, it will randomly choose a problem from its set of modules and ask you to deal with boot problemconfiguration problemhardware problem and user reporting problem.

It is Strongly recommended not to install “Trouble Maker” on your Primary/Production Machine. Better use it on any of the ‘virtual machine‘ in order to remain away from any trouble or data loss.

Installation of Trouble-Maker in Linux

The application is a cross­-platform project and hence don’t come bundled with OS specific files/application. The project is developed in Perl programming language. Of course you need Perl installed on your Linux server, before using the application.

To install required Perl modules, you need to install and enable third party RPMForge repository under your systems. Please use the following article to enable repository.

Install and Enable RPMForge Repository in RHEL/CentOS

Once you’ve enabled RPMForge repository, you can run the following command to install required Perl modules.

# yum install perl-Archive-Tar perl-YAML

Now, download the latest Trouble-Maker application using the following download link or you may use the wget command to download it as shown.

http://sourceforge.net/projects/trouble­maker/files/

# cd /tmp
# wget http://kaz.dl.sourceforge.net/project/trouble-maker/trouble-maker/0.11/trouble-maker-0.11.tgz
# cd /
# tar -zxvf /tmp/trouble-maker-0.11.tgz
# /usr/local/trouble-maker/bin/trouble-maker.pl --version=RHEL_6

How to Run Trouble-Maker in Linux

The default mode for running trouble-maker is very easy to use. Simply run the following command with the version flag. For example, on RedHat Enterprise Linux 6, run the command as shown.

# /usr/local/trouble-maker/bin/trouble-maker.pl --version=RHEL_6

To run a specified module.

# /usr/local/trouble­maker/bin/trouble­maker.pl –version=RHEL_6 –selection=module_name

Trouble-Maker Problem Modules

Having a look at some of the System breaks, arising as a result of running Trouble Maker.

1. No GUI! Only command Line

Area to see: Your Runlevel has been modified from 5 to 3 in /etc/inittab file.

2. User ‘gdm’ don’t exist

Area to see: Modification in /etc/passwd file.

3. INIT: No more process in the runlevel

Area to see: Problem with /etc/inittab file.

4. Switchroot: Mount Failed: No such file or directory

Area to see: Location of root partition is modified. You need to change /boot/grub/grub.conf

5. Can’t log in as root

Area to see: You need to check file /etc/pam.d/login file.

6. initrd file not found

Area to see: correct /boot/grub/grub.conf

7. Network is not working

Area to see: You have to see at number of places. Check if ‘ifconfig’ command is working or not followed by looking into the file /etc/sysconfig/network file.

8. Log in to root denied, in console

Area to see: check /etc/pam.d/login file and /etc/security file and correct either or both of them.

9. FTP is not working

Area to see: check for errors in the ftp configuration file, /etc/hosts.allow and /etc/hosts.deny.

10. SSH not working

Area to see: Fix SSH configuration file.

Conclusion

I already describe 10 modules above, out of 16 modules of trouble maker, and leaving remaining 6 modules for you to explore. To be true 1 module is dummy hence you are left with 5 modules to explore and a total of 15 modules and 1 dummy module available in ‘Trouble Maker’. Run the program at your own risk. We are not responsible for any damage to your System/Server.

Reference Links

  1. Product’s Homepage
  2. Product’s Documentation

Hope you people would love the writing and tell us about your experience with ‘Trouble Maker’. That’s all for now and don’t forget to provide us with your valuable feedback in the comment section.

Source

Neofetch – Shows Linux System Information with Distribution Logo

Neoftech is a cross-platform and easy-to-use system information command line script that collects your Linux system information and display it on the terminal next to an image, it could be your distributions logo or any ascii art of your choice.

Recently, a new major version of Neofetch 3.0 released with large amount of breaking changes added to this update.

Neoftech is very similar to ScreenFetch or Linux_Logo utilities, but highly customizable and comes with some extra features as discussed below.

Its main features include: it’s fast, prints a full color image – your distributions logo in ASCII alongside your system information, it’s highly customizable in terms of which, where and when information is printed on the terminal and it can take a screenshot of your desktop when closing the script as enabled by a special flag.

Required Dependencies:

  1. Bash 3.0+ with ncurses support.
  2. w3m-img (occasionally packaged with w3m) or iTerm2 or Terminology for printing images.
  3. imagemagick – for thumbnail creation.
  4. Linux terminal emulator should support \033[14t [3] or xdotool or xwininfo + xprop or xwininfo + xdpyinfo .
  5. On Linux, you need fehnitrogen or gsettings for wallpaper support.

Important: You can read more about optional dependencies from the Neofetch Github repository to check if your Linux terminal emulator actually supports \033[14t or any extra dependencies for the script to work well on your distro.

How To Install Neofetch in Linux

Neofetch can be easily installed from third-party repositories on almost all Linux distributions by following below respective installation instructions as per your distribution.

On Debian

$ echo "deb http://dl.bintray.com/dawidd6/neofetch jessie main" | sudo tee -a /etc/apt/sources.list
$ curl -L "https://bintray.com/user/downloadSubjectPublicKey?username=bintray" -o Release-neofetch.key && sudo apt-key add Release-neofetch.key && rm Release-neofetch.key
$ sudo apt-get update
$ sudo apt-get install neofetch

On Ubuntu and Linux Mint

$ sudo add-apt-repository ppa:dawidd0811/neofetch
$ sudo apt-get update
$ sudo apt-get install neofetch

On RHEL, CentOS and Fedora

You need to have dnf-plugins-core installed on your system, or else install it with the command below:

$ sudo yum install dnf-plugins-core

Enable COPR repository and install neofetch package.

$ sudo dnf copr enable konimex/neofetch
$ sudo dnf install neofetch

On Arch Linux

You can either install neofetch or neofetch-git from the AUR using packer or Yaourt.

$ packer -S neofetch
$ packer -S neofetch-git
OR
$ yaourt -S neofetch
$ yaourt -S neofetch-git

On Gentoo

Install app-misc/neofetch from Gentoo/Funtoo’s official repositories. However, in case you need the git version of the package, you can install =app-misc/neofetch-9999.

How To Use Neofetch in Linux

Once you have installed the package, the general syntax for using it is:

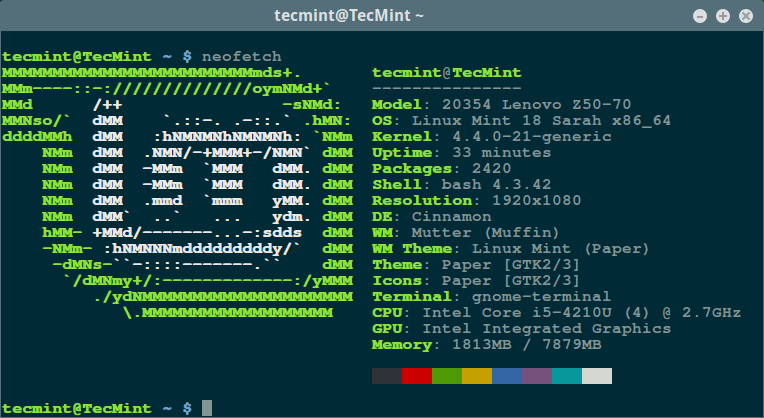
$ neofetch

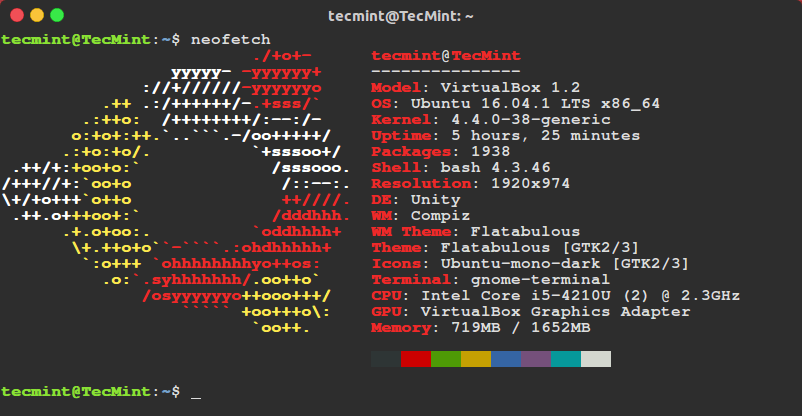
Note: If w3m-img or imagemagick is not installed on your system, screenfetch will be enabled by default and neofetch will display your ASCII art logo as in the image below.

Linux Mint Information

Linux Mint System Information

Linux Mint System Information

Ubuntu Information

Ubuntu System Information

Ubuntu System Information

If you want to display the default distribution logo as image, you should install w3m-img or imagemagick on your system as follows:

$ sudo apt-get install w3m-img    [On Debian/Ubuntu/Mint]
$ sudo yum install w3m-img        [On RHEL/CentOS/Fedora]

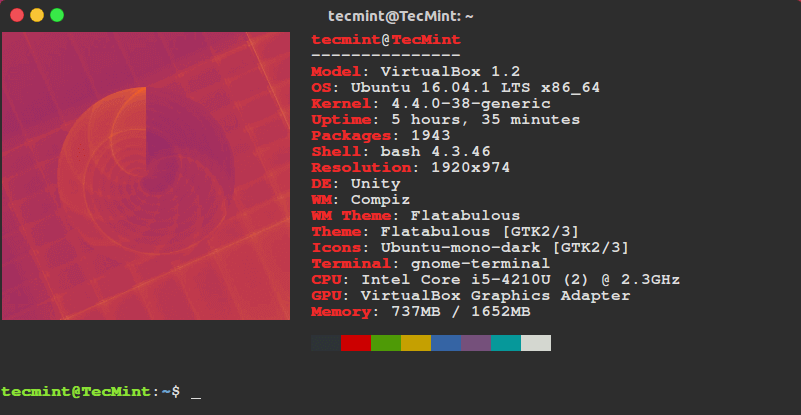
Then run neofetch again, you will see the default wallpaper of your Linux distributions as the image.

$ neofetch

Ubuntu System Information with Logo

Ubuntu System Information with Logo

After running neofetch for the first time, it will create a configuration file with all options and settings: $HOME/.config/neofetch/config.

This configuration file will enable you through the printinfo () function to alter the system information that you want to print on the terminal. You can type in new lines of information, modify the information lineup, delete certain lines and also tweak the script it using bash code to manage the information to be printed out.

You can open the configuration file using your favorite editor as follows:

$ vi ~/.config/neofetch/config

Below is an excerpt of the configuration file on my system showing the printinfo () function.

Neofetch Configuration File
#!/usr/bin/env bash
# vim:fdm=marker
#
# Neofetch config file
# https://github.com/dylanaraps/neofetch

# Speed up script by not using unicode
export LC_ALL=C
export LANG=C

# Info Options {{{


# Info
# See this wiki page for more info:
# https://github.com/dylanaraps/neofetch/wiki/Customizing-Info
printinfo() {
    info title
    info underline

    info "Model" model
    info "OS" distro
    info "Kernel" kernel
    info "Uptime" uptime
    info "Packages" packages
    info "Shell" shell
    info "Resolution" resolution
    info "DE" de
    info "WM" wm
    info "WM Theme" wmtheme
    info "Theme" theme
    info "Icons" icons
    info "Terminal" term
    info "Terminal Font" termfont
    info "CPU" cpu
    info "GPU" gpu
    info "Memory" memory

    # info "CPU Usage" cpu_usage
    # info "Disk" disk
    # info "Battery" battery
    # info "Font" font
    # info "Song" song
    # info "Local IP" localip
    # info "Public IP" publicip
    # info "Users" users
    # info "Birthday" birthday

    info linebreak
    info cols
    info linebreak
}
.....

Type the command below to view all flags and their configuration values you can use with neofetch script:

$ neofetch --help

To launch neofetch with all functions and flags enabled, employ the --test flag:

$ neofetch --test

You can enable the ASCII art logo again using the --ascii flag:

$ neofetch --ascii

In this article, we have covered a simple and highly configuration/customizable command line script that gathers your system information and displays it on the terminal.

Remember to get in touch with us via the feedback form below to ask any questions or give us your thoughts concerning the neofetch script.

Last but not least, if you know of any similar scripts out there, do not hesitate to let us know, we will be pleased to hear from you.

Visit the neofetch Github repository.

Source

How to Install Dropbox (An Ultimate Cloud Storage) in Linux

In this era of Information Technology, data is all important. A data needs to be available across several machines at one/different point of time. Thus the concept of cloud storage was introduced. ‘Dropbox‘, the file hosting and cloud storage service enables each of its user to create a special folder on each machine and then sync them so that on each box, the same folder with same content is available.

Install Dropbox in Linux

Install Dropbox in Linux

Here in this article we will be throwing light on Dropbox, its feature, usages, area of application and installation on various Linux distributions.

What is Dropbox?

Dropbox is a cloud storage service which provides real time data syncing across multiple platforms and architectures. It is a tool which is very useful in managing data on the go. It lets you edit, update content and share your work with your family and friends. Real time syncing across various devices is now a cake-walk.

Features of Dropbox

  1. Get 2 GB online storage for free.
  2. Get up-to 16 GB online storage with referrals.
  3. Pro Dropbox account gets 500GB online storage.
  4. Business accounts are supported and it starts with 1 TB online storage with 5 Users.
  5. Available for all known platforms Windows, Mac and Linux.
  6. Available for most of the mobile platforms Symbian, Android, iOS.
  7. Available for most of the devices Laptops, Desktops, Servers, Mobile – Blackberry, iPhone, ipad.
  8. Works even when you are working offline.
  9. Transfer only changed/new content.
  10. Can be configured to set bandwidth limit.
  11. Files Available on the go.
  12. Edit files in real-time directly in dropbox.
  13. Easy sharing and User-Friendly file upload.

Installation of Dropbox in Linux

Firstly, go the official download page to grab a latest version (i.e. Dropbox 2.6.25) according to your system architecture.

  1. https://www.dropbox.com/install?os=lnx

Alternatively, you may also use following direct links to download and install the latest version using following commands.

On Ubuntu/Linux Mint
$ wget https://linux.dropbox.com/packages/ubuntu/dropbox_1.6.0_i386.deb		[32-bit]
$ sudo dpkg -i dropbox_1.6.0_i386.deb

$ wget https://linux.dropbox.com/packages/ubuntu/dropbox_1.6.0_amd64.deb	[64-bit]
$ sudo dpkg -i dropbox_1.6.0_amd64.deb
On Debian
$ wget https://linux.dropbox.com/packages/debian/dropbox_1.6.0_i386.deb		[32-bit]
$ sudo dpkg -i dropbox_1.6.0_i386.deb

$ wget https://linux.dropbox.com/packages/debian/dropbox_1.6.0_amd64.deb	[64-bit]
$ sudo dpkg -i dropbox_1.6.0_amd64.deb
On RHEL/CentOS and Fedora
# wget https://linux.dropbox.com/packages/fedora/nautilus-dropbox-1.6.0-1.fedora.i386.rpm	[32-bit]
# rpm -Uvh nautilus-dropbox-1.6.0-1.fedora.i386.rpm

$ wget https://linux.dropbox.com/packages/fedora/nautilus-dropbox-1.6.0-1.fedora.x86_64.rpm	[64-bit]
# rpm -Uvh nautilus-dropbox-1.6.0-1.fedora.x86_64.rpm

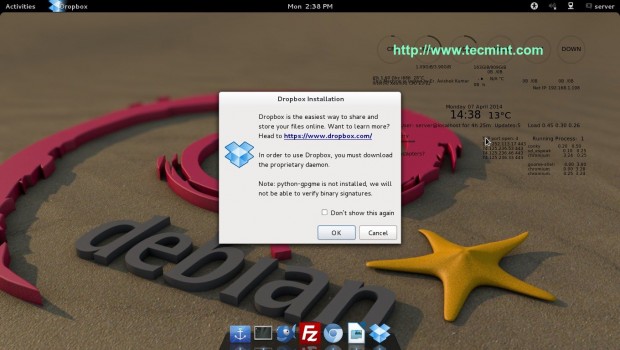
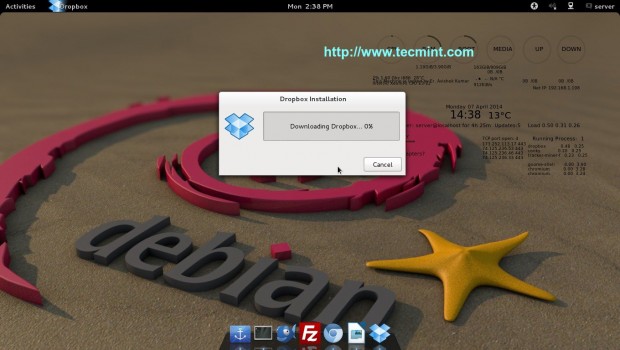
After successful installation. Click ‘Start Dropbox‘ button to begin installation, it will download latest version for your system.

Dropbox Installation

Dropbox Installation

Downloading Dropbox

Downloading Dropbox

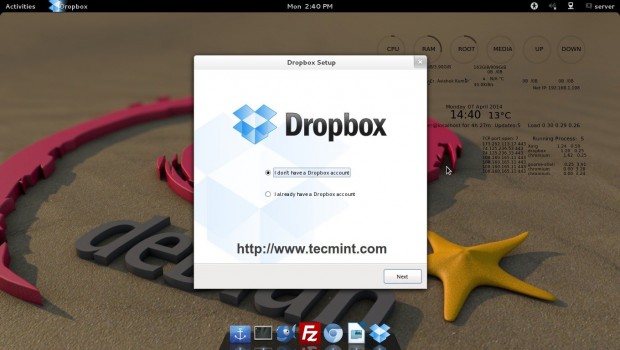
After that, Dropbox setup will prompt you to login with your existing account or create one if you don’t.

Dropbox Setup

Dropbox Setup

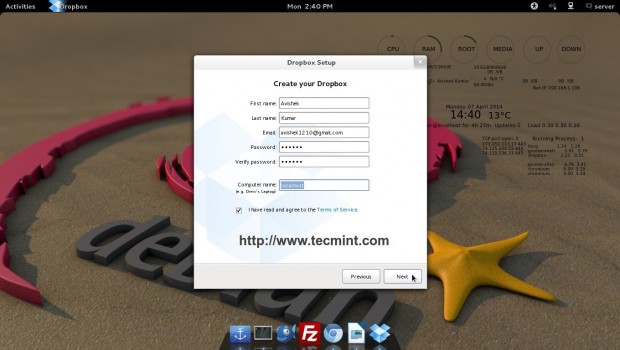
Create Dropbox Account

Create Dropbox Account

User Details

User Details

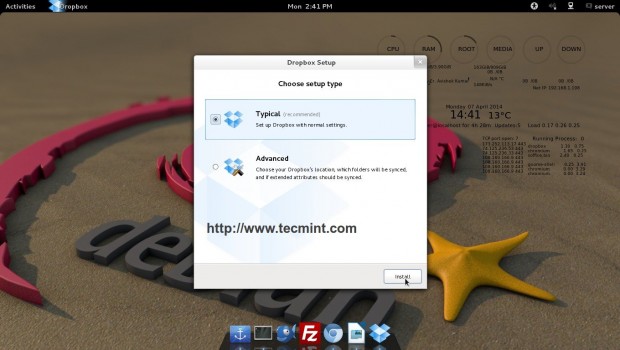
Choose Setup Type

Choose Setup Type

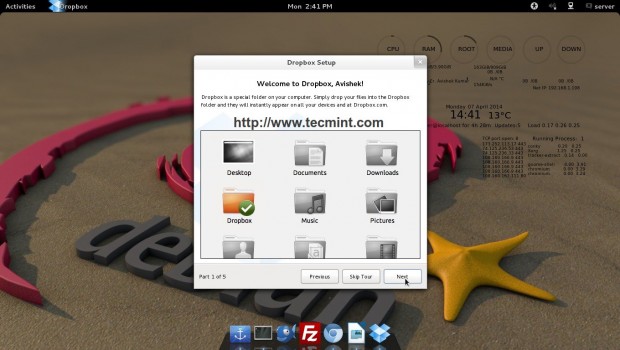
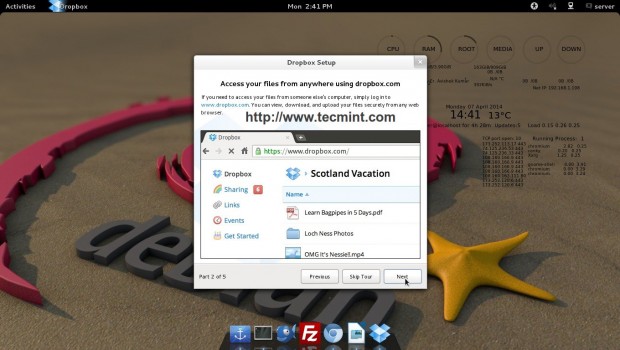
Drop Files and Folders

Drop Files and Folders

Dropbox Setup

Dropbox Setup

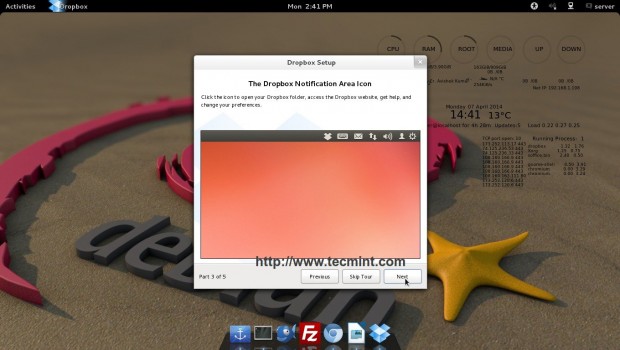
Notification Area Icon

Notification Area Icon

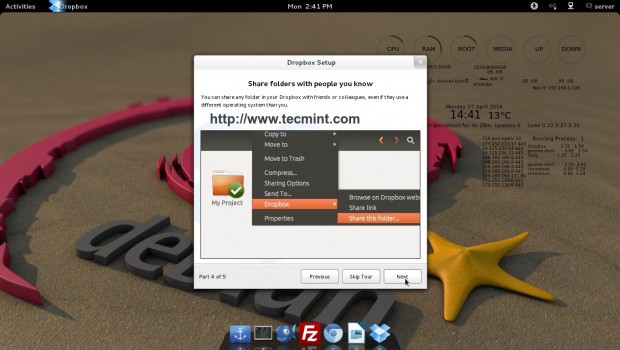
Share Dropbox Folders

Share Files

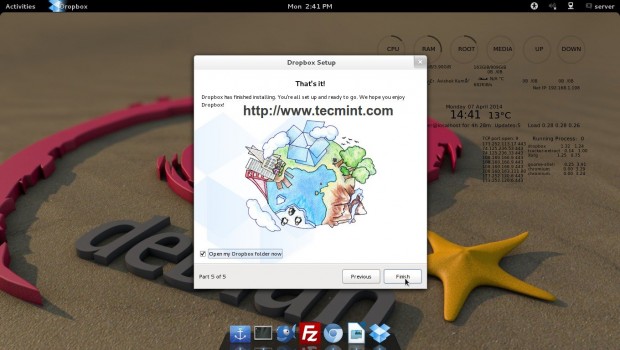
Dropbox Installation Complete

Installation Complete

After this, we need to install Dropbox client across all the box we need. Just login and start syncing in real-time from the special Dropbox folder.

Security

Well security of data is a major concern and in cloud storage service, when you are not aware of where your data is going to be saved, can we trust Dropbox?

Well at present time, Dropbox don’t support own private key to secure data. But it stores data in encrypted form which means you can be assured that your data is safe.

It shows a promising future. No doubt the developer should concentrate more on security point of view.

Conclusion

Dropbox is a brilliant cloud storage Application, most of us are aware of. If you have not tried it till now, you must give it a try and mind it you would never regret.

Dropbox Homepage

That’s all for now.

Source

mimipenguin – Dump Login Passwords From Current Linux Users

Mimipenguin is a free and open source, simple yet powerful Shell/Python script used to dump the login credentials (usernames and passwords) from the current Linux desktop user and it has been tested on various Linux distributions.

Additionally, it supports applications such as: VSFTPd (active FTP client connections), Apache2 (active/old HTTP BASIC AUTH sessions but this requires Gcore) and openssh-server (active SSH connections with sudo command usage). Importantly, it’s gradually being ported to numerous languages to support all imaginable post-exploit situations.

How does Mimipenguin Works?

To understand how mimipenguin works, you need to keep in mind that all if not most Linux distributions store a great deal of such critical information as: credentials, encryption keys, as well as personal data in memory.

Particularly usernames and passwords are held by processes (running programs) in memory and stored as plain text for relatively long periods of time. Mimipenguin technically exploits these clear-text credentials in memory – it dumps a process and extracts lines that have a likelihood of accommodating clear-text credentials.

It then tries to perform a calculation of each word’s chances of being present by determining hashes in: /etc/shadow, memory, and regex searches. Once it finds any, it prints them on standard output.

Installing Mimipenguin in Linux Systems

We will use git to clone the mimipenguin repository, so first install git on the system if in case you don’t have it.

$ sudo apt install git 		#Debian/Ubuntu systems
$ sudo yum install git		#RHEL/CentOS systems
$ sudo dnf install git		#Fedora 22+

Then clone the mimipenguin directory in your home folder (any where else) like this:

$ git clone https://github.com/huntergregal/mimipenguin.git

Once you have downloaded the directory, move into it and run mimipenguin as follows:

$ cd mimipenguin/
$ ./mimipenguin.sh 

Note: If you encounter the error below, use the sudo command like so:

Root required - You are dumping memory...
Even mimikatz requires administrator

Dump Login Passwords in Linux

Dump Login Passwords in Linux

From the output above, mimipenguin provides you the desktop environment along with the username and password.

Alternatively, run the Python script as follows:

$ sudo ./mimipenguin.py

Note that sometimes gcore may hang the script (this is a known problem with gcore).

Future Updates

Below is a list of features yet to be added in mimipenguin:

  • Improving overall effectiveness
  • Adding more support and other credential locations
  • Including support for non-desktop environments
  • Adding support for LDAP

mimipenguin Github repository: https://github.com/huntergregal/mimipenguin

Also, check out:

  1. How to Password Protect a Vim File in Linux
  2. How to Generate/Encrypt/Decrypt Random Passwords in Linux
  3. How to Protect GRUB with Password in RHEL / CentOS / Fedora Linux
  4. Resetting/Recovering Forgotten Root User Account Password in CentOS 7

Do share any additional ideas relating to this tool or issues of cleartext credentials in memory in Linux via the comment section below.

Source

14 Best RSS Feed Readers for Linux in 2018

There is a wealth of information on the web that you probably want to keep up to date with; from news, to how tos, guides, tutorials and more. Imagine having to visit, on a daily basis, all your favorite blogs or websites – it’s a bit of a challenge, especially if you have a tight schedule. This is where RSS comes into play.

RSS (Rich Site Summary or also Really Simple Syndication) is a popular and standardized web format used to deliver regularly changing content on the web. It is employed by blogs, news-related sites as well as other sites to deliver their content as an RSS Feed to internet users interested in it.

RSS feeds enable you to see when blogs or websites have added new content so you can get the latest headlines, videos and images within a single interface, immediately after being published, without necessarily visiting the news sources (you have taken the feeds from).

To subscribe to a feed, simply go to your favorite blog or site, copy the RSS URL and paste it into your RSS feed reader: do this for sites you visit frequently.

For example, Tecmint.com RSS feed URL is:

https://www.tecmint.com/feed/

In this article, we will review 14 RSS Feed readers for Linux systems. The list is not arranged in any particular order.

1. FeedReader

FeedReader is a free, open source, modern and highly customizable RSS client for Linux desktop. It supports keyboard shortcuts, comes with a fast search and filters feature, and supports desktop notifications. FeedReader also supports tags for categorizing and sorting articles. Importantly, it offers amazing consistency in article formating.
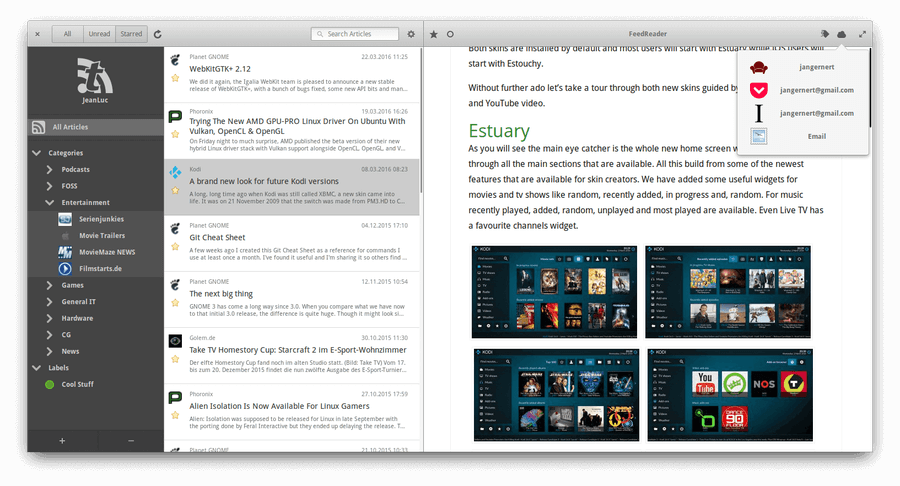
FeedReader for Linux

FeedReader for Linux

It allows you to save your feeds to pocket, instapaper or wallabag for later reading. You can also share feeds with friends via twitter, telegram or email. And it supports podcasts. In addition, you can choose from four themes and use the dconf-editor to tweak it.

Last but not least, it works with third-party applications (such as Feedbin, Feedly, FreshRSS, InoReader, LocalRSS, Tiny Tiny RSS, TheOldReader, and more) to extend its functionality.

Install FeedReader in Linux

FeedReader can be easily installed using Flatpak on all major Linux distributions.

$ flatpak install http://feedreader.xarbit.net/feedreader-repo/feedreader.flatpakref
$ flatpak run org.gnome.FeedReader

2. RSSowl

RSSowl is a free, powerful, cross-platform desktop RSS feed reader that runs on Linux, Windows and MacOS. It helps you to organize your feeds the way you want, under various categories, instantly search, and read feeds conveniently.
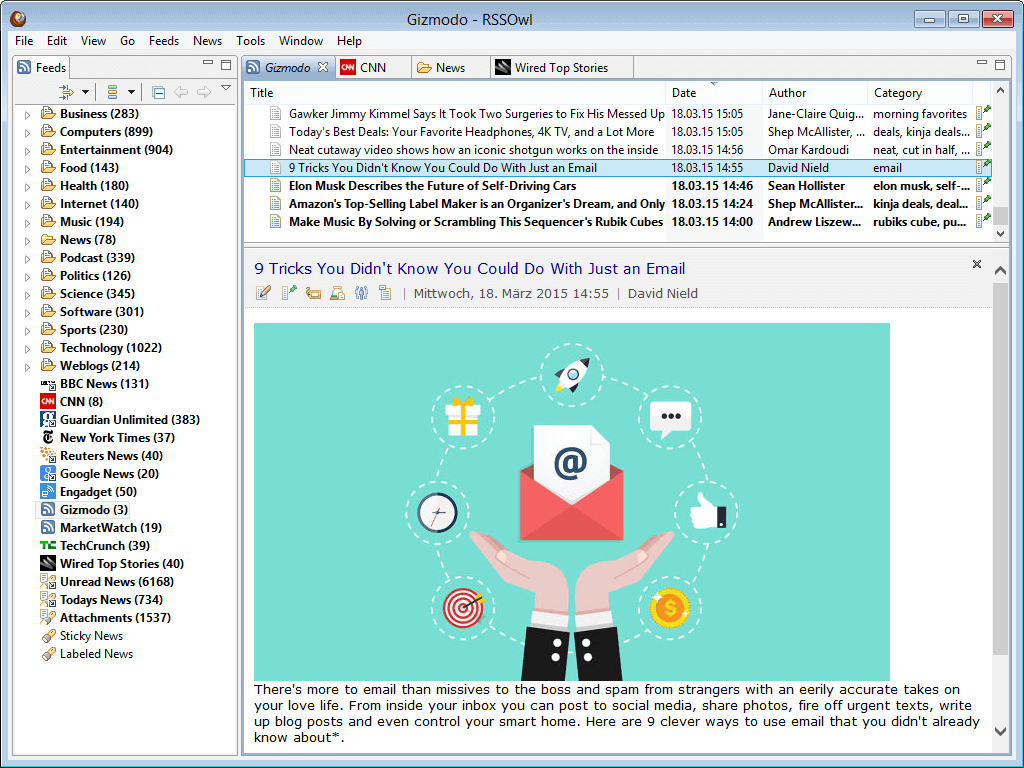
RSSOwl Feed Reader for Linux

RSSOwl Feed Reader for Linux

It allows you to save searches and use them like feeds and supports notifications. It also offers news bins for storing news entires that you consider very important. RSSowl also supports labels for associating keywords with news entries and more.

3. TinyTiny RSS

Tiny Tiny RSS is a free open source web-based RSS/Atom reader and aggregator, powered by AJAX. To host it, you need to setup a LEMP or LAMP stack on your system. Then use a web browser to read news; there is an Android app for mobile users.
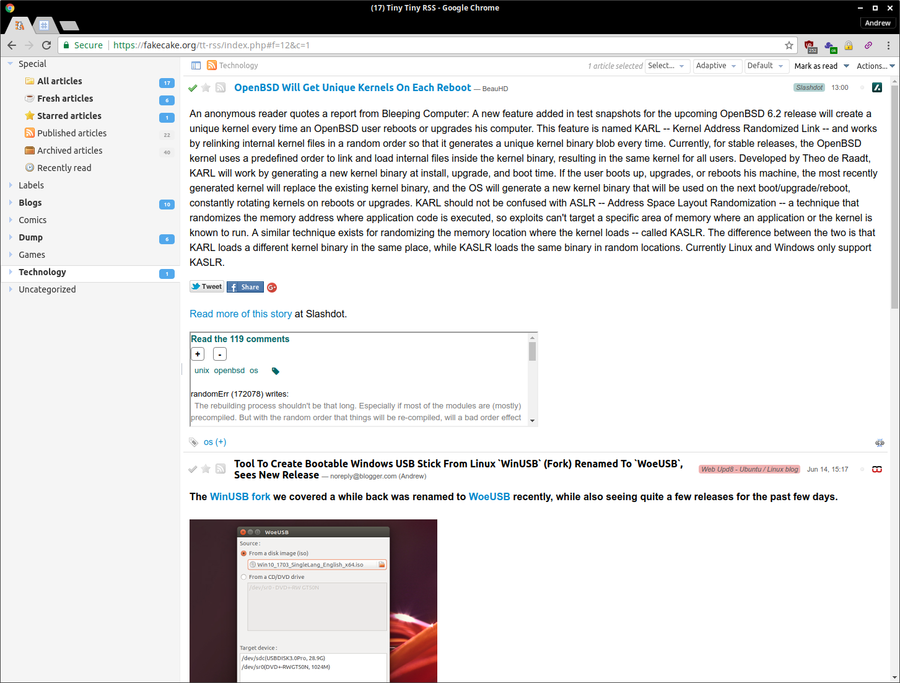
TinyTiny RSS for Linux

TinyTiny RSS for Linux

It supports keyboard shortcuts, several languages and allows for feed aggregation/syndication. TT RSS also supports podcasts and allows you to share new entries in various ways including via RSS feeds, social networks, or sharing by URL, and many more.

It supports flexible article filtering, and automatically identifies and filters duplicate articles. It comes with multiple themes to customize its look and feel, and there are plugins to extend its core functionality. You can integrate it with external applications via a JSON-based API. In addition, it supports OPML import/export and more.

4. Akregator

Akregator is a very powerful news RSS/Atom feed reader for KDE, designed to get feeds from hundreds of news sources. It is easy to use and very convenient. It ships in with an embedded browser for reading news in a simple and convenient way, and can be integrated with Konqueror to add news feeds.
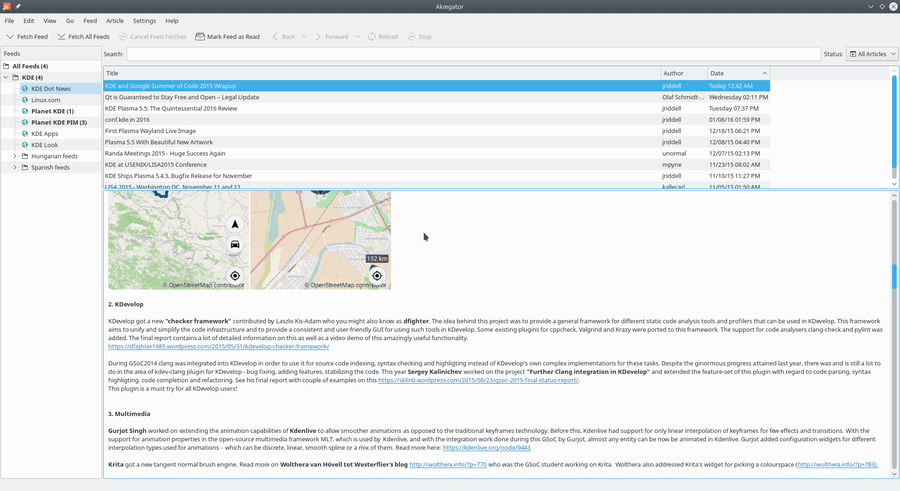
Akregator Feed Reader for Linux

Akregator Feed Reader for Linux

Install Akregator in Linux

If you are using KDE desktop, most likely Akregator is already installed. If not, you can use the following command to install it.

$ sudo apt install akregator

5. FreshRSS

FreshRSS is a free open source, fast, lightweight, powerful and customizable web-based RSS feed reader and aggregator. It is a multi-user application and has a terminal interface for those who like to work from the command-line. To self-host it, all you need is to install a LAMP or LEMP stack on your system.
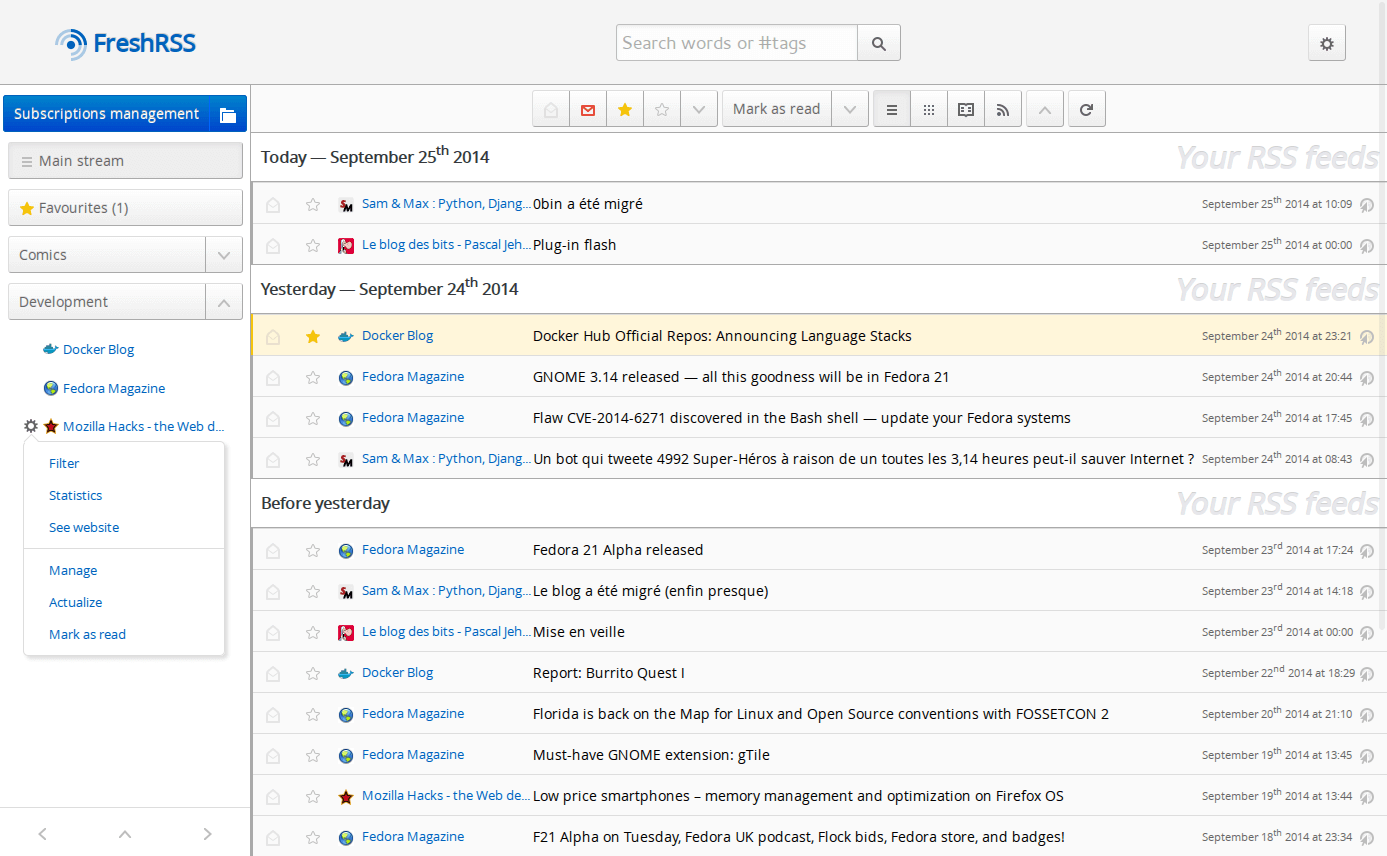
FreshRSS Reader for Linux

FreshRSS Reader for Linux

It is easy to use, very responsive with good mobile support. FressRSS supports anonymous reading mode, and instant notifications from compatible sites, via PubSubHubbub. It comes with various extensions to improve its core functionality, and an API for (mobile) clients.

6. Selfoss

Selfoss is a free open source, modern, lightweight and multipurpose web-based RSS reader, developed using PHP (therefore self-hostable). It can also be used for live stream, mashup, and as a universal aggregation.
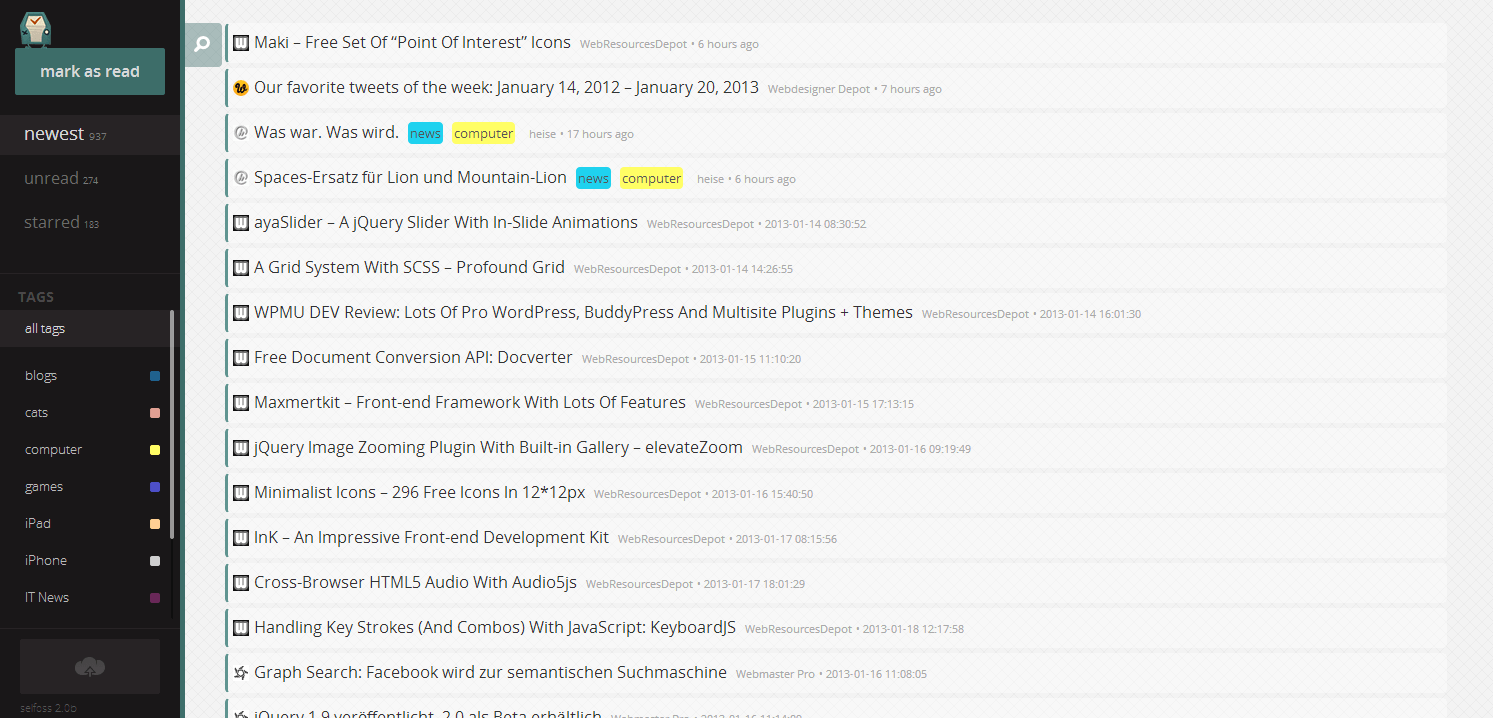
Selfoss RSS Reader

Selfoss RSS Reader

It comes with amazing mobile support (apps) for Android, iOS and tablets. It supports plugins for further tuning, and it also supports OPML import. In addition, you can integrate it with other external applications or develope you own plugins with the help of a Restful JSON API.

7. QuiteRSS

QuiteRSS is a free open source, cross-platform and feature-rich RSS feed reader. It works on Linux, Windows and MacOS. It comes in a multitude of languages around the world. It automatically update news feeds on startup and via a timer.
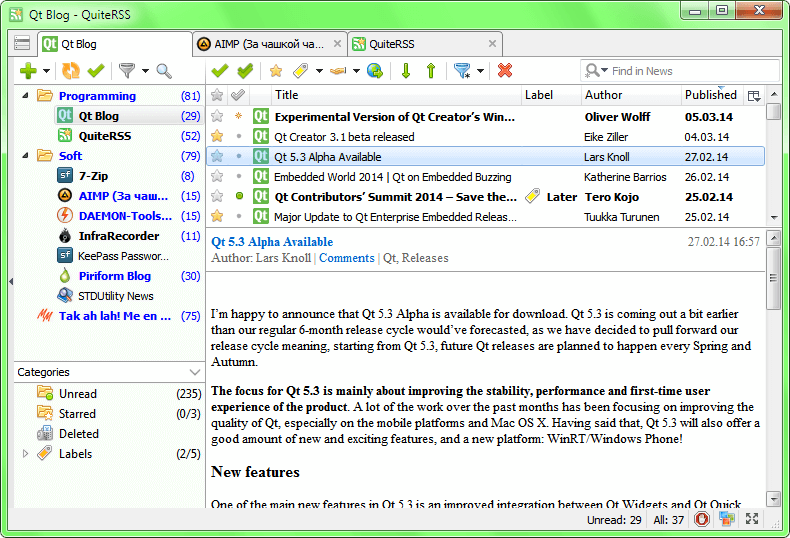
QuiteRSS Reader for Linux

QuiteRSS Reader for Linux

QuiteRSS supports shortcuts, OPML import/export, quick search in browser, and filters (user, feed and news filters). It also supports notifications (pop-up and sound), displays new or unread news counter on your system tray.

If you don’t want to view images in preview, this application allows you to disable them. And for security minded users, it allows you to configure a proxy either automatically or manually. It also comes with an ad-lock, internal browser and so much more.

Install QuiteRSS on Linux

Simply add the following PPA to install QuiteRSS on Debian based systems.

$ sudo add-apt-repository ppa:quiterss/quiterss
$ sudo apt-get update
$ sudo apt-get install quiterss

8. Liferea (Linux Feed Reader)

Liferea is a free open source, web-based feed reader and news aggregator for Linux. It is considered one of the best RSS feed readers on Ubuntu Linux. It has a simple interface allowing you to easily organize and browse feeds.
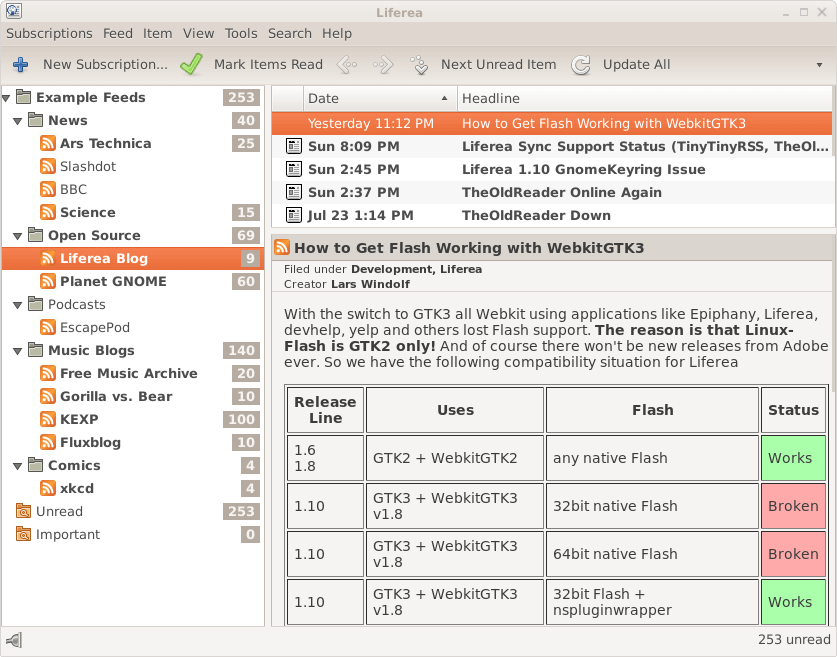
Liferea Feed Reader for Linux

Liferea Feed Reader for Linux

It comes with an embedded graphical browser, supports reading articles while offline, and supports podcats. It also provides news bins for permanently saving headlines, and allows you to match items using search folders. And Liferea can be synchronizes with InoReader, Reedah, TheOldReader and TinyTinyRSS.

Install Liferea in Linux

$ sudo apt-get install liferea  [On Ubuntu/Debian]
$ sudo dnf install liferea      [On Fedora]

9. OpenTICKR

OpenTickr is a free open source, highly customizable GTK-based RSS reader that shows feeds in a TICKER bar on your Linux desktop with a fast and smooth scroller. It’s a native Linux program developed using C with GTK+ and Libxml2; it can also run on Windows with MinGW support.
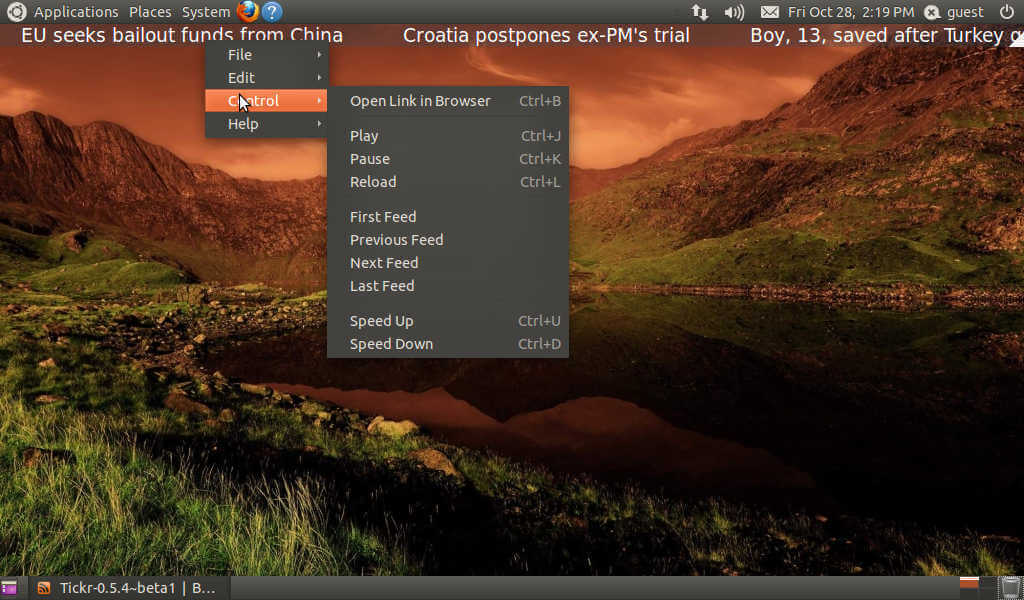
Tickr Feed Reader for Linux

Tickr Feed Reader for Linux

It supports bookmarking of your favorite feeds, and allows you to easily play, pause or reload the current feed. Other than using remote XML resources, you can use it with any text file. In addition, it is highly scriptable, since all its parameters can be passed from command-line, and much more.

10. MiniFlux

MiniFlux is a free open source, very simple, lightweight and fast RSS/Atom/JSON feed reader, developed in Goand Postgresql. It is easy to install and use, and comes with a few useful features. It comes in six languages: Chinese, Dutch, English, French, German, and Polish.

MiniFlux Feed Reader for Linux

MiniFlux Feed Reader for Linux

It supports OPML import/export, bookmarks, and categories. For YouTube lovers, it allows you to play videos from channels directly from within the program. In addition, it supports multiple enclosures/attachments such as videos, music, images as well as podcasts. With it, you can also save articles to external applications or services.

11. Newsbeuter

Newsbeuter is a free open source, terminal-based RSS/Atom feed reader for Unix-like systems (Linux, FreeBSD, Mac OS X and others). With it, you can connect to any feed source via a highly flexible filter and plugin system. It supports configurable keyboard shortcuts, podcasts, a search facility, category and tag system, as well as OPML import/export.

NewBeuter RSS Feed Reader

NewBeuter RSS Feed Reader

Newsbeuter uses a powerful query language to set meta feeds and you can automatically delete unwanted articles via a killfile.

Install Newsbeuter on Linux

Newsbeuter is available to install from the default system repository using following command.

$ sudo apt-get install newsbeuter

12. Snownews

Snownews is a free open source, simple, lightweight, fast and fully featured command-line RSS feed reader for Unix-like systems, with color support.
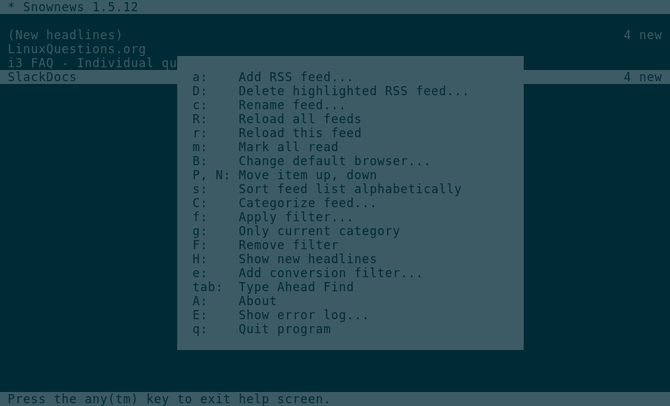
Snownews RSS Reader

Snownews RSS Reader

It is a native Unix program written in C and has few external dependencies (ncurses and libxml2). It comes with an embedded HTTP client which follows server redirects and automatically updates feed URLs that point to permanent redirects (301).

It supports HTTP proxy and authentication(basic and digest methods), feed categories, OPML import, and uses fully customizable keyboard shortcuts. Snownews also uses a local cache to minimize network traffic, hence boosting its performance. Furthermore, you can extend it via plug-ins; it is available in several languages, and much more.

13. Newsroom

Newsroom is a free open-source, simple, modern and cross-platform command-line utility to get your favorite news, developed using NodeJS. It runs on Linux systems, Mac OSX as well as Windows.
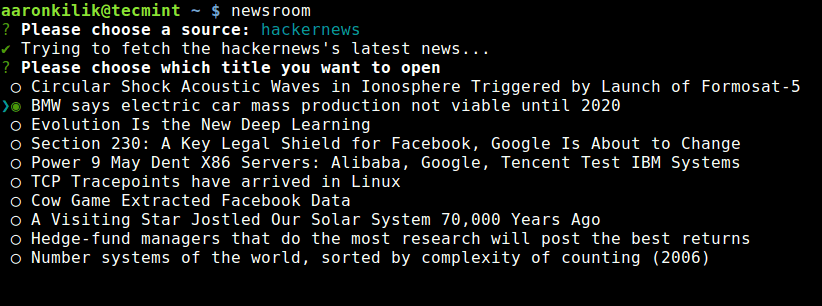
Newsroom Commandline RSS Reader

Newsroom Commandline RSS Reader

14. Newsboat

Newsboat (a fork of Newsbeuter) is also a free, open source and simple terminal-based RSS/Atom feed reader. It only runs on Unix-like systems such as GNU/Linux, FreeBSD and MacOS.
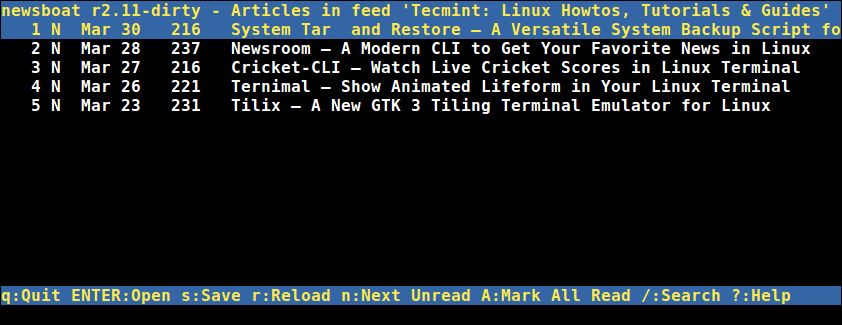
Newsboat Commandline RSS Reader

Newsboat Commandline RSS Reader

Summary

RSS is a standardized format used to deliver regularly changing content on the web. In this article, we have explained 14 RSS Feed readers for Linux systems. If we have missed any application in the list above, let us know via the feedback form below.

Source

15 Best Linux Photo/Image Editors I Discovered

In this article, I have reviewed of some the best photo editing software available on different Linux distributions. This fifteen are not the only photo editors available but are among the best and commonly used by Linux users.

Best Linux Image Photo Editors

15 Best Linux Image Photo Editors

Don’t Miss: 8 Best Video Editing Softwares I Discovered for Linux

1. GIMP

GNU image manipulation program (GIMP) is an open source photo editing tool that has features such as:

  1. image composition
  2. photo retouching
  3. image authoring

GIMP is highly customizable and pluggable through third party plugins and its users range from graphic designers, photographers, graphical illustrators and even scientists.

Gimp Photo Editor

Gimp Photo Editor

2. Photoshop WINE

Many users who have migrated from Windows to Linux may just enjoys this, it is one of the most popular photo editing tools available. Though you can not install it directly on Linux, but you can use WINE to install it and use it on many Linux distributions.

WINE helps Linux users to use some of the favorite Windows programs on Linux and Photoshop is just one of them.

Photoshop Editor

Photoshop Editor

3. Pinta

Pinta is also a great photo editing application which works similar to Windows Paint.NET. Just think of it as a Linux version of Windows Paint. It simple and easy to use allowing users to do quick photo editing.

Pinta Image Editor

Pinta Image Editor

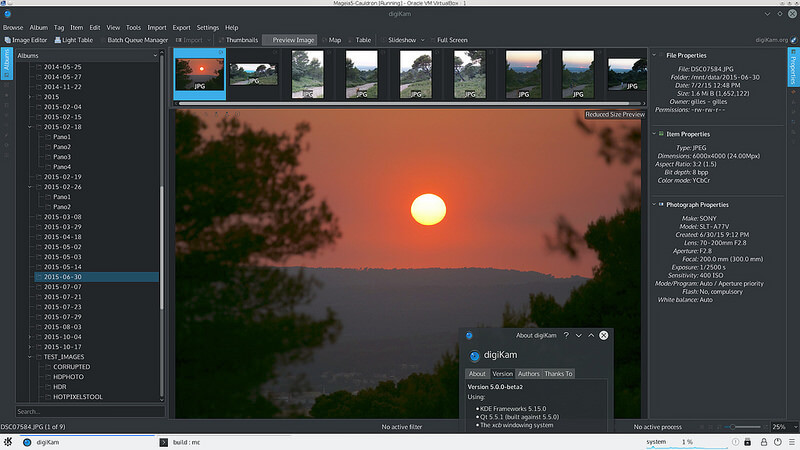
4. DigiKam

It is an open source and good photo editor for dedicated photographers in KDE, it offers easy to use functions to enhance usability.

It has the following features:

  1. directory for tutorials on how to use it
  2. facial recognition support
  3. easy photo importing and exporting to different formats

DigiKam Photo Editor

DigiKam Photo Editor

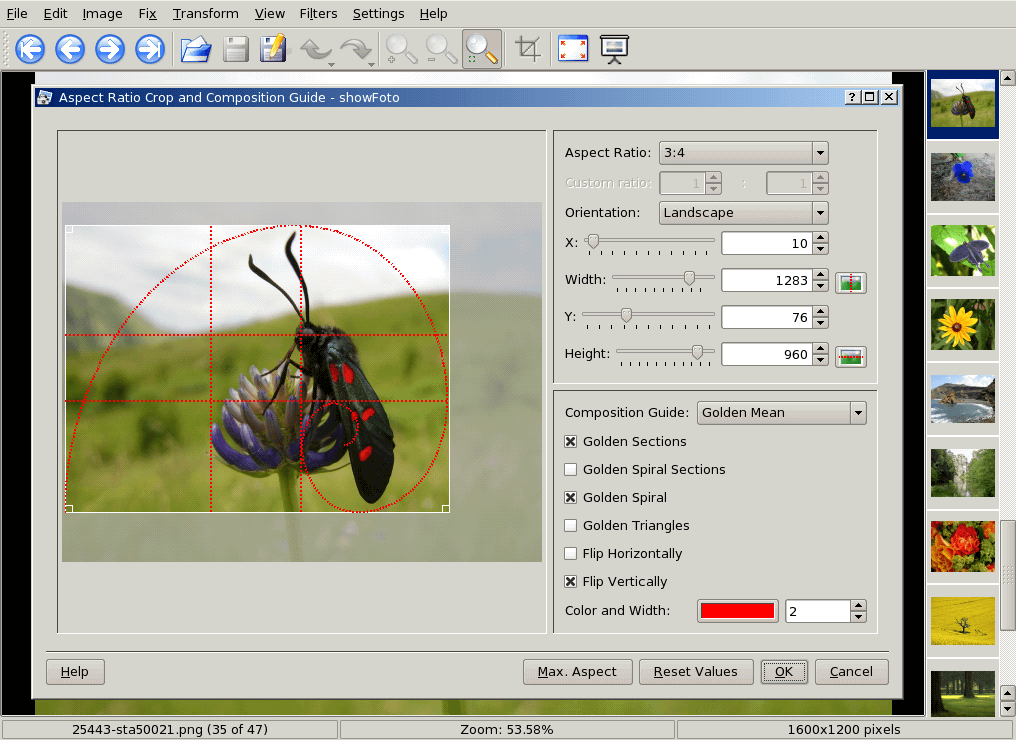
5. ShowFOTO

ShowFOTO is a standalone image editor under the digiKam project. It is free and comes with all the standard photo editing functionalists such as transformation, adding effects, filtering, metadata editing and many more.

It is light weight and not feature rich though it is a good image editing software that doesn’t require other software to run.

ShowFoto Image Editor

ShowFoto Image Editor

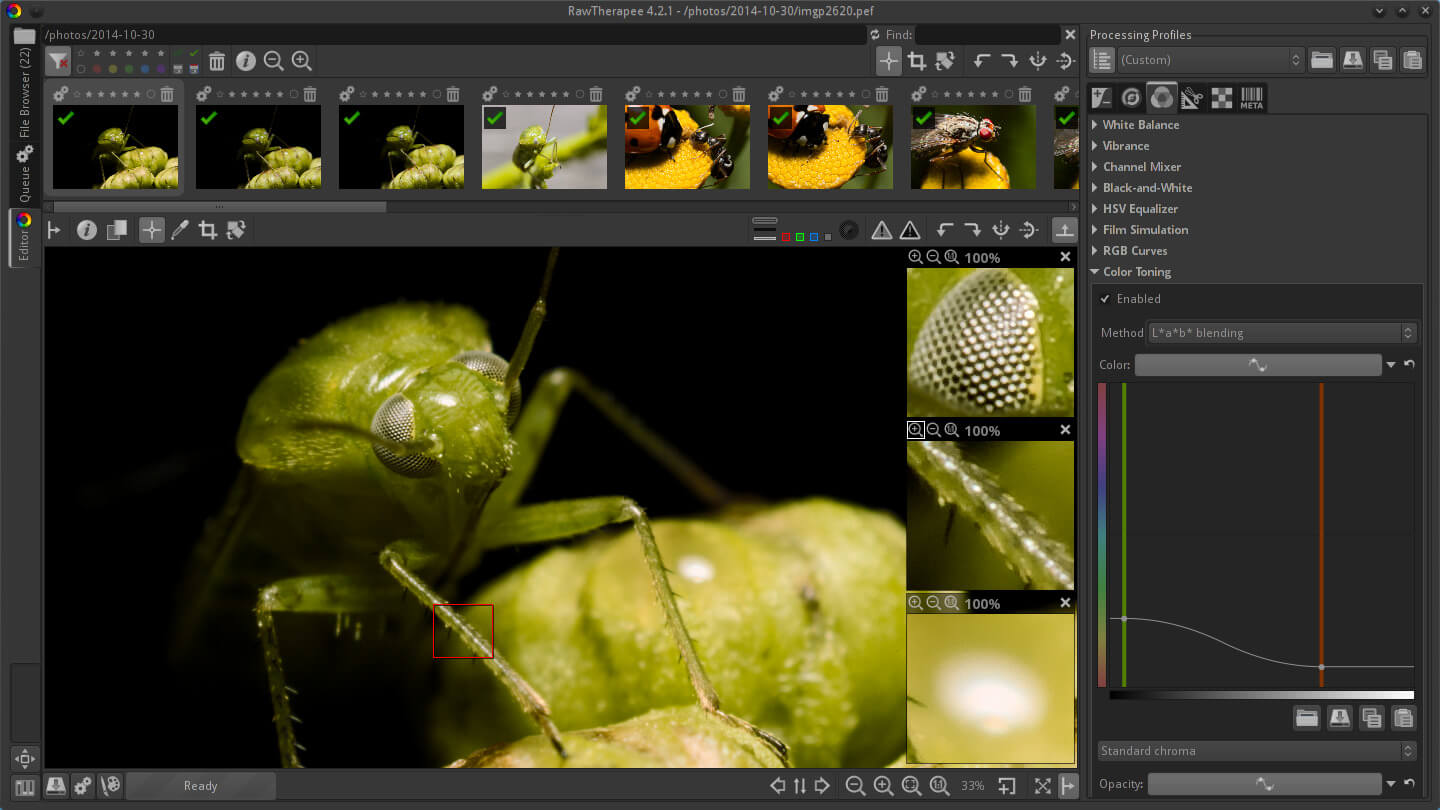
6. RawTherapee

RawTherapee is a free and open source photo editor for optimizing digital images. It is feature rich and powerful when you need quality digital images from RAW image files. RAW files can be modified and then saved in compressed formats as well.

It has many features as listed in project homepage including:

  1. variety of supported cameras
  2. exposure control
  3. parallel editing
  4. color adjustment
  5. option of using secondary display
  6. metadata editing and many more

Rawtherapee Image Editor

Rawtherapee Image Editor

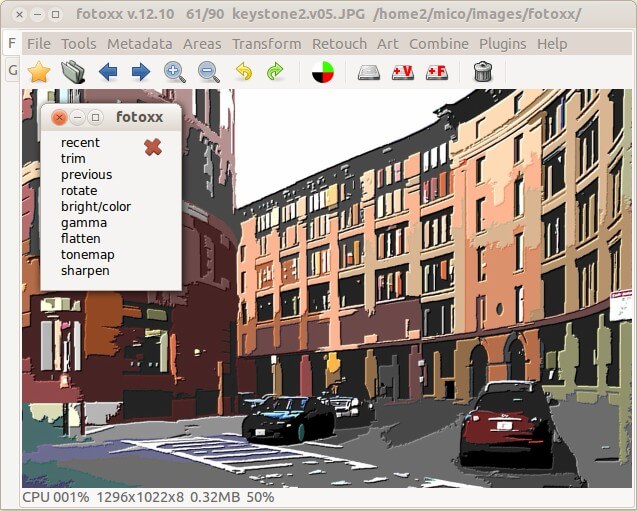
7. Fotoxx

Fotoxx is also a free and open source photo editing and collection management tool. It is intended for dedicated photographers who need a simple, fast and easy tool for photo editing.

It offers photo collection management and an easy way to navigate through the collection directories and subdirectories using a thumbnail browser.

It has the following features:

  1. use simple clicks to transform photos
  2. ability to retouch photos in enormous amounts of ways
  3. artistic photo transformation such as animations
  4. access to work with meta-data and many more

Fotoxx Image Editor

Fotoxx Image Editor

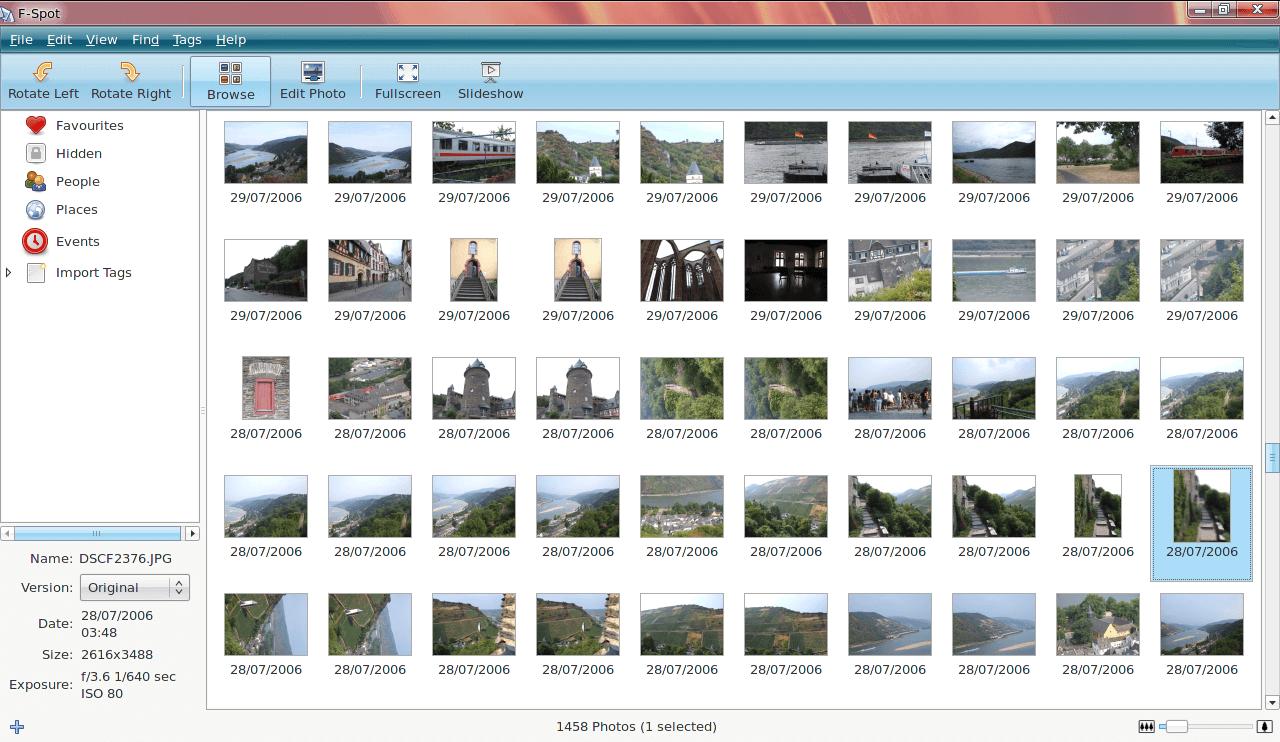
8. F-spot

It is a free and open source, feature rich photo editing and management software for Gnome desktop environment. F-spot allows users to edit, modify, save, organize, find and share images easily.

It has some of the following user feature:

  1. Photo editor with rich colour adjustment functionalities
  2. Tag icon editor
  3. export images to the web
  4. create photo CD

F-Spot Image Editor

F-Spot Image Editor

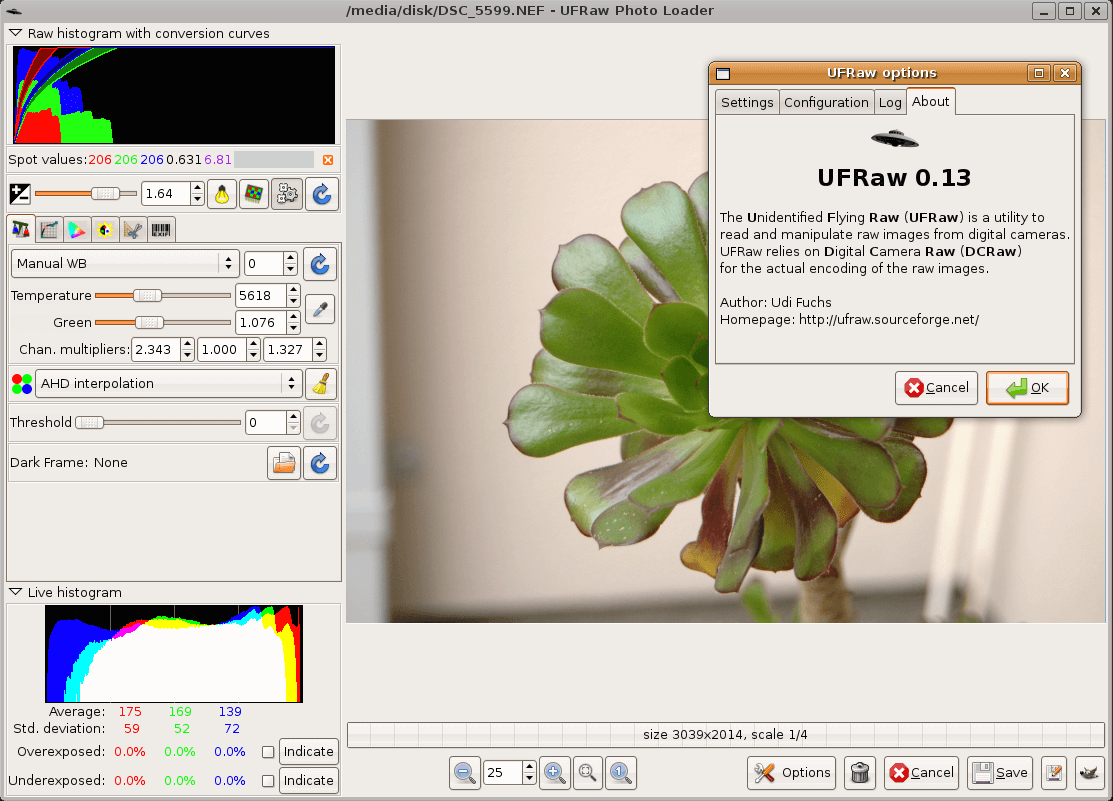
9. UFRaw

UFRaw which stands for “Unidentified Flying Raw” is a software that reads and manipulates RAW images files from various types of digital cameras. You can use it independently as a standalone software or as a GIMP plug-in.

UFRaw uses Dave Coffin’s raw conversion utility DCRaw to read raw images and its color management workflow is based on Little CMS. This allows a user to apply ICC color profiles to images being edited.

UFRaw Image Editor

UFRaw Image Editor

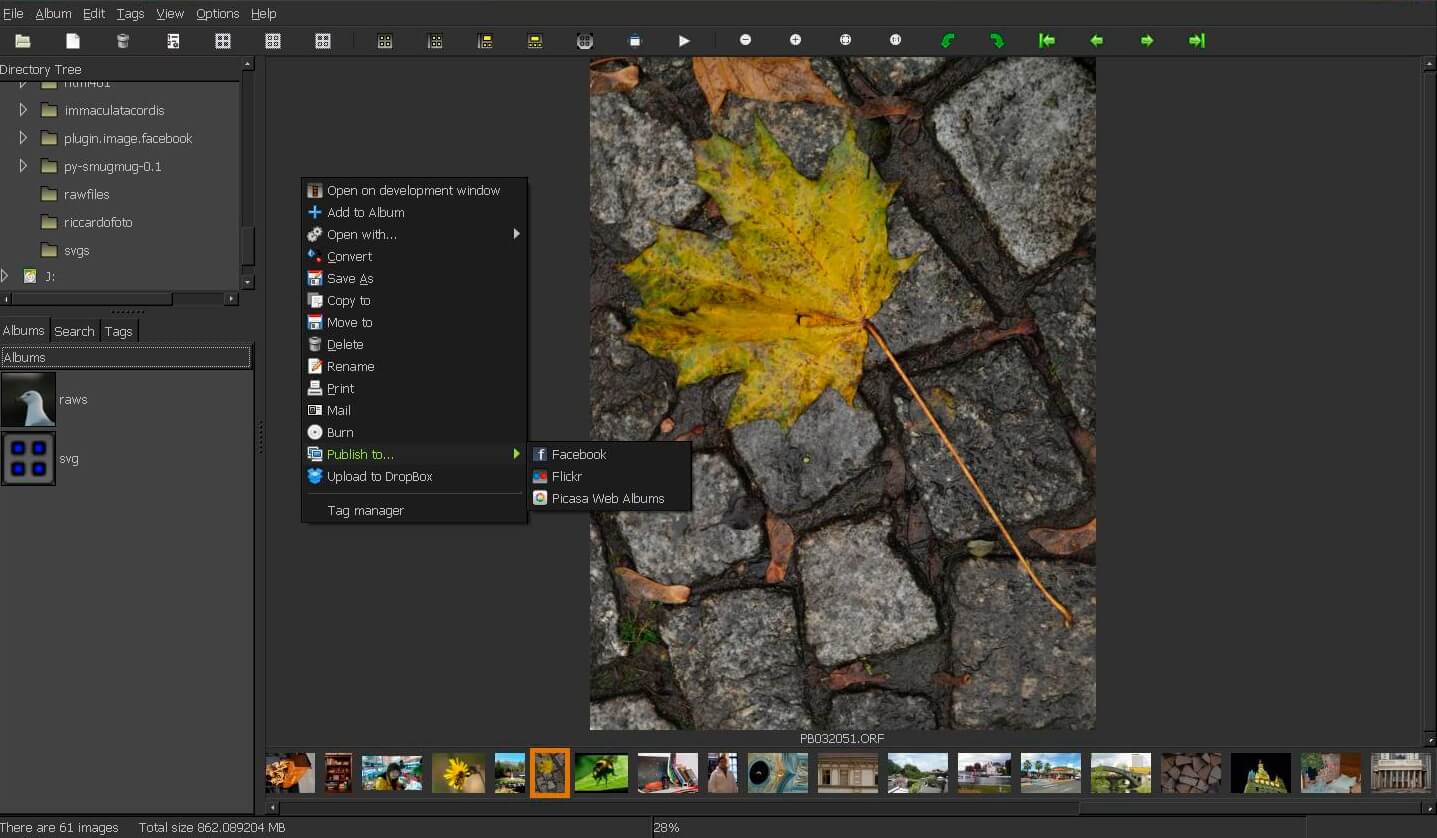
10. GTKRawGallery

GTKRawGallery is another free and open source workflow oriented photo editing and retouching software. It also works with raw 16 bit color depth camera images using tools such as Exiftool, Dcraw and Imagemagick.

It allows users to do the following:

  1. image browser and photo album manager
  2. image modification tools for 16 bit/channel post-processing
  3. batch Processor to speed up workflow and batch conversion with different available styles
  4. fast image tagging
  5. color Management
  6. print support
  7. advanced Metadata Editor
  8. dropbox uploader
  9. facebook, Flickr and Picasa Web Albums Publisher

GTKRawGallery Image Editor

GTKRawGallery Image Editor

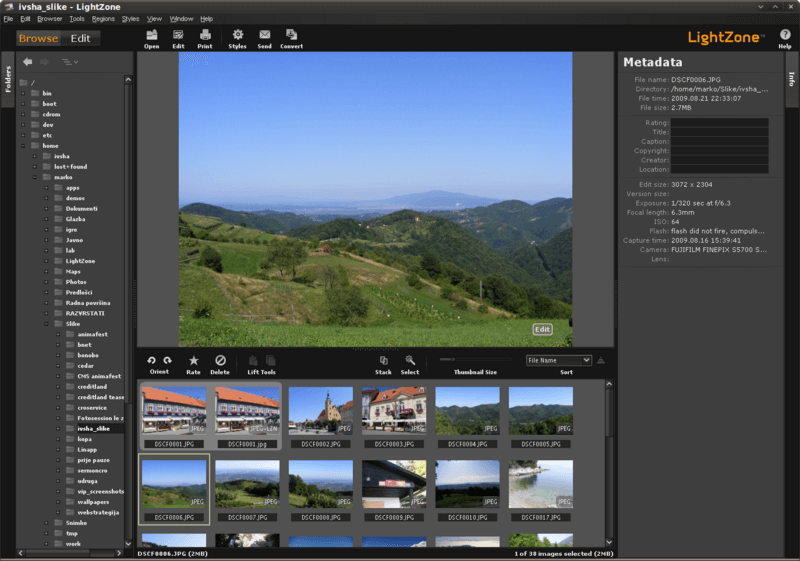
11. LightZone

LightZone is also a free and open source photo editing software for photographers which offers RAW file processing and editing. It offers powerful, highly flexible and customizable tools that a user can build in a stack. The stack of tools can be turned on or off, readjusted, rearranged to fit user needs in different sessions.

LightZone Image Editor

LightZone Image Editor

12. Pixeluvo

Pixeluvo is also a powerful layer-based image editing software that offers its users RAW image processing, color correction tools, different image enhancement filters and many more.

It has the following features:

  1. fix perspective distortion
  2. Add a vignette to your photos
  3. transform the feel of an image with the Quick Color filter
  4. add text or captions to your images
  5. remove noise and JPEG compression artifacts
  6. boost image detail
  7. add a tilt-shift effect to images
  8. image spot-heal tool
  9. clone tool
  10. text tool
  11. warp tool
  12. filter brush and many more

Pixeluvo Image Editor

Pixeluvo Image Editor

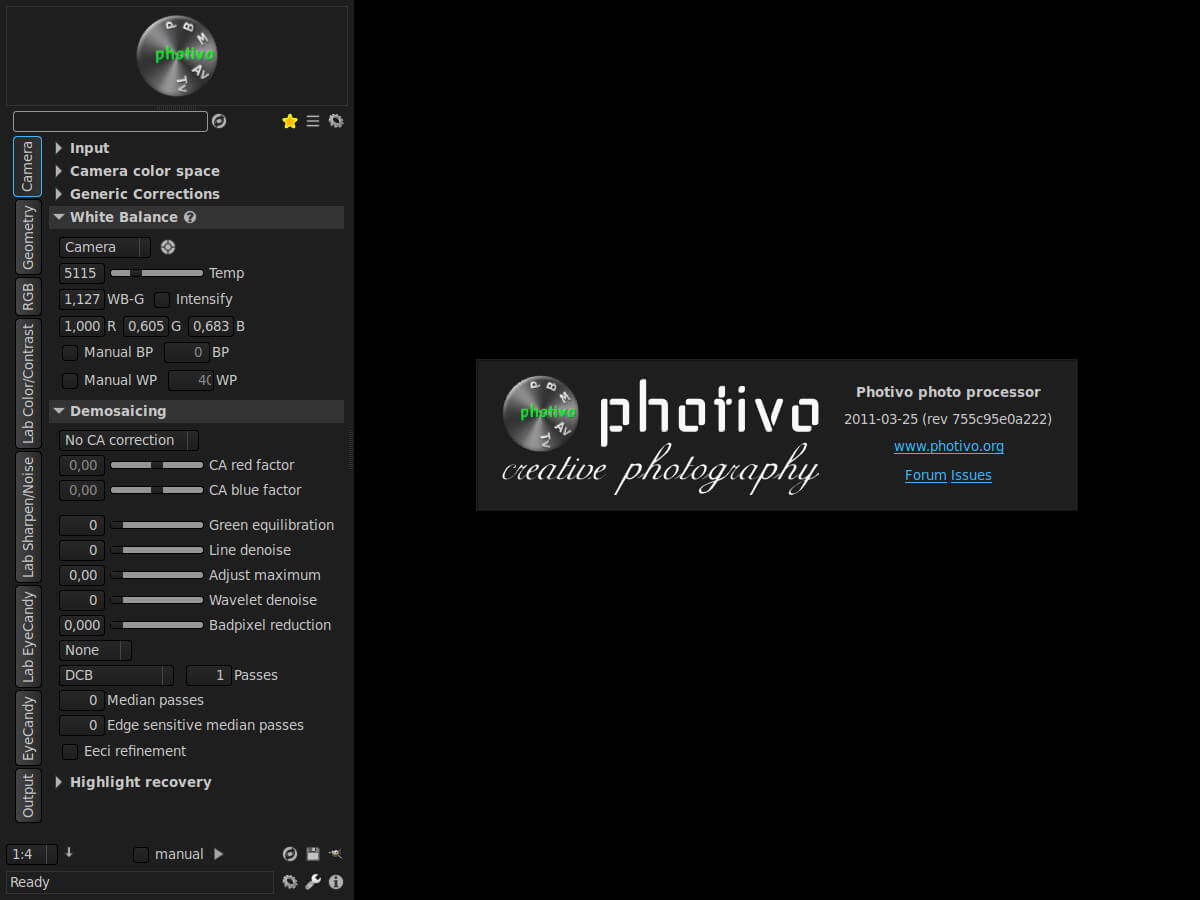
13. Photivo

This is also a free and open source photo editor for Linux users. It is feature rich can also offers RAW and bitmap file processing under 16-bit processing in a non-destructive manner. It is known have some of the best powerful and flexible photo editing algorithms available.

It has the following features:

  1. 16-bit internal processing with LCMS2 color management
  2. works with RAW and bitmaps files
  3. integration of Gimp workflow for import and export
  4. adaptive saturation.
  5. film grain simulation
  6. cross processing
  7. black and white conversion.

Photivo Image Editor

Photivo Image Editor

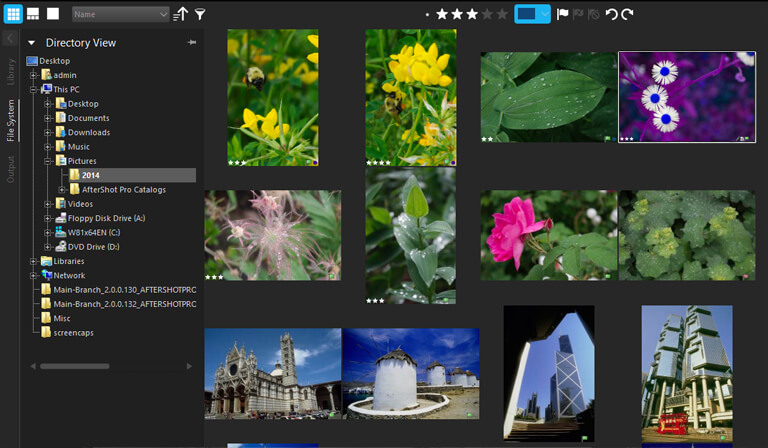
14. AfterShot Pro

AfterShot Pro is powerful, fast, highly flexible and pluggable photo workflow and management software. It offers RAW processing functionalists and advanced non-destructive photo editing.

You can store images in folders and use meta-data tools to search images by keywords, tags and even camera setting and many more. It is up to 30% more faster under the new 64-bit performance.

Aftershotpro Image Editor

Aftershotpro Image Editor

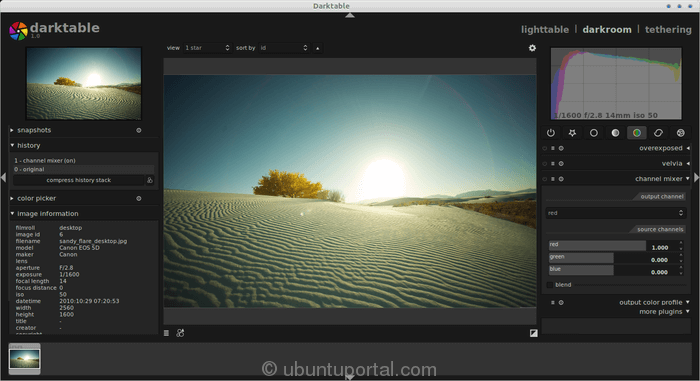
15. Darktable

Darktable is a free and open source photography workflow software and also RAW file developer. It is a virtual light table and darkroom for photographers which helps them to manage their digital negatives in a database.

Darktable Image Editor

Darktable Image Editor

Conclusion

Thanks for reading and hope you find this article useful, if you know of other good photo editors available in Linux.

Source

10 Best Open Source Video Players For Linux

10 Best Open Source Linux Video Players of 2016

10 Best Open Source Linux Video Players of 2016

Audio and Video are two common sources of information sharing we see in today’s world. May it be publishing any product, or need of sharing any information between huge community of people, or a way of socializing in the group, or sharing of knowledge (e.g. as we see in online tutorials) audio and video hold a great place in this highly expressive world which wants to share their ideas, prove themselves and do all possible steps which brings them in limelight.

 21 Best Music Players That Are Worth Trying On Linux

Video players are the channel for people to see videos. There is a huge list of uses of these videos in our life, few of them namely being: watching movies, online tutorials, broadcasting a social message to huge mass of people, for fun and laughter (i.e. funny short videos), to name a few. Video Players provide a means to view and even customize the appearance of Videos as we desire.

Below is the list of some quality open source video players which are available on Linux. Usually you can find that most video players differ only in User interface, there backend which is made of shared libraries remains same for many if not all the players.

So, the distinguishable feature in most Video Players is UI, then libraries used internally, and then any other additional feature which only that player supports that attracts attention. Based on these factors, we have shortlisted few Video Players which are:

1. VLC Media Player

Initially released in 2001 under VideoLAN project, VLC Media player is one of the most powerful media player which is available on large number of OS including but not limiting to: Linux, Windows, Solaris, Android, iOS, Syllable etc.

It is written in C, C++ and Objective C and released under GNU GPLv2+ and GNU LGPLv2.1+. It supports large number of encoding / decoding libraries avoiding need for calibrating any kind of plugins.

VLC supports wide variety of audio and video formats including subtitle support. It is one of the few players providing support for DVD on Linux. Other features include: providing ability to play .iso files so that users can play files on a disk image directly, ability to play high definition recordings of D-VHS tapes, can be installed and run directly from USB flash drive or external drive, its functionality can be extended via Lua scripting. Also, apart from all this, VLC also provides API support by providing various API’s, and browser plugin support in Mozilla, Google Chrome, Safari etc.

VLC Player

VLC Player

Website: http://www.videolan.org/

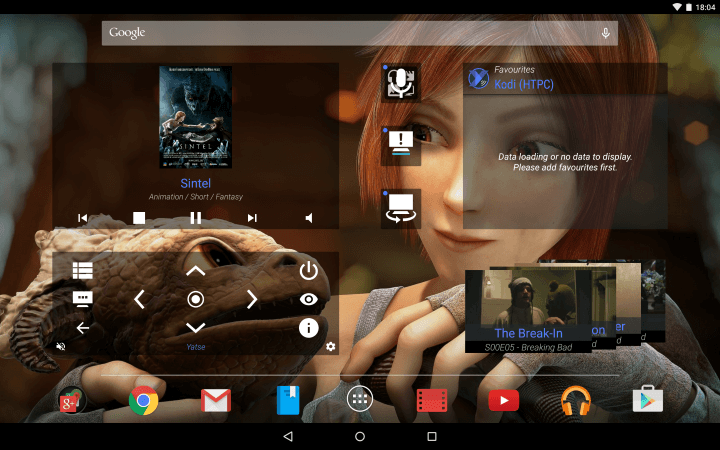
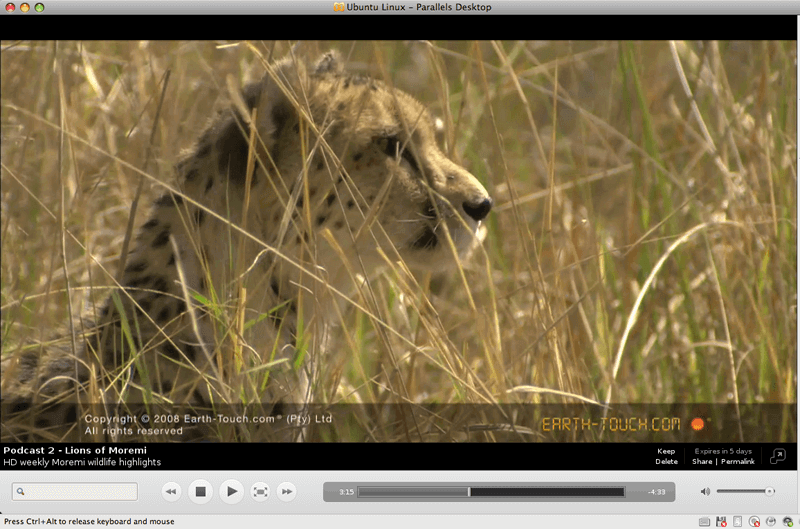
2. XBMC – Kodi Media Center

Formerly known as Xbox Media Center (XBMC) and now Kodi, this cross-platform player is available under GNU General Public License and in 69+ languages. It is written with C++ as core with python scripts as addons available.

It allows complete flexibility to user to play both audio and video files and that to from internet podcasts, and all media player files from both local and network storage.

Open source nature of Kodi has helped it gain a lot of popularity as modified parts of this software are being used along with JeOS as an application suite or framework in variety of devices including Smart TV, set top boxes, network connected media players etc.

It provides a lot of features as addons which are added as python scripts which include: audio and video streaming plugins, screensavers, visualizations, themes etc. It provides support of a lot of formats including: Audio Formats like: MIDI, MP2, MP3, Vorbis etc, Video formats including: MPEG-1,2,4, HVC, HEVC, RealVideo, Sorenson etc.

Kodi XBMC

Kodi XBMC

Websitehttp://kodi.tv/

3. Miro Music and Video Player

Formerly known as Democracy Player (DTV), Miro is a cross-platform audio and video player and Internet television application developed by Participatory Cluture Foundation. It supports numerous Audio and Video formats, some in HD quality. Written purely in Python and GTK and released under GPL-2.0 +, this player is available in more than 40 languages.

It is able to play various file formats including: Quick Time, WMV, MPEG files, Audio Video Interface (AVI), XVID. It also integrates RSS news aggregator and podacatcher, a BitTorrent client and a media player. Its video converter is based on FFmpeg and converts various video formats.

It has ability to notify and automatically download a video once available. It received a great reception with its download link appearing on front page of Pirate Bay in 2009 under heading “We Love Free Software”. Apart from this it received positive critical reviews with rating of 9/10 in Softonic.

Miro Music and Video Player

Miro Music and Video Player

Website: http://www.getmiro.com/

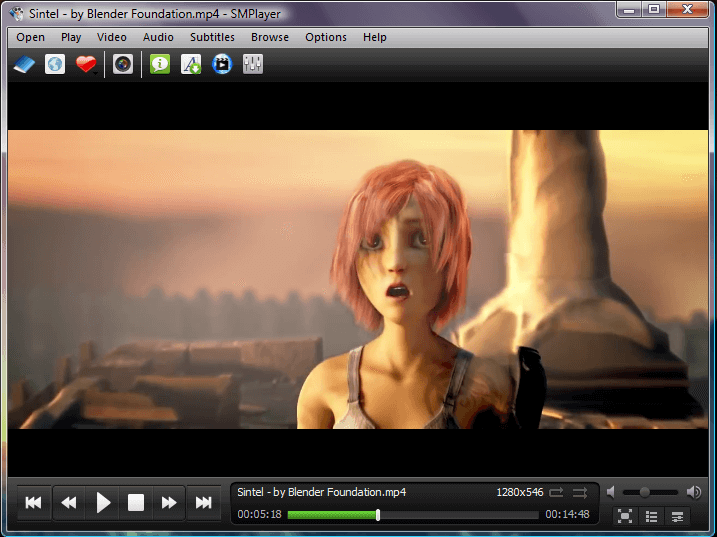
4. SMPlayer

It is another cross-platform media player and a graphical front end for the likes of Mplayer and its forks, written purely using Qt library in C++. It is available in multiple languages and only on Windows and Linux OS, released under GNU General Public License.

It provides support for all the default formats as in other media players. Talking about its features it provides: Support for EDL files, Configurable subtitles which can be fetched from Internet, numerous Skins downloadable from Internet, Youtube browser, Multiple speed playback, Audio and Video filters and equalizers.

SMPlayer

SMPlayer

Website: http://www.smplayer.eu/

5. MPV Player

Written in C, Objective-C, Lua and Python, MPV is another free and cross platform media player released under GPLv2 or later with latest stable release being 0.21.0 on 20 October 2016. It is based on MPlayer and focuses mainly on modern systems which has led to advancements in original code of MPlayer and introduction of new features.

Transformation from MPlayer to MPV player has led to deprecation of “slave mode” which was earlier part of MPlayer but now has been discontinued due to broken compatibility.

Instead of this, MPV can now be compiled as a library which exposes client API’s for better control. Other features include: Media Encoding functionality, smooth-motion which is a form of interpolation between two frames for smooth transition between them.

MPV Player

MPV Player

Website: https://mpv.io/

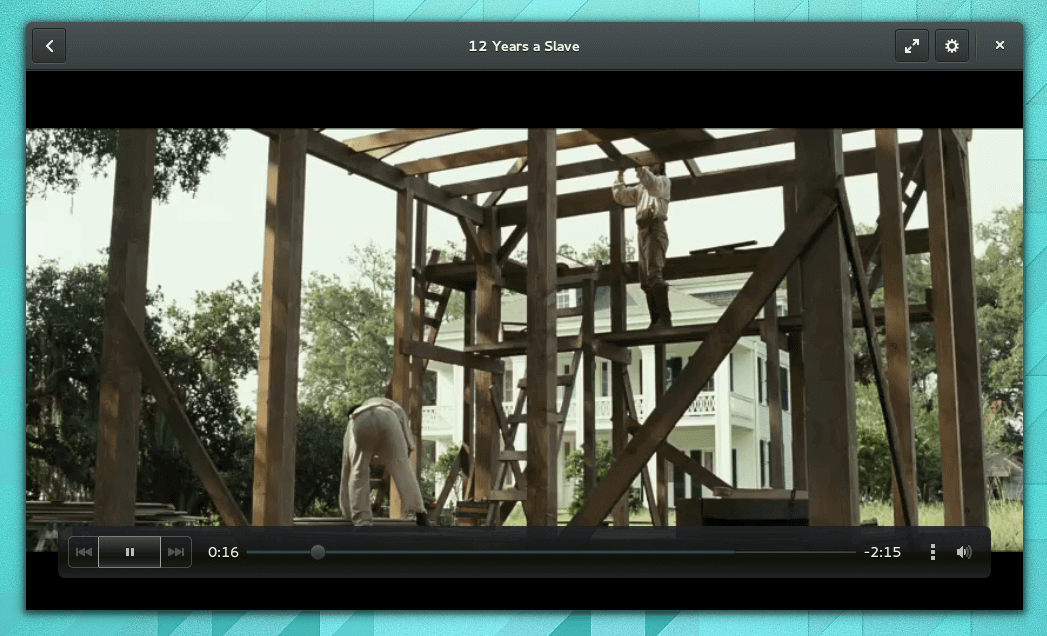
6. Gnome Videos

Formerly known as Totem, it is the default media player for Gnome based desktop environments. It is written purely in C and uses GTK+ and Clutter libraries. From initial stages only, its development was in two stages, one stage used GStreamer multimedia framework for playback and other version (> 2.7.1) was configured to use xine libraries as a backend.

Although xine version had better DVD compatibility, but was discontinued as GStreamer version evolved many folds over time with introduction of DVD compatible features, and its ability to support wide variety of formats including playlist formats like: SHOUTcast, M3U, SMIL, Windows Media Player format, and Real Audio format.

Other features include: still capturing, loading of subRip subtitles, ability to adjust brightness, contrast and saturation during playback. GNOME 3.12 added support for direct video playback from online channels like: Guardian and Apple.

Gnome Videos Player

Gnome Videos Player

Website: https://wiki.gnome.org/Apps/Videos

7. Bomi (CMPlayer)

Another powerful and highly configurable video player which promises to fulfill all the requirements one expects from a good video player. It is based on MPV player. Various features that are provided by Bomi include: easy to use GUI, playback tracking/ recording and ability to resume playback later, subtitle support and ability to render multiple subtitle files, hardware accelerated decoding by GPU, and other features that are by default provided by other video players.

Bomi CMPlayer

Bomi CMPlayer

Website: https://bomi-player.github.io/

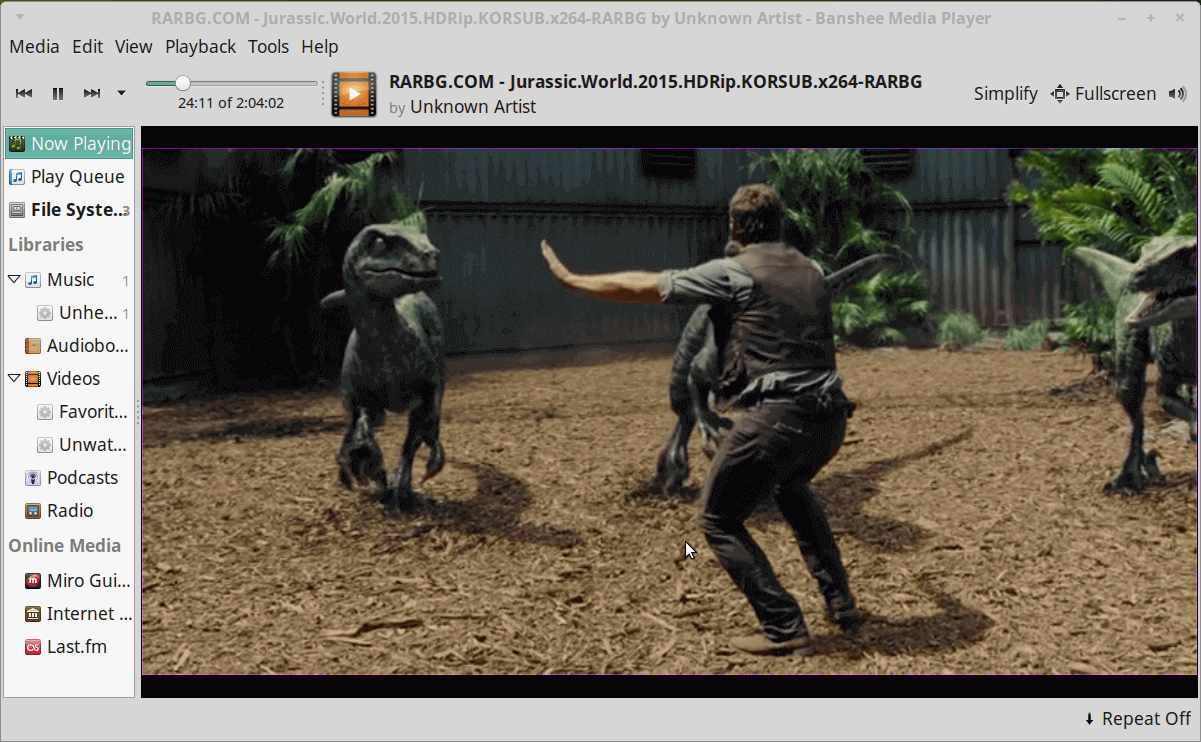
8. Banshee Music and Video Player

Initially called SonanceBanshee is another open source cross-platform media player developed in GTK# (C#) which is available on Linux platform on many Linux distributions. It was initially released in 2005 under MIT License. It uses GStreamer multimedia framework which adds in lot of functionality including support for lare number of audio and video formats.

Some features provided by this media player include: Multimedia keys support, iPod manager which allows transfer of audio and video between system and iPod, Podcasting which enables Banshee to subscribe to feeds, notification area icon which it adds in GNOME. These all features are because of Banshee’s enhanced plugin architecture.

Banshee Player

Banshee Player

Website: http://banshee.fm/

9. MPlayer

Another multi-lingual cross platform media player developed by MPlayer team, available for all major Operating Systems i.e. Linux, Mac, Windows and even other systems including OS/2, Syllable, AmigaOS, AROS Research Operating System. It is purely written in C and released under GNU General Public License.

In itself, it is a command-line media player which has ability to play: Video, Audio from Physical Media like: DVD, CD etc and Local file system.

In case of Videos, it can play lots of video input file formats including: CINEPAK, DV, H.263, MPEG, MJPEG, Real Video, and even is able to easily store the streamed content to a file locally.

Other features which make it one of great media players include: supporting variety of output driver protocols like: X video extension, DirectX, VESA, Framebuffer, SDL etc, easy integration with multiple GUI front-ends written in GTK+ and Qt, MEncoder which can take input file or stream and can translate into any output format after applying various transformations and subtitle support for Videos.

MPlayer

MPlayer

Website: http://www.mplayerhq.hu/

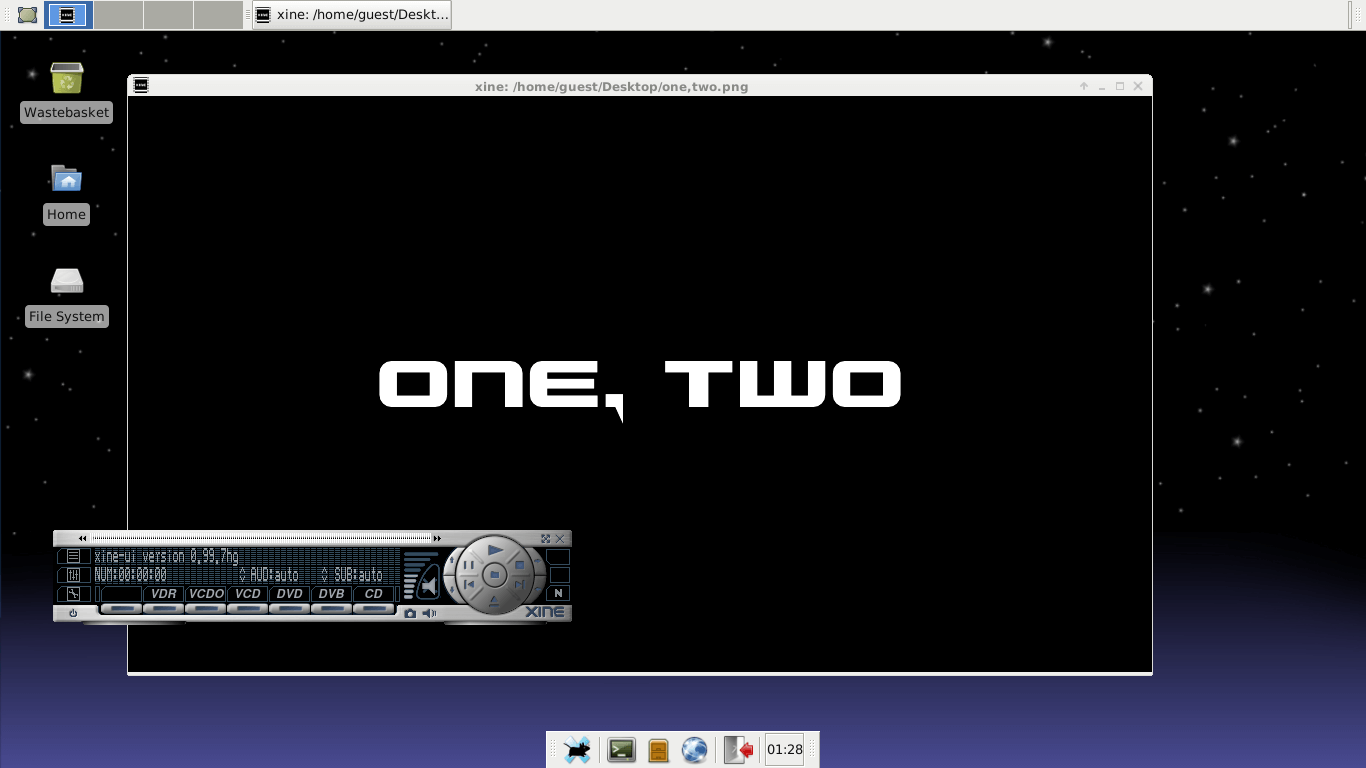
10. Xine Multimedia Player

Released under GNU General Public License, Xine is a cross-platform multimedia player written purely in C. It is build around a shared library xine-lib that supports multiple configurable frontends.

Development of Xine project dates back to year 2000 when even running DVD’s was manual and tedious process. Other media players which share the same shared library as of xine are: Totem and Kaffeine.

Apart from supporting physical media, container formats like: 3gp, Matroska, MOV, Mp4, Audio formats, Network Protocols, Xine also supports various Video Devices like: V4L, DVB, PVR and Various Video formats like: Cinepak, DV, H.263, MPEG series, WMV etc.

One advantage of this media player is its ability to manually correct audio and video streams synchronization.

Xine Multimedia Player

Xine Multimedia Player

Website: https://www.xine-project.org/

Conclusion

These are some selected video players which are available on Linux platform. If you use any other video player, do write to us in comments and we will include it in our list.

Source

11 Best Open Source Web Browsers I Discovered for Linux

Best Open Source Linux Web Browsers

Best Open Source Linux Web Browsers

Web Browser is a software which provides an interface to surf the web. With introduction in around 1991, there development and advancement has advanced many folds till the current stage which we see today. Earlier there used to be mostly text based sites with few having images and graphical content, hence only text based browsers sufficed with some of early browsers being: LynxNetscape and Opera.

But, with advancement of technology to support of audio, video, images and even flash content, browsers also need to be that advanced to support such content. This has pushed the advancement of browsers to what we see today.

A modern browser requires support of many softwares which include: web browser engine like: Geeko, Trident, WebKit, KHTML etc, Rendering engine to render the web site content and display in proper format.

Linux being open source community gives freedom to developers across the globe to experiment with features they expect from an ideal browser.

Some Open Source Browsers in Linux

Below are listed some Open Source web browsers which are just perfect to be listed here. Usually the features which distinguish a normal to a good browser are: Ability to support all types of data including: audio, video, flash and HTML and HTML5, fast performance, memory friendly to adjust to old and new systems completely, ability to support maximum architectures like: Intel, AMD and operating systems like: Windows, Mac, Unix-like, BSD to name a few.

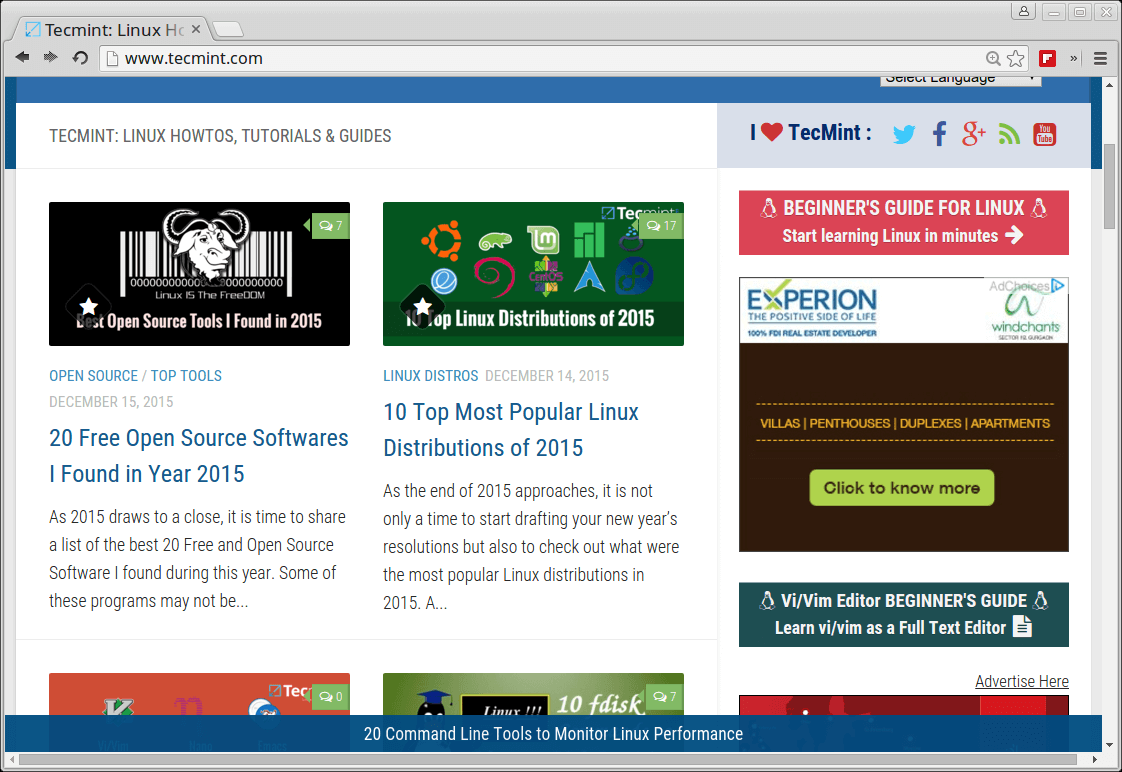
1. Google Chrome

Accounted as the most popular web browser in smartphones and PC’s with more than half usage share of web browsers, Google Chrome is a freeware developed by Google. It forked from Chromium whose code is modified with certain add-ons to structure it. It uses WebKit layout engine till version 27 and Blink thereafter. Written mostly in C++, it is available for many Operating Systems including Android, iOS, OS X, Windows and Linux.

Features provided by Chrome include: bookmarking and synchronization, enhanced security, malware blocking, and addition of external plugins like: AddBlock etc available in Google Web Store which is provided as a default extension in Chrome. Also, it supports user tracking feature which can be enabled if required.

It is fast because of inbuilt mechanism it uses, also is very stable with tabbed browsing, speed dials and incognito (private browsing ) mode, provides custom themes which can be installed as an extension from web store. It is widely accepted as one of default browser which can be found in almost all systems, with mostly positive reviews.

Google Chrome Browser

Google Chrome Browser

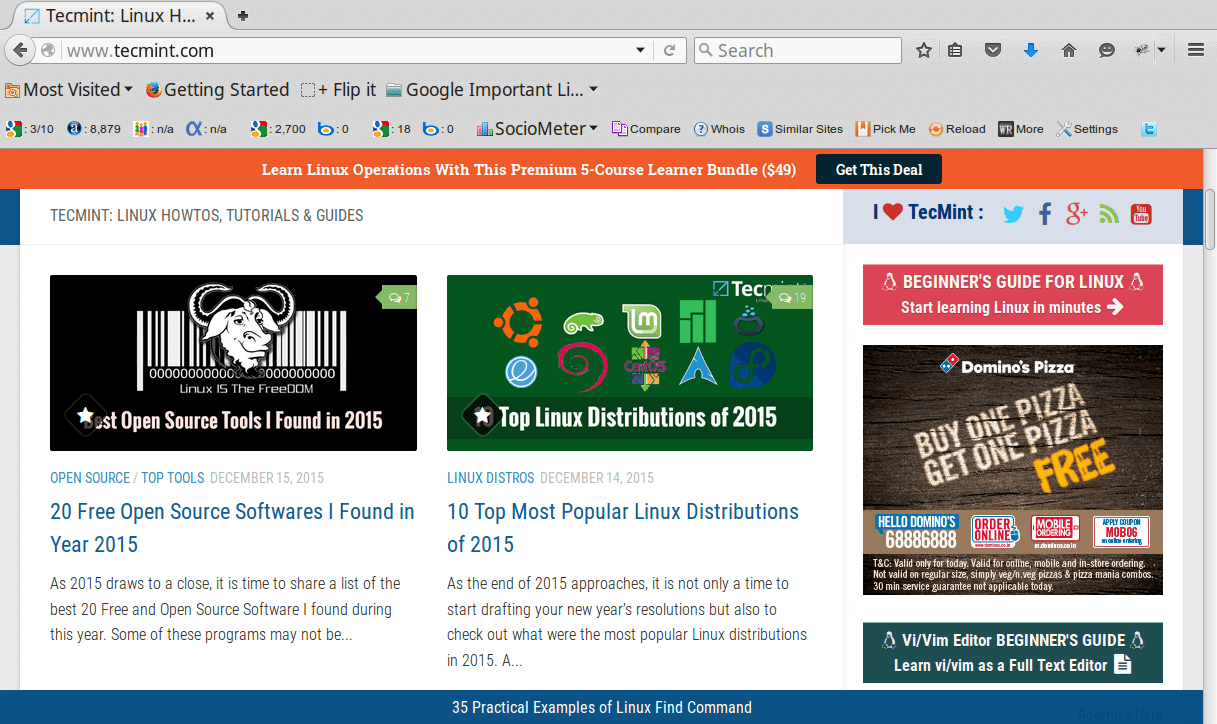
2. Firefox

One of the popular Web Browsers, Firefox is also Open Source and available for major operating systems including: OS X, Linux, Solaris, Linux, Windows, Android etc. It is written majorly in C++, Javascript, C, CSS, XUL, XBL and released under MPL2.0 License.

Since its introduction, it has been praised for its speed and security add ons and even is often termed as spiritual successor of Netscape Navigator. It uses Geecko web engine in all the supported platforms leaving the latest one on iOS which doesn’t use Geecko.

Features supported by Firefox include: tabbed browsing, spell checking, incremental find, live bookmarking, private browsing, add-on support which allows easy integration of many features. Apart from these, it supports many standards including: HTML4, XML, XHTML, SVG and APNG etc. It has been one of the popular web browsers in many Asian and African countries with more than a billion users around the world.

Firefox Browser

Firefox Browser

3. Opera

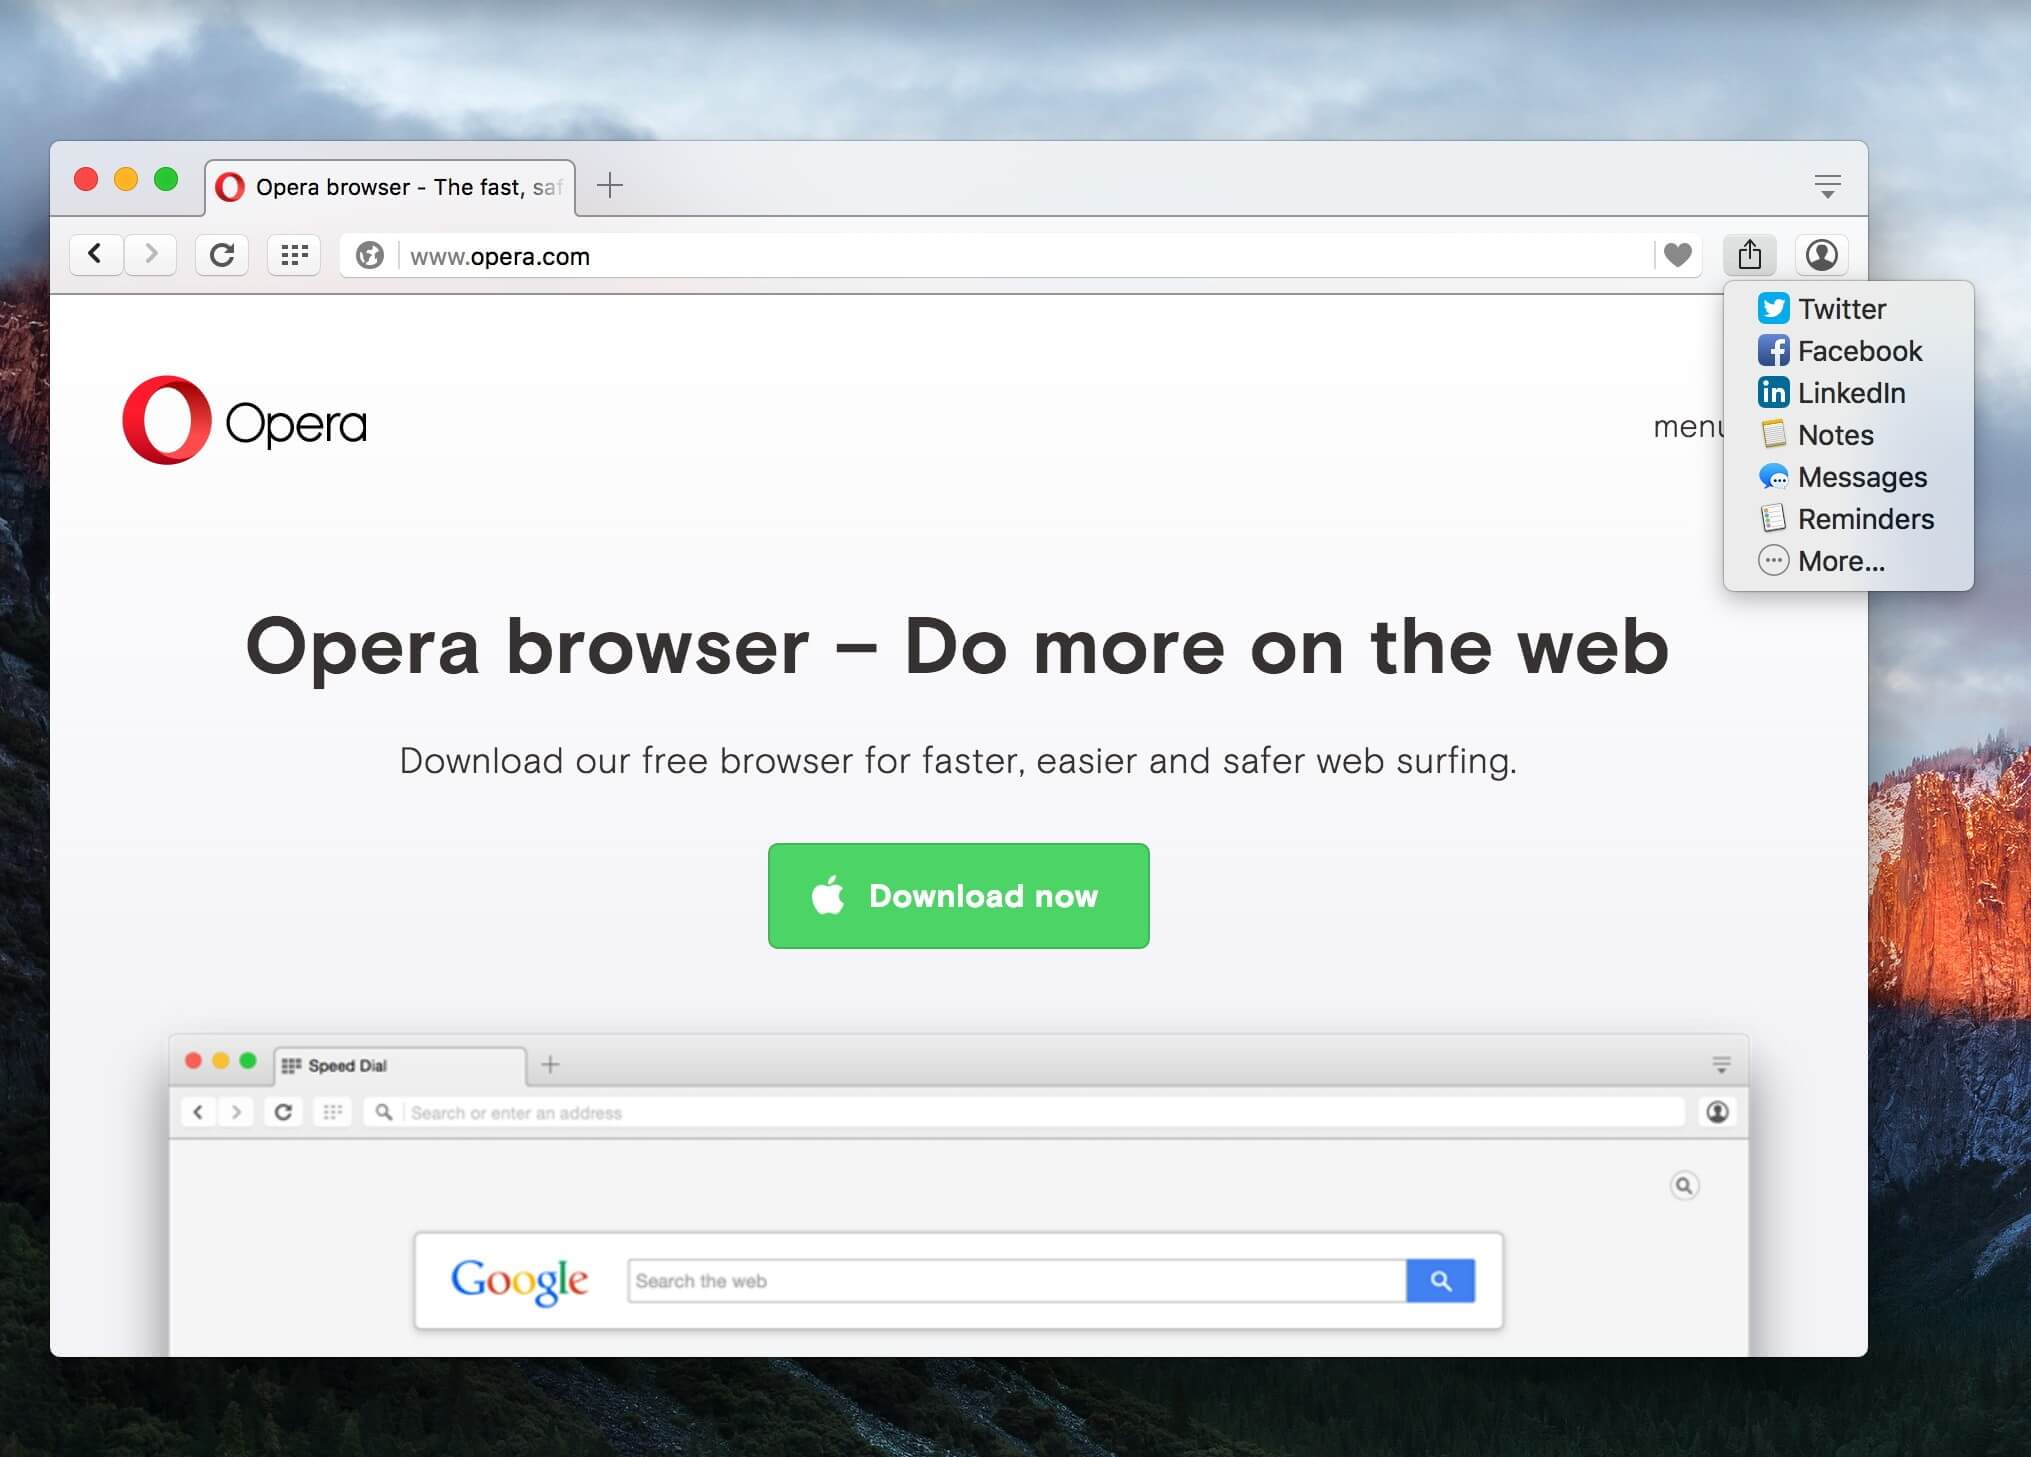
Another popular web browser, Opera is one of the earliest one we have till date, with initial version released in 1995, 20 years ago. It is written in C++ with availability marked for all Operating Systems including: Windows, OS, Linux, OS X, Symbian and Mobile phones including: Android, iOS. It uses Blink web engine, whereas earlier versions used Presto.

Features of this browser include: speed-dial for quick search, tabbed browsing, downloads manager, Page Zooming which allows Flash, Java and SVG to be increased or decreased as per user requirements, deletion of HTTP cookies, browsing history and other data on click of a button. Despite of its criticism for compatibility, and other UI related issues, it has been one of the favourite browsers with total of around 291 million users in mid of 2015.

Opera Browser

Opera Browser

4. Chromium

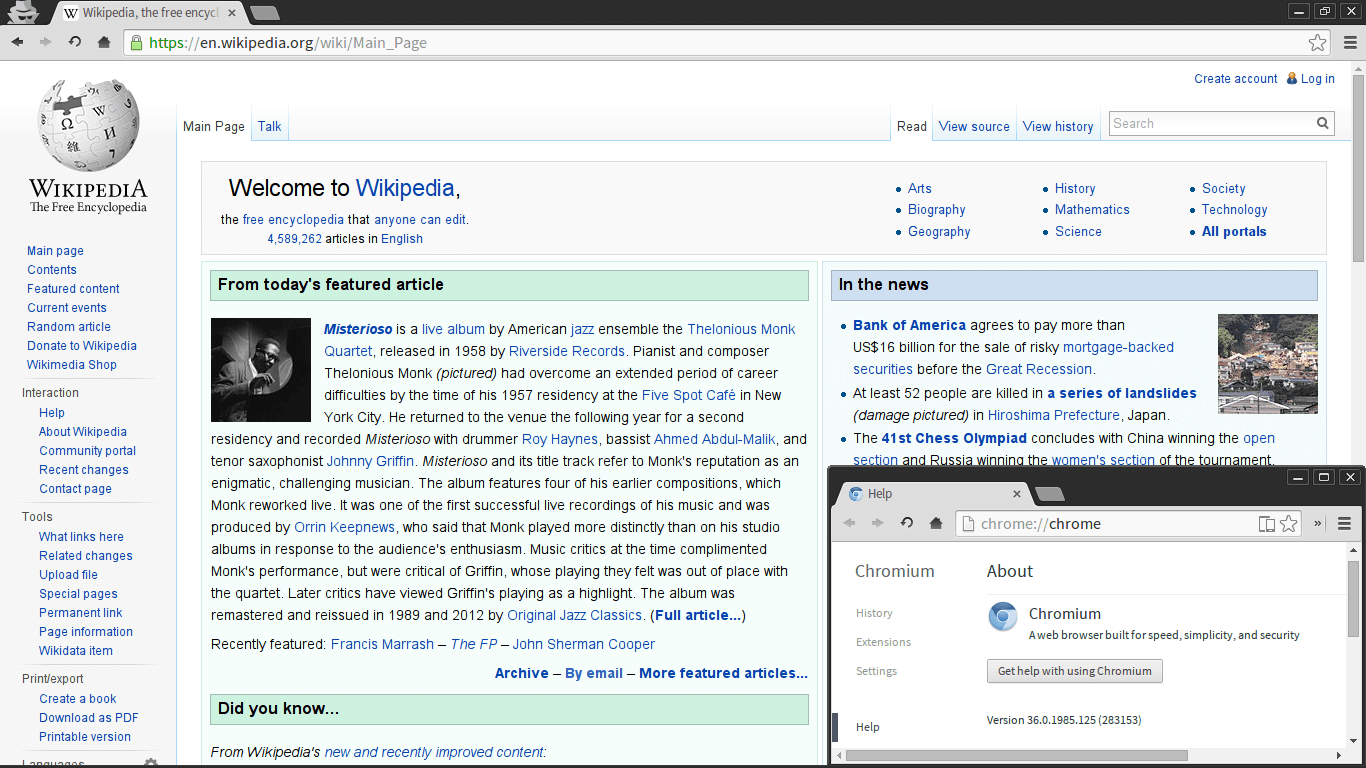
Widely known web browser, which forms the base from where Google Chrome takes its source code, Chromiumis another Open Source web browser available for Linux, Windows, OS X and Android Operating Systems. It is mainly written in C++ with latest release being in December 2016. It is designed with minimalistic user interface so as to make it lightweight and fast.

Features of Chromium include: a tabbed window manager, support for Vorbis, Theora, WebM codecs for HTML5 Audio and Video, Bookmark and History and Session management. Apart from Google Chrome, Chromium also forms base for large number of other Web Browsers some of which are still active while others have been discontinued. Some of them are: Opera, Dartum, Epic Browser, Vivaldi, Yandex Browser, Flock (discontinued), Rockmelt (discontinued) and many more.

Chromium Browser

Chromium Browser

5. Midori

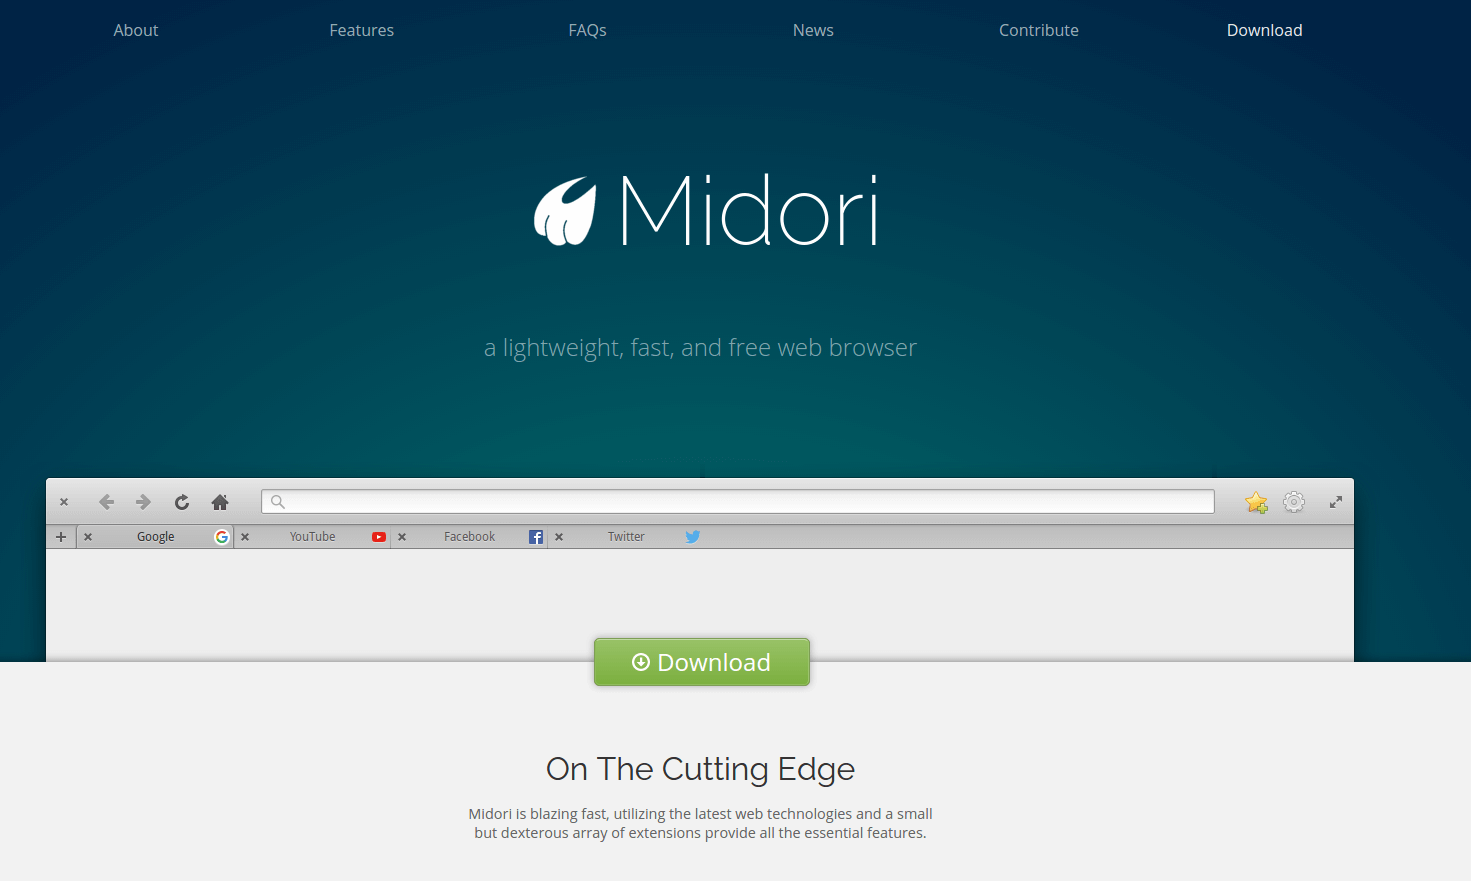
Midori is an open source web browser developed In Vala and C with WebKit engine and GTK+ 2 and GTK+ 3 interface. With initial stable release in 2007 and latest stable release being in August 2015, Midori is currently the default browser in many Linux distros including: Manjaro Linux, elementary OS, SliTaz Linux, Bodhi Linux, Trisqel Mini, SystemRescue CD, old versions of Raspbian.

Major Features provided by it include: HTML5 Support, Bookmark Management, Private Browsing, Windows, Tabs and Sessions management, Speed Dial, Easy integration of extensions which can be written in C and Vala, Unity Support. Midori has been mentioned as one of the alternative web browsers for Linux by LifeHacker and many other sites including: TechRadar, ComputerWorld and Gigaom.

Midori Browser

Midori Browser

6. QupZilla

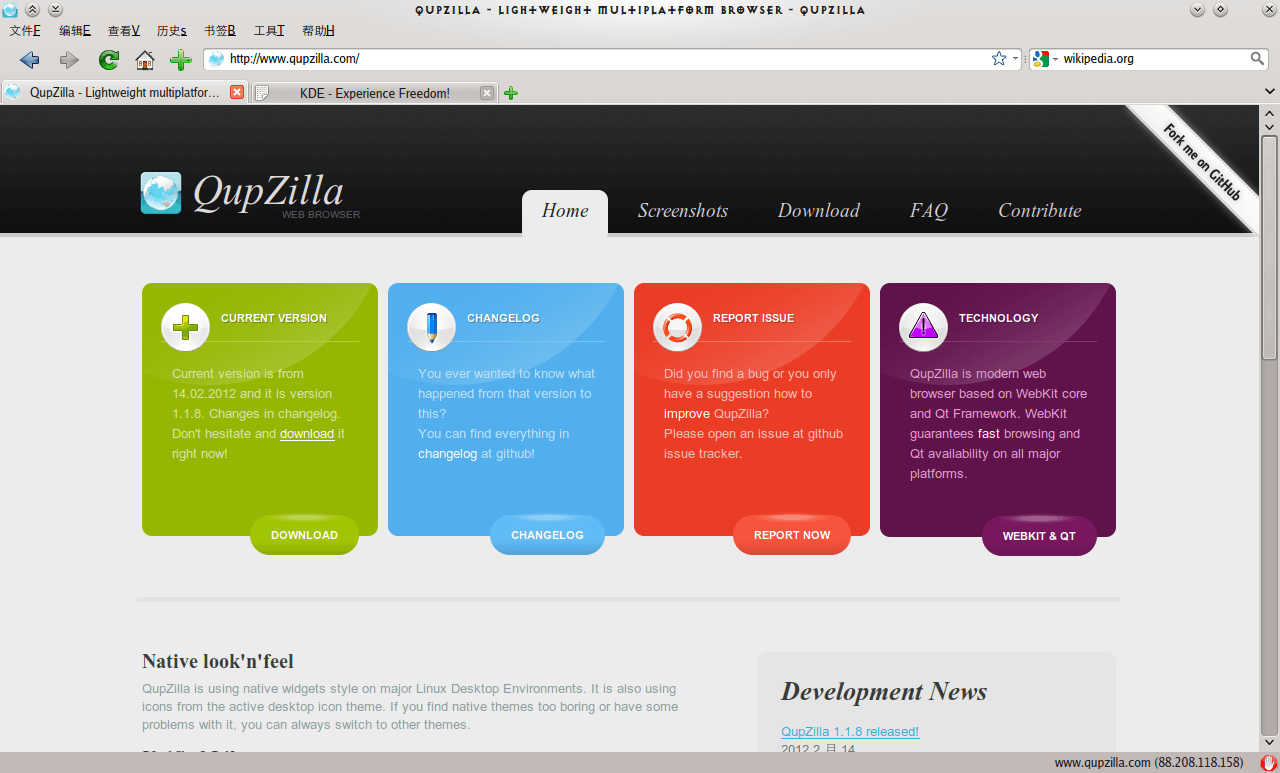
QupZilla is another known web browser which started merely as a Research Project with first release in December 2010 written in Python, and later releases being in C++ with goal to develop a portable web browser. It is licensed under GPLv3 and available for Linux, Windows, OS X, FreeBSD.

QupZilla uses WebKit engine with QtWebKit to be in sync with mordern web standards. It provides all the functions of a mordern web browser including: Speed Dial, built-in Add Block feature, bookmark management, etc. Additional features which would make you opt this browser include: Performance Optimization with memory consumption lower than most famous web browsers including Firefox and Google Chrome.

Qupzilla Browser

Qupzilla Browser

7. Konqueror

Another multi-purpose Web Browser and File Manager, Konqueror is another one in the list. Developed in C++(Qt) and available for Operating Systems including: Linux and Windows and licensed under GPLv2. As the name shows, Konqueror (starting with ‘K’) is the default browser for KDE Desktop environment, replacing the then known KFM.

As a web browser, it uses KTML derived web rendering engine and also supports JavaScript, Java applets, CSS, Jquery. Its rendering abilities are unquestionable and better than most web browsers which highlights its performance optimization.

Other features include: Customizable search services (even custom search shortcut is also included which can be added), ability to show multimedia content within web pages due to integrated Kpart, Ability to open PDF, Open Document and other specific file types, integrates I/O plugin system which allows several protocols including: HTTP, FTP, WebDaV, SMB etc, ability to browse through local file system of user. Konqueror Embedded is another embedded version of Knoqueror which is also available.

Konqueror Browser

Konqueror Browser

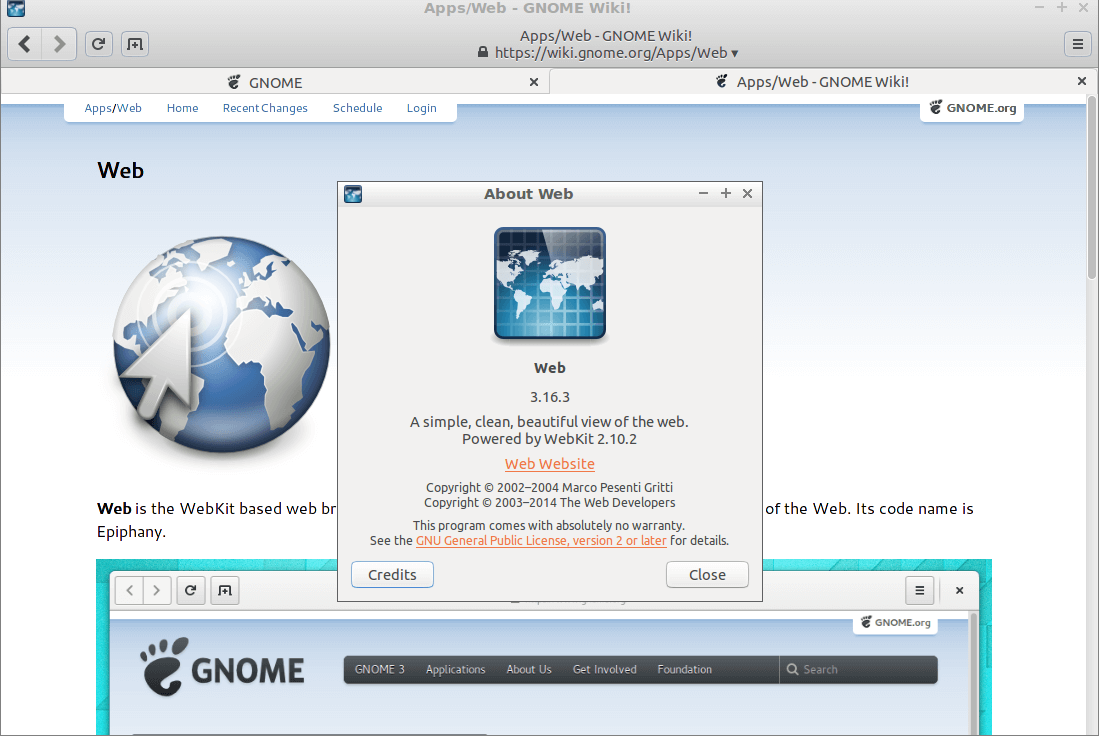
8. Web (Epiphany)

Originally named as Epiphany is another we browser which deserves a mention in the list. Written in C (GTK+) it was originally a fork of Galeon and since then has been part of GNOME project and complies to GNOME’s guidelines at each stage of its development.

Initially, it used Geeko engine but with version 2.20, it started using WebKitGTK+ engine. Web provides support for Linux and BSD Operating Systems with source code available under GPLv2.

Features include: HTML4, CSS1 and XHTML support including support for HTML5 and CSS3, inbuilt plugins of Adobe Flash and IcedTea, bookmark and “smart bookmark” feature which allows easy search in find-in-as-you-type manner, full integration with GNOME features including GNOME Network Manager, GNOME printer etc, and other features supported by most browsers. While it has received mixed reviews, one capability for which it is praised by many is its fast launching and page-load capability.

Epiphany Web

Epiphany Web

9. SwiftFox

A browser based on Mozilla Firefox, SwiftFox is the next one in list. It is build exclusively for Linux with code bring completely Open Source under MPL 1.1 and binaries proprietary.

SwiftFox is optimized version of Firefox for Linux platform. It employs Binary Code Optimization technique with -O3 level compilation, optimization specific to architectures including: AMD, AMD64, Intel.

Other features which make it more advanced from Firefox are: increased security, Pango disabled for reduced package size and rendering. Its version 1.5.6.0 has been reported to have increased speed by about 1.7%.

Swiftfox Browser

Swiftfox Browser

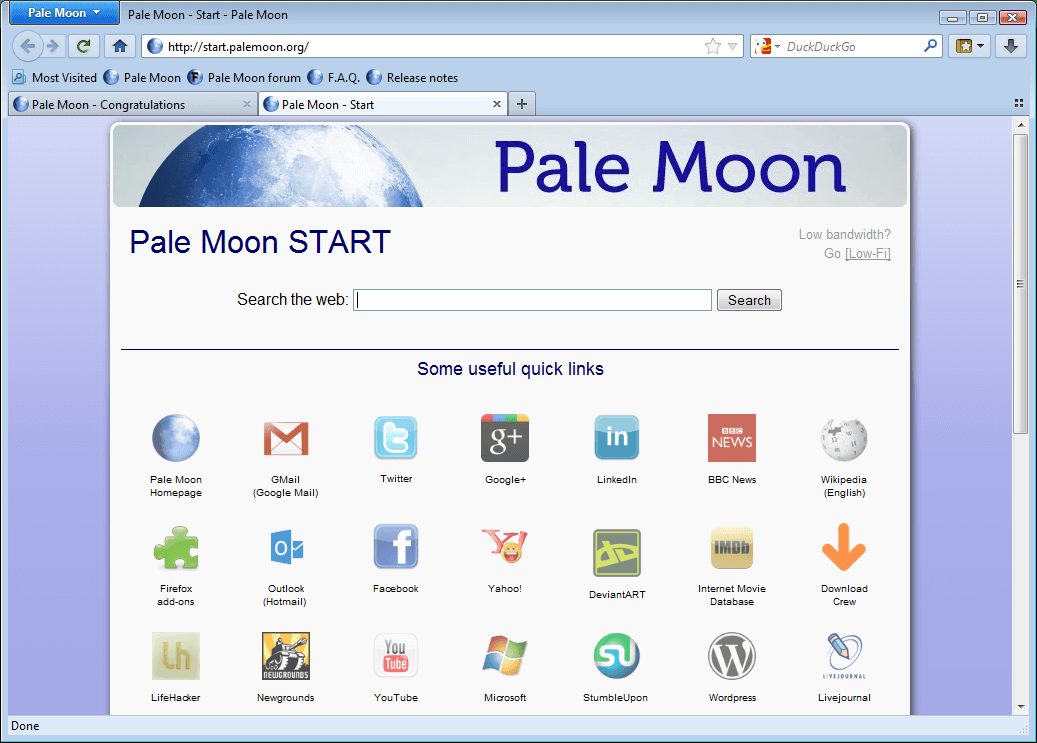
10. Pale Moon

Another browser based on Mozilla Firefox, Pale Moon is a replacement for Firefox on Linux, Windows and Android. It is developed in C/C++ with Source Code available under MPL2.0 License. It retains the user interface seen in previous versions of Firefox, focusing only on web browsing abilities. Its latest version will use Gonna, which is fork of Geeko, a web browser engine of Firefox.

Pale Moon focuses on speed optimization features and utilizes Microsoft C Compiler’s speed optimization, auto-parallelization features. Also, it removes unnecessary add on features which are not required i.e. crash reporter, accessibility hardware features, and targets Windows Vista and later OS due to which it may fail on older hardwares. Other features include: DuckDuckGo default search engine, IP-API geolocation service, functional status bar and enhanced customization.

Pale Moon Browser

Pale Moon Browser

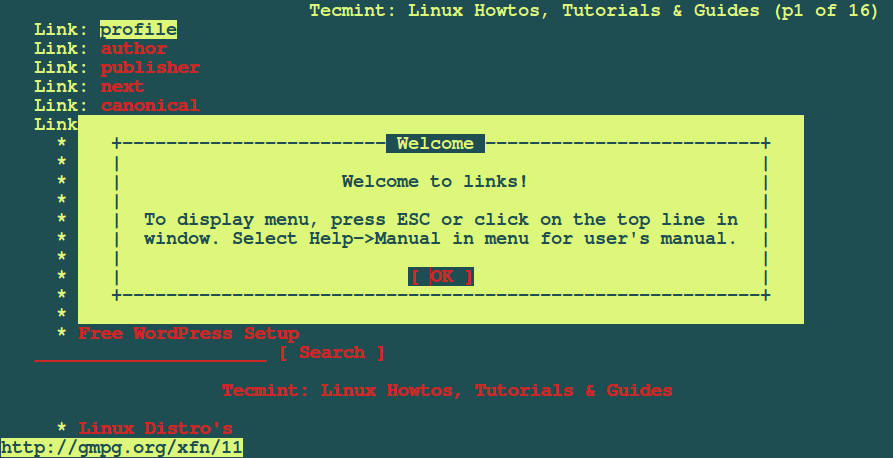
11. Links

Links is an Open source text and graphical web browser which is written in C and available for Windows, Linux, OS X and OS/2, Open VMS and DOS systems. It is released under GPLv2+ License. It is one of those browsers which has many forks based upon it including: Elinks (Experimental/Enhanced Links), Hacked Links etc.

This is ideal browser for those who want to experience GUI elements in a text only environment. Links 2 being the latest version was released in September 2015 and it is advanced version of Links which supports JavaScript which results in much fast web browser.

Main highlight feature of Links is that it can run in graphics mode even for those systems which do not have X Server because of its support for Graphic drivers for X Server, Linux Framebuffer, svgalib, OS/2 PMShell and Atheos GUI.

Don’t Miss:

 Best Command Line Web Browsers for Linux

Links Browser

Links Browser

Conclusion

These were some of the Open Source Browsers available on Linux. If you have some personal favorites, do mention them in your comments and we would include them in our list too.

Source

WP2Social Auto Publish Powered By : XYZScripts.com