8 Best Screen Recorders for Desktop Screen Recording in Linux

It has become a common and good practice to record an important desktop session, say a case where you want to played a hard level of a game and want to observe how you possibly achieved later on Or you intend to create a video tutorial, a how-to article or a guide, or any other activity to do with recording your desktop session, then screen recording software can help you accomplish all the above.

Best Linux Desktop Screen Recording Tools

Best Linux Desktop Screen Recording Tools

In this review guide, we shall cover some of the best screen recording and live video streaming software that you can find for your Linux desktop.

Don’t Miss: Record Linux Terminal Sessions using ‘script’ and ‘scriptreplay’ Commands

Don’t Miss: Showterm.io – A Linux Terminal Recording Tool

1. SimpleScreenRecorder

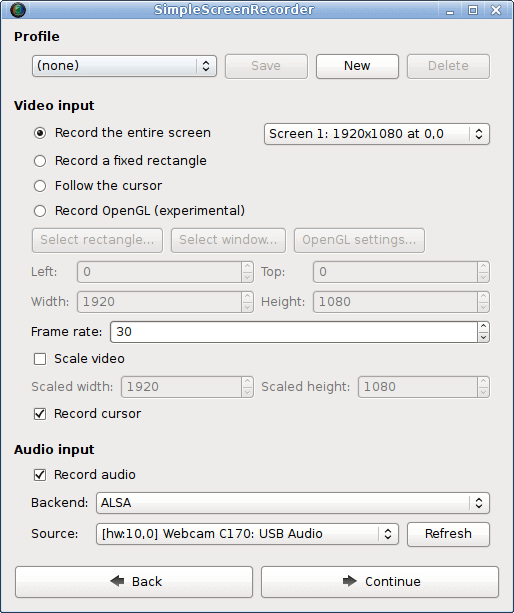
SimpleScreenRecorder is an application that enables you to record other applications and games running on your screen. It is a simple yet powerful and feature rich screen recorder with an easy to use interface.

For installation and usage read: How to Record Programs and Games Using Simple Screen Recorder in Linux

Some of its notable features include:

  1. Qt based simple GUI
  2. Can record entire screen or part of it
  3. Directly records from OpenGL apps
  4. Good audio and video synchronization
  5. Helps to reduce video frame rates for slow machines
  6. Support for pause and resume functionality
  7. Shows statistics during the recording process
  8. Supports previewing during recording
  9. Sensible default settings, no need to alter anything and many more

SimpleScreenRecorder For Linux

SimpleScreenRecorder For Linux

Visit Homepagehttp://www.maartenbaert.be/simplescreenrecorder/

2. recordMyDesktop

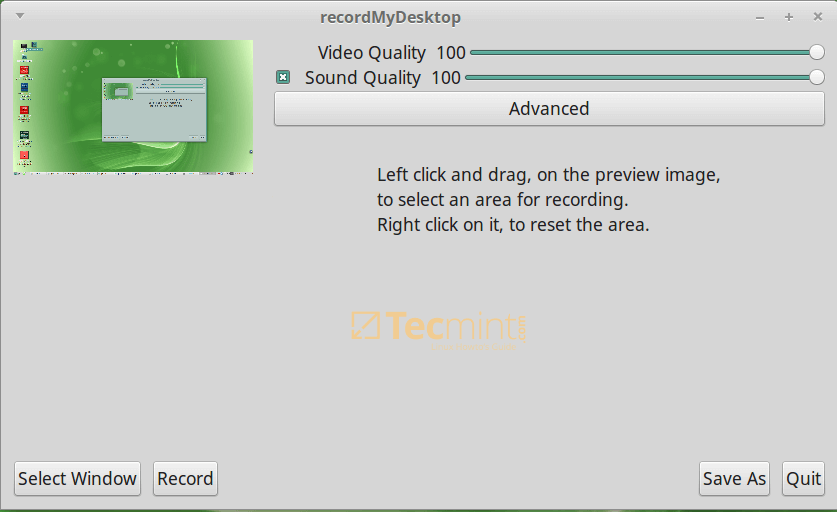
recordMyDesktop is a lightweight and powerful screen session recorder for your Linux desktop, it offers users some great features including choosing video and audio quality, a command line interface which allows recording and encoding only.

Additionally, it offers a clear GUI with basic functions that is few and direct user options, supports recording HD videos plus many more. Although it works exceptionally well, recordMyDesktop has got one major limitation, that is, its output is limited Theora video and Vorbis audio formats.

recordMyDesktop for Linux

recordMyDesktop for Linux

Visit Homepagehttp://recordmydesktop.sourceforge.net/

3. Vokoscreen

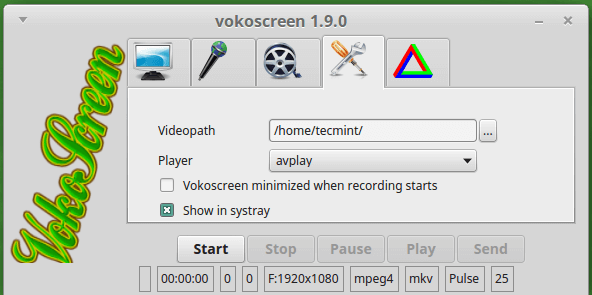
Vokoscreen is a great screen recorder that records both video and audio in multiple formats, most importantly, it is user-friendly.

It offers some great features such as:

  1. Recording the entire screen or application window or selected area
  2. Allows access of the webcam while recording
  3. Supports one application window recording
  4. Magnification of selected area plus many more

Vokoscreen for Linux

Vokoscreen for Linux

Visit Homepagehttp://www.kohaupt-online.de/hp/

4. ScreenStudio

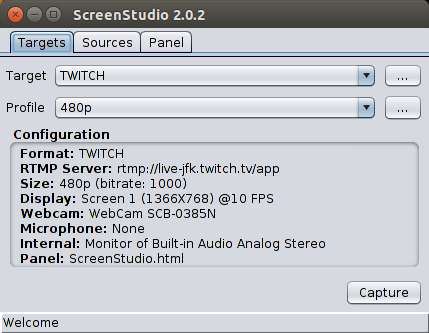
Screenstudio is a powerful screen recording software for Linux that enables users to record HD video files. It works on Linux and Mac OS X and has some of the following components:

  1. Supports both audio and video recording
  2. Supports using overlay text and connection to webcam
  3. Supports streaming of desktop sessions to Twitch.tv, UStream or Hitbox
  4. Built around ffmpeg
  5. Supports several video file formats including mp4, flv and so on

Screenstudio for Linux

Screenstudio for Linux

Visit Homepagehttp://screenstudio.crombz.com/

5. Kazam Screencaster

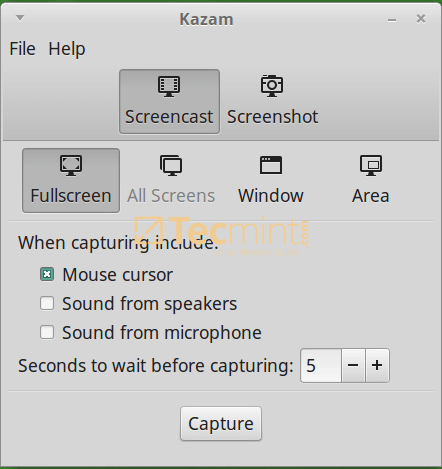
Kazam is also a simple yet powerful screen recorder that you can use on your Linux desktop, it captures your screen content, records a video file and optionally audio from a supported input device.

You can now find it in the Universal Ubuntu repositories, but you can use a stable PPA to avoid waiting for latest releases from Ubuntu repositories.

It has some great features and some of these include:

  1. Outputs recorded video in VP8 or WebM formats
  2. Supports exporting videos directly to YouTube
  3. Enables users to add text such title and description
  4. Simple GUI and many more

Kazam Screen Recorder for Linux

Kazam Screen Recorder for Linux

Visit Homepagehttps://launchpad.net/kazam

6. Byzanz-record

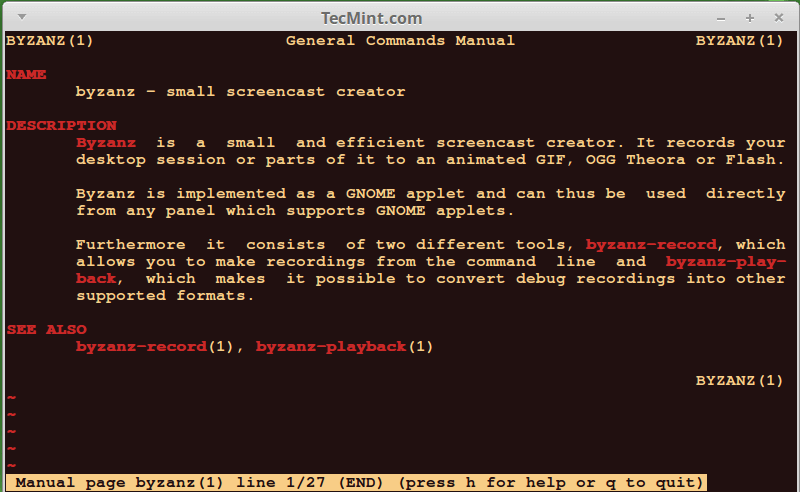
Byzanz-record is also a powerful text-based screen recorder for Linux, for those who love to work from the terminal, it can be a great alternative to the screen recorders we have looked at above.

It comes with some exceptional features and these include; enabling users to record desktop sessions to animated GIF files, supports recording of entire desktop, a single application window or a given screen region.

It offers recording functions directly from the command-line but users who prefer a GUI can take advantage of the panel applet. For more help on how to use this tool, check for its man pages at:

$ man byzanz

Byzanz Screen Creator for Linux

Byzanz Screen Creator for Linux

7. VLC Media Player

VLC is more than just a screen recorder, it is a popular, free, open-source and cross-platform media player that runs on Linux, Windows and Mac OS X.

VLC supports several (almost all) video and audio formats, it is also feature rich and one of its great features is recording desktop sessions. Therefore, you can use it as a screen recorder on your Linux desktop.

Visit Homepagehttp://www.videolan.org

8. OBS (Open Broadcaster Software)

OBS is a free, open source and cross-platform video recording and streaming application, it can work on Linux, Windows and Mac OS X.
It has got several powerful features and the notable features include:

  1. Supports encoding using H264 and AAC
  2. Supports Intel QSV and NVENC
  3. Supports unlimited number of scenes and input sources
  4. Outputs files in MP4 or FLV formats
  5. Allows access to webcam, capture cards and so on during recording sessions
  6. Highly extensible through plugins, developers can use APIs to code their own plugins and many more

Visit Homepagehttps://obsproject.com

Source

How to Make ‘Vim Editor’ as Bash-IDE Using ‘bash-support’ Plugin in Linux

An IDE (Integrated Development Environment) is simply a software that offers much needed programming facilities and components in a single program, to maximize programmer productivity. IDEs put forward a single program in which all development can be done, enabling a programmer to write, modify, compile, deploy and debug programs.

In this article, we will describe how to install and configure Vim editor as a Bash-IDE using bash-support vim plug-in.

What is bash-support.vim plug-in?

bash-support is a highly-customizable vim plug-in, which allows you to insert: file headers, complete statements, comments, functions, and code snippets. It also enables you to perform syntax checking, make a script executable, start a debugger simply with a keystroke; do all this without closing the editor.

It generally makes bash scripting fun and enjoyable through organized and consistent writing/insertion of file content using shortcut keys (mappings).

The current version plug-in is 4.3, version 4.0 was a rewriting of version 3.12.1; versions 4.0 or better, are based on a comprehensively new and more powerful template system, with changed template syntax unlike previous versions.

How To Install Bash-support Plug-in in Linux

Start by downloading the latest version of bash-support plug-in using the command below:

$ cd Downloads
$ curl http://www.vim.org/scripts/download_script.php?src_id=24452 >bash-support.zip

Then install it as follows; create the .vim directory in your home folder (in case it doesn’t exist), move into it and extract the contents of bash-support.zip there:

$ mkdir ~/.vim
$ cd .vim
$ unzip ~/Downloads/bash-support.zip

Next, activate it from the .vimrc file:

$ vi ~/.vimrc

By inserting the line below:

filetype plug-in on   
set number   #optionally add this to show line numbers in vim

How To Use Bash-support plug-in with Vim Editor

To simplify its usage, the frequently used constructs as well as certain operations can be inserted/performed with key mappings respectively. The mappings are described in ~/.vim/doc/bashsupport.txt and ~/.vim/bash-support/doc/bash-hotkeys.pdf or ~/.vim/bash-support/doc/bash-hotkeys.tex files.

Important:
  1. All mappings ((\)+charater(s) combination) are filetype specific: they are only work with ‘sh’ files, in order to avoid conflicts with mappings from other plug-ins.
  2. Typing speed matters-when using key mapping, the combination of a leader ('\') and the following character(s) will only be recognized for a short time (possibly less than 3 seconds – based on assumption).

Below are certain remarkable features of this plug-in that we will explain and learn how to use:

How To Generate an Automatic Header for New Scripts

Look at the sample header below, to have this header created automatically in all your new bash scripts, follow the steps below.

Script Sample Header Options

Script Sample Header Options

Start by setting your personal details (author name, author reference, organization, company etc). Use the map \ntw inside a Bash buffer (open a test script as the one below) to start the template setup wizard.

Select option (1) to setup the personalization file, then press [Enter].

$ vi test.sh

Set Personalizations in Scripts File

Set Personalizations in Scripts File

Afterwards, hit [Enter] again. Then select the option (1) one more time to set the location of the personalization file and hit [Enter].

Set Personalization File Location

Set Personalization File Location

The wizard will copy the template file .vim/bash-support/rc/personal.templates to .vim/templates/personal.templates and open it for editing, where you can insert your details.

Press i to insert the appropriate values within the single quotes as shown in the screenshot.

Add Info in Script Header

Add Info in Script Header

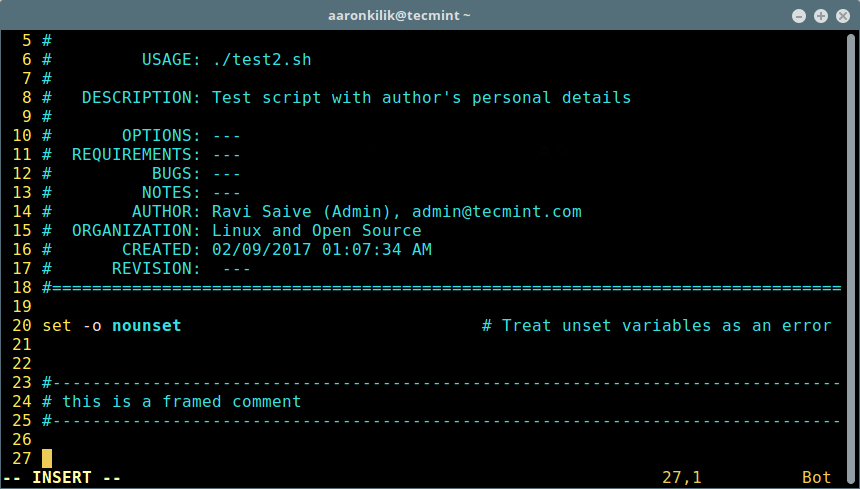
Once you have set the correct values, type :wq to save and exit the file. Close the Bash test script, open another script to check the new configuration. The file header should now have your personal details similar to that in the screen shot below:

$ test2.sh

Auto Adds Header to Script

Auto Adds Header to Script

Make Bash-support Plug-in Help Accessible

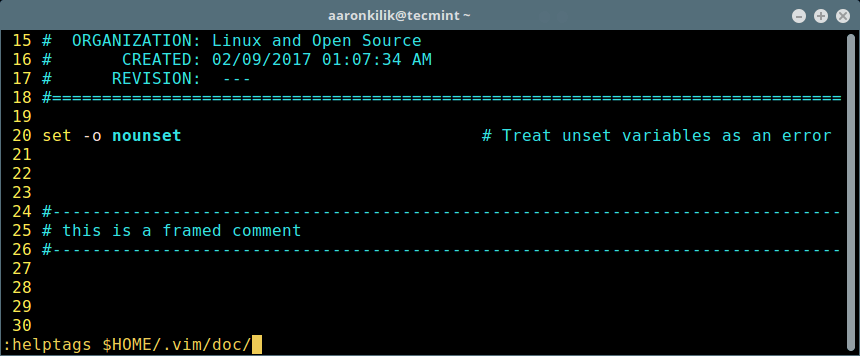
To do this, type the command below on the Vim command line and press [Enter], it will create a file .vim/doc/tags:

:helptags $HOME/.vim/doc/

Add Plugin Help in Vi Editor

Add Plugin Help in Vi Editor

How To Insert Comments in Shell Scripts

To insert a framed comment, type \cfr in normal mode:

Add Comments to Scripts

Add Comments to Scripts

How To Insert Statements in a Shell Script

The following are key mappings for inserting statements (n – normal mode, i – insert mode):

  1. \sc – case in … esac (n, I)
  2. \sei – elif then (n, I)
  3. \sf – for in do done (n, i, v)
  4. \sfo – for ((…)) do done (n, i, v)
  5. \si – if then fi (n, i, v)
  6. \sie – if then else fi (n, i, v)
  7. \ss – select in do done (n, i, v)
  8. \su – until do done (n, i, v)
  9. \sw – while do done (n, i, v)
  10. \sfu – function (n, i, v)
  11. \se – echo -e “…” (n, i, v)
  12. \sp – printf “…” (n, i, v)
  13. \sa – array element, ${.[.]} (n, i, v) and many more array features.

Insert a Function and Function Header

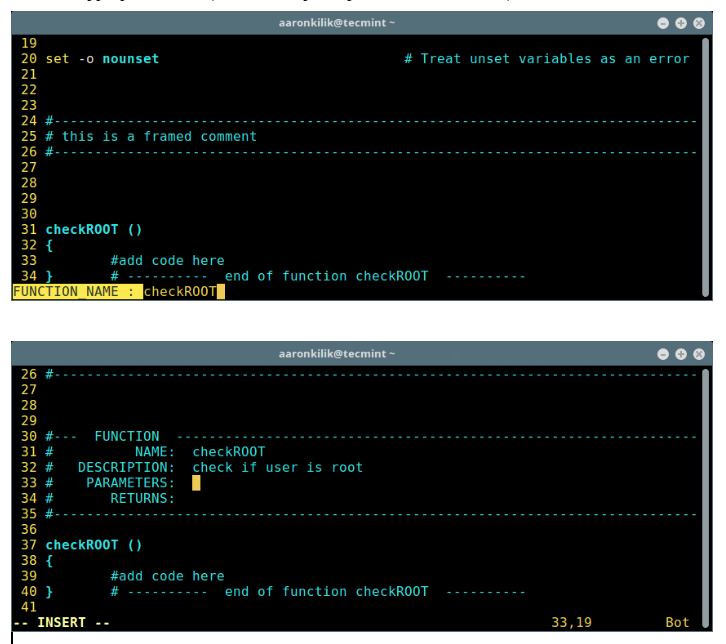
Type \sfu to add a new empty function, then add the function name and press [Enter] to create it. Afterwards, add your function code.

Insert New Function in Script

Insert New Function in Script

To create a header for the function above, type \cfu, enter name of the function, click [Enter] and fill in the appropriate values (name, description, parameters and returns):

Create Header Function in Script

Create Header Function in Script

More Examples of Adding Bash Statements

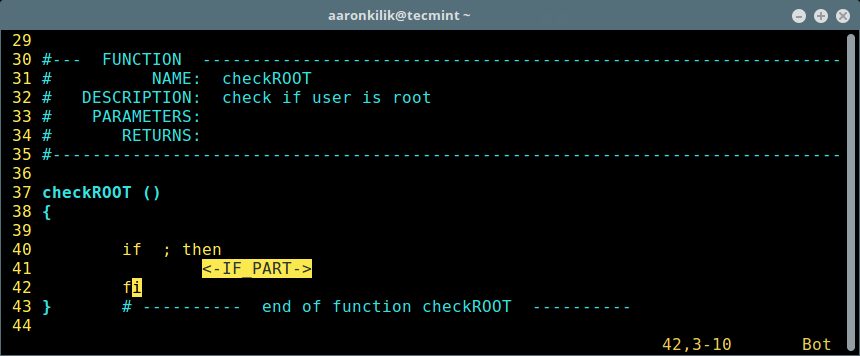
Below is an example showing insertion of an if statement using \si:

Add Insert Statement to Script

Add Insert Statement to Script

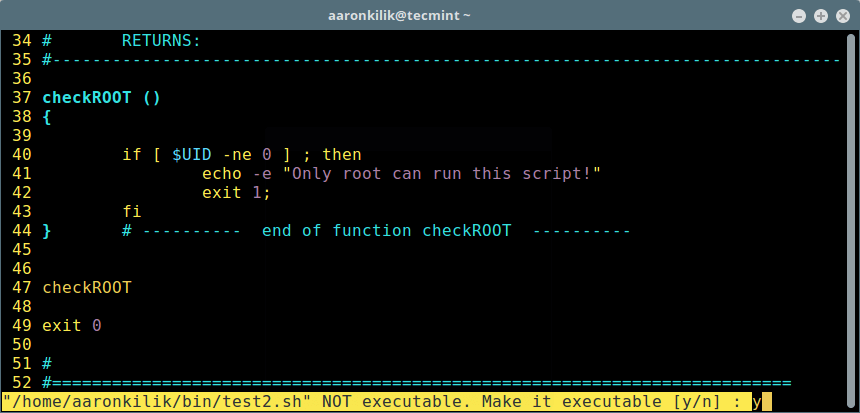
Next example showing addition of an echo statement using \se:

Add echo Statement to Script

Add echo Statement to Script

How To Use Run Operation in Vi Editor

The following is a list of some run operations key mappings:

  1. \rr – update file, run script (n, I)
  2. \ra – set script cmd line arguments (n, I)
  3. \rc – update file, check syntax (n, I)
  4. \rco – syntax check options (n, I)
  5. \rd – start debugger (n, I)
  6. \re – make script executable/not exec.(*) (in)

Make Script Executable

After writing script, save it and type \re to make it executable by pressing [Enter].

Make Script Executable

Make Script Executable

How To Use Predefined Code Snippets To a Bash Script

Predefined code snippets are files that contain already written code meant for a specific purpose. To add code snippets, type \nr and \nw to read/write predefined code snippets. Issue the command that follows to list default code snippets:

$ .vim/bash-support/codesnippets/

List of Code Snippets

List of Code Snippets

To use a code snippet such as free-software-comment, type \nr and use auto-completion feature to select its name, and press [Enter]:

Add Code Snippet to Script

Add Code Snippet to Script

Create Custom Predefined Code Snippets

It is possible to write your own code snippets under ~/.vim/bash-support/codesnippets/. Importantly, you can also create your own code snippets from normal script code:

  1. choose the section of code that you want to use as a code snippet, then press \nw, and closely give it a filename.
  2. to read it, type \nr and use the filename to add your custom code snippet.

View Help For the Built-in and Command Under the Cursor

To display help, in normal mode, type:

  1. \hh – for built-in help
  2. \hm – for a command help

View Built-in Command Help

View Built-in Command Help

For more reference, read through the file :

~/.vim/doc/bashsupport.txt  #copy of online documentation
~/.vim/doc/tags

Visit the Bash-support plug-in Github repository: https://github.com/WolfgangMehner/bash-support
Visit Bash-support plug-in on the Vim Website: http://www.vim.org/scripts/script.php?script_id=365

That’s all for now, in this article, we described the steps of installing and configuring Vim as a Bash-IDE in Linux using bash-support plug-in. Check out the other exciting features of this plug-in, and do share them with us in the comments.

Source

Vi, Vim, Nano, Emacs – My Favorite Command Line Editors for Linux – What’s Your Editor?

Linux Command Line Text Editors

Top 3 Linux Command Line Text Editors

Knowing how to fast and effectively edit files via command line is vital for every Linux system administrator. File edits are performed on a daily basis, whether it’s a configuration file, user file, text document or whatever file you need to edit.

This is why it is good idea to pick a favourite command line text editor and master it. It’s good to know how to work with other text editors, but you should master at least one so you can perform more complex tasks when needed.

In this tutorial, we are going to show you the most common command line text editors in Linux and show you their pros and cons.

Note however that we will not cover a complete guide how to work with each one of them as this can be a complete other article with explanation.

1. Vi/Vim Editor

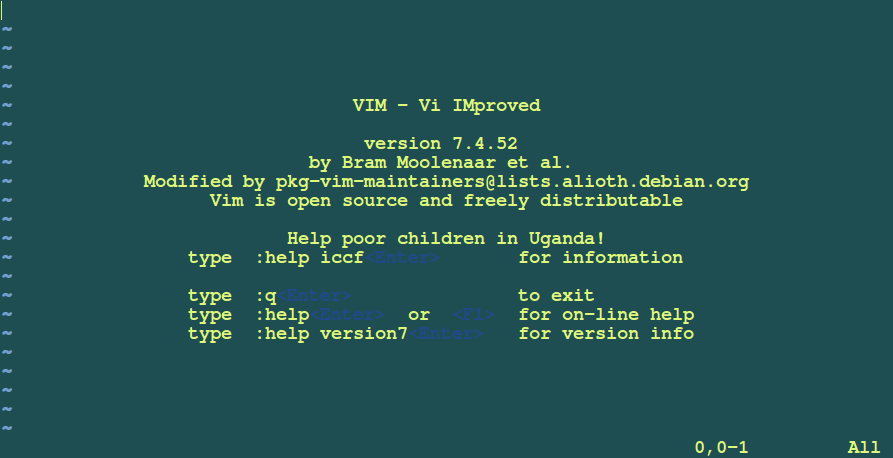
First in our list is the infamous Vi/Vim (Vim comes from Vi improved). This is a very flexible text editor that can perform many different operations on text.

Vi/Vim Linux Editor

Vi/Vim Linux Editor

For example you can use regular expressions to replace text snippets in a file using vim. This of course is not the only benefit. Vi(m) provides an easy way to navigate between lines, words paragraphs. It also includes text highlighting.

Vim may not be the most user friendly text editor, but it is often preferred by developers and Linux power users. If you want to install this command line text editor on your system, you can use the command associated with your OS:

Install Vi/Vim Editor in Linux

$ sudo apt-get install vim         [On Debian and its derivatives]
# yum install vim                  [On RedHat based systems]
OR
# dnf install vim                  [On newer Fedora 22+ versions]

If you want to see our complete coverage of vi(m), please follow the links below:

  1. Learn and Use Vi/Vim as a Full Text Editor in Linux
  2. Learn ‘Vi/Vim’ Editor Tips and Tricks to Enhance Your Skills
  3. 8 Interesting ‘Vi/Vim’ Editor Tips and Tricks

2. Nano Editor

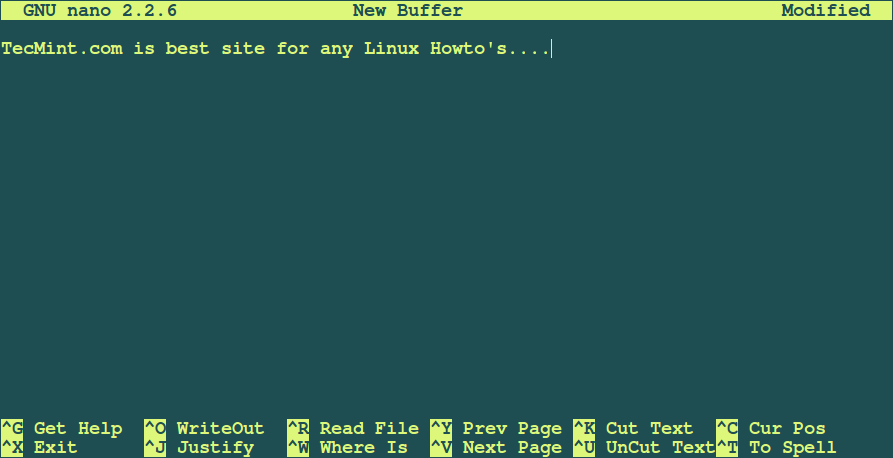
Nano is probably one of the most used command line text editors. The reason for this is it’s simplicity and the fact that it’s preinstalled in most of the Linux distributions.

Nano Editor for Linux

Nano Editor for Linux

Nano doesn’t have vim’s flexibility, but it will definitely do the work if you need to edit a large file. Actually picoand nano are quite similar. Both have their command options displayed at the bottom so you can choose which one to run. Commands are completed with key combinations of Ctrl and a letter displayed at the bottom.

Nano has the following features that you can use out of the box:

  1. Get Help
  2. Write out
  3. Justify
  4. Read File
  5. Where is (search)
  6. Previous page
  7. Next page
  8. Cut Text
  9. Uncut Text
  10. Cur Pos (Current position)
  11. Spell check

Install Nano Editor in Linux

$ sudo apt-get install nano         [On Debian and its derivatives]
# yum install nano                  [On RedHat based systems]
OR
# dnf install nano                  [On newer Fedora 22+ versions]

You can check our complete guide for editing files with Nano editor on this link:

  1. How to Use Nano Editor in Linux

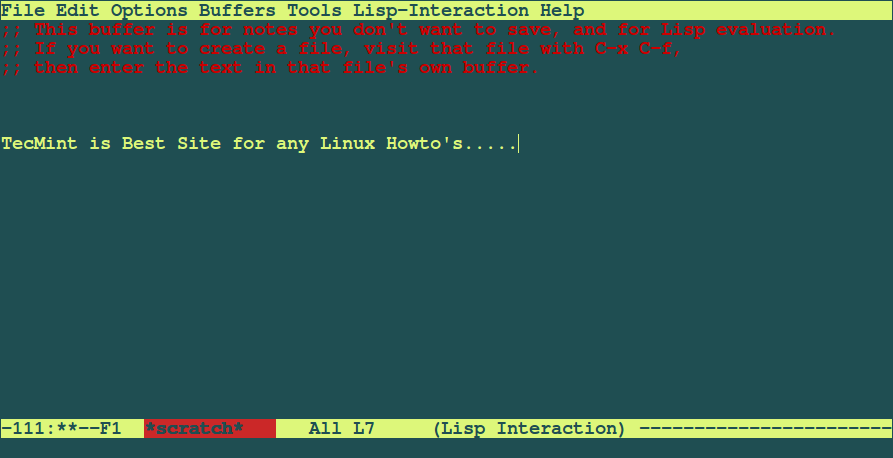
3. Emacs Editor

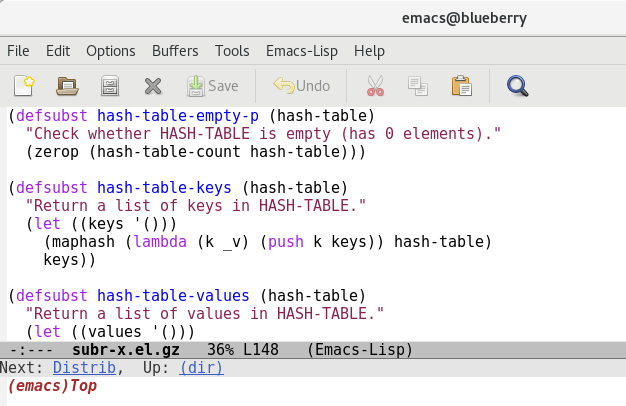
This is probably the most complex text editor in our list. It’s the oldest command line editor available for both Linux and UNIX based systems. Emacs can help you be more productive by providing an integrated environment for different kinds of tasks.

Emacs Editor for Linux

Emacs Editor for Linux

At first the user interface may look somehow confusing. The good thing is that emacs has a very detailed manual that will help you with file navigation, edits, customization, setting up commands. Emacs is the ultimate tool used by advanced *Nix users.

Here are some of the features that make it the preferred choice over the previous editors we mentioned:

  1. Emacs server platform enables multiple hosts to connect to the same Emacs server and share the buffer list.
  2. Powerful and extensible file manager.
  3. Customization beyond a regular editor – as some say it’s an OS within the OS.
  4. Commands customization.
  5. Can change to Vi(m) like mode.

Emacs is a multi-platform editor and can be easily installed with the commands shown below:

Install Emacs Editor in Linux

$ sudo apt-get install emacs         [On Debian and its derivatives]
# yum install emacs                  [On RedHat based systems]
OR
# dnf install emacs                  [On newer Fedora 22+ versions]

Note: In Linux Mint 17 I had to run the following command to complete the installation:

$ sudo apt-get install emacs23-nox

Conclusion

There are other command line editors, but they barely even reach the functionality that the above 3 provide. Whether you are a Linux newbie or a Linux guru, you will most definitely need to learn at least one of the above mentioned editors. If we’ve missed any command-line editor in this article, please don’t forget to inform us via comments.

Source

10 Best Media Server Software for Linux in 2018

A media server is simply a specialized file server or computer system for storing media (digital videos/movies, audio/music, and images) which can be accessed over a network.

In order to setup a media server, you need computer hardware (or perhaps a cloud server) as well as a software that enables you to organize your media files, and makes it easier to stream and/or share them with friends and family.

In this article, we will share with you a list of 10 best media server software for Linux systems. By the time you complete this article, you will be able to choose the most appropriate software to setup your home/office/cloud media server powered by a Linux system.

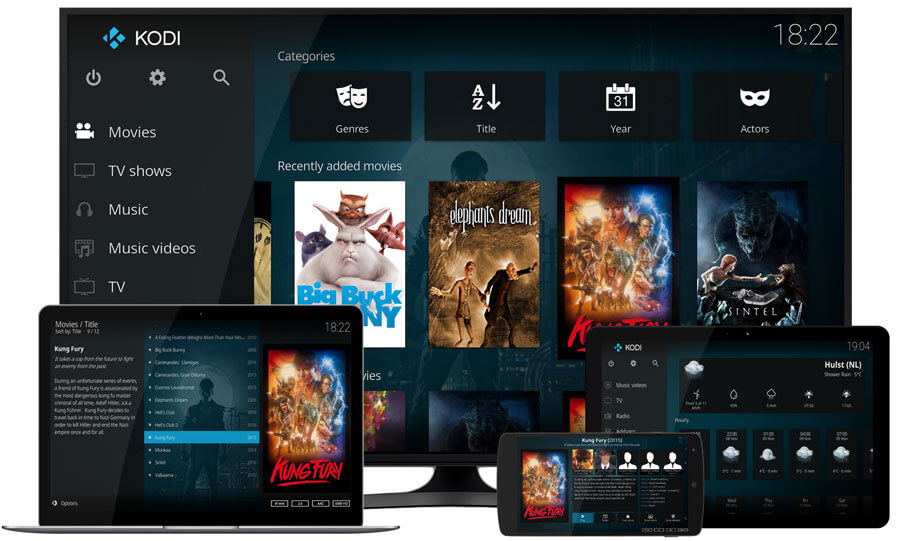
1. Kodi – Home Theater Software

Kodi (previously known as XBMC) is a free and open source, highly customizable media server software. It is cross-platform and runs on Linux, Windows, MacOS; iOS and Android. It is more than just a media server; it’s an ideal entertainment center software with a fabulous user interface and several other media server software appliances are based on it.

Kodi Home Theater Software

Kodi Home Theater Software

Kodi enables you to play movies/videos, music/audio, podcasts, view images and other digital media files from your local computer or a network server as well as the internet.

Kodi Features:

  • Runs on a wide variety of devices.
  • It is user friendly.
  • Supports a web interface.
  • Supports a variety of user created Add-ons.
  • Supports televisions and remote controls.
  • Has a highly configurable interface via skins.
  • Allows you to watch and record live TV.
  • Supports importing pictures into a library.
  • Allows you to browse, view, sort, filter or even start a slideshow of your pictures and much more.

How to Install Kodi in Linux

To install Kodi on Ubuntu-based distributions, use the following PPA to install latest version.

$ sudo apt-get install software-properties-common
$ sudo add-apt-repository ppa:team-xbmc/ppa
$ sudo apt-get update
$ sudo apt-get install kodi

To install Kodi on Debian 9 (Stretch), use the following command, as Kodi is available in the default “main” Debian repository.

$ sudo apt-get update
$ sudo apt-get install kodi

To install Kodi on Fedora use pre-built RPMFusion packages as shown.

$ sudo dnf install --nogpgcheck \  https://download1.rpmfusion.org/free/fedora/rpmfusion-free-release-$(rpm -E %fedora).noarch.rpm
$ sudo dnf install kodi

2. PLEX – Media Server

Plex is a powerful, secure and fully-featured and easy-to-install media server software. It runs on Linux, Windows, MacOS, and many other platforms.

Plex Home Media Server

Plex Home Media Server

It supports almost all major file formats and allows you to organize your media in a central point for easy access. Plex has an easy-to-navigate interface, and a collection of useful apps for a variety of devices: phones, tablets, gaming consoles, streaming devices and smart TVs.

Plex Features:

  • Supports encrypted connections with multiple user accounts.
  • Allows you to easily pick and choose what to share.
  • Offers a parental control functionality.
  • Supports mobile sync which offers offline access to your media files.
  • Supports flinging of video from one device to another.
  • Also supports cloud sync.
  • Supports audio fingerprinting and automatic photo-tagging.
  • Has a media optimizer and much more.

How to Install Plex in Linux

To install Plex in UbuntuFedora and CentOS distributions, go the Download section and choose your Linux distribution architecture (32-bit or 64-bit) to download .DEB or .RPM package and install it using your default package manager.

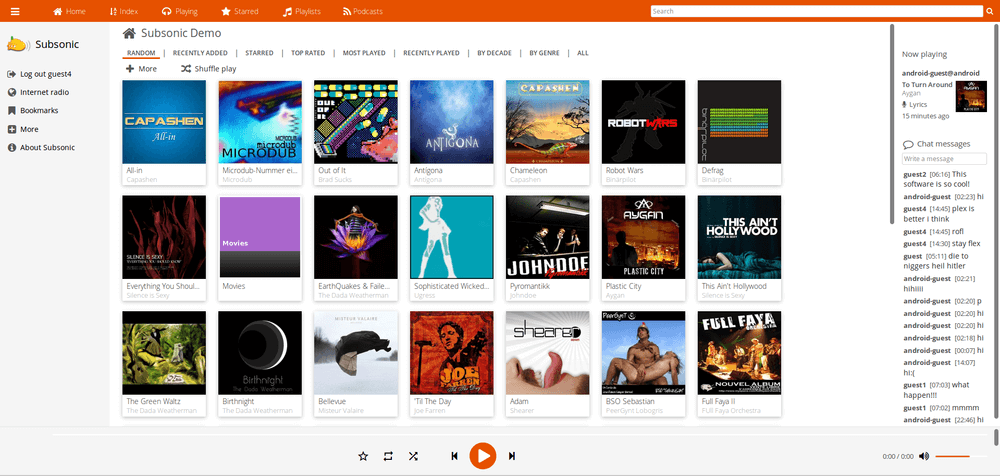
3. Subsonic – Personal Media Streamer

Subsonic is a secure, reliable and easy-to-use personal media server and streamer. It runs on Linux, Windows, MacOS and Synology NAS. It is very customizable and supports all major media formats. There are more than 25 supported apps that you can use to stream music directly on your mobile phone.

Subsonic Personal Media Streamer

Subsonic Personal Media Streamer

Subsonic can operate with multiple users and any number of players at the same time. And it allows you to play movies/videos or music/audio files on any compatible DLNA/UPnP devices.

Subsonic Features:

  • Has a highly configurable UI (user interface).
  • Supports secure connections over HTTPS/SSL.
  • Integrates with the best web services.
  • Supports up to 28 languages and comes with 30 different themes.
  • Offers a chat features.
  • Allows you to access your server using your own address i.e https://yourname.subsonic.org.
  • Supports authentication in LDAP and Active Directory.
  • Has an integrated podcast receiver.
  • Supports setting upload and download bandwidth limits and lots more.

How to Install Subsonic in Linux

To install Subsonic in Debian/Ubuntu and Fedora/CentOS distributions, you need to first install Java 8 or Java 9using following commands on your respective distributions.

------------- Install Java in Debian and Ubuntu ------------- 
$ sudo apt-get install openjdk-8-jre  [Install Java 8 in Debian/Ubuntu]
$ sudo apt-get install openjdk-9-jre  [Install Java 9 in Debian/Ubuntu]

------------- Install Java in Fedora and CentOS ------------- 
$ sudo sudo yum install java-1.8.0-openjdk

Next go to the Subsonic Download section to grab the .deb or .rpm package and install it using your default package manager.

$ sudo dpkg -i subsonic-x.x.deb                    [On Debian/Ubuntu]
$ sudo yum install --nogpgcheck subsonic-x.x.rpm   [On Fedora/CentOS]

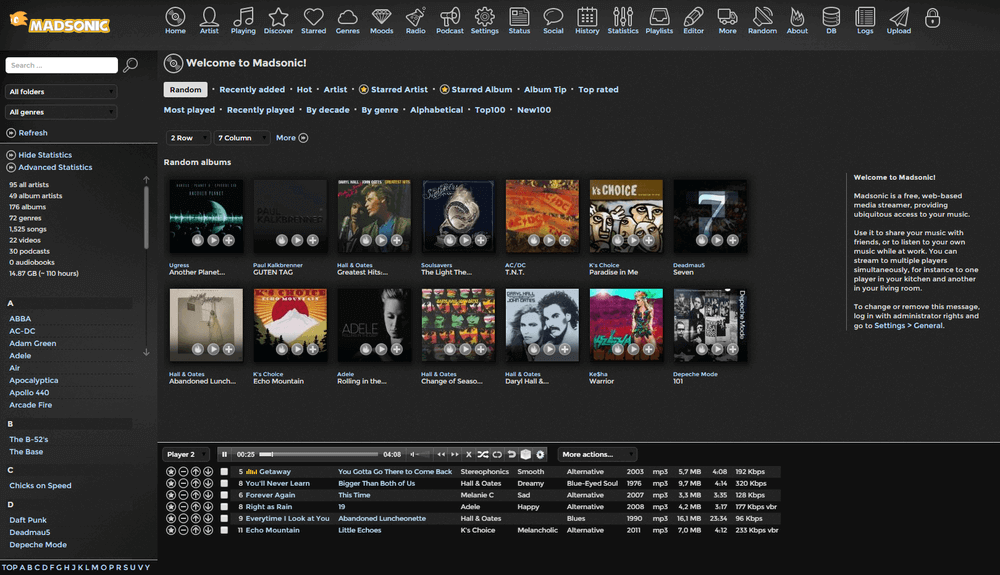
4. Madsonic – Music Streamer

Madsonic is an open source, flexible and secure web-based media server and media streamer developed using Java. It runs Linux, MacOS, Windows, and other Unix-like systems. If you are a developer, there is a free REST API (Madsonic API) that you use to develop your own apps, addons or scripts.

Madsonic Music Streamer

Madsonic Music Streamer

Madsonic Features:

  • Easy to use and comes with jukebox functionality.
  • It is highly flexible and scalable with an intuitive web interface.
  • Offers search and index functionalities with Chromecast support.
  • Has built-in support for your dreambox receiver.
  • Supports authentication in LDAP and Active Directory.

How to Install Madsonic in Linux

To install Madsonic in Debian/Ubuntu and Fedora/CentOS distributions, you need to first install Java 8 or Java 9 using following commands on your respective distributions.

------------- Install Java in Debian and Ubuntu ------------- 
$ sudo apt-get install openjdk-8-jre  [Install Java 8 in Debian/Ubuntu]
$ sudo apt-get install openjdk-9-jre  [Install Java 9 in Debian/Ubuntu]

------------- Install Java in Fedora and CentOS ------------- 
$ sudo yum install java-1.8.0-openjdk

Next go to the Madsonic Download section to grab the .deb or .rpm package and install it using your default package manager.

$ sudo dpkg -i Madsonic-x.x.xxxx.deb                         [On Debian/Ubuntu]
$ sudo sudo yum install --nogpgcheck Madsonic-x.x.xxxx.rpm   [On Fedora/CentOS]

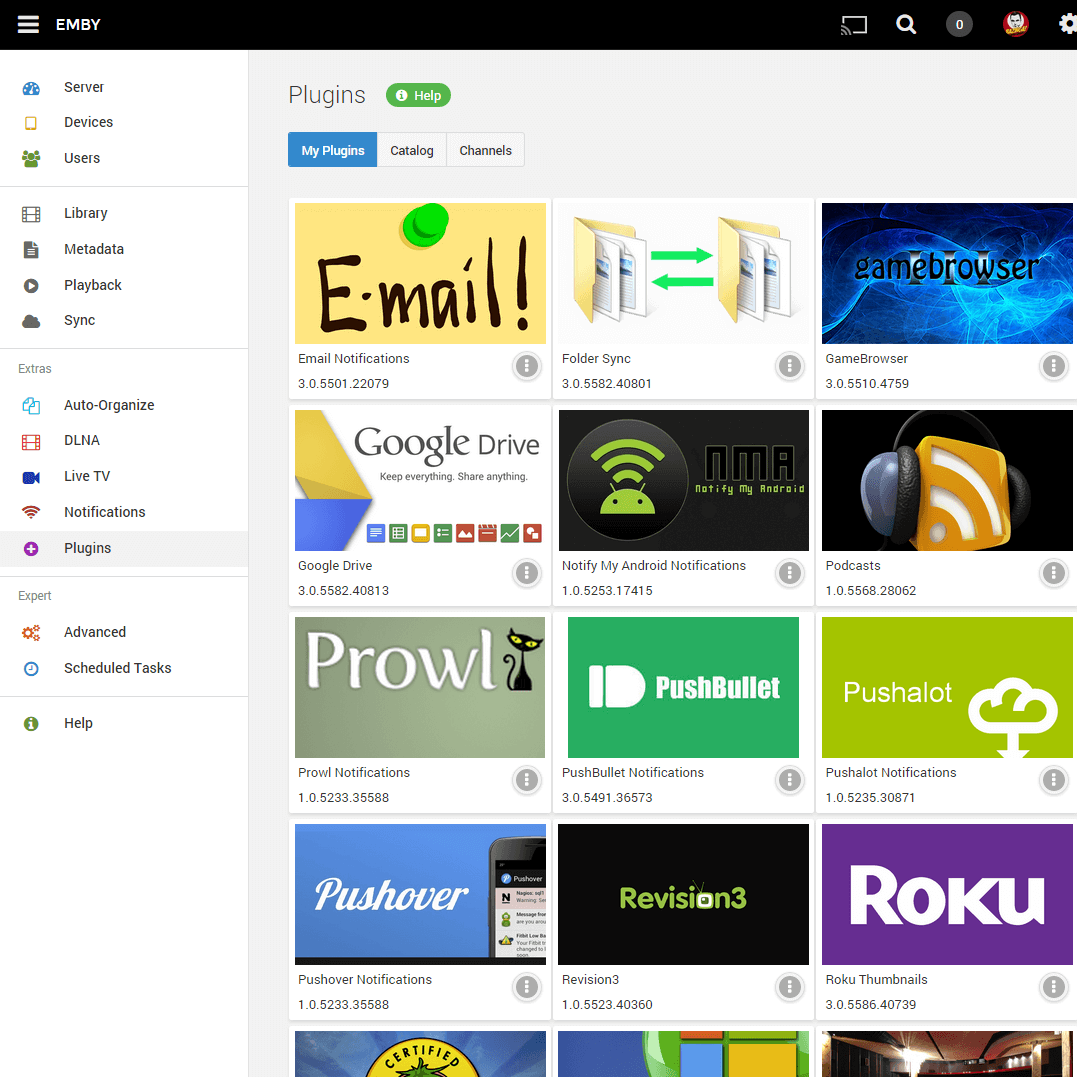
5. Emby – Open Media Solution

Emby is a powerful, easy-to-use and cross-platform media server software. Simply install the emby server on your machine running Linux, FreeBSD, Windows, MacOS or on NAS. You can also grab the emby app on Andriod, iOS, Windows or run the web client from a browser or still use the emby TV app.

Emby Media Solution

Emby Media Solution

Once you have it, it will help you manage your personal media library, such as home videos, music, photos and many other media formats.

Emby Features:

  • A beautiful UI with supports for mobile sync and cloud sync.
  • Offers powerful web-based tools for managing your media files.
  • Supports parental control.
  • It automatically detects DLNA devices.
  • Enables easy sending of movies/videos, music, pictures, and live TV shows to Chromecast and much more.

How to Install Emby in Linux

To install Emby in UbuntuFedora and CentOS distributions, go the Emby Download section and choose your Linux distribution to download .DEB or .RPM package and install it using your default package manager.

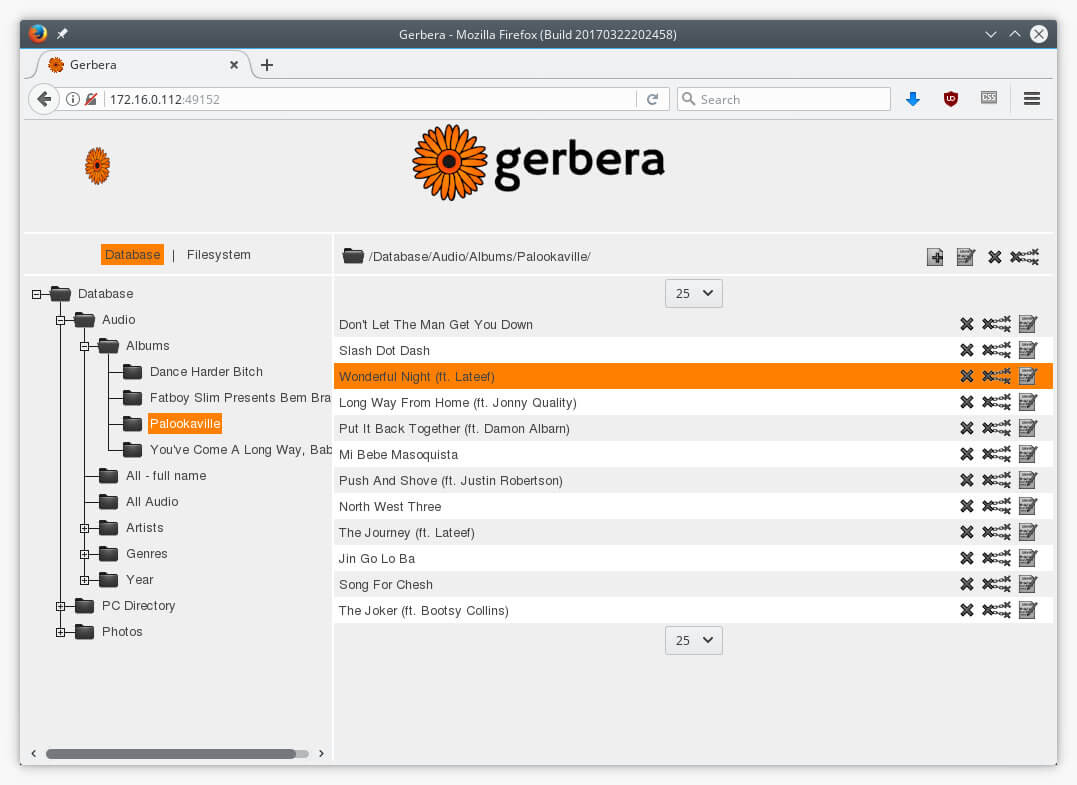
6. Gerbera – UPnP Media Server

Gerbera is a free open source, powerful, flexible and full-featured UPnP (Universal Plug and Play) media server. It comes with a simple and intuitive web user interface for easily configuring your web server.

Gerbera UPnP Media Server

Gerbera UPnP Media Server

Gerbera has a highly flexible configuration, allowing you to control the behavior of various features of the server. It allows you to browse and playback media via UpnP.

Gerbera Features:

  • It is easy to setup.
  • Supports metadata extraction from mp3, ogg, flac, jpeg, etc. files.
  • Supports user defined server layout based on extracted metadata.
  • Support for ContentDirectoryService container updates.
  • Comes with exif thumbnail support.
  • Supports automatic directory rescans (timed, inotify).
  • Offers a nice Web UI with a tree view of the database and the file system, allowing to add/remove/edit/browse media.
  • Support for external URLs (create links to internet content and serve them via UPnP to your renderer).
  • Supports flexible media format transcoding via plugins / scripts and much more.

How to Install Gerbera in Linux

To install Gerbera in UbuntuFedora and CentOS distributions, follow our installation guide that explains installation of Gerbera – UPnP Media Server in Linux and also shows how to stream media files using Gerbera on your home network.

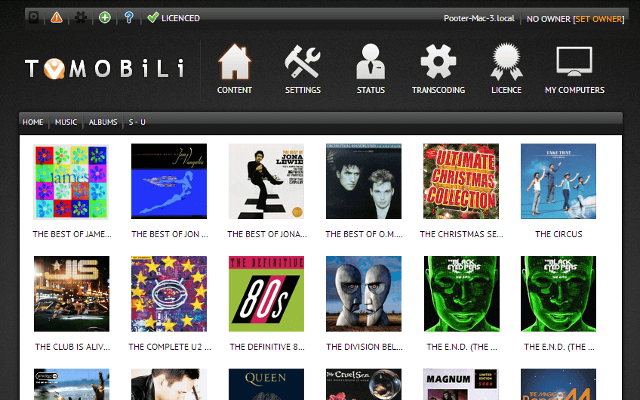
7. Tvmobili – Smart TV Media Server

Tvmobili is a lightweight, high performance, cross-platform media server software that runs on Linux, Windows and MacOS; NAS as well as embedded/ARM devices. It is easy to install and in addition, tvmobili is is fully integrated with iTunes and offers amazing support for full 1080p High Definition (HD) videos.

Tvmobili Media Server

Tvmobili Media Server

Tvmobili Features:

  • Easy to install, high performance media server.
  • Fully integrated with iTunes (and iPhoto on Macs).
  • Supports full 1080p High Definition (HD) video.
  • Lightweight media server.

How to Install Tvmobili in Linux

To install Tvmobili in UbuntuFedora and CentOS distributions, go the Tvmobili Download section and choose your Linux distribution to download .DEB or .RPM package and install it using your default package manager.

8. OpenELEC – Open Embedded Linux Entertainment Center

OpenELEC is a lightweight Linux based operating system for setting up your machine as a media server using Kodi. It is built from scratch for the sole purpose of running Kodi media server software.

OpenELEC Open Embedded Linux

OpenELEC Open Embedded Linux

It allows you to organize your movie collections; offers you a picture browser, music and audiobook player, TV and personal video recorder, and a TV show management functionality. It is highly extensible through a great number of addons.

OpenELEC Features

  • Organize your movie collections and play your media with relevant info, subtitles and fanart.
  • Manually watch all your photos or use a handy slide show with zoom effect.
  • Browe, watch and record your favourite TV channels.
  • Manage your TV series and keep track of your favorite episodes.
  • Listent audo files in various formats with artists photos and album covers.
  • Easy expandable with Addons.

How to Install OpenELEC in Linux

As we said, OpenELEC is a small Linux based operating system built from scratch as a platform to turn your computer into a Kodi media center. To install it, go to the OpenELEC installation section,that shows you how to create the OpenELEC install stick on a Linux machine and install OpenELEC via the created install stick onto your HTPC.

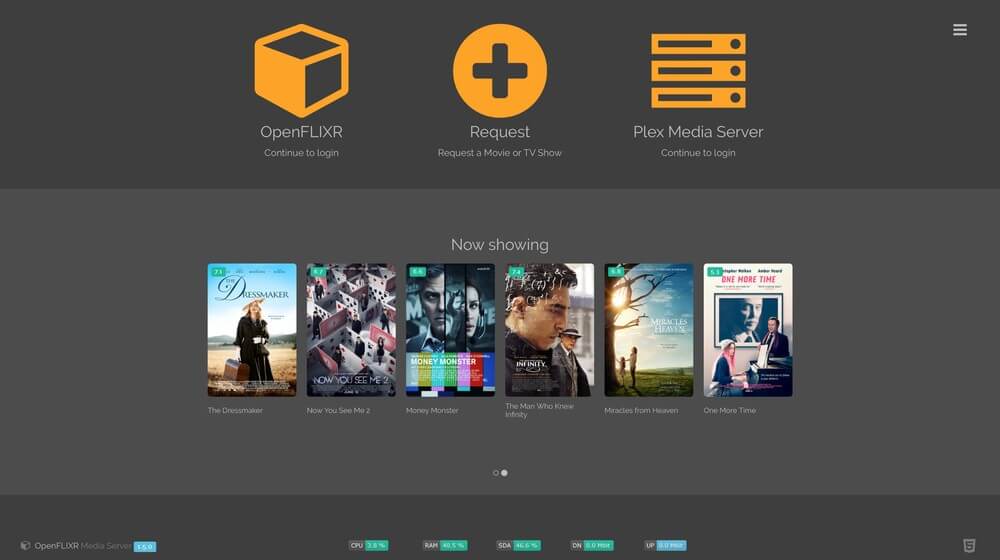
9. OpenFlixr – Media Server

OpenFlixr is a virtual, flexible, energy efficient and fully-automated media server software. It uses several other applications to achieve its overall functions, including Plex as a media server (to organizes movies, series, music and pictures and streams them), Ubooquity for serving comics and ebooks and a web-based reader. It supports automated downloading and serving of media, encrypted connections, and smart auto-updating.

OpenFLIXR Media Server

OpenFLIXR Media Server

How to Install OpenFLIXR in Linux

To install OpenFLIXR, the only thing you need is a visualization software such as VirtualBoxKVMVmware, etc.

Once you have visualization software installed, Download OpenFLIXR and then import in hypervisor, power on and let it sit back for a couple of minutes till installation finishes, after that go to http://IP-Address/setup to setup OpenFLIXR.

10. OSMC – Open Source Media Center

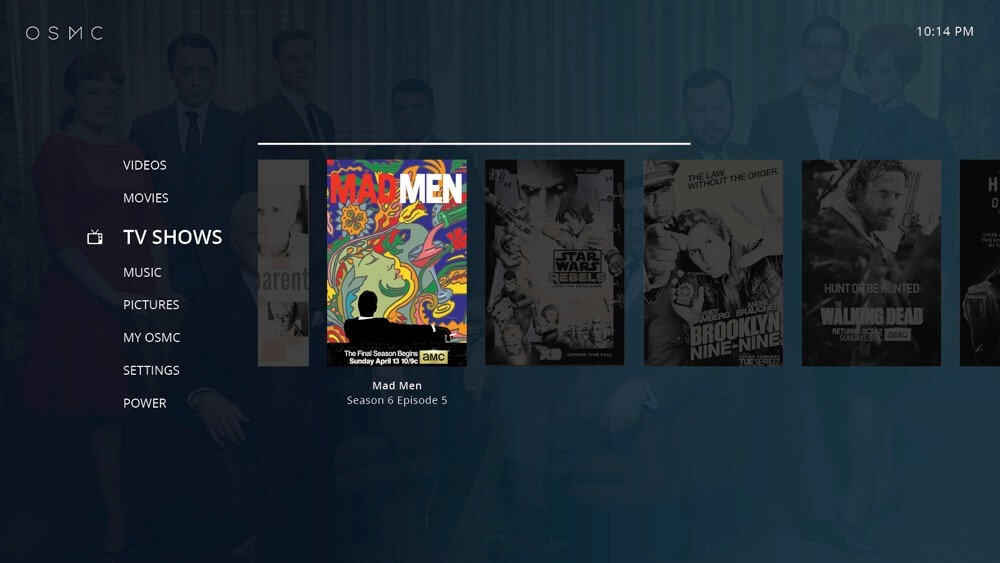
OSMC is a free open source, simple, easy-to-use, full-featured media server software and media streamer for Linux. It is based on the Kodi media server software. It supports all well known media formats and a variety of sharing protocols. In addition, it comes with a remarkable interface. Once you have installed it, you get easy updates and apps to use.

OSMC - Open Source Media Center

OSMC – Open Source Media Center

How to Install OSMC in Linux

To install OSMC in Debian/UbuntuFedora and RHEL/CentOS distributions, first go to the OSMC Downloadsection, simply select your current Linux operating system and follow the installation instructions to install it using your package manager.

Conclusion

In this article, we shared with you some of the best media server software for Linux systems. If you know any media server software for Linux missing in the list above, just hit us up via the feedback form below.

Source

14 Best Open Source Music Making Software for Linux

Are you a music producer and use Linux as your primary operating system, then music production is going to become easy for you after reading this article.

There are good music production software in Linux just as it is in Windows and Mac OS, though a few features may vary but the underlying functionalities mostly are the same.

Music Making Linux Tools

8 Music Making or Creation Linux Tools

Here, I will look at some free and open source software that you can use for music production purposes or music creation.

1. Audacity

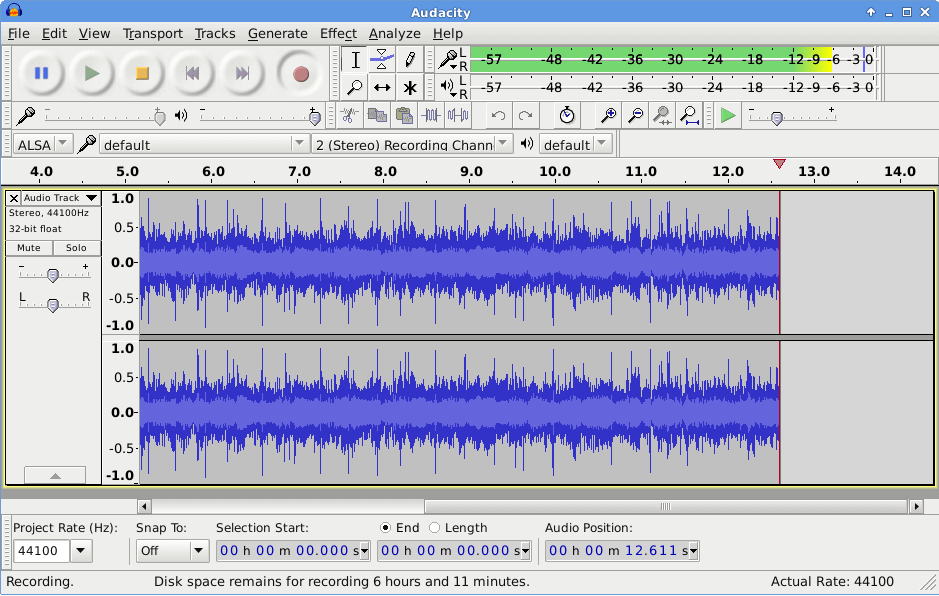
It is free, open source and also a cross platform application for audio recording and editing. Therefore it can run on Linux, Mac OS X, Windows and other operating systems. Audacity has the some of the following features:

  1. Records live audio through a microphone, a mixer or from other media.
  2. Import and export files from and to different sound formats.
  3. Copy, cut, paste, delete options for easy editing.
  4. Large range of keyboard shortcuts.
  5. Add sound effects.
  6. Extensible with various plug-ins and many more.

Audacity Running on Linux

Audacity Running on Linux

VisitAudacity Homepage

2. Cecilia

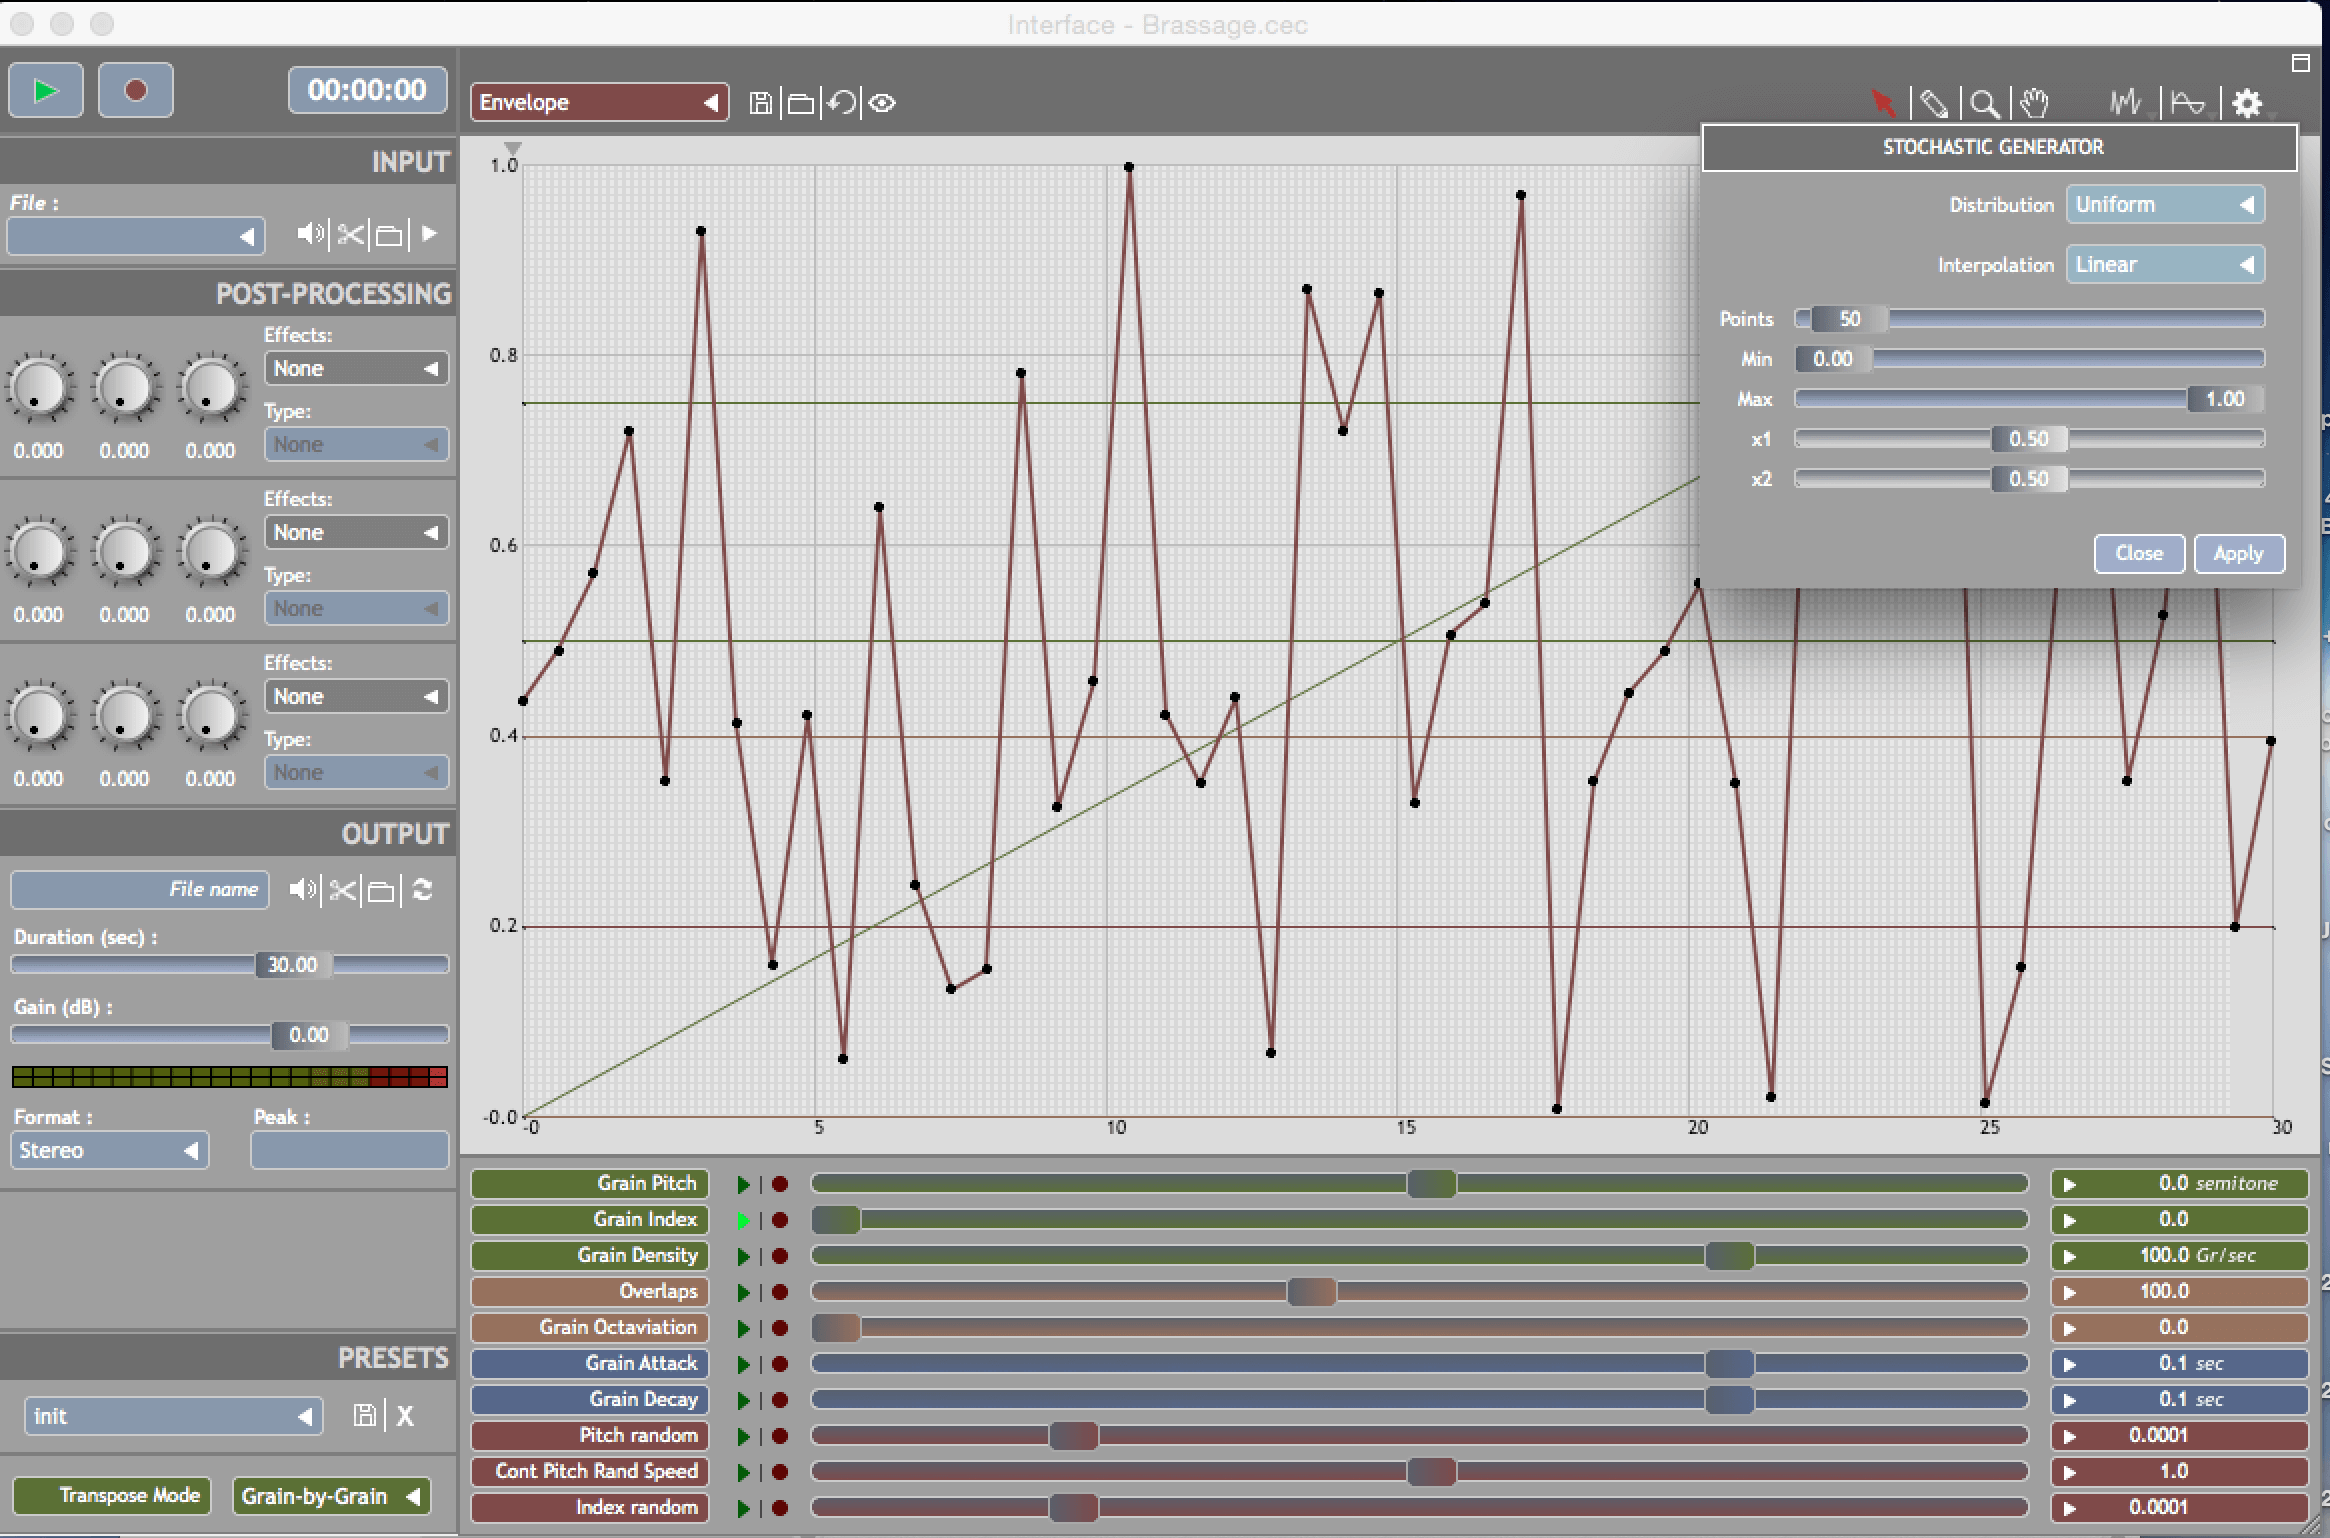
It is an audio signal processing software that allows users to do sound exploration and music composition, and it is intended for use by sound designers. It can run on Linux, Windows and Mac OS X.

It allows you to create a customized GUI by following a simple syntax. Cecilia has in-built modules that allow users to add sound effects and also for synthesis.

Cecilia Running On Linux

Cecilia Running On Linux

VisitCecilia Homepage

3. Mixxx

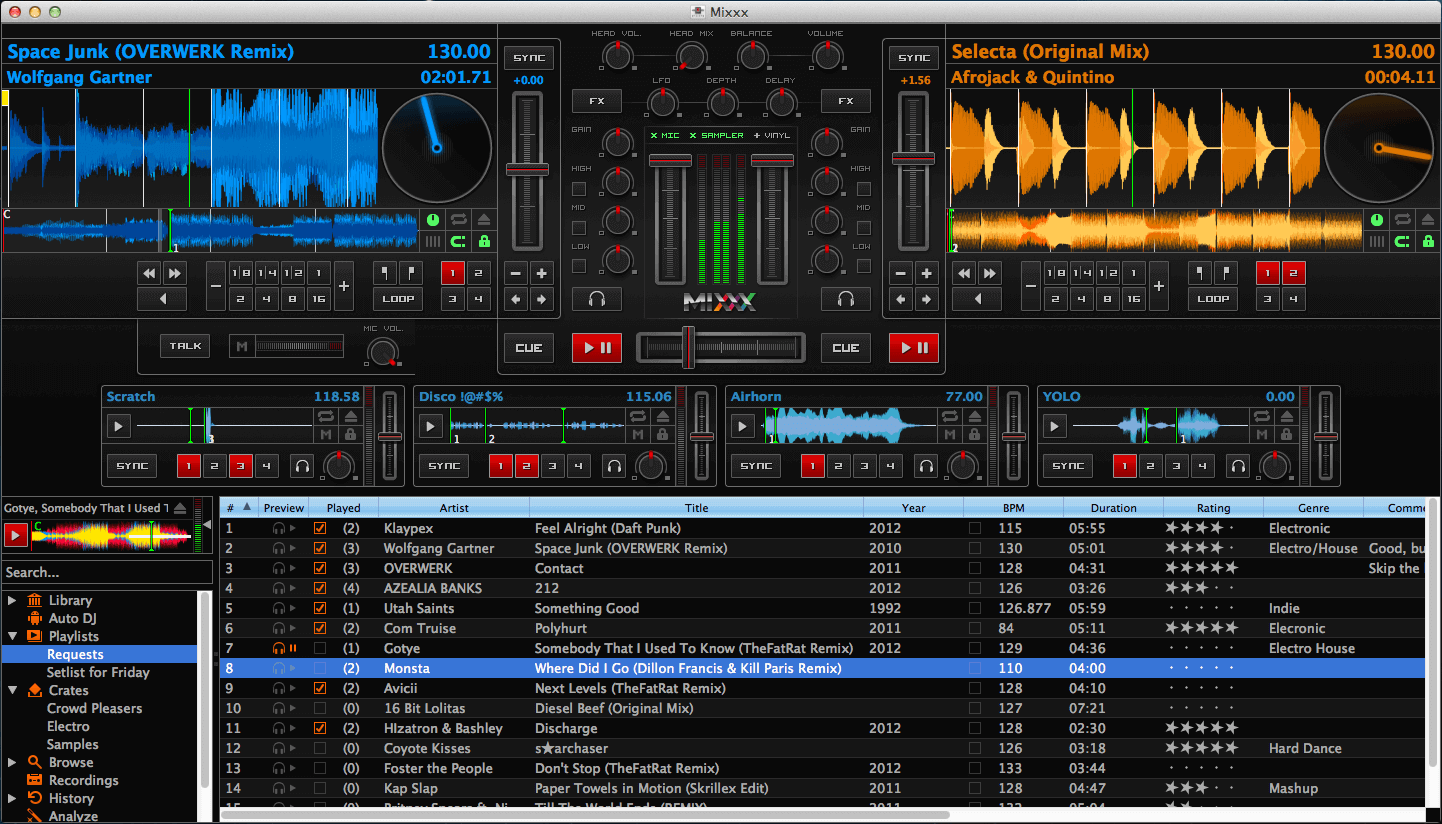
This is a music mixing software that can help you become a professional DJ. It is available on Linux, Mac OS X and Windows. It can help you test you audio after complete production by mixing it with other audio files while listening to it.

Therefore having it in a studio can be so helpful just in case the user is also a sound producer.

It has some of the following features:

  1. Four decks with advanced controls.
  2. In-built sound effects.
  3. Quad sampler decks.
  4. Designer skins.
  5. Record and broadcast functionality.
  6. DJ hardware support and many more.

Mixxx Running on Linux

Mixxx Running on Linux

VisitMixxx Homepage

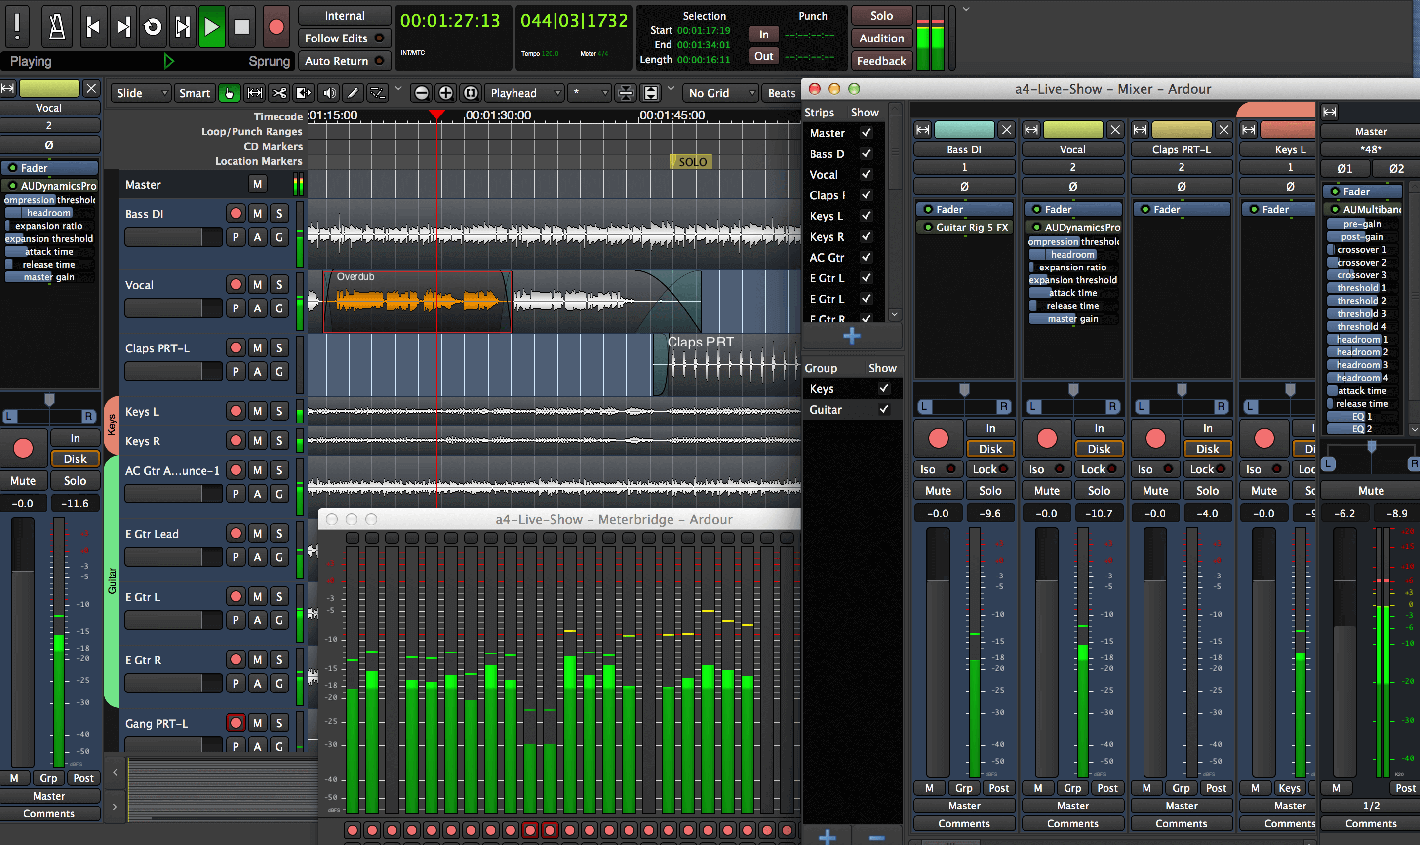
4. Ardour

It is available on Linux and Mac OS X and allows you to record, edit, mix and master audio and MIDI projects. It can be used by musicians, soundtrack editors and composers.

Ardour has some of the following features:

  1. Flexible recording.
  2. Unlimited multichannel tracks.
  3. Importing and exporting audio files of different formats.
  4. Extensible through plug-ins and In-line plug-in control .
  5. Automation and many more.

Ardour Running on Linux

Ardour Running on Linux

VisitArdour Homepage

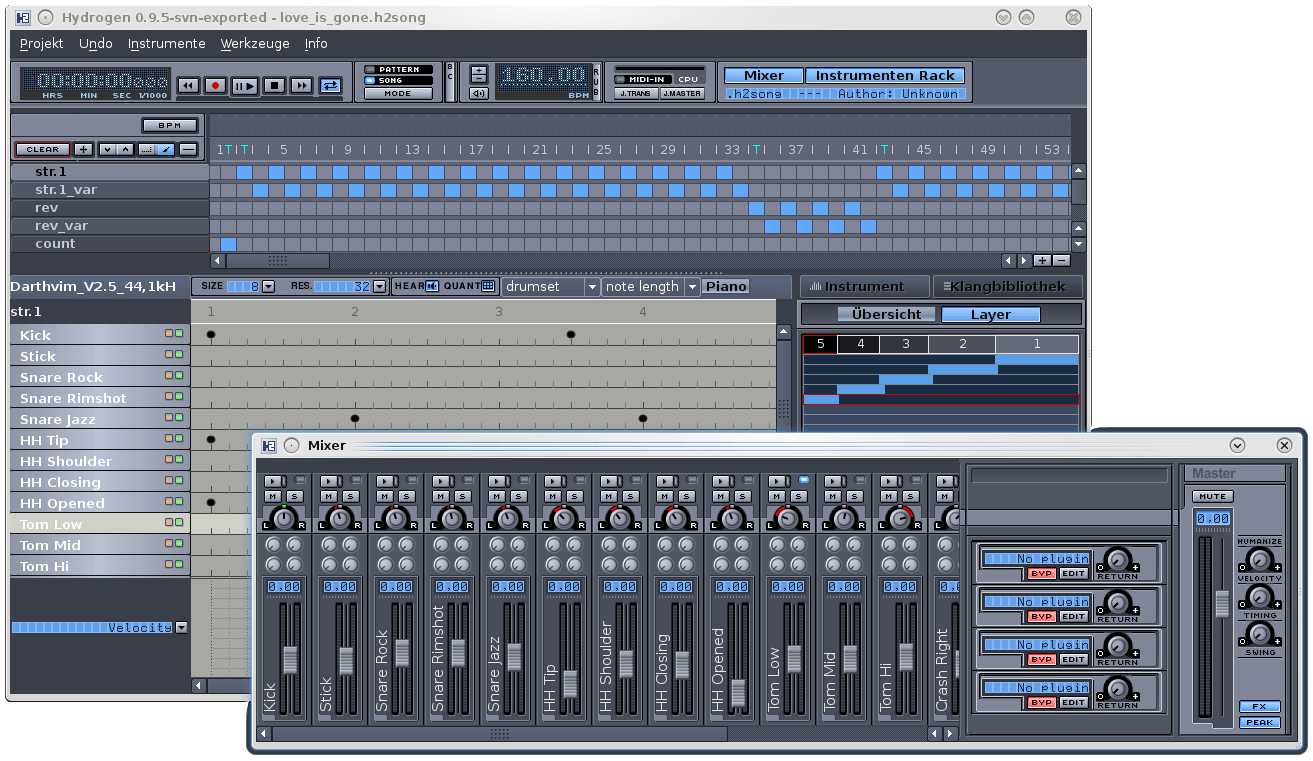
5. Hydrogen Drum Machine

It is an advanced drum sampler developed for Linux and Mac OS X operating systems though it is still experimental in OS X.

Hydrogen machine has some of the following features:

  1. User friendly and modular
  2. Fast and intuitive GUI
  3. Pattern based sequencer
  4. Multilayer instrument support
  5. Jack audio connection kit
  6. Import and export drum kits and also export audio files to different formats plus many more

Hydrogen Drum Machine

Hydrogen Drum Machine

VisitHydrogen Drum Machine Homepage

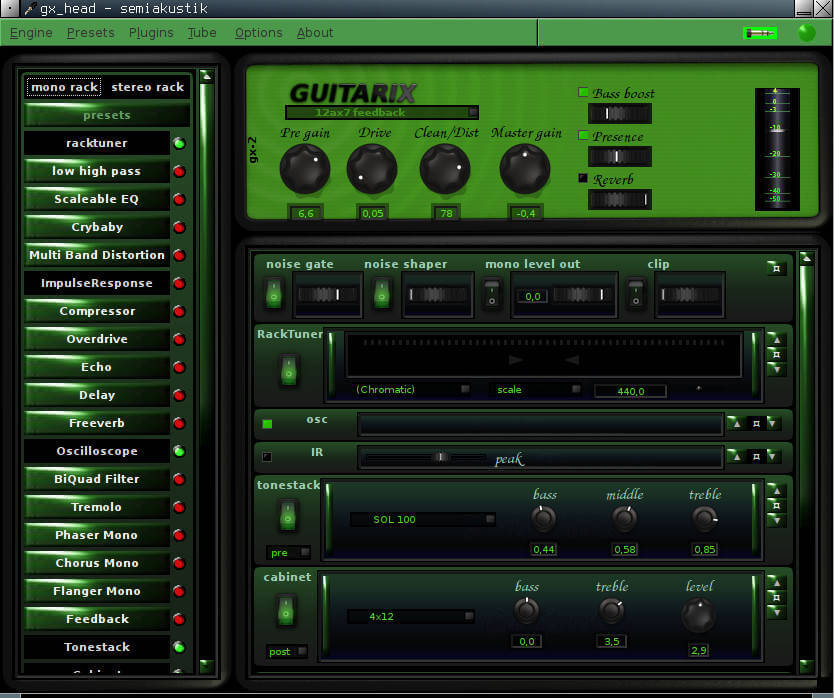
6. Guitarix

This is a virtual guitar amplifier and is available on Linux but can be built to work on BSD and Mac OS X. It runs on the Jack audio connection kit and works by taking signal from a guitar and processes it mono amp and a rack section. It also has in-built modules to allow you add effects to the rack.

Guitarix Running on Linux

Guitarix Running on Linux

VisitGuitarix Homepage

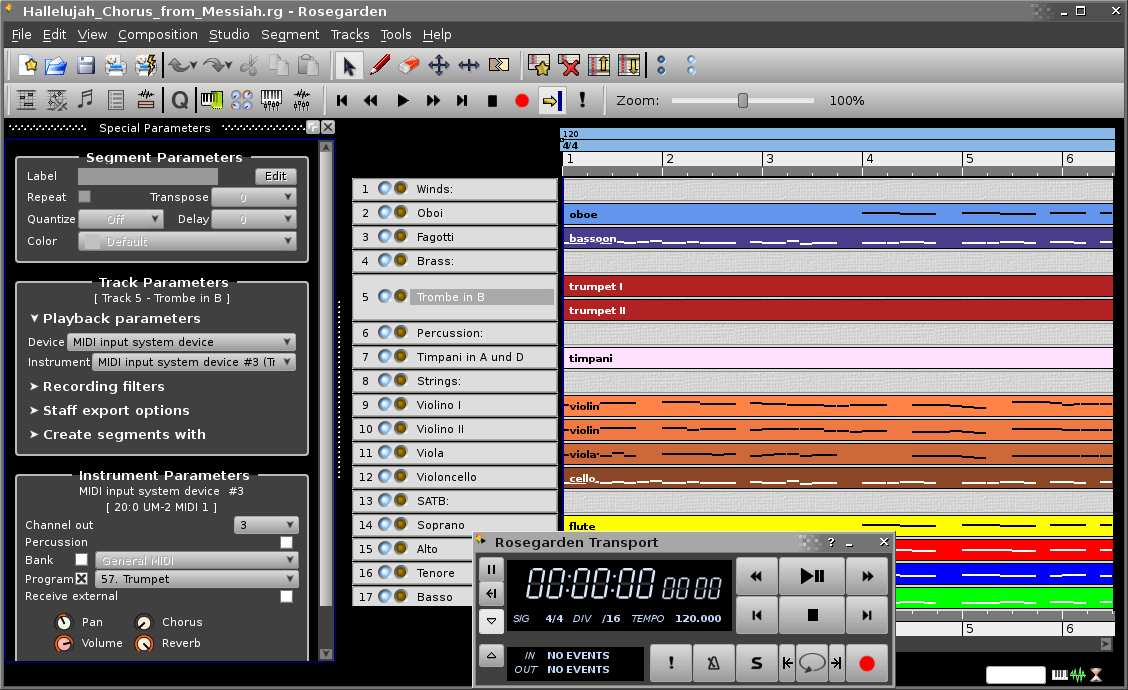
7. Rosegarden

It is a music composing and editing application available on Linux and it is intended for use by music composers, musicians can can be used in a home or small scale recording environments.

Great understanding of music notations makes it interesting for users who know and understand music notations. Furthermore, it also has some basic support for digital audio.

Rosegarden Running on Linux

Rosegarden Running on Linux

VisitRosegarden Homepage

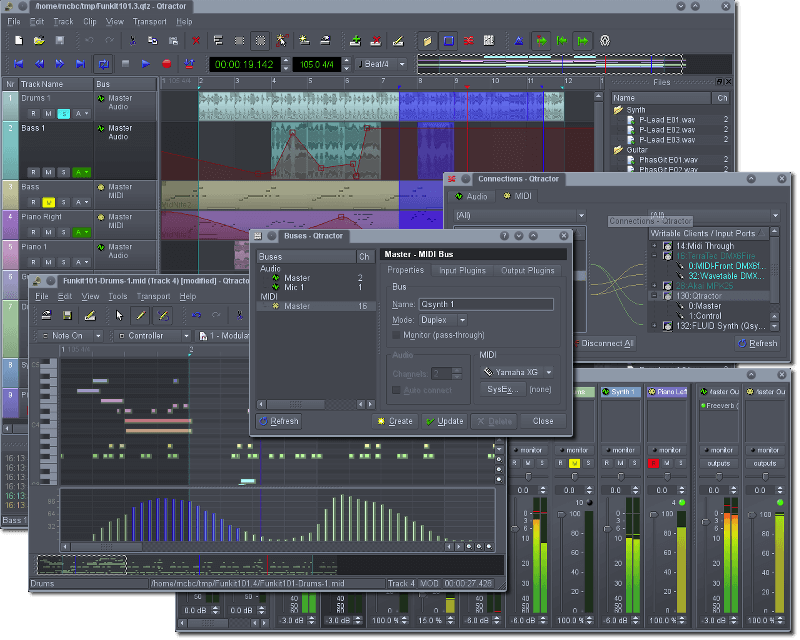
8. Qtractor

It is an audio Audio/MIDI multi track sequencer designed specifically for personal home studios. It runs on Linux as the target operating system.

It has some the following features:

  1. Use of Jack Audio Connection Kit for audio and Advanced Linux Sound Architecture sequencer for MIDI as multimedia infrastructures.
  2. Support for different audio formats such as WAV, MP3, AIFF, OGG and many more.
  3. In-built mixer and monitor controls.
  4. Loop recording.
  5. MIDI clip editor.
  6. Non-destructive and non-linear editing.
  7. Extensible through unlimited number of plug-Ins plus many more.

Qtractor Running on Linux

Qtractor Running on Linux

VisitQtractor Homepage

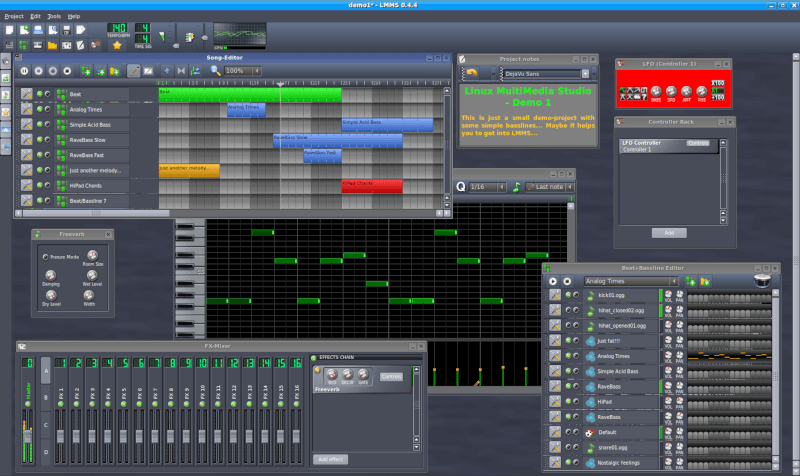
9. LMMS

LMMS (Let’s Make Music) is a free, open source and cross-platform software for making music on your computer, made by musicians, for musicians. It comes with a user-friendly and modern interface.

LMMS also comes with playback instruments, samples and plugins. It is bundled with ready-to-use content such as a collection of instrument and effect plugins, presets and samples to VST and SoundFont support.

LMMS - Digital Audio Workstation

LMMS – Digital Audio Workstation

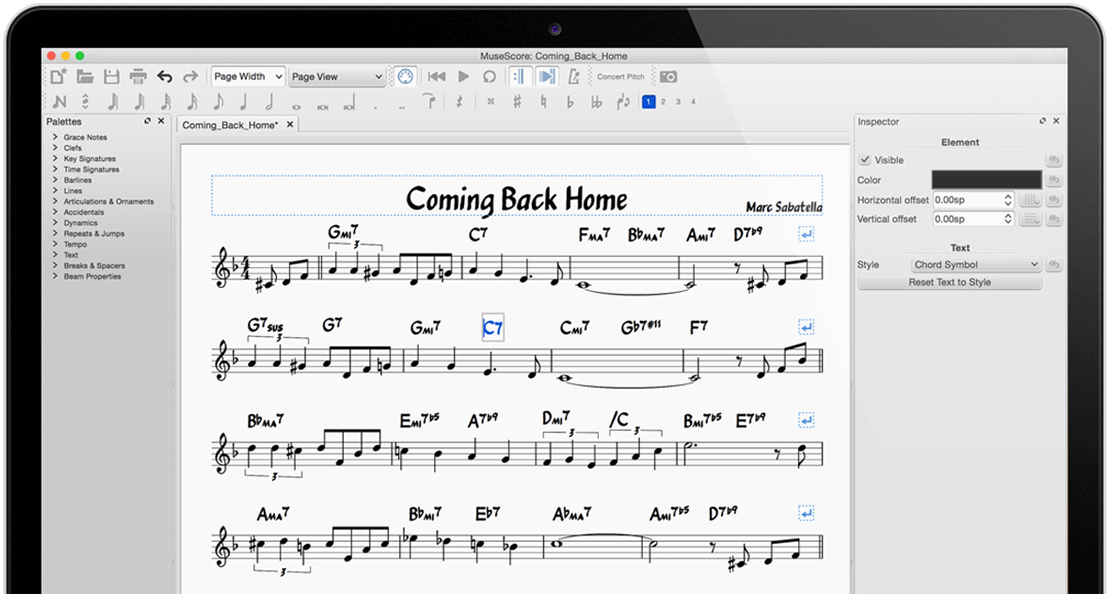
10. MuseScore

MuseScore is also a free, open source and easy to use, yet powerful tool for creating, playing and printing beautiful sheet music. It supports input via MIDI keyboard and also supports exporting to and from other programs via MusicXML, MIDI and more.

MuseScore - Music Notation Software

MuseScore – Music Notation Software

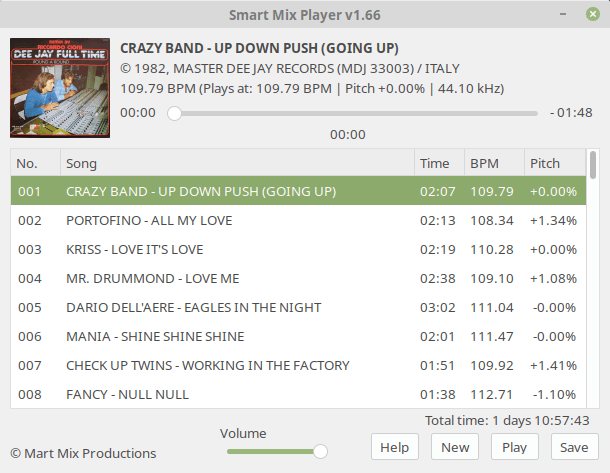
11. Smart Mix Player

Smart Mix Player is a free and configurable auto DJ player for Linux and Windows. All you need to do is configure it let the player mix songs automatically.

It plays audio files as a non stop mix; unlike other commonly used music mixing software out there that mix songs at the end, Smart Mix mixes like a real DJ.

Smart Mix Player - Auto DJ Player

Smart Mix Player – Auto DJ Player

12. Renoise [Not Open Source]

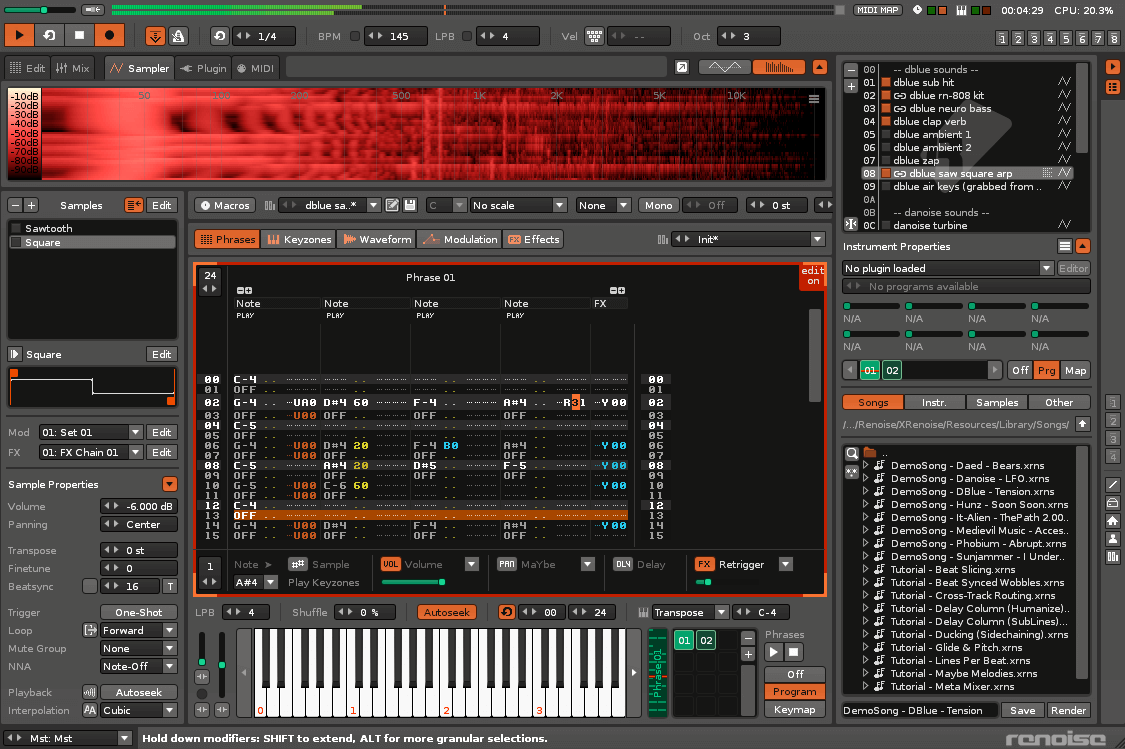
Renoise is a premium, powerful, cross-platform, and fully-featured Digital Audio Workstation (DAW) with a unique top-down approach.

Renoise features a wide range of modern features that allow you to record, compose, edit, process and render production-quality audio using a tracker-based approach. Importantly, it comes with Redux, a powerful yet affordable sampler and sequencer in the VST/AU format.

Renoise - Digital Audio Workstation

Renoise – Digital Audio Workstation

13. Virtual DJ [Not Open Source]

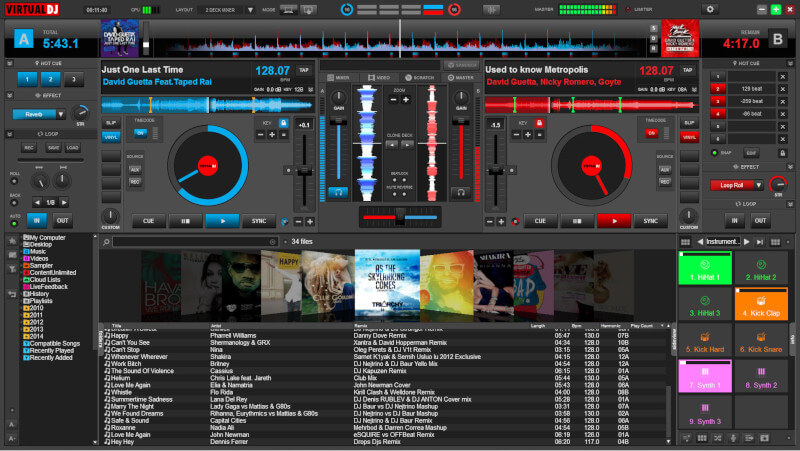
Virtual DJ is a premium, powerful, widely used, feature-rich and highly-configurable music mixing software. Many DJ hardware devices such as those from ‘Pioneer’ include built-in support for ‘Virtual DJ’. Unfortunately, Virtual DJ is designed to run on Windows and Mac OS X only.

To run Virtual DJ on GNU/Linux, you can use Wine, a tool that lets you run some of MS Windows software on GNU/Linux.

Virtual DJ - MP3 and Video Mix Software

Virtual DJ – MP3 and Video Mix Software

14. Aria Maestosa

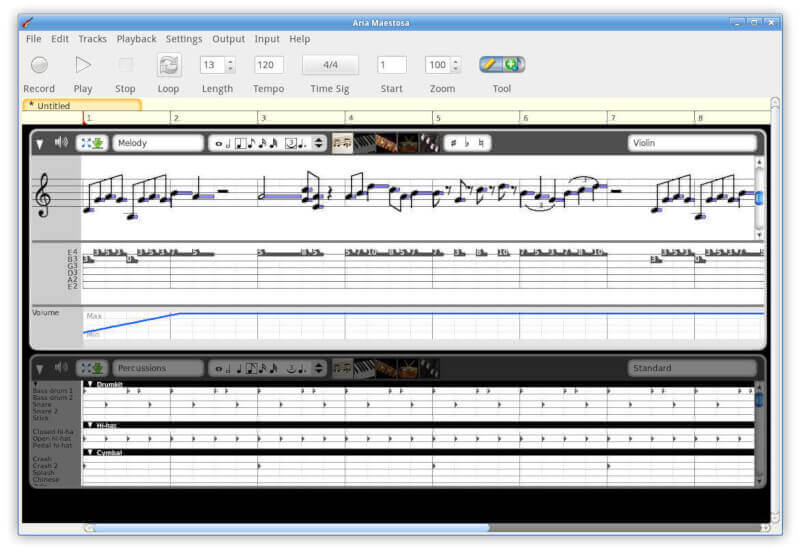
Aria Maestosa is a free and open-source midi sequencer and editor for Linux, that enables you to compose, edit and play midi files with a few easy clicks in a user-friendly interface providing score, keyboard, guitar, drum and controller views.

Aria Maestosa Midi Editor

Aria Maestosa Midi Editor

Summary

There are lot of music making and mixing software out there for the Linux operating system, we have just looked a few. You can let us know of what you are using by leaving a comment or make give some additional information on the ones we have looked at.

Source

9 Best File Comparison and Difference (Diff) Tools for Linux

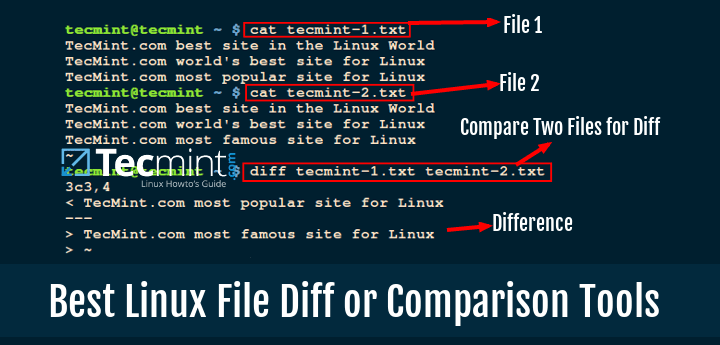
While writing program files or normal text files, programmers and writers sometimes want to know the difference between two files or two versions of the same file. When you compare two computer files on Linux, the difference between their contents is called a diff. This description was born out of a reference to the output of diff, the well known Unix command-line file comparison utility.

9 Best Linux File Diff or Comparison Tools

9 Best Linux File Diff or Comparison Tools

There are several file comparison tools that you can use on Linux, and in this review, we shall look at some of the best terminal based and GUI diff tools you can take advantage of while writing code or other text files.

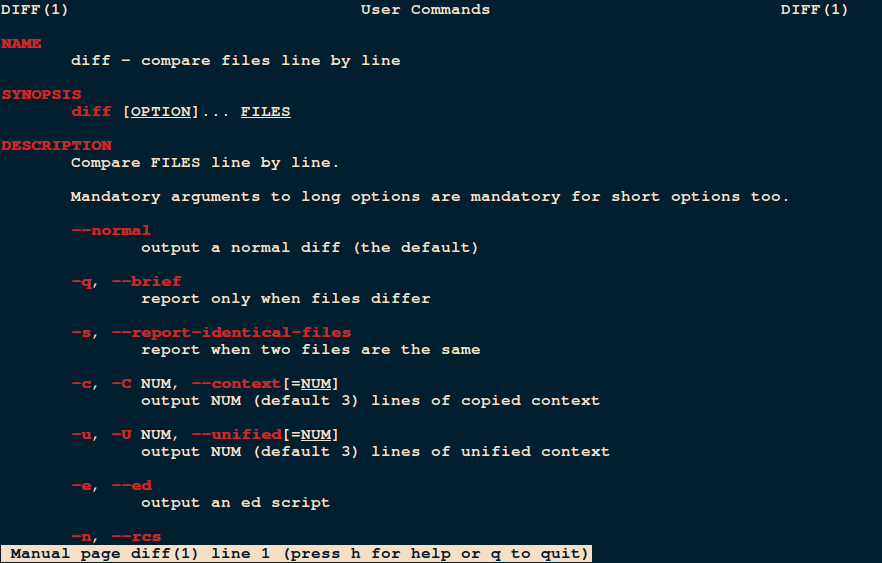
1. diff Command

I like to start with the original Unix command-line tool that shows you the difference between two computer files. Diff is simple and easy to use, it comes pre-installed on most Linux distributions. It compares files line by line and outputs the difference between them.

You can check out the manual entry for diff to easily use it.

# man diff

Linux diff Command to Compare Files

Linux diff Command to Compare Files

There are some wrappers for the diff tool that enhance its functionality and these include:

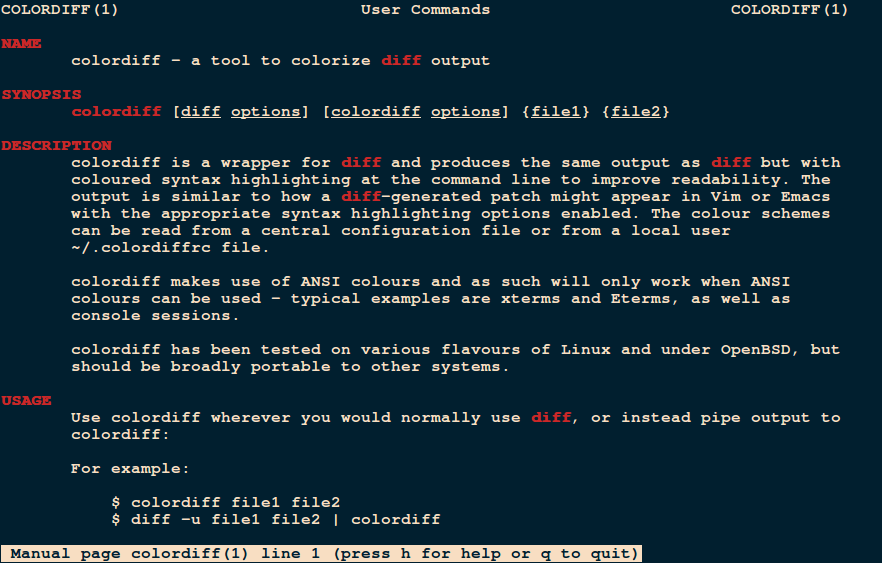
colordiff Command

Colordiff is a Perl script that produces same output as diff, but with color and syntax highlighting. It has customizable color schemes.

You can install Colordiff on your Linux systems, using default package manager tools called yumdnf or apt-getas shown.

# yum install colordiff             [On CentOS/RHEL/Fedora]
# dnf install colordiff             [On Fedora 23+ version]
$ sudo apt-get install colordiff    [On Debian/Ubuntu/Mint]

You can check out the manual entry for Colordiff as shown.

# man colordiff

Linux Colordiff Command - Color diff Output

Linux Colordiff Command – Color diff Output

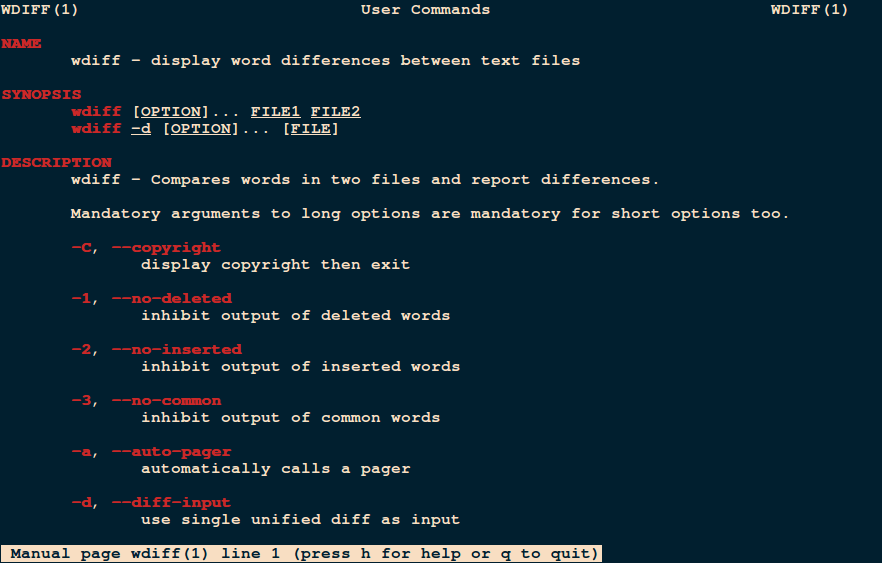
wdiff Command

The wdiff utility is a front end to diff command used to compare files on a word by word basis. This program is very useful when comparing two texts for changed words and for which paragraphs have been refilled.

To install wdiff on your Linux systems, run:

# yum install wdiff             [On CentOS/RHEL/Fedora]
# dnf install wdiff             [On Fedora 23+ version]
$ sudo apt-get install wdiff    [On Debian/Ubuntu/Mint]

Use wdiff manual for how to use it on Linux.

# man wdiff

wdiff Compare Two Files in Linux

wdiff Compare Two Files in Linux

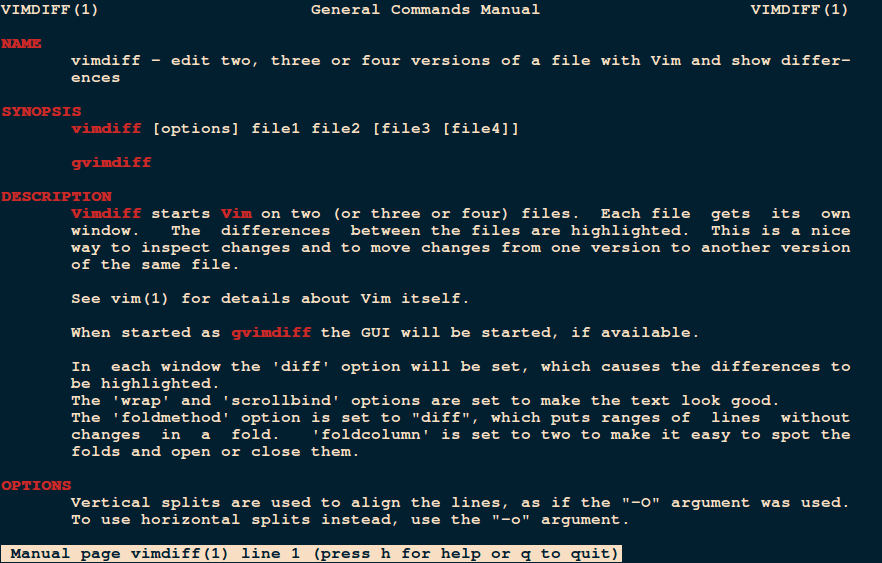
2. Vimdiff Command

Vimdiff works in an advanced manner in comparison to diff utility. It enables a user to edit up to four versions of a file while showing their differences. When you run it, Vimdiff opens two or three or four files using vim text editor.

Vimdiff Edit Multiple Files for Differences

Vimdiff Edit Multiple Files for Differences

Visit Homepagehttp://vimdoc.sourceforge.net/htmldoc/diff.html

Having looked the old school diff tools, lets quickly move to some GUI diff tools available on Linux.

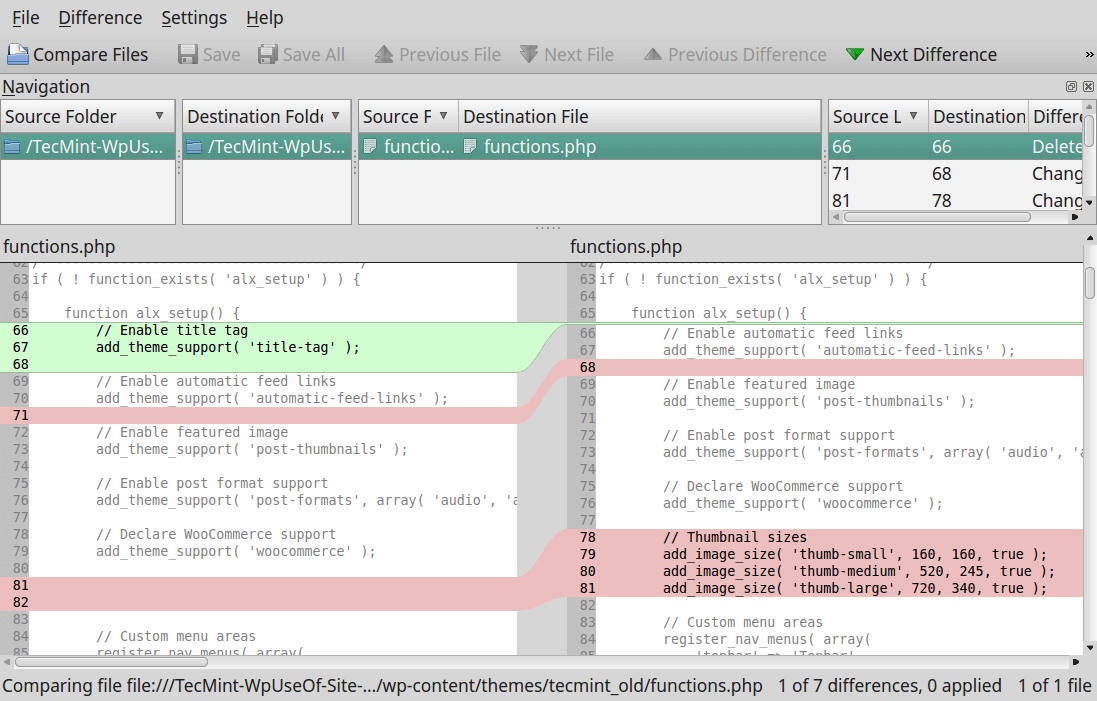
3. Kompare

Kompare is a diff GUI wrapper that allows users to view differences between files and also merge them.

Some of its features include:

  1. Supports multiple diff formats
  2. Supports comparison of directories
  3. Supports reading diff files
  4. Customizable interface
  5. Creating and applying patches to source files

Kompare Tool - Compare Two Files in Linux

Kompare Tool – Compare Two Files in Linux

Visit Homepagehttps://www.kde.org/applications/development/kompare/

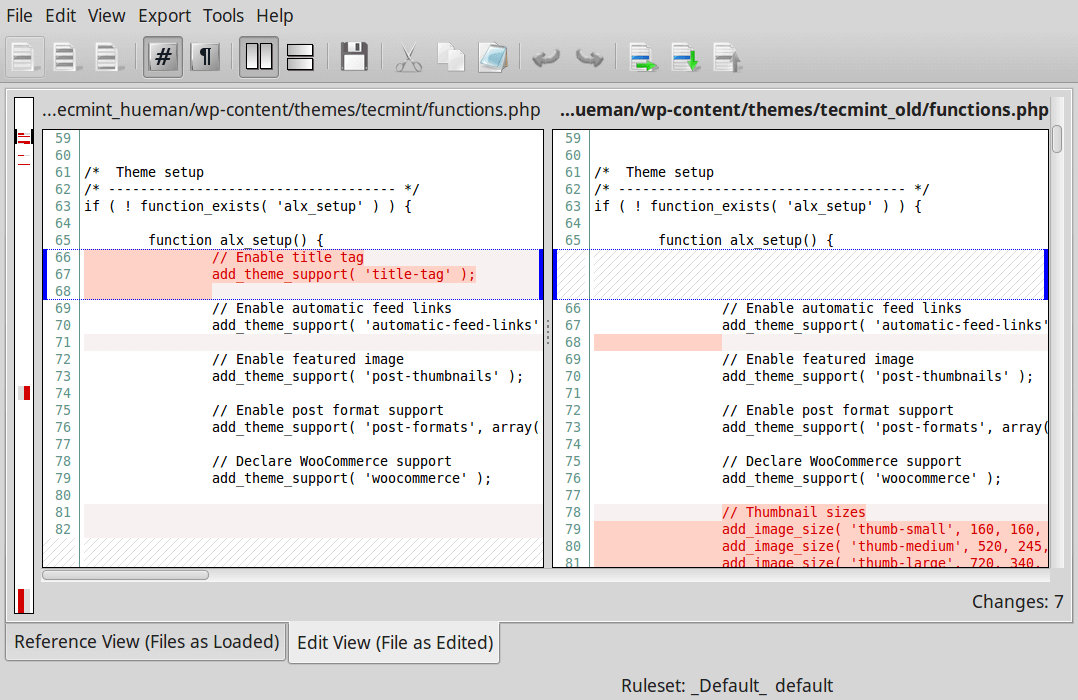
4. DiffMerge

DiffMerge is a cross-platform GUI application for comparing and merging files. It has two functionality engines, the Diff engine which shows the difference between two files, which supports intra-line highlighting and editing and a Merge engine which outputs the changed lines between three files.

It has got the following features:

  1. Supports directory comparison
  2. File browser integration
  3. Highly configurable

DiffMerge - Compare Files in Linux

DiffMerge – Compare Files in Linux

Visit Homepagehttps://sourcegear.com/diffmerge/

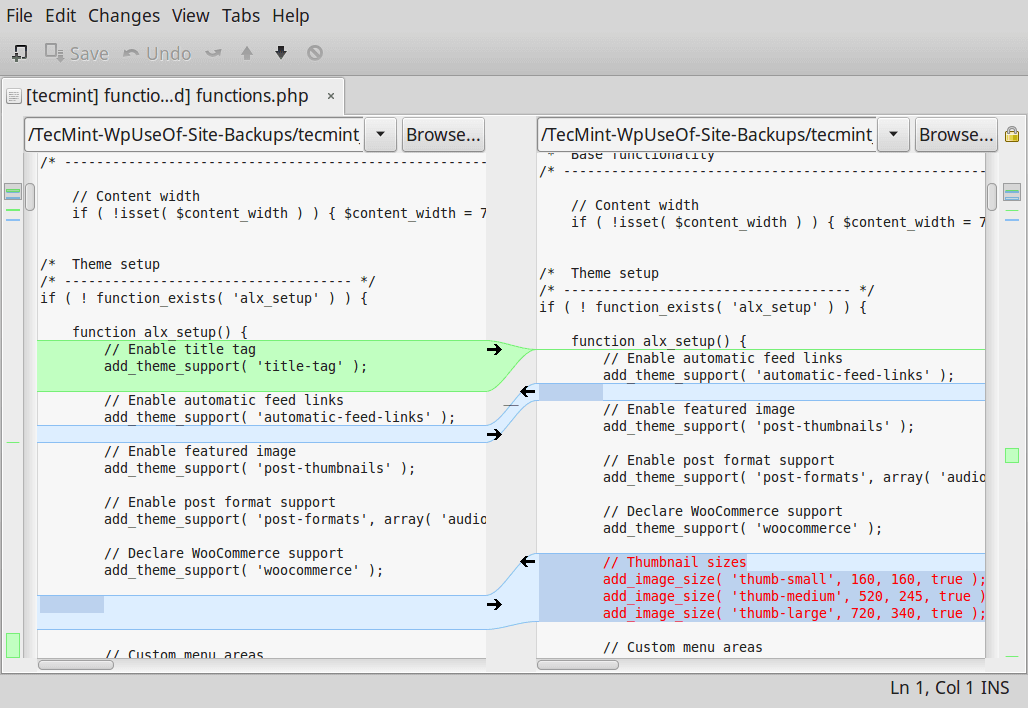
5. Meld – Diff Tool

Meld is a lightweight GUI diff and merge tool. It enables users to compare files, directories plus version controlled programs. Built specifically for developers, it comes with the following features:

  1. Two-way and three-way comparison of files and directories
  2. Update of file comparison as a users types more words
  3. Makes merges easier using auto-merge mode and actions on changed blocks
  4. Easy comparisons using visualizations
  5. Supports Git, Mercurial, Subversion, Bazaar plus many more

Meld - A Diff Tool to Compare File in Linux

Meld – A Diff Tool to Compare File in Linux

Visit Homepagehttp://meldmerge.org/

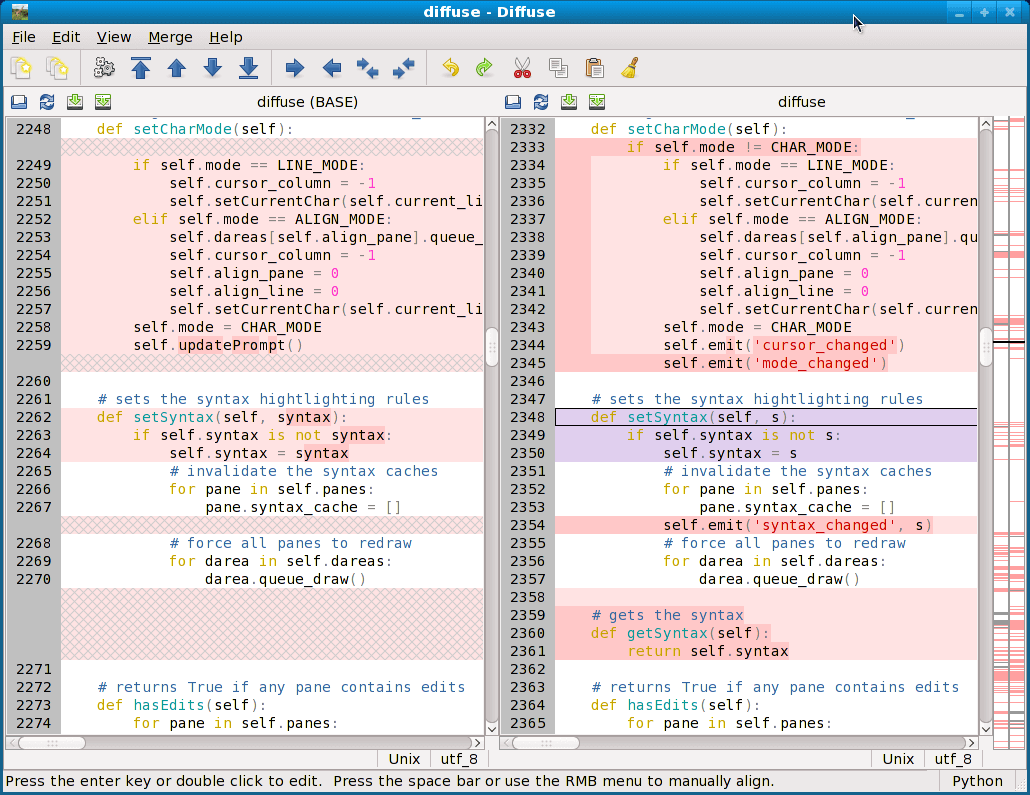
6. Diffuse – GUI Diff Tool

Diffuse is another popular, free, small and simple GUI diff and merge tool that you can use on Linux. Written in Python, It offers two major functionalities, that is: file comparison and version control, allowing file editing, merging of files and also output the difference between files.

You can view a comparison summary, select lines of text in files using a mouse pointer, match lines in adjacent files and edit different file. Other features include:

  1. Syntax highlighting
  2. Keyboard shortcuts for easy navigation
  3. Supports unlimited undo
  4. Unicode support
  5. Supports Git, CVS, Darcs, Mercurial, RCS, Subversion, SVK and Monotone

DiffUse - A Tool to Compare Text Files in Linux

DiffUse – A Tool to Compare Text Files in Linux

Visit Homepagehttp://diffuse.sourceforge.net/

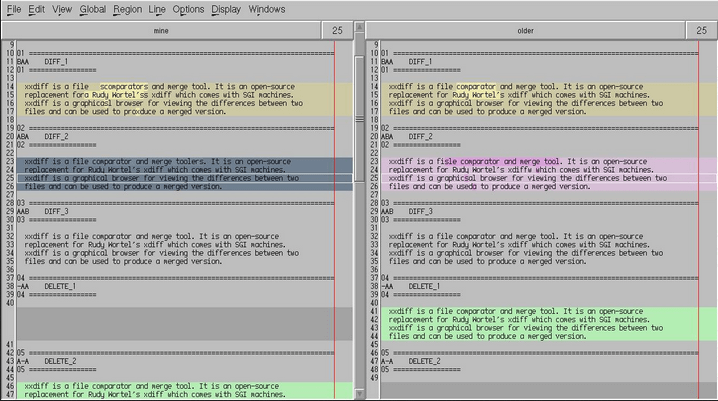
7. XXdiff – Diff and Merge Tool

XXdiff is a free, powerful file and directory comparator and merge tool that runs on Unix like operating systems such as Linux, Solaris, HP/UX, IRIX, DEC Tru64. One limitation of XXdiff is its lack of support for unicode files and inline editing of diff files.

It has the following list of features:

  1. Shallow and recursive comparison of two, three file or two directories
  2. Horizontal difference highlighting
  3. Interactive merging of files and saving of resulting output
  4. Supports merge reviews/policing
  5. Supports external diff tools such as GNU diff, SIG diff, Cleareddiff and many more
  6. Extensible using scripts
  7. Fully customizable using resource file plus many other minor features

xxdiff Tool

xxdiff Tool

Visit Homepagehttp://furius.ca/xxdiff/

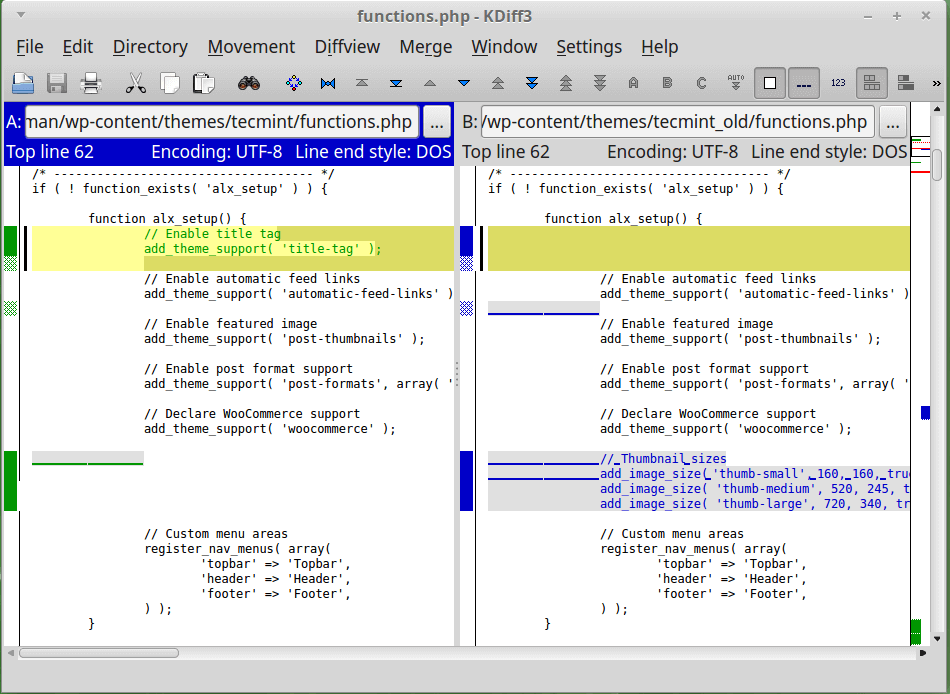
8. KDiff3 – – Diff and Merge Tool

KDiff3 is yet another cool, cross-platform diff and merge tool made from KDevelop. It works on all Unix-like platforms including Linux and Mac OS X, Windows.

It can compare or merge two to three files or directories and has the following notable features:

  1. Indicates differences line by line and character by character
  2. Supports auto-merge
  3. In-built editor to deal with merge-conflicts
  4. Supports Unicode, UTF-8 and many other codecs
  5. Allows printing of differences
  6. Windows explorer integration support
  7. Also supports auto-detection via byte-order-mark “BOM”
  8. Supports manual alignment of lines
  9. Intuitive GUI and many more

KDiff3 Tool for Linux

KDiff3 Tool for Linux

Visit Homepagehttp://kdiff3.sourceforge.net/

9. TkDiff

TkDiff is also a cross-platform, easy-to-use GUI wrapper for the Unix diff tool. It provides a side-by-side view of the differences between two input files. It can run on Linux, Windows and Mac OS X.

Additionally, it has some other exciting features including diff bookmarks, a graphical map of differences for easy and quick navigation plus many more.

Visit Homepagehttps://sourceforge.net/projects/tkdiff/

Having read this review of some of the best file and directory comparator and merge tools, you probably want to try out some of them. These may not be the only diff tools available you can find on Linux, but they are known to offer some the best features, you may also want to let us know of any other diff tools out there that you have tested and think deserve to be mentioned among the best.

Source

10 Best Clipboard Managers for Linux

Many times you get frustrated after copying something to your clipboard and then end up clearing it due to distraction from something else or someone. It can be annoying when this actually happens.

But how can you do away with such frustration? That is the question we are going to answer in this article.

Here, we shall look at clipboard managers that can help you manage and keep track of you clipboard contents.

What is a Clipboard Manager?

You can refer to a clipboard manager as a utility or tool that is runs in the background of your Linux system and keeps a history everything that you have saved to your system clipboard.

Why you actually need a Clipboard Manager?

One important use of clipboard managers is that you do not have to worry of clearing or overwriting your clipboard content especially if you a programmer or writer and do a lot of copy and paste.

There are many tools out there that can help you manage your Linux clipboard and these include:

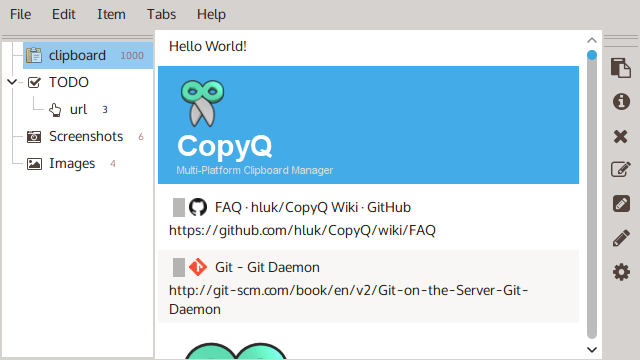
1. CopyQ

This is a advanced clipboard manager which is available on most if not all platforms. It has editing and scripting features including some of the following:

  1. Command line control and scripting
  2. Searchable
  3. Image format support
  4. Editable history
  5. Customize tray menu
  6. Fully customizable appearance
  7. Variety of system-wide shortcuts and many more.

CopyQ Clipboard Manager

CopyQ Clipboard Manager

Visit Homepagehttp://hluk.github.io/CopyQ/

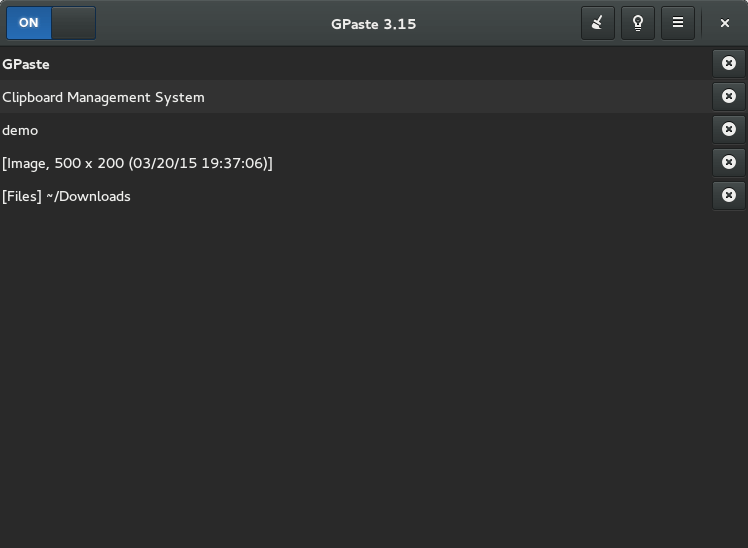
2. GPaste

It is a powerful and great clipboard manager for GNOME based distributions, but can work on a variety of desktop environments as well.

It has features such as:

  1. Integration with the GNOME shell
  2. Clipboard history management
  3. Quick access shortcuts
  4. Copying images
  5. GTK+3 GUI

GPaste Clipboard Manager

GPaste Clipboard Manager

Visit Homepagehttps://github.com/Keruspe/GPaste

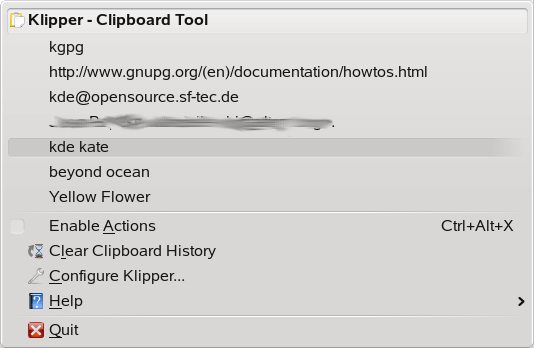
3. Klipper

Klipper is a clipboard manager for the KDE desktop environment. It offers fundamental features similar to that offered by Gpaste, but is also has some advanced and power features such as clipboard actions.

Some of its features include:

  1. History management
  2. Quick access shortcuts
  3. Image copying
  4. Create custom actions

Klipper Clipboard Manager

Klipper Clipboard Manager

Visit Homepagehttps://userbase.kde.org/Klipper

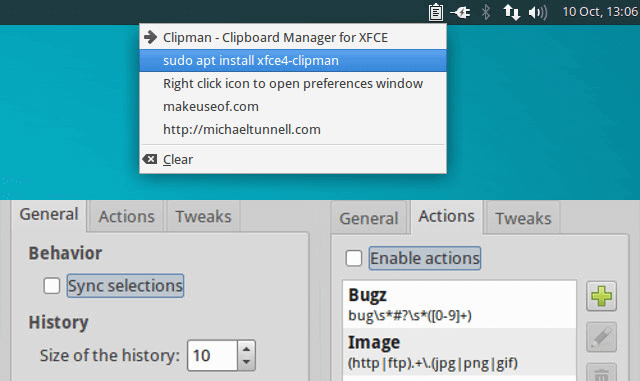
4. Clipman

It is a lightweight clipboard plugin option for XFCE desktop environment and works well on XFCE based distributions such as Xubuntu.

It is feature rich including:

  1. History management
  2. Access shortcuts
  3. Ignoring application closure signals
  4. Tweaks support and many more

Clipman Clipboard Manager

Clipman Clipboard Manager

Visit Homepagehttps://sourceforge.net/projects/clipman/

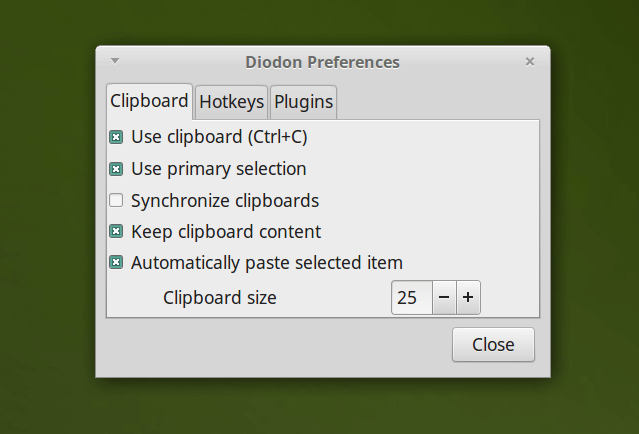
5. Diodon

It is a light weight but yet powerful clipboard manager designed to work best when integrated with Unity and GNOME desktop environments.

It has the following features similar to other clipboard management tools:

  1. Desktop integration
  2. History management in terms of size and so on
  3. Quick access shortcuts
  4. Copying images

Diodon Clipboard Manager

Diodon Clipboard Manager

Visit Homepagehttps://launchpad.net/diodon

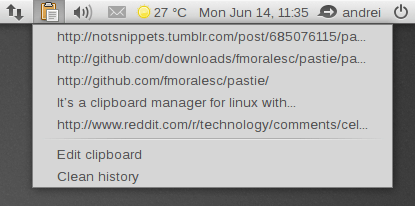
6. Pastie

This is a simple clipboard manager for Ubuntu and makes use of the AppIndicator. It has some cool features that include among others:

  1. Image copy support
  2. Customizable interface
  3. Quick access shortcuts and so much more

Pastie Clipboard Manager

Pastie Clipboard Manager

Visit Homepagehttps://github.com/fmoralesc/pastie

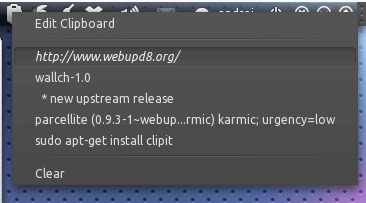
7. Parcellite

It is a stripped down, lightweight GTK+2, basic-features clipboard manager for Linux.

It has some of the following features:

  1. History management
  2. Daemon mode
  3. Display clipboard contents quickly using global hotkeys
  4. Perform custom commands using clipboard contents

Parcellite Clipboard Manager

Parcellite Clipboard Manager

Visit Homepagehttp://parcellite.sourceforge.net/

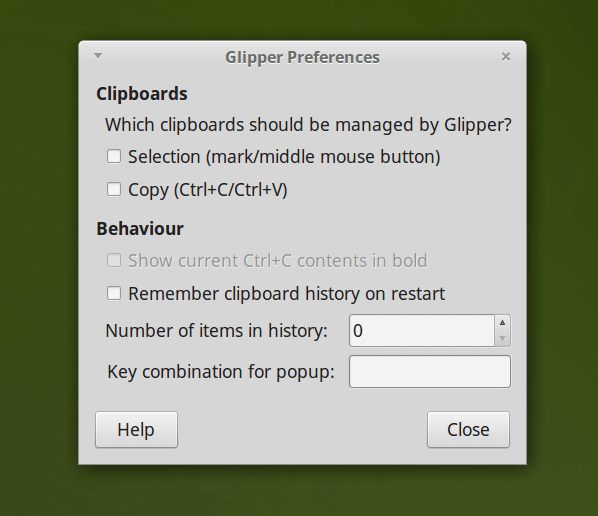
8. Glipper

It is a clipboard management tool for GNOME desktop environment, users can extend its functionality using plugins. It now uses the App Indicator to support Unity and Gnome Classic desktop environments in Ubuntu.

Glipper has most of the fundamental features including clipboard history management.

Glipper Clipboard Manager

Glipper Clipboard Manager

Visit Homepagehttps://launchpad.net/glipper

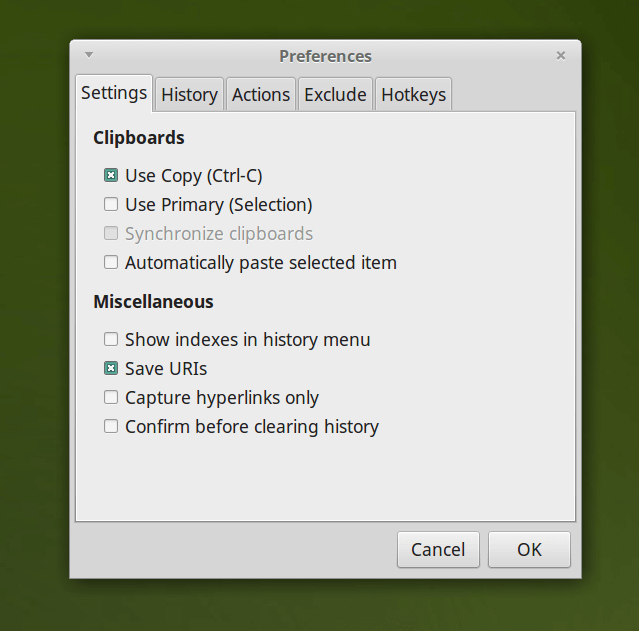
9. Clipit

This is a lightweight GTK+ clipboard manager. It is feature rich and actually forked from Parcellite, but includes some extra features and bug fixes.

It has got the following features:

  1. Save history of last copied item
  2. Global hotkeys for most used functions
  3. Declare static items
  4. Exclude specific items from history
  5. Searchable history and many more

Clipit Clipboard Manager

Clipit Clipboard Manager

Visit Homepagehttps://sourceforge.net/projects/gtkclipit/

10. Keepboard

It is a cross-platform clipboard manager that allows users to save clipboard history.

Visit Homepagehttps://sourceforge.net/projects/keepboard/

Summary

That is it for now, there could be some clipboard management utilities or tools that I have not included in the article, let us know of any by dropping a comment. Hope you find this article useful.

Source

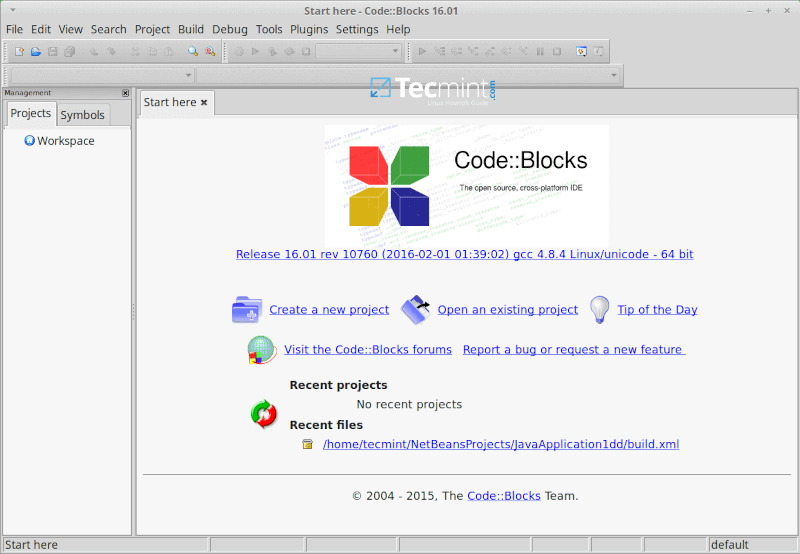
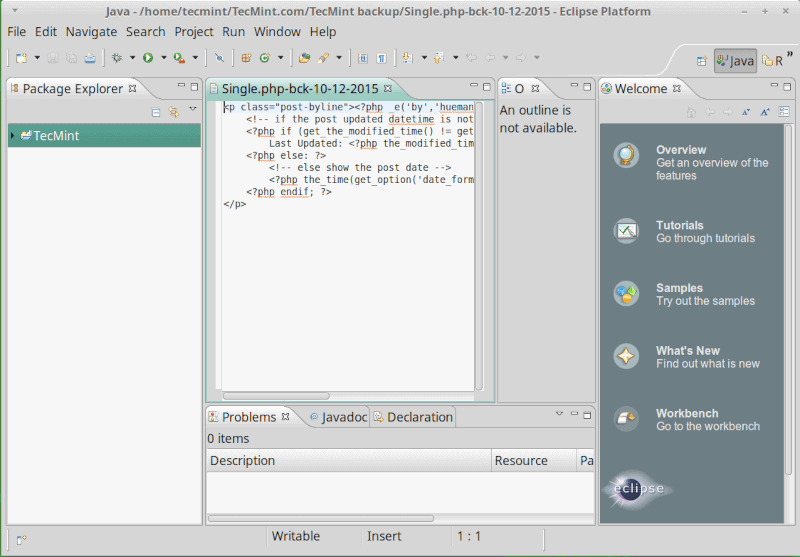
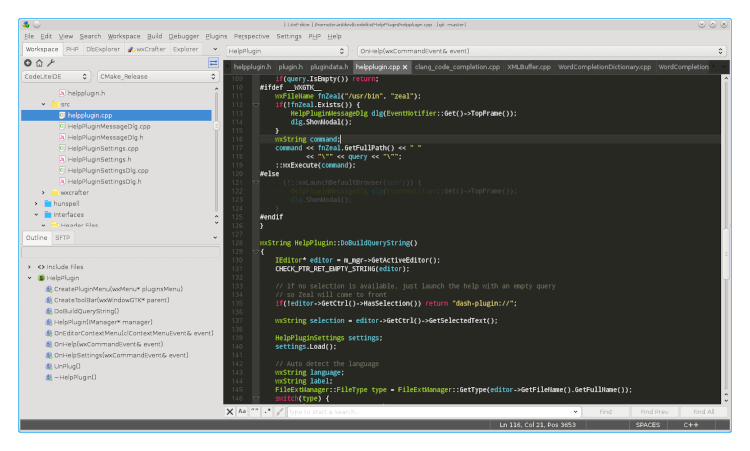
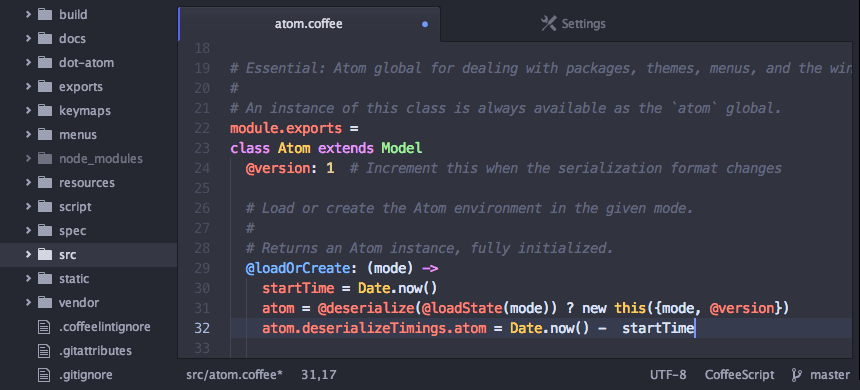
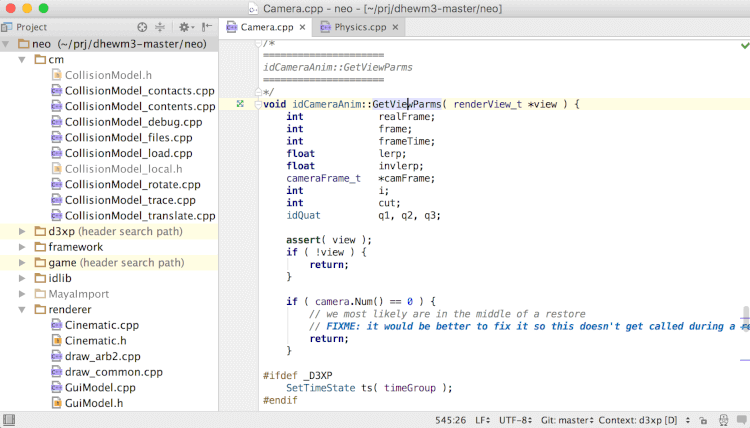
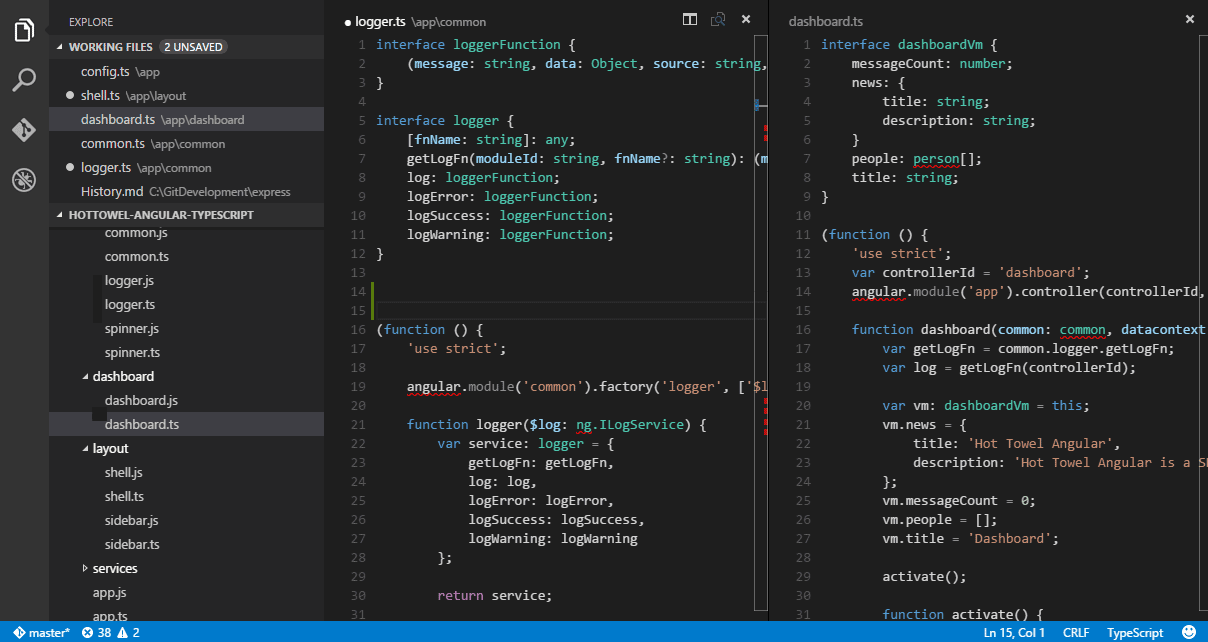
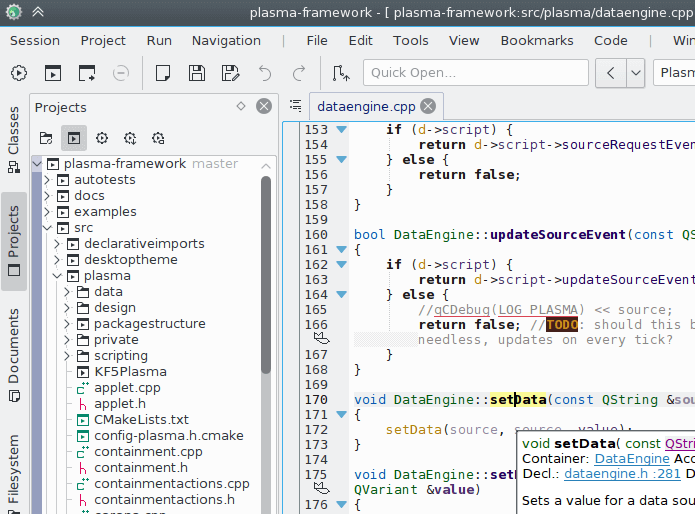
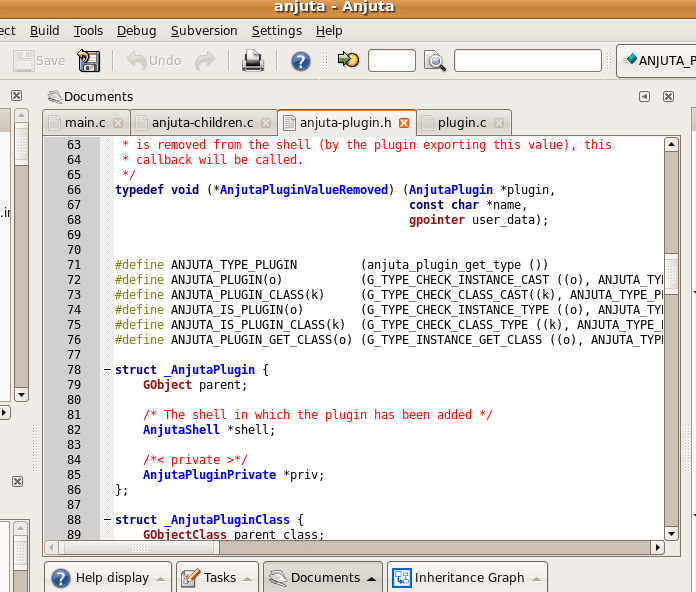
18 Best IDEs for C/C++ Programming or Source Code Editors on Linux

C++, an extension of well known C language, is an excellent, powerful and general purpose programming language that offers modern and generic programming features for developing large-scale applications ranging from video games, search engines, other computer software to operating systems.

C++ is highly reliable and also enables low-level memory manipulation for more advanced programming requirements.

Best Linux IDE Editors or Source Code Editors

Best Linux IDE Editors or Source Code Editors

There are several text editors out there that programmers can use to write C/C++ code, but IDE have come up to offer comprehensive facilities and components for easy and ideal programming.

Don’t Miss: 12 Best Text Editors (GUI + CLI) for Linux I Found in 2015

In this article, we shall look at some of the best IDE’s you can find on the Linux platform for C++ or any other programming.

1. Netbeans for C/C++ Development

How to Host Multiple Linux Terminals for Viewing and Collaboration with Wemux

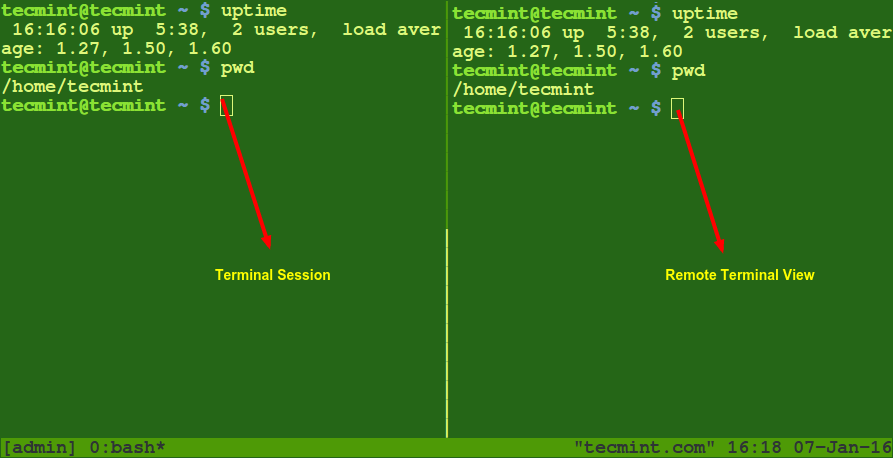
Now we will introduce you to wemux (a multi-user version of tmux), which not only includes the features provided by tmux, but also allows users to host a multi-terminal environment where clients can join in viewing or collaborative mode.

Wemux View Remote Linux Terminal Session

Wemux View Remote Linux Terminal Session

In other words, you can host a session where others can view what you do in the terminal (to perform a demonstration, for example), or to collaborate with them.

To help you get the most of wemux, I highly recommend you take a look at the previous guide about tmux before going through the present article.

Installing and Configuring Wemux Multi-User Terminal

As a prerequisite before installing wemux, we will use git to clone the project’s repository in our local system. If the following command shows that git is not found in your system:

# which git 

as indicated by:

/usr/bin/which: no git in (/usr/local/sbin:/usr/local/bin:/sbin:/bin:/usr/sbin:/usr/bin:/root/bin) 

Install it before proceeding (use yum or aptitude depending on your distribution):

# yum install git       [On RedHat based systems] 
# dnf install git       [On Fedora 22+ versions]
# aptitude install git  [On Debian based systems]

Then,

1. Clone the remote repository.

# git clone git://github.com/zolrath/wemux.git /usr/local/share/wemux 

2. Create a symbolic link to the wemux executable inside /usr/local/bin or another directory in your $PATHvariable.

# ln -s /usr/local/share/wemux/wemux /usr/local/bin/wemux 

3. Copy the configuration sample configuration file into /usr/local/etc.

# cp /usr/local/share/wemux/wemux.conf.example /usr/local/etc/wemux.conf 

And insert the following line:

host_list=(user1 user2 user3) 

where user1user2, and user3 are users who are allowed to start wemux servers. You can add as many users as needed separated by spaces. Other users will be able to connect to a running wemux server but will not be allowed to start one.

Introducing wemux Multi-User Terminal

To simplify things, please keep in mind that you can think of wemux as a tool that facilitates console viewing and mutual collaboration on the same tmux session.

As explained earlier, in the configuration file (/usr/local/etc/wemux.conf), you must have already indicated which users will be allowed to start a wemux server, or in other words, a tmux session that other users will be able to attach to. In this context, these “users” are called clients.

To summarize:

  1. Wemux server: a tmux session.
  2. Wemux clients: users joining the tmux session described above.

These are the commands that are used to manage wemux servers:

    1. wemux or wemux start: starts a new wemux server (if none exists; otherwise creates a new one) and creates a socket in /tmp/wemux-wemux whose permissions need to be set to 1777 so that other users may connect or attach to it:
# chmod 1777 /tmp/wemux-wemux 
  1. wemux attach hooks you up to an existing wemux server.
  2. wemux stop kills the wemux server and removes the socket created earlier. This command needs to be executed from a separate terminal. Alternatively, you can use the exit shell builtin to close panes and eventually to return to your regular shell session.
  3. wemux kick username gets rid of the user currently logged on via SSH from the wemux server and removes his / her rogue sessions (more on this in a minute). This command requires that the wemux server has been started as root or with sudo privileges.
  4. wemux config opens the configuration file in the text editor indicated by the environment variable $EDITOR (only if such variable is configured in your system, which you can verify with echo $EDITOR).

All of the tmux commands listed previously are valid within wemux, with the advantage that the client may attach to a wemux server in one of three modes.

To do so, execute the command found in the COMMAND column below in a “prospective client“, so to speak (it will become an actual client once it has joined the wemux server):

Mode Description Commands
Mirror Read-only, non-interactive wemux mirror
Pair Interactive, client shares cursor with the server wemux pair
Rogue Joins an existing session but allows the client to uses independent windows wemux rogue

Let’s take a look at the following screencast for a brief demonstration of the three client modes outlined in the above table (same order). Please note that I used Terminator in order to start the server (as user gacanepa) in the left pane and connect a client (as user test) in the right pane.

Thus, you can easily see how a wemux server works while interacting with one client. By repeating the the process that is used by a client to join a wemux server, you can have multiple clients do the same simultaneously.

Other Features of wemux Terminal

If the above paragraphs didn’t give you enough reasons to give wemux a try, hopefully the following features will convince you.

Users that are allowed to start wemux servers (as per the host_list directive in /usr/local/etc/wemux.conffile) can host multiple sessions simultaneously if the allow_server_change directive is set to true:

allow_server_change="true"

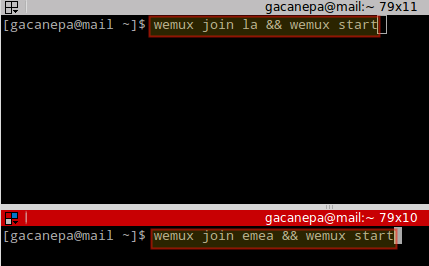
To start two sessions named la and emea, execute the following commands in two different terminals:

# wemux join la && wemux start
# wemux join emea && wemux start

Again, we will use Terminator to view the two terminals at the same time (this is similar to what you could expect by switching to different consoles with Ctrl+Alt+F1 through F7):

View Two Linux Terminals

Img 01: View Two Linux Terminals

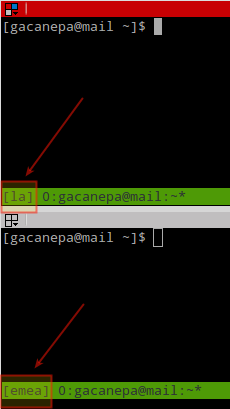
After you press Enter, both sessions are started separately:

Start Multiple User Terminal Sessions

Img 02: Start Multiple User Terminal Sessions

Then you can have a client join either session with:

# wemux join la && wemux attach
Or
# wemux join emea && wemux attach

Finally, to have a remote user (connecting via SSH) start automatically on wemux after logon and disconnect them from the server when they detach, append the follow stanza to its ~/.bash_profile file:

wemux [mode]; exit

where [mode] is one of the client modes listed earlier.
Alternatively, a client can switch from one server to another using:

# exit
# wemux join [server name here] && wemux [mode]

Summary

In this article we have explained how to use wemux to set up remote viewing of your terminal (and even mutual collaboration) very easily. Being released under the MIT license, wemux is open source software and you can further customize it according to your needs.

The source code is found in wemux Github and available in your system in /usr/local/bin/wemux. In the same Github repository you can find more information about this program.

Did you find this post useful? Please let us know what you think using the form below.

Referencehttps://github.com/zolrath/wemux

Source

OwnCloud 9 Released – Create Personal/Private Cloud Storage in Linux

Cloud storage stands for virtualised pool of network storage most commonly hosted by third parties. Cloud storage is a network-based service which physically do not exist but remains somewhere in the cloud. To be more clear, cloud storage means sharing data over network, rather than having local servers or personal device.

Cloud storage is all around us in our smart phones, on desktops and servers etc. The Dropbox application which is now available on smart phone is nothing but cloud storage application. Google Drive is another cloud storage application which lets you store and access your stored data from anywhere and anytime.

This article aims at – Building your personal cloud storage using ownCloud application. But what is the need of building personal cloud when there are third party hosting. Well all the third party hosting limits you to work with the given configuration and storage limit. With the ever expanding list of photosvideosmp3’s of storage is not sufficient, moreover cloud storage is a relatively new concept and there are not many third party cloud storage host and the available one is too much costly.

ownCloud community has recently released their special release ownCloud 9. They have come up with incredible changes in terms of qualityperformance and innovations to provide excellent cloud experience with “ownCloud“. If you are already working with its older version, you’ll definitely experience significant improvements in Document handling.

What is ownCloud

ownCloud is a free, open-source and powerful web application for data synchronization, file sharing, and remote storage of files. ownCloud is written in PHP/JavaScript languages. It is designed to work with several database management systems, including MySQLMariaDBSQLiteOracle Database, and PostgreSQL. Moreover owncloud can be deployed on all known platforms viz., LinuxMacintoshWindows and Android. In short it’s a robust, platform Independent, flexible in terms of configuration and usability, easy-to-use open source Application.

Install Owncloud in Linux

Install Owncloud in Linux

Features of owncloud

  1. Store files, folders, contacts, photo galleries, calendar, etc on the server of your choice, Later you can access it from mobile, desktop, or web browser.
  2. In the world of gadgets, a normal person have tablet, smart phone, laptop, etc. Own cloud lets you sync all your files, contacts, photo, calendar, etc synced among the devices.
  3. In the era of sharing aka Facebook, Twitter, Google+, etc, owncloud lets you share your data with others and share them publicly or privately as per your needs.
  4. Easy user interface lets you manage, upload, create user, etc in a very easy fashion.
  5. A special feature is that, even user can undelete the accidentally deleted data from Trash, is not it easy to handle and maintain.
  6. The search feature in owncloud is very responsive which is done in background and lets user search by name as well as file type.
  7. Contacts are organised in categories/group hence easy to access contacts on the basis of friends, co-worker, Family, etc.
  8. You can now access external storage be it Dropbox, FTP or anything else by mounting.
  9. Easy to migrate to/from other owncloud server.

What’s New in ownCloud 9

  1. Accessibility Improvement for app’s management page, updater app and search.
  2. Additional notification and direct download supported.
  3. Storage configuration file can be tuned to a higher level in this release.
  4. Apps management is now intelligent enough to store App’s dependency in XML file from where Apps container can solve the dependencies automatically.
  5. Documentation improved to next level, PDF viewer improved with the implementation of new version of PDF.js.
  6. Improved user management and structured settings and admin page improved.
  7. Link sharing has now gone better by shortening.
  8. Overall performance improved as compared to previous version.
  9. Contacts importing improved.
  10. Federated (United) cloud sharing which means setting up of shared folder across server is a cake walk. This feature makes it possible to collaborate organizations with the control at local owncloud deployment server.
  11. Apps now features rating and are category based.
  12. Set favorite icon to files and folder so that it is easy to sort and edit.
  13. Add files to favorites so that it is easy to find them later.
  14. Admin can edit email address of users, sort and select user as well as rename group.
  15. Basic feature includes – connecting to owncloud over HTTP(s), browse for files/folder in explorer, automatic sync, sharing files with other users, sync folders from PC, Pause and resume downloads and uploads and configure proxy.

System Requirements

For higher performance, stability, support, and full functionality we recommend following things:

  1. Minimum 128MB RAM, recommend 512MB.
  2. RHEL/CentOS 7/6, Fedora 18-23, Ubuntu 16.04-12.04, Debian 8/7, etc.
  3. MySQL/MariaDB
  4. PHP 5.4 +
  5. Apache 2.4 with mod_php

Step 1: Install ownCloud Storage in Linux

In order to setup your own personal cloud storage (ownCloud), you must have LAMP (LinuxApacheMySQL/MariaDBPHP) stack installed. Other than LAMP stack you might need Perl and Python based upon your use.

On Debian/Ubuntu/Linux Mint
---------------------- For MySQL Server ----------------------
# apt-get install apache2 apache2-doc apache2-utils mysql-server mysql-client php5 php5-mysql php5-curl

---------------------- For MariaDB Server ----------------------
# apt-get install apache2 apache2-doc apache2-utils mariadb-server php5 php5-mysql php5-curl
On RedHat/CentOS/Fedora
---------------------- For MySQL Server ----------------------
# yum install httpd mysql-server mysql-client php php-mysql php-curl

---------------------- For MariaDB Server ----------------------
# yum install httpd mariadb-server php php-mysql php-curl

Step 2: Create Cloud Database

Once you setup LAMP stack on your personal box, just login to your database (MySQL, here).

# mysql -u root -p

Enter mysql root password. Now we will be creating a database (say cloud).

mysql> create database cloud ; 
Query OK, 1 row affected (0.00 sec)

It is not a good idea to access your database from root, hence grant all the permission to a normal user (say tecmint).

mysql> grant all on cloud.* to tecmint@localhost identified by 'my_password'; 
Query OK, 0 rows affected (0.00 sec)

Step 3: Download and Install ownCloud Application

Now its time to Download latest ownCloud (i.e version 8.0.0) application using below link.

  1. http://owncloud.org/install/

Alternatively, you may use wget command to download the source tar-ball package.

# wget https://download.owncloud.org/community/owncloud-9.0.0.tar.bz2

You may alternatively install from binary package using APT or YUM. The installation instruction can be found at:

  1. Install ownCloud using APT or YUM

However we choose the TAR package which is universally accepted and works on most of the known system.

After Downloading the owncloud package, move it to your Apache working directory, which is /var/www (for Debian) and /var/www/html (for RedHat).

# cp owncloud-9.0.0.tar.bz2 /var/www/		[For Debian based Systems]
# cp owncloud-9.0.0.tar.bz2 /var/www/html/	[For RedHat based Systems]

Next, extract the package using tar command as shown below.

# tar -jxvf owncloud-9.0.0.tar.bz2

Since the TAR Archive is extracted you may remove the Archive.

# rm -rf owncloud-9.0.0.tar.bz2

We might need to change the file permission of owncloud, in our Apache working directory.

# chmod -R 777 owncloud/

Note: Remember we are giving readwrite and execute permission to all, which is although risky but this time needed since several configuration file would be written automatically. We later need to change permission to 755, once the setup is finished.

Step 4: Configuring Apache for ownCloud

For security purpose ownCloud uses Apache‘s .htaccess files, in order to use them. We need to enable two Apache modules mod_rewrite and mod_headers for ownCloud to function properly. Type the following command to enable these modules under Debian based systems only, for RedHat systems they are enabled by default.

# a2enmod rewrite
# a2enmod headers

Additionally, we need to enable mod_rewrite rules to work properly under Apache‘s main configuration file. Open the Apache global configuation file.

# nano /etc/apache2/sites-available/default	[For Debian based Systems]
# vi /etc/httpd/conf/httpd.conf			[For RedHat based Systems]

There, find “AllowOverride None” and change this to “AllowOverride All” as shown.

AllowOverride None

Change this to:

AllowOverride All

Now we need to restart Apache to reload new changes.

# service apache2 restart			[For Debian based Systems]
# service httpd restart				[For RedHat based Systems]

Step 5: Access ownCloud Application

Now you can acess your very personal cloud storage at:

http://localhost/owncloud
OR
http://your-ip-address/owncloud

Once you get the Owncloud page, you need to create an admin account and a Data folder location, where all files/folders will be stored (or leave default location i.e. /var/www/owncloud/data or /var/www/html/owncloud/data). Next, you need to enter mysql database usernamepassword and database name, refer the screenshot below.
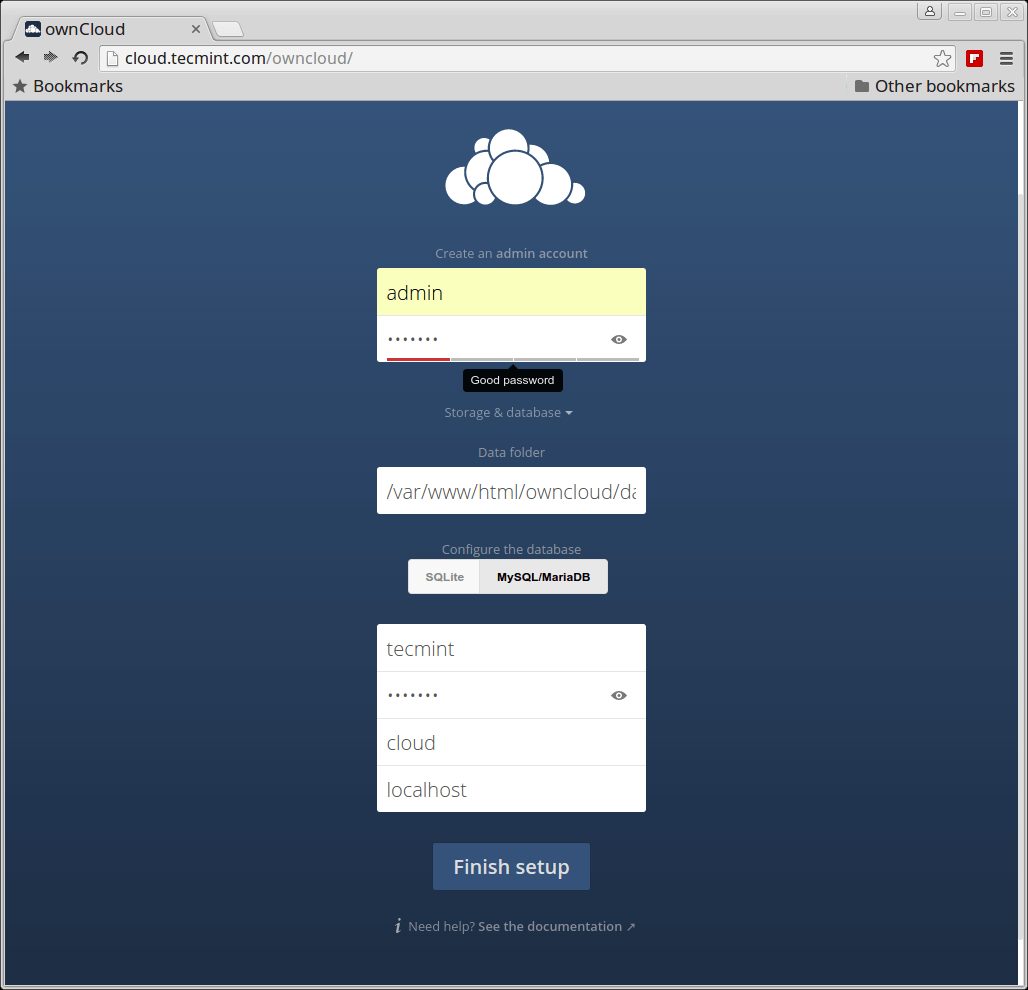
OwnCloud 9 Installation Wizard

OwnCloud 9 Installation Wizard

Once all the correct values are entered, click Finish and your private cloud storage is ready, you are greeted with the working interface:
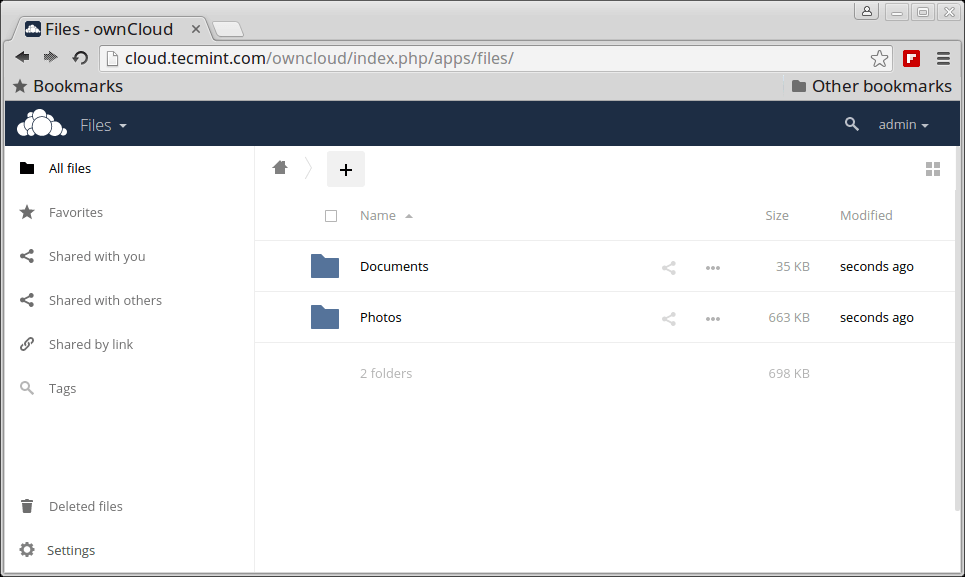
OwnCloud 9 Admin Dashboard

OwnCloud 9 Admin Dashboard

Notice the Favorites, edit, share, download, upload and new file options available for a file.
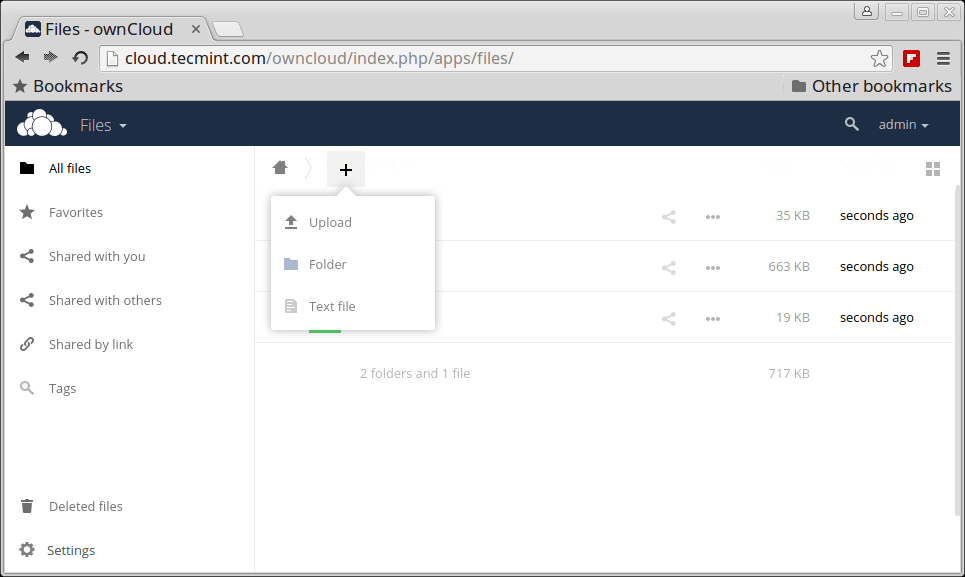
Upload Files to OwnCloud Storage

Upload Files to OwnCloud Storage

Activities log of oneself and others.
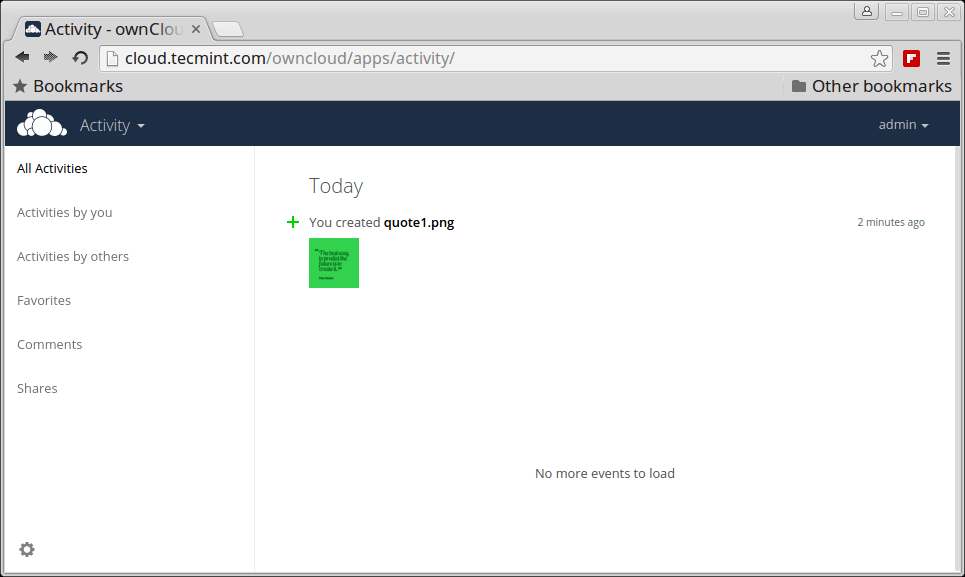
Owncloud Activity Log

Owncloud Activity Log

Pictures library.
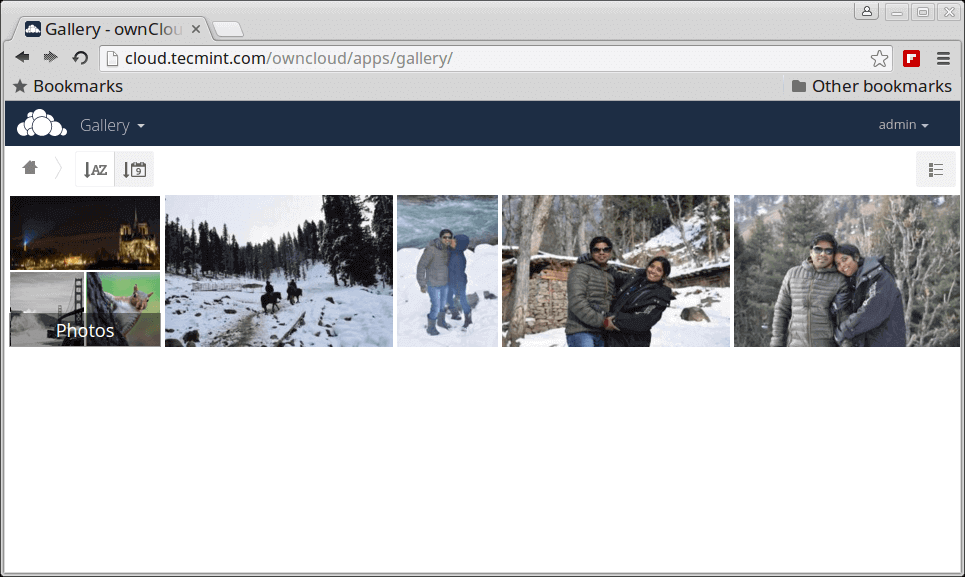
My Owncloud Picture Library

My Owncloud Picture Library

Apps enable and disable interface as well as recommendation with brief introduction.
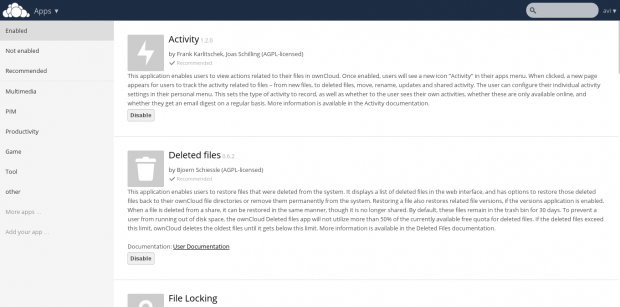
Enabled Application

Enabled Application

Inbuilt PDF reader.
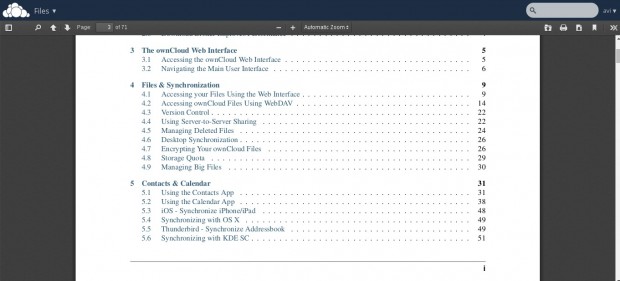
PDF Reader

PDF Reader

From this admin panel you can view security and setup warnings, Fedrated cloud sharing, Mail Templates,
Updater, Cron, sharing, Security, Email Server, Log, etc.
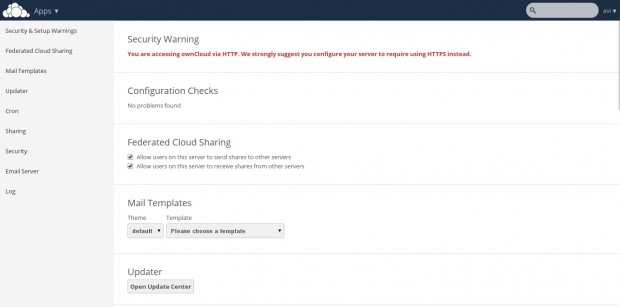
Security Setup Warning

Security Setup Warning

User and Group information with quota.

User Group Quota

User Group Quota

Note: You can add users or imports user accountchange password, assign user role and allocate space by clicking the Gear icon on left bottom of the page.

You may now add foldersync media files be it pictures, images and videos from the mobile application. Owncloud lets you add new user, and sync calendar, contacts, Media files, etc.

It also has a built in MP3 PlayerPDF ViewerDocument Viewer, and a lot many which is worth a try and explore. So what are you waiting for? Become a proud owner of private cloud storage, give it a try!

Upgrading to Owncloud 9 from Older Versions

To update earlier version of your owncloud to 9, you need to first update the old owncloud to latest point release of the same version.

For example, if you’re using owncloud 6.0.xy (where ‘xy‘ is the version number), you need to first update to 6.0.xof the same series, and then you able to upgrade to owncloud 7 using the following instructions.

Update Owncloud 6.0.xx to 6.0.2

1. Making proper backup of everything is always suggested.

2. Enable the updater plugin (if it is disabled).

3. Go to Admin Panel and fire update.

4. Refresh page using ‘Ctrl+F5‘, you’re done.

If above procedure doesn’t worked, you can do a full upgrade to update to the newest point release (see ‘Upgrade‘ instructions below).

Else, if you’re already using Owncloud 7 or 8 and want to update to Owncloud 9, you can follow the below same ‘Upgrade’ instructions to get the latest version of Owncloud.

Upgrading OwnCloud 8 to OwnCloud 9 Latest Release

1. Update your owncloud version to latest point release of your version.

2. Not to Mention, Make a full backup before upgrading.

3. Download the latest tarball using wget command.

# wget http://download.owncloud.org/community/owncloud-latest.tar.bz2

4. Deactivate all native and third party Applications and plugins.

5. Delete Everything from the owncloud Directory except DATA and CONFIG directory.

NOTE: Don’t touch DATA and CONFIG directory.

6. Untar the tar-ball and copy everything to the root of your owncloud directory within your working directory.

7. Grant required permissions and run Upgrade from the Next page and its done!.

8. Don’t forget to install and enable Third party Application and plug-ins only after checking the compatibility with the current version.

So what are you waiting for? Install the latest owncloud project or upgrade your last version to latest and start using it.

Reference Links

  1. ownCloud Homepage

That’s all for now. Don’t forget to provide us with your valuable feedback in comments.

Source

WP2Social Auto Publish Powered By : XYZScripts.com