How to Record and Replay Linux Terminal Sessions using ‘script’ and ‘scriptreplay’ Commands

In this guide we are going to look at how to use a script and scriptreplay commands in Linux that can help you to record commands and their output printed on your terminal during a given session.

Record Linux Terminal Commands

Record and Replay Linux Terminal Commands

The history command is a great command-line utility that helps users to store previous command used, though it does not store the output of a command.

Don’t Miss: Showterm.io – A Linux Terminal Recording Tool

Don’t Miss: 8 Best Desktop Screen Recorders for Linux

Therefore the script command comes in handy to provide you a powerful functionality that helps you to record everything that is printed on your terminal to a log_file. You can then refer to this file later on in case you want to view the output of a command in history from the log_file.

You can also replay commands that you recorded using the scriptreplay command by using a timing information.

How to Record Linux Terminal Using script Command

The script command stores terminal activities in a log file that can be named by a user, when a name is not provided by a user, the default file name, typescript is used.

Basic Syntax of script Command
# script [options] - -timing=timing_file log_filename

To start recording of Linux terminal, type script and add the log filename as shown.

tecmint@tecmint ~ $ script history_log.txt

Script started, file is history_log.txt

To stop script, type exit and press [Enter].

tecmint@tecmint ~ $ exit

Script done, file is history_log.txt

If the script can not write to the named log file then it shows an error.

For example, in the output below, the permissions of the file typescript does not allow reading, writing and execution of the file not by any user or group. When you run the script command without a log file name, it attempts to write to the default file, typescript hence showing an error.

tecmint@tecmint ~ $ ls -l typescript

--------- 1 ubuntu ubuntu 144 Sep 15 00:00 typescript

tecmint@tecmint ~ $ script

script: open failed: typescript: Permission denied
Terminated

Examples of using the script command

I have named my log file script.log in the example below, you can give your file a different name.

tecmint@tecmint ~ $ script script.log

Now try to execute few commands to allow script to record executed commands on the terminal.

tecmint@tecmint ~ $ cal

   September 2015     
Su Mo Tu We Th Fr Sa  
       1  2  3  4  5  
 6  7  8  9 10 11 12  
13 14 15 16 17 18 19  
20 21 22 23 24 25 26  
27 28 29 30           
                      
tecmint@tecmint ~ $ w

 14:49:40 up  4:06,  2 users,  load average: 1.37, 1.56, 1.62
USER     TTY      FROM             LOGIN@   IDLE   JCPU   PCPU WHAT
tecmint  tty8     :0               10:45    4:06m  7:40   0.36s x-session-manager
tecmint  pts/5    :0               13:42    4.00s  0.07s  0.00s script script.log

tecmint@tecmint ~ $ uptime

 14:49:43 up  4:06,  2 users,  load average: 1.37, 1.56, 1.62

tecmint@tecmint ~ $ whoami

tecmint

tecmint@tecmint ~ $ echo 'using script'

using script
tecmint@tecmint ~ $ exit
exit
Script done, file is script.log

Now try to view the log file ‘script.log‘ for all recorded commands, while you view the log you realize that the script also stores line feeds and backspaces.

tecmint@tecmint ~ $ vi script.log
Sample Output
^[[0m^[[255D^[[01;32mtecmint@tecmint^[[01;34m ~ $^[[00m cal^M
   September 2015     ^M
Su Mo Tu We Th Fr Sa  ^M
       1  2  3  4  5  ^M
 6  7  8  9 10 11 12  ^M
13 14 15 ^[[7m16^[[27m 17 18 19  ^M
20 21 22 23 24 25 26  ^M
27 28 29 30           ^M
                      ^M
^[[01;32mtecmint@tecmint^[[01;34m ~ $^[[00m w^M
 14:49:40 up  4:06,  2 users,  load average: 1.37, 1.56, 1.62^M
USER     TTY      FROM             LOGIN@   IDLE   JCPU   PCPU WHAT^M
tecmint  tty8     :0               10:45    4:06m  7:40   0.36s x-session-manager^M
tecmint  pts/5    :0               13:42    4.00s  0.07s  0.00s script script.log^M
^[[01;32mtecmint@tecmint^[[01;34m ~ $^[[00m uptime^M
 14:49:43 up  4:06,  2 users,  load average: 1.37, 1.56, 1.62^M
^[[01;32mtecmint@tecmint^[[01;34m ~ $^[[00m whoami^M
tecmint^M
^[[01;32mtecmint@tecmint^[[01;34m ~ $^[[00m echo ''^Hu'^Hs'^Hi'^Hn'^Hg'^H '^Hs'^Hc'^Hr'^Hi'^Hp'^Ht'^H^M
using script^M
^[[01;32mtecmint@tecmint^[[01;34m ~ $^[[00m exit^M
exit^M

Script done on Wednesday 16 September 2015 02:49:59 PM IST
~                                                              

You may use the -a option to append the log file or typescript, retaining the prior contents.

tecmint@tecmint ~ $ script -a script.log
Script started, file is script.log

tecmint@tecmint ~ $ date
Wed Sep 16 14:59:36 IST 2015


tecmint@tecmint ~ $ pwd
/home/tecmint


tecmint@tecmint ~ $ whereis script
script: /usr/bin/script /usr/bin/X11/script /usr/share/man/man1/script.1.gz


tecmint@tecmint ~ $ whatis script
script (1)           - make typescript of terminal session

View the contents of script, log after using -a option to append it.

tecmint@tecmint ~ $ vi script.log
Sample Output
^[[0m^[[255D^[[01;32mtecmint@tecmint^[[01;34m ~ $^[[00m date^M
Wed Sep 16 14:59:36 IST 2015^M
^[[01;32mtecmint@tecmint^[[01;34m ~ $^[[00m pwd^M
/home/tecmint^M
^[[01;32mtecmint@tecmint^[[01;34m ~ $^[[00m whre^H^[[K^H^[[Kereis script^M
script: /usr/bin/script /usr/bin/X11/script /usr/share/man/man1/script.1.gz^M
^[[01;32mtecmint@tecmint^[[01;34m ~ $^[[00m whatis script^M
script (1)           - make typescript of terminal session^M
^[[01;32mtecmint@tecmint^[[01;34m ~ $^[[00m vi s^H^[[K^H^[[K^H^[[K^H^[[Kexit^M
exit^M

To log results of a single command other than an interactive shell session, use the -c option.

tecmint@tecmint ~ $ script -c 'hostname' script.log

Script started, file is script.log
tecmint.com
Script done, file is script.log

If you want script to run in a quiet mode then you can use the -q option. You will not see a message that shows script is starting or exiting.

tecmint@tecmint ~ $ script -c 'who'  -q  script.log

tecmint  tty8         2015-09-16 10:45 (:0)
tecmint  pts/5        2015-09-16 13:42 (:0)

To set timing information to standard error or a file use the –timing option. The timing information is useful when you want to re-display the output stored in the log_file.

Let us start script and run the following commands wuptime and cal to be recorded.

tecmint@tecmint ~ $ script --timing=time.txt script.log
Script started, file is script.log

tecmint@tecmint ~ $ w
 15:09:31 up  4:26,  2 users,  load average: 1.38, 1.39, 1.47
USER     TTY      FROM             LOGIN@   IDLE   JCPU   PCPU WHAT
tecmint  tty8     :0               10:45    4:26m  8:15   0.38s x-session-manager
tecmint  pts/5    :0               13:42    3.00s  0.09s  0.00s script --timing=time.txt script.log

tecmint@tecmint ~ $ uptime
 15:09:36 up  4:26,  2 users,  load average: 1.43, 1.40, 1.48

tecmint@tecmint ~ $ cal
   September 2015     
Su Mo Tu We Th Fr Sa  
       1  2  3  4  5  
 6  7  8  9 10 11 12  
13 14 15 16 17 18 19  
20 21 22 23 24 25 26  
27 28 29 30    

You can view the script.log and time.txt file for the timing command above.

tecmint@tecmint ~ $ vi script.log
Sample Output
^[[0m^[[255D^[[01;32mtecmint@tecmint^[[01;34m ~ $^[[00m w^M
 15:12:05 up  4:28,  2 users,  load average: 1.31, 1.37, 1.45^M
USER     TTY      FROM             LOGIN@   IDLE   JCPU   PCPU WHAT^M
tecmint  tty8     :0               10:45    4:28m  8:20   0.38s x-session-manager^M
tecmint  pts/5    :0               13:42    5.00s  0.09s  0.00s script --timing=time.txt script.log^M
^[[01;32mtecmint@tecmint^[[01;34m ~ $^[[00m uptime^M
 15:12:07 up  4:28,  2 users,  load average: 1.29, 1.36, 1.45^M
^[[01;32mtecmint@tecmint^[[01;34m ~ $^[[00m cal^M
   September 2015     ^M
Su Mo Tu We Th Fr Sa  ^M
       1  2  3  4  5  ^M
 6  7  8  9 10 11 12  ^M
13 14 15 ^[[7m16^[[27m 17 18 19  ^M
20 21 22 23 24 25 26  ^M
27 28 29 30           ^M
                      ^M

Now view time.txt file.

tecmint@tecmint ~ $ vi time.txt
Sample Output
0.259669 306
0.037680 829
0.000006 2
0.000002 100
0.000002 2
0.000002 102
0.000019 202
0.000004 2
0.000002 102
0.000015 100
0.000002 2
0.000003 2
0.000002 99
0.000011 2
0.000003 82
...

The time.txt file has two columns, the first column shows how much time has elapsed since the last display and the second column, shows the number of characters that have been displayed this time around.

Use the man page and –help to seek for more options and help in using the script command-line utility.

Using scriptreplay to replay scripts using timing information

The scriptreplay command helps to replay information in your log_file recorded by the script command.

The timing information is defined by the -timing=file option used with the script command and file in this case is file.txt that was used with script command .

Remember you need to specify the log_file you used with the script command.

Let us now replay the last three commands wuptime and cal that we had run as follows.

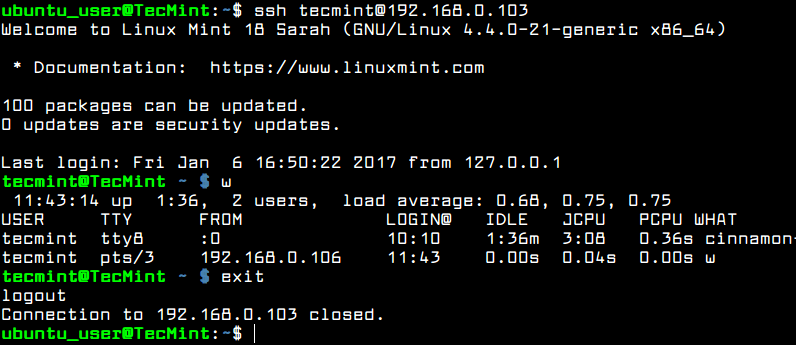
tecmint@tecmint ~ $ scriptreplay --timing=time.txt script.log

Replay Last Executed Commands in Linux

Replay Last Executed Commands in Linux

When the log_file replayed using the timing information, the commands recorded are run and their output is displayed at the same time the original output was displayed while being recorded.

Summary

These two commands, script and scriptreplay easy to use and help a lot when you need to run the same batch of commands several times. They help a lot in managing servers that have only command-line interface for interaction with your system. Hope this guide was useful and if you have anything to add or face a challenge while using them, do not hesitate to post a comment.

Source

How to Install Linux OS on USB Drive and Run it On Any PC

Ever thought of using any computer which is not yours, with all your personal stuff and configuration? It is possible with any Linux distribution. Yes! You can use your own, customized Linux OS on any machine with just an USB drive.

This tutorial is all about installing Latest Linux OS on your pen-drive ( fully reconfigurable personalized OS, NOT just a Live USB ), customize it, and use it on any PC you have an access to. Here I am using Lubuntu 18.04 Bionic beaver for this tutorial (but, you can use any Linux distribution). So let’s gets started..

Requirements:

  1. One Pendrive 4GB or More (Let’s call it as Main USB drive/Pendrive).
  2. One more Pen drive or DVD disk to use as bootable Linux installation media.
  3. Linux OS ISO file, for example Lubuntu 18.04.
  4. One PC (Don’t worry, there will not be any effect on that PC).

TIP: Use 32 bit Linux OS to make it compatible with any available PC.

That’s it! Go, and collect all of these. It’s time to do something new.

Step 1: Create Bootable Linux Installation Media

Use your Linux ISO image file to create a bootable USB installation media. You can use any software like UnetbootinGnome Disk UtilityYumi Multi BootxbootLive USB Creator etc. to create bootable usb with the help of ISO image file.

Alternatively you can use dvd disk by writing that ISO image to it (but that is the old school method).

Step 2: Create Partitions On Main USB Drive

You have to make two partitions on your Main USB drive using Gparted or Gnome Disk Utility, etc.

  • Root partition of format ext4 of size according to your use.
  • Optionally you can use rest of the space as a FAT partition for using it as a normal USB drive.

I am having 16GB USB drive and I have created one root partition of 5GB and using rest 11GB as normal FATpartition. So my 16 GB USB drive is converted to 11GB drive for normal use on any PC. Sounds good!!!

This step you can do while installing Linux also, but it will be very complex while installing Operating System’s like Arch Linux.

Main USB Drive Partitions

Main USB Drive Partitions

Once you have created required partitions on Main USB drive. Now take a deep breath because it’s time to go for Linux installation section.

Step 3: Install Linux on USB Drive

1. First boot Linux OS (Lubuntu 18.04) from your bootable installation media and launch installation application from live session. Live session of Lubuntu 18.04 will look like this.

Lubuntu Live Boot

Lubuntu Live Boot

2. Installer welcome screen will appear, select Language there and hit Continue.

Select Lubuntu Installation Language

Select Lubuntu Installation Language

3. Select Keyboard Layout and continue…

Select Lubuntu Keyboard Layout

Select Lubuntu Keyboard Layout

4. Select Wifi internet if you want to update Lubuntu while installation. I will skip it..

Select Wifi to Update Lubuntu

Select Wifi to Update Lubuntu

5. Select Installation Type and Third party installation as per your choice and go to next..

Select Lubuntu Software Updates

Select Lubuntu Software Updates

6. Here select Something Else Option (It is Mandatory) and go to next…

Select Lubuntu Installation Type

Select Lubuntu Installation Type

7. This is an an Important step, here you need to find out where your Main USB drive is mounted.

Find Main USB Drive

Find Main USB Drive

In my case /dev/sda is internal hard disk of the PC and I am using /dev/sdb is USB Lubuntu Installation media from where this live session is booted.

And /dev/sdc is my Main USB drive where I want to install my Linux system and where I have made two partition in step number 2. If you have skipped step 2, you can also make partitions in this window.

First change mount point of First partition on this Main USB drive to ROOT (i.e. “ / ”). And as shown in second red square select bootloader installation device as the Main USB drive.

In my case it is /dev/sdc. This is the most important step in this tutorial. If it is not done correctly your system will boot only on the current PC you are using, which is exactly opposite of your motivation to follow this tutorial.

Once it is completed, double check it and hit continue. You will get a small window showing devices and drive which will be affected.

8. Make sure that the device and drives shown on this window are of your Main USB drive, which is in my case /dev/sdc. Hit continue

Write Partition Changes to Disk

Write Partition Changes to Disk

9. Now select your Region and hit Continue

Select Lubuntu Region

Select Lubuntu Region

10. Add username, password and hostname etc…

Create Lubuntu User

Create Lubuntu User

11. Let the installation finish..

Lubuntu Installation

Lubuntu Installation

12. After completing installation hit restart and remove your installation media and press Enter.

Lubuntu Installation Completes

Lubuntu Installation Completes

13. Congratulations, you have successfully installed your own Linux OS on your pen drive to use it on any PC. Now you can connect USB drive to any PC and start your system on that PC by simply selecting boot from usb option while booting.

Step 4: Customize Lubuntu System

Now it’s time for fun. Just boot your system on any PC and start customizing. You can install any softwares you want. You can change Themes, Icon themes, install docker.

You can add and store your online accounts on it. Install / modify / customize whatever you want. All the changes will be permanent. They will not change or reset after rebooting or booting on other PCs.

Following figure shows my customized Lubuntu 18.04.

Lubuntu Running on USB Drive

Lubuntu Running on USB Drive

The main advantage of this method is you can use your personal stuff, your online accounts securely on any PC. You can even do secure online transactions as well on any available PC.

I hope it will be helpful for you, if you have questions regarding this article, please feel free to ask in the comment section below.

Source

How to Install Kernel Headers in CentOS 7

When you compile a custom kernel module such as device driver on a CentOS system, you need to have kernel header files installed on the system, which include the C header files for the Linux kernel. Kernel header files provide different kinds of function and structure definitions required when installing or compiling any code that interfaces with the kernel.

When you install Kernel Headers, make sure it matches with the currently installed kernel version on the system. If your Kernel version comes with the default distribution installation or you have upgraded your Kernel using yum package manager from system base repositories, then you must install matching kernel headers using package manager only. If you’ve compiled Kernel from sources, you can install kernel headers from sources only.

Read AlsoHow to Install Kernel Headers in Ubuntu and Debian

In this article, we will explain how to install Kernel Headers in CentOS/RHEL 7 and Fedora distributions using default package manager.

Install Kernel Headers in CentOS 7

First confirm that the matching kernel headers are already installed under /usr/src/kernels/ location on your system using following commands.

# cd /usr/src/kernels/
# ls -l

Check Kernel Headers in CentOS 7

Check Kernel Headers in CentOS 7

If no matching kernel headers are located in the /usr/src/kernels/ directory, go ahead and install kernel headers, which is provided by the kernel-devel package that can be installed using default package manager as shown.

# yum install kernel-devel   [On CentOS/RHEL 7]
# dnf install kernel-devel   [On Fedora 22+]

Install Kernel Headers in CentOS 7

Install Kernel Headers in CentOS 7

After installing the kernel-devel package, you can find all the kernel headers files in /usr/src/kernels directory using following command.

# ls -l /usr/src/kernels/$(uname -r) 

Note on a VPS (for instance a Linode VPS), a kernel may have a customized version name, in such scenario, you have to identify the kernel version manually and check the installed kernel header files using following commands.

# uname -r	
# ls -l /usr/src/kernels/3.10.0-862.2.3.el7.x86_64

Check Kernel Version in CentOS 7

Check Kernel Version in CentOS 7

Sample Output
total 4544
drwxr-xr-x.  32 root root    4096 May 16 12:48 arch
drwxr-xr-x.   3 root root    4096 May 16 12:48 block
drwxr-xr-x.   4 root root    4096 May 16 12:48 crypto
drwxr-xr-x. 119 root root    4096 May 16 12:48 drivers
drwxr-xr-x.   2 root root    4096 May 16 12:48 firmware
drwxr-xr-x.  75 root root    4096 May 16 12:48 fs
drwxr-xr-x.  28 root root    4096 May 16 12:48 include
drwxr-xr-x.   2 root root    4096 May 16 12:48 init
drwxr-xr-x.   2 root root    4096 May 16 12:48 ipc
-rw-r--r--.   1 root root     505 May  9 19:21 Kconfig
drwxr-xr-x.  12 root root    4096 May 16 12:48 kernel
drwxr-xr-x.  10 root root    4096 May 16 12:48 lib
-rw-r--r--.   1 root root   51205 May  9 19:21 Makefile
-rw-r--r--.   1 root root    2305 May  9 19:21 Makefile.qlock
drwxr-xr-x.   2 root root    4096 May 16 12:48 mm
-rw-r--r--.   1 root root 1093137 May  9 19:21 Module.symvers
drwxr-xr-x.  60 root root    4096 May 16 12:48 net
drwxr-xr-x.  14 root root    4096 May 16 12:48 samples
drwxr-xr-x.  13 root root    4096 May 16 12:48 scripts
drwxr-xr-x.   9 root root    4096 May 16 12:48 security
drwxr-xr-x.  24 root root    4096 May 16 12:48 sound
-rw-r--r--.   1 root root 3409102 May  9 19:21 System.map
drwxr-xr-x.  17 root root    4096 May 16 12:48 tools
drwxr-xr-x.   2 root root    4096 May 16 12:48 usr
drwxr-xr-x.   4 root root    4096 May 16 12:48 virt
-rw-r--r--.   1 root root      41 May  9 19:21 vmlinux.id

In addition, if you need header files for the Linux kernel for use by glibc, install the kernel-header package using following command.

# yum install kernel-headers   [On CentOS/RHEL 7]
# dnf install kernel-headers   [On Fedora 22+]

Now you are good to go with compiling your own or existing kernel modules for software such as VirtualBoxand many more.

That’s it! In this article, we have explained how to install kernel-devel and kernel-header packages in CentOS/RHEL 7 and Fedora systems. Remember that before you can compile kernel modules such as device driver on a Linux system, you should have necessary kernel header files installed. If you have queries, please use the comment form below to reach us.

Source

How to Install Kernel Headers in Ubuntu and Debian

Kernel Headers contain the Cheader files for the Linux kernel, which offers the various function and structure definitions required when compiling any code that interfaces with the kernel, such as kernel modules or device drivers and some user programs.

It is very important to note that the kernel headers package you install should match with the currently installed kernel version on your system. If your kernel version ships with the default distribution installation or you have upgraded your Kernel using dpkg or apt package manager from the Ubuntu or Debian base repositories, then you must install matching kernel headers using package manager only. And if you’ve compiled kernel from sources, you must also install kernel headers from sources.

In this article, we will explain how to install Kernel Headers in Ubuntu and Debian Linux distributions using default package manager.

Install Kernel Headers in Ubuntu and Debian

First check your installed kernel version as well as kernel header package that matches your kernel version using following commands.

$ uname -r
$ apt search linux-headers-$(uname -r)

Check Kernel Version and Kernel Headers in Ubuntu

Check Kernel Version and Kernel Headers in Ubuntu


On DebianUbuntu and their derivatives, all kernel header files can be found under /usr/src directory. You can check if the matching kernel headers for your kernel version are already installed on your system using the following command.

$ ls -l /usr/src/linux-headers-$(uname -r)

Check Kernel Headers in Ubuntu

Check Kernel Headers in Ubuntu

From the above output, it’s clear that the matching kernel header directory doesn’t exist, meaning the package is not yet installed.

Before you can install the appropriate kernel headers, update your packages index, in order to grab information about the latest package releases, using the following command.

$ sudo apt update

Then run the following command that follows to install the Linux Kernel headers package for your kernel version.

$ sudo apt install linux-headers-$(uname -r)

Install Kernel Headers in Ubuntu

Install Kernel Headers in Ubuntu

Next, check if the matching kernel headers have been installed on your system using the following command

$ ls -l /usr/src/linux-headers-$(uname -r)

Verify Installed Kernel Headers in Ubuntu

Verify Installed Kernel Headers in Ubuntu

That’s all! In this article, we have explained how to install kernel headers in Ubuntu and Debian Linux and other distributions in the Debian family tree.

Always keep in mind that to compile a kernel module, you will need the Linux kernel headers. If you have any quires, or thoughts to share, use the comment form below to reach us.

Source

Livepatch – Apply Critical Security Patches to Ubuntu Linux Kernel Without Rebooting

If you are a system administrator in charge of maintaining critical systems in enterprise environments, we are sure you know two important things:

1) Finding a downtime window to install security patches in order to handle kernel or operating system vulnerabilities can be difficult. If the company or business you work for does not have security policies in place, operations management may end up favoring uptime over the need to solve vulnerabilities. Additionally, internal bureaucracy can cause delays in granting approvals for a downtime. Been there myself.

2) Sometimes you can’t really afford a downtime, and should be prepared to mitigate any potential exposures to malicious attacks some other way.

The good news is that Canonical has recently released (actually, a couple of days ago) its Livepatch service to apply critical kernel patches to Ubuntu 16.04 (64-bit edition / 4.4.x kernel) without the need for a later reboot. Yes, you read that right: with Livepatch, you don’t need to restart your Ubuntu 16.04 server in order for the security patches to take effect.

Signing up for Ubuntu Livepatch

In order to use Canonical Livepatch Service, you need to sign up at https://auth.livepatch.canonical.com/ and indicate if you are a regular Ubuntu user or an Advantage subscriber (paid option). All Ubuntu users can link up to 3 different machines to Livepatch through the use of a token:

Canonical Livepatch Service

Canonical Livepatch Service

In the next step you will be prompted to enter your Ubuntu One credentials or sign up for a new account. If you choose the latter, you will need to confirm your email address in order to finish your registration:

Ubuntu One Confirmation Mail

Ubuntu One Confirmation Mail

Once you click on the link above to confirm your email address, you’ll be ready to go back to https://auth.livepatch.canonical.com/ and get your Livepatch token.

Getting and Using your Livepatch Token

To begin, copy the unique token assigned to your Ubuntu One account:

Canonical Livepatch Token

Canonical Livepatch Token

Then go to a terminal and type:

$ sudo snap install canonical-livepatch

The above command will install the livepatch, whereas

$ sudo canonical-livepatch enable [YOUR TOKEN HERE]

will enable it for your system. If this last command indicates it can’t find canonical-livepatch, make sure /snap/bin has been added to your path. A workaround consists of changing your working directory to /snap/bin and do.

$ sudo ./canonical-livepatch enable [YOUR TOKEN HERE]

Install Livepatch in Ubuntu

Install Livepatch in Ubuntu

Overtime, you’ll want to check the description and the status of patches applied to your kernel. Fortunately, this is as easy as doing.

$ sudo ./canonical-livepatch status --verbose

as you can see in the following image:

Check Livepatch Status in Ubuntu

Check Livepatch Status in Ubuntu

Having enabled Livepatch on your Ubuntu server, you will be able to reduce planned and unplanned downtimes at a minimum while keeping your system secure. Hopefully Canonical’s initiative will award you a pat on the back by management – or better yet, a raise.

Feel free to let us know if you have any questions about this article. Just drop us a note using the comment form below and we will get back to you as soon as possible.

Source

How to Install Different PHP (5.6, 7.0 and 7.1) Versions in Ubuntu

PHP (recursive acronym for PHP: Hypertext Preprocessor) is an open source, popular general-purpose scripting language that is widely-used and best suited for developing websites and web-based applications. It is a server-side scripting language that can be embedded in HTML.

Currently, there are three supported versions of PHP, i.e PHP 5.67.0 and 7.1. Meaning PHP 5.35.4 and 5.5have all reached end of life; they are no longer supported with security updates.

In this article, we will explain how to install all the supported versions of PHP in Ubuntu and its derivatives with most requested PHP extensions for both Apache and Nginx web servers using a Ondřej Surý PPA. We will also explain how to set default version of PHP to be used on the Ubuntu system.

Note that PHP 7.x is the supported stable version in the Ubuntu software repositories, you can confirm this by running the apt command below.

$sudo apt show php
OR
$ sudo apt show php -a
Show PHP Version Information
Package: php
Version: 1:7.0+35ubuntu6
Priority: optional
Section: php
Source: php-defaults (35ubuntu6)
Origin: Ubuntu
Maintainer: Ubuntu Developers <ubuntu-devel-discuss@lists.ubuntu.com>
Original-Maintainer: Debian PHP Maintainers <pkg-php-maint@lists.alioth.debian.org>
Bugs: https://bugs.launchpad.net/ubuntu/+filebug
Installed-Size: 11.3 kB
Depends: php7.0
Supported: 5y
Download-Size: 2,832 B
APT-Sources: http://archive.ubuntu.com/ubuntu xenial/main amd64 Packages
Description: server-side, HTML-embedded scripting language (default)
 PHP (recursive acronym for PHP: Hypertext Preprocessor) is a widely-used
 open source general-purpose scripting language that is especially suited
 for web development and can be embedded into HTML.
 .
 This package is a dependency package, which depends on Debian's default
 PHP version (currently 7.0).

To install the default PHP version from the Ubuntu software repositories, use the command below.

$ sudo apt install php

Install PHP (5.6, 7.0, 7.1) on Ubuntu Using PPA

1. First start by adding Ondřej Surý PPA to install different versions of PHP – PHP 5.6PHP 7.0 and PHP 7.1 on Ubuntu system.

$ sudo apt install python-software-properties
$ sudo add-apt-repository ppa:ondrej/php

Add PPA in Ubuntu

Add PPA in Ubuntu

2. Next, update the system as follows.

$ sudo apt-get update

3. Now install different supported versions of PHP as follows.

For Apache Web Server

$ sudo apt install php5.6   [PHP 5.6]
$ sudo apt install php7.0   [PHP 7.0]
$ sudo apt install php7.1   [PHP 7.1]

For Nginx Web Server

$ sudo apt install php5.6-fpm   [PHP 5.6]
$ sudo apt install php7.0-fpm   [PHP 7.0]
$ sudo apt install php7.1-fpm   [PHP 7.1]

4. To install any PHP modules, simply specify the PHP version and use the auto-completion functionality to view all modules as follows.

------------ press Tab key for auto-completion ------------ 
$ sudo apt install php5.6 
$ sudo apt install php7.0 
$ sudo apt install php7.1 

Search PHP Modules

Search PHP Modules

5. Now you can install most required PHP modules from the list.

------------ Install PHP Modules ------------
$ sudo apt install php5.6-cli php5.6-xml php5.6-mysql 
$ sudo apt install php7.0-cli php7.0-xml php7.0-mysql 
$ sudo apt install php7.1-cli php7.1-xml php7.1-mysql 

6. Finally, verify your default PHP version used on your system like this.

$ php -v 

Check Default PHP Version in Ubuntu

Check Default PHP Version in Ubuntu

Set Default PHP Version in Ubuntu

7. You can set the default PHP version to be used on the system with the update-alternatives command, after setting it, check the PHP version to confirm as follows.

------------ Set Default PHP Version 5.6 ------------
$ sudo update-alternatives --set php /usr/bin/php5.6

Set PHP 5.6 Version in Ubuntu

Set PHP 5.6 Version in Ubuntu

------------ Set Default PHP Version 7.0 ------------
$ sudo update-alternatives --set php /usr/bin/php7.0

Set PHP 7.0 Version in Ubuntu

Set PHP 7.0 Version in Ubuntu

------------ Set Default PHP Version 7.1 ------------
$ sudo update-alternatives --set php /usr/bin/php7.1

Set PHP 7.1 Version in Ubuntu

Set PHP 7.1 Version in Ubuntu

8. To set the PHP version that will work with Apache web server, use the commands below. First disable the current version with the a2dismod command and then enable the one you want with the a2enmod command.

$ sudo a2dismod php7.0
$ sudo a2enmod php7.1
$ sudo systemctl restart apache2

Enable Disable PHP Modules for Apache

Enable Disable PHP Modules for Apache

9. After switching from one version to another, you can find your PHP configuration file, by running the command below.

------------ For PHP 5.6 ------------
$ sudo update-alternatives --set php /usr/bin/php5.6
$ php -i | grep "Loaded Configuration File"

------------ For PHP 7.0 ------------
$ sudo update-alternatives --set php /usr/bin/php7.0
$ php -i | grep "Loaded Configuration File"

------------ For PHP 7,1 ------------
$ sudo update-alternatives --set php /usr/bin/php7.1
$ php -i | grep "Loaded Configuration File"

Find PHP Configuration File

Find PHP Configuration File

You may also like:

  1. How to Use and Execute PHP Codes in Linux Command Line
  2. 12 Useful PHP Commandline Usage Every Linux User Must Know
  3. How to Hide PHP Version in HTTP Header

In this article, we showed how to install all the supported versions of PHP in Ubuntu and its derivatives. If you have any queries or thoughts to share, do so via the feedback form below.

Source

How to Create an HTTP Proxy Using Squid on CentOS 7

Web proxies have been around for quite some time now and have been used by millions of users around the globe. They have a wide range of purposes, most popular being online anonymity, but there are other ways you can take advantage of web proxies. Here are some ideas:

  • Online anonymity
  • Improve online security
  • Improve loading times
  • Block malicious traffic
  • Log your online activity
  • To circumvent regional restrictions
  • In some cases can reduce bandwidth usage

How Proxy Server Works

The proxy server is a computer that is used as an intermediary between the client and other servers from which client may request resources. A simple example of this is when a client makes online requests (for example want to open a web page), he connects first to the proxy server.

The proxy server then checks its local disk cache and if the data can be found in there, it will return the data to the client, if not cached, it will make the request in the client’s behalf using the proxy IP address (different from the clients) and then return the data to the client. The proxy server will try to cache the new data and will use it for future requests made to the same server.

What is Squid Proxy

Squid is a web proxy used my wide range of organizations. It is often used as caching proxy and improving response times and reducing bandwidth usage.

For the purpose of this article, I will be installing Squid on a Linode CentOS 7 VPS and use it as an HTTP proxy server.

How to Install Squid on CentOS 7

Before we start, you should know that Squid, does not have any minimum requirements, but the amount of RAM usage may vary depending on the clients browsing the internet through the proxy server.

Squid is included in the base repository and thus the installation is simple and straightforward. Before installing it, however, make sure your packages are up to date by running.

# yum -y update

Proceed by installing squid, start and enable it on system startup using following commands.

# yum -y install squid
# systemctl start squid
# systemctl  enable squid

At this point your Squid web proxy should already be running and you can verify the status of the service with.

# systemctl status squid
Sample Output
 squid.service - Squid caching proxy
   Loaded: loaded (/usr/lib/systemd/system/squid.service; enabled; vendor preset: disabled)
   Active: active (running) since Thu 2018-09-20 10:07:23 UTC; 5min ago
 Main PID: 2005 (squid)
   CGroup: /system.slice/squid.service
           ├─2005 /usr/sbin/squid -f /etc/squid/squid.conf
           ├─2007 (squid-1) -f /etc/squid/squid.conf
           └─2008 (logfile-daemon) /var/log/squid/access.log

Sep 20 10:07:23 tecmint systemd[1]: Starting Squid caching proxy...
Sep 20 10:07:23 tecmint squid[2005]: Squid Parent: will start 1 kids
Sep 20 10:07:23 tecmint squid[2005]: Squid Parent: (squid-1) process 2007 started
Sep 20 10:07:23 tecmint systemd[1]: Started Squid caching proxy.

Here are some important file locations you should be aware of:

  • Squid configuration file: /etc/squid/squid.conf
  • Squid Access log: /var/log/squid/access.log
  • Squid Cache log: /var/log/squid/cache.log

A minimum squid.conf configuration file (without comments in it) looks like this:

acl localnet src 10.0.0.0/8	# RFC1918 possible internal network
acl localnet src 172.16.0.0/12	# RFC1918 possible internal network
acl localnet src 192.168.0.0/16	# RFC1918 possible internal network
acl localnet src fc00::/7       # RFC 4193 local private network range
acl localnet src fe80::/10      # RFC 4291 link-local (directly plugged) machines
acl SSL_ports port 443
acl Safe_ports port 80		# http
acl Safe_ports port 21		# ftp
acl Safe_ports port 443		# https
acl Safe_ports port 70		# gopher
acl Safe_ports port 210		# wais
acl Safe_ports port 1025-65535	# unregistered ports
acl Safe_ports port 280		# http-mgmt
acl Safe_ports port 488		# gss-http
acl Safe_ports port 591		# filemaker
acl Safe_ports port 777		# multiling http
acl CONNECT method CONNECT
http_access deny !Safe_ports
http_access deny CONNECT !SSL_ports
http_access allow localhost manager
http_access deny manager
http_access allow localnet
http_access allow localhost
http_access deny all
http_port 3128
coredump_dir /var/spool/squid
refresh_pattern ^ftp:		1440	20%	10080
refresh_pattern ^gopher:	1440	0%	1440
refresh_pattern -i (/cgi-bin/|\?) 0	0%	0
refresh_pattern .		0	20%	4320

Configuring Squid as an HTTP Proxy

Here, we will show you how to configure squid as an HTTP proxy using only the client IP address for authentication.

Add Squid ACLs

If you wish to allow IP address to access the web through your new proxy server, you will need to add new acl(access control list) line in the configuration file.

# vim /etc/squid/squid.conf

The line you should add is:

acl localnet src XX.XX.XX.XX

Where XX.XX.XX.XX is the actual client IP address you wish to add. The line should be added in the beginning of the file where the ACLs are defined. It is a good practice to add a comment next to ACL which will describe who uses this IP address.

It is important to note that if Squid is located outside your local network, you should add the public IP address of the client.

You will need to restart Squid so the new changes can take effect.

# systemctl  restart squid

Open Squid Proxy Ports

As you may have seen in the configuration file, only certain ports are allowed for connecting. You can add more by editing the configuration file.

acl Safe_ports port XXX

Where XXX is the actual port you wish to load. Again it is a good idea to leave a comment next to that will describe what the port is going to be used for.

For the changes to take effect, you will need to restart squid once more.

# systemctl  restart squid

Squid Proxy Client Authentication

You will most probably want your users to authenticate before using the proxy. For that purpose, you can enable basic http authentication. It is easy and fast to configure.

First you will need httpd-tools installed.

# yum -y install httpd-tools

Now lets create a file that will later store the username for the authentication. Squid runs with user “squid” so the file should be owned by that user.

# touch /etc/squid/passwd
# chown squid: /etc/squid/passwd

Now we will create a new user called “proxyclient” and setup its password.

# htpasswd /etc/squid/passwd proxyclient

New password:
Re-type new password:
Adding password for user proxyclient

Now to configure the autnetication open the configuration file.

# vim /etc/squid/squid.conf

After the ports ACLs add the following lines:

auth_param basic program /usr/lib64/squid/basic_ncsa_auth /etc/squid/passwd
auth_param basic children 5
auth_param basic realm Squid Basic Authentication
auth_param basic credentialsttl 2 hours
acl auth_users proxy_auth REQUIRED
http_access allow auth_users

Save the file and restart squid so that the new changes can take effect:

# systemctl restart squid

Block Websites on Squid Proxy

Finally we will create one last ACL that will help us block unwanted websites. First create the file that will store the blacklisted sites.

# touch /etc/squid/blacklisted_sites.acl

You can add some domains you wish to block. For example:

.badsite1.com
.badsite2.com

The proceding dot tells squid to block all referecnes to that sites including www.badsite1subsite.badsite1.cometc.

Now open Squid’s configuration file.

# vim /etc/squid/squid.conf

Just after the ports ACLs add the following two lines:

acl bad_urls dstdomain "/etc/squid/blacklisted_sites.acl"
http_access deny bad_urls

Now save the file and restart squid:

# systemctl restart squid

Once everyting configured correctly, now you can configure your local client browser or operating system’s network settings to use your squid HTTP proxy.

Conclusion

In this tutorial you learned how to install, secure and configure a Squid HTTP Proxy server on your own. With the information you just got, you can now add some basic filtering for incoming and outgoing traffic through Squid.

If you wish to go the extra mile, you can even configure squid to block some websites during working hours to prevent distractions. If you have any questions or comments, please post them in the comment section below.

Source

How to Setup “Squid Proxy” Server on Ubuntu and Debian

Squid is a most popular caching and forwarding HTTP web proxy server used my wide range of companies to cache web pages from a web server to improve web server speed, reduce response times and reduce network bandwidth usage.

Read AlsoHow to Create an HTTP Proxy Using Squid on CentOS 7

In this article, we will explain how to install a squid proxy server on Ubuntu and Debian distributions and use it as an HTTP proxy server.

How to Install Squid on Ubuntu

Before we begin, you should know that Squid server doesn’t have any requirements, but the amount of RAM utilization may differ based on the clients browsing the internet via the proxy server.

Squid package is available to install from the base Ubuntu repository, but before that make sure to update your packages by running.

$ sudo apt update

Once your packages are up to date, you can proceed further to install squid and start and enable it on system startup using following commands.

$ sudo apt -y install squid
$ sudo systemctl start squid
$ sudo systemctl enable squid

At this point your Squid web proxy should already be running and you can verify the status of the service with.

$ sudo systemctl status squid
Sample Output
● squid.service - LSB: Squid HTTP Proxy version 3.x
   Loaded: loaded (/etc/init.d/squid; generated)
   Active: active (running) since Tue 2018-12-04 06:42:43 UTC; 14min ago
     Docs: man:systemd-sysv-generator(8)
    Tasks: 4 (limit: 1717)
   CGroup: /system.slice/squid.service
           ├─2761 /usr/sbin/squid -YC -f /etc/squid/squid.conf
           ├─2766 (squid-1) -YC -f /etc/squid/squid.conf
           ├─2768 (logfile-daemon) /var/log/squid/access.log
           └─2772 (pinger)

Dec 04 06:42:43 tecmint systemd[1]: Starting LSB: Squid HTTP Proxy version 3.x...
Dec 04 06:42:43 tecmint squid[2708]:  * Starting Squid HTTP Proxy squid
Dec 04 06:42:43 tecmint squid[2708]:    ...done.
Dec 04 06:42:43 tecmint systemd[1]: Started LSB: Squid HTTP Proxy version 3.x.
Dec 04 06:42:43 tecmint squid[2761]: Squid Parent: will start 1 kids
Dec 04 06:42:43 tecmint squid[2761]: Squid Parent: (squid-1) process 2766 started

Following are the some important squid file locations you should be aware of:

  • Squid configuration file: /etc/squid/squid.conf
  • Squid Access log: /var/log/squid/access.log
  • Squid Cache log: /var/log/squid/cache.log

The default configuration file contains some configuration directives that needs to be configured to affect the behavior of the Squid.

Now open this file for editing using Vi editor and make changes as shown below.

$ sudo vim /etc/squid/squid.conf

Now, you may search about the following lines and change them as requested, in the Vi editor, you may search about those lines by hitting the ‘ESC’ and typing “/” key to writing the specific lines to look for.

  • http_port : This is the default port for the HTTP proxy server, by default it is 3128, you may change it to any other port that you want, you may also add the “transparent” tag to the end of the line like http_port 8888 transparent to make Squid proxy act like a transparent proxy if you want.
  • http_access deny all : This line won’t let anybody to access the HTTP proxy server, that’s why you need to change it to http_access allow all to start using your Squid proxy server.
  • visible_hostname : This directive is used to set the specific hostname to a squid server. You can give any hostname to squid.

After making above changes, you may restart the Squid proxy server using the command.

$ sudo systemctl restart squid

Configuring Squid as an HTTP Proxy on Ubuntu

In this squid configuration section, we will explain you how to configure squid as an HTTP proxy using only the client IP address for authentication.

Add Squid ACLs

If you wish to allow only one IP address to access the internet through your new proxy server, you will need to define new acl (access control list) in the configuration file.

$ sudo vim /etc/squid/squid.conf

The acl rule you should add is:

acl localnet src XX.XX.XX.XX

Where XX.XX.XX.XX is the IP address of client machine. This acl should be added in the beginning of the ACL’s section as shown in the following screenshot.

Add IP Address to Allow Web

Add IP Address to Allow Web

It is always a good practice to define a comment next to ACL which will describe who uses this IP address, for example.

acl localnet src 192.168.0.102  # Boss IP address

You will need to restart Squid service to take the new changes into effect.

$ sudo systemctl restart squid

Open Ports in Squid Proxy

By default, only certain ports are allowed in the squid configuration, if you wish to add more just define them in the configuration file as shown.

acl Safe_ports port XXX

Where XXX is the port number that you wish to allow. Again it is a good practive to define a comment next to acl that will describe what the port is going to be used for.

Add Ports in Squid Proxy

Add Ports in Squid Proxy

For the changes to take effect, you will need to restart squid once more.

$ sudo systemctl restart squid

Squid Proxy Client Authentication

To allow users to authenticate before using the proxy, you need to enable basic http authentication in the configuration file, but before that you need to install apache2-utils package using following command.

$ sudo apt install apache2-utils

Now create a file called “passwd” that will later store the username for the authentication. Squid runs with user “proxy” so the file should be owned by that user.

$ sudo touch /etc/squid/passwd
$ sudo chown proxy: /etc/squid/passwd
$ ls -l /etc/squid/passwd

Now we will create a new user called “tecmint” and setup its password.

$ sudo htpasswd /etc/squid/passwd tecmint

New password: 
Re-type new password: 
Adding password for user tecmint

Now to enable basic http authentication open the configuration file.

$ sudo vim /etc/squid/squid.conf

After the ports ACLs add the following lines:

auth_param basic program /usr/lib64/squid/basic_ncsa_auth /etc/squid/passwd
auth_param basic children 5
auth_param basic realm Squid Basic Authentication
auth_param basic credentialsttl 2 hours
acl auth_users proxy_auth REQUIRED
http_access allow auth_users

Enable Squid User Authentication

Enable Squid User Authentication

Save the file and restart squid so that the new changes can take effect:

$ sudo systemctl restart squid

Block Websites on Squid Proxy

To block access to unwanted websites, first create a file called “blacklisted_sites.acl” that will store the blacklisted sites in it.

$ sudo touch /etc/squid/blacklisted_sites.acl

Now add the websites that you wish to block access, for example.

.badsite1.com
.badsite2.com

The proceeding dot informs squid to block all references to that sites including www.badsite1subsite.badsite1.com etc.

Now open Squid’s configuration file.

$ sudo vim /etc/squid/squid.conf

Just after the above ACLs add the following two lines:

acl bad_urls dstdomain "/etc/squid/blacklisted_sites.acl"
http_access deny bad_urls

Block Websites in Squid

Block Websites in Squid

Now save the file and restart squid:

$ sudo systemctl restart squid

Block Specific Keyword with Squid

To block a list of keywords, first create a file called “blockkeywords.lst” that will store the blacklisted keywords in it.

$ sudo touch /etc/squid/blockkeywords.lst

Now add the keywords that you wish to block access, for example.

facebook
instagram
gmail

Now open Squid’s configuration file and add the following rule.

acl blockkeywordlist url_regex "/etc/squid/blockkeywords.lst"
http_access deny blockkeywordlist

Now save the file and restart squid:

$ sudo systemctl restart squid

Once everything configured accurately, you can now configure your local client web browser or operating system’s network settings to use your newly configured squid HTTP proxy.

Configure Client to Use Squid Proxy

Now to test that your proxy server is working or not, you may open Firefox and go to Edit –> Preferences –> Advanced –> Network –> Settings and select “Manual proxy configuration” and enter your proxy server IP address and Port to be used for all connection as it follows.

Configure Client to Use Squid Proxy

Configure Client to Use Squid Proxy

Once you fill all the required proxy details, you will be able to surf the Web using your Squid proxy server, you may do the same thing in any other browser or program you want.

To make sure that you are surfing the web using your proxy server, you may visit http://www.ipaddresslocation.org/, in the right top corner you must see the same IP address as your server IP address.

For more additional configuration settings, you may check official squid documentation. If you have any questions or comments, please add them in the comment section below.

Source

Installation of Ubuntu 16.04 Server Edition and Initial Ubuntu Server Setup

Ubuntu Server 16.04, also named Xenial Xerus, has been released by Canonical and it’s now ready for installation.

The details about this new LTS version can be found on the previous article: How to upgrade Ubuntu 15.10 to 16.04.

This topic will guide you on how you can install Ubuntu 16.04 Server Edition with Long Time Support on your machine.

If you’re looking for Desktop Edition, read our previous article: Installation of Ubuntu 16.04 Desktop

Requirements

  1. Ubuntu 16.04 Server ISO Image

Install Ubuntu 16.04 Server Edition

1. On the first step visit the above link and download the latest version of Ubuntu Server ISO image on your computer.

Once the image download completes, burn it to a CD or create a bootable USB disk using Unbootin (for BIOS machines) or Rufus (for UEFI machines).

2. Place the bootable media intro the appropriate drive, start-up the machine and instruct the BIOS/UEFI by pressing a special function key (F2F11F12) to boot-up from the inserted USB/CD drive.

In a few seconds you will be presented with the first screen of Ubuntu installer. Select your language to perform the installation and hit Enter key to move to the next screen.

Choose Ubuntu 16.04 Server Installation Language

Choose Ubuntu 16.04 Server Installation Language

3. Next, select the first option, Install Ubuntu Server and press Enter key to continue.

Install Ubuntu 16.04 Server

Install Ubuntu 16.04 Server

4. Select the language you with to install the system and press Enter again to continue further.

Select Language for Ubuntu 16.04 Server

Select Language for Ubuntu 16.04 Server

5. On the next series of screen choose your physical location from the presented list. If your location is different than the ones offered on the first screen, select other and hit Enter key, then select the location based on your continent and country. This location will be also used by the timezone system variable. Use the below screenshots as a guide.

Choose Location for Ubuntu 16.04 Server

Choose Location for Ubuntu 16.04 Server

Select Country Region

Select Country Region

Select Area Location

Select Area Location

6. Assign the locales and keyboard settings for your system as illustrated below and hit Enter to continue the installation setup.

Configure Locales

Configure Locales

Configure Keyboard Layout

Configure Keyboard Layout

7. The installer will load a series of additional components required for the next steps and will automatically configure your network settings in case you have a DHCP server on the LAN.

Because this installation is intended for a server it’s a good idea to setup a static IP address for your network interface.

To do this you can interrupt the automatic network configuration process by pressing on Cancel or once the installer reaches hostname phase you can hit on Go Back and choose to Configure network manually.

Set Ubuntu 16.04 Hostname

Set Ubuntu 16.04 Hostname

Configure Network Manually

Configure Network Manually

8. Enter your network settings accordingly (IP Address, netmask, gateway and at least two DNS nameservers) as illustrated on the below images.

Set Static IP Address on Ubuntu 16.04

Set Static IP Address on Ubuntu 16.04

Configure Network Mask for Ubuntu 16.04

Configure Network Mask for Ubuntu 16.04

Configure Network Gateway for Ubuntu 16.04

Configure Network Gateway for Ubuntu 16.04

Configure Network DNS on Ubuntu 16.04

Configure Network DNS on Ubuntu 16.04

9. On the next step setup a descriptive hostname for your machine and a domain (not necessary required) and hit on Continue to move to the next screen. This step concludes the network settings.

Set Ubuntu 16.04 Server Hostname

Set Ubuntu 16.04 Server Hostname

Set Ubuntu 16.04 Domain Name

Set Ubuntu 16.04 Domain Name

10. On this step the installer prompts you to setup a username and a password for your system. This username will be granted by the system with sudo powers, so, technically, this user will be the supreme administrator next to root account (which is disabled by default).

Thus, choose an inspired username, maybe hard to guess for security reasons, with a strong password and hit on Continue. Choose not to encrypt your home directory and press Enter to continue further.

Setup User and Password

Setup User and Password

11. Next, the installer will automatically set your clock based on the physical location configured earlier. In case the location is correctly chosen hit on Yes to continue to disk partition layout.

Configure System Clock

Configure System Clock

12. On the next step you can choose the method that will be used to slice up your disk. For instance, if you need to create custom partition scheme (such as /home/var/boot etc) choose Manual method.

For a general purpose server you can stick to Guided with LVM method as illustrated below, which automatically creates the partitions on your behalf.

Select Partition Method

Select Partition Method

13. Next, select the disk that will be used by the installer to create partitions and press Enter key.

Select Disk Partition

Select Disk Partition

14. Answer with Yes at the next screen in order to commit changes to disk with LVM scheme and hit on Continue to use the entire disk space for guided partitions.

Add Disk Partition Size

Add Disk Partition Size

Confirm Disk Partition Changes

Confirm Disk Partition Changes

15. Finally, approve for the last time the changes to be written to disk by pressing on Yes and the installation will now begin. From this step on all the changes will be committed to disk.

Confirm Disk Partition Changes

Confirm Disk Partition Changes

Installing Ubuntu 16.04 Server

Installing Ubuntu 16.04 Server

16. In case your system is behind a proxy or a firewall use the next screen to bypass the network restrictions, otherwise just leave it black and hit on Continue.

Configure System Package Manager

Configure System Package Manager

17. Next, the installer will configure apt repositories and will install the selected software. After it finishes the installation tasks a new screen will appear which will ask you how to manage the upgrade process. Select Noautomatic updates for now (you will manually select what updates are necessary) and hit Enter key to continue.

Manage Ubuntu 16.04 Upgrades

Manage Ubuntu 16.04 Upgrades

18. On the next step you will be asked to select what software to install. Select only standard system utilities and OpenSSH server (if you require remote access) by pressing the spacebar key and hit on Continue.

System Software Selection

System Software Selection

19. Once the installer finishes installing the software, a new screen will prompt you whether to install the Grubboot loader to hard disk MBR (first 512 byte sector). Obviously without the GRUB you can’t boot up your system after restart, so hit on Yes to continue with the installation.

Install Grub Boot Loader

Install Grub Boot Loader

20. Finally, after the boot loader is written to Hard Disk MBR, the installation process finishes. Hit on Continue to reboot the machine and remove the installation media.

Finish Ubuntu 16.04 Server Installation

Finish Ubuntu 16.04 Server Installation

21. After reboot, login to your system console using the credentials configured during the installation process and you’re good to go on production with your server.

Ubuntu 16.04 Server Login Prompt

Ubuntu 16.04 Server Login Prompt

That’s all! Keep in mind that this version of Ubuntu has official maintenance support from Canonical until 2021for hardware, bugs, software and security updates.

Initial Ubuntu Server Setup for Beginners

This tutorial will guide you on the first basic steps you need to configure on a new installed Ubuntu server in order to increase security and reliability for your server.

The configurations explained in this topic are almost the same for all Ubuntu server systems, regarding of the underlying OS platform, whether Ubuntu is installed on a bare-metal server, in a private virtual machine or a virtual machine spinned-out in a VPS public cloud.

Requirements

  1. Ubuntu Server Edition installation

Update and Upgrade Ubuntu System

The first step you need to take care of in case of fresh installation of Ubuntu server or a new deployed Ubuntu VPS is to make sure the system and all system components, such as the kernel, the package manager and all other installed packages are up-to-date with the latest released versions and security patches.

To update Ubuntu server, to log in to server’s console with an account with root privileges or directly as root and run the below commands in order to perform the update and upgrade process.

$ sudo apt update 

Update Ubuntu Server

Update Ubuntu Server

After running the update command, you will see the number of available packages for upgrading process and the command used for listing the packages upgrades.

$ sudo apt list --upgradable

List Upgrade Ubuntu Packages

List Upgrade Ubuntu Packages

After you’ve consulted the list of packages available for upgrading, issue the below command to start system upgrade process.

$ sudo apt upgrade

Upgrade Ubuntu Server Packages

Upgrade Ubuntu Server Packages

In order to remove all locally downloaded deb packages and all other apt-get caches, execute the below command.

$ sudo apt autoremove
$ sudo apt clean

Autoremove APT Packages and Cache

Autoremove APT Packages and Cache

Create New Account in Ubuntu

By default, as a security measure, the root account is completely disabled in Ubuntu. In order to create a new account on the system, log in to the system with the account user with root privileges and create a new account with the below command.

This new account will be granted with root powers privileges via sudo command and will be used to perform administrative tasks in the system. Make sure you setup a strong password to protect this account. Follow the adduser prompt to setup the user details and password.

$ sudo adduser ubuntu_user

Create User in Ubuntu

Create User in Ubuntu

If this account will be assigned to another system admin, you can force the user to change its password at the first log in attempt by issuing the following command.

$ sudo chage -d0 ubuntu_user

For now, the new added user cannot perform administrative tasks via sudo utility. To grant this new user account with administrative privileges you should add the user to “sudo” system group by issuing the below command.

$ sudo usermod -a -G sudo ubuntu_user

By default, all users belonging to the “sudo” group are allowed to execute commands with root privileges via sudo utility. Sudo command must be used before writing the command needed for execution, as shown in the below example.

$ sudo apt install package_name

Test if the new user has the root privileges granted, by logging in to the system and run the apt updatecommand prefixed with sudo.

$ su - ubuntu_user
$ sudo apt update

Verify New User

Verify New User

Configure System Hostname in Ubuntu

Usually, the machine hostname is set-up during the system installation process or when the VPS is created in the cloud. However, you should change the name of your machine in order to better reflect the destination of your server or to better describe its final purpose.

In a large company, machines are named after complex naming schemes in order to easily identify the machine in datacenter’s racks. For instance, if your Ubuntu machine will operate a mail server, the name of the machine should reflect this fact and you can setup machine hostname as mx01.mydomain.lan, for example.

To show details about your machine hostname run the following command.

$ hostnamectl

In order to change the name of your machine, issue hostnamectl command with the new name you will configure for your machine, as illustrated in the below excerpt.

$ sudo hostnamectl set-hostname tecmint

Verify the new name of your system with one of the below commands.

$ hostname
$ hostname -s
$ cat /etc/hostname 

Set Hostname in Ubuntu Server

Set Hostname in Ubuntu Server

Setup SSH with Public Key Authentication in Ubuntu

To increase system security degree of an Ubuntu server, you should set-up SSH public key authentication for an local account. In order to generate SSH Key Pair, the public and private key, with a specifying a key length, such as 2048 bits, execute the following command at your server console.

Make sure you’re logged in to the system with the user you’re setting up the SSH key.

$ su - ubuntu_user
$ ssh-keygen -t RSA -b 2048

Setup SSH Keys in Ubuntu

Setup SSH Keys in Ubuntu

While the key is generated, you will be prompted to add passphrase in order to secure the key. You can enter a strong passphrase or choose to leave the passphrase blank if you want to automate tasks via SSH server.

After the SSH key has been generated, you can copy the public key to a remote server by executing the below command. To install the public key to the remote SSH server you will need a remote user account with the proper permissions and credentials to log in to remote server.

$ ssh-copy-id remote_user@remote_server

Copy SSH Key to Remote Server

Copy SSH Key to Remote Server

You should be able to automatically log in via SSH to the remote server using the public key authentication method. You won’t need to add the remote user password while using SSH public key authentication.

After you’ve logged in to the remote server, you can start to execute commands, such as w command to list ssh remote logged in users, as shown in the below screenshot.

Type exit in the console to close the remote SSH session.

$ ssh remote_user@remote_server
$ w
$ exit

Verify SSH Passwordless Login

Verify SSH Passwordless Login

To see the content of your public SSH key in order to manually install the key to a remote SSH server, issue the following command.

$ cat ~/.ssh/id_rsa.pub

View SSH Key

View SSH Key

Secure SSH Server in Ubuntu

In order to secure the SSH daemon you should change the default SSH port number from 22 to a random port, higher than 1024, and disallow remote SSH access to the root account via password or key, by opening SSH server main configuration file and make the following changes.

$ sudo vi /etc/ssh/sshd_config

First, search the commented line #Port22 and add a new line underneath (replace the listening port number accordingly):

Port 2345

Don’t close the file, scroll down and search for the line #PermitRootLogin yes, uncomment the line by removing the # sign (hashtag) from the beginning of the line and modify the line to look like shown in the below excerpt.

PermitRootLogin no

Secure SSH Service

Secure SSH Service

Afterwards, restart the SSH server to apply the new settings and test the configuration by trying to log in from a remote machine to this server with the root account via the new port number. The access to root account via SSH should be restricted.

$ sudo systemctl restart sshd

Also, run netstat or ss command and filter the output via grep in order to show the new listening port number for SSH server.

$ sudo ss -tlpn| grep ssh
$ sudo netstat -tlpn| grep ssh

Verify SSH Port

Verify SSH Port

There are situations where you might want to automatically disconnect all remote SSH connections established into your server after a period of inactivity.

In order to enable this feature, execute the below command, which adds the TMOUT bash variable to your account .bashrc hidden file and forces every SSH connection made with the name of the user to be disconnected or dropped-out after 5 minutes of inactivity.

$ echo 'TMOUT=300' >> .bashrc

Run tail command to check if the variable has been correctly added at the end of .bashrc file. All subsequent SSH connections will be automatically closed after 5 minutes of inactivity from now on.

$ tail .bashrc

In the below screenshot, the remote SSH session from drupal machine to Ubuntu server via ubuntu_user account has been timed out and auto-logout after 5 minutes.

Auto Disconnect SSH Sessions

Auto Disconnect SSH Sessions

Configure Ubuntu Firewall UFW

Every server needs a well configured firewall in order to secure the system at network level. Ubuntu server uses UFW application to manage the iptables rules on the server.

Check the status of UFW firewall application in Ubuntu by issuing the below commands.

$ sudo systemctl status ufw
$ sudo ufw status

Check UFW Firewall Status

Check UFW Firewall Status

Usually, the UFW firewall daemon is up and running in Ubuntu server, but the rules are not applied by default. Before enabling UFW firewall policy in you system, first you should add a new rule to allow SSH traffic to pass through firewall via the changed SSH port. The rule can be added by executing the below command.

$ sudo ufw allow 2345/tcp

After you’ve allowed SSH traffic, you can enable and check UFW firewall application with the following commands.

$ sudo ufw enable
$ sudo ufw status

Open SSH Port and Verify

Open SSH Port and Verify

To add new firewall rules for other network services subsequently installed on your server, such as HTTP server, a mail server or other network services, use the below firewall commands examples as guide.

$ sudo ufw allow http  #allow http traffic
$ sudo ufw allow proto tcp from any to any port 25,443  # allow https and smtp traffic

To list all firewall rules run the below command.

$ sudo ufw status verbose

Check UFW Firewall Rules

Check UFW Firewall Rules

Set Ubuntu Server Time

To control or query Ubuntu server clock and other related time settings, execute timedatectl command with no argument.

In order to change your server’s time zone settings, first execute timedatectl command with list-timezones argument to list all available time zones and, then, set the time zone of your system as shown in the below excerpt.

$ sudo timedatectl 
$ sudo timedatectl list-timezones 
$ sudo timedatectl set-timezone Europe/Vienna

Set Ubuntu Timezone

Set Ubuntu Timezone

The new systemd-timesyncd systemd daemon client can be utilized in Ubuntu in order to provide an accurate time for your server across network and synchronize time with an upper time peer server.

To apply this new feature of Systemd, modify systemd-timesyncd daemon configuration file and add the closest geographically NTP servers to NTP statement line, as shown in the below file excerpt:

$ sudo nano /etc/systemd/timesyncd.conf

Add following configuration to timesyncd.conf file:

[Time]
NTP=0.pool.ntp.org 1.pool.ntp.org
FallbackNTP=ntp.ubuntu.com

NTP Time Configuration

NTP Time Configuration

To add your nearest geographically NTP servers, consult the NTP pool project server list at the following address: http://www.pool.ntp.org/en/

Afterwards, restart the Systemd timesync daemon to reflect changes and check daemon status by running the below commands. After restart, the daemon will start to sync time with the new ntp server peer.

$ sudo systemctl restart systemd-timesyncd.service 
$ sudo systemctl status systemd-timesyncd.service

Start TimeSyncd Service

Start TimeSyncd Service

Disable and Remove Unneeded Services in Ubuntu

In order to get a list of all TCP and UDP network services up-and-running by default in your Ubuntu server, execute the ss or netstat command.

$ sudo netstat -tulpn
OR
$ sudo ss -tulpn

List All Running Services

List All Running Services

Staring with Ubuntu 16.10 release, the default DNS resolver is now controlled by systemd-resolved service, as revealed by the output of netstat or ss commands.

You should also check the systemd-resolved service status by running the following command.

$ sudo systemctl status systemd-resolved.service

Check Systemd Resolved Status

Check Systemd Resolved Status

The systemd-resolved service binds on all enabled network interfaces and listens on ports 53 and 5355 TCPand UDP.

Running system-resolved caching DNS daemon on a production server can be dangerous due to the numerous number of DDOS attacks performed by malicious hackers against unsecured DNS servers.

In order to stop and disable this service, execute the following commands.

$ sudo systemctl stop systemd-resolved
$ sudo systemctl disable systemd-resolved

Disable Systemd Resolved Service

Disable Systemd Resolved Service

Verify if the service has been stopped and disabled by issuing ss or netstat command. The systemd-resolved listening ports, 53 and 5355 TCP and UDP, should not be listed in netstat or ss command output, as illustrated in the below.

You should also reboot the machine in order to completely disable all systemd-resolved daemon services and restore the default /etc/resolv.conf file.

$ sudo ss -tulpn
$ sudo netstat -tulpn
$ sudo systemctl reboot

Verify All Running Services

Verify All Running Services

Although, you’ve disabled some unwanted networking services to run in your server, there are also other services installed and running in your system, such as lxc process and snapd service. These services can be easily detected via pstop or pstree commands.

$ sudo ps aux
$ sudo top
$ sudo pstree

List Running Services in Tree Format

List Running Services in Tree Format

In case you’re not going to use LXC container virtualization in your server or start installing software packaged via Snap package manager, you should completely disable and remove these services, by issuing the below commands.

$ sudo apt autoremove --purge lxc-common lxcfs
$ sudo apt autoremove --purge snapd

That’s all! Now, Ubuntu server is now prepared for installing additional software needed for custom network services or applications, such as installing and configuring a web server, a database server, a file share service or other specific applications.

Source

How to Install Ubuntu via PXE Server Using Local DVD Sources

PXE or Preboot eXecution Environment is a server-client mechanism which instructs a client machine to boot form network.

In this guide we’ll show how to install Ubuntu Server via a PXE server with local HTTP sources mirrored from Ubuntu server ISO image via Apache web server. The PXE server used in this tutorial is Dnsmasq Server.

Requirements:

  1. Ubuntu Server 16.04 or 17.04 Installation
  2. A network interface configured with Static IP address
  3. Ubuntu Server 16.04 or 17.04 ISO image

Step 1: Install and Configure DNSMASQ Server

1. In order to setup the PXE server, on the first step login with the root account or an account with root privileges and install Dnsmasq package in Ubuntu by issuing the following command.

# apt install dnsmasq

2. Next, backup dnsmasq main configuration file and then start editing the file with the following configurations.

# mv /etc/dnsmasq.conf /etc/dnsmasq.conf.backup
# nano /etc/dnsmasq.conf

Add the following configuration to dnsmasq.conf file.

interface=ens33,lo
bind-interfaces
domain=mypxe.local

dhcp-range=ens33,192.168.1.230,192.168.1.253,255.255.255.0,1h
dhcp-option=3,192.168.1.1
dhcp-option=6,192.168.1.1
dhcp-option=6,8.8.8.8
server=8.8.4.4
dhcp-option=28,10.0.0.255
dhcp-option=42,0.0.0.0

dhcp-boot=pxelinux.0,pxeserver,192.168.1.14

pxe-prompt="Press F8 for menu.", 2
pxe-service=x86PC, "Install Ubuntu 16.04 from network server 192.168.1.14", pxelinux
enable-tftp
tftp-root=/srv/tftp

On the above configuration file replace the following lines accordingly.

  • interface Replace with your own machine network interface.
  • domain – Replace it with your domain name.
  • dhcp-range – Define your own network range for DHCP to allocate IPs to this network segment and how long should an IP address for a client should be granted.
  • dhcp-option=3 – Your Gateway IP.
  • dhcp-option=6 DNS Server IPs – several DNS IPs can be defined.
  • server – DNS forwarder IPs Address.
  • dhcp-option=28 – Your network broadcast address.
  • dhcp-option=42 – NTP server – use 0.0.0.0 Address is for self-reference.
  • dhcp-boot – the pxe boot file and the IP address of the PXE server (here pxelinux.0 and IP address of the same machine).
  • pxe-prompt – Uses can hit F8 key to enter PXE menu or wait 2 seconds before automatically switching to PXE menu.
  • pxe=service – Use x86PC for 32-bit/64-bit architectures and enter a menu description prompt under string quotes. Other values types can be: PC98, IA64_EFI, Alpha, Arc_x86, Intel_Lean_Client, IA32_EFI, BC_EFI, Xscale_EFI and X86-64_EFI.
  • enable-tftp – Enables the build-in TFTP server.
  • tftp-root – the system path for net boot files.

3. Also, after you’ve finished editing the dnsmasq configuration file, create the directory for the PXE netboot files by issuing the below command and restart dnsmasq daemon to apply changes. Check dnsmasq service status to see if it has been started.

# mkdir /srv/tftp
# systemctl restart dnsmasq.service
# systemctl status dnsmasq.service

Step 2: Install TFTP Netboot Files

4. On the next step grab the latest version of Ubuntu server ISO image for 64-bit architecture by issuing the following command.

# wget http://releases.ubuntu.com/16.04/ubuntu-16.04.3-server-amd64.iso

5. After Ubuntu server ISO has been downloaded, mount the image in /mnt directory and list the mounted directory content by running the below commands.

# mount -o loop ubuntu-16.04.3-desktop-amd64.iso /mnt/
# ls /mnt/

Verify Ubuntu ISO Files

Verify Ubuntu ISO Files

6. Next, copy the netboot files from Ubuntu mounted tree to tftp system path by issuing the below command. Also, list tftp system path to see the copied files.

# cp -rf /mnt/install/netboot/* /srv/tftp/
# ls /srv/tftp/

Copy and Verify TFTP Files

Copy and Verify TFTP Files

Step 3: Prepare Local Installation Source Files

7. The local network installation sources for Ubuntu server will be provided via HTTP protocol. First, install, start and enable Apache web server by issuing the following commands.

# apt install apache2
# systemctl start apache2
# systemctl status apache2
# systemctl enable apache2

8. Then, copy the content of the mounted Ubuntu DVD to Apache web server web root path by executing the below commands. List the content of Apache web root path to check if Ubuntu ISO mounted tree has been completely copied.

# cp -rf /mnt/* /var/www/html/
# ls /var/www/html/

9. Next, open HTTP port in firewall and navigate to your machine IP address via a browser (http://192.168.1.14/ubuntu) in order to test if you can reach sources via HTTP protocol.

# ufw allow http

Check HTTP Ubuntu Sources

Check HTTP Ubuntu Sources

Step 4: Setup PXE Server Configuration File

10. In order to be able to pivot the rootfs via PXE and local sources, Ubuntu needs to be instructed via a preseed file. Create the following local-sources.seed file in your web server document root path with the following content.

# nano /var/www/html/ubuntu/preseed/local-sources.seed

Add following line to local-sources.seed file.

d-i live-installer/net-image string http://192.168.1.14/ubuntu/install/filesystem.squashfs

Here, make sure you replace the IP address accordingly. It should be the IP address where web resources are located. In this guide the web sources, the PXE server and TFTP server are hosted on the same system. In a crowded network you might want to run PXE, TFTP and web services on separate machines in order to improve PXE network speed.

11. A PXE Server reads and executes configuration files located in pxelinux.cfg TFTP root directory in this order: GUID files, MAC files and default file.

The directory pxelinux.cfg is already created and populated with the required PXE configuration files because we’ve earlier copied the netboot files from Ubuntu mounted ISO image.

In order to add the above preseed statement file to Ubuntu installation label in PXE configuration file, open the following file for editing by issuing the below command.

# nano /srv/tftp/ubuntu-installer/amd64/boot-screens/txt.cfg

In Ubuntu PXE txt.cfg configuration file replace the following line as illustrated in the below excerpt.

append auto=true url=http://192.168.1.14/ubuntu/preseed/local-sources.seed vga=788 initrd=ubuntu-installer/amd64/initrd.gz --- quiet

The /srv/tftp/ubuntu-installer/amd64/boot-screens/txt.cfg file should have the following global content:

default install
label install
	menu label ^Install Ubuntu 16.04 with Local Sources
	menu default
	kernel ubuntu-installer/amd64/linux
	append auto=true url=http://192.168.1.14/ubuntu/preseed/local-sources.seed vga=788 initrd=ubuntu-installer/amd64/initrd.gz --- quiet 
label cli
	menu label ^Command-line install
	kernel ubuntu-installer/amd64/linux
	append tasks=standard pkgsel/language-pack-patterns= pkgsel/install-language-support=false vga=788 initrd=ubuntu-installer/amd64/initrd.gz --- quiet

12. In case you want to add the preseed url statement to Ubuntu Rescue menu, open the below file and make sure you update the content as illustrated in the below example.

# nano /srv/tftp/ubuntu-installer/amd64/boot-screens/rqtxt.cfg

Add the followng configuration to rqtxt.cfg file.

label rescue
	menu label ^Rescue mode
	kernel ubuntu-installer/amd64/linux
	append auto=true url=http://192.168.1.14/ubuntu/preseed/local-sources.seed vga=788 initrd=ubuntu-installer/amd64/initrd.gz rescue/enable=true --- quiet

The important line you should update is url=http://192.168.1.14/ubuntu/preseed/local-sources.seed which specifies the URL address where the pressed file is located in your network.

13. Finally, open Ubuntu pxe menu.cfg file and comment the first three lines in order to expand the PXE boot screen as illustrated in the below screenshot.

# nano /srv/tftp/ubuntu-installer/amd64/boot-screens/menu.cfg

Comment these three following lines.

#menu hshift 13
#menu width 49
#menu margin 8

PXE Menu Configuration

PXE Menu Configuration

Step 5: Open Firewall Ports in Ubuntu

14. Execute netstat command with root privileges to identify dnsmasq, tftp and web open ports in listening state on your server as illustrated in the below excerpt.

# netstat -tulpn

Verify Open Ports

Verify Open Ports

15. After you’ve identified all required ports, issue the below commands to open the ports in ufw firewall.

# ufw allow 53/tcp
# ufw allow 53/udp
# ufw allow 67/udp
# ufw allow 69/udp
# ufw allow 4011/udp

Step 6: Install Ubuntu with Local Sources via PXE

16. To install Ubuntu server via PXE and use the local network installation sources, reboot your machine client, instruct the BIOS to boot from network and at the first PXE menu screen choose the first option as illustrated in the below images.

Select Network Boot

Select Network Boot

Select PXE Boot Option

Select PXE Boot Option

Install Ubuntu using PXE

Install Ubuntu using PXE

17. The installation procedure should be performed as usual. When the installer reaches the Ubuntu archive mirror country setup, use the up keyboard arrow to move to the first option, which says: enter information manually.

Select Ubuntu Mirror Archive

Select Ubuntu Mirror Archive

18. Press [enter] key to update this option, delete the mirror string and add the IP address of the web server mirror sources and press enter to continue as illustrated in the below image.

http://192.168.1.14

Enter Ubuntu Mirror Archive Hostname

Enter Ubuntu Mirror Archive Hostname

19. On the next screen, add your mirror archive directory as shown below and press enter key to continue with the installation process and usually.

/ubuntu

Select Ubuntu Mirror Archive Directory

Select Ubuntu Mirror Archive Directory

20. In case you want to see information about what packages are downloaded from your network local mirror, press [CTRL+ALT+F2] keys in order to change machine virtual console and issue the following command.

# tail –f /var/log/syslog

Check Network Mirror Logs

Check Network Mirror Logs

21. After the installation of the Ubuntu server finishes, login to the newly installed system and run the following command with root privileges in order to update the repositories packages from local network sources to official Ubuntu mirrors.

The mirrors needs to be changed in order to update the system using the internet repositories.

$ sudo sed –i.bak ‘s/192.168.1.14/archive.ubuntu.com/g’ /etc/apt/sources.list

Change Ubuntu Network Sources

Change Ubuntu Network Sources

Assure you replace the IP address according to the IP address of your own web local sources.

Official Ubuntu Network Sources

Official Ubuntu Network Sources

That’s all! You can now update your Ubuntu server system and install all required software. Installing Ubuntu via PXE and a local network source mirror can improve the installation speed and can save internet bandwidth and costs in case of deploying a large number of servers in a short period of time at your premises.

Source

WP2Social Auto Publish Powered By : XYZScripts.com