3 Useful GUI and Terminal Based Linux Disk Scanning Tools

There mainly two reasons for scanning a computer hard disk: one is to examine it for filesystem inconsistencies or errors that can result from persistent system crashes, improper closure of critical system software and more significantly by destructive programs (such as malware, viruses etc).

And another is to analyze its physical condition, where we can check a hard disk for bad sectors resulting from physical damage on the disk surface or failed memory transistor.

Suggested Read: How to Repair and Defragment Linux Partitions

In this article, we will review a mix of GUI and terminal based disk scanning utilities for Linux.

In case you notice any unusual behavior from a computer hard disk or a particular partition, one of the first things you can always investigate is filesystem inconsistency or errors and there is no other better utility for performing this other than fsck.

1. fsck – Filesystem Consistency Check

fsck is a system utility used to check and optionally repair a Linux filesystem. It is a front-end for several filesystem checkers.

Warning: Try out fsck commands on test Linux servers only, unless you know what you’re doing..

Always unmount a partition first before you can run fsck on it.

$ sudo unmount /dev/sdc1
$ sudo fsck -Vt vfat /dev/sdc1

In the command below, the switch:

  1. -t – specifies the filesystem type.
  2. -V – enables verbose mode.

You can find detailed usage instructions in the fsck man page:

$ man fsck

Once you have performed filesystem inconsistency tests, you proceed to carry out physical condition assessments.

2. badblock

badblocks is a utility for scanning bad blocks or bad sectors in hard disks. Assuming you detect any bad blocks on your hard disk, you can use it together with fsck or e2fsck to instruct the kernel not to use the bad blocks.

For more information on how to check bad blocks using badblock utility, read: How to Check Bad Sectors or Bad Blocks on Hard Disk in Linux.

3. S.M.A.R.T System Utilities

S.M.A.R.T (Self-Monitoring, Analysis and Reporting Technology) is a system built into nearly all modern ATA/SATA and SCSI/SAS hard disks as well as solid-state disks.

It collects in-depth information about a supported hard disk and you can get that data using the utilities below.

i. Smartctl

smartctl is one of the two utilities under the smartmontools package. It is a command line utility which controls and monitors the S.M.A.R.T system.

To install smartmontools package, run the applicable command below for your distro:

$ sudo apt-get install smartmontools   #Debian/Ubuntu systems 
$ sudo yum install smartmontools       #RHEL/CentOS systems

The following is an example of a smartctl command for reporting hard disk partition health where the option -Hhelps to show the general partition health condition after a self-test:

$ sudo smartctl -H /dev/sda6

Look through the smartctl man page for more usage guidelines:

$ man smartctl 

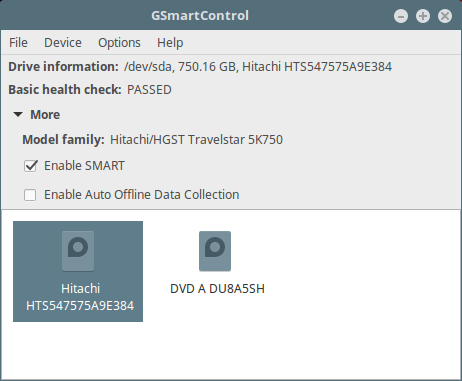
There is a GUI front-end for smartctl called gsmartcontrol which can be installed as follows:

$ sudo apt-get install gsmartcontrol  #Debian/Ubuntu systems 
$ sudo yum install gsmartcontrol       #RHEL/CentOS systems

GSmart Control - Linux Disk Scanning Tool

GSmart Control – Linux Disk Scanning Tool

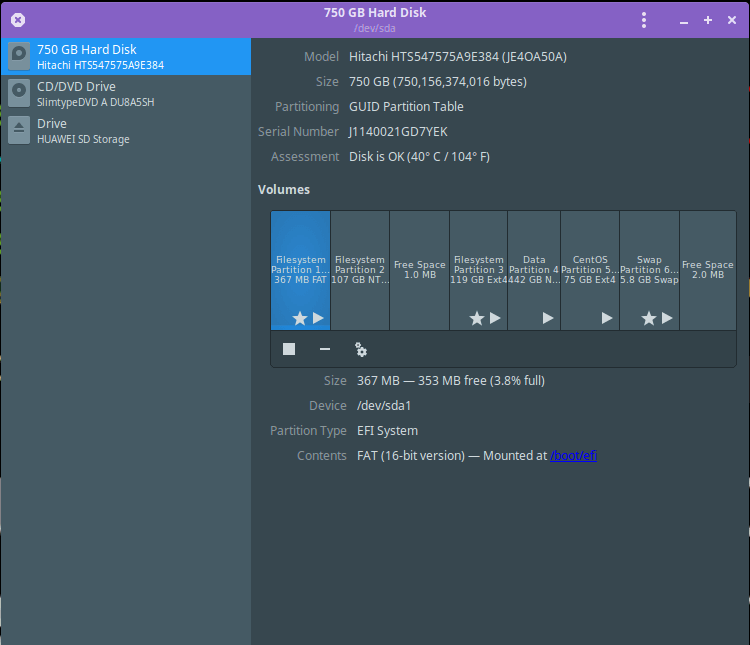
ii. Gnome Disk Utility( or Disks)

Gnome disk utility offers a GUI for doing all the partition management related tasks such as creating, deleting, mounting partitions and beyond. It comes pre-installed in majority of mainstream Linux systems such as Ubuntu, Fedora, Linux Mint and others.

To use it on Ubuntu, open the Dash and search for Disks, on Linux Mint, open Menu and search for Disks and on Fedora, click on Activities type Disks.

Gnome Disk Utility for Linux Disk Scanning

Gnome Disk Utility for Linux Disk Scanning

More importantly, it can as well provide S.M.A.R.T data and effect self-tests as in the following interface.

Gnome Disk Utility for Linux Disk Scanning

Gnome Disk Utility for Linux Disk Scanning

That’s it! In this article, we reviewed hard disk scanning utilities for Linux operating system. You can share with us any utilities/tools for the same purpose, that are not mentioned in the list above or ask any related questions all in the comments.

Source

10 Best Open Source Forum Software for Linux

A forum is a discussion platform where related ideas and views on a particular issue can be exchanged. You can setup a forum for your site or blog, where your team, customers, fans, patrons, audience, users, advocates, supporters, or friends can hold public or private discussions, as a whole or in smaller groups.

If you are planning to launch a forum, and you can’t build your own software from scratch, you can opt for any of the existing forum applications out there. Some forum applications allow you to setup only a single discussion site on a single installation, while others support multiple-forums for a single installation instance.

In this article, we will review 10 best open source forum software for Linux systems. By the end of this article, you will know exactly which open source forum software best suites your needs.

You can get a 2GB RAM VPS from Linode for $10, but it’s unmanaged. If you want a Managed VPS, then use our new BlueHost Promotion Offer, you will get upto 40% OFF on hosting with one Free Domain for Life. If you get a Managed VPS, they will probably install any of the following Forum Software for you.

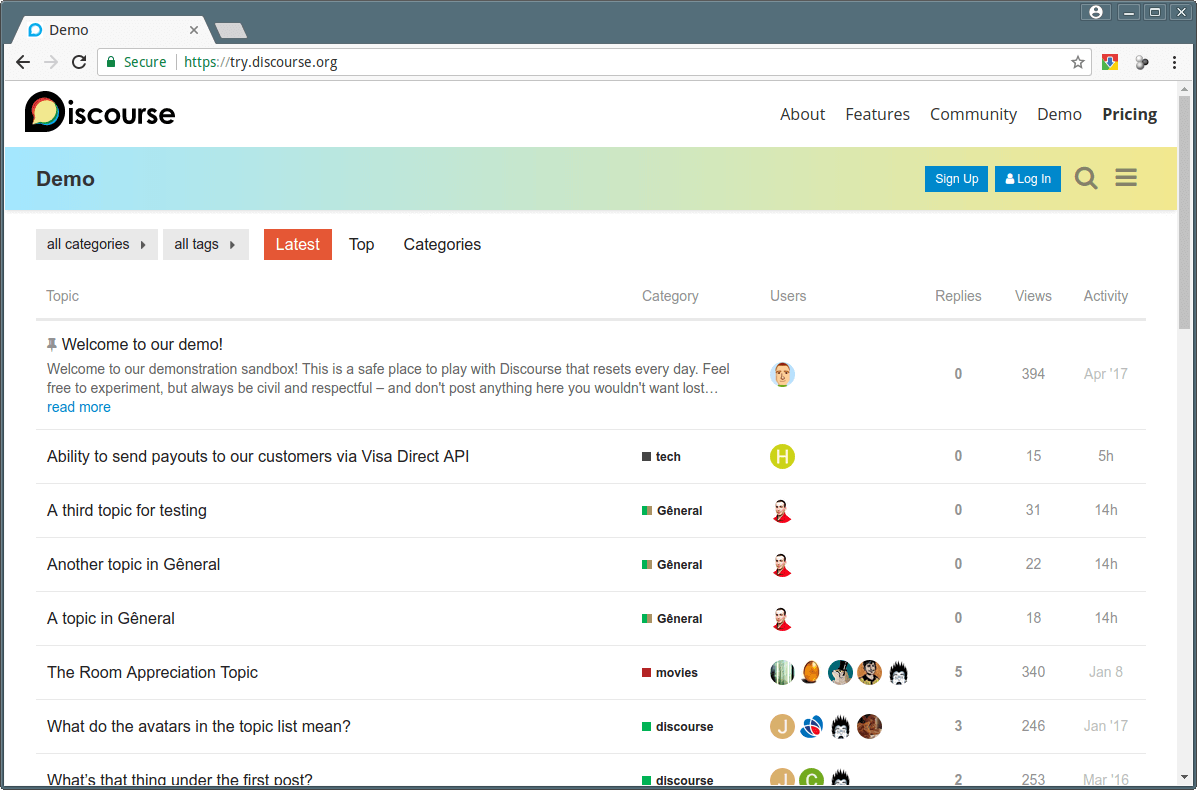
1. Discourse – Discussion Platform

Discourse is a free open source, simple, modern, incredibly powerful and feature-rich community discussion software.

Discourse Forum Software

Discourse Forum Software

It works as a mailing list, discussion forum, long-form chat room, and so much more. Its front-end is built using JavaScript and it is powered by the Ember.js framework; and the server side is developed using Ruby on Railsbacked by a PostgreSQL database and Redis cache.

It is responsive (auto-switches to a mobile layout for small screens), it supports: dynamic notifications, community moderation, social login, spam blocking, reply via email, emojis and badges. It also comes with a trust system and so much more. Above all, Discourse is simple, modern, awesome and fun, and has a one-click upgrade feature, once installed.

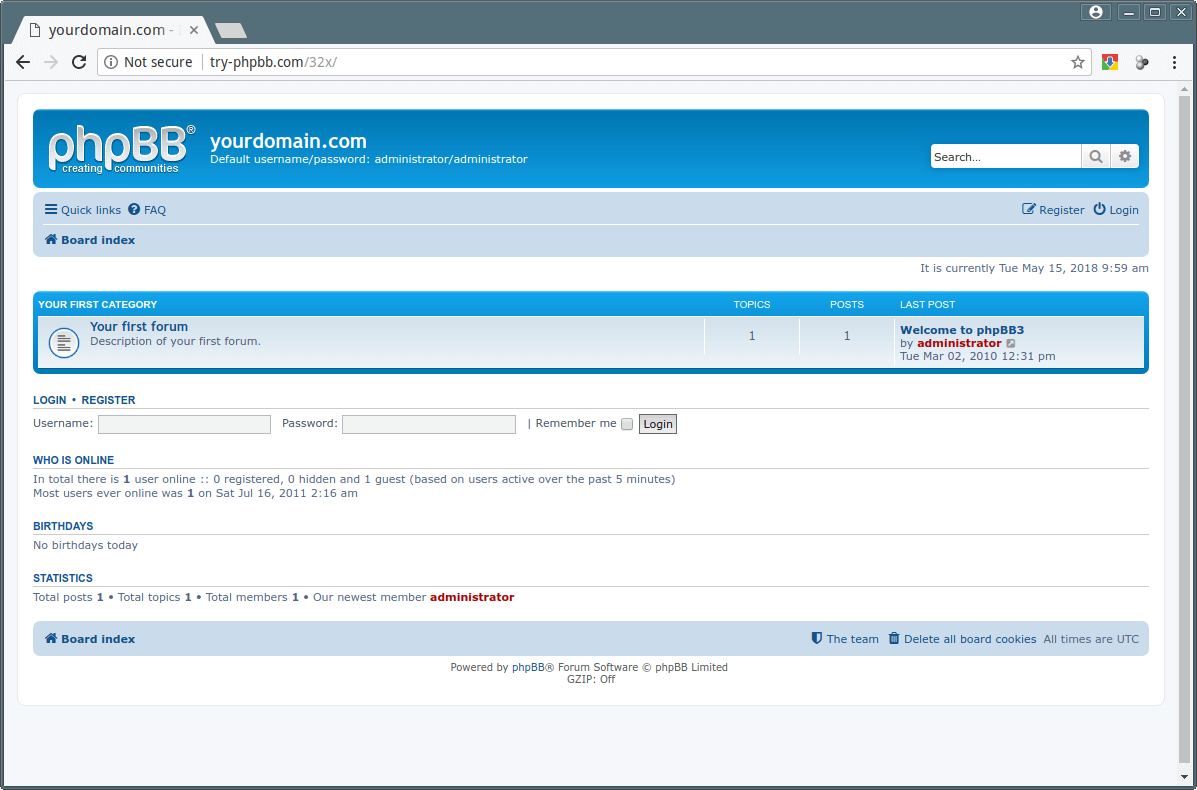
2. phpBB – Bulletin Board Software

phpBB is a free open source, powerful, feature-rich and highly extensible forum or bulletin board software. There are numerous extensions and a styles database (with hundreds of style and image packages) for you to enhance its core functionality and to customize your board respectively.

phpBB Bulletin Board Forum

phpBB Bulletin Board Forum

It is secure and comes with various tools to protect your forum from unwanted users and spam. It supports: a search system, private messaging, multiple methods of notifying users of forum activities, conversation moderators, and user-groups. Importantly, it has an advanced caching system for increased performance. You can integrate it with other applications via multiple plugins and so much more.

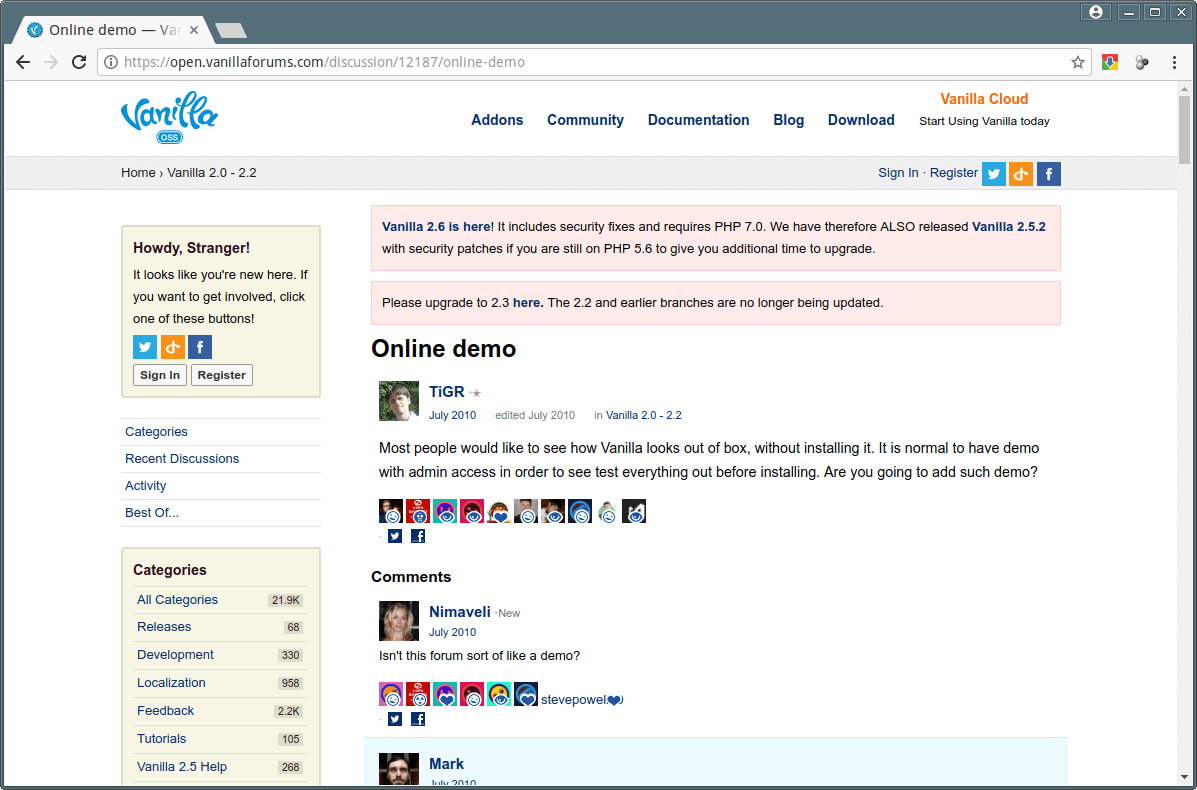
3. Vanilla – Modern Community Forum

Vanilla is an open source, fully-featured, intuitive, robust cloud-based and multi-lingual community forum software. It is easy to use giving users a modern forum experience, allows users to post questions and polls; it has an advance editor for formating posts with html, markdown, or bbcode, and supports @ mentions.

Vanilla Community Forum

Vanilla Community Forum

It also supports user-profiles, notifications, auto-save, avatars, private messaging, real-time preview, a powerful search facility, user-groups, single sign on and so much more. Vanilla can be integrated with social networks for easy sharing, login and more. It comes with numerous plugins and themes to enhance its primary features and customize its look and feel.

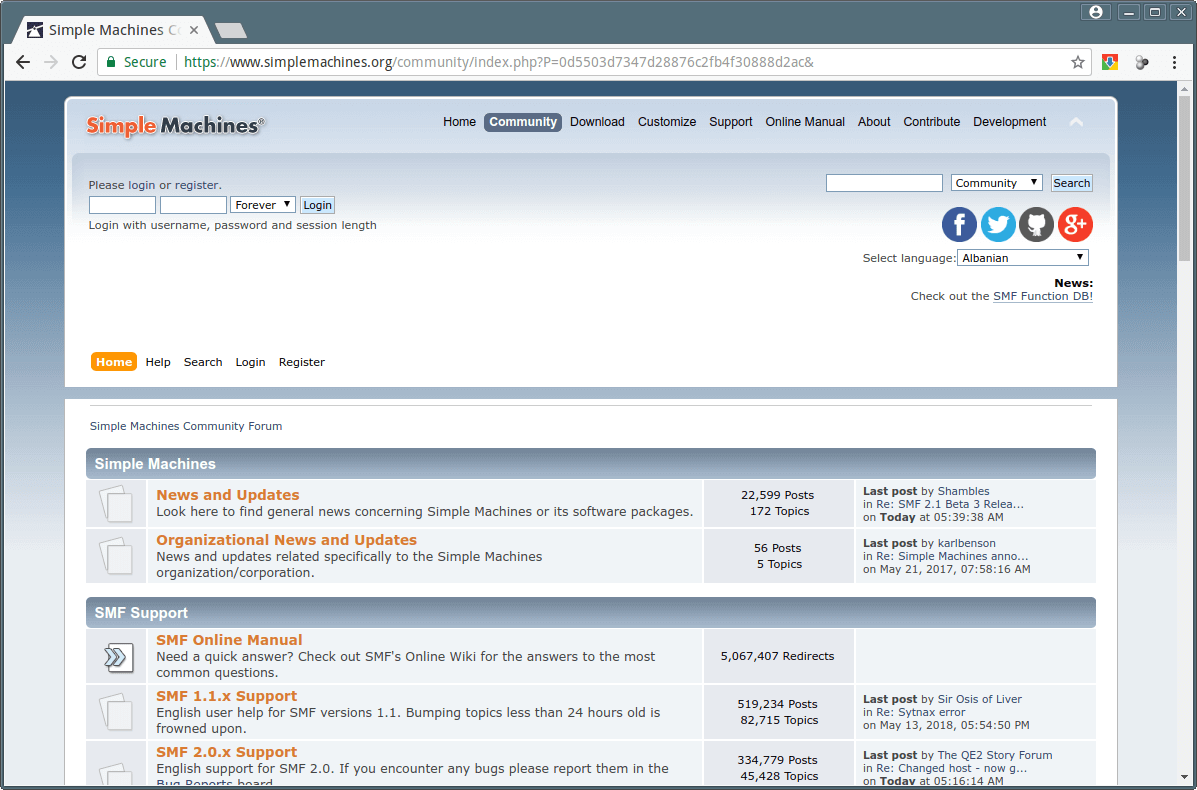
4. SimpleMachinesForum (SMF)

SimpleMachinesForum is a free, open source, simple, beautiful and powerful forum software. It is available in over 45 different languages. SMF is easy to use and highly customizable, with a multitude of powerful and effective features. It comes with high quality and reliable support.

Simple Machines Forum

Simple Machines Forum

SMF is highly customizable; it has many extensions/packages (under various categories such as security, socialization, administration, permissions, posting, theme enhancements and more) to modify its core functionality, add or remove features, and lot more.

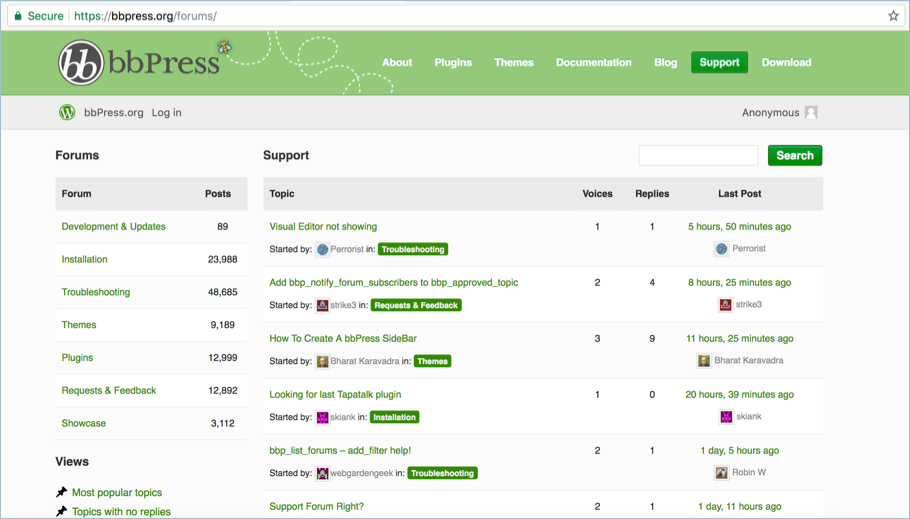
5. bbPress – Forum Software

bbPress is a free open source, simple, lightweight, fast and secure bulletin board software built in a WordPress-fashion. It is easy to install, and configure, fully integrated and supports setting up multiple forums on one site installation.

bbPress Forum Software

bbPress Forum Software

It is highly extensible and customizable, supports several plugins. It also supports RSS feeds and offers spam blocking functionality for additional security.

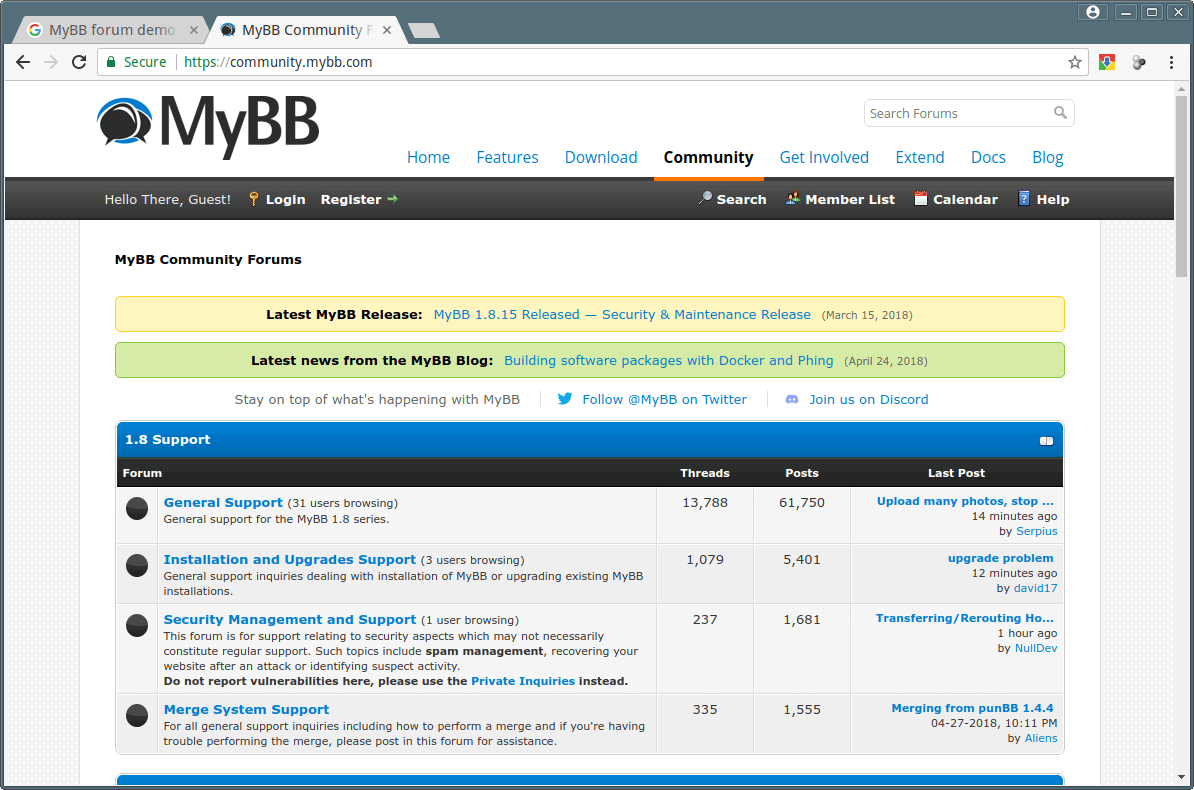
6. MyBB – Powerful Forum Software

MyBB is a free open source, simple, easy-to-use, intuitive yet powerful, and extremely efficient forum software. It is a discussion-oriented application that supports: user profiles, private messages, reputation, warnings, calenders and events, user promotion, moderation, and more.

MyBB Community Forum

MyBB Community Forum

It ships in with a number of plugins, and templates and themes to extend its core functionality and customize its default look and feel, allowing you to setup a fully customized and effective online community forum with ease.

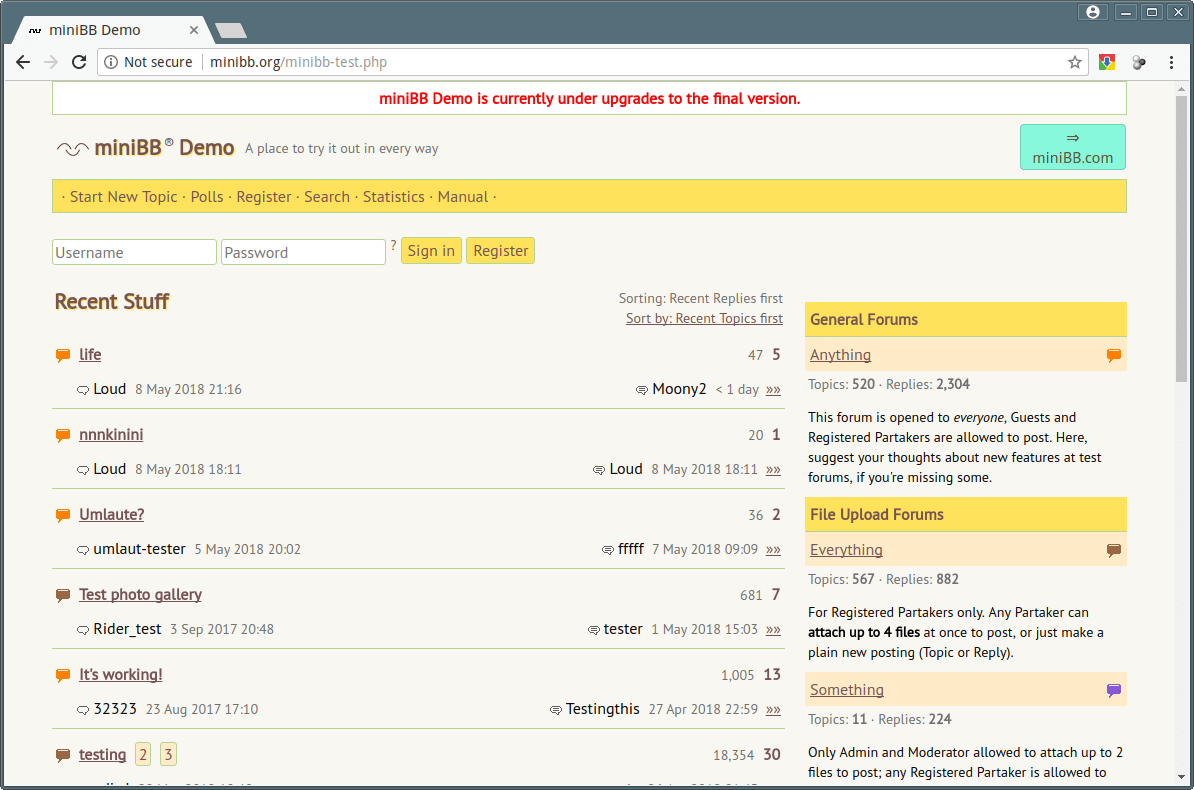
7. miniBB – Community Discussion Forum

miniBB is a free open source, standalone, lightweight, fast, and highly customizable software for building a web forum. It is suitable and effective for setting up a simple and stable community discussion platform, especially for novices. It allows for dynamic and content-rich discussions, and you can enable it to be responsive via the mobile template.

MiniBB Community Discussion Forum

MiniBB Community Discussion Forum

It can easily be integrated with your website, allowing you to change its layout to the look of your website. In addition, miniBB offers facilities for you to synchronize with an existing membership system. Importantly, it supports guest posts and quick moderation.

8. Phorum – Forum Software

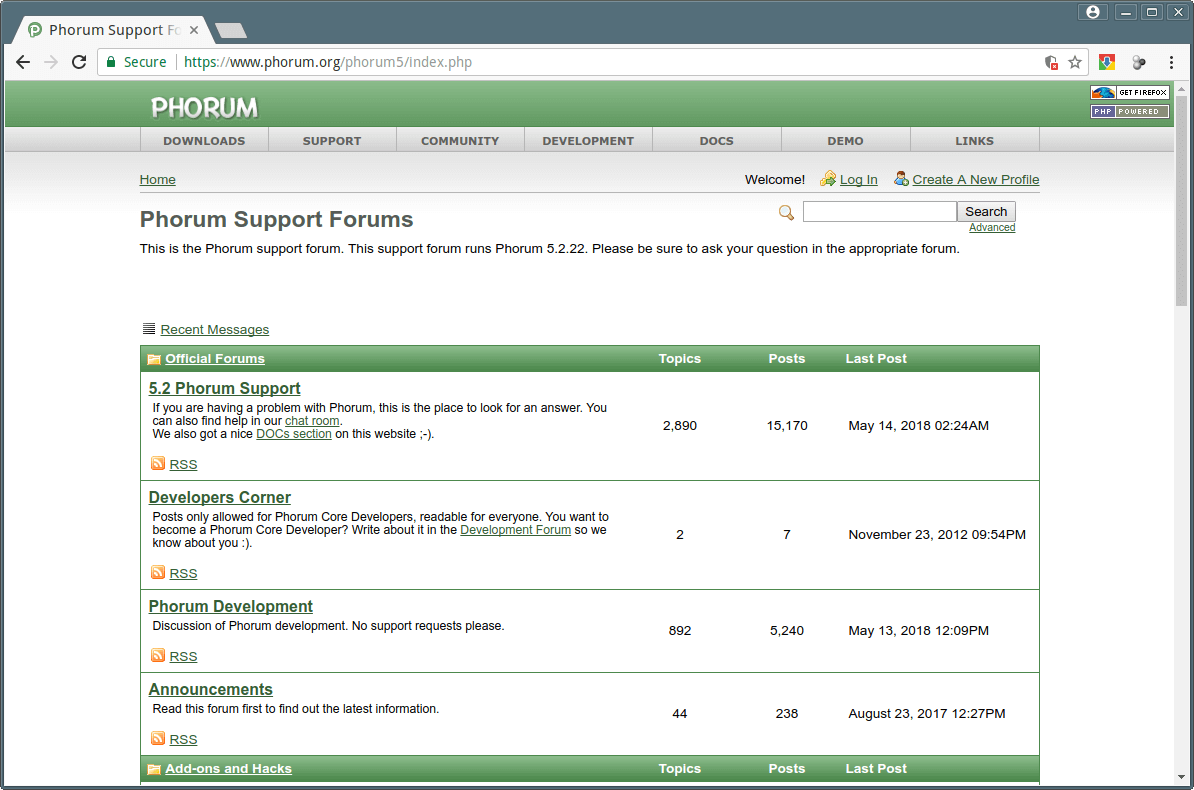
Phorum is a free open source, simple, highly-customizable, and easy-to-use PHP message board software. It has a very flexible hook and module system for you to customize your web community discussion platform.

Phorum Forum Software

Phorum Forum Software

You can easily changes its default using HTML templates that have simple to understand text commands in-built.

9. FluxBB – Forum Software

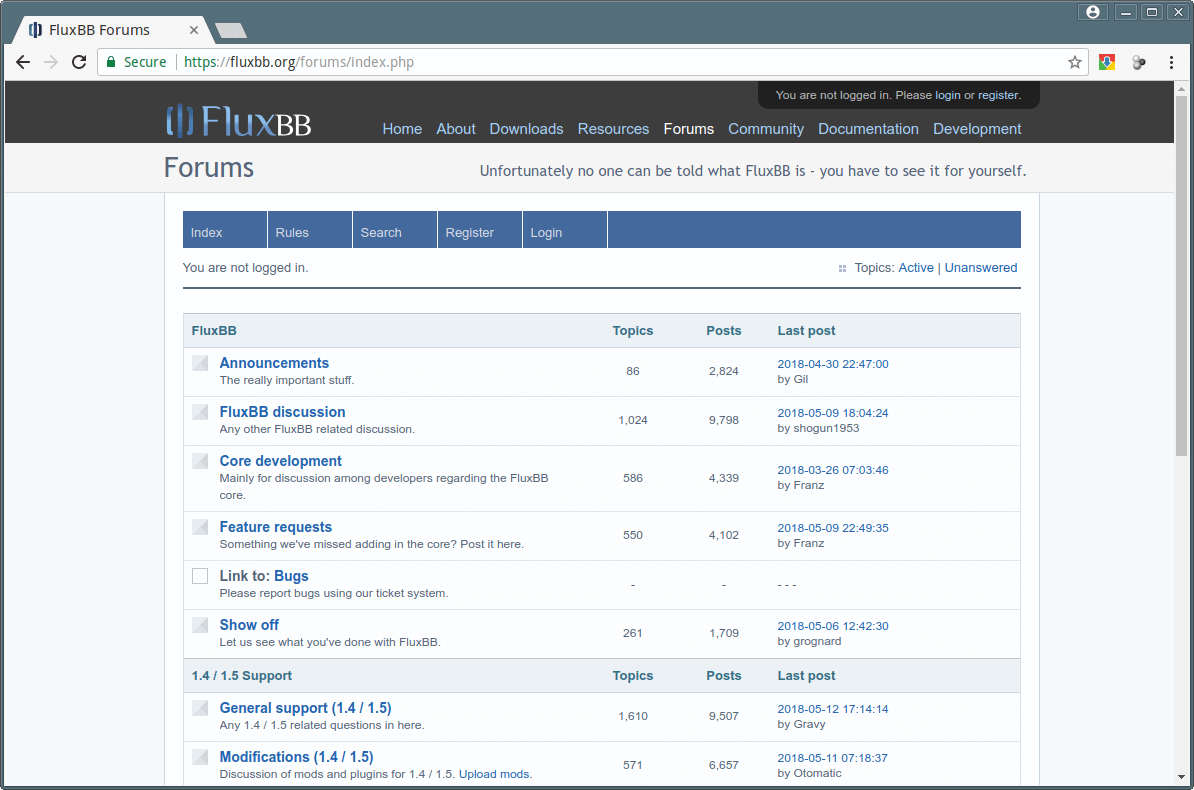
FluxBB is fast, light, easy-to-use, stable, secure, user-friendly and multi-lingual PHP forum software. It comes with a well organized administration interface and admin panel plugins, supports a flexible permission system, and it is XHTML compliant.

FluxBB Forum Software

FluxBB Forum Software

It supports user profiles, avatar, forum categories, announcements, topic search, post preview RSS/Atom feeds, user selectable CSS styles and language and so much more.

10. PunBB – Bulletin Board Software

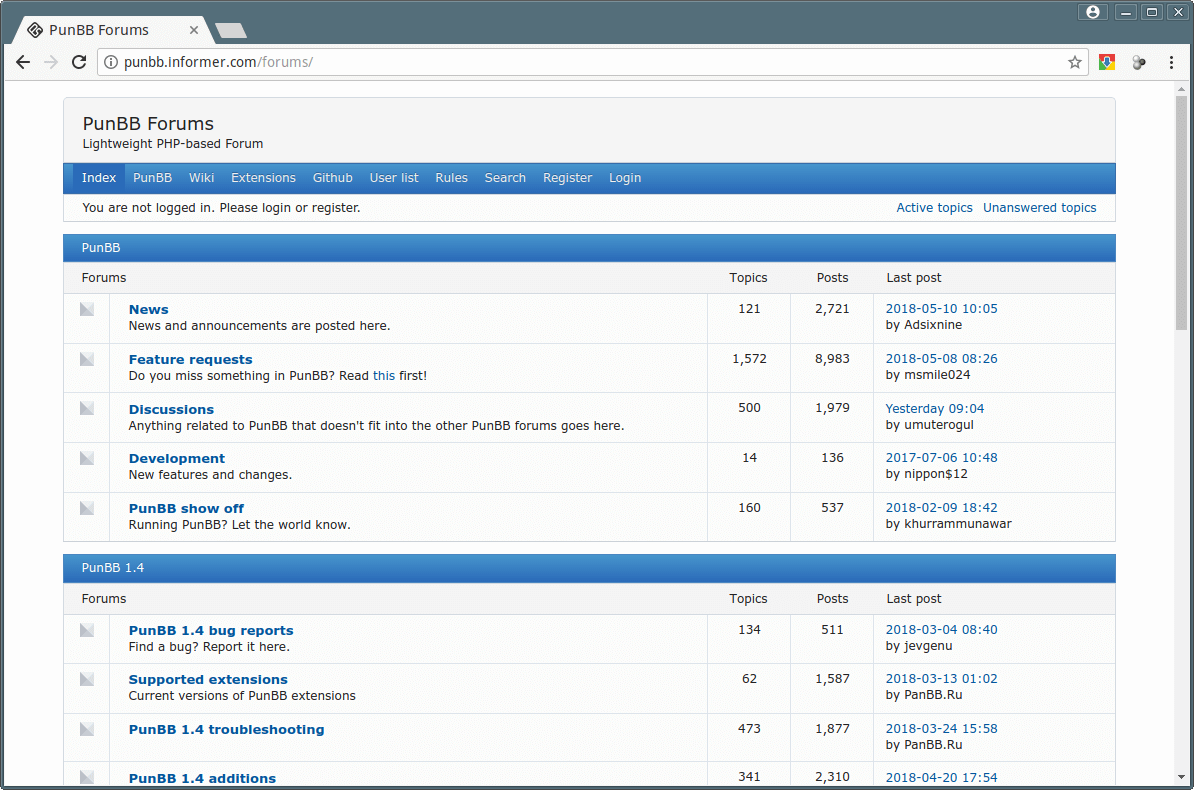
PunBB is a free open source, lightweight and fast PHP bulletin board software. It has a simple layout and design, like most forum software listed above, it supports private messaging, polls, linking to off-site avatars, advanced text formatting commands, file attachments, multi-forums and so much more.

PunBB Bulletin Board Forum

PunBB Bulletin Board Forum

That’s all for now! In this article, we reviewed 10 best open source forum software for Linux. If you are interested in setting up a forum for your site or blog, by now, you should be knowing which open source software to use. If your favorite software is missing in the list, let us know via the feedback form below.

Source

16 Most Used Microsoft Office Alternatives for Linux

Productivity on any operating system is without doubt one of the most important things that can make or break a platform however, execution is the key – if done right, enterprise adaptation would be shortly underway.

Linux today is most certainly an ultimate viable alternative to Windows – both in the general consumer and business market.

Read Also: Most Commonly Used Windows Applications for Linux

If you’re quite familiar with the fact that the ecosystem of any platform (i.e, the apps available to it) determines its success then you will know by now that Firefox OS and Sailfish likewise (which are alternative mobile platforms to Android and iOS) aren’t where they ought to be particularly because they lacked the extensive array of apps to attract users like their counterparts.

Productivity on Linux had terribly lacked in the past and adaptation was rather hard and impossible for most during it’s earlier days – fast forward two decades later and we have an abundant of apps tailored to the specific needs for Linuxers and extremely user-friendly operating systems for newcomers in the Linux world.

When we talk about productivity the first thing that comes to mind mostly is an office suite before anything else – and more specifically, Microsoft office or it’s immediate competitor, LibreOffice.

While we may have these two as the most popular, they are not necessarily the best and the former is not native to Linux.

We’ve made a comprehensive list of Office suites available for the Linux platform in this article totaling 16 – most of which are cross platform too – essentially making them alternatives to the Microsoft Office suite available on competing desktop platforms (Windows and OSX) out there and even the mobile ones.

1. LibreOffice

This office suite is essentially a fork of the used-to-be well-known Openoffice. It features support for most formats native to MS Office suite including docdocsxlsx etc., alongside many other open document standards.

Libreoffice is cross-platform and features a word processor – Writer, spreadsheets – Calc, Presentation – Impress and many others.

Asides its feature set, LibreOffice is also customizable with a varying number of icon sets available on its website and added functionalities as plugins.
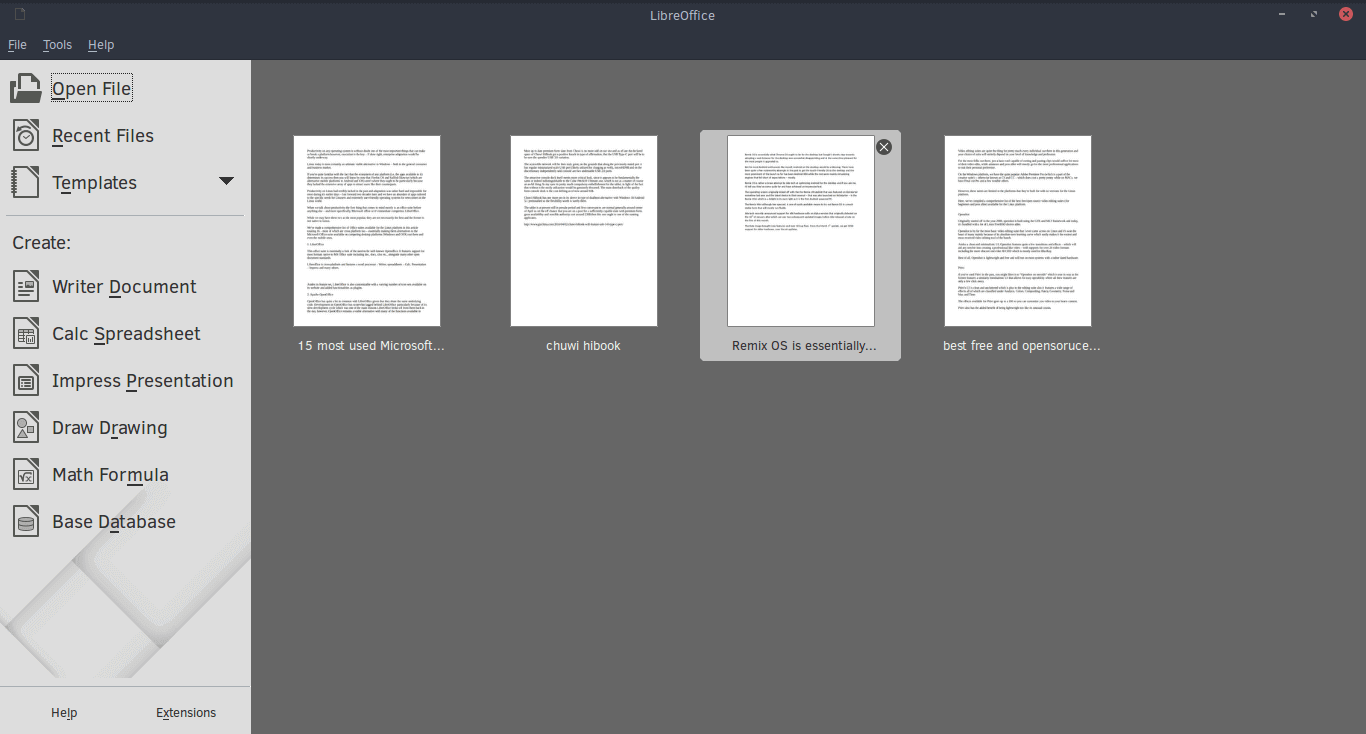
Libreoffice for Linux

Libreoffice for Linux

For installation instructions visit: Install LibreOffice in Linux Systems

2. Apache OpenOffice

OpenOffice has quite a lot in common with LibreOffice given that they share the same underlying code. Development on OpenOffice has somewhat lagged behind LibreOffice particularly because of its slow development cycle which was one of the main reasons LibreOffice broke off from them back in the day, however, OpenOffice remains a viable alternative with many of the functions available in LibreOffice and many years of development work.

Also, OpenOffice is cross-platform with availability on Windows, OSX, and Linux.
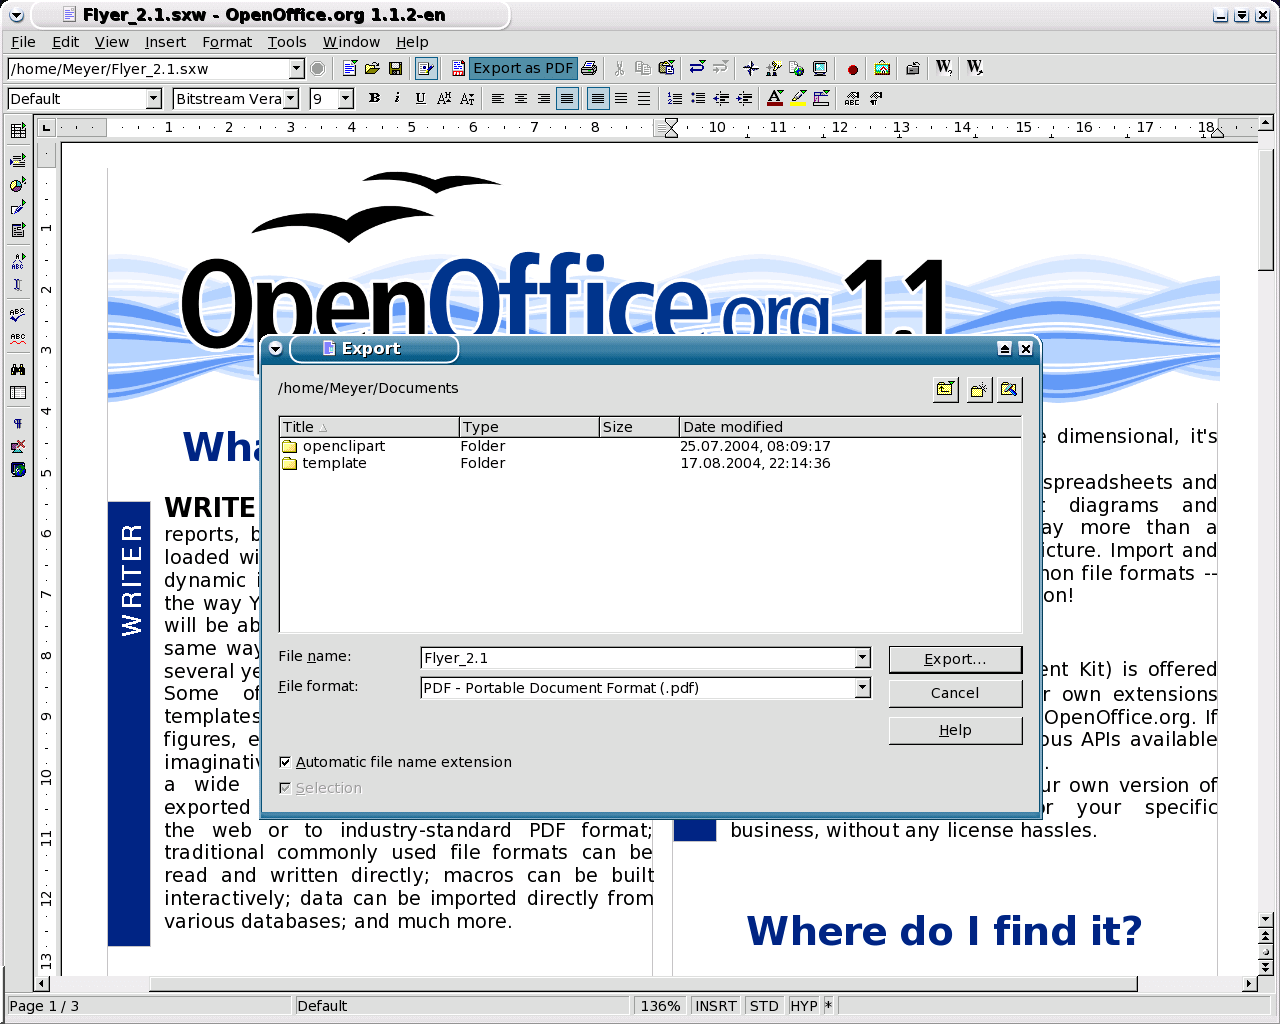
Openoffice for Linux

Openoffice for Linux

For installation instructions visit: Install Apache OpenOffice in Linux Systems

3. Calligra Suite

Calligra is one of the oldest open-sourse Office suites that has been in active development for the well part of 15years and was formally known as KOffice.

It’s a Qt-based office solution built around the the KDE desktop environment but still available for other platforms.

Under Calligra is a host of suites for almost all forms of productivity work including the popular image manipulation software known as Krita.

  1. Calligra Words – word processor
  2. Calligra Sheets – spreadsheet
  3. Calligra Stage – presentation
  4. Calligra Author – used to make Epubs
  5. Calligra Plan – project planner
  6. Krita – paint
  7. Calligra Flow (formerly Kivio) – flowchart designer
  8. Karbon (formerly Karbon14) – vector graphics
  9. Braindump – mind-mapping and notes application
  10. Kexi – database manager

Caligra Office Suite for Linux

Caligra Office Suite for Linux

Visit Homepage: https://www.calligra.org/

4. WPS Office

WPS otherwise (writer presentation and spreadsheets), has quickly grown to become of the most-used productivity suites especially due to its modernized look and availability on the most used desktop platforms and mobile alike.

WPS used to be Kingsoft Office and was born in June 2013. The program’s code is proprietary and has the free and premium side of things with premium offerings that include, over 230 fonts, documents collaboration, advanced spreadsheets, documents encryption et ‘al.

However, the free versions of the mobile and desktop apps alike offer quite a lot for free including online templates and a modernized UI which is not something most of the office suites in this article can exactly boast of.

WPS is today featured as the default Office suite in many Linux-based distros such as Deepin OS.

The Kingsoft made office suite supports all MS Office formats and also features some proprietary formats of its own known one of which is .wps.
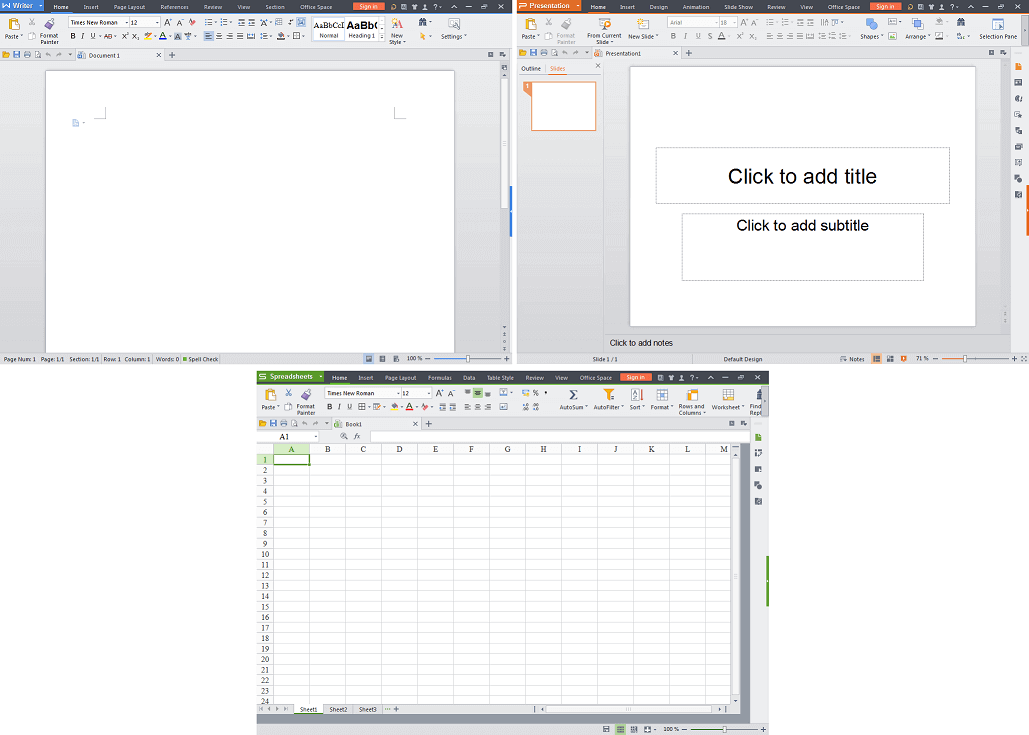
WPS Office for Linux

WPS Office for Linux

Visit Homepage: https://www.wps.com/

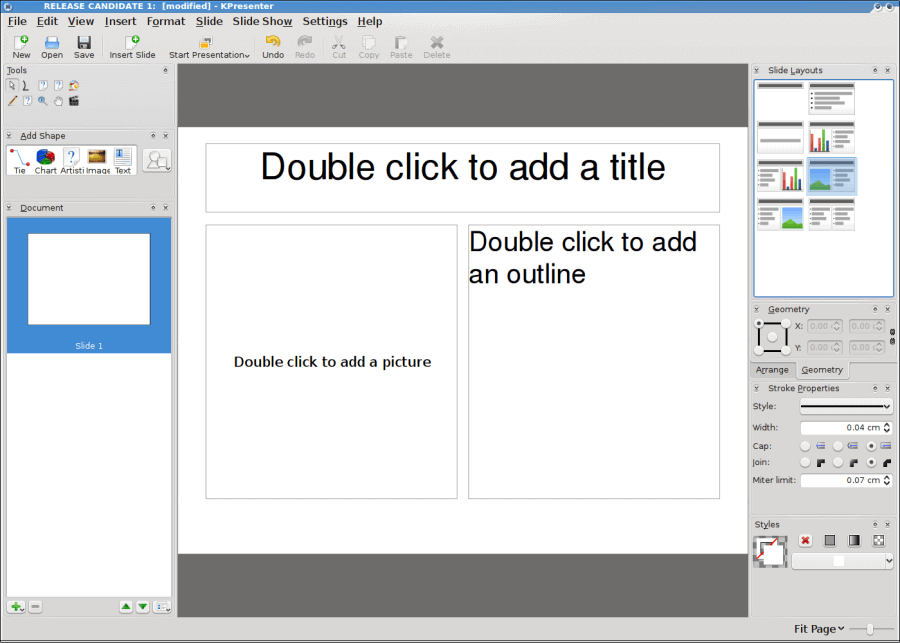
5. GNOME Office

This is yet another open-source office suite built around a desktop environment like Calligra above. If you haven’t guessed it by now, GNOME Office is built for the GNOME DE using GTK technologies.

It supports just as much formats as the above-mentioned suites with elements (some of which you already know) used across varying distributions around the world.

GNOME Office is however only available on the Linux platform and has the following list of softwares under its entirety.

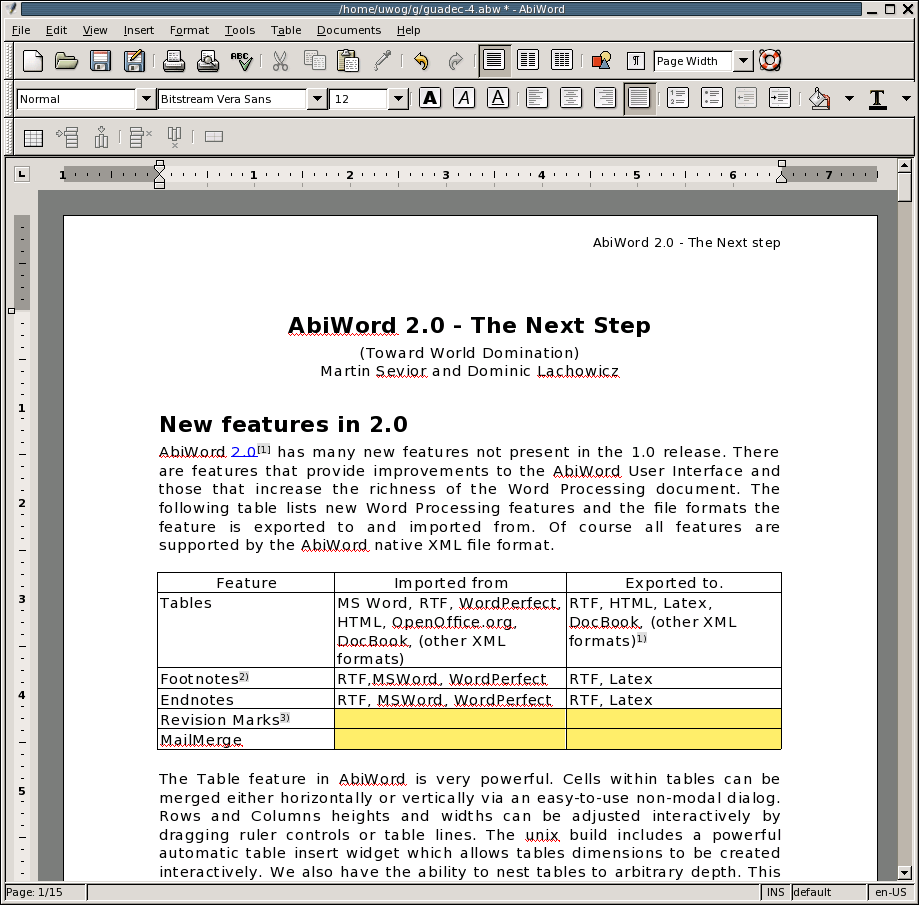
  1. AbiWord – word processing application
  2. Gnumeric – spreadsheets application
  3. Ease – presentation application
  4. Inkscape – Drawing
  5. Glom – database manager
  6. GnuCash – financial manager
  7. Evolution – Email manager and RSS viewer
  8. Evince – PDF viewer
  9. gLabels – label-maker
  10. Dia – Diagram designer

Gnome Office for Linux

Gnome Office for Linux

Visit Homepage: https://wiki.gnome.org/GnomeOffice

6. Softmaker Office

Softmaker is a Microsoft Office compatible closed-source software also offering the free and premium side of things.

The former is rather referred to as Softmaker FreeOffice while the latter is just Softmaker – encompassing all the features and functionalities.

Like LibreOffice and WPSSoftmaker is available on multiple platforms and the apps under the Office Suite includes the following.

  1. Textmaker
  2. PlanMaker spreadsheet
  3. SoftMaker Presentations – presentations
  4. BasicMaker – VB programming tool ( Windows only)
  5. eM Client – email-client (professional only)
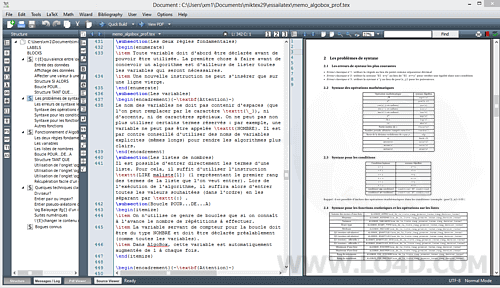
Softmaker Office for Linux

Softmaker Office for Linux

Visit Homepage: http://www.softmaker.com/en/softmaker-office-linux

7. Oxygen Office

This is essentially a continuity of the “OpenOffice.org Premium” of back in the day in a free package with all the essentials supported by the Apache Office and LibreOffice with noteworthy differences in the maneuverability of the GUI and it’s enhanced code-base.

It supports all the norm including word creation, spreadsheets, and more with a few nifty extras like an antivirus software (for those on the Windows platform) – Avast Home Edition specifically, a diagram creator and also a calculator.
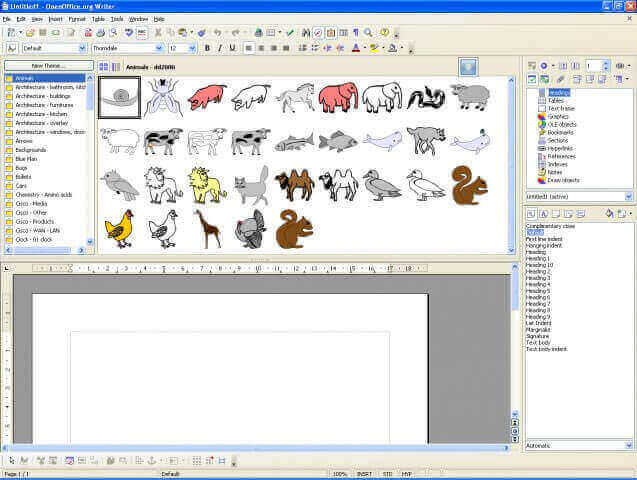
Oxygen Office for Linux

Oxygen Office for Linux

8. Yozo Office

This is one of the fewer-known Office suites that also offer a wide array of features including support for most Microsoft Office formats. Its components include a word processing engine, spreadsheets, PDF viewer, and presentation.

Yozo is however, proprietary but free and cross platform. But if you want even more features, then you you’ll have to go for the premium bundle which is quite hefty in pricing. Yozo also features its own custom file format ending in .eio
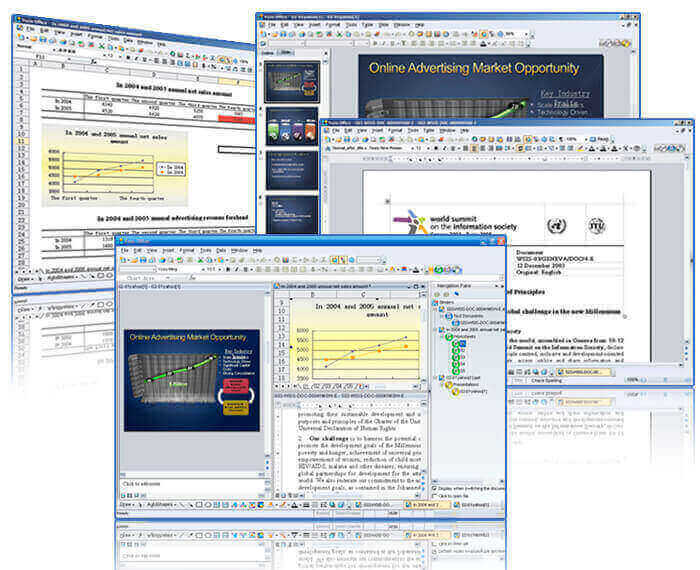
Yozo Office for Linux

Yozo Office for Linux

9. Google Docs

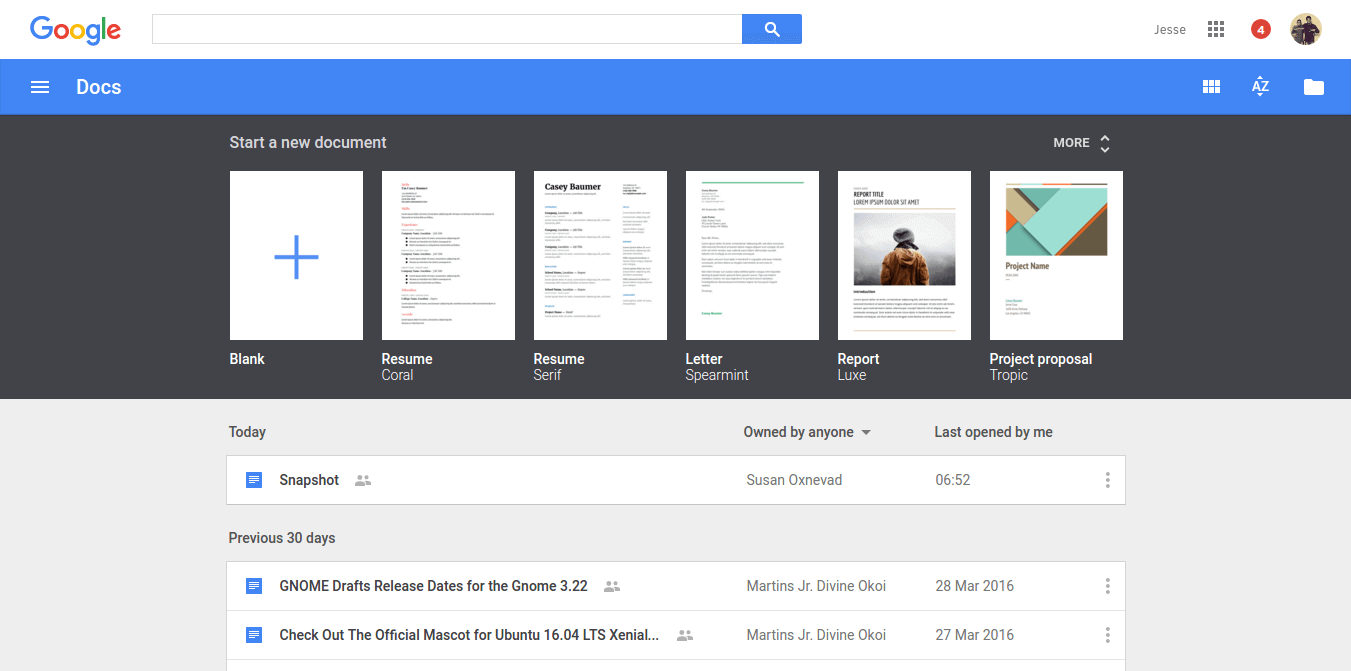
Google Docs which is an online-based office suite takes quite a different approach in documents creation and it’s essentially cross-platform, free and powerful.

It is used by millions around the world and has native apps for the two most used mobile operating systems (Android and iOS). It is written in JavaScript and features online collaboration, offline saving, and more.

It is the suite of choice for thousands of schools around the world and enterprises too.

Google Docs applications include:

  1. word processor,
  2. Sheets – spreadsheet
  3. Drawing – diagrams and flowcharts
  4. Forms – surveys
  5. Slides – presentation

Google Docs

Google Docs

10. Zoho Docs

Zoho Docs is another web-based suite similar in functionality to Google Docs but is, however, targeted at the business market (even though there’s the free version of it) because features like online collaboration and offline saving are are only available if you go for a premium subscription.

Zoho Docs can be quite pricey but it’s likewise advantageous as it also has native apps for Android and iOS with sync desktop clients for OSX, Linux and Windows.
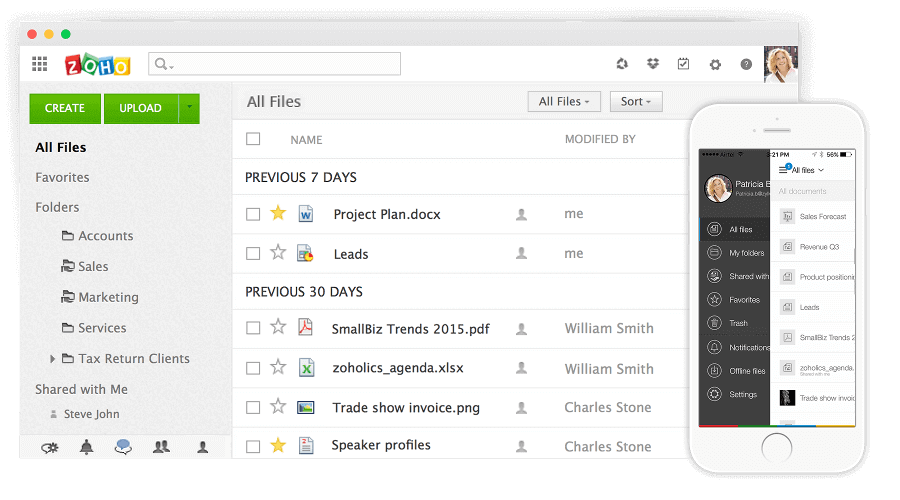
Zoho Docs

Zoho Docs

11. Joeffice

Joeffice is another alternative with the commonly supported features like word processing, spreadsheets, presentations, and database management with the exception of the fact that it’s written in Java.

Joeffice isn’t half as bad as it has a modernized look, completely open-source, and has the ability to run online.
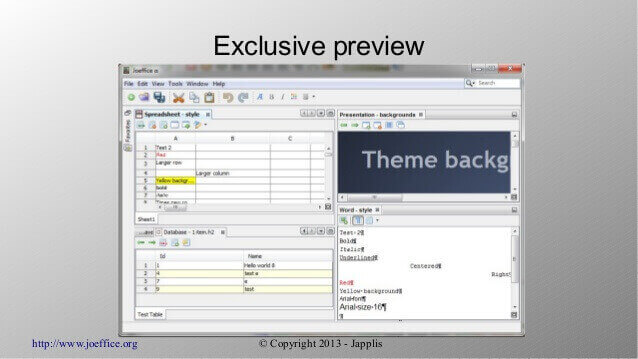
Joeffice Office Suite

Joeffice Office Suite

12. Siag Office

Siag is another uncommon office suite that supports all the well-known Microsoft Office formats and quite a few components to boot – they include:

  1. Spreadsheet Siag – spreadsheets
  2. Pathetic writer – word processor
  3. Egon – an animation program
  4. XedPlus – text editor
  5. Xfiler – file manager
  6. Gvu – previewer

Siag is available for OSX, OpenBSD and Linux. The only downside I see to Siag is its somewhat dated user interface which I feel might be a turn-off for some.
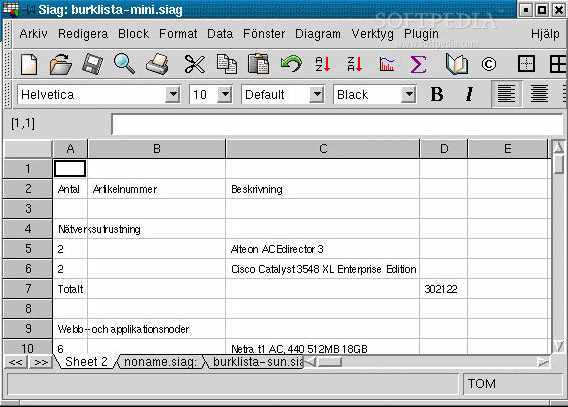
Siag Office for Linux

Siag Office for Linux


13. EuroOffice

EuroOffice is another open-source application with aims to further enhance the office experience by combining the best of OpenOffice and LibreOffice for more interoperability and extensibility.

There is both a free and professional version however, and includes most if not all of the features that can be found on the office suites that it has its base and even more – specific to the professional version (which is closed) which include additional spell checkers and tools.

14. ThinkFree Office

ThinkFree is yet another proprietary Office suite of applications that aim to look, feel and deliver like Microsoft’s Office. It is written in Java and Ajax and is as well cross-platform and features apps like:

  1. Write – word-processor
  2. Calc – spreadsheet
  3. Show – presentation
  4. Note – blog editor
  5. WYSIWYG – HTML editor

It’s a premium office suite and has no free version but a trial that last for thirty days after which you’ll need to shell out some cash for the full experience.
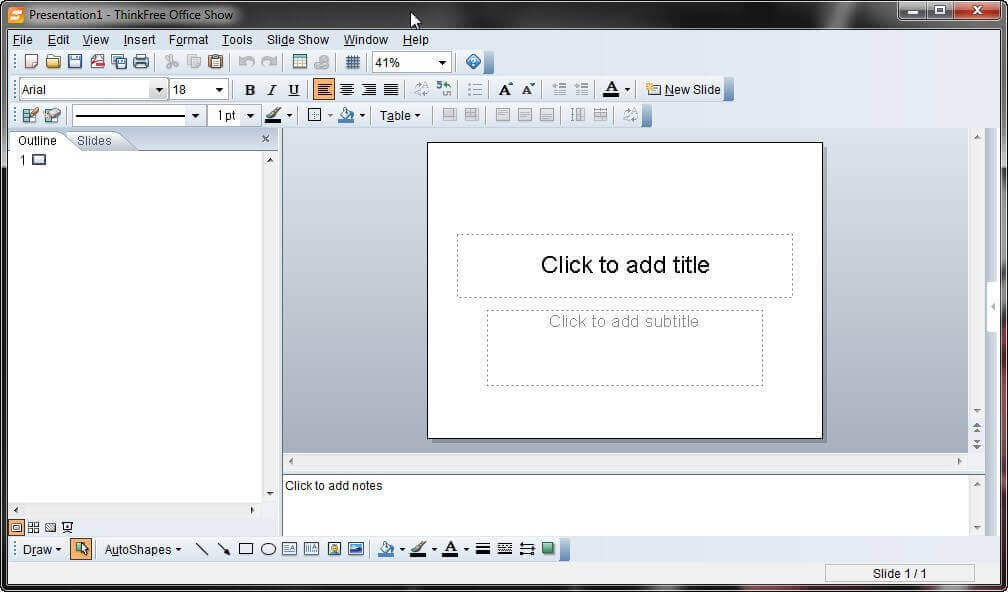
ThinkFree Office for Linux

ThinkFree Office for Linux

15. Hancom Office

Hancom is a closed-source office suite popular in the Asia (especially South Korea) and also cross- platform. The suite features support for the most-used Microsoft formats and also happens to be the preferred office application for most Koreans.

It has been pre-installed on quite a number of Android-powered Samsung devices in the past and it’s also one of the more intuitive options that is also available in multiple languages.
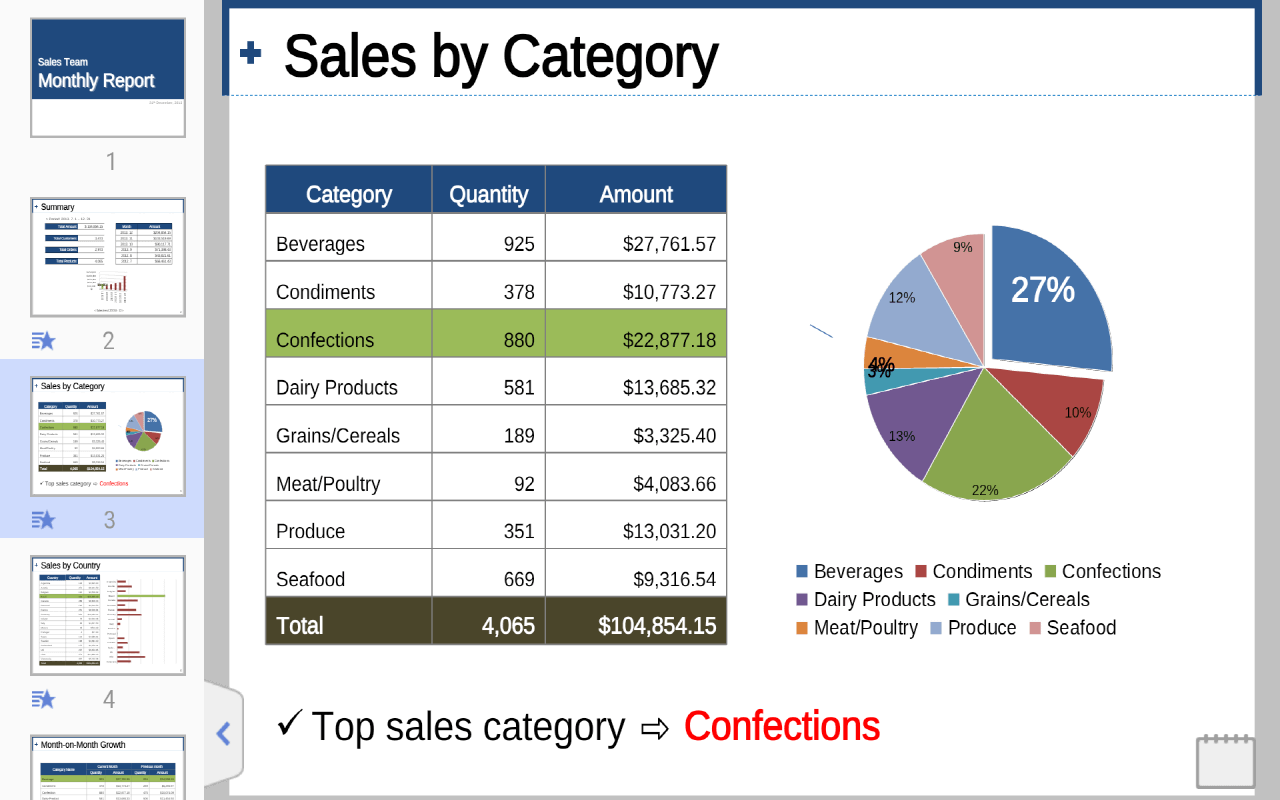
Hancom Office for Linux

Hancom Office for Linux

16. Office 365

If you haven’t guessed it by now, this is Microsoft’s own answer to “Office in the Cloud”. The service is basically a stripped down version of the full MS Office suite available locally as it lacks of many of the advanced features.

You are therefore limited to its basic functionality that will give you a rather sub-par experience. You can however enjoy seamless integration with Onedrive and other features like online collaboration and more.
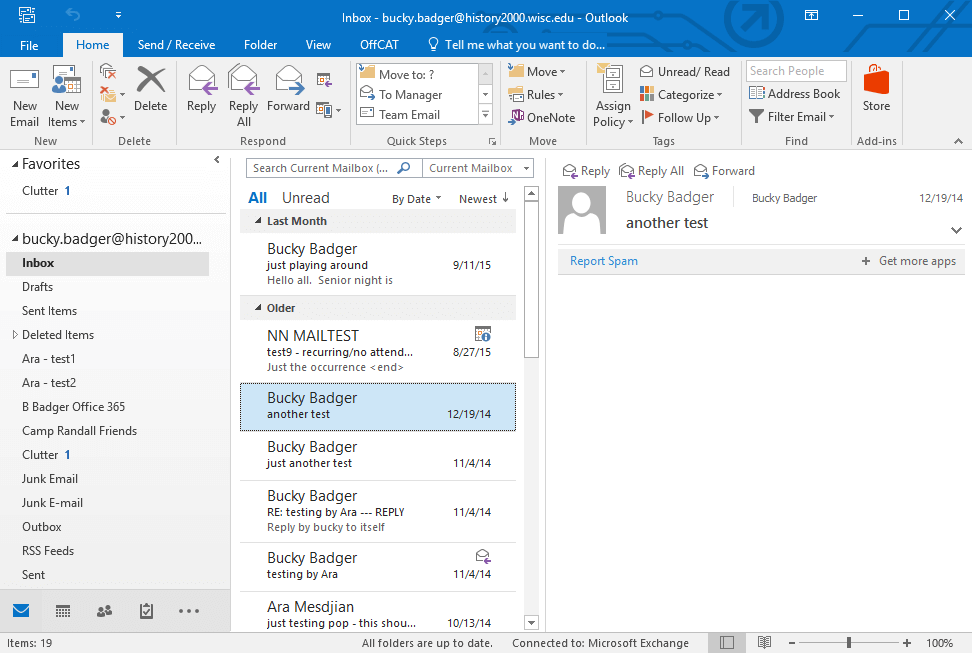
Office 365

Office 365

Conclusion

Here is our comprehensive list, Did we miss anything? Let us know in the comments section down below.

Source

Install Latest SMPlayer in Debian, Ubuntu, Linux Mint and Fedora

SMPlayer is an open source and free cross platform multi media player for Linux and Windows was released under the GPL license.

It’s playback engine was designed using award winning MPlayer as it capable of playing almost all audio and video formats like avimkvwmvmp4mpeg etc. It uses own codecs, so you don’t need to download and install additional codecs.

The most interesting features of SMPlayer is it stores all the settings of recently played files. Let’s say you suppose to watch the movie but you have to leave… don’t worry, when you open that movie, it will start playing at the same point where you left it with same volume, audio track, subtitles and so on.

Suggested Read: 10 Best Open Source Video Players For Linux in 2015

SMPlayer Features

  1. Complete preferences dialog to change colors, key shortcuts and fonts of the subtitles, and many more.
  2. Supports Multiple speed playback. You can play video at 2X, 4X and even in slow motion.
  3. Delay adjustments for Audio and Video subtitles and allows you to sync audio and subtitles.
  4. Provided search function to search and download subtitles from opensubtitles.org.
  5. Included YouTube browser to download and play videos online.
  6. Currently supports more than 30 languages, including Italian, Spanish, French, Russian, German, Chinese, Japanese.
  7. Options to change style and icon set of the interface.

SMPlayer, the popular mplayer/mplayer2 GUI, has reached version 16.8 with playlist support, options to load playlist from interent and other changes.

What’s new in SMPlayer 16.8

  1. Support for 2 in 1 computers with touch screens
  2. Support for dual-screen sharing, means play video from an external screen
  3. Support for high DPI screens
  4. Global shortcuts
  5. Settings are remembered for online streams too

The complete change log and feature set of SMPlayer 16.8 can be found at http://smplayer.sourceforge.net/.

Installation of SMPlayer Media Player in Linux

To install SMPlayer on Debian, Ubuntu and Linux Mint systems, run these following commands from terminal.

$ sudo add-apt-repository ppa:rvm/smplayer 
$ sudo apt-get update 
$ sudo apt-get install smplayer smplayer-themes smplayer-skins

On Fedora 22-24, open a terminal and run these commands:

On Fedora 24

# dnf config-manager --add-repo http://download.opensuse.org/repositories/home:/smplayerdev/Fedora_24/home:smplayerdev.repo
# dnf install smplayer

On Fedora 23

# dnf config-manager --add-repo http://download.opensuse.org/repositories/home:/smplayerdev/Fedora_23/home:smplayerdev.repo
# dnf install smplayer

On Fedora 22

# dnf config-manager --add-repo http://download.opensuse.org/repositories/home:/smplayerdev/Fedora_22/home:smplayerdev.repo
# dnf install smplayer

Starting SMPlayer

Start the SMPlayer by executing following command on the terminal.

$ smplayer
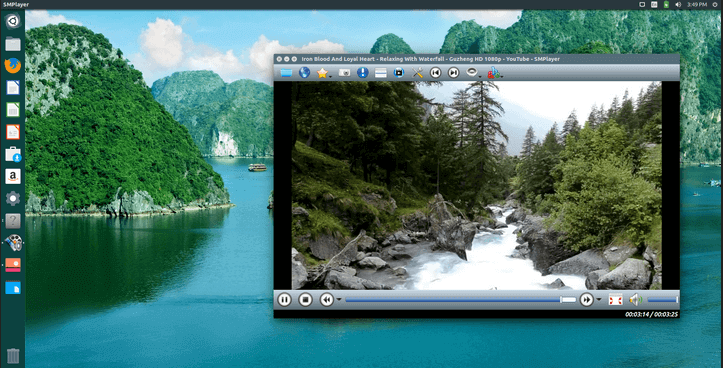
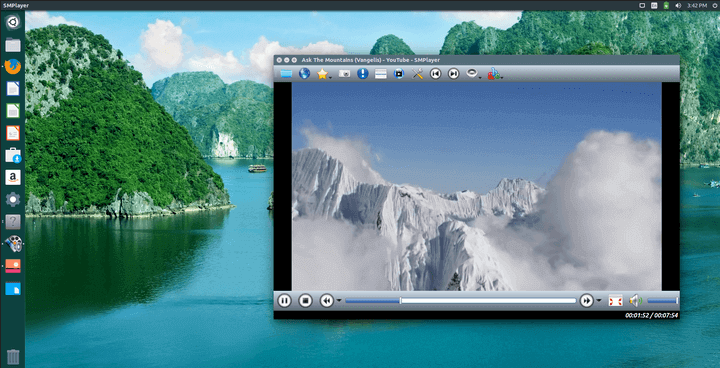
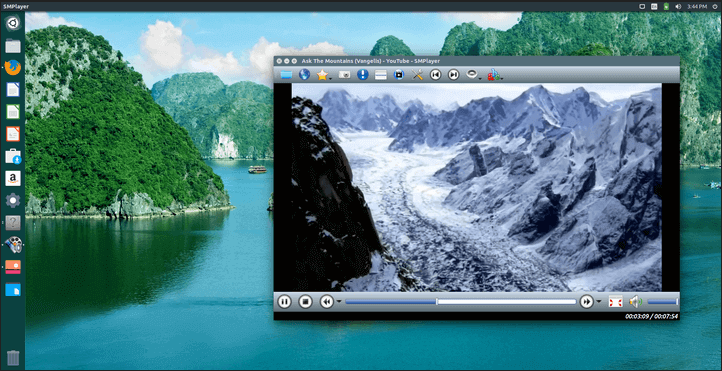
SMPlayer Screenshot Tour

SMPlayer Running on Ubuntu 16.04

SMPlayer Running on Ubuntu 16.04

SMPlayer Running on Ubuntu 16.04

SMPlayer Running on Ubuntu 16.04

SMPlayer Running on Ubuntu 16.04

SMPlayer Running on Ubuntu 16.04

For other distributions packages, go to the SMPlayer download section.

Source

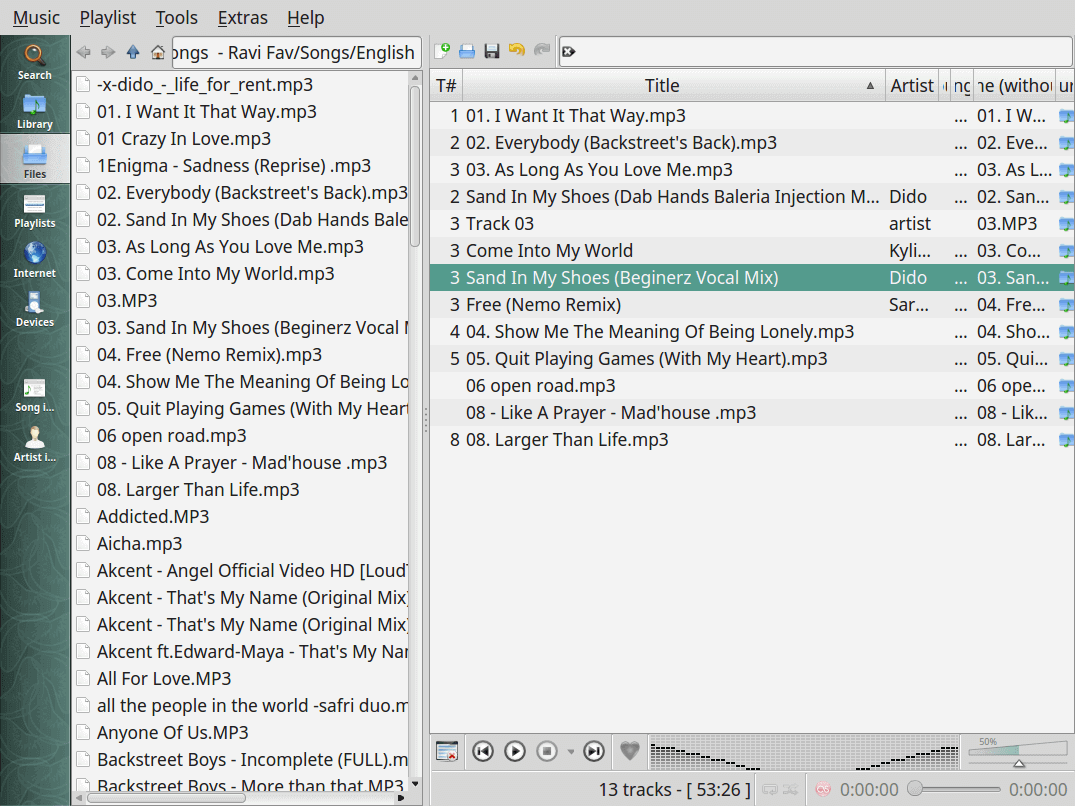
21 Best Music Players That Are Worth Trying On Linux

Some may describe it as their passion, while some may consider it as their stress reliever, some may consider it as a part of their daily life but in every form listening to music has become an undetachable part of our lives. Music plays different roles in our lives.

Best Linux Music Players

21 Best Linux Music Players

Sometimes it makes us enjoy with enthusiasm, sometimes it makes us feel pleasant and good, sometimes it makes us remember someone or some feel good moments of our past. Listening to music has sustained generations, but the medium has changed.

 10 Best Open Source Video Players For Linux in 2015

Earlier people relied on radio’s to listen music, while present generation has ipods, smartphones, PC and other gadgets to listen to music. Coming to PC’s we have dedicated software’s called Music Players to play our choice of song or playlist for us.

While most generation has smartphones, ipods to listen to music, these Software’s are also common source to listen to music which suits the mood for people who spent hours working on PC’s and Laptop’s and find it convenient to listen using their daily friend.

Thus, even Music Players form an important medium for countless crowd comprising students, professionals and other citizens.

Music Players and Linux

Growth of Linux as an accepted Operating System in Market was not so much few decades back, but flourishment of this Open Source Industry in IT Market from past few years has opened tremendous opportunities for a huge crowd of professionals who wanted to contribute to this industry with their work.

One such opportunity struck in very late twentieth century with need for Music Player on Linux. Since then many Music Players have been added to various Linux distributions, some as default and some as externally downloadable. Many companies, professionals have made such Music Players and have added to the repository.

Main aim for any Music Player is to support all the file formats of audio files which are supported by Windows as well as Linux and additionally support online music streaming which is trending now a days.

21 Best Music Players on Linux Till Date

Below we list some of the best Music Players created on Linux till date. A Music Player can be characterized as best after considering following features: formats supported, memory consumption, online or offline streaming of music or both, user interface design, feature-set.

Some of the music players highlighted below guarantee all the above factors while some guarantee only some factors which is the main criteria for ranking them.

1. Amarok

Amarok is a cross-platform open source software written in C++ (Qt) and released under GNU Public License.

Originally started by Mark Kretschmann as an effort to improve xmms , this software was initially named as amaroK after name of wolf and later changed to Amarok.

It can play media files in various formats but not limited to: FLAC, Ogg, Mp3, AAC, Musepack etc. Apart from playing offline collection, it can stream online music integrating with various online services like: Magnatune, Jamendo, MP3tunes, Last.fm and Shoutcast.

Amarok provides apart from basic services, few advanced features like: fetching, transferring music to or from digital music players, moodbar support, and dynamic playlist support etc.

Install Amarok

Amarok can be easily installed by using apt-get or yum package manager as shown:

# apt-get install amarok	[On Debian based systems] 
# yum install amarok		[On RedHat based systems]
# dnf install amarok		[On Fedora 22+ versions]

Preview: Amarok Player

Preview: Amarok Player

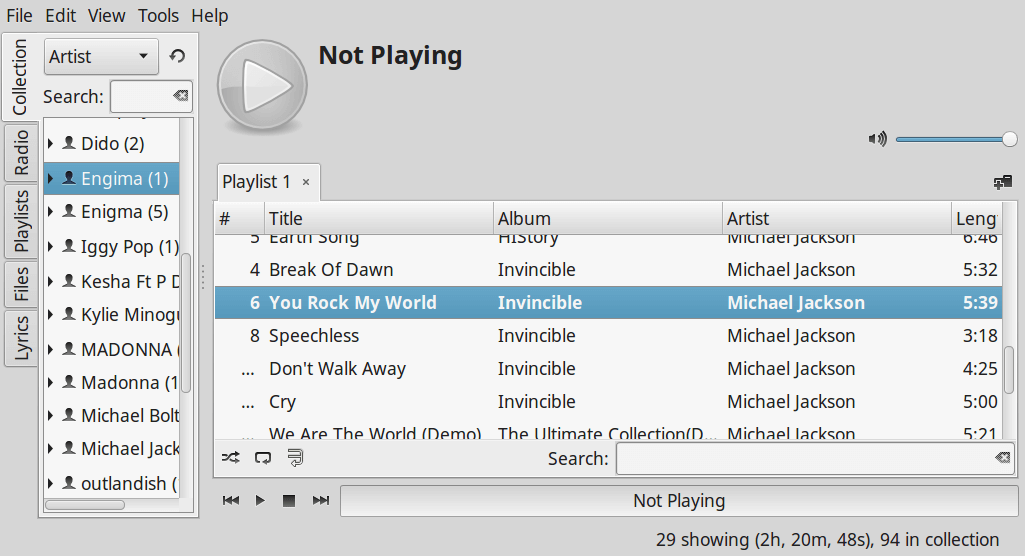
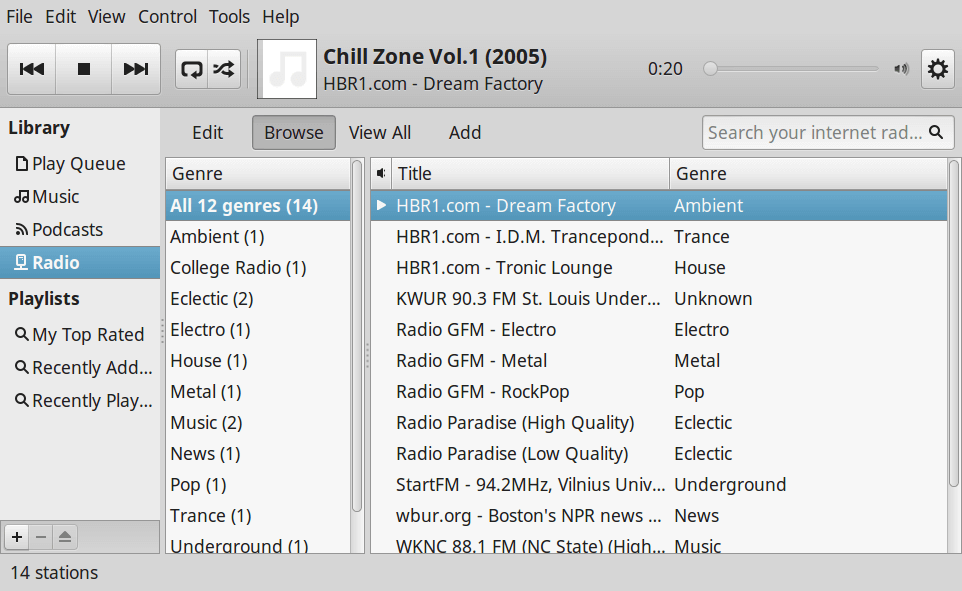
2. Clementine

Released in February 2010, Clementine is also a cross-platform software which aimed to solve criticism of many people against the transition of Amarok from version 1.4 to 2.

It is a port of Amarok version 1.4 to Qt4 and Gstreamer multimedia framework. It is also written in C++ (Qt) framework released under GNU General Public License.

With features almost same as of Amarok, it provides few extra functionalities like: Remote Control using Android device, Wii Remote, MPRIS or command-line interface.

Install Clementine

Clementine can be easily installed by using apt-get or yum package manager as shown:

# apt-get install clementine	        [On Debian based systems] 
# yum install clementine		[On RedHat based systems]
# dnf install clementine		[On Fedora 22+ versions]

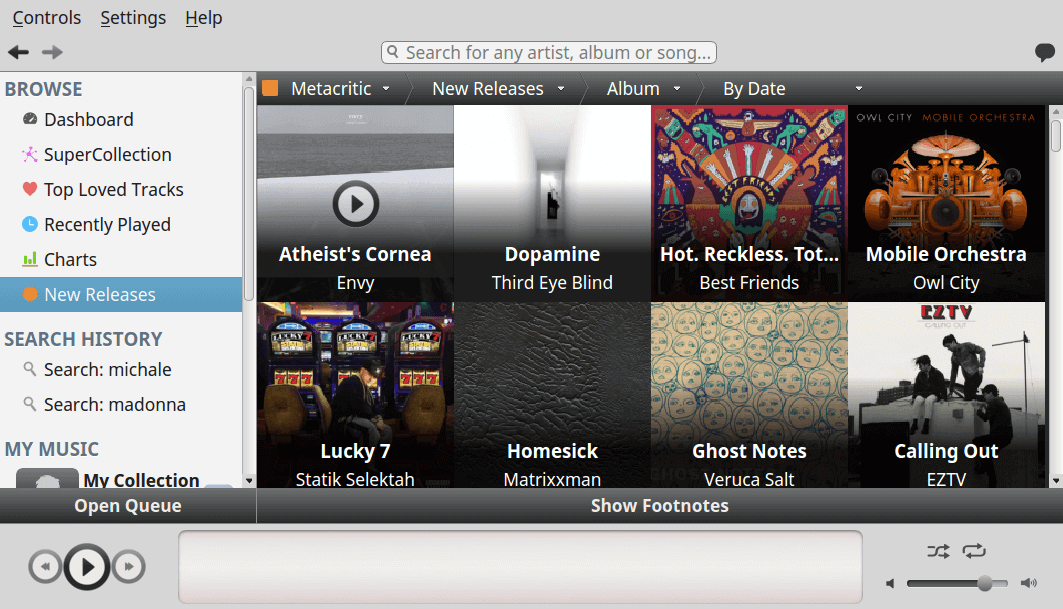
Clementine Music Player

Clementine Music Player

3. Tomahawk

Tomahawk is cross-platform open source music player released in March 2011. It is also written entirely in C++ (Qt) and released under GNU General Public License.

Tomahawk is a light-weight software and focuses on aggregation of music from all the sources including local, network and streaming services. Talking of UI, it has iTunes like interface.

Also, it provides access to various music services like: Spotify, Youtube, Jamendo, Grooveshark etc through various externally downloadable plug-ins. Like above music players, it also offers a basic feature-set.

Install Tomahawk

# apt-get install tomahawk	[On Debian based systems] 
# yum install tomahawk		[On RedHat based systems]
# dnf install tomahawk		[On Fedora 22+ versions]

Tomahawk Music Player

Tomahawk Music Player

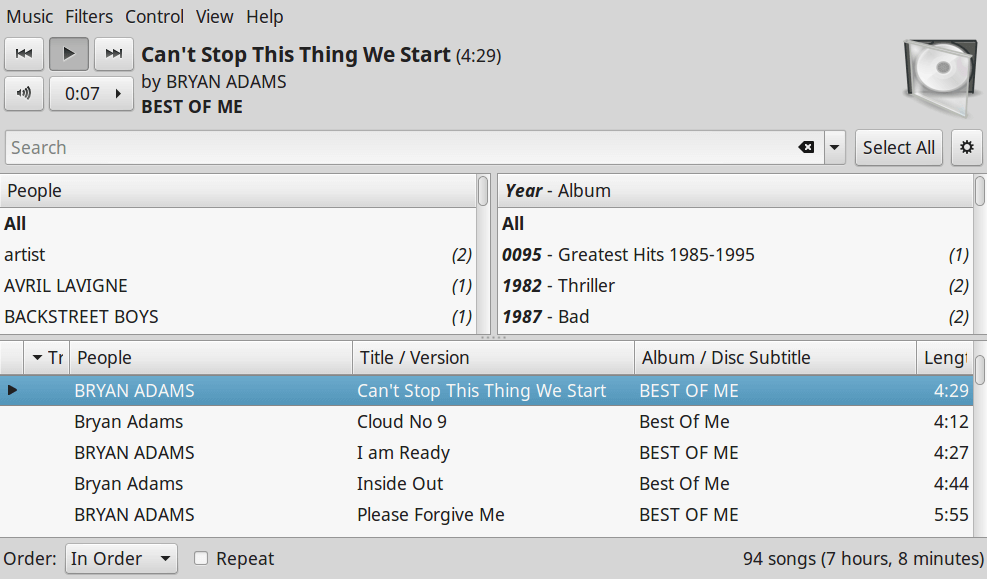
4. Lollypop

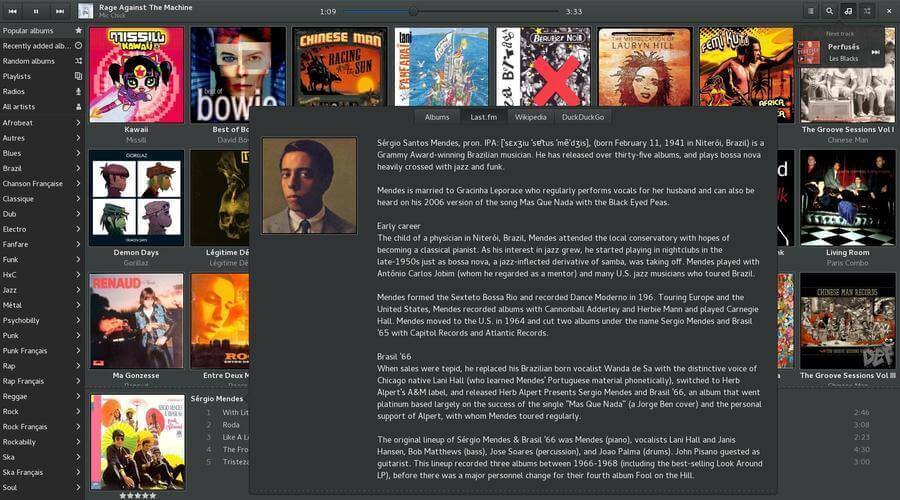
Lollypop is a gnome music player which is a free and open source project hosted on github. It is written entirely in Python and Gtk3.

It is very lightweight and has a very good looking User Interface with ability to play mp3, mp4, Ogg and flac files. Provides with the feature to read artist biography from Last.fm or Wikipedia, lyrics of song from Wikia.

It also provides features like: browsing through the collection using artist, album or genres, party mode effect for playing music etc. This can play only downloaded audio tracks and doesn’t allow streaming audio.

Install Lollypop Music Player

------------------ On Debian based Systems ------------------
$ sudo add-apt-repository ppa:gnumdk/lollypop
$ sudo apt-get update
$ sudo apt-get install lollypop
# yum install lollypop		[On RedHat based systems]
# dnf install lollypop		[On Fedora 22+ versions]

Lollypop Music Player

Lollypop Music Player

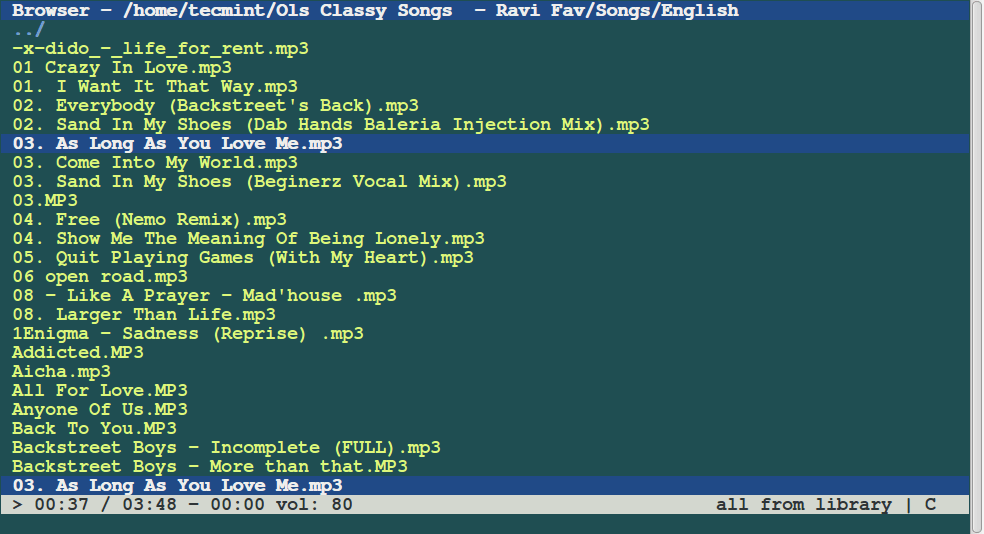
5. Cmus

Cmus is a console based music player for Linux OS. Written exclusively in C and released under GNU General Public Liscense, this music player runs on terminal and is operated through keyboard with the help of commands prepended with the colon.

Because of being console-based, this music player is very fast to load even with huge number of songs. It has support of Ogg, Mp3, Wav, MPEG-4/AAC, WMA etc.

It enjoys all the advantages of being the console based music player but this has some effect on its user interface which is not much glossy. Apart from this, it is controllable through cmus-remote program and is known to work on many Unix like Operating Systems: FreeBSD, OpenBSD, Cygwin etc.

Cmus Commandline Music Player

Cmus Commandline Music Player

Read More: Install CMUS Console Based Music Player in Linux

6. Aqualung

Released in August 2015, aqualung is a cross-platform audio player originally targeted at GNU/Linux but also running on Mac OS, Windows, FreeBSD etc.

It is written entirely in C and is available for many languages including French, German, Hungarian etc. This software supports various audio file formats like: Org, Forbis, FLAC and Mp3.

The feature which makes it different from most of the music players is to play gapless music. Other features include: multi-language translation, allowing multiple playlists at same time, changing the skin at any time, support for MPEG formats and even Audio CD’s.

Install Aqualung Music Player

# apt-get install qualung	[On Debian based systems] 
# yum install qualung		[On RedHat based systems]
# dnf install qualung		[On Fedora 22+ versions]

Aqualung Music Player

Aqualung Music Player

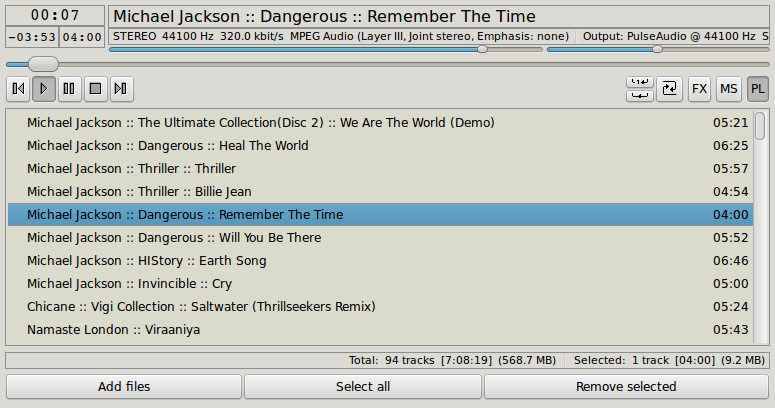
7. Quod Libet

Quod Libet is an open source cross-platform music player cum tag editor. Written in Python using GTK+ and released under GNU General Public License, this software has support for Linux, Windows and OS X requiring plug-ins for Python, PyGObject including OSS and ALSA compatible audio devices.

With a great User Interface and Pango support to dynamically position the tags, it provides various other features including: dealing with audio back-ends using Gstreamer plugin, RelayGain support, option for shuffling entire playlist before repeating, rich set of features for tag editing, saving the play count of songs, downloading lyrics, fast-refreshing entire library etc.

Install Quod Libet Music Player

# apt-get install quodlibet	[On Debian based systems] 
# yum install quodlibet		[On RedHat based systems]
# dnf install quodlibet		[On Fedora 22+ versions]

Quodlibet Music Player

Quodlibet Music Player

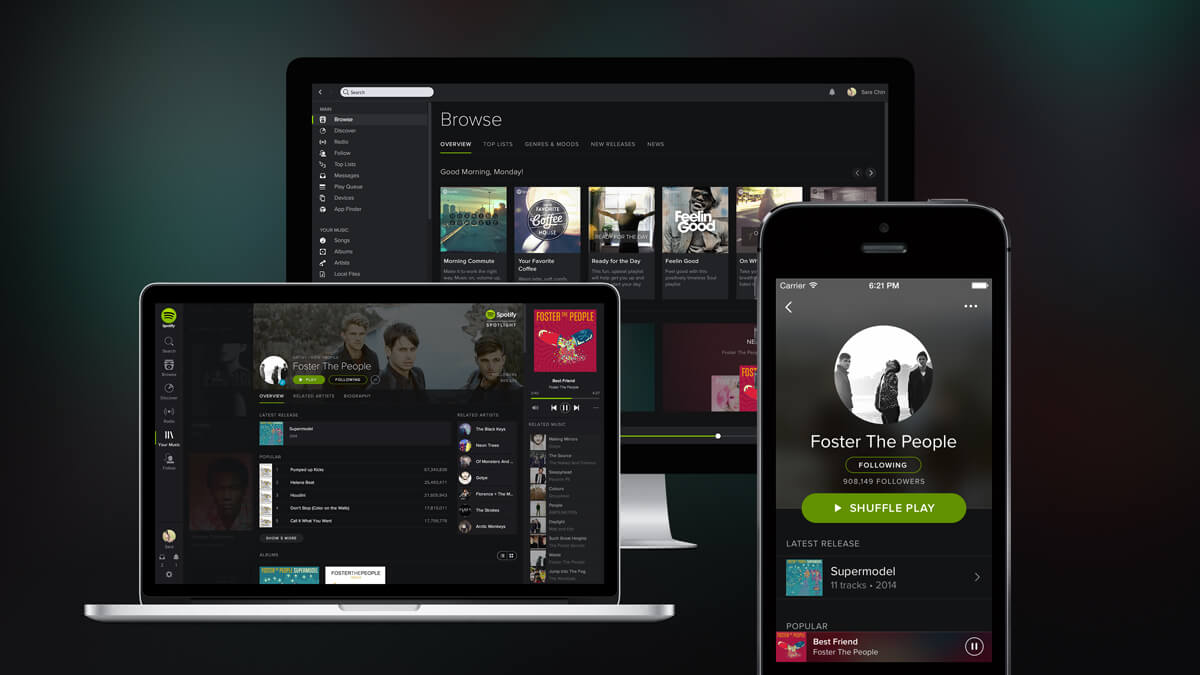
8. Spotify

It is a Swedish commercial music streaming, podcast and video service that gives full view to the user as an online audio player. It is cross-platform service which is available on almost all platforms.

Released in October 2008 by a Swedish startup Spotify AB, it got famous in hearts of 10 million+ users in no time and by June 2015, it has gathered a huge crowd amongst it which is around 75 million.

Spotify offers ability to browse or search music by artist, album, genre, playlist or record label. Spotify offers two music streaming services : Spotify Free with 160 kbit/s and Spotify Premium with speed upto 320 kbit/s.

Install Spotify Music Player

------------------ On Debian based Systems ------------------ 
$ sudo apt-add-repository -y "deb http://repository.spotify.com stable non-free" 
$ sudo apt-key adv --keyserver keyserver.ubuntu.com --recv-keys D2C19886 
$ sudo apt-get update -qq 
$ sudo apt-get install spotify-client
------------------ On RedHat based Systems ------------------ 
# yum-config-manager --add-repo=http://negativo17.org/repos/epel-spotify.repo
# yum -y install spotify-client


------------------ On Fedora 22+ Systems ------------------ 
# dnf config-manager --add-repo=http://negativo17.org/repos/fedora-spotify.repo
# dnf -y install spotify-client

Spotify Music Player

Spotify Music Player

9. Exaile

A cross platform music player whose latest release happened to be 3.4.2 in November 2014. It uses GTK+ widget toolkit rather than Qt and is written in Python with Gstreamer media framework.

With a plain yet appealing user interface this music player holds very much similarity to Amarok for most of its functionalities Last.fm support, fetching of lyrics, editing of tags.

Also, it provides devices support via external plug-ins. Apart from these basic features, it also provides some advanced features like: ReplayGain support, Moodbar integration, previewing tracks via secondary soundcard etc.

Install Exaile Music Player

# apt-get install exaile	[On Debian based systems] 
# yum install exaile		[On RedHat based systems]
# dnf install exaile		[On Fedora 22+ versions]

Exaile Music Player

Exaile Music Player

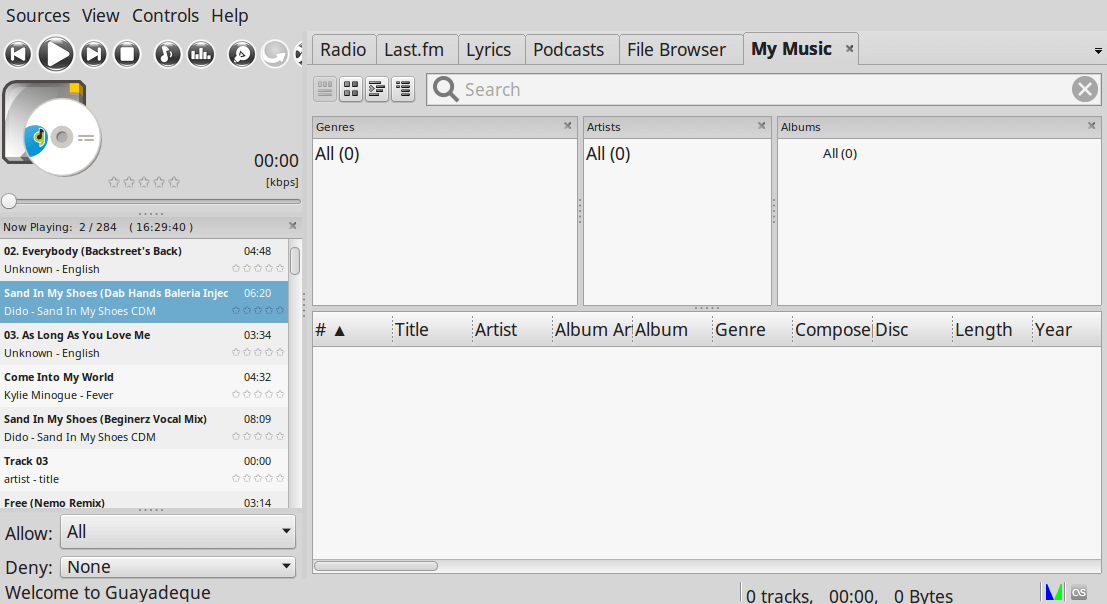
10. Guayadeque

Guayadeque is a free and Open source audio player written in C++ and made entirely for Linux was released in March 2009 under GNU General Public License.

Guayadeque has a user interface which is analogs to Windows Player winamp and Foobar 2000 for Linux. Its features include creating and managing complex music collection, Last.fm and ReplayGain support, support for both lossless (e.g. FLAC, AIFF, AIF, APE etc.) and lossy formats like: Mp3, Ogg, mp4, m4a etc.), access to SHOUTcast, seamless playback of music collection, manage podcasts in music collection possible.

Install Guayadeque Music Player

# apt-get install guayadeque	        [On Debian based systems] 
# yum install guayadeque		[On RedHat based systems]
# dnf install guayadeque		[On Fedora 22+ versions]

Guayadeque Music Player

Guayadeque Music Player

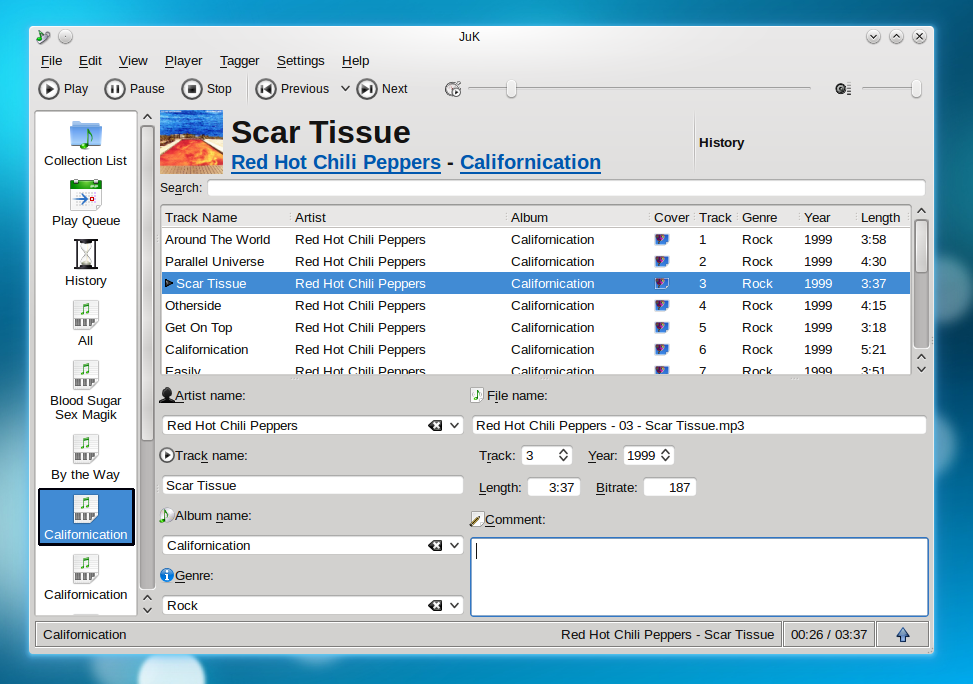
11. Juk

Another cross-platform audio player designed for Unix-like systems and Windows, JuK was released on February 2004. It is written in C++ and released under GPL.

JuK supports collection of audio files of formats like: Mp3, Ogg Vorbis, and FLAC. Some features that make it a part of the list are: Dynamic Search Playlists that are auto-updated, auto-sync feature that automatically detects new added songs to the music directory, guessing tag info by online lookup, tag-reading and editing support.

Install Juk Music Player

# apt-get install juk	[On Debian based systems] 
# yum install juk		[On RedHat based systems]
# dnf install juk		[On Fedora 22+ versions]

Juk Music Player

Juk Music Player

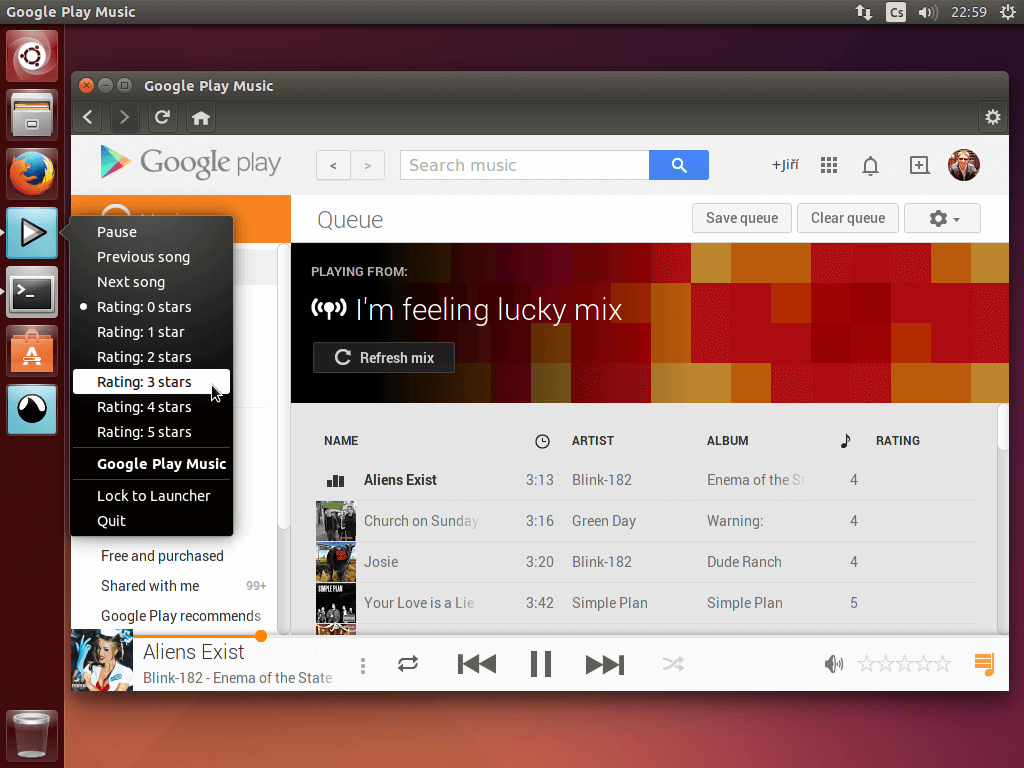
12. Nuvola Player

Nuvola Player is actually cross-platform cloud music integration for your desktop. This player is designed to have a very native look and feel but is a webapp built up of components of regular browser.

Nuvola supports Mpris v2 which means it has a sound menu support in Linux Desktop Environments. Many services work with Nuvola which are:
Bandcamp, Deezer, Google Play Music, Jango, Mixcloud, Rdio, This is my Jam and Spotify and many services are being worked upon for current and future versions like: Amazon cloud player, KEXP live stream, Synology Audio Station, Btracks.

Install Nuvola Player on Ubuntu

$ sudo add-apt-repository ppa:nuvola-player-builders/stable
$ sudo apt-get update
$ sudo apt-get install nuvolaplayer

Install Nuvola Player on Fedora

Add the following lines to tiliado-nuvolaplayer.repo file under software sources list at /etc/yum.repos.d/.

[tiliado-nuvolaplayer]
baseurl=https://tiliado.eu/nuvolaplayer/repository/rpm/<codename>/<arch>/<component>
enabled=1
gpgcheck=1
repo_gpgcheck=1
enabled_metadata=1
  1. Replace <codename> as fc23, fc22 or fc21 and <arch> with with x86_64 for 64bit systems.
  2. Replace <component> with stable – Stable releases with new features and bug fixes.

Import PGP key.

# rpm --import http://keyserver.ubuntu.com/pks/lookup?search=0x40554B8FA5FE6F6A&op=get

Update package metadata cache.

# yum makecache fast
OR
# dnf makecache fast

Finally, install the nuvolaplayer.

# yum install nuvolaplayer			[On Fedora systems]
# dnf install nuvolaplayer			[On Fedora 22+ versions]

Nuvola Player

Nuvola Player


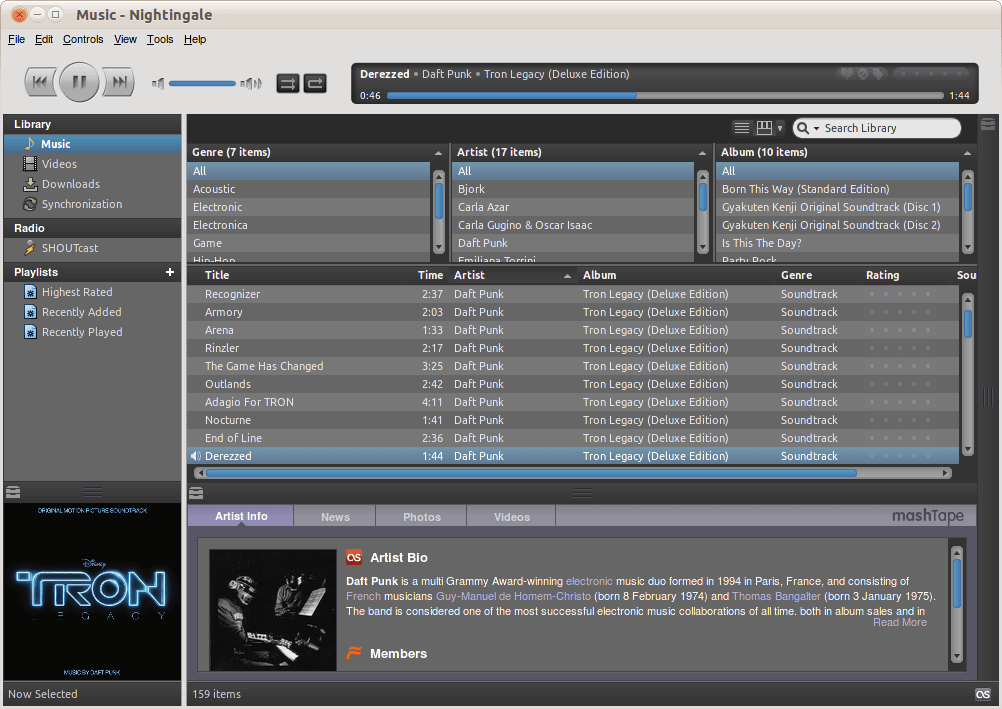
13. Nightingale

Nightingale is a free, open source and cross-platform audio player written in C++ and released under GPLv2, MPL and BSD Licenses for Windows, Linux and OS X. It can also be considered as a web browser based on Songbird media player source code. It has more of a web browser type user interface and has ability to play multiple audio formats like: MP3, AAC, Ogg Vorbis, FLAC, WMA and Apple Lossless. Also, this player provides ability to subscribe to mp3 blogs as playlists, build custom mixes, scan computer for audio files and add them to local library. One of the very unique feature of it is collapsible GUI similar to iTunes and mini-player mode.

Install Nightingale Player on Ubuntu

$ sudo add-apt-repository ppa:nightingaleteam/nightingale-release
$ sudo apt-get update
$ sudo apt-get install nightingale

Nightingale Player

Nightingale Player

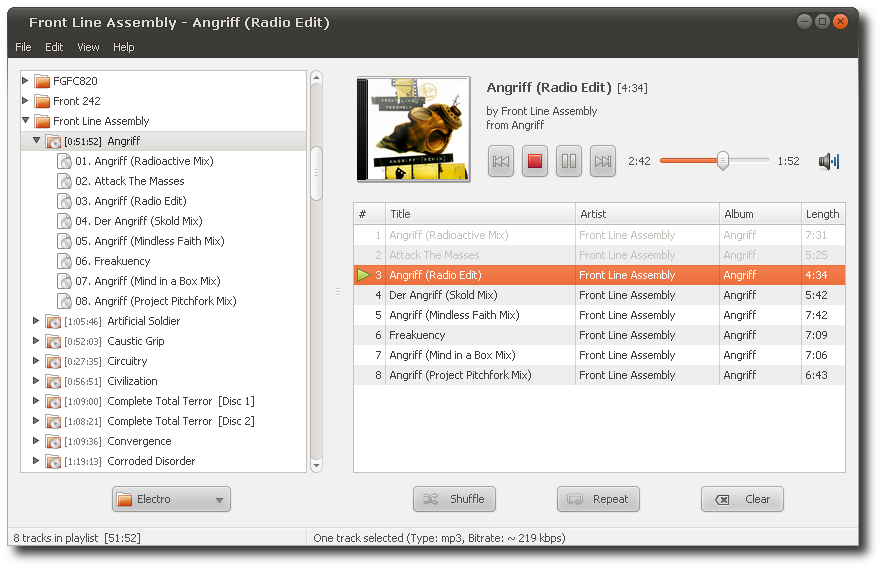
14. Decibel Audio Player

Decibel audio player is a free and open source audio player which is written in GTK+ and meant for GNU/Linux. It is simple yet very effective kind of a music player. It has a very clean interface with all the required set of features and no extras, but apart from that it is rich in feature-set and offers great deal of features.

Some of them include: full right to user to disable the feature he doesn’t need which makes it probably one of the most memory efficient one, tagging of files or burning CD’s. It has three modes which are: full, playlist and min. Above all, it offers many features which are not directly available but, they are available via plug-ins.

Install Decibel Audio Player

# apt-get install decibel-audio-player	        [On Debian based systems] 
# yum install decibel-audio-player		[On RedHat based systems]
# dnf install decibel-audio-player		[On Fedora 22+ versions]

Decibel Audio Player

Decibel Audio Player

15. MPD

MPD is another music player which is also written in C++, released in February 2015 and available for Unix-like OS and Windows and released under GPL.

Apart from all music players discussed till now, this is a daemon server which runs in background which needs a client for interaction. This music player once initiated, a daemon runs in background which uses the database of audio files kept in-memory and any local client can playback audio files after connecting to server via Sockets.

MPD can recognize large number of audio file formats including: Ogg, Vorbis, FLAC, Opus, WavPack, MP3, MOD etc. This Daemon behavior of this music player server although takes UI feature from it, but provides it with various other features like: Buffer support for playback, Seeking and Crossfading support, remotely controlling the daemon over the network, support for ALSA, OSS, JACK, MVP, PulseAudio, OS X and Windows.

It also has clients which have user interface but it is kept to very simple one.

Install MPD Music Player

# apt-get install mpd	[On Debian based systems] 
# yum install mpd		[On RedHat based systems]
# dnf install mpd		[On Fedora 22+ versions]

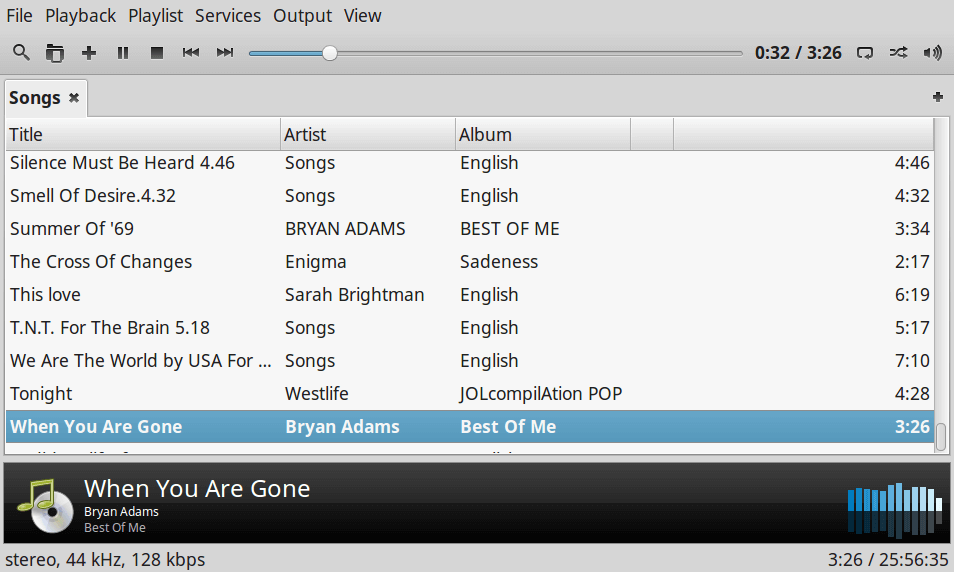
16. Audacious

Primarily designed for POSIX-compatible platforms like Linux with added support to Windows, Audacious is an open source audio player and default music player for Lubuntu and Ubuntu Studio. It is entirely written in C++ with latest version being 3.4 released in June 2013.

Audacious is one of the players with wide variety of features, most of which are available through external plugins namely: Decoder, Transport, Output, Effect plugin etc. Apart from this, it has support for wide variety of codecs namely few of which are: Mp3, FLAC, Wavpac, TTA, Shorten, MIDI etc.

It has full support for Winamp 2 skins and with all skins usually rendered in png format, it allows users to render the skins adjusting the RGB color balance by themselves. Even after being a standalone player, it accepts connection from client software’s like: Conky.

Install Audacious Music Player

# apt-get install audacious	[On Debian based systems] 
# yum install audacious		[On RedHat based systems]
# dnf install audacious		[On Fedora 22+ versions]

Audacious Player

Audacious Player

17. Rhythmbox

Written in C and released for Unix like systems like: BSD, GNU/Linux and Solaris, Rhythmbox is an audio player that plays and helps organize digital music. It is a default music player for Ubuntu Linux system. Works well under GNOME desktop environment with GStreamer media framework.

With a good looking user interface, Rhythmbox provides various features like: gapless playback, Last.fm support through which it can stream online music, Audio CD burning, Music importing. It can integrate into countless number of platforms very efficiently. Versions of Rhythmbox above 0.10.0 support DAAP sharing. Additionally it uses udev subsystem of Linux to detect the device chosen for playing music.

Install Rhythmbox Music Player

# apt-get install rhythmbox	[On Debian based systems] 
# yum install rhythmbox		[On RedHat based systems]
# dnf install rhythmbox		[On Fedora 22+ versions]

Rhythmbox Player

Rhythmbox Player

18. DeaDBeeF

Written in C, DeaDBeeF is a lightweight but powerful music player released under GPLv2 for Linux and Android. Most of external plugins supported by DeaDBeeF are written in C++ and interface uses GTK2.

One of the major advantage it holds above many audio players is low memory consumption. It can play large number of formats including but not limited to: mp3, ogg, wav, m4a etc.

Other notable features include: Online and Offline streaming of music, 18-band equalizer support, gapless playback, Cuesheet support, Last.fm support etc.

Install DeadBeeF Music Player

# apt-get install deadbeef	[On Debian based systems] 
# yum install deadbeef		[On RedHat based systems]
# dnf install deadbeef   	[On Fedora 22+ versions]

DeaDBeeF Music Player

DeaDBeeF Music Player

19. MOC (Music On Console)

MOC is another text-only music player somewhat similar to what we saw in MPD but with some changes. Written in C and based on ncurses, this console audio player is specially written for Linux/Unix based systems. It was written originally by Damian Pietras and now being maintined by John Fitzgerald.

The console-based feature of this audio player comes with many advantages which are: simple yet powerful interface, low memory utilization. Apart from this it has seperate thread for output buffer which helps it avoid high load situations.

MOC has customizable interface layouts and supports ALSA, OSS and JACK outputs. Like MPD, it also has a client/server architecture but doesn’t support remote network accessibility by any graphical client.

Install MOC Music Player

# apt-get install moc	        [On Debian based systems] 
# yum install moc		[On RedHat based systems]
# dnf install moc   	        [On Fedora 22+ versions]

MOC Commandline Music Player

MOC Commandline Music Player

20. Qmmp Music Player

It is a cross-platform Qt based audio player similar to Audacious and Winamp. It is easily available for almost all Linux Distros without compilation unless you need the latest build.

It supports wide variety of audio formats including: FLAC, Ogg Vorbis, MPEG-1, AAC, etc. Along with support to cuesheets. It can have skins similar to Winamp and even you can customize your skins.

It supports Volume Normalization which is a built-in option. Many other features can be availed in this player using external plugins. Other features include; Last.fm support, ReplayGain support, viewing lyrics, crossfade, support for ALSA, OSS and JACK audio outputs.

Install Qmmp Music Player

# apt-get install qmmp	        [On Debian based systems] 
# yum install qmmp		[On RedHat based systems]
# dnf install qmmp   	        [On Fedora 22+ versions]

Qmmp Music Player

Qmmp Music Player

21. YAROCK Music Player

YAROCK is a music player exclusively for Linux platform. It is written in C++ and Qt and using Phonon multimedia framework. Its mordern looks and minimal dependencies and support for different audio back-ends makes it be in this list of best music players.

It has MPRIS 2 interface which provides basic playback control, tracklist control. Also, it supports command-line interface. YAROCK supports variety of music formats like: MP3, Ogg, Vorbis, FLAC, WMA.

Other features include: ReplayGain support, support for multiple music collections, integration with services like: Last.fm, Echonest, DiscoGs, providing user with useful information like: lyrics, artist biography, albums context and covers etc.

Install YAROCK Music Player in Ubuntu

$ sudo apt-get install build-essential cmake libqt4-dev libtag1-dev libqjson-dev libphonon-dev libvlc-dev mpv
$ wget https://launchpad.net/yarock/1.x/1.1.4/+download/Yarock_1.1.4_source.tar.gz
$ cd Yarock_1.1.4_source/
$ mkdir build && cd build
$ cmake ..
$ make
$ sudo make install

Yarock Music Player

Yarock Music Player

Conclusion

We have made this list based on our research. If you think of any other music player on Linux which should have been listed here then you can mention its name in the comments.

Source

How to Install PM2 to Run Node.js Apps on Production Server

PM2 is a free open source, advanced, efficient and cross-platform production-level process manager for Node.jswith a built-in load balancer. It works on Linux, MacOS as well as Windows. It supports app monitoring, efficient management of micro-services/processes, running apps in cluster mode, graceful start and shutdown of apps.

It keeps your apps “alive forever” with auto restarts and can be enabled to start at system boot, thus allowing for High Availability (HA) configurations or architectures.

Notably, PM2 allows you to run your apps in cluster mode without making any changes in your code (this also depends on the number of CPU cores on your server). It also allows you to easily manage app logs, and so much more.

In addition, it also has incredible support for major Node.js frameworks such as ExpressAdonis JsSailsHapiand more, without need for any code changes. PM2 is being used by companies such IBMMicrosoftPayPal, and more.

In this article, we will explain how to install and use PM2 to run Nodejs apps in Linux production server. We will create an app for demonstrating some of PM2’s fundamental features for you to get started with it.

Step 1: Install Nodejs and NPM in Linux

1. To install most recent version of Node.js and NPM, first you need to enable official NodeSource repository under your Linux distribution and then install Node.js and NPM packages as shown.

On Debian/Ubuntu

---------- Install Node.js v11.x ---------- 
$ curl -sL https://deb.nodesource.com/setup_11.x | sudo -E bash -
$ sudo apt-get install -y nodejs

---------- Install Node.js v10.x ----------
$ curl -sL https://deb.nodesource.com/setup_10.x | sudo -E bash -
$ sudo apt-get install -y nodejs

On CentOS/RHEL and Fedora

---------- Install Node.js v11.x ---------- 
$ curl -sL https://rpm.nodesource.com/setup_11.x | bash -

---------- Install Node.js v10.x ----------
$ curl -sL https://rpm.nodesource.com/setup_10.x | bash -

Step 2: Create a Nodejs Application

2. Now, let’s create a testing application (we will assume it has a client and admin side which share the same database), the microservices will run on ports 3000, and 3001 respectively.

$ sudo mkdir -p /var/www/html/app
$ sudo mkdir -p /var/www/html/adminside
$ sudo vim /var/www/html/app/server.js
$ sudo vim /var/www/html/adminside/server.js

Next, copy and paste the following pieces of code in the server.js files (replace 192.168.43.31 with your server IP).

##mainapp code
const http = require('http');

const hostname = '192.168.43.31';
const port = 3000;

const server = http.createServer((req, res) => {
	res.statusCode = 200;
  	res.setHeader('Content-Type', 'text/plain');
  	res.end('This is the Main App!\n');
});

server.listen(port, hostname, () => {
  	console.log(`Server running at http://${hostname}:${port}/`);
});
##adminside code
const http = require('http');

const hostname = '192.168.43.31';
const port = 3001;

const server = http.createServer((req, res) => {
	res.statusCode = 200;
  	res.setHeader('Content-Type', 'text/plain');
  	res.end('This is the Admin Side!\n');
});

server.listen(port, hostname, () => {
  	console.log(`Server running at http://${hostname}:${port}/`);
});

Save the file and exit.

Step 3: Install PM2 Product Process Manager in Linux

3. The latest stable version of PM2 is available to install via NPM as shown.

$ sudo npm i -g pm2 

4. Once PM2 installed, you can start your node applications using following commands.

$ sudo node /var/www/html/app/server.js
$ sudo node /var/www/html/adminside/server.js

Note that, in a production environment, you should start them using PM2, as shown (you may not need sudo command if your app is stored in a location where a normal user has read and write permissions).

$ sudo pm2 start /var/www/html/app/server.js
$ sudo pm2 start /var/www/html/adminside/server.js

Start Nodejs App Using PM2

Start Nodejs App Using PM2

Step 4: How to Use and Manage PM2 in Linux

5. To start an application in cluster mode using the -i flag to specify the number of instances, for example.

$ sudo pm2 start /var/www/html/app/server.js -i 4 
$ sudo pm2 scale 0 8			#scale cluster app to 8 processes

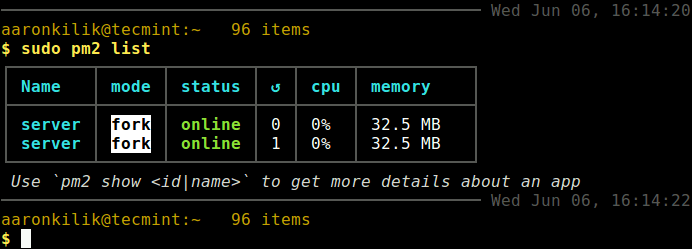
6. To list all your node application (process/microservices), run the following command.

$ sudo pm2 list

List All PM2 Managed Node Apps

List All PM2 Managed Node Apps

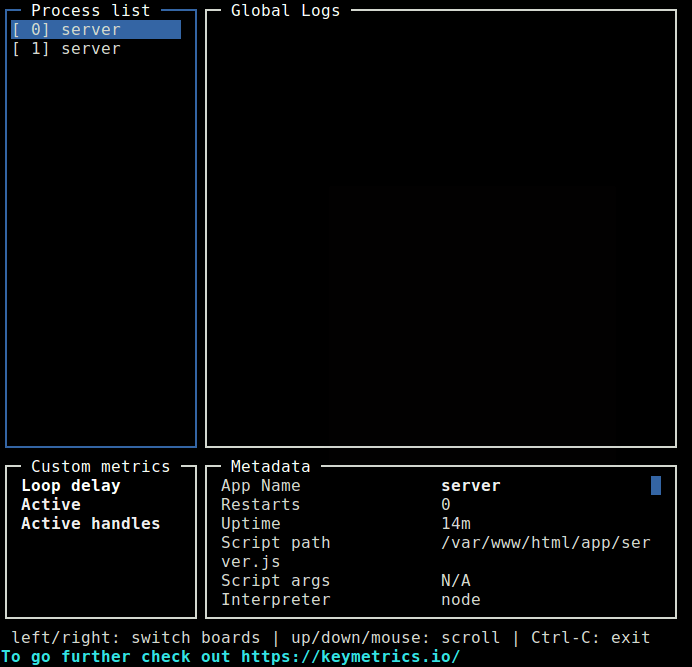
7. To monitor logs, custom metrics, process information from all processes by running the following command.

$ sudo pm2 monit

Monitor All Node Processes

Monitor All Node Processes

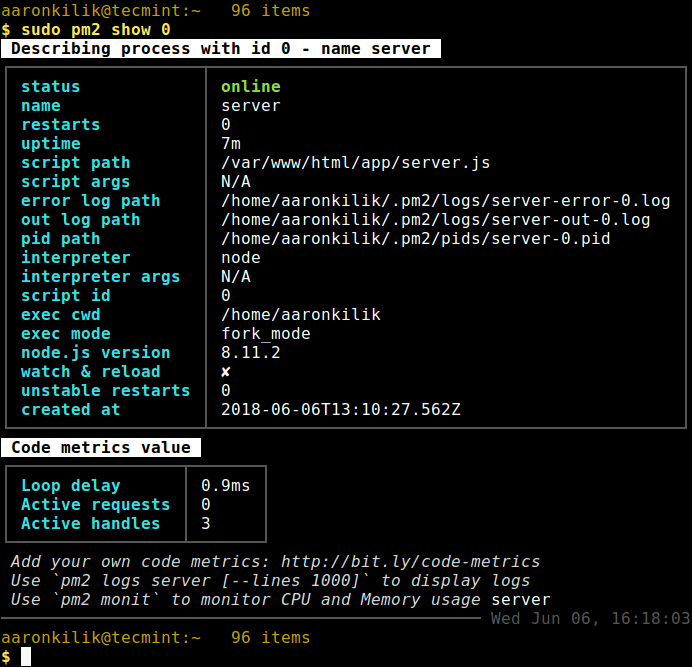
8. To view details of a single Node process as shown, using the process ID or name.

$ sudo pm2 show 0

View Details of Single App

View Details of Single App

Step 5: How to Manage Node Apps Using PM2 in Linux

9. The following is a list of some common process (single or all) management commands you should take note of.

$ sudo pm2 stop all                  		#stop all apps
$ sudo pm2 stop 0                    		#stop process with ID 0
$ sudo pm2 restart all               		#restart all apps
$ sudo pm2 reset 0		         	#reset all counters
$ sudo pm2 delete all                		#kill and remove all apps
$ sudo pm2 delete 1                 		#kill and delete app with ID 1

10. To manage application logs, use the following commands.

$ sudo pm2 logs                      	#view logs for all processes 
$ sudo pm2 logs 1	         	#view logs for app 1
$ sudo pm2 logs --json               	#view logs for all processes in JSON format
$ sudo pm2 flush			#flush all logs

11. To manage the PM2 process, use the following commands.

$ sudo pm2 startup            #enable PM2 to start at system boot
$ sudo pm2 startup systemd    #or explicitly specify systemd as startup system 
$ sudo pm2 save               #save current process list on reboot
$ sudo pm2 unstartup          #disable PM2 from starting at system boot
$ sudo pm2 update	      #update PM2 package

Step 6: Access Node Apps From Web Browser

12. To access all your node application from a remote web browser, first you need to open following ports on your system firewall, to allow client connections to the apps as shown.

-------- Debian and Ubuntu -------- 
$ sudo ufw allow 3000/tcp
$ sudo ufw allow 3001/tcp
$ sudo ufw reload

-------- RHEL and CentOS --------
# firewall-cmd --permanent --add-port=3000/tcp
# firewall-cmd --permanent --add-port=3001/tcp
# firewall-cmd --reload 

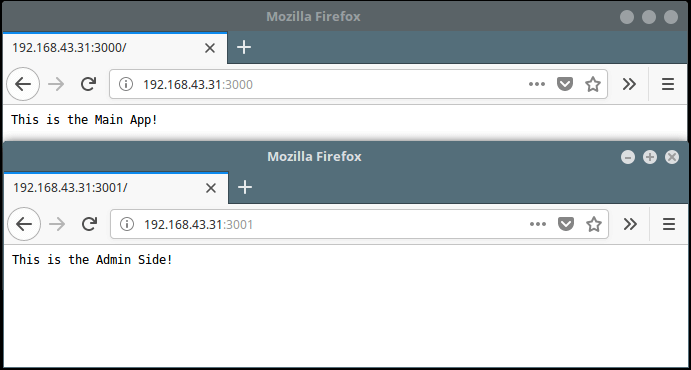
13. Then access your apps from a web browser with these URLs:

http://198.168.43.31:3000
http://198.168.43.31:3001 

Access Node Apps from Browser

Access Node Apps from Browser

Last but not least, PM2 is a simple, in-built module system to extend its core capabilities, some of the modules include pm2-logrotate, pm2-webshell, pm2-server-monit, and more – you can also create and use your own modules.

For more information, go to the PM2 GitHub repository: https://github.com/Unitech/PM2/.

That’s all! PM2 is an advanced, and efficient production-level process manager for Node.js with a built-in load balancer. In this article, we showed how to install and use PM2 to manage Nodejs apps in Linux. If you have any queries, send them to use via the comment form below.

Source

How to Rescue, Repair and Reinstall GRUB Boot Loader in Ubuntu

This tutorial will guide you on how to rescue, repair or reinstall a damaged Ubuntu machine which cannot be booted due to the fact that the Grub2 boot loader has been compromised and cannot load the boot loader which transfers the control further to the Linux kernel. In all modern Linux operating systems GRUB is the default boot loader.

This procedure has been successfully tested on an Ubuntu 16.04 server edition with the Grub boot loader damaged. However, this tutorial will only cover Ubuntu server GRUB rescue procedure, although the same procedure can be successfully applied on any Ubuntu system or on the majority of Debian-based distributions.

Requirements

    1. Download Ubuntu Server Edition DVS ISO Image

You try to boot your Ubuntu server machine and you see that the operating systems no longer starts-up and you discover that the boot loader program no longer works?

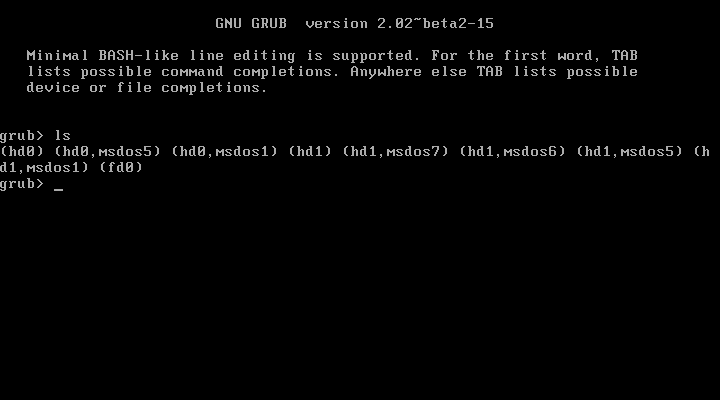
Typically, the GNU GRUB minimal console appears on your screen, as illustrated on the below screenshot. How can you restore the Grub in Ubuntu?

Ubuntu Grub Console

Ubuntu Grub Console

There are a lot of methods in Linux that can be used to re-install a broken grub, some can involve the ability to work and restore the boot loader by using the Linux command line and others are fairly simple and implies booting the hardware with a Linux live CD and using the GUI indications to repair the damaged boot loader.

Among the simplest methods, that can be used in Debian based distributions, especially on Ubuntu systems, is the method presented in this tutorial, which involves only booting the machine into the Ubuntu live DVD ISO image.

The ISO image can be downloaded from the following link: http://releases.ubuntu.com/

Reinstall Ubuntu GRUB Boot Loader

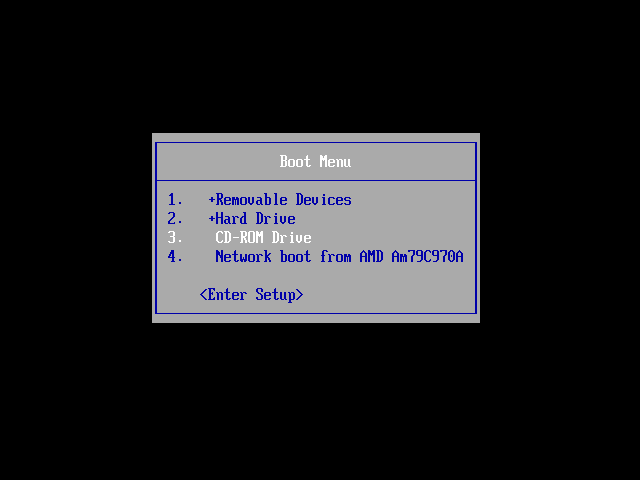
1. After you’ve downloaded and burned the Ubuntu ISO image, or created a bootable USB stick, place the bootable media into your appropriate machine drive, reboot the machine and instruct the BIOS to boot into Ubuntu live image.

Machine Boot Menu

Machine Boot Menu

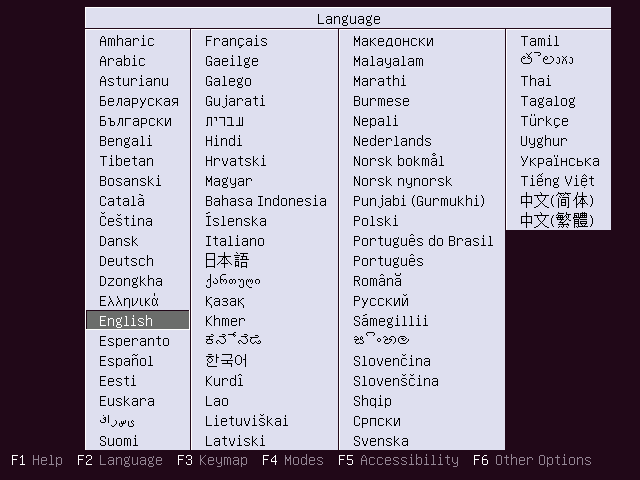
2. On the first screen, choose the language and press [Enter] key to continue.

Choose Language

Choose Language

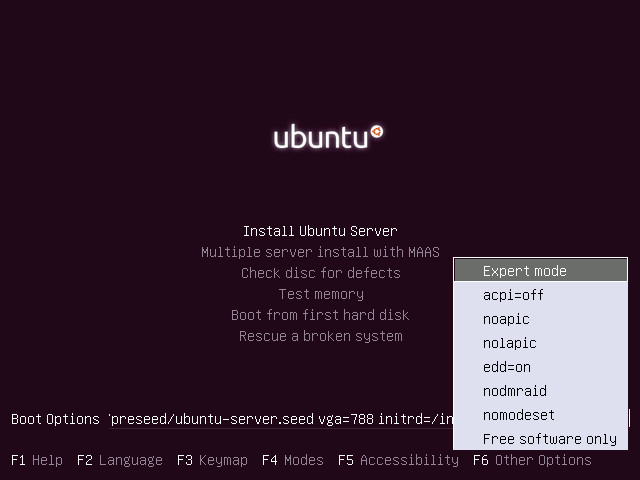
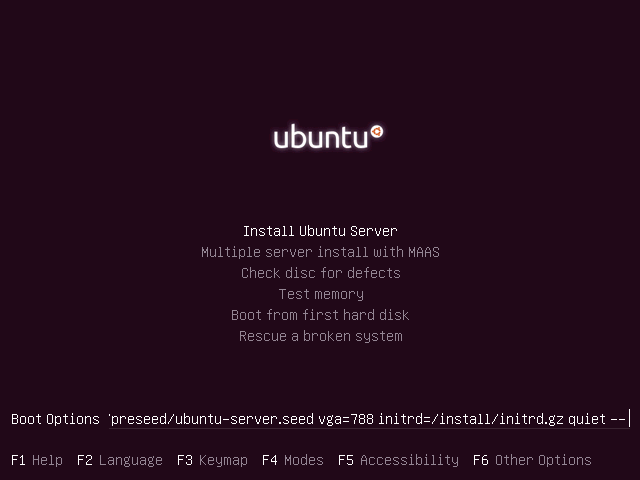
3. On the next screen, press F6 function key in order to open the other options menu and select Expert mode option. Then, hit Escape key to return to Boot Options line in editing mode, as illustrated in the below screenshots.

Ubuntu Expert Mode

Ubuntu Expert Mode

Ubuntu Boot Options

Ubuntu Boot Options

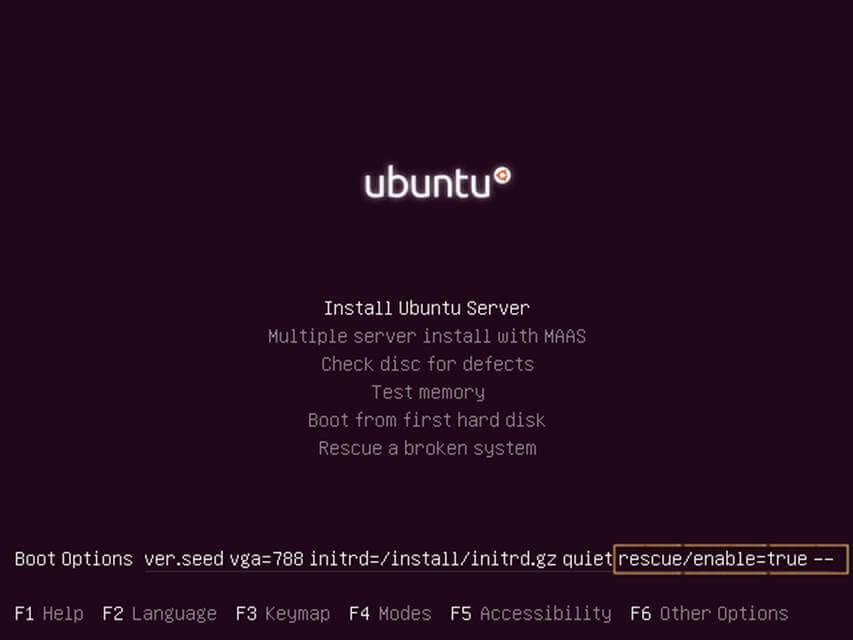
4. Next, edit Ubuntu live image boot options by using the keyboard arrows to move the cursor just before the quiet string and write the following sequence as illustrated in the below screenshot.

rescue/enable=true 

Enable Ubuntu Rescue Boot Option

Enable Ubuntu Rescue Boot Option

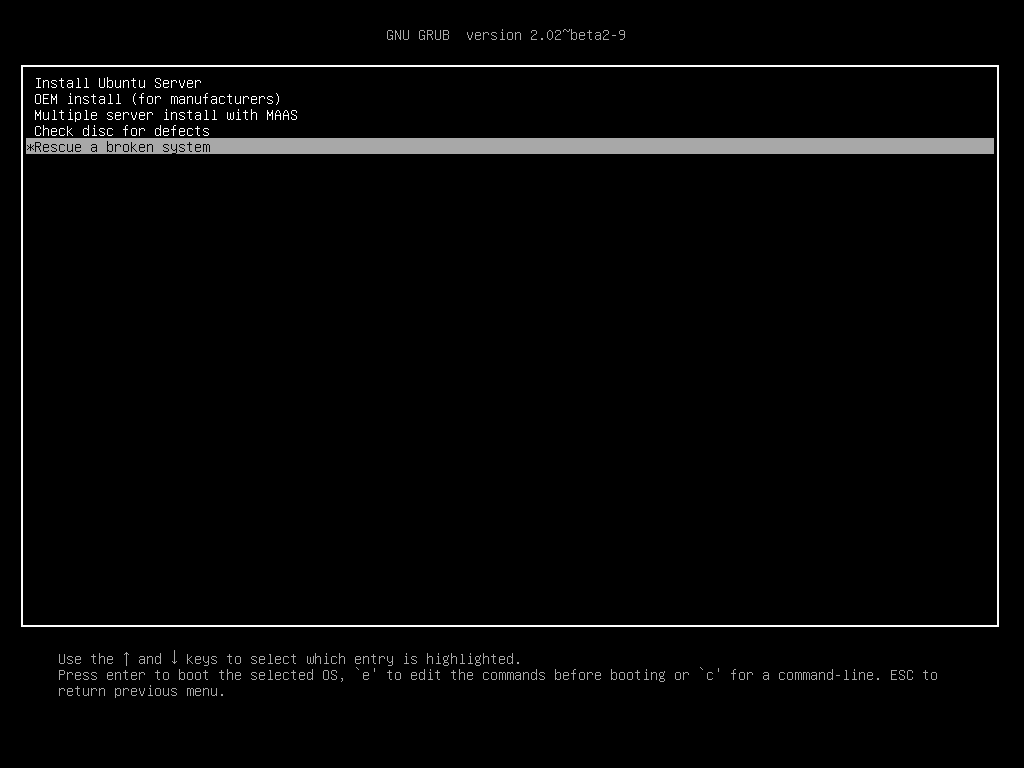
5. After you’ve wrote the above statement, press [Enter] key to instruct the live ISO image to boot into rescue mode in order to Rescue a broken system.

Ubuntu Rescue Mode

Ubuntu Rescue Mode

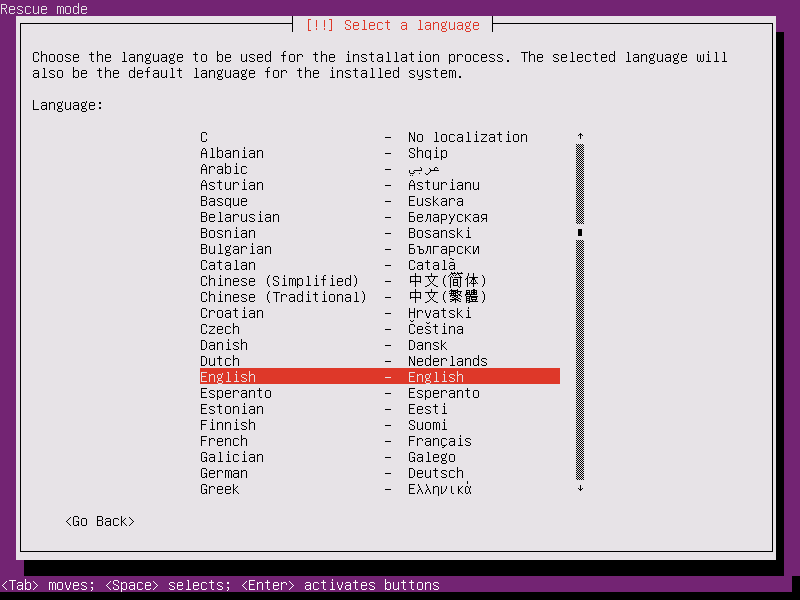
6. On the next screen select the language you want to perform the system rescue and press [enter] key to continue.

Choose Language in Rescue Mode

Choose Language in Rescue Mode

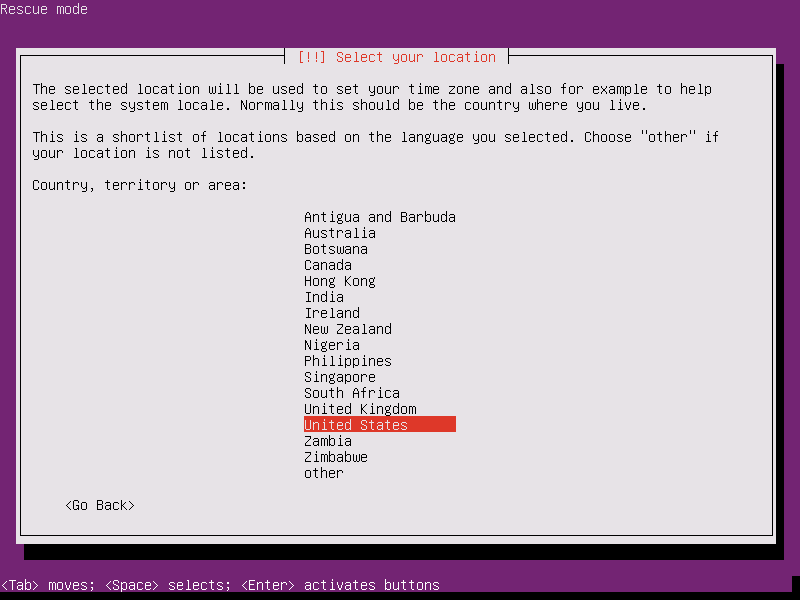
7. Next, select your appropriate location from the presented list and press [enter] key to move further.

Select Your Location

Select Your Location

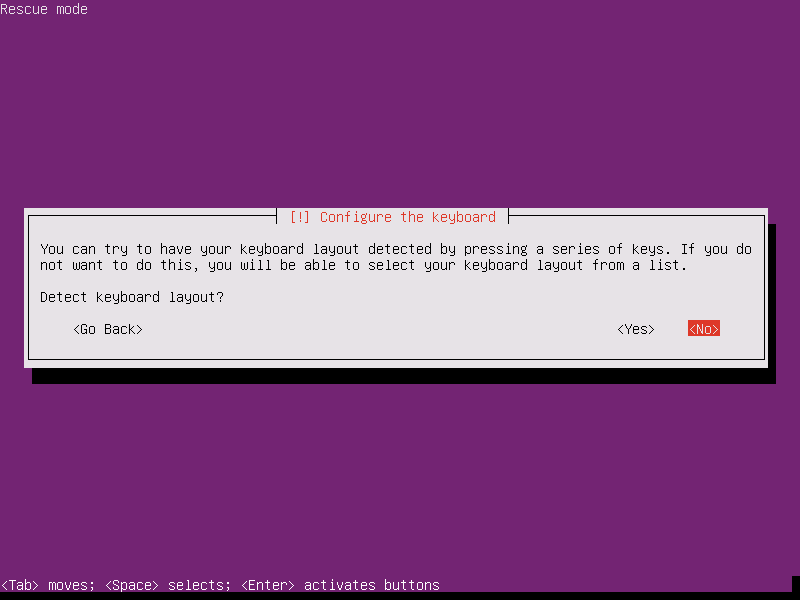
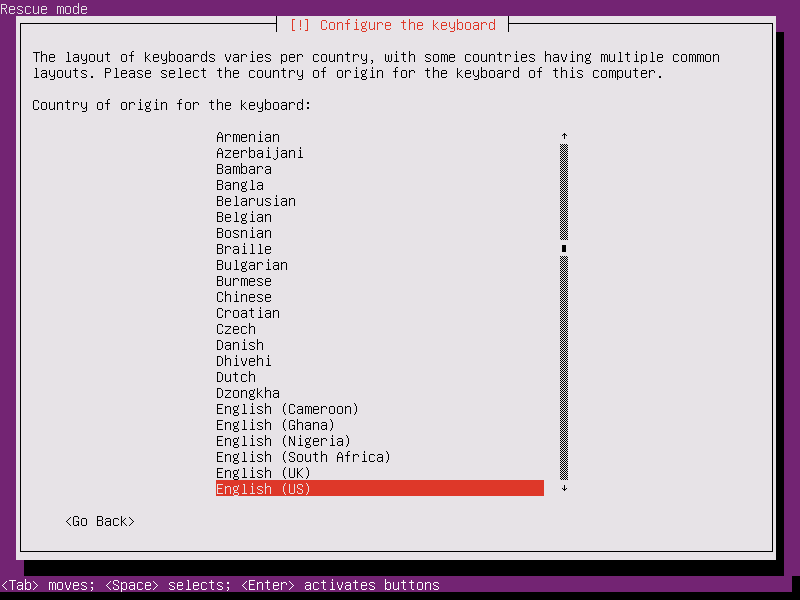
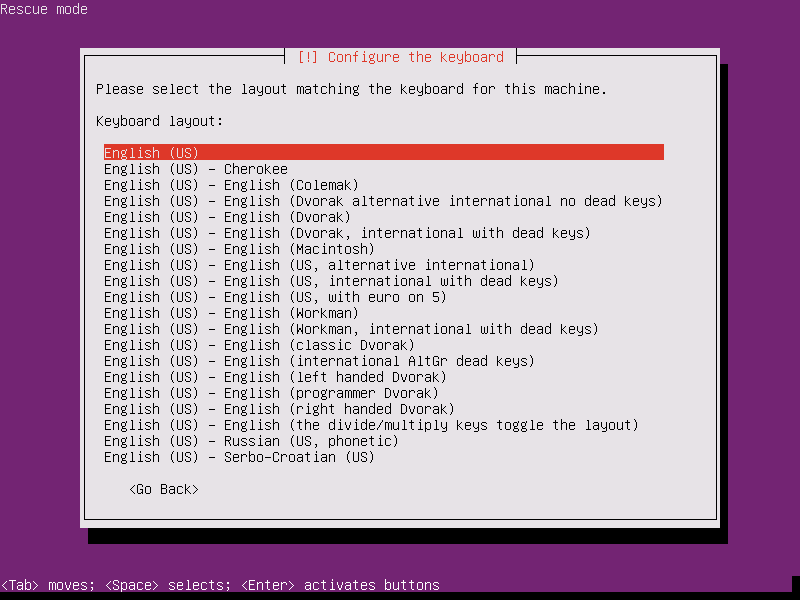
8. On the next series of screens, select your keyboard layout as illustrated in the below screenshots

Configure Keyboard

Configure Keyboard

Select Keyboard Country Layout

Select Keyboard Country Layout

Select Keyboard Layout

Select Keyboard Layout

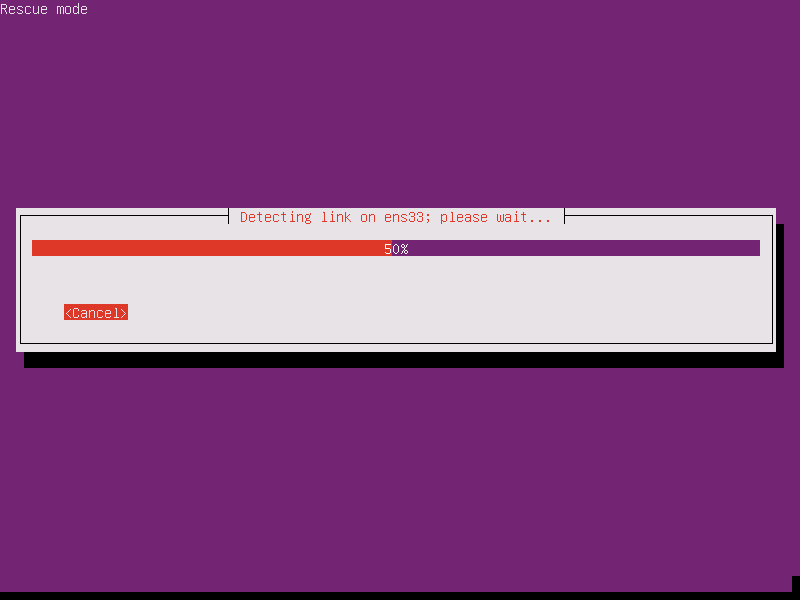
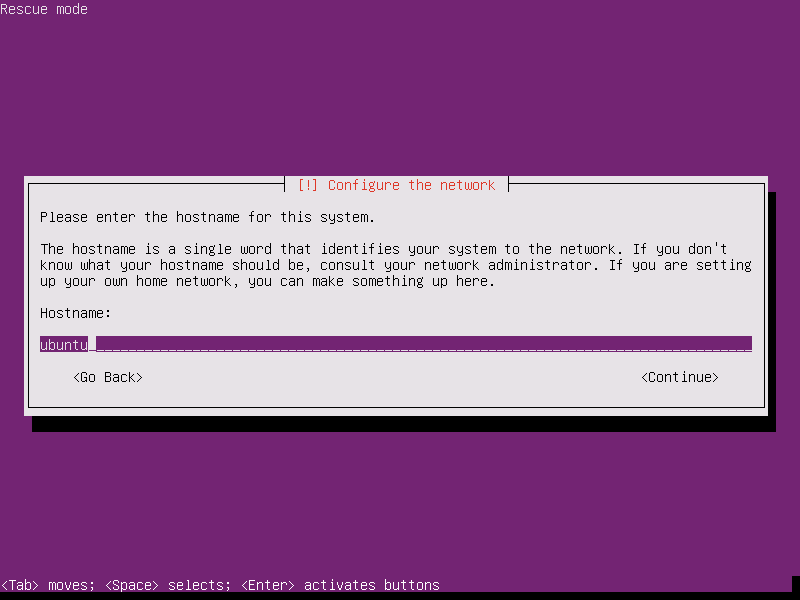
9. After detecting your machine hardware, loading some additional components and configuring the network you will be asked to setup your machine hostname. Because you’re not installing the system, just leave the system hostname as default and press [enter] to continue.

Detecting System Hardware

Detecting System Hardware

Keep System Hostname

Keep System Hostname

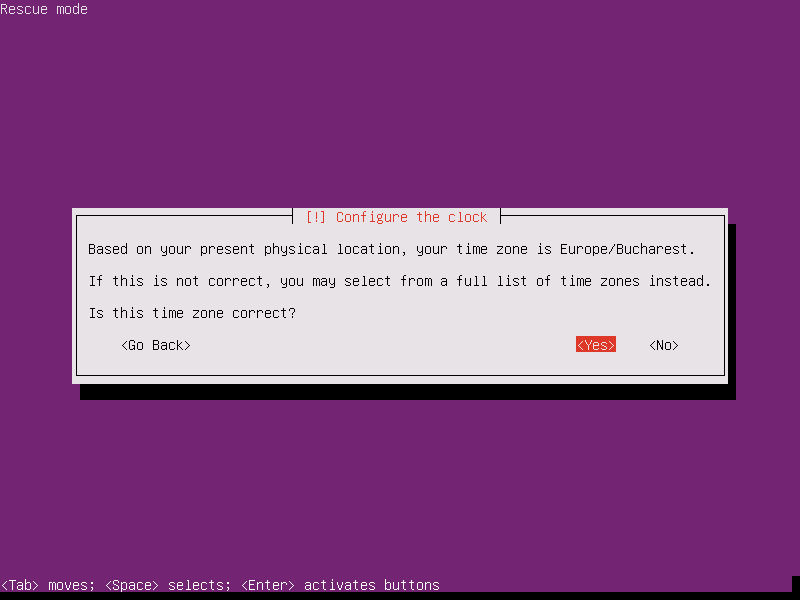
10. Next, based on the supplied physical location the installer image will detect your time zone. This setup will accurately work only if your machine is connected to internet.

However, it’s unimportant if your time zone is not correctly detected, because you are not performing a system installation. Just press Yes to continue further.

Keep Timezone

Keep Timezone

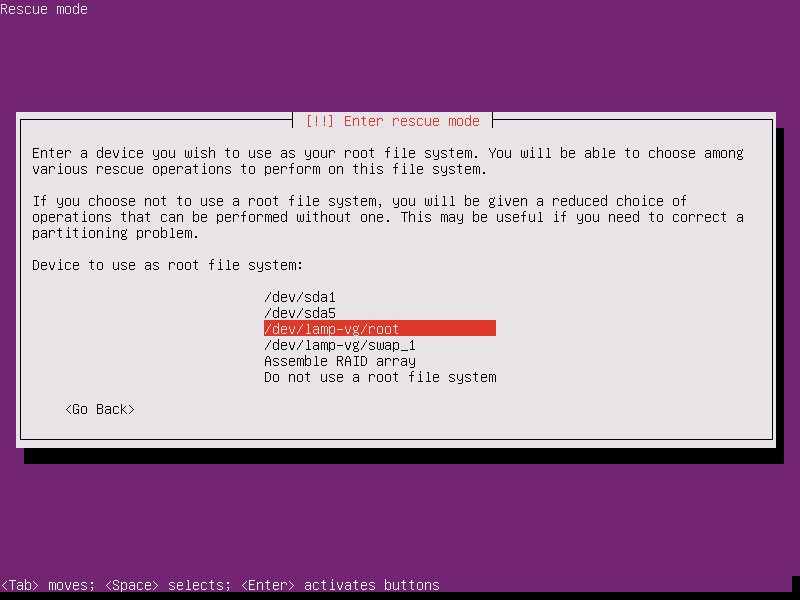
11. On the next screen you’ll be directly transferred into rescue mode. Here, you should choose your machine root file system from the provided list. In case your installed system uses a logical volume manager to delimit partitions, it should be easy to detect your root partition from the list by reviewing volume group names as illustrated in the below screenshot.

Otherwise, in case you’re not sure which partition is used for the /(root) file system, you should try to probe each partition until you detect the root file system. After selecting the root partition press [Enter] key to continue.

Choose Root Partition

Choose Root Partition

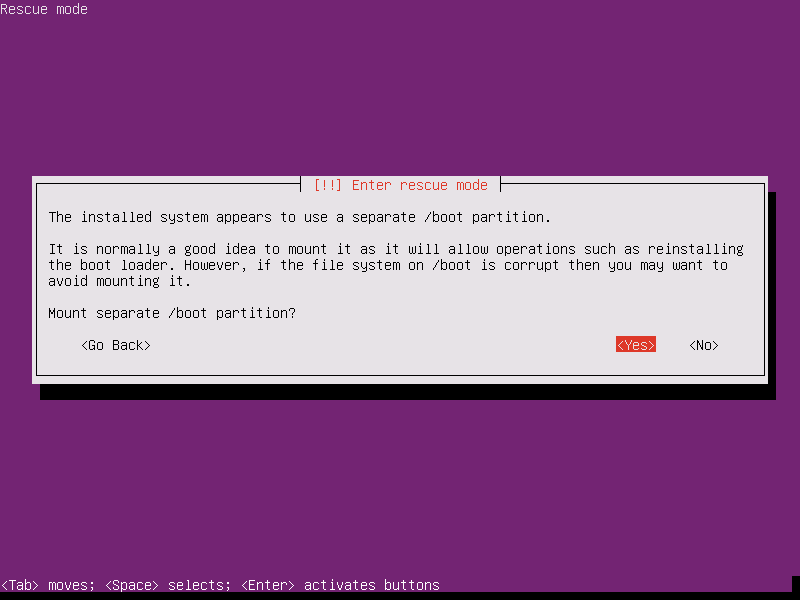
12. In case your system has been installed with a separate /boot partition, the installer will ask you whether you want to mount the separate /boot partition. Select Yes and press [Enter] key to continue.

Mount Boot Partition

Mount Boot Partition

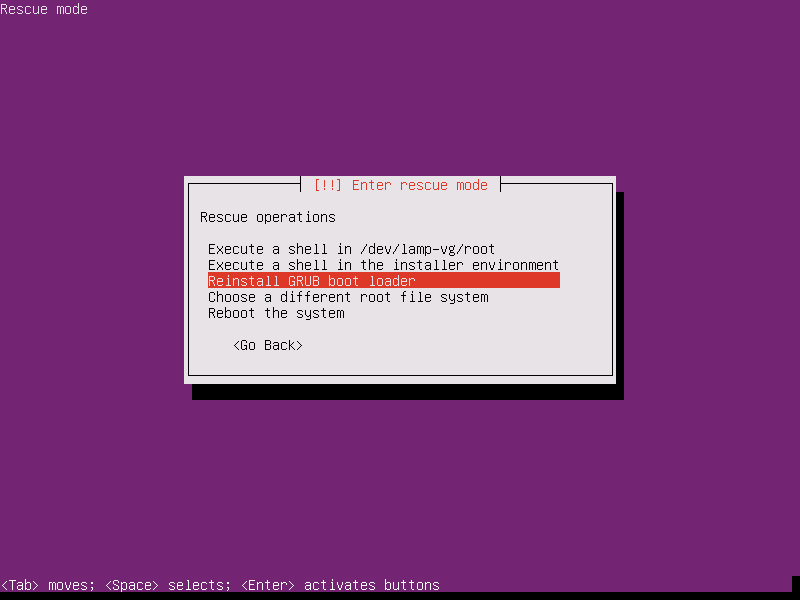
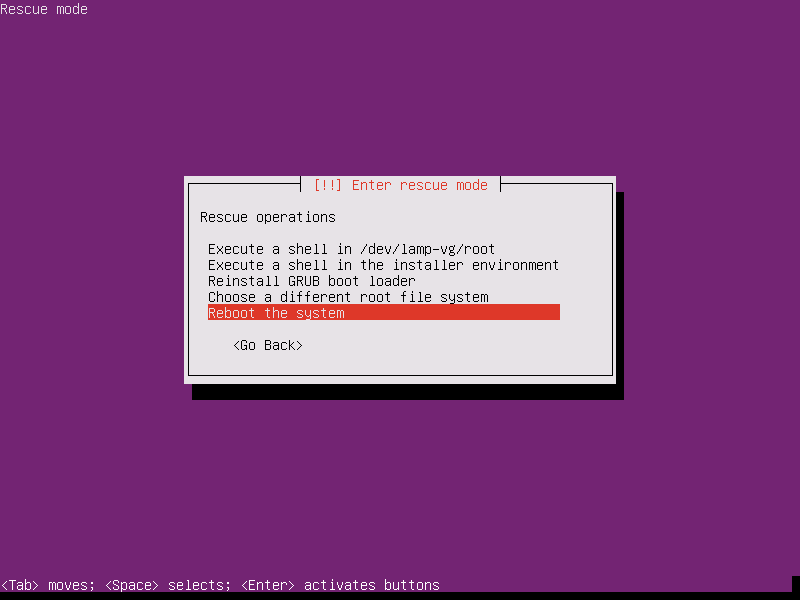
13. Next, you will be provided with Rescue operations menu. Here, select the option to Reinstall the GRUB boot loader and press [enter] key to continue.

Reinstall Ubuntu Grub Loader

Reinstall Ubuntu Grub Loader

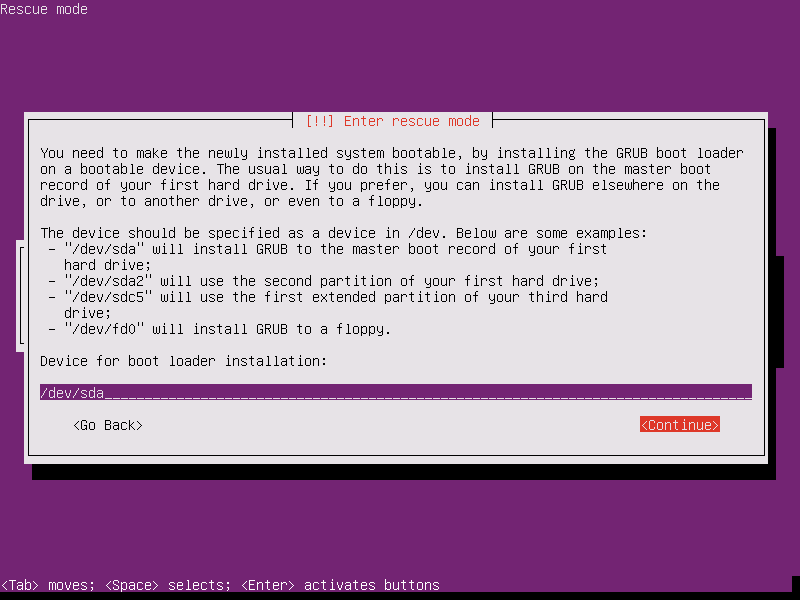
14. On the next screen, type your machine disk device where the GRUB will be installed and press [Enter] to continue, as shown in the below image.

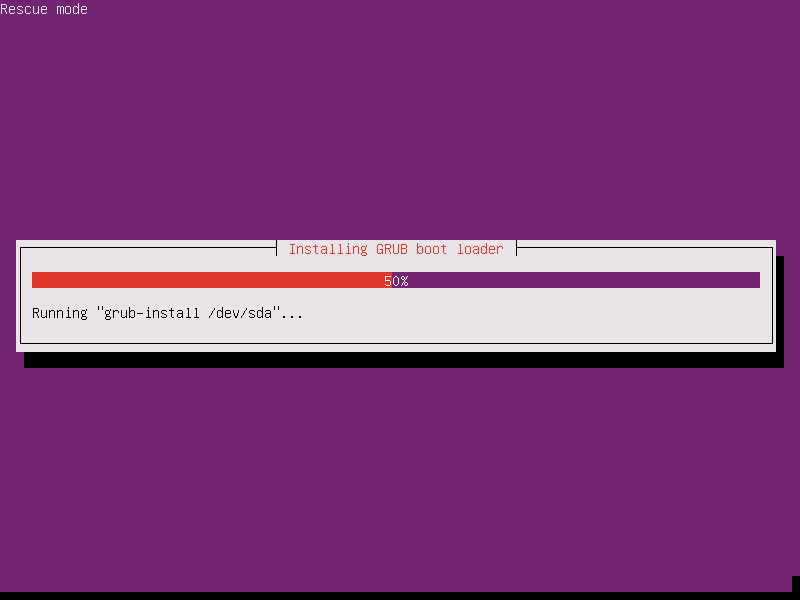
Usually, you should install the boot loader on your first machine hard disk MBR, which is /dev/sda in most cases. The installation process of GRUB will start as soon as you hit the Enter key.

Select Disk to Install Grub Loader

Select Disk to Install Grub Loader

15. After the live system installs the GRUB boot loader you will be directed back to main rescue mode menu. The only thing left now, after you’ve successfully repaired your GRUB, is to reboot the machine as shown in the below images.

Installing Ubuntu Grub Boot Loader

Installing Ubuntu Grub Boot Loader

Reboot Ubuntu System

Reboot Ubuntu System

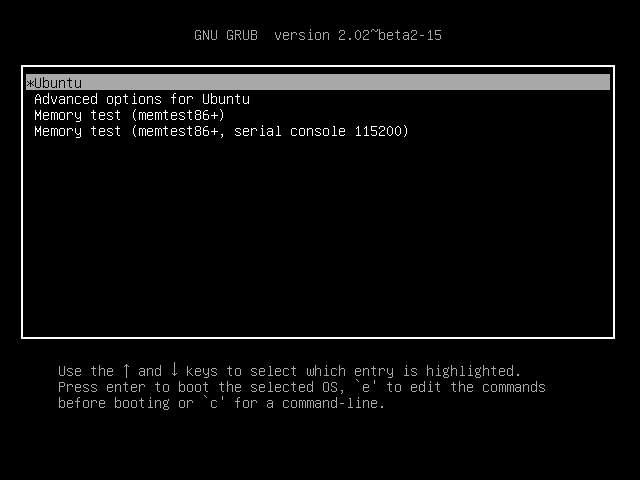
Finally, eject the live bootable media from the appropriate drive, reboot the machine and you should be able to boot into the installed operating system. The first screen to appear should be installed operating system GRUB menu, as illustrated in the below screenshot.

Ubuntu Boot Menu

Ubuntu Boot Menu

Manually Reinstall Ubuntu Grub Boot Loader

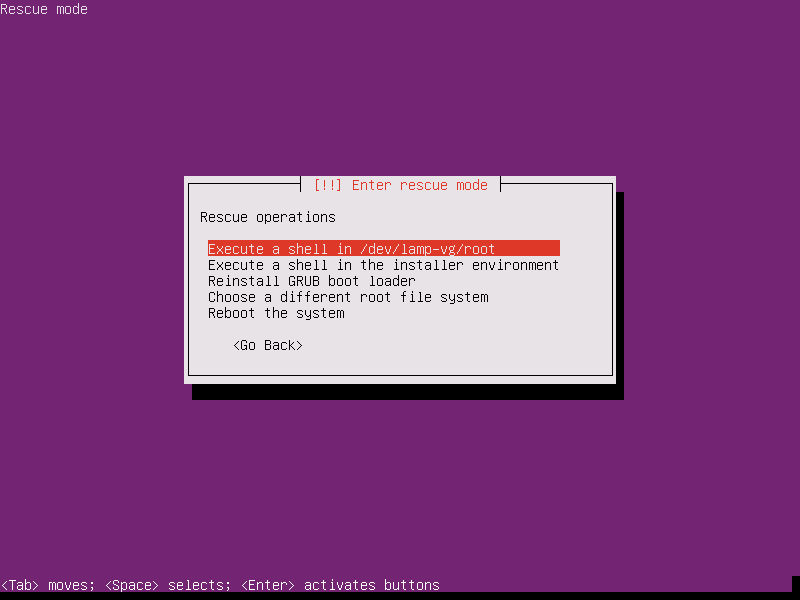
14. However, if you like to manually reinstall the GRUB boot loader from Rescue operations menu, follow all the steps presented in this tutorial until you reach point 13, where you make the following changes: instead of choosing the option to reinstall GRUB boot loader, select the option which says Execute a shell in /dev/(your_chosen_root_partition and press [Enter] key to continue.

Select Execute a Shell in Root Partition

Select Execute a Shell in Root Partition

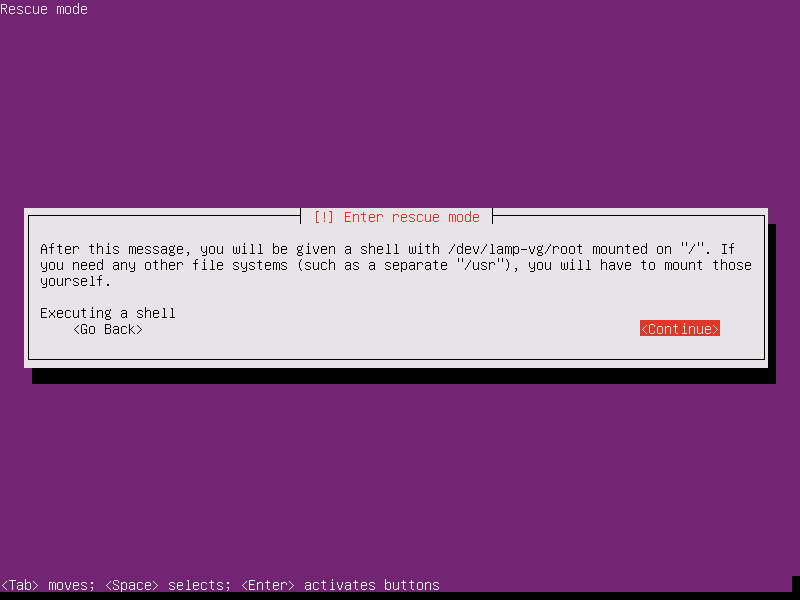
15. On the next screen hit Continue by pressing [enter] key in order to open a shell in your root file system partition.

Open Shell Mode

Open Shell Mode

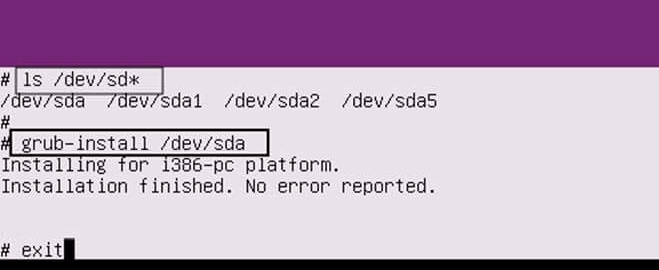
16. After the shell has been opened in the root file system, execute ls command as presented below in order to identify your machine hard disk devices.

# ls /dev/sd* 

After you’ve identified the correct hard disk device (usually the first disk should be /dev/sda), issue the following command to install the GRUB boot loader on the identified hard disk MBR.

# grub-install /dev/sda

After GRUB has been successfully installed leave the shell prompt by typing exit.

# exit

Install Ubuntu Grub Boot Loader

Install Ubuntu Grub Boot Loader

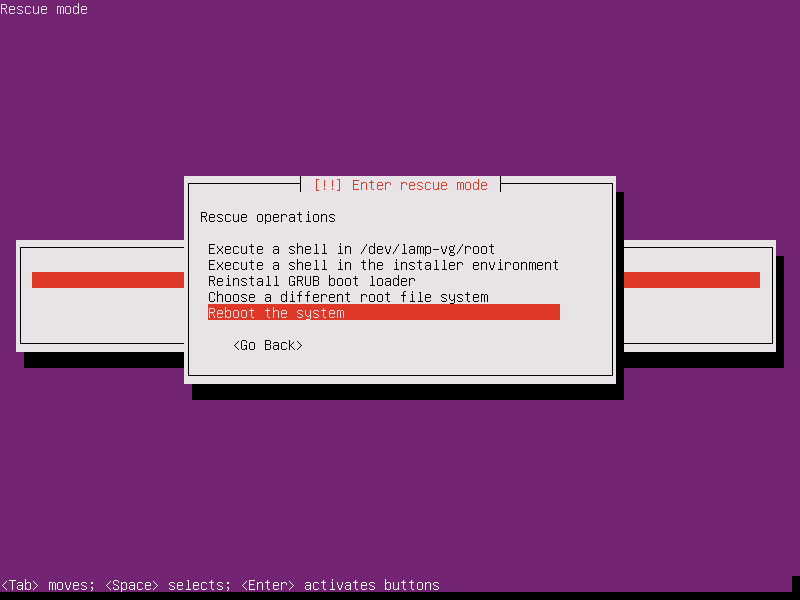
17. After you’ve exited the shell prompt, you will be returned to main rescue mode menu. Here, choose the option to reboot the system, eject the live bootable ISO image and your installed operating system should be booted without any issue.

Reboot System

Reboot System

That’s all! With a minimal effort you’ve successfully rendered your Ubuntu machine the ability to boot the installed operating system.

Source

zzUpdate – Fully Upgrade Ubuntu PC/Server to Newer Version

zzUpdate is a free, open source, simple, fully configurable, and easy to use command line utility to fully upgrade an Ubuntu system via apt package management system. It is a completely configfile-driven shell script that allows you to upgrade your Ubuntu PC or server hands-off and unwatched for almost the entire process.

It will upgrade your Ubuntu system to the next available release in case of a normal release. For Ubuntu LTS(Long Term Support) releases, it tries to search for the next LTS version only and not the latest Ubuntu version available.

In this article, we will explain how to install and run zzupdate tool to upgrade an Ubuntu system to latest available version from the command line.

How to Install zzUpdate Tool in Ubuntu

First make sure that your system has curl program installed, otherwise install it using the following command.

$ sudo apt install curl

Now install zzupdate on your Ubuntu system by running the following command. The below setup shell script will install git, which is required for cloning the zzupdate source tree and sets up the package on your system.

$ curl -s https://raw.githubusercontent.com/TurboLabIt/zzupdate/master/setup.sh | sudo sh

Install zzUpdate in Ubuntu

Install zzUpdate in Ubuntu

After you have successfully installed it, create your configuration file from the provided sample configuration file using the following command.

$ sudo cp /usr/local/turbolab.it/zzupdate/zzupdate.default.conf /etc/turbolab.it/zzupdate.conf

Next, set your preferences in the configuration file.

$ sudo nano /etc/turbolab.it/zzupdate.conf

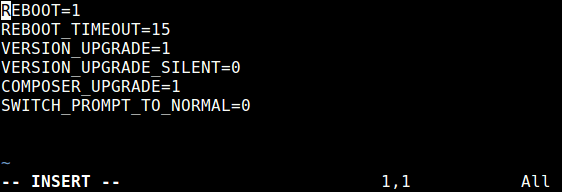
The following are the default configuration variables (a value of 1 means yes and 0 means no) you will find in this file.

REBOOT=1
REBOOT_TIMEOUT=15
VERSION_UPGRADE=1
VERSION_UPGRADE_SILENT=0
COMPOSER_UPGRADE=1
SWITCH_PROMPT_TO_NORMAL=0

zzUpdate Configuration

zzUpdate Configuration

Before upgrading your Ubuntu system, you can check your current Ubuntu release using following command.

$ cat /etc/os-release

Check Ubuntu Release Version

Check Ubuntu Release Version

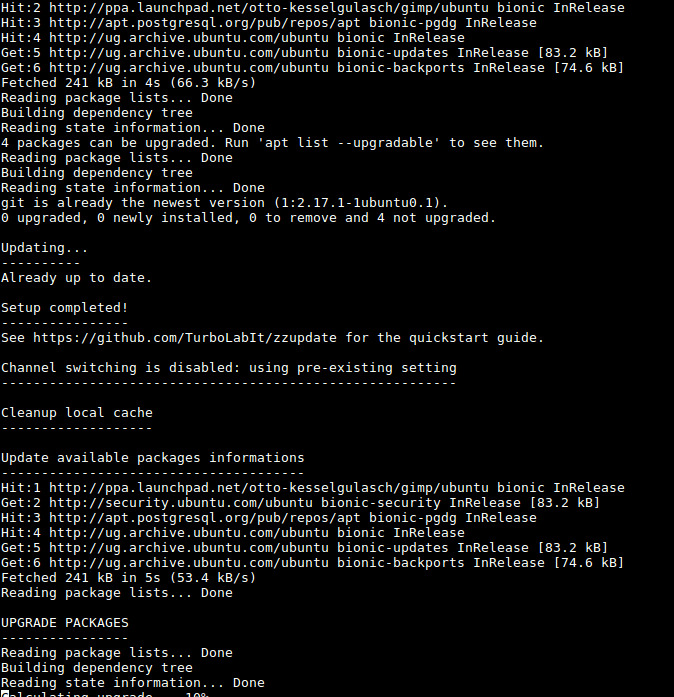
When you have configured zzupdate to work the way you wish, simply run it to fully upgrade your Ubuntu system with root user privileges. It will inform you of any actions performed.

$ sudo zzupdate 

Once you have launched it, zzupdate will self-update via git, updates available packages informations (asks you to disable third-party repositories), upgrades any packages where necessary, and checks for a new Ubuntu release.

If there is a new release, it will download the upgrade packages and install them, when the system upgrade is complete, it will prompt you to restart your system.

zzupdate Upgrade Ubuntu

zzupdate Upgrade Ubuntu

zzUpdate Github repositoryhttps://github.com/TurboLabIt/zzupdate

That’s all! zzUpdate is a simple and fully configurable command line utility to fully update an Ubuntu system via apt package manager. In this guide, we have explained how to install and use zzupdate to upgrade an Ubuntu system from the command line. You can ask any questions via the feedback form below.

Source

Clementine 1.3 Released – A Modern Music Player for Linux

Clementine is a freely available cross-platform open source Qt based music player inspired by Amarok 1.4. The latest stable version 1.3 was released (On April 15th, 2016) after a year of development and comes with Vk.com and Seafile support along with numerous other enhancements and bug fixes.

Clementine Music Player for Linux

Clementine Music Player for Linux

Using Clementine, you can listen to different online music services such as Soundcloud, Spotify, Icecast, Jamendo, Magnatune and even play your favorite music from Google Drive, Dropbox and OneDrive. Other online features include lyrics, artist biographies and view photos.

Read Also: 21 Best Music Players for Linux

Clementine Features

  1. Search and play local music library
  2. Listen online Radio from Spotify, Grooveshark, SomaFM, Magnatune, Jamendo, SKY.fm, Soundcloud, Icecast, etc.
  3. Play songs from Dropbox, Google Drive, OneDrive, etc.
  4. Sidebar information pane with songs, lyrics, artist biographies and pictures.
  5. Create smart playlists and dynamic playlists.
  6. Transfer music in iPod, iPhone or storage etc.
  7. Search and download podcast.

If you want to know more about Clementine features and its Change log you can visit Clementine Website.

Install Clementine 1.3.0 in Linux

To install latest Clementine 1.3 version on Ubuntu 16.04, 15.10, 15.04, 14.10, 14.04 and Linux Mint 17.x and its derivatives, you can use official stable PPA (Personal Package Archives). To add PPA, press keys CTRL+ALT+Tto get command prompt and follow the instructions.

$ sudo add-apt-repository ppa:me-davidsansome/clementine
$ sudo apt-get update
$ sudo apt-get install clementine

New recent versions of Clementine require GStreamer 1.0 which wasn’t added in Ubuntu 12.04. If you get any errors during installation, you should add the GStreamer PPA as well:

$ sudo add-apt-repository ppa:gstreamer-developers/ppa

On Fedora 21-23, you can use official RPM packages to get Clementine 1.3 as shown:

On 32-bit Systems

----------- On Fedora 21 ----------- 
# dnf install https://github.com/clementine-player/Clementine/releases/download/1.3/clementine-1.3.0-1.fc21.i686.rpm

----------- On Fedora 22 ----------- 
# dnf install https://github.com/clementine-player/Clementine/releases/download/1.3/clementine-1.3.0-1.fc22.i686.rpm

----------- On Fedora 23 ----------- 
# dnf install https://github.com/clementine-player/Clementine/releases/download/1.3/clementine-1.3.0-1.fc23.i686.rpm

On 64-bit Systems

----------- On Fedora 21 ----------- 
# dnf install https://github.com/clementine-player/Clementine/releases/download/1.3/clementine-1.3.0-1.fc21.x86_64.rpm

----------- On Fedora 22 ----------- 
# dnf install https://github.com/clementine-player/Clementine/releases/download/1.3/clementine-1.3.0-1.fc22.x86_64.rpm

----------- On Fedora 23 ----------- 
# dnf install https://github.com/clementine-player/Clementine/releases/download/1.3/clementine-1.3.0-1.fc23.x86_64.rpm

For other distributions, Clementine binary and source code downloads are available from HERE.

Source

How to Install VLC 3.0 in Debian, Ubuntu and Linux Mint

VLC (VideoLAN Client) is an open source highly portable Media Player that designed to run various video and audio media files, including mpegmpeg-2mpeg-4wmvmp3dvdsvcdspodcastsogg/vorbismovdivxquicktime and streaming of multimedia files from various online networks like Youtube and other network sources.

Recently, VideoLan team announced the major release of VLC 3.0 with some new features, number of improvements and bug fixes.

VLC 3.0 Features

  • VLC 3.0 “Vetinari” is a new major update of VLC
  • Activates hardware decoding by default, to get 4K and 8K playback!
  • It supports 10bits and HDR
  • Supports 360 video and 3D audio, up to Ambisonics 3rd order
  • Allows audio passthrough for HD audio codecs
  • Stream to Chromecast devices, even in formats not supported natively
  • Supports browsing of local network drives and NAS

Find out all the changes in VLC 3.0 in the release announcement page.

Suggested Read: Install VLC Media Player in RHEL/CentOS 7/6 and Fedora 27-22

Installing VLC Media Player in Debian, Ubuntu and Linux Mint

The recommended way of installing latest VLC 3.0 version on DebianUbuntu and Linux Mint using official VLC PPA repository.

Launch terminal by doing “Ctrl+Alt+T” from the desktop and add a VLC PPA to your system, by running following command.

$ sudo add-apt-repository ppa:videolan/stable-daily

Next, do an update of system local repository index.

$ sudo apt-get update

Once, you’ve done index update, let’s install VLC package.

$ sudo apt-get install vlc

Important: User’s who are using older versions of DebianUbuntu and Linux Mint, can also use above PPA to install/upgrade to latest VLC version, but the PPA only installs or upgrades to whichever latest VLC version available (latest VLC version offered by this PPA is 2.2.7).

So, if you’re looking for more latest version, then consider upgrading your distribution to latest version or use Snap package of VLC, which provides VLC 3.0 stable in snap packaging system as shown.

$ sudo apt install snapd
$ sudo snap install vlc

Suggested Read: 10 Best Open Source Video Players For Linux in 2015
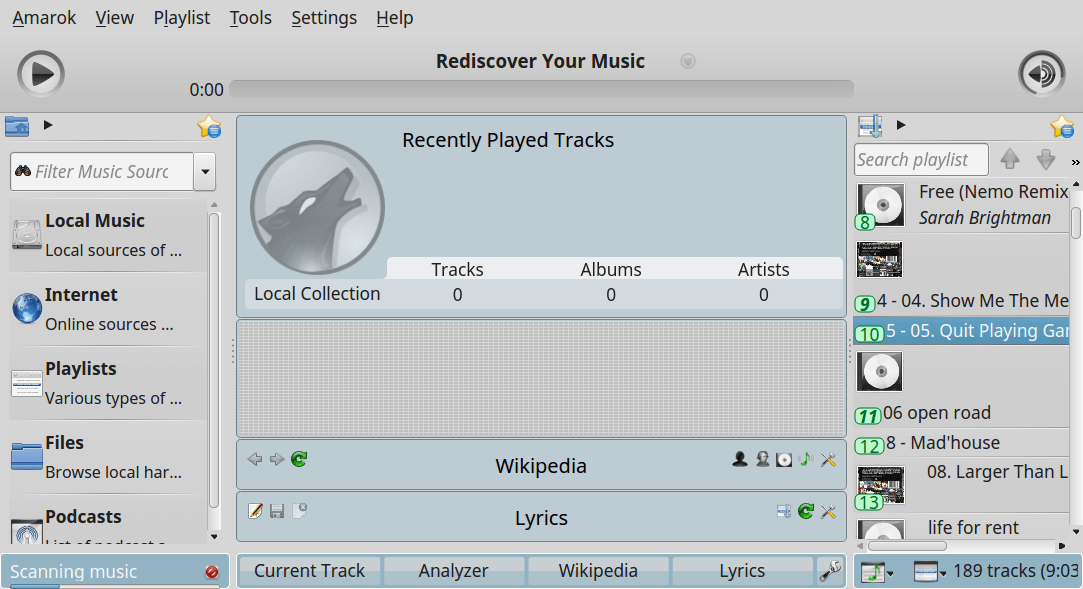
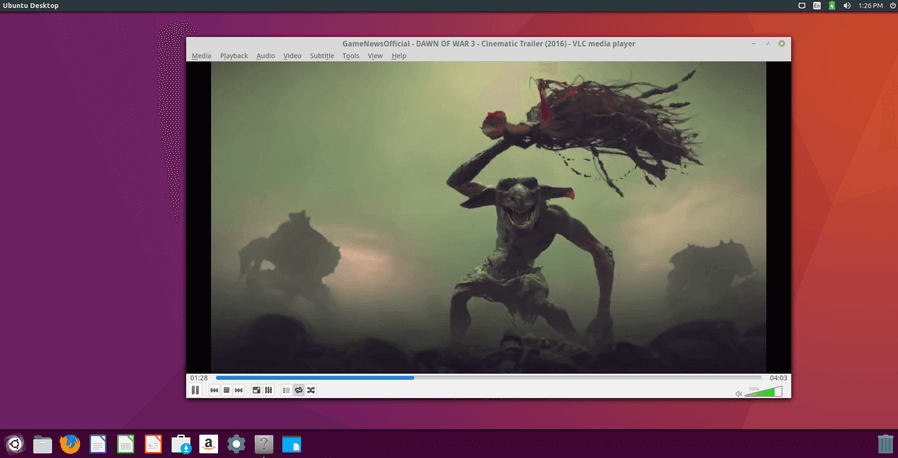
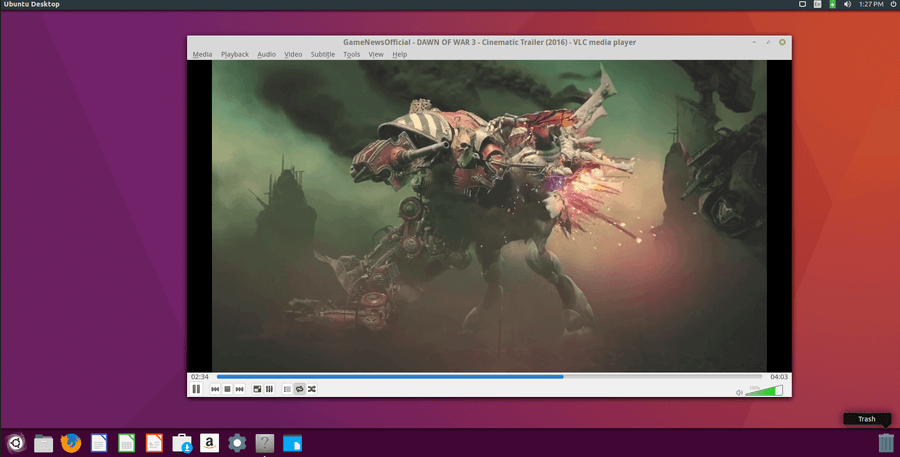
VLC Screenshots

VLC Player Running on Ubuntu 16.04

VLC Player Running on Ubuntu 16.04

VLC Player Running on Ubuntu 16.04

VLC Player Running on Ubuntu 16.04

VLC also offers packages for RPM based and other Linux distributions, including source tarballs, that you can download and install them from THIS PAGE.

Source
WP2Social Auto Publish Powered By : XYZScripts.com