How to Install Your Own Cloud Platform with OpenStack in RHEL/CentOS 7
OpenStack is a free and open-source software platform which provides IAAS (infrastructure-as-a-service) for public and private clouds.
OpenStack platform consists of several inter-related projects that control hardware, storage, networking resources of a datacenter, such as: Compute, Image Service, Block Storage, Identity Service, Networking, Object Storage, Telemetry, Orchestration and Database.
The administration of those components can be managed through the web-based interface or with the help of OpenStack command line.
Install OpenStack in CentOS 7 and RHEL 7
This tutorial will guide you on how you can deploy your own private cloud infrastructure with OpenStackinstalled on a single node in CentOS 7 or RHEL 7 or Fedora distributions by using rdo repositories, although the deployment can be achieved on multiple nodes.
Requirements
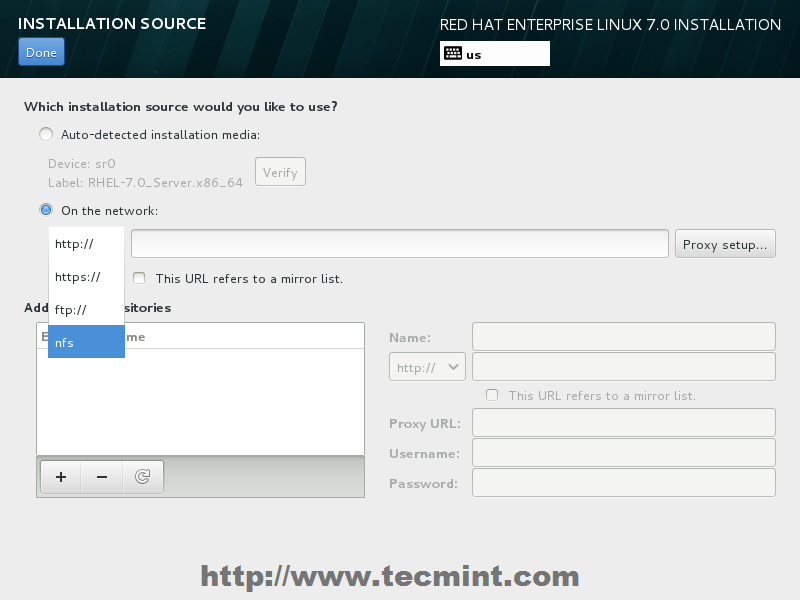
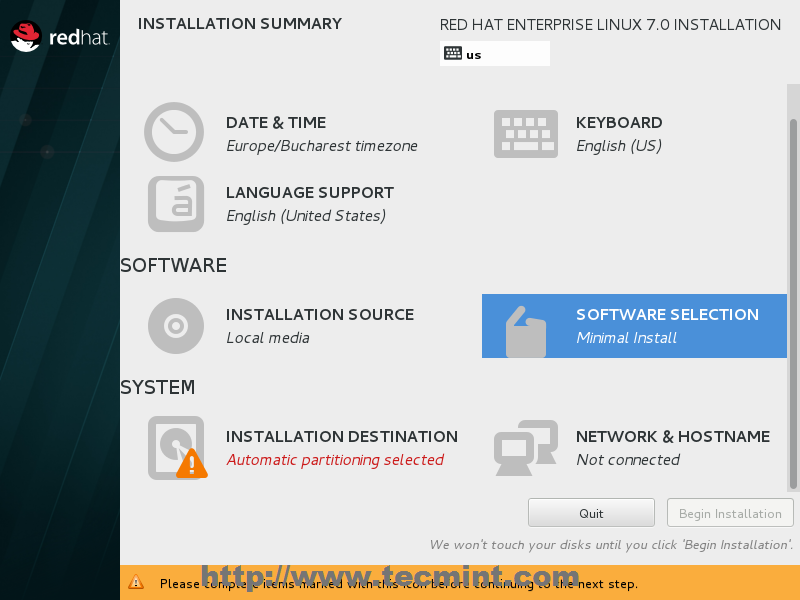
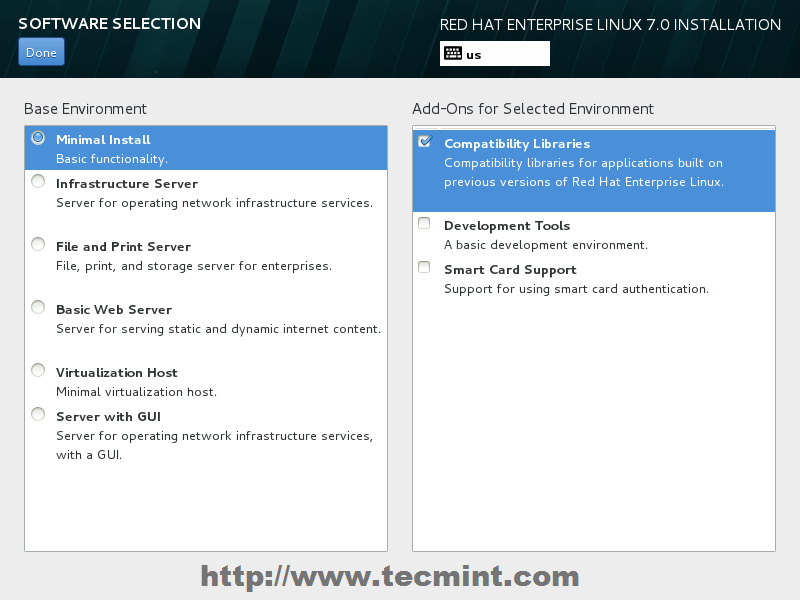
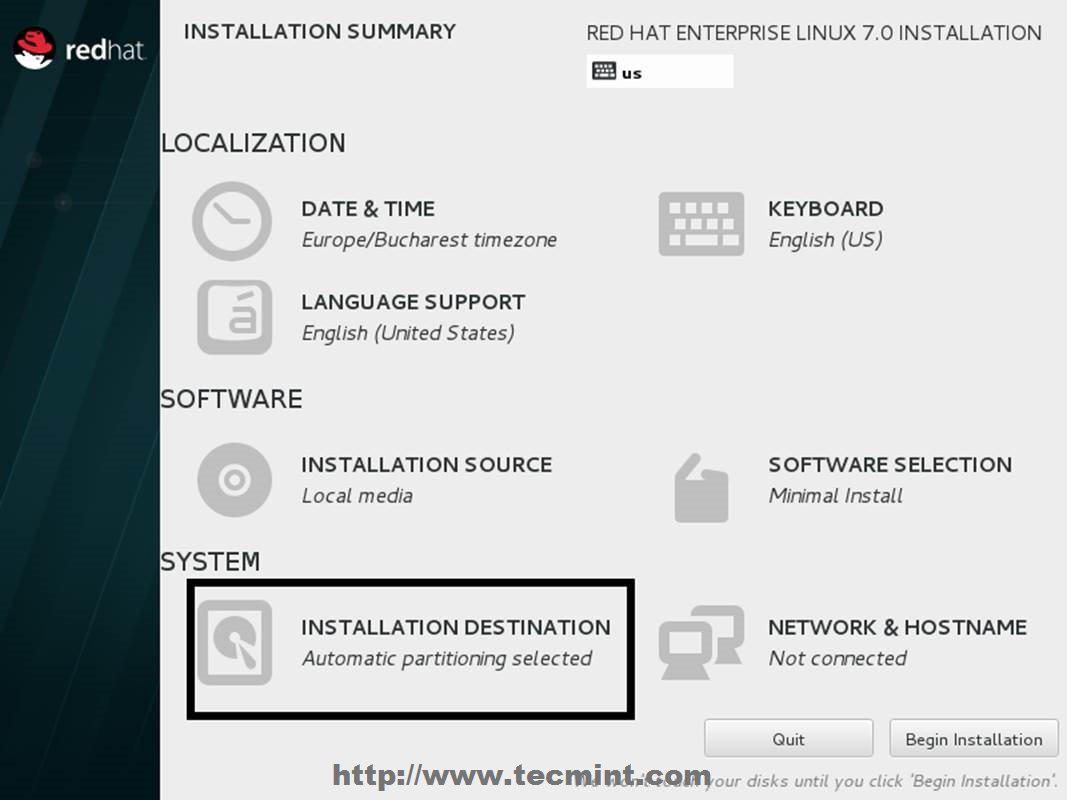
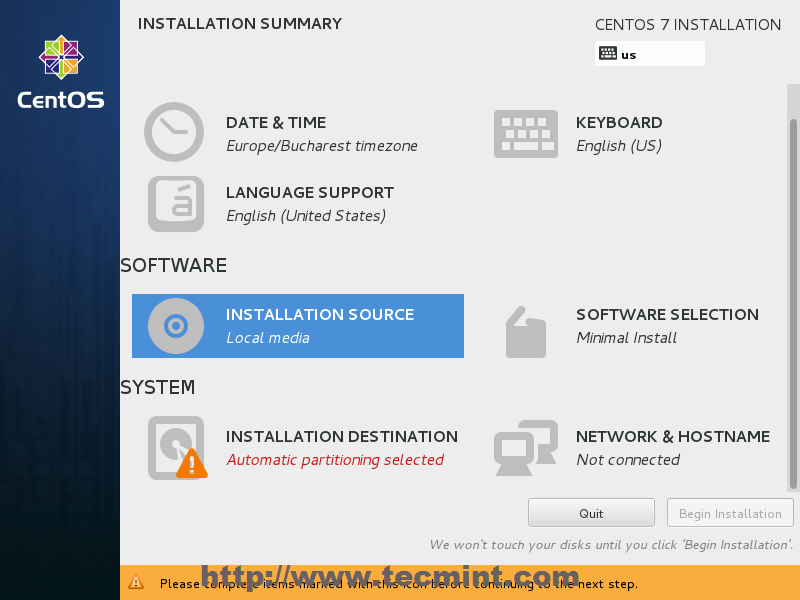
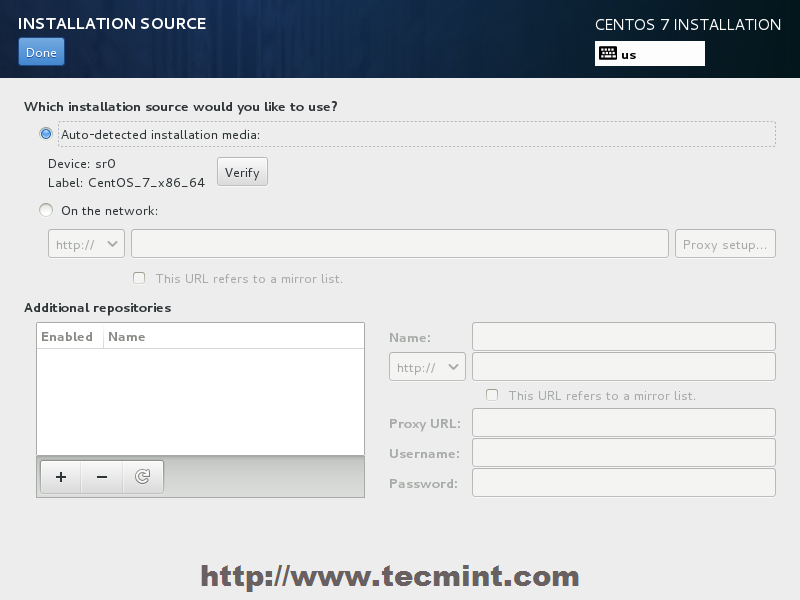
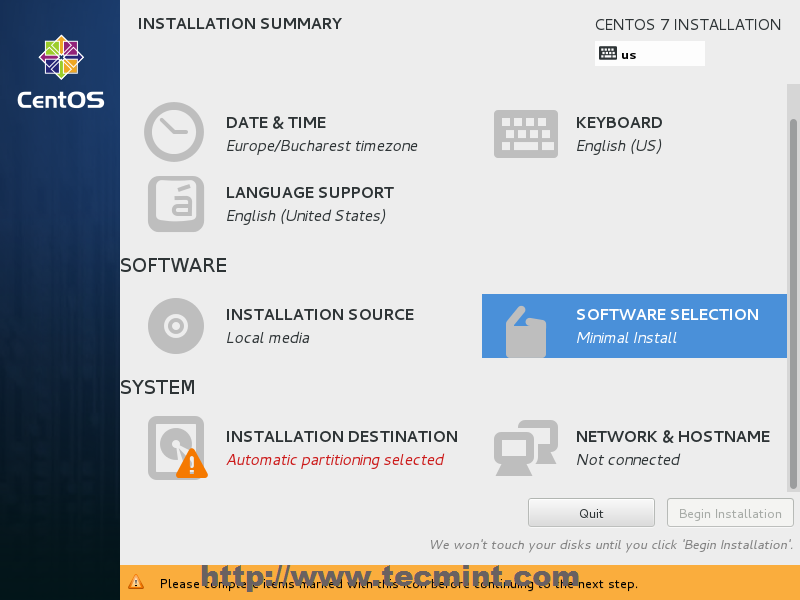
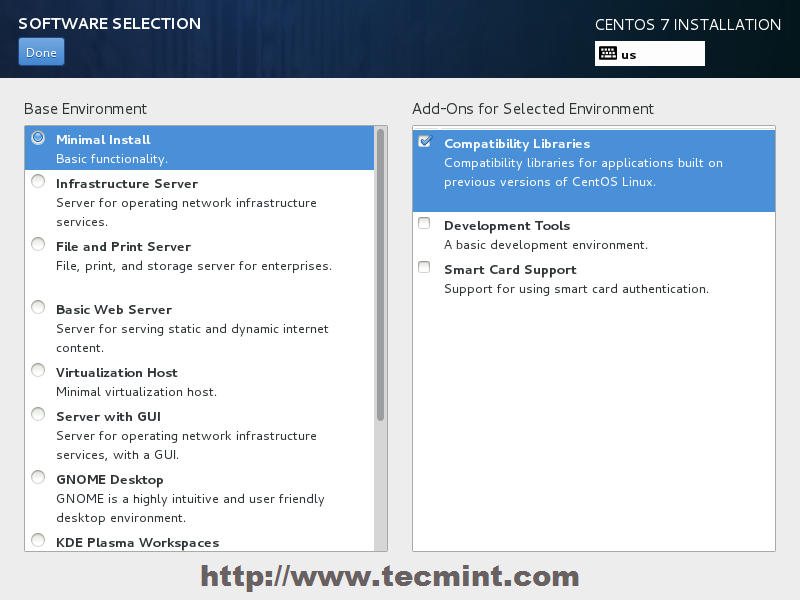
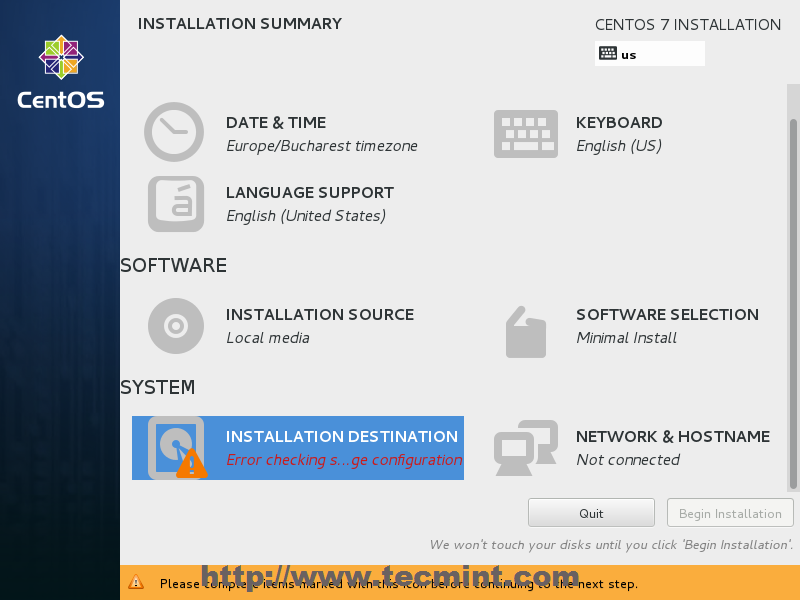
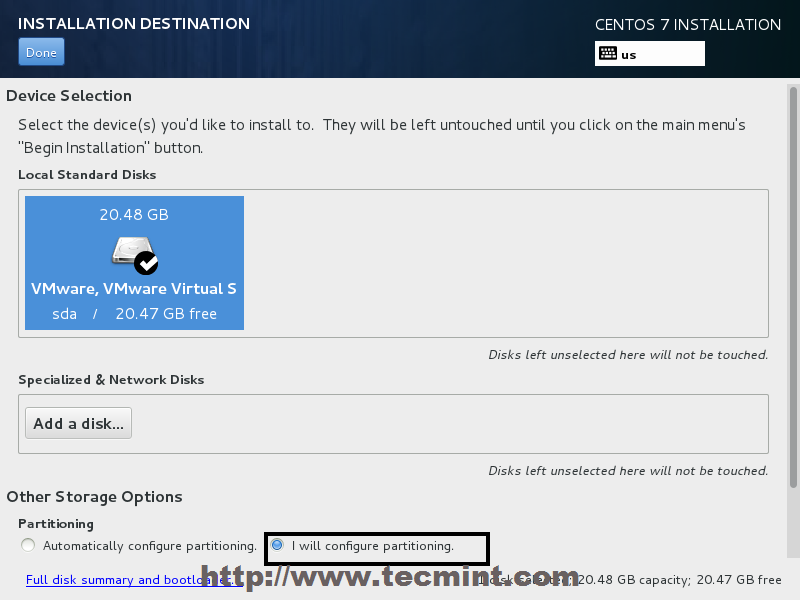
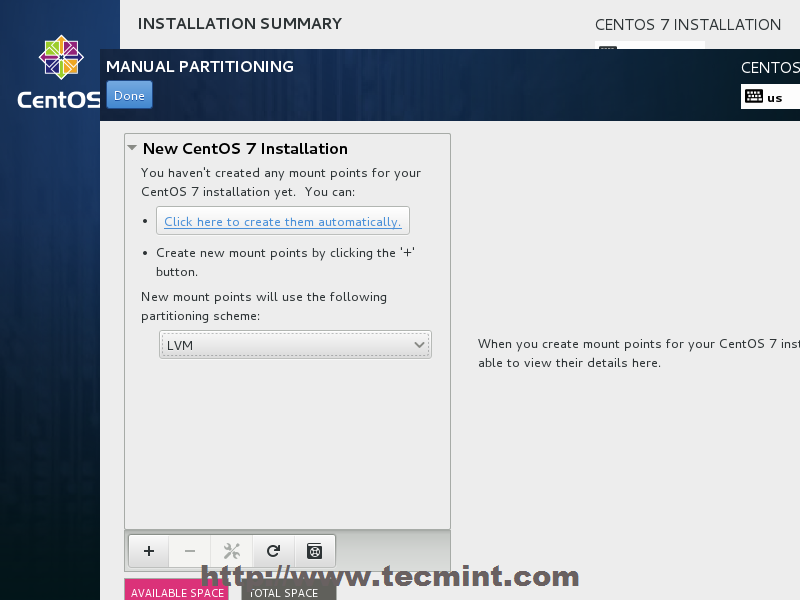
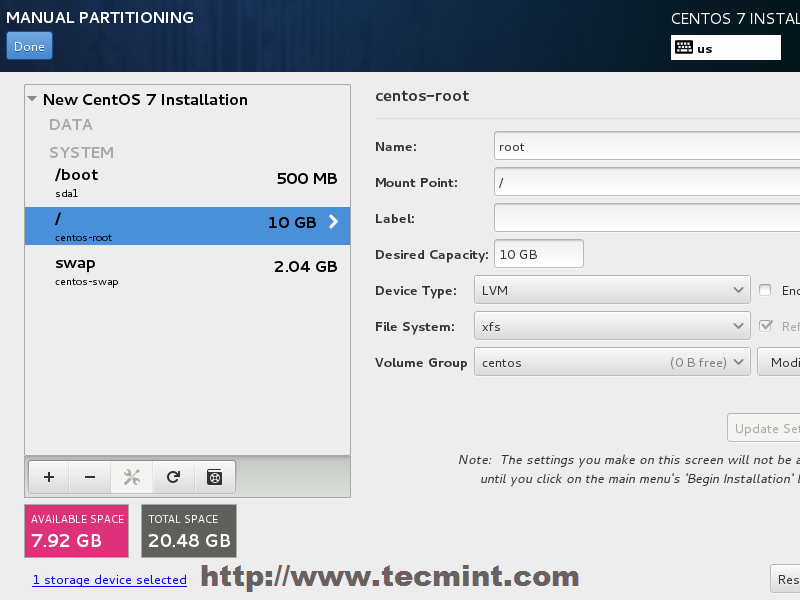
- Minimal Installation of CentOS 7
- Minimal Installation of RHEL 7
Step 1: Initial System Configurations
1. Before you begin preparing the node in order to deploy your own virtual cloud infrastructure, first login with root account and assure that the system is up to date.
2. Next, issue the ss -tulpn command to list all running services.
# ss -tulpn
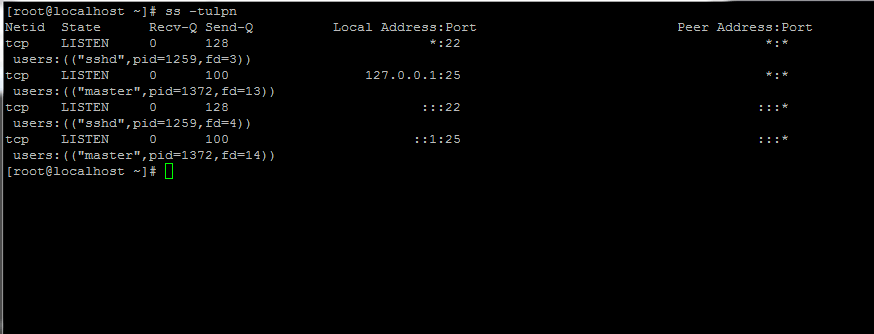
List All Running Linux Services
3. Next, identify, stop, disable and remove unneeded services, mainly postfix, NetworkManager and firewalld. At the end the only daemon that would be running on your machine should be sshd.
# systemctl stop postfix firewalld NetworkManager
# systemctl disable postfix firewalld NetworkManager
# systemctl mask NetworkManager
# yum remove postfix NetworkManager NetworkManager-libnm
4. Completely disable Selinux policy on the machine by issuing the below commands. Also edit /etc/selinux/config file and set SELINUX line from enforcing to disabled as illustrated on the below screenshot.
# setenforce 0
# getenforce
# vi /etc/selinux/config
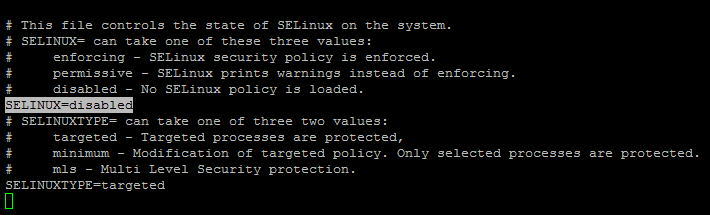
Disable SELinux
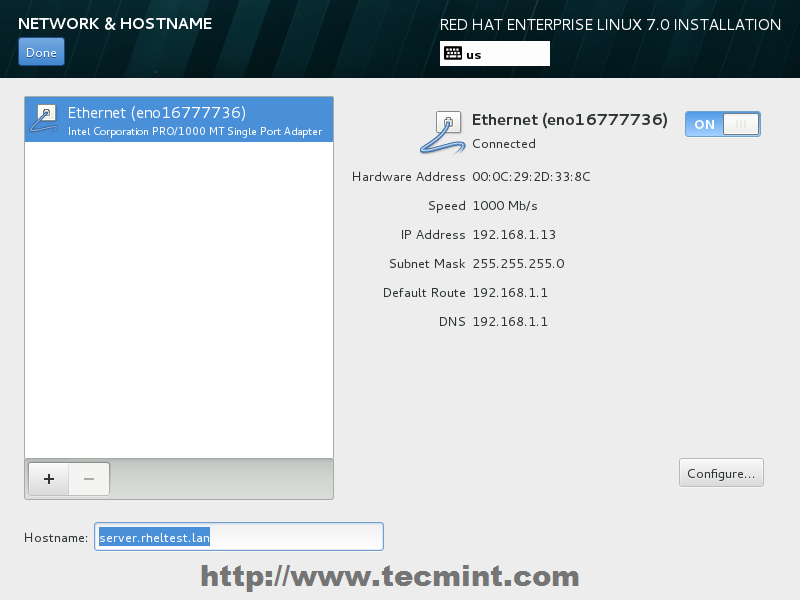
5. On the next step using the hostnamectl command to set your Linux system hostname. Replace the FQDNvariable accordingly.
# hostnamectl set-hostname cloud.centos.lan
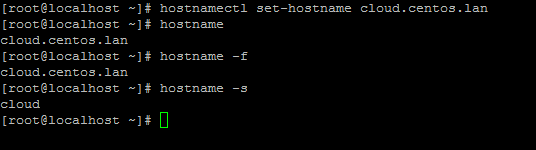
Set Linux System Hostname
6. Finally, install ntpdate command in order to synchronize time with a NTP server on your premises near your physical proximity.
# yum install ntpdate
Step 2: Install OpenStack in CentOS and RHEL
7. OpenStack will be deployed on your Node with the help of PackStack package provided by rdo repository (RPM Distribution of OpenStack).
In order to enable rdo repositories on RHEL 7 run the below command.
# yum install https://www.rdoproject.org/repos/rdo-release.rpm
On CentOS 7, the Extras repository includes the RPM that actives the OpenStack repository. Extras is already enabled, so you can easily install the RPM to setup the OpenStack repository:
# yum install -y centos-release-openstack-mitaka
# yum update -y
8. Now it’s time to install PackStack package. Packstack represents a utility which facilitates the deployment on multiple nodes for different components of OpenStack via SSH connections and Puppet modules.
Install Packstat package in Linux with the following command:
# yum install openstack-packstack
9. On the next step generate an answer file for Packstack with the default configurations which will be later edited with the required parameters in order to deploy a standalone installation of Openstack (single node).
The file will be named after the current day timestamp when generated (day, month and year).
# packstack --gen-answer-file='date +"%d.%m.%y"'.conf
# ls

Generate Packstack Answer Configuration File
10. Now edit the generated answer configuration file with a text editor.
# vi 13.04.16.conf
and replace the following parameters to match the below values. In order to be safe replace the passwords fields accordingly.
CONFIG_NTP_SERVERS=0.ro.pool.ntp.org
Please consult http://www.pool.ntp.org/en/ server list in order to use a public NTP server near your physical location.

Add NTP Server in Packstack
CONFIG_PROVISION_DEMO=n

Add Provision in Packstack
CONFIG_KEYSTONE_ADMIN_PW=your_password for Admin user

Add Admin Account in Packstack
Access OpenStack dashboard via HTTP with SSL enabled.
CONFIG_HORIZON_SSL=y

Enable HTTPS for OpenStack
The root password for MySQL server.
CONFIG_MARIADB_PW=mypassword1234

Set MySQL Root Password in OpenStack
Setup a password for nagiosadmin user in order to access Nagios web panel.
CONFIG_NAGIOS_PW=nagios1234

Set Nagios Admin Password
11. After you finished editing save and close the file. Also, open SSH server configuration file and uncomment PermitRootLogin line by removing the front hashtag as illustrated on the below screenshot.
# vi /etc/ssh/sshd_config
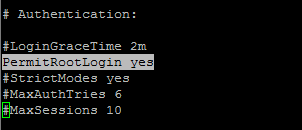
Enable SSH Root Login
Then restart SSH service to reflect changes.
# systemctl restart sshd
Step 3: Start Openstack Installation Using Packstack Answer File
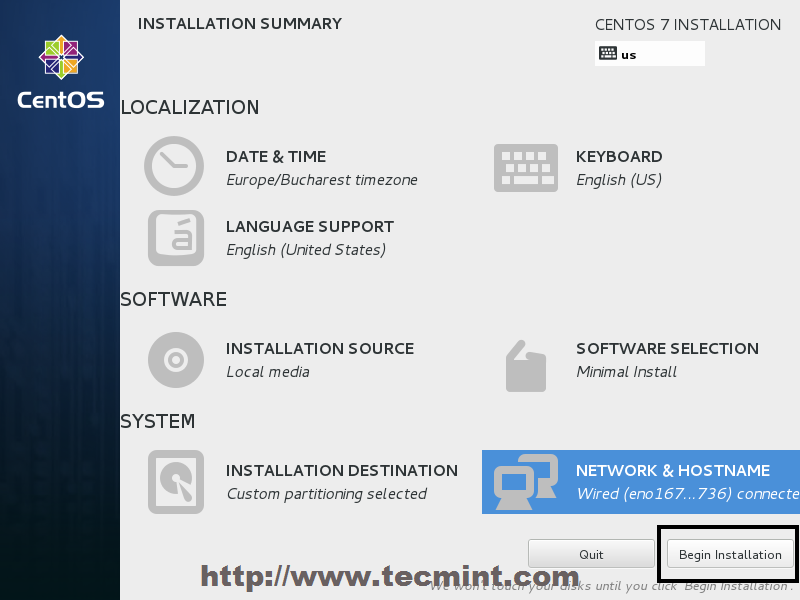
12. Finally start Openstack installation process via the answer file edited above by running the below command syntax:
# packstack --answer-file 13.04.16.conf
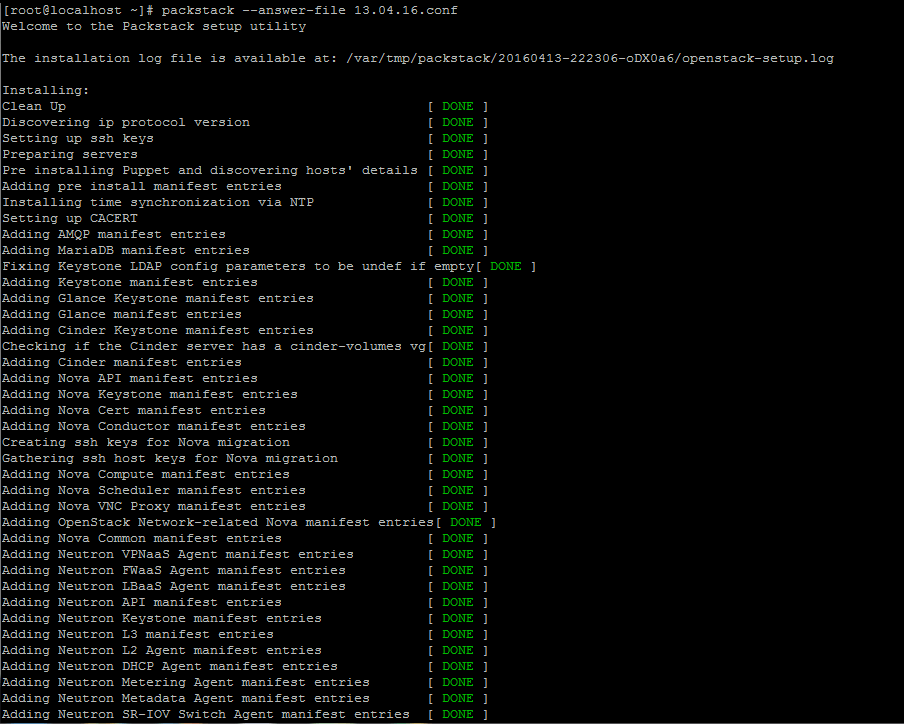
Openstack Installation in Linux
13. Once the installation of OpenStack components is successfully completed, the installer will display a few lines with the local dashboard links for OpenStack and Nagios and the required credentials already configured above in order to login on both panels.
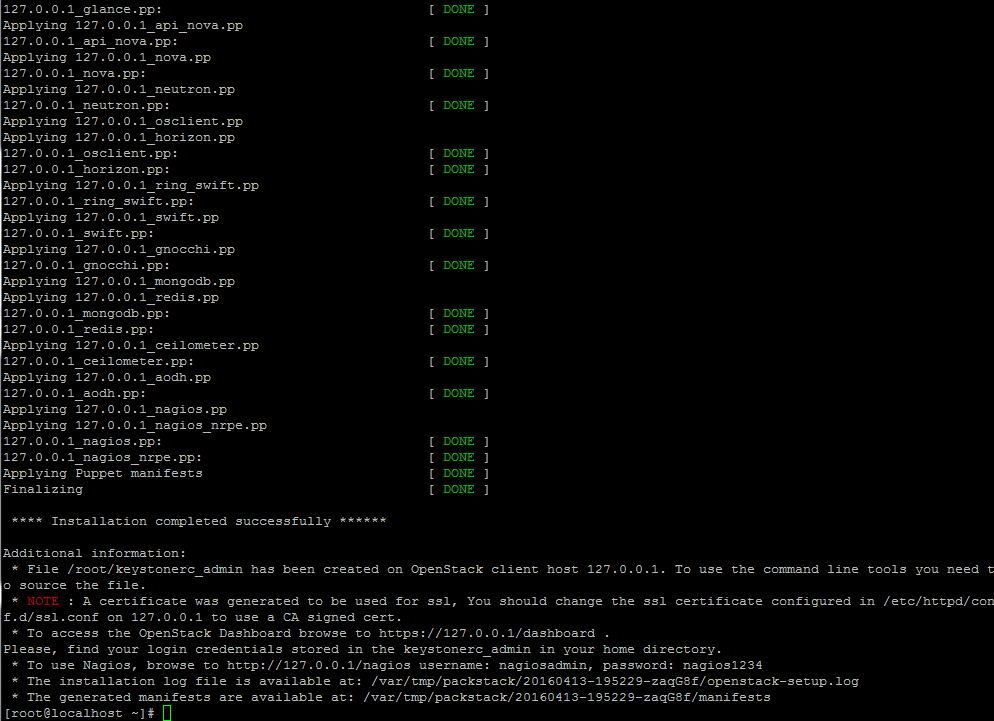
OpenStack Installation Completed
The credentials are also stored under your home directory in keystonerc_admin file.
14. If for some reasons the installation process ends with an error regarding httpd service, open /etc/httpd/conf.d/ssl.conf file and make sure you comment the following line as illustrated below.
#Listen 443 https
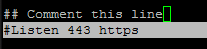
Disable HTTPS SSL Port
Then restart Apache daemon to apply changes.
# systemctl restart httpd.service
Note: In case you still can’t browse Openstack web panel on port 443 restart the installation process from beginning with the same command issued for the initial deployment.
# packstack --answer-file /root/13.04.16.conf
Step 4: Remotely Access OpenStack Dashboard
15. In order to access OpenStack web panel from a remote host in your LAN navigate to your machine IP Address or FQDN/dashboard via HTTPS protocol.
Due to the fact that you’re using a Self-Signed Certificate issued by an untrusted Certificate Authority an error should be displayed on your browser.
Accept the error and login to the dashboard with the user admin and the password set on CONFIG_KEYSTONE_ADMIN_PW parameter from answer file set above.
https://192.168.1.40/dashboard
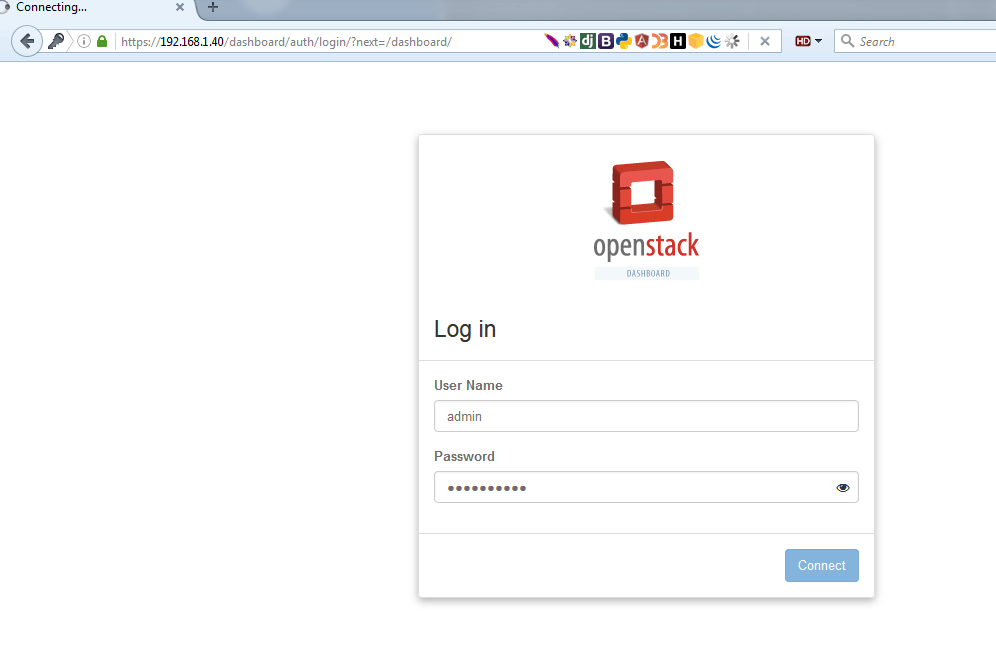
OpenStack Login Dashboard
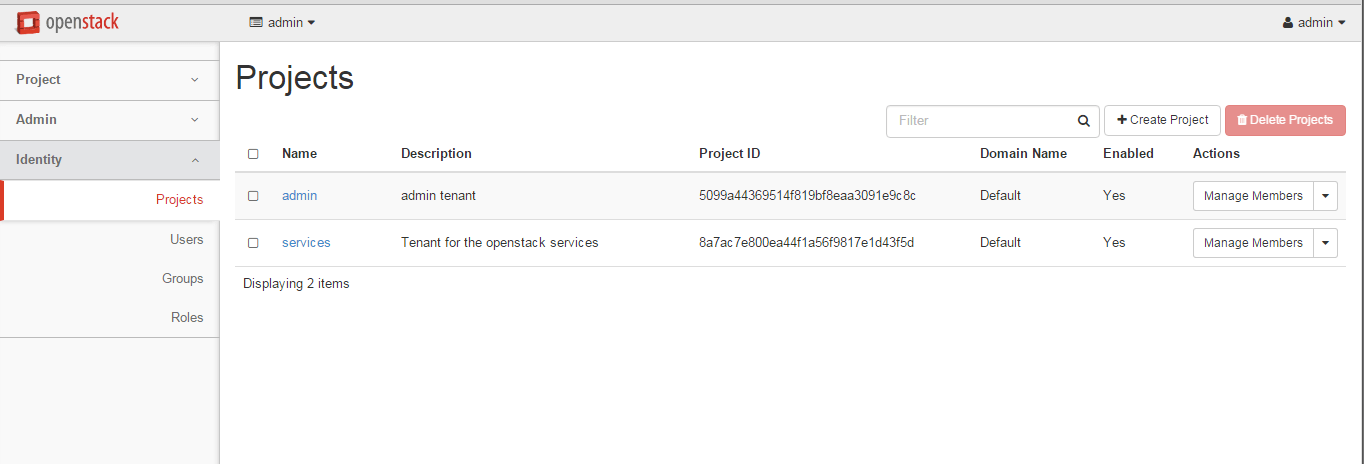
Openstack Projects
16. Alternatively, if you opted to install Nagios component for OpenStack, you can browse Nagios web panel at the following URI and login with the credentials setup in answer file.
https://192.168.1.40/nagios
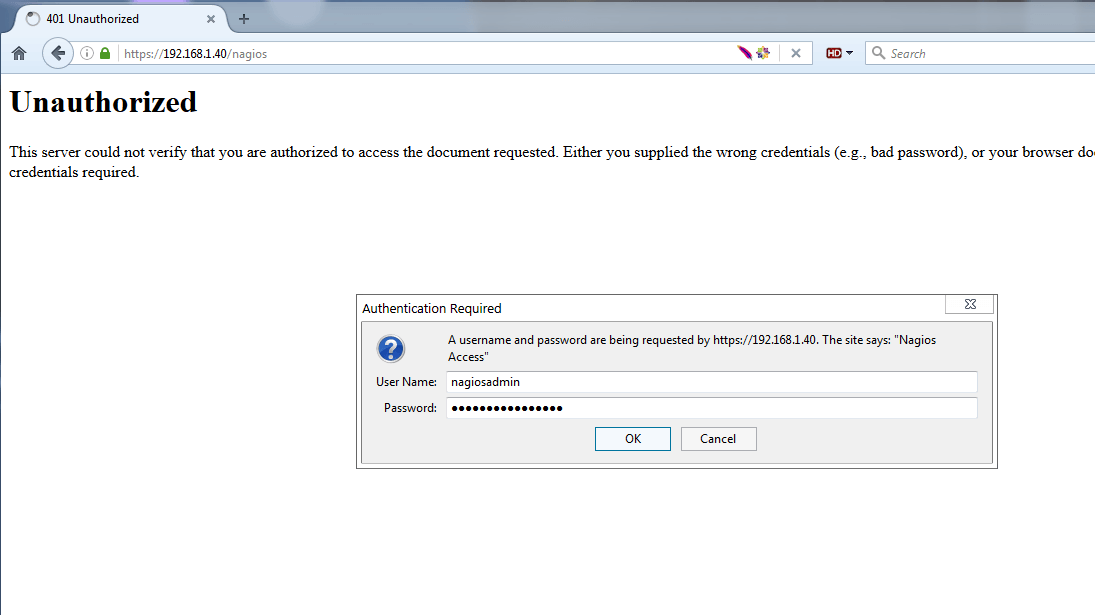
Nagios Login Dashboard
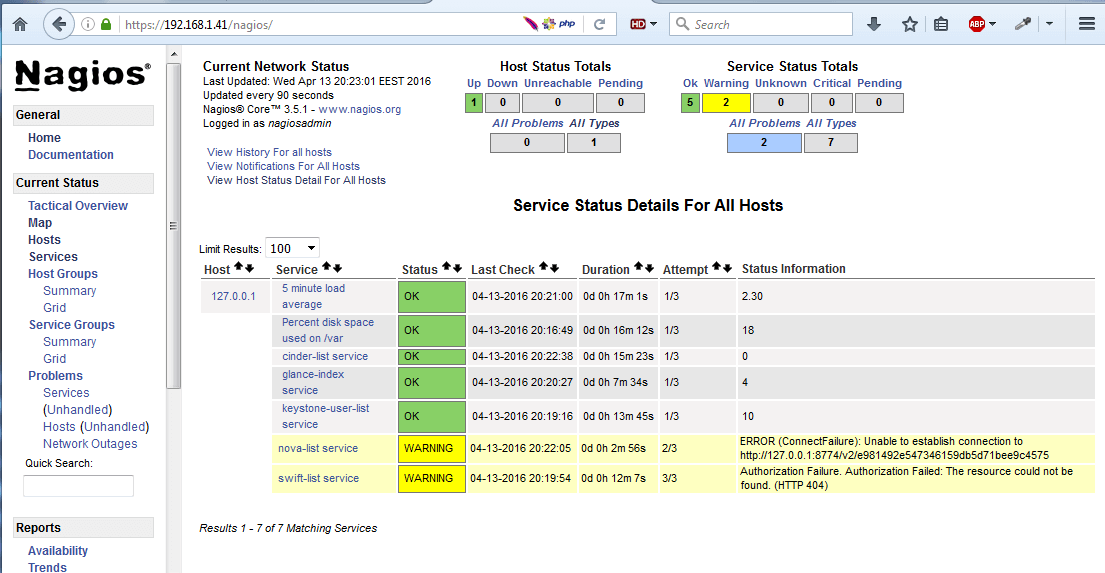
Nagios Linux Monitoring Interface
That’s all! Now you can start setup your own internal cloud environment. Now follow the next tutorial that will explain how to link the server physical NIC to openstack bridge interface and manage Openstack from web panel.
How to Configure OpenStack Network to Enable Access to OpenStack Instances
This tutorial will guide you on how you can configure OpenStack networking service in order to allow access from external networks to OpenStack instances.
Requirements
- Install OpenStack in RHEL and CentOS 7
Step 1: Modify Network Interface Configuration Files
1. Before starting to create OpenStack networks from dashboard, first we need to create an OVS bridge and modify our physical network interface to bind as a port to OVS bridge.
Thus, login to your server terminal, navigate to network interfaces directory scripts and use the physical interface as an excerpt to setup OVS bridge interface by issuing the following commands:
# cd /etc/sysconfig/network-scripts/
# ls
# cp ifcfg-eno16777736 ifcfg-br-ex
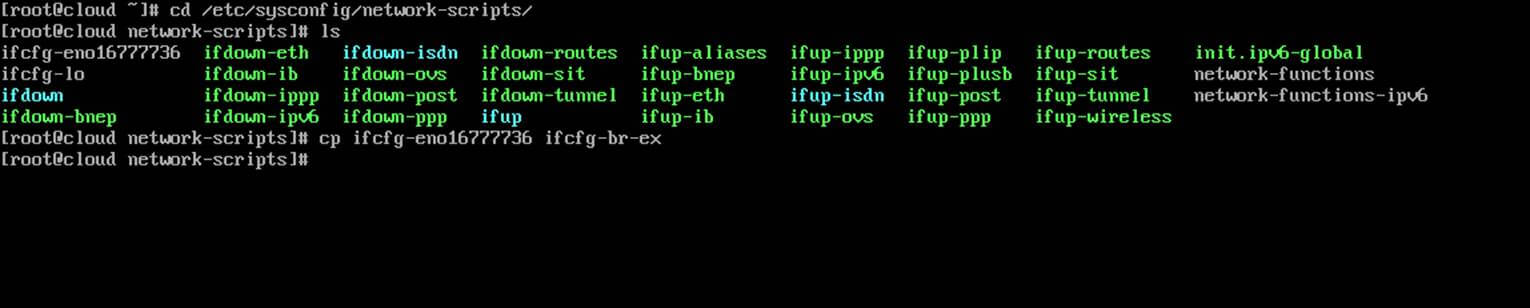
Setup OVS Bridge Interface in OpenStack
2. Next, edit and modify the bridge interface (br-ex) using a text editor as illustrated below:
# vi ifcfg-br-ex
Interface br-ex excerpt:
TYPE="Ethernet"
BOOTPROTO="none"
DEFROUTE="yes"
IPV4_FAILURE_FATAL="no"
IPV6INIT="no"
IPV6_AUTOCONF="no"
IPV6_DEFROUTE="no"
IPV6_FAILURE_FATAL="no"
NAME="br-ex"
UUID="1d239840-7e15-43d5-a7d8-d1af2740f6ef"
DEVICE="br-ex"
ONBOOT="yes"
IPADDR="192.168.1.41"
PREFIX="24"
GATEWAY="192.168.1.1"
DNS1="127.0.0.1"
DNS2="192.168.1.1"
DNS3="8.8.8.8"
IPV6_PEERDNS="no"
IPV6_PEERROUTES="no"
IPV6_PRIVACY="no"
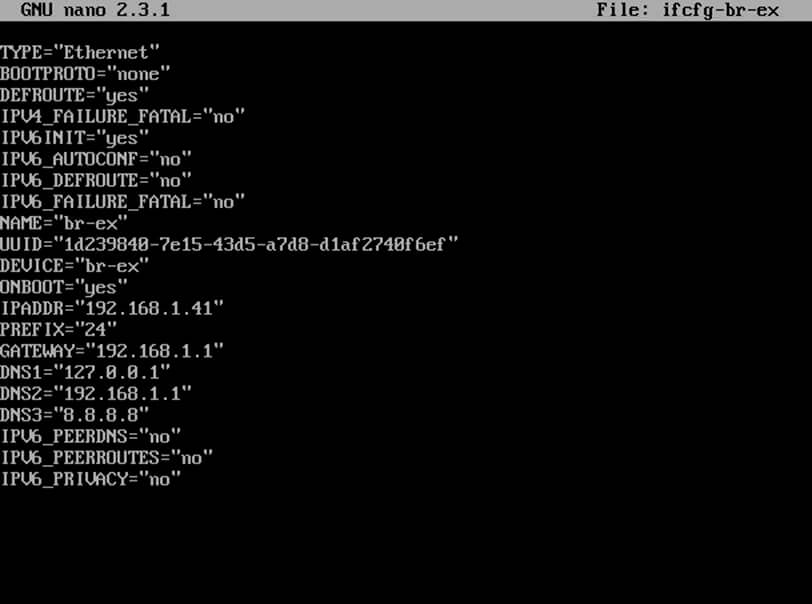
Configure Bridge Network Interface for OpenStack
3. Do the same with the physical interface (eno16777736), but make sure it looks like this:
# vi ifcfg-eno16777736
Interface eno16777736 excerpt:
TYPE="Ethernet"
BOOTPROTO="none"
DEFROUTE="yes"
IPV4_FAILURE_FATAL="no"
IPV6INIT="no"
IPV6_AUTOCONF="no"
IPV6_DEFROUTE="no"
IPV6_FAILURE_FATAL="no"
NAME="eno16777736"
DEVICE="eno16777736"
ONBOOT="yes"
TYPE=”OVSPort”
DEVICETYPE=”ovs”
OVS_BRIDGE=”br-ex”
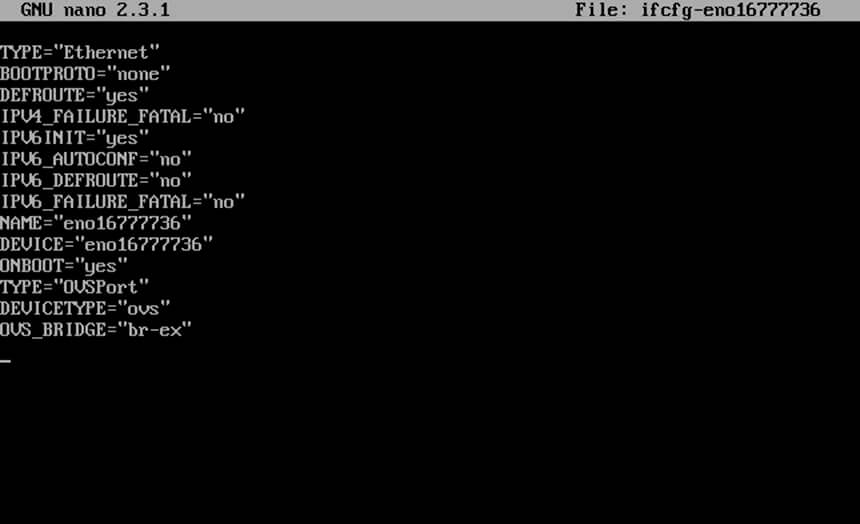
Configure Physical Network Interface for OpenStack
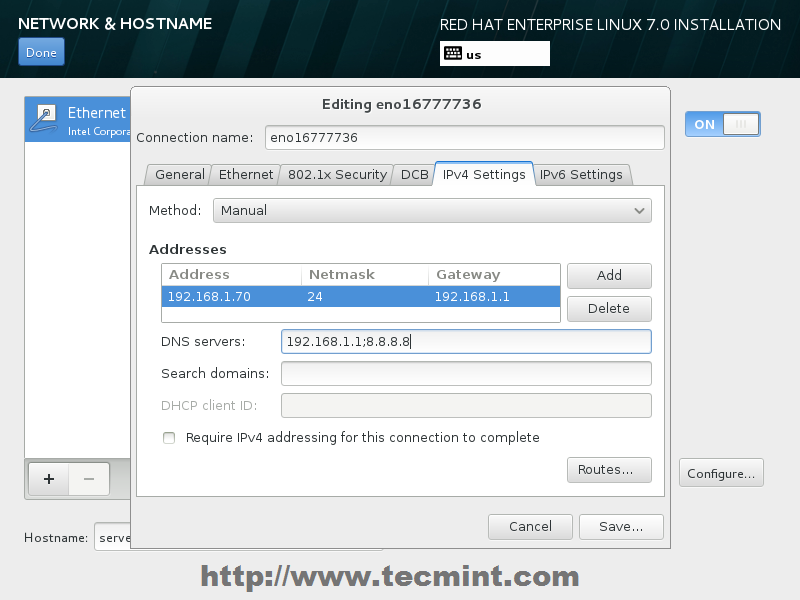
Important: While editing interfaces cards make sure you replace the physical interface name, IPs and DNS servers accordingly.
4. Finally, after you’ve modified edited both network interfaces, restart network daemon to reflect changes and verify the new configurations using ip command.
# systemctl restart network.service
# ip a
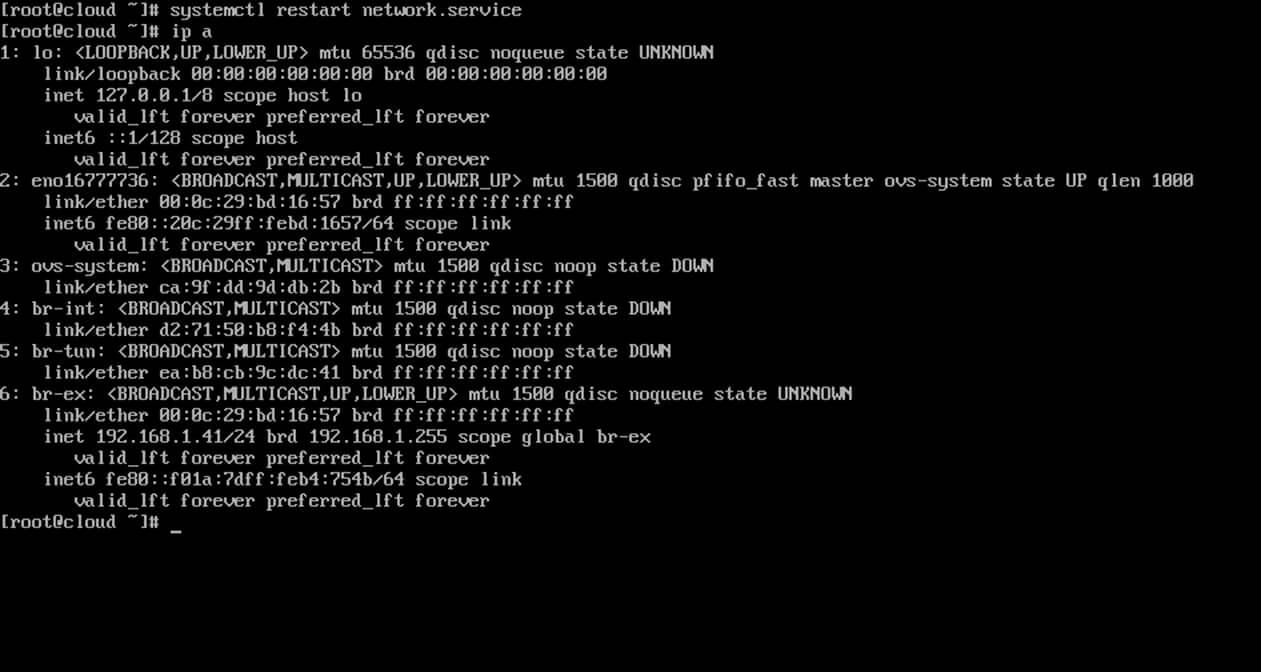
Verify Network Configuration
Step 2: Create a New OpenStack Project (Tenant)
5. On this step we need to use Openstack dashboard in order to further configure our cloud environment.
Login to Openstack web panel (dashboard) with admin credentials and go to Identity -> Projects -> Create Project and create a new project as illustrated below.
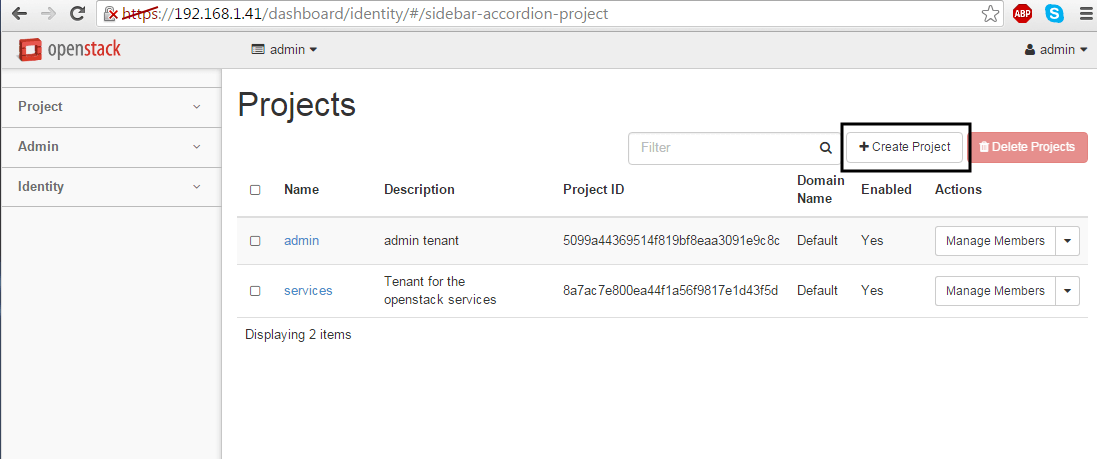
Create New OpenStack Project
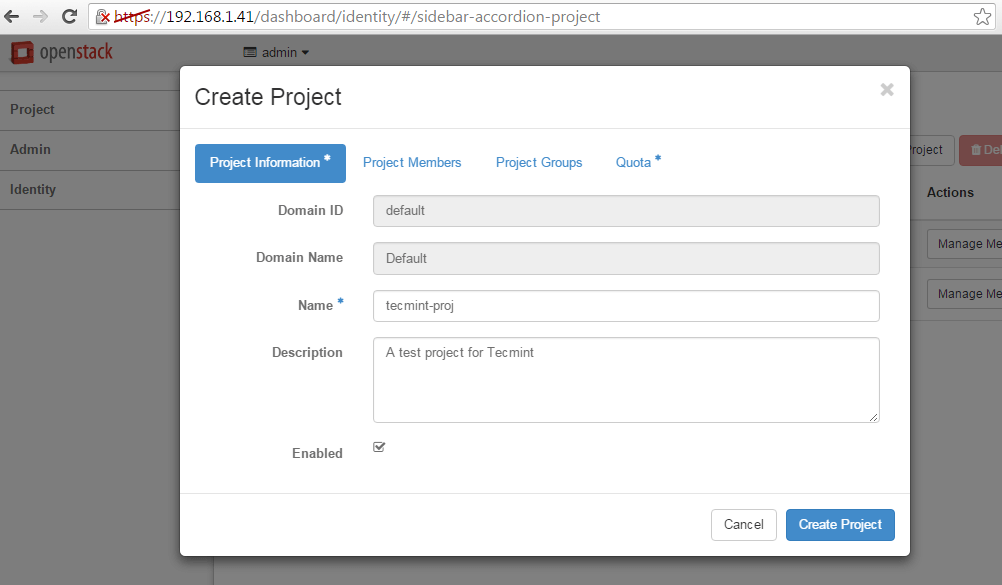
Add OpenStack New Project Details
6. Next, navigate to Identity -> Users -> Create User and create a new user by filling all the fields with the required information.
Assure that this new user has the Role assigned as a _member_ of the newly created tenant (project).
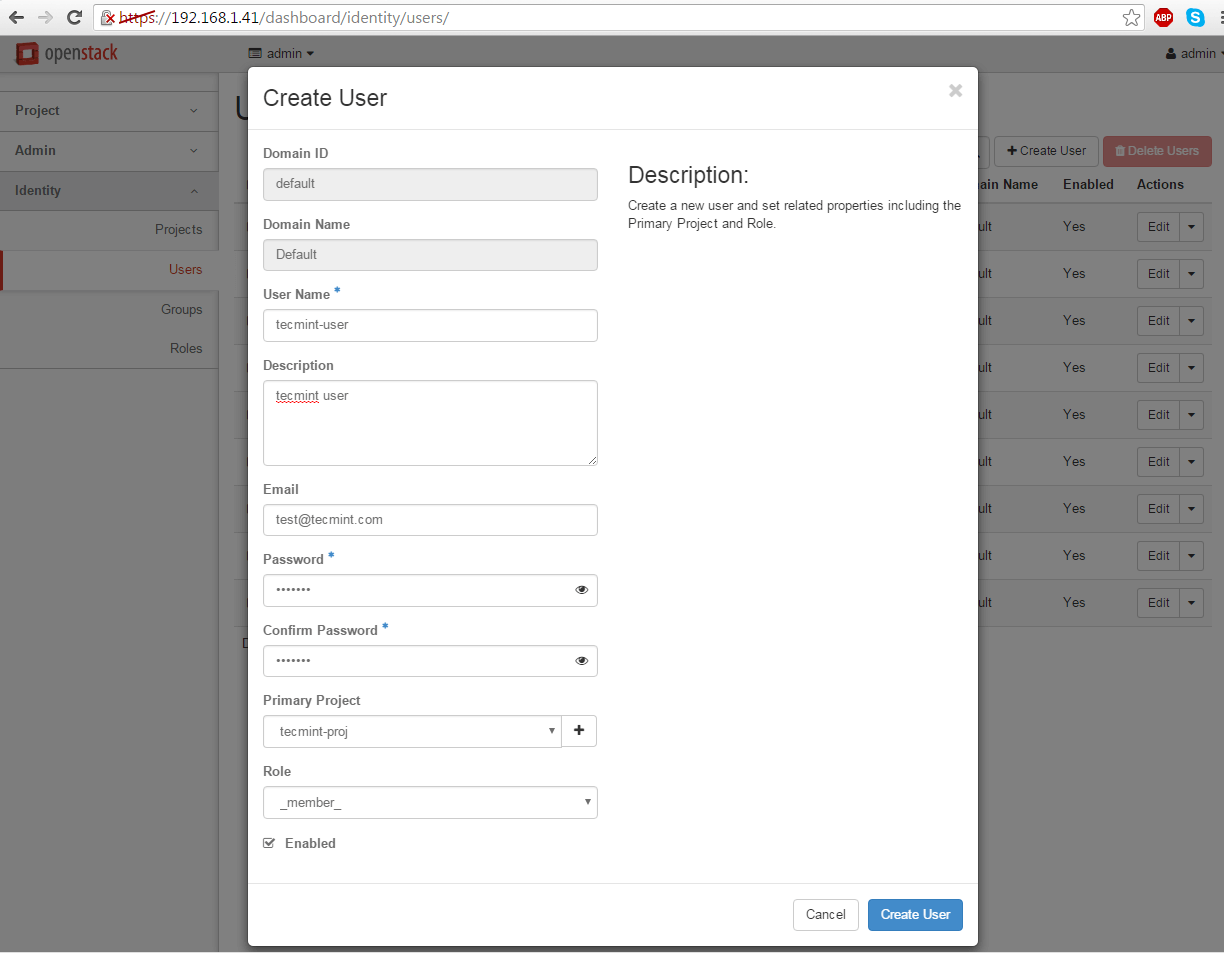
Create New User in OpenStack Project
Step 3: Configure OpenStack Network
7. After the user has been created, log out admin from dashboard and log in with the new user in order to create two networks (internal network and external).
Navigate to Project -> Networks -> Create Network and setup the internal network as follows:
Network Name: internal
Admin State: UP
Create Subnet: checked

Subnet Name: internal-tecmint
Network Address: 192.168.254.0/24
IP Version: IPv4
Gateway IP: 192.168.254.1

DHCP: Enable
Use the below screenshots as a guide. Also, replace the Network Name, Subnet Name and IP addresses with your own custom settings.
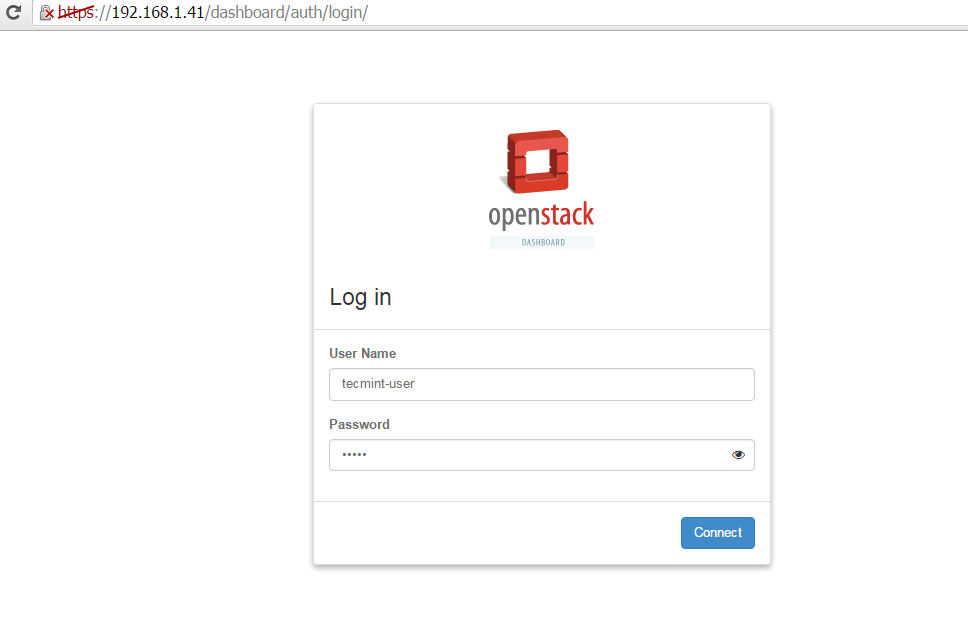
Login as User to OpenStack Dashboard
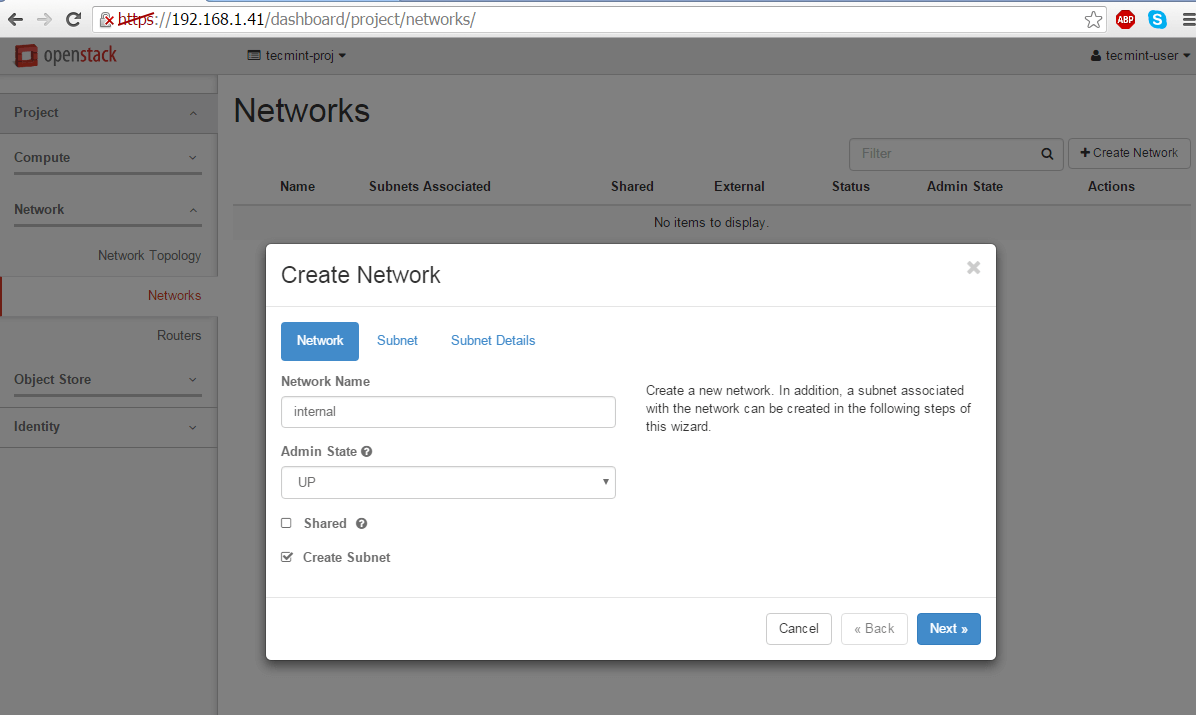
Create Network for OpenStack
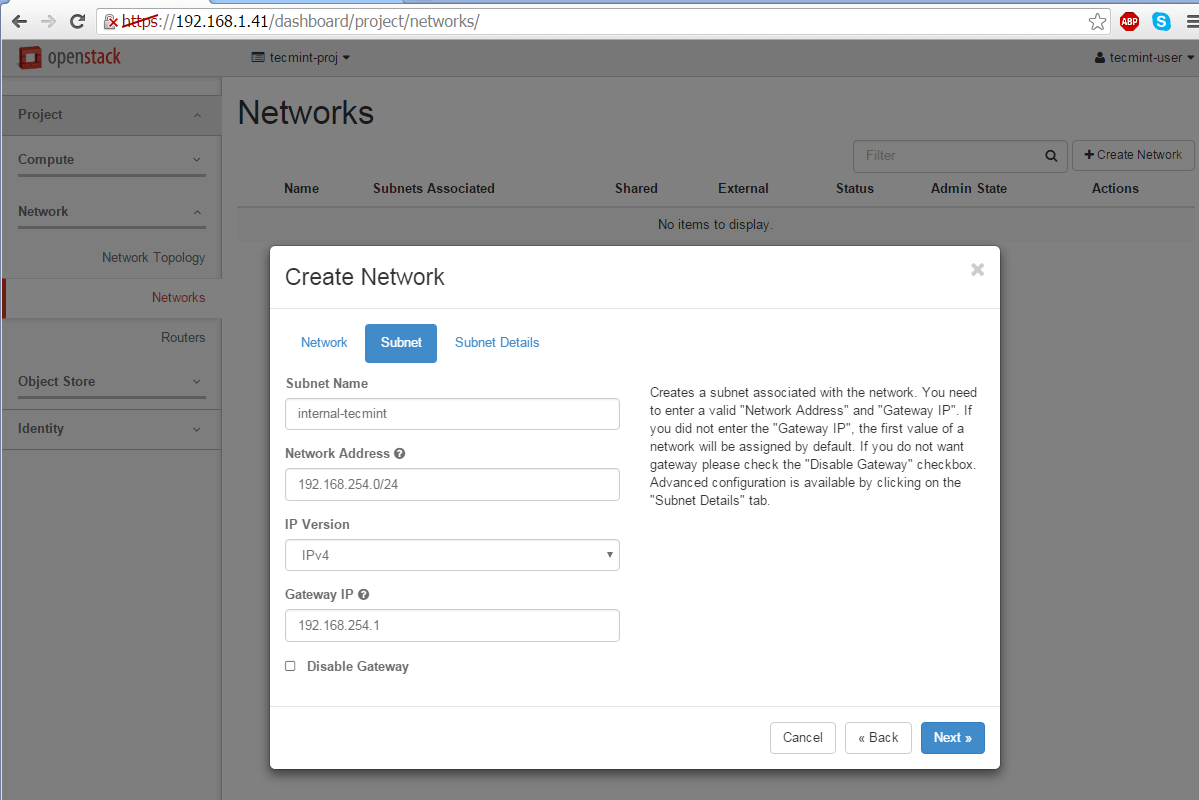
Create Network Subnet for OpenStack
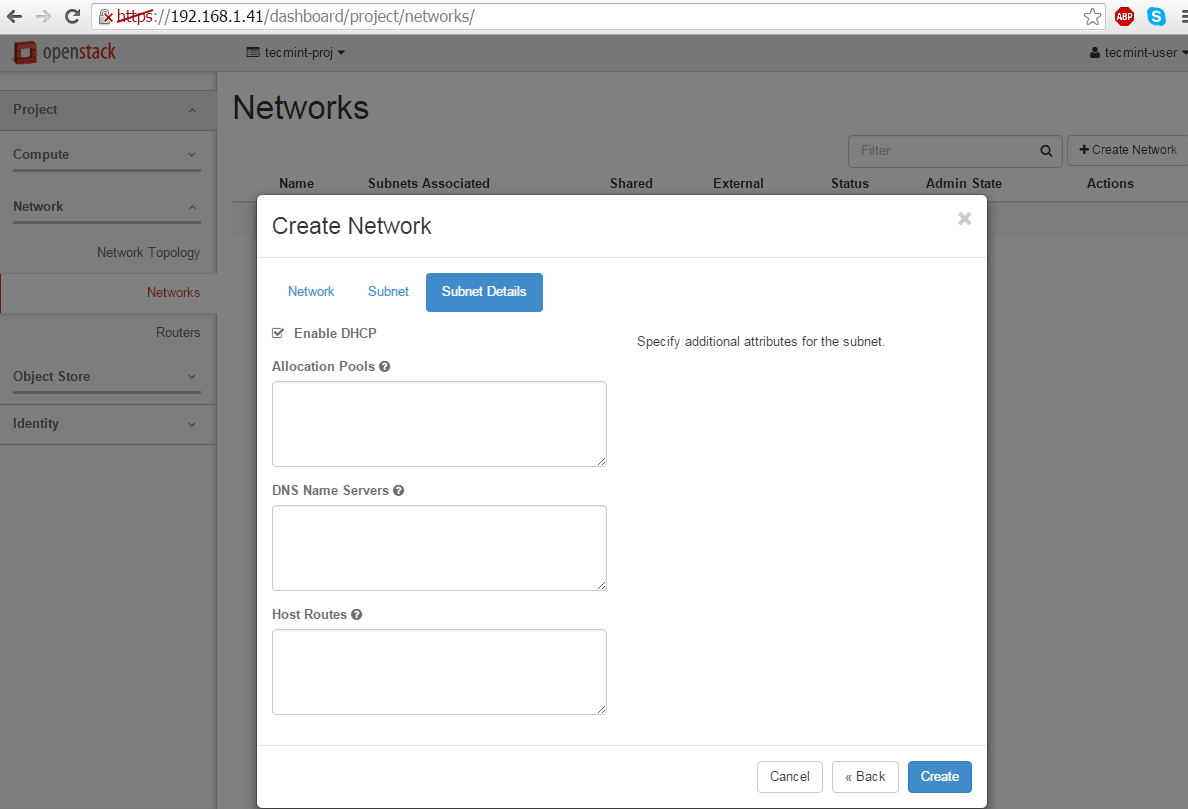
Enable DHCP for OpenStack
8. Next, use the same steps as above to create the external network. Make sure the IP address space for external network is in the same network range as your uplink bridge interface IP address range in order to work properly without extra routes.
Therefore, if the br-ex interface has 192.168.1.1 as a default gateway for 192.168.1.0/24 network, the same network and gateway IPs should be configured for external network too.
Network Name: external
Admin State: UP
Create Subnet: checked

Subnet Name: external-tecmint
Network Address: 192.168.1.0/24
IP Version: IPv4
Gateway IP: 192.168.1.1

DHCP: Enable
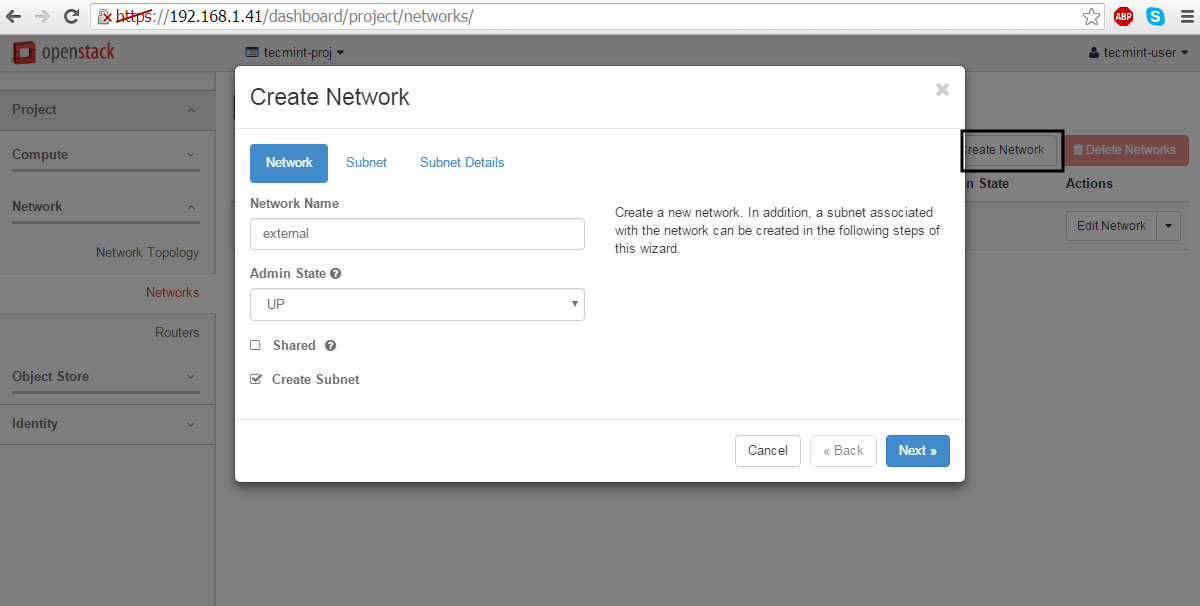
Create External Network for OpenStack
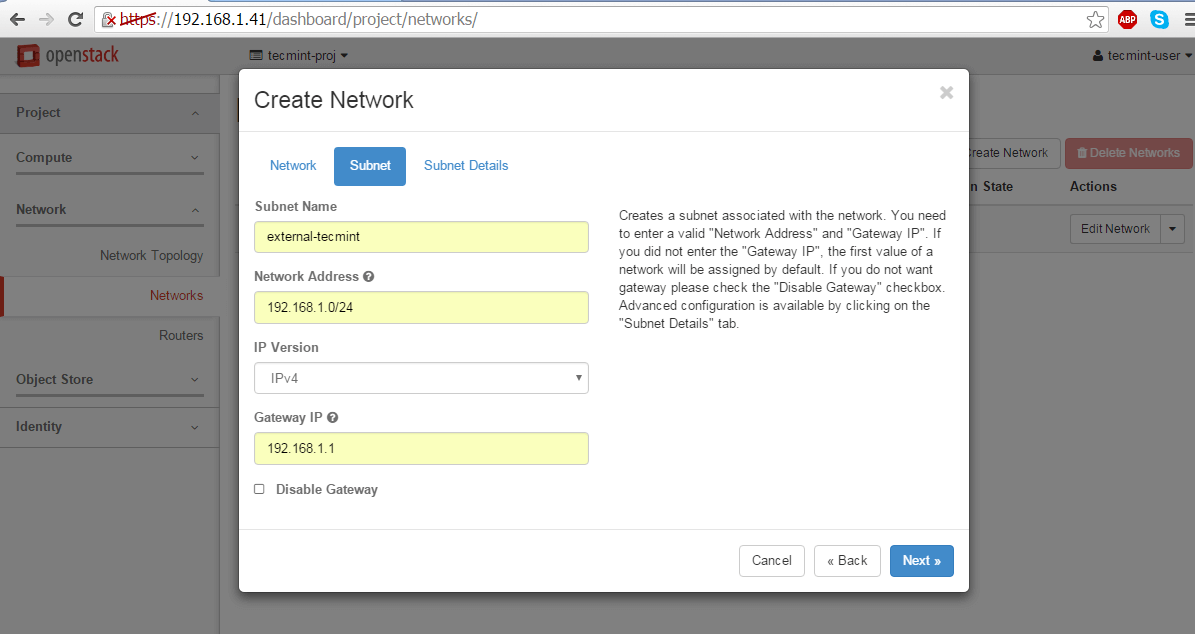
Create Subnet for External Network
Enable DHCP for External Network
Again, replace the Network Name, Subnet Name and IP addresses according to your own custom configurations.
9. On the next step we need to log in OpenStack dashboard as admin and mark the external network as Externalin order to be able to communicate with the bridge interface.
Thus, login with admin credentials and move to Admin -> System-> Networks, click on the external network, check the External Network box and hit on Save Changes to apply the configuration.

Login as Admin in OpenStack Dashboard
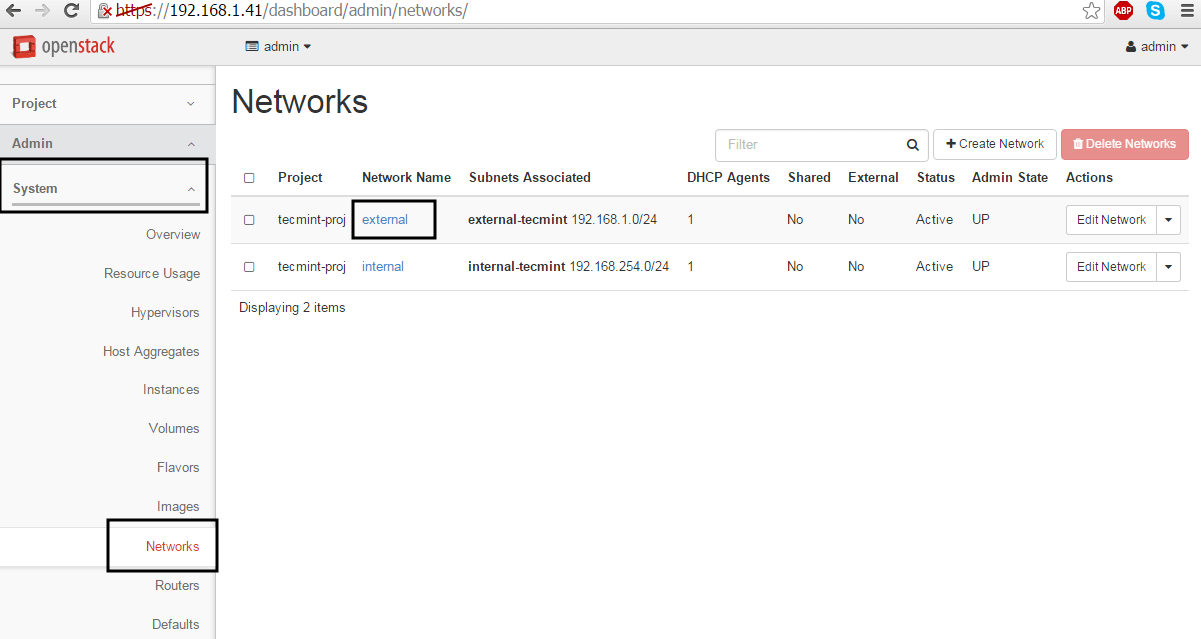
Select External Network

Make Network as External Network
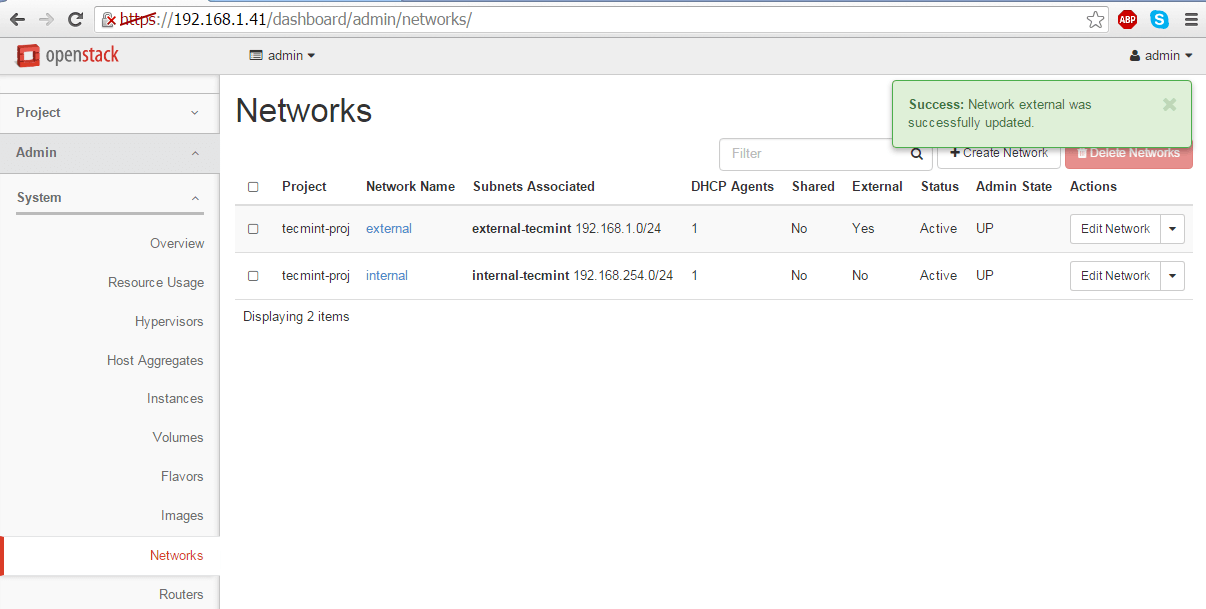
External Network Settings Updated
When done, logout from admin user and log in with the custom user again to proceed to the next step.
10. Finally, we need to create a router for our two networks in order to move packets back and forth. Go to Project -> Network -> Routers and hit on Create Router button. Add the following settings for the router.
Router Name: a descriptive router name
Admin State: UP
External Network: external
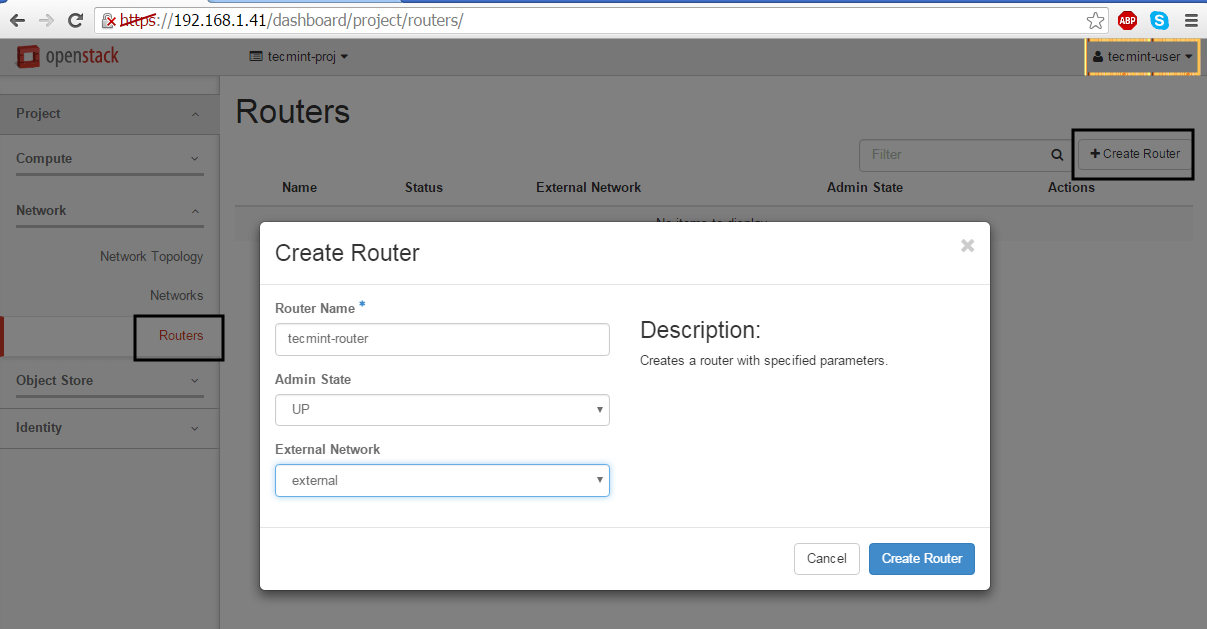
Create Network Router in OpenStack
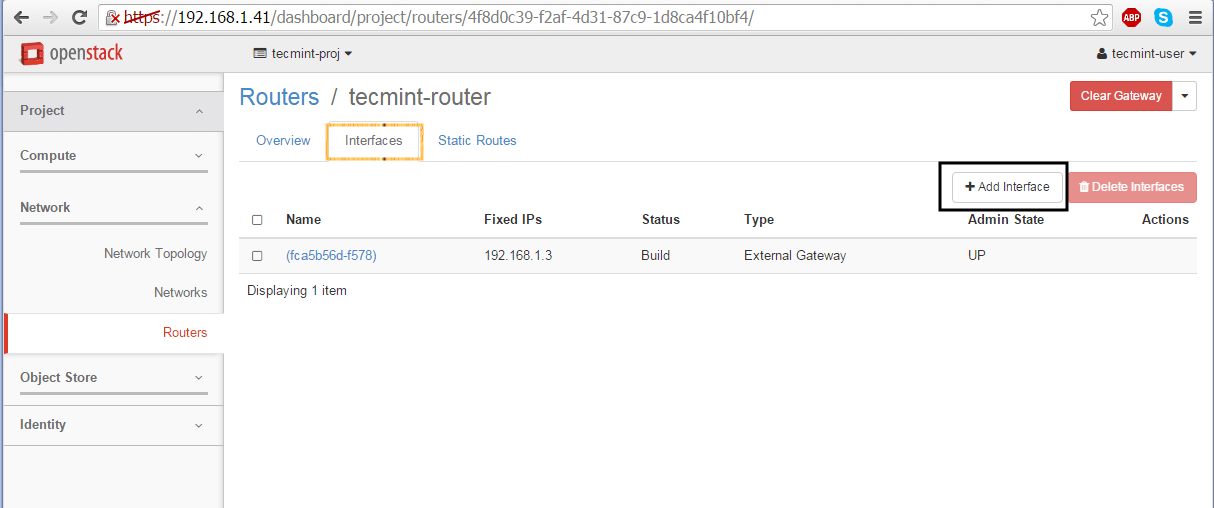
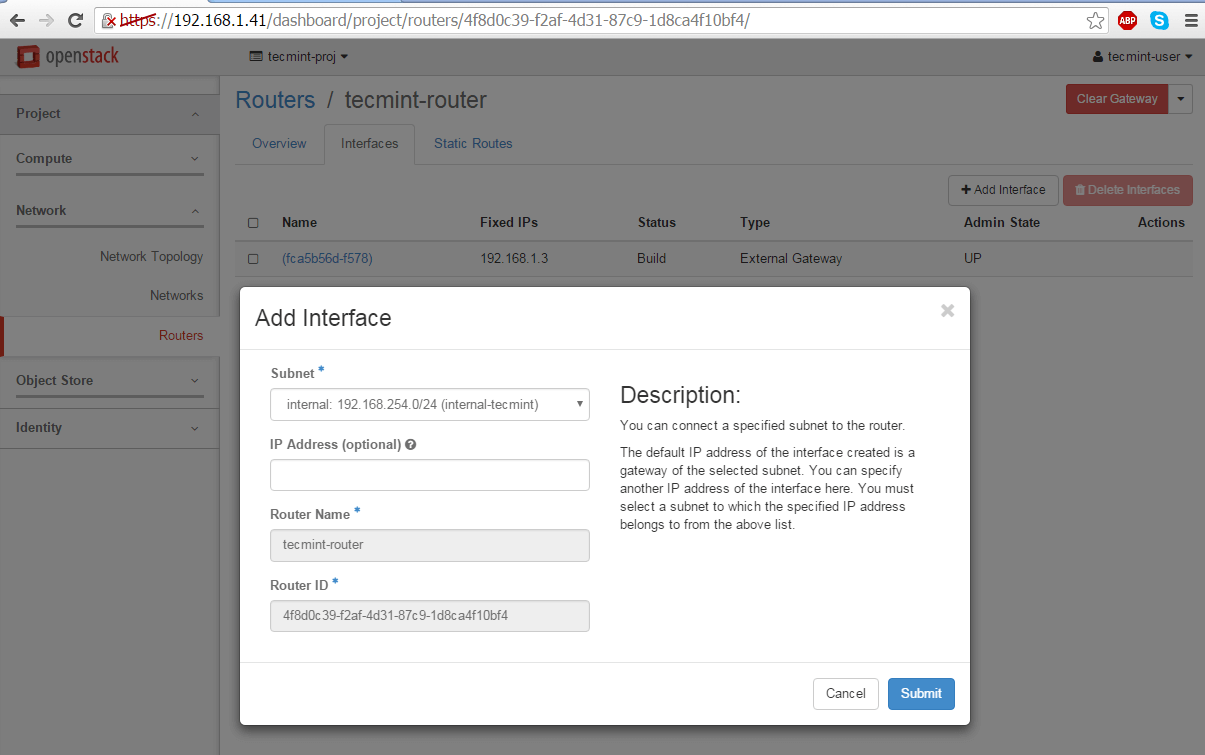
11. Once the Router has been created you should be able to see it in the dashboard. Click on the router name, go to Interfaces tab and hit on Add Interface button and a new prompt should appear.
Select the internal subnet, leave the IP Address field blank and hit on Submit button to apply changes and after a few seconds your interface should become Active.
Add New Network Interface in OpenStack
Configure Network Interface
12. In order to verify OpenStack network settings, go to Project -> Network -> Network Topology and a network map will be presented as illustrated on the below screenshot.
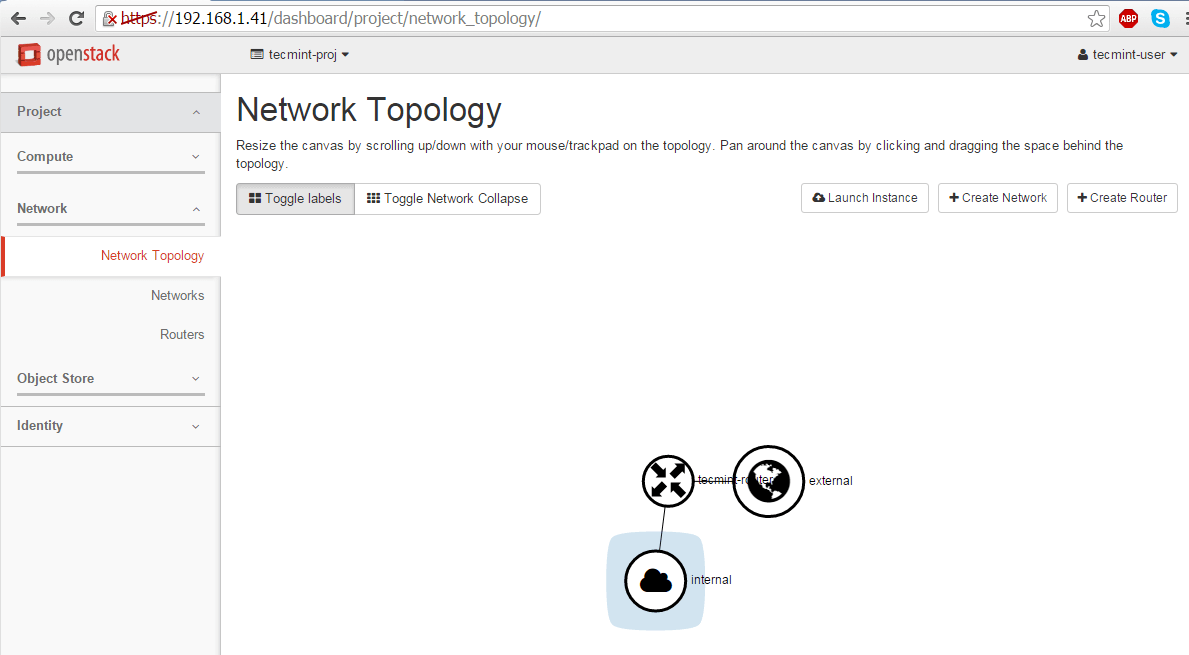
Verify OpenStack Network Topology
That’s all! Your OpenStack network is now functional and ready for virtual machines traffic. On the next topic we’ll discuss how to create and launch an OpenStack image instance.
How to Create, Deploy and Launch Virtual Machines in OpenStack
In this guide we will learn how to create images and launch an instance of an image (virtual machine) in OpenStack and how to gain control over an instance via SSH.
Requirements
- Install OpenStack in RHEL and CentOS 7
- Configure OpenStack Networking Service
Step 1: Allocate Floating IP to OpenStack
1. Before you deploy an OpenStack image, first you need to assure that all pieces are in place and we’ll start by allocating floating IP.
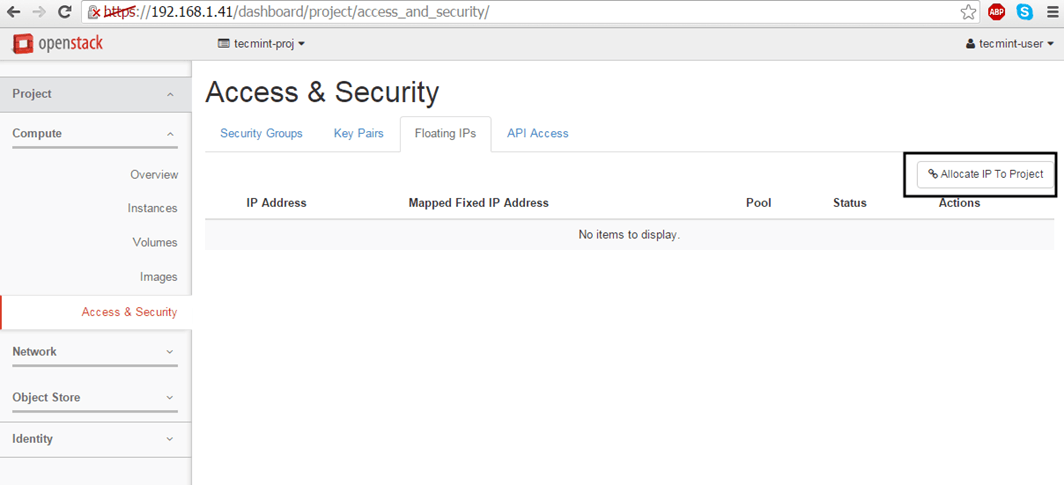
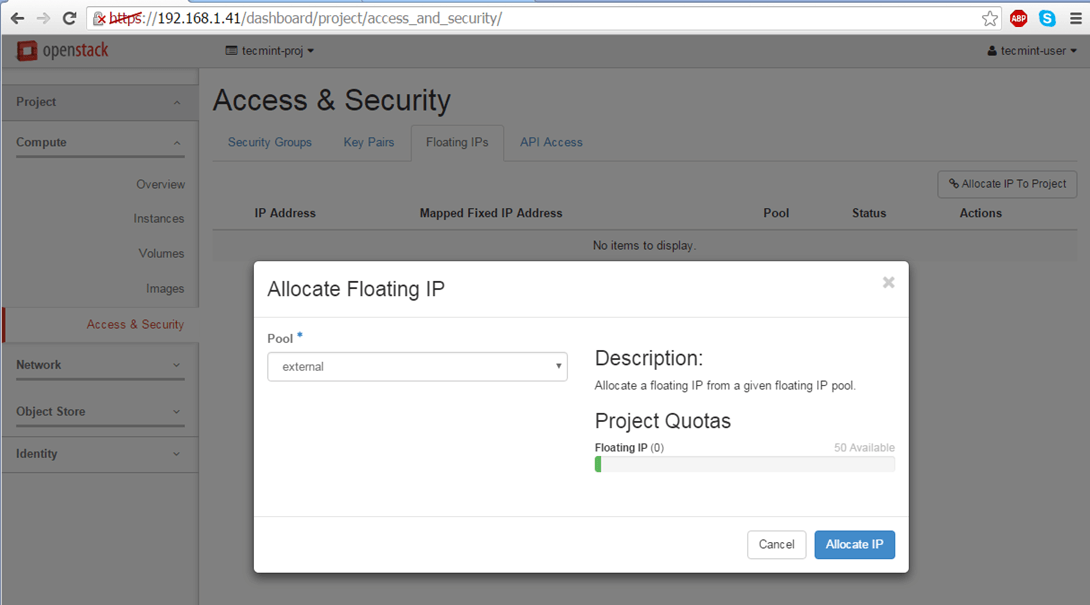
Floating IP allows external access from outside networks or internet to an Openstack virtual machine. In order to create floating IPs for your project, login with your user credentials and go to Project -> Compute -> Access & Security -> Floating IPs tab and click on Allocate IP to The Project.
Choose external Pool and hit on Allocate IP button and the IP address should appear in dashboard. It’s a good idea to allocate a Floating IP for each instance you run.
Allocate Floating IP to Project in OpenStack
Allocate Floating IP to External Pool

Confirmation of Adding Floating IP
Step 2: Create an OpenStack Image
2. OpenStack images are just virtual machines already created by third-parties. You can create your own customized images on your machine by installing an Linux OS in a virtual machine using a virtualization tool, such as KVM, VirtualBox, VMware or Hyper-V.
Once you have installed the OS, just convert the file to raw and upload it to your OpenStack cloud infrastructure.
To deploy official images provided by major Linux distributions use the following links to download the latest packaged images:
- CentOS 7 – http://cloud.centos.org/centos/7/images/
- CentOS 6 – http://cloud.centos.org/centos/6/images/
- Fedora 23 – https://download.fedoraproject.org/pub/fedora/linux/releases/23/Cloud/
- Ubuntu – http://cloud-images.ubuntu.com/
- Debian – http://cdimage.debian.org/cdimage/openstack/current/
- Windows Server 2012 R2 – https://cloudbase.it/windows-cloud-images/#download
Official images additionally contain the cloud-init package which is responsible with SSH key pair and user data injection.
On this guide we’ll deploy a test image, for demonstration purposes, based on a lightweight Cirros cloud image which can be obtained by visiting the following link http://download.cirros-cloud.net/0.3.4/.
The image file can be used directly from the HTTP link or downloaded locally on your machine and uploaded to OpenStack cloud.
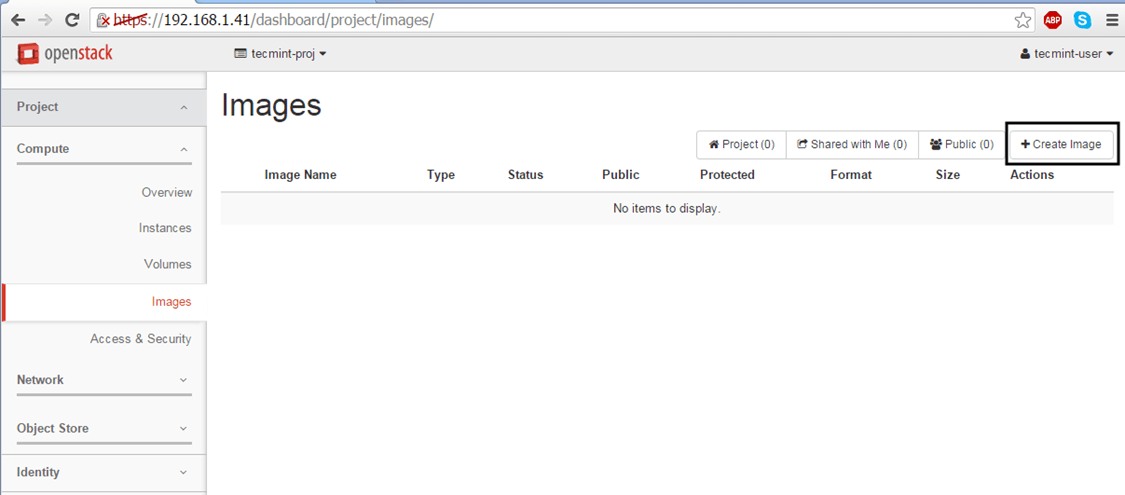
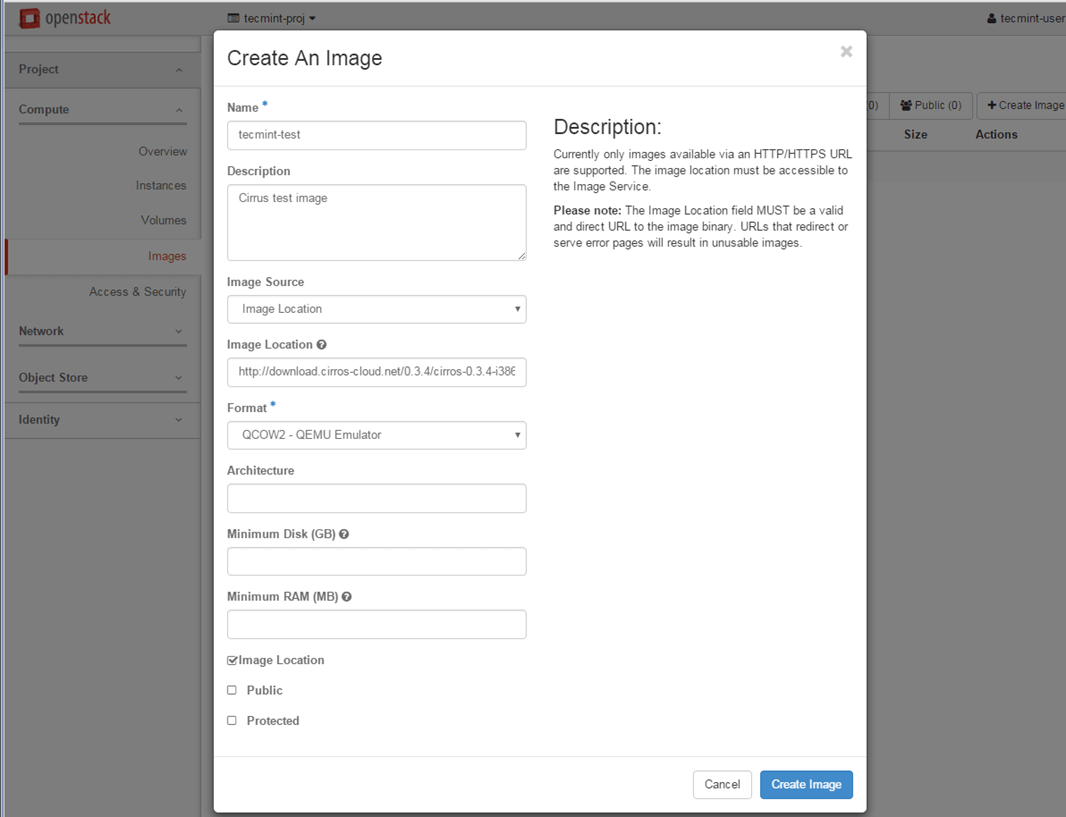
To create an image, go OpenStack web panel and navigate to Project -> Compute -> Images and hit on Create Image button. On the image prompt use the following settings and hit on Create Image when done.
Name: tecmint-test
Description: Cirros test image
Image Source: Image Location  #Use Image File if you’ve downloaded the file locally on your hard disk
Image Location: http://download.cirros-cloud.net/0.3.4/cirros-0.3.4-i386-disk.img
Format: QCOWW2 – QEMU Emulator
Architecture: leave blank
Minimum Disk: leave blank
Minimum RAM: leave blank
Image Location: checked
Public: unchecked
Protected: unchecked
Create Images in OpenStack
Add OpenStack Image Details
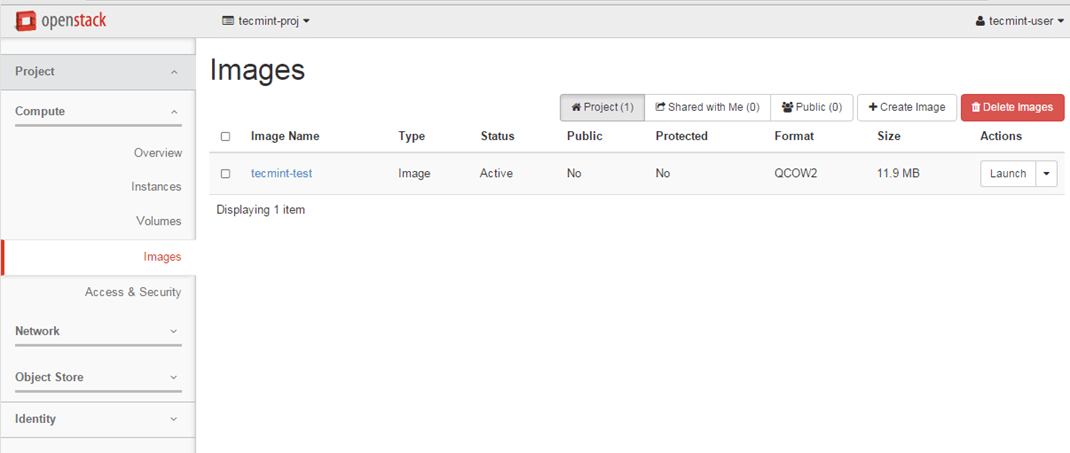
OpenStack Images
Step 3: Launch an Image Instance in OpenStack
3. Once you’ve created an image you’re good to go. Now you can run the virtual machine based on the image created earlier in your cloud environment.
Move to Project -> Instances and hit on Launch Instance button and a new window will appear.

Launch Image Instance in Openstack
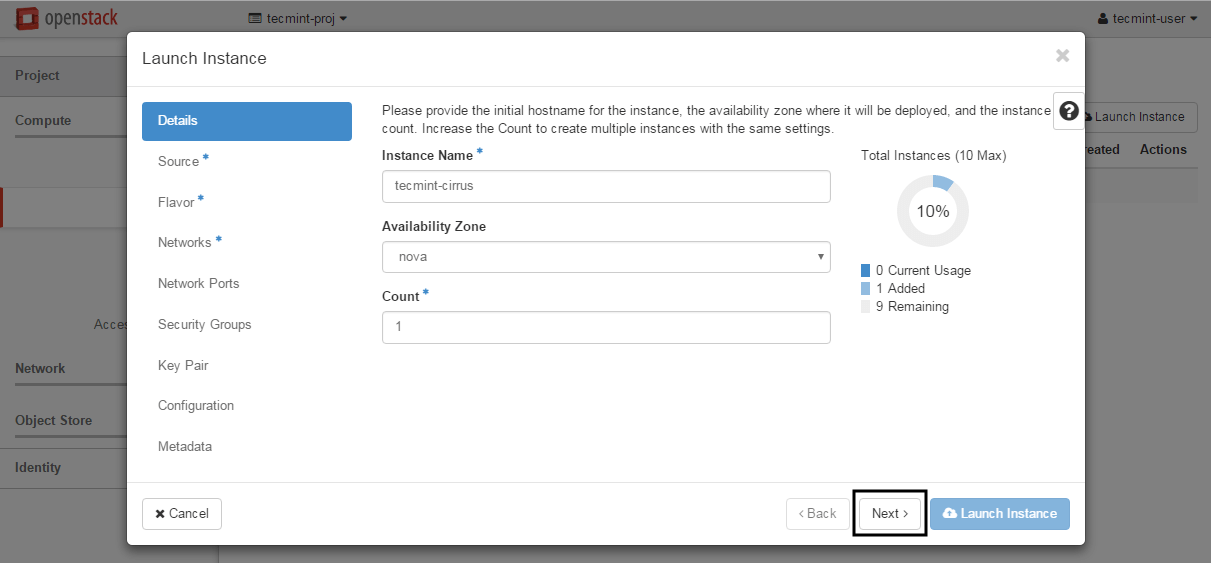
4. On the first screen add a name for your instance, leave the Availability Zone to nova, use one instance count and hit on Next button to continue.
Choose a descriptive Instance Name for your instance because this name will be used to form the virtual machine hostname.
Add Hostname to OpenStack Instance
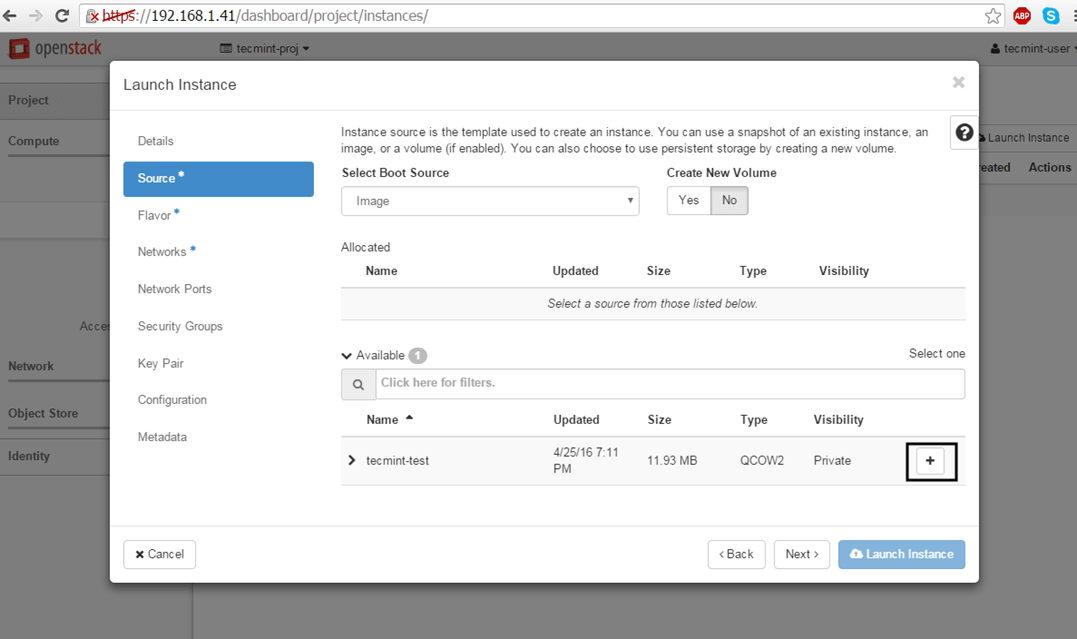
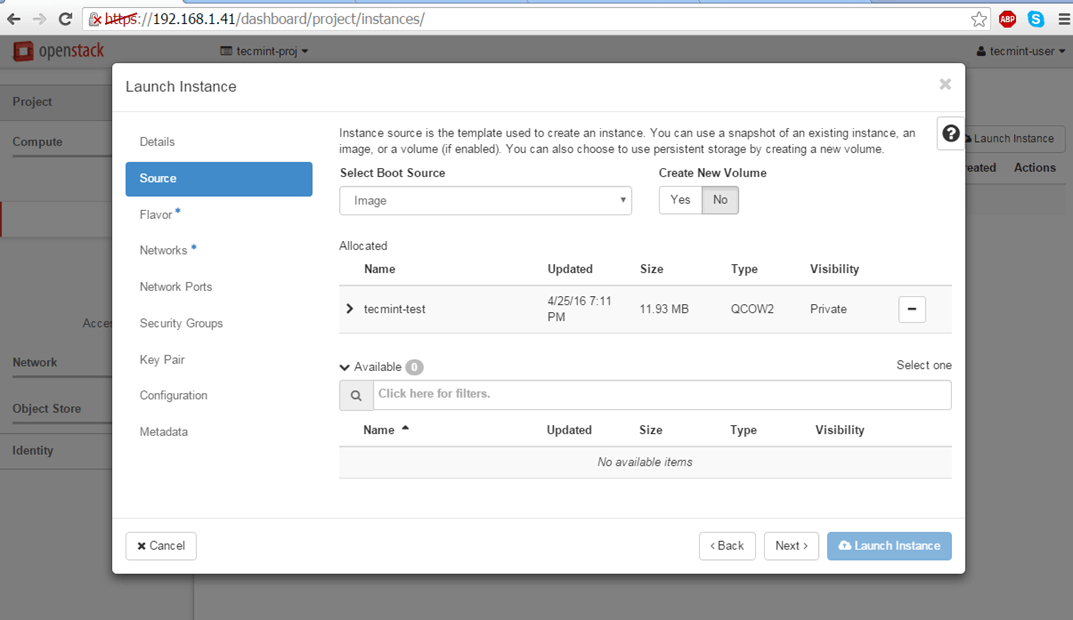
5. Next, select Image as a Boot Source, add the Cirros test image created earlier by hitting the + button and hit Next to proceed further.
Select OpenStack Instance Boot Source
Add Cirros Text Image
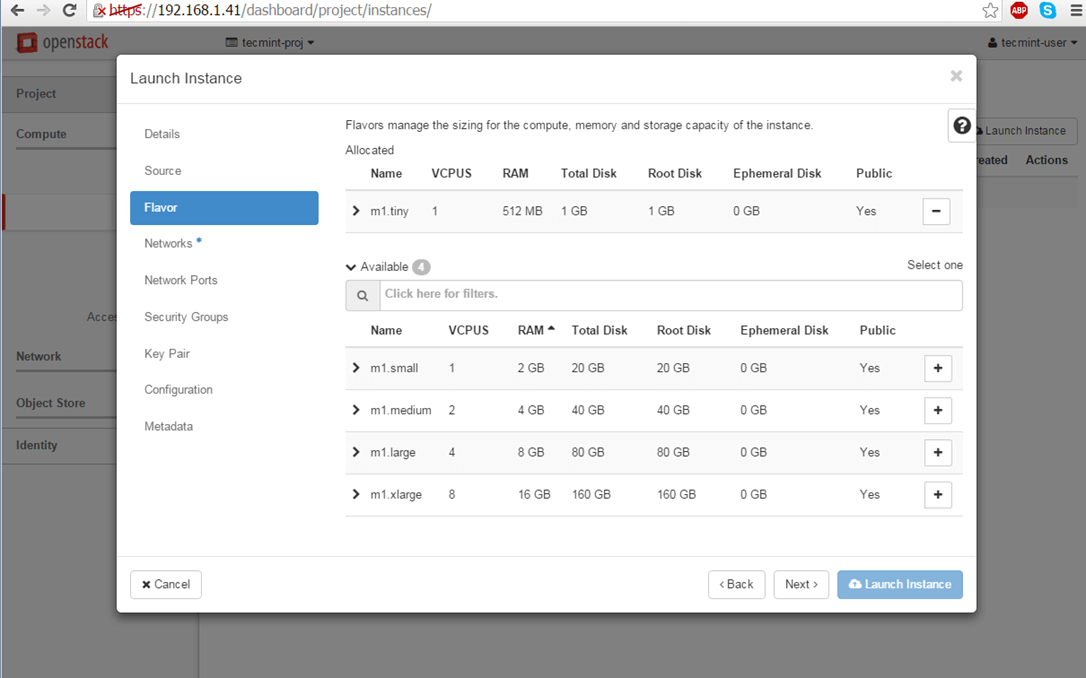
6. Allocate the virtual machine resources by adding a flavor best suited for your needs and click on Next to move on.
Add Resources to OpenStack Instance
7. Finally, add one of the OpenStack available networks to your instance using the + button and hit on Launch Instance to start the virtual machine.
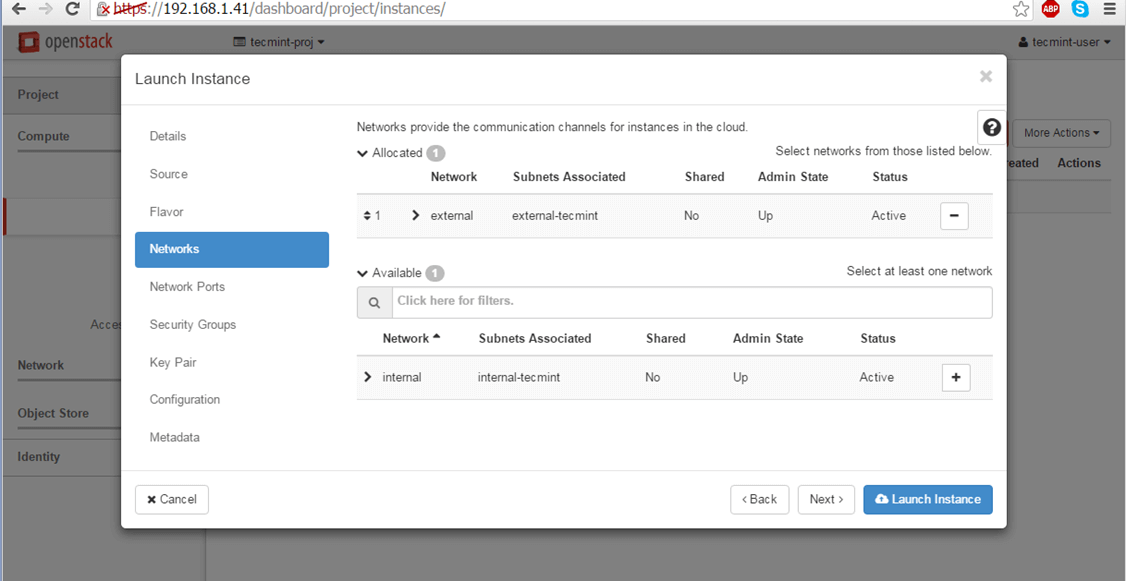
Add Network to OpenStack Instance
8. Once the instance has been started, hit on the right arrow from Create Snapshot menu button and choose Associate Floating IP.
Select one of the floating IP created earlier and hit on Associate button in order to make the instance reachable from your internal LAN.
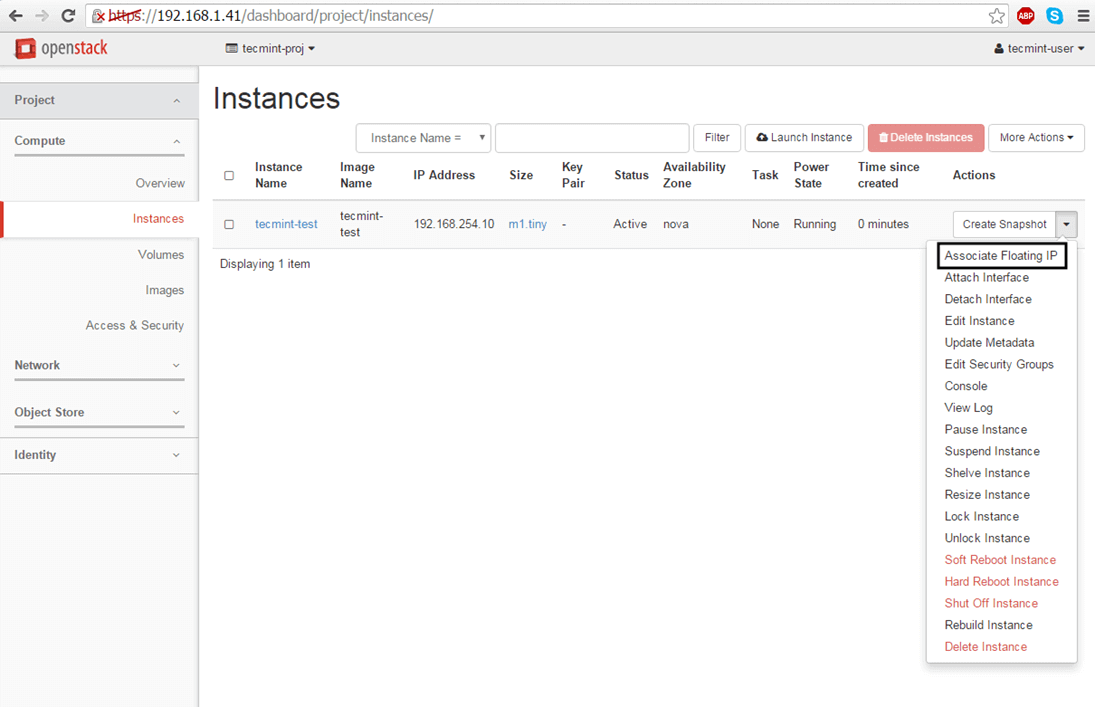
Add Associate Floating IP to OpenStack Instance
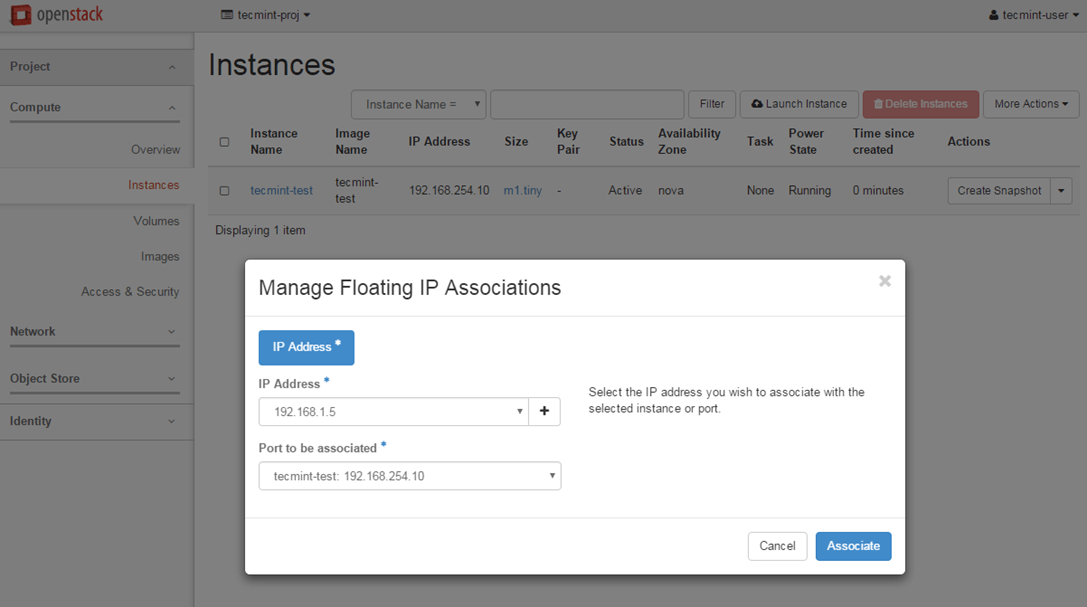
Manage Floating IP Associations
9. To test the network connectivity for your active virtual machine issue a ping command against the instance floating IP address from a remote computer in your LAN.
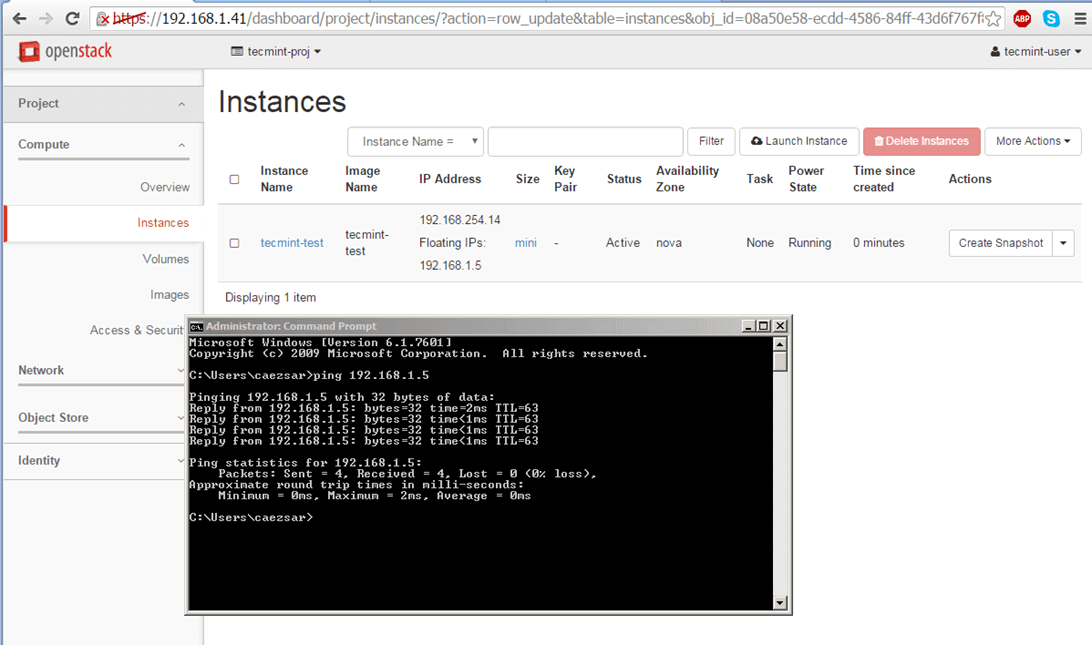
Check Network of Virtual Machine in OpenStack
10. In case there’s no issue with your instance and the ping command succeeds you can remotely login via SSH on your instance.
Use the instance View Log utility to obtain Cirros default credentials as illustrated on the below screenshots.
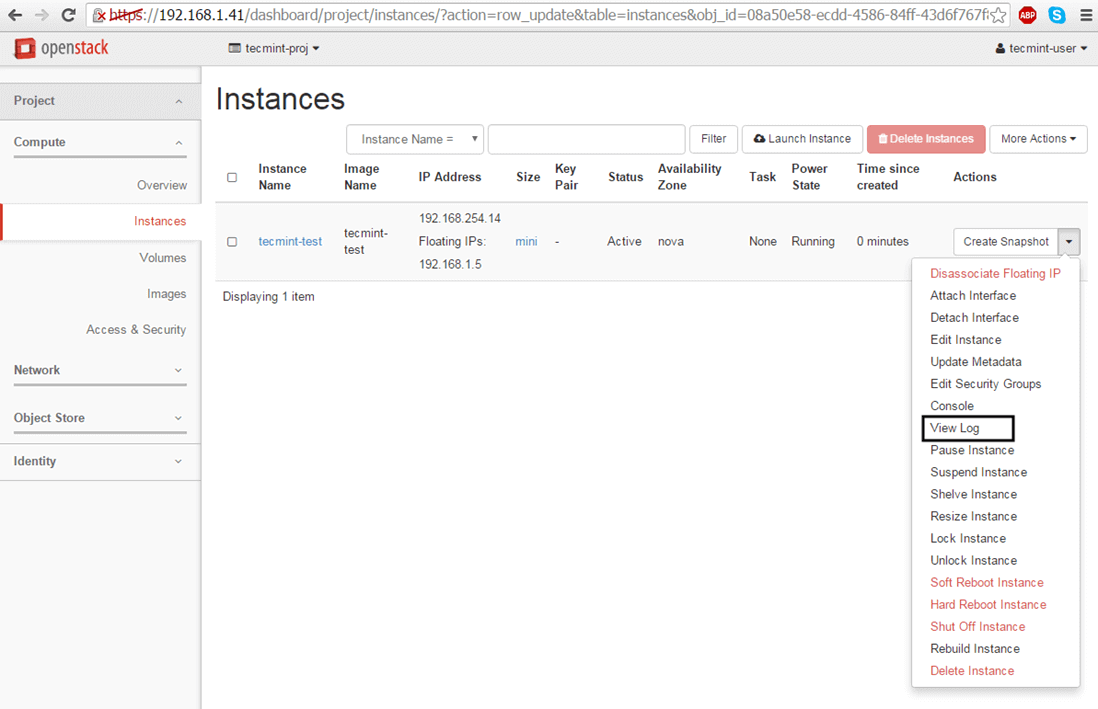
Instance View Log Utility
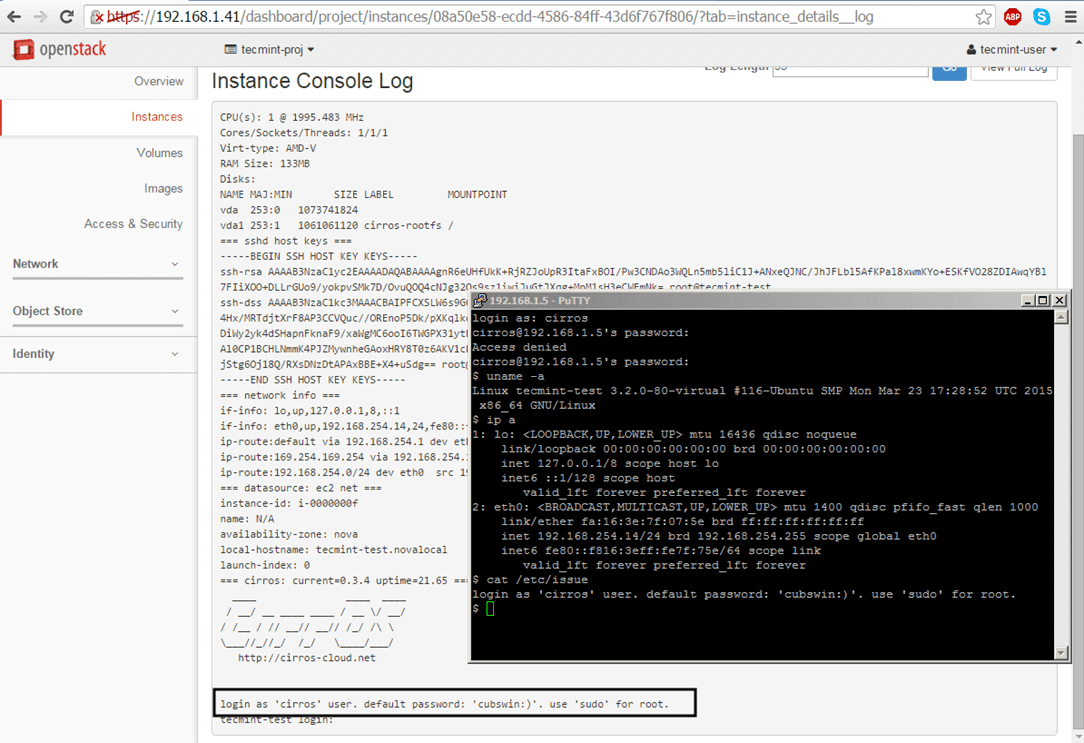
Instance Login Credentials
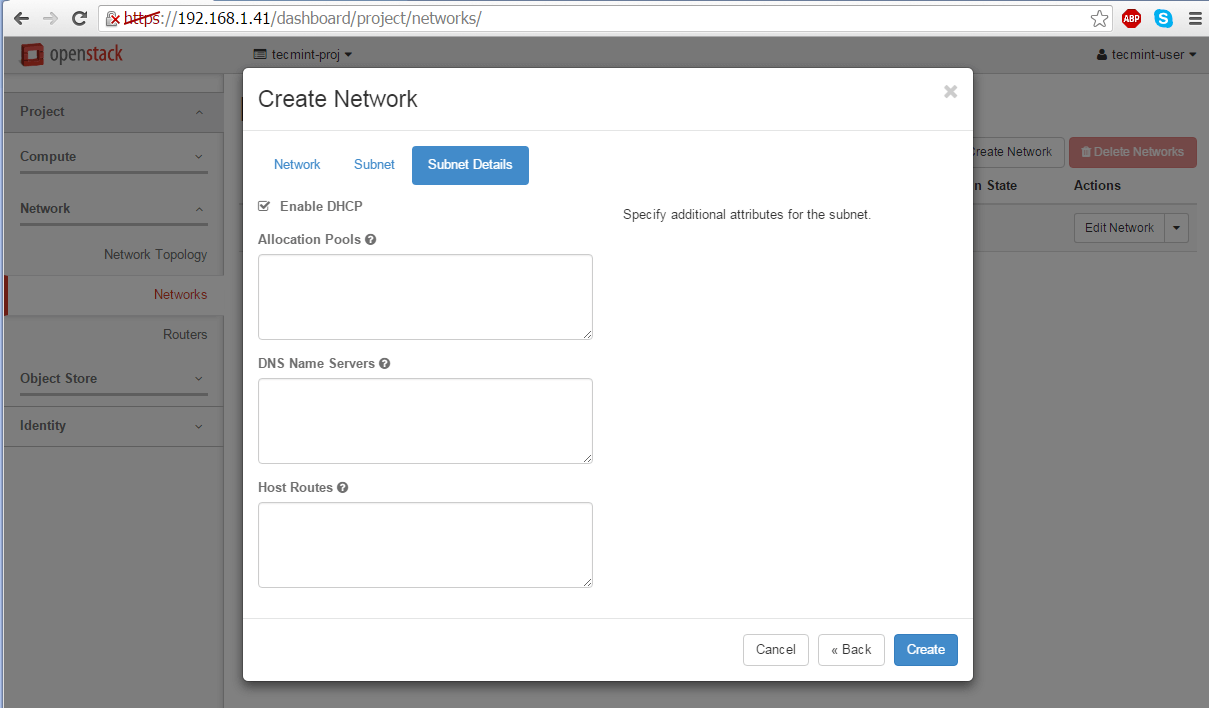
11. By default, no DNS name servers will be allocated from the internal network DHCP server for your virtual machine. This problem leads to domain connectivity issues from instance counterpart.
To solve this issue, first stop the instance and go to Project -> Network -> Networks and edit the proper subnet by hitting the Subnet Details button.
Add the required DNS name servers, save the configuration, start and connect to the instance console to test if the new configuration has been applied by pinging a domain name. Use the following screenshots as a guide.
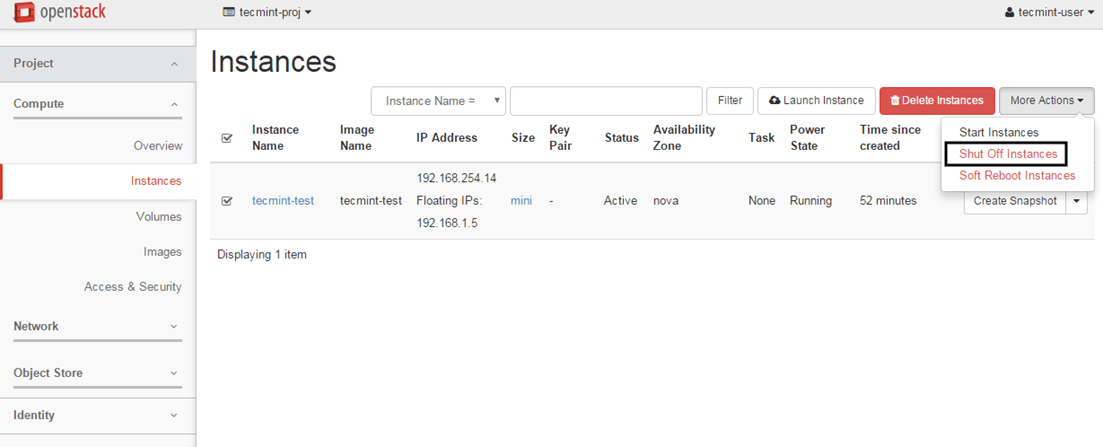
Shutdown Instance
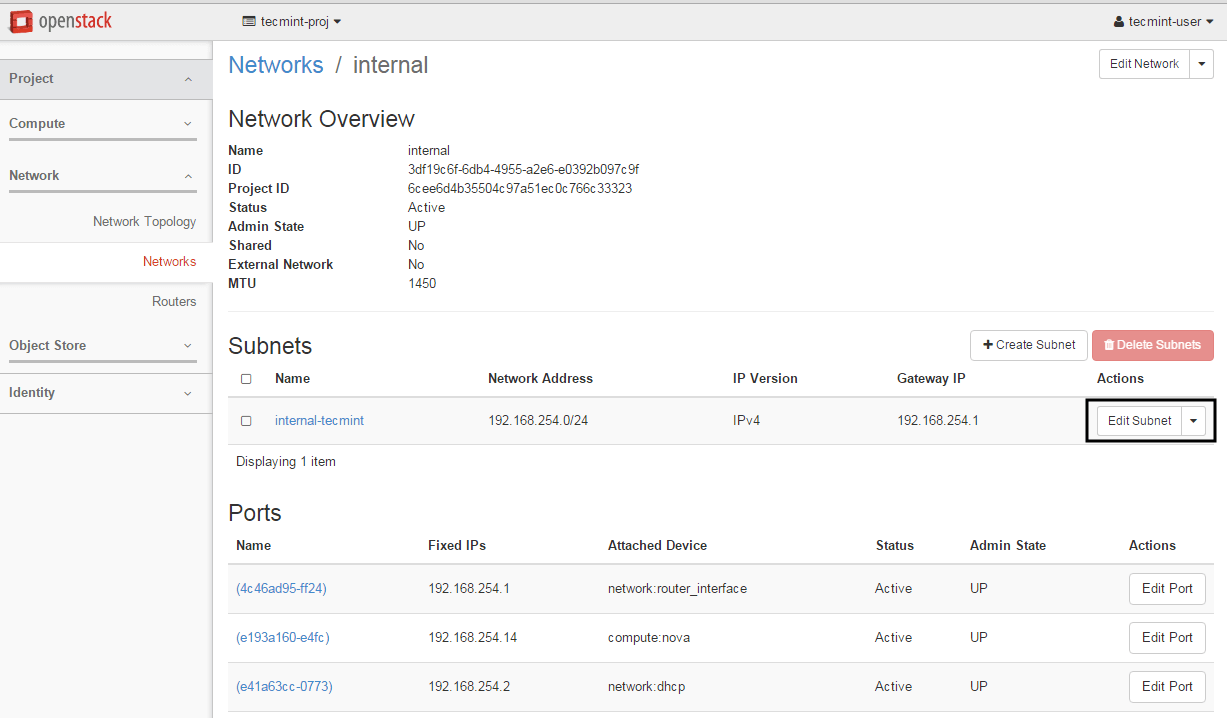
Modify Instance Network Subnet
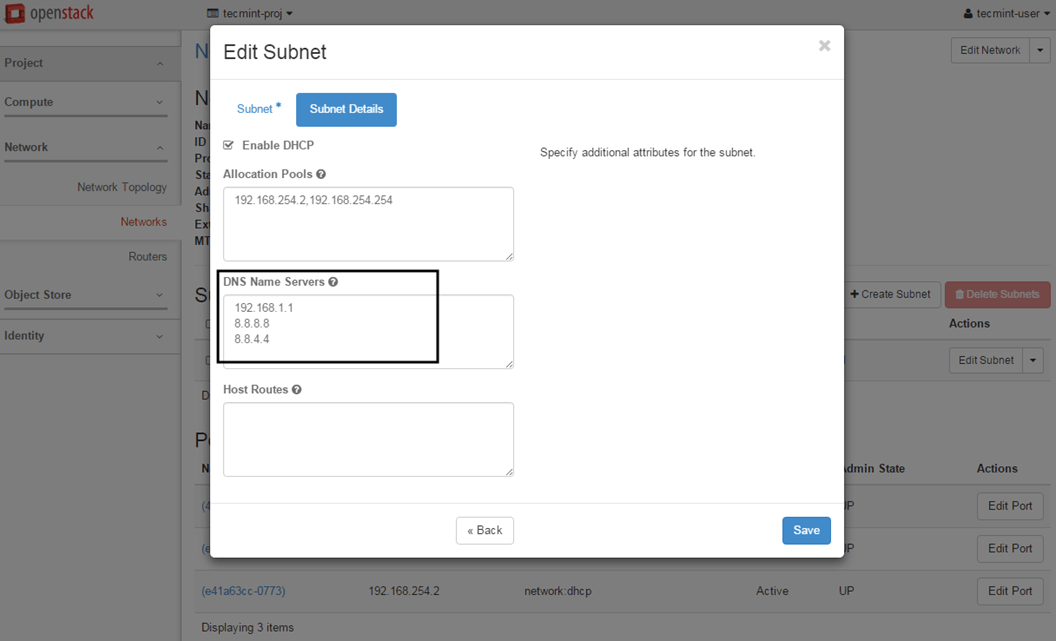
Add DNS Servers to Instance
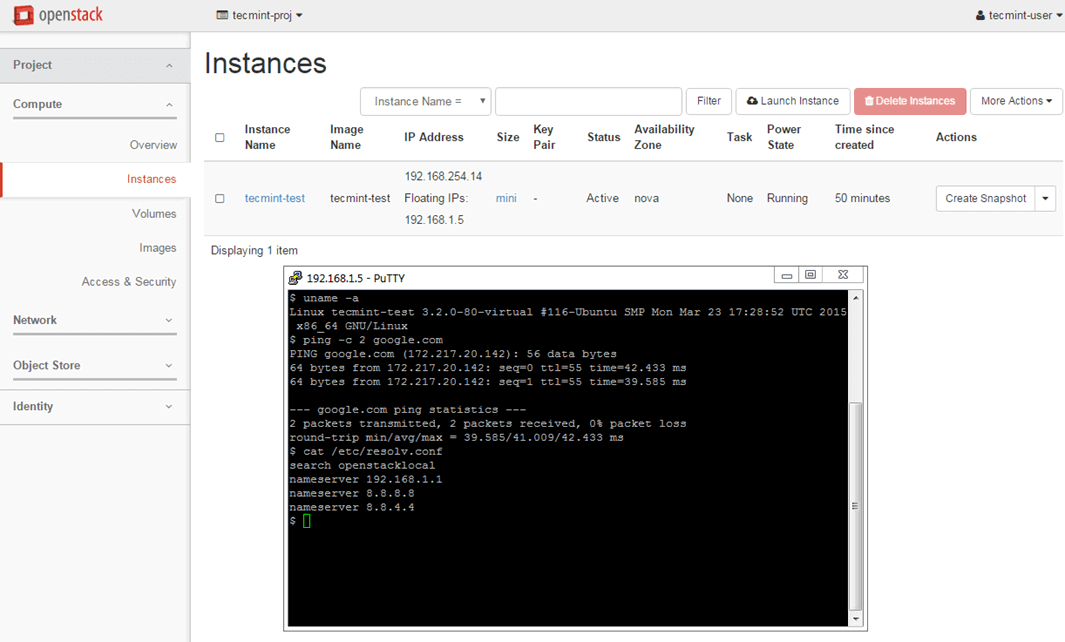
Check Instance Network Connectivity
In case you have limited physical resources in your infrastructure and some of your instances refuse to start, edit the following line from nova configuration file and restart the machine in order to apply changes.
# vi /etc/nova/nova.conf
Change the following line to look like this:
ram_allocation_ratio=3.0
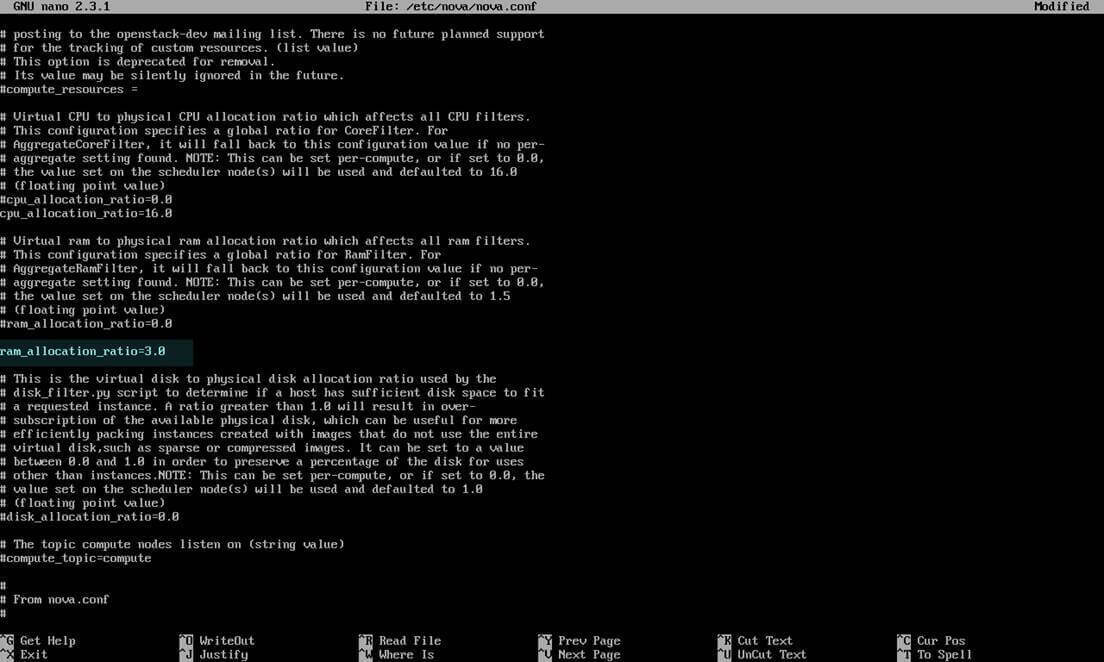
Configure Physical Resources in Nova Configuration
That’s all! Although this series of guides just scratched the surface of OpenStack mammoth, now you have the basic knowledge to start create new tenants and use real Linux OS images in order to deploy virtual machines in your own OpenStack cloud infrastructure.
Source