A Basic Guide to Linux Boot Process

As promised in our earlier post, in this post we are going to review boot process in Linux Operating System. How Operating system passes through different stage of booting states. This article is written for those readers who has just steps in Linux world. Understanding how Linux boots up is very important in terms of effectively troubleshooting in case of system failure. When a system switched on and after few moment we get a login prompt. Have we try to find out what all stage of booting sequence has crossed and what happened behind the scene during system boots up.

Linux Boot Process

Linux Boot Loader Process

Power on

  1. BIOS (Basic Input Output System) is a software program comes pre-built in a motherboard chipset.
  2. BIOS loads and scans for devices such as Hard DiskCD-ROMRAM, etc.
  3. BIOS searches for MBR (Master Boot Record: 1st sector) of the primary hard drive, it scans for 1st stage loader (In our case boot loader is (GRUB LILO) and hands over the responsibility to MBR.
  4. Boot PROM/FLASH/BIOS is proficient of loading the MBR into RAM and executing it.

MBR (Master Boot Record)

  • 512 bytes of space –> MBR
  • MBR contains the information of loader of most operating system e.g UNIXLinux and WINDOWS
  • MBR holds the small binary information of 1st stage of loader
  • MBR consist physical sector of the first disk drive (i.e 512 bytes) and it’s not part of any partition.
  • Placed on the prime disk drive, in the prime sector of the first cylinder of track is 0 and head is 0 (this whole path is generally booked for boot programs)
  • MBR involve a mini executable programs and a table specify the primary partitions.
Boot Code (GRUB) 446 bytes
partition 1: 16 bytes
partition 2: 16 bytes
partition 3: 16 bytes
partition 4: 16 bytes
magic Number: 2 bytes
  1. MBR also document which primary partition is ACTIVE.
  2. The BIOS surrender rights to the first stage boot loader, which then scans partition table and finds second stage boot loader on the partition configured as bootable.

Boot Loader

  1. The boot loader termed from 1st stage loader and loads itself into RAM. All this go on in milliseconds.
  2. The default stage 2 boot loader is a GRUB (Grand Unified Boot Loader) or LILO (Linux Loader)
  3. Once GRUB is loaded into RAM, then it’s search for the location of Kernel.
  4. GRUB will scrutinize the map file to find the kernel image, that is located under (/boot) and load it.
  5. GRUB loads the kernel (vmlinuz-version) from /boot partition

Trivia 1

GRUB organize RAMDISK for initrd —> (RAMDISK is reserved space from RAM). In addition, it drives initrd into RAM to ready the kernel for loading itself into memory and depended modules so that it can leave the system to “init” process

In, Linux most of the drivers are pre-built as modules, these would be initial ram drive (initrd.img) where it can keep all the information of additional modules. So, when the kernel boots, it creates ramdrive, loads the initrd.img and its depended modules.

GRUB reads /boot/grub/grub.conf & shows us a clean interface for selecting Operating System

Once Kernel loads its depended modules and then it hand over to “init” process. The kernel image has a small, unpacked program that un-compresses kernel and runs it.

Trivia 2

LILO needed to indicate MBR in order to locate operating systems on the hard drive. Any modifications done to /etc/lilo.conf, that must be updated in MBR, but in GRUB‘s case no need to update, it reads directly from the file /boot/grub/grub.conf.

After making changes in /etc/lilo.conf, we’ll have to update the MBR manually

# /sbin/lilo -v

Trivia 3

The GRUB second stage loader resides within the MBR and within /boot partition. Once GRUB is loaded into memory it becomes 2nd stage loader.

Trivia 4

The /initrd directory should not be removed it is a temporary place holder for kernel to have quick access to the modules that it needs to start the system modules include device drivers.

Kernel initialization highlights include:

  1. initialize CPU components, eg, MMU
  2. initialize the scheduler (PID 0)
  3. mount the root filesystem in rw mode
  4. fork off the init process (PID 1)

In essence, kernel initialization does two things:

  1. Start the core system of shared resource managers (RAM, processor and mass storage).
  2. Starts a single process, /sbin/init.

Init process (sbin/init) is the very fist process which loads all the various daemons and mounts all the partitions which are listed under /etc/fstab.

About /etc/fstab

  1. The /sbin/init reads /etc/inittab file
  2. Set default runlevel ( the telinit command allows administrators to tell the init process to change its current runlevel)
  3. Calls /etc/rc.d/rc.sysinit and /etc/rc.d/rc x (where ‘x‘ is a runlevel)
  4. In /etc/rc.d/rc5.d directory files starting with letter K –> kill scripts and files starting with letter S –> Startup scripts.
  5. Start up the tty processes and xdm ( X display manager)
  6. Starts User’s login screen

Source

How to Scan for Rootkits, backdoors and Exploits Using ‘Rootkit Hunter’ in Linux

Guys, if you are a regular reader of tecmint.com you will notice that this is our third article on security tools. In our previous two articles we have given you all the guidance in how to secure Apache and Linux Systems from MalwareDOS and DDOS attacks using mod_security and mod_evasive and LMD (Linux Malware Detect).

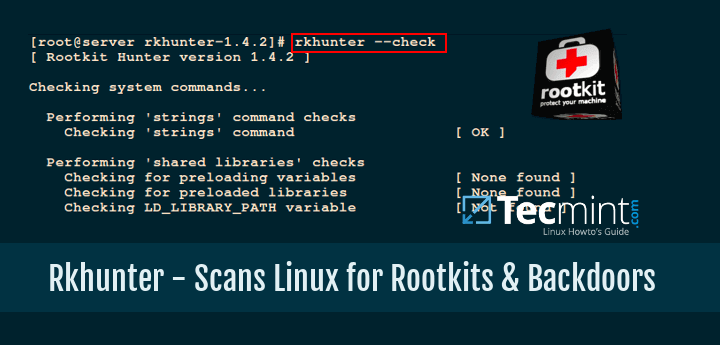
Again we are here to introduce a new security tool called Rkhunter (Rootkit Hunter). This article will guide you a way to install and configure RKH (RootKit Hunter) in Linux systems using source code.

Rootkit Hunter - Scans Linux Systems for Rootkits, backdoors and Local Exploits

Rootkit Hunter – Scans Linux Systems for Rootkits, backdoors and Local Exploits

What Is Rkhunter?

Rkhunter (Rootkit Hunter) is an open source Unix/Linux based scanner tool for Linux systems released under GPL that scans backdoors, rootkits and local exploits on your systems.

It scans hidden files, wrong permissions set on binaries, suspicious strings in kernel etc. To know more about Rkhunter and its features visit http://www.rootkit.nl/.

Install Rootkit Hunter Scanner in Linux Systems

Step 1: Downloading Rkhunter

First download the latest stable version of Rkhunter tool by going to http://www.rootkit.nl/projects/rootkit_hunter.html or use below Wget command to download it on your systems.

# cd /tmp
# wget http://downloads.sourceforge.net/project/rkhunter/rkhunter/1.4.2/rkhunter-1.4.2.tar.gz

Step 2: Installing Rkhunter

Once you have downloaded the latest version, run the following commands as a root user to install it.

# tar -xvf rkhunter-1.4.2.tar.gz 
# cd rkhunter-1.4.2
# ./installer.sh --layout default --install
Sample Output
Checking system for:
 Rootkit Hunter installer files: found
 A web file download command: wget found
Starting installation:
 Checking installation directory "/usr/local": it exists and is writable.
 Checking installation directories:
  Directory /usr/local/share/doc/rkhunter-1.4.2: creating: OK
  Directory /usr/local/share/man/man8: exists and is writable.
  Directory /etc: exists and is writable.
  Directory /usr/local/bin: exists and is writable.
  Directory /usr/local/lib64: exists and is writable.
  Directory /var/lib: exists and is writable.
  Directory /usr/local/lib64/rkhunter/scripts: creating: OK
  Directory /var/lib/rkhunter/db: creating: OK
  Directory /var/lib/rkhunter/tmp: creating: OK
  Directory /var/lib/rkhunter/db/i18n: creating: OK
  Directory /var/lib/rkhunter/db/signatures: creating: OK
 Installing check_modules.pl: OK
 Installing filehashsha.pl: OK
 Installing stat.pl: OK
 Installing readlink.sh: OK
 Installing backdoorports.dat: OK
 Installing mirrors.dat: OK
 Installing programs_bad.dat: OK
 Installing suspscan.dat: OK
 Installing rkhunter.8: OK
 Installing ACKNOWLEDGMENTS: OK
 Installing CHANGELOG: OK
 Installing FAQ: OK
 Installing LICENSE: OK
 Installing README: OK
 Installing language support files: OK
 Installing ClamAV signatures: OK
 Installing rkhunter: OK
 Installing rkhunter.conf: OK
Installation complete

Step 3: Updating Rkhunter

Run the RKH updater to fill the database properties by running the following command.

# /usr/local/bin/rkhunter --update
# /usr/local/bin/rkhunter --propupd
Sample Output
[ Rootkit Hunter version 1.4.2 ]

Checking rkhunter data files...
  Checking file mirrors.dat                                  [ No update ]
  Checking file programs_bad.dat                             [ Updated ]
  Checking file backdoorports.dat                            [ No update ]
  Checking file suspscan.dat                                 [ No update ]
  Checking file i18n/cn                                      [ No update ]
  Checking file i18n/de                                      [ No update ]
  Checking file i18n/en                                      [ No update ]
  Checking file i18n/tr                                      [ No update ]
  Checking file i18n/tr.utf8                                 [ No update ]
  Checking file i18n/zh                                      [ No update ]
  Checking file i18n/zh.utf8                                 [ No update ]

[ Rootkit Hunter version 1.4.2 ]
File created: searched for 174 files, found 137

Step 4: Setting Cronjob and Email Alerts

Create a file called rkhunter.sh under /etc/cron.daily/, which then scans your file system every day and sends email notifications to your email id. Create following file with the help of your favourite editor.

# vi /etc/cron.daily/rkhunter.sh

Add the following lines of code to it and replace “YourServerNameHere” with your “Server Name” and “your@email.com” with your “Email Id“.

#!/bin/sh
(
/usr/local/bin/rkhunter --versioncheck
/usr/local/bin/rkhunter --update
/usr/local/bin/rkhunter --cronjob --report-warnings-only
) | /bin/mail -s 'rkhunter Daily Run (PutYourServerNameHere)' your@email.com

Set execute permission on the file.

# chmod 755 /etc/cron.daily/rkhunter.sh

Step 5: Manual Scan and Usage

To scan the entire file system, run the Rkhunter as a root user.

# rkhunter --check
Sample Output
[ Rootkit Hunter version 1.4.2 ]

Checking system commands...

  Performing 'strings' command checks
    Checking 'strings' command                               [ OK ]

  Performing 'shared libraries' checks
    Checking for preloading variables                        [ None found ]
    Checking for preloaded libraries                         [ None found ]
    Checking LD_LIBRARY_PATH variable                        [ Not found ]

  Performing file properties checks
    Checking for prerequisites                               [ OK ]
    /usr/local/bin/rkhunter                                  [ OK ]
    /usr/sbin/adduser                                        [ OK ]
    /usr/sbin/chkconfig                                      [ OK ]
    /usr/sbin/chroot                                         [ OK ]
    /usr/sbin/depmod                                         [ OK ]
    /usr/sbin/fsck                                           [ OK ]
    /usr/sbin/fuser                                          [ OK ]
    /usr/sbin/groupadd                                       [ OK ]
    /usr/sbin/groupdel                                       [ OK ]
    /usr/sbin/groupmod                                       [ OK ]
    /usr/sbin/grpck                                          [ OK ]
    /usr/sbin/ifconfig                                       [ OK ]
    /usr/sbin/ifdown                                         [ Warning ]
    /usr/sbin/ifup                                           [ Warning ]
    /usr/sbin/init                                           [ OK ]
    /usr/sbin/insmod                                         [ OK ]
    /usr/sbin/ip                                             [ OK ]
    /usr/sbin/lsmod                                          [ OK ]
    /usr/sbin/lsof                                           [ OK ]
    /usr/sbin/modinfo                                        [ OK ]
    /usr/sbin/modprobe                                       [ OK ]
    /usr/sbin/nologin                                        [ OK ]
    /usr/sbin/pwck                                           [ OK ]
    /usr/sbin/rmmod                                          [ OK ]
    /usr/sbin/route                                          [ OK ]
    /usr/sbin/rsyslogd                                       [ OK ]
    /usr/sbin/runlevel                                       [ OK ]
    /usr/sbin/sestatus                                       [ OK ]
    /usr/sbin/sshd                                           [ OK ]
    /usr/sbin/sulogin                                        [ OK ]
    /usr/sbin/sysctl                                         [ OK ]
    /usr/sbin/tcpd                                           [ OK ]
    /usr/sbin/useradd                                        [ OK ]
    /usr/sbin/userdel                                        [ OK ]
    /usr/sbin/usermod                                        [ OK ]
....
[Press  to continue]


Checking for rootkits...

  Performing check of known rootkit files and directories
    55808 Trojan - Variant A                                 [ Not found ]
    ADM Worm                                                 [ Not found ]
    AjaKit Rootkit                                           [ Not found ]
    Adore Rootkit                                            [ Not found ]
    aPa Kit                                                  [ Not found ]
.....

[Press  to continue]


  Performing additional rootkit checks
    Suckit Rookit additional checks                          [ OK ]
    Checking for possible rootkit files and directories      [ None found ]
    Checking for possible rootkit strings                    [ None found ]

....
[Press  to continue]


Checking the network...

  Performing checks on the network ports
    Checking for backdoor ports                              [ None found ]
....
  Performing system configuration file checks
    Checking for an SSH configuration file                   [ Found ]
    Checking if SSH root access is allowed                   [ Warning ]
    Checking if SSH protocol v1 is allowed                   [ Warning ]
    Checking for a running system logging daemon             [ Found ]
    Checking for a system logging configuration file         [ Found ]
    Checking if syslog remote logging is allowed             [ Not allowed ]
...
System checks summary
=====================

File properties checks...
    Files checked: 137
    Suspect files: 6

Rootkit checks...
    Rootkits checked : 383
    Possible rootkits: 0

Applications checks...
    Applications checked: 5
    Suspect applications: 2

The system checks took: 5 minutes and 38 seconds

All results have been written to the log file: /var/log/rkhunter.log

One or more warnings have been found while checking the system.
Please check the log file (/var/log/rkhunter.log)

The above command generates log file under /var/log/rkhunter.log with the checks results made by Rkhunter.

# cat /var/log/rkhunter.log
Sample Output
03:33:40] Running Rootkit Hunter version 1.4.2 on server
[03:33:40]
[03:33:40] Info: Start date is Tue May 31 03:33:40 EDT 2016
[03:33:40]
[03:33:40] Checking configuration file and command-line options...
[03:33:40] Info: Detected operating system is 'Linux'
[03:33:40] Info: Found O/S name: CentOS Linux release 7.2.1511 (Core) 
[03:33:40] Info: Command line is /usr/local/bin/rkhunter --check
[03:33:40] Info: Environment shell is /bin/bash; rkhunter is using bash
[03:33:40] Info: Using configuration file '/etc/rkhunter.conf'
[03:33:40] Info: Installation directory is '/usr/local'
[03:33:40] Info: Using language 'en'
[03:33:40] Info: Using '/var/lib/rkhunter/db' as the database directory
[03:33:40] Info: Using '/usr/local/lib64/rkhunter/scripts' as the support script directory
[03:33:40] Info: Using '/usr/lib64/qt-3.3/bin /usr/local/sbin /usr/local/bin /usr/sbin /usr/bin /bin /sbin /usr/libexec /usr/local/libexec' as the command directories
[03:33:40] Info: Using '/var/lib/rkhunter/tmp' as the temporary directory
[03:33:40] Info: No mail-on-warning address configured
[03:33:40] Info: X will be automatically detected
[03:33:40] Info: Found the 'basename' command: /usr/bin/basename
[03:33:40] Info: Found the 'diff' command: /usr/bin/diff
[03:33:40] Info: Found the 'dirname' command: /usr/bin/dirname
[03:33:40] Info: Found the 'file' command: /usr/bin/file
[03:33:40] Info: Found the 'find' command: /usr/bin/find
[03:33:40] Info: Found the 'ifconfig' command: /usr/sbin/ifconfig
[03:33:40] Info: Found the 'ip' command: /usr/sbin/ip
...

For more information and options please run the following command.

# rkhunter --help

If you liked this article, then sharing is the right way to say thanks.

Source

How to Manage ‘Systemd’ Services and Units Using ‘Systemctl’ in Linux

Systemctl is a systemd utility which is responsible for Controlling the systemd system and service manager.

Systemd is a collection of system management daemons, utilities and libraries which serves as a replacement of System V init daemon. Systemd functions as central management and configuration platform for UNIX like system.

In the Linux Ecosystem Systemd has been implemented on most of the standard Linux Distribution with a few exception. Systemd is the parent Process of all other daemons oftenly but not always.

Manage Linux Services Using Systemctl

Manage Linux Services Using Systemctl

This article aims at throwing light on “How to control System and Services” on a system running systemd.

Starting with Systemtd and Systemctl Basics

1. First check if systemd is installed on your system or not and what is the version of currently installed Systemd?

# systemd --version

systemd 215
+PAM +AUDIT +SELINUX +IMA +SYSVINIT +LIBCRYPTSETUP +GCRYPT +ACL +XZ -SECCOMP -APPARMOR

It’s clear from the above example, that we have systemd 215 version Installed.

2. Check where the binaries and libraries of systemd and systemctl are installed.

# whereis systemd 
systemd: /usr/lib/systemd /etc/systemd /usr/share/systemd /usr/share/man/man1/systemd.1.gz


# whereis systemctl
systemctl: /usr/bin/systemctl /usr/share/man/man1/systemctl.1.gz

3. Check whether systemd is running or not.

# ps -eaf | grep [s]ystemd

root         1     0  0 16:27 ?        00:00:00 /usr/lib/systemd/systemd --switched-root --system --deserialize 23
root       444     1  0 16:27 ?        00:00:00 /usr/lib/systemd/systemd-journald
root       469     1  0 16:27 ?        00:00:00 /usr/lib/systemd/systemd-udevd
root       555     1  0 16:27 ?        00:00:00 /usr/lib/systemd/systemd-logind
dbus       556     1  0 16:27 ?        00:00:00 /bin/dbus-daemon --system --address=systemd: --nofork --nopidfile --systemd-activation

Notice: systemd is running as parent daemon (PID=1). In the above command ps with (-e) select all Processes, (-a) select all processes except session leaders and (-f) for full format listing (i.e. -eaf).

Also note the square brackets in the above example and rest of the examples to follow. Square Bracket expression is part of grep’s character class pattern matching.

4. Analyze systemd boot process.

# systemd-analyze
Startup finished in 487ms (kernel) + 2.776s (initrd) + 20.229s (userspace) = 23.493s

5. Analyze time taken by each process at boot.

# systemd-analyze blame

8.565s mariadb.service
7.991s webmin.service
6.095s postfix.service
4.311s httpd.service
3.926s firewalld.service
3.780s kdump.service
3.238s tuned.service
1.712s network.service
1.394s lvm2-monitor.service
1.126s systemd-logind.service
....

6. Analyze critical chain at boot.

# systemd-analyze critical-chain

The time after the unit is active or started is printed after the "@" character.
The time the unit takes to start is printed after the "+" character.

multi-user.target @20.222s
└─mariadb.service @11.657s +8.565s
  └─network.target @11.168s
    └─network.service @9.456s +1.712s
      └─NetworkManager.service @8.858s +596ms
        └─firewalld.service @4.931s +3.926s
          └─basic.target @4.916s
            └─sockets.target @4.916s
              └─dbus.socket @4.916s
                └─sysinit.target @4.905s
                  └─systemd-update-utmp.service @4.864s +39ms
                    └─auditd.service @4.563s +301ms
                      └─systemd-tmpfiles-setup.service @4.485s +69ms
                        └─rhel-import-state.service @4.342s +142ms
                          └─local-fs.target @4.324s
                            └─boot.mount @4.286s +31ms
                              └─systemd-fsck@dev-disk-by\x2duuid-79f594ad\x2da332\x2d4730\x2dbb5f\x2d85d19608096
                                └─dev-disk-by\x2duuid-79f594ad\x2da332\x2d4730\x2dbb5f\x2d85d196080964.device @4

Important: Systemctl accepts services (.service), mount point (.mount), sockets (.socket) and devices (.device) as units.

7. List all the available units.

# systemctl list-unit-files

UNIT FILE                                   STATE   
proc-sys-fs-binfmt_misc.automount           static  
dev-hugepages.mount                         static  
dev-mqueue.mount                            static  
proc-sys-fs-binfmt_misc.mount               static  
sys-fs-fuse-connections.mount               static  
sys-kernel-config.mount                     static  
sys-kernel-debug.mount                      static  
tmp.mount                                   disabled
brandbot.path                               disabled
.....

8. List all running units.

# systemctl list-units

UNIT                                        LOAD   ACTIVE SUB       DESCRIPTION
proc-sys-fs-binfmt_misc.automount           loaded active waiting   Arbitrary Executable File Formats File Syste
sys-devices-pc...0-1:0:0:0-block-sr0.device loaded active plugged   VBOX_CD-ROM
sys-devices-pc...:00:03.0-net-enp0s3.device loaded active plugged   PRO/1000 MT Desktop Adapter
sys-devices-pc...00:05.0-sound-card0.device loaded active plugged   82801AA AC'97 Audio Controller
sys-devices-pc...:0:0-block-sda-sda1.device loaded active plugged   VBOX_HARDDISK
sys-devices-pc...:0:0-block-sda-sda2.device loaded active plugged   LVM PV Qzyo3l-qYaL-uRUa-Cjuk-pljo-qKtX-VgBQ8
sys-devices-pc...0-2:0:0:0-block-sda.device loaded active plugged   VBOX_HARDDISK
sys-devices-pl...erial8250-tty-ttyS0.device loaded active plugged   /sys/devices/platform/serial8250/tty/ttyS0
sys-devices-pl...erial8250-tty-ttyS1.device loaded active plugged   /sys/devices/platform/serial8250/tty/ttyS1
sys-devices-pl...erial8250-tty-ttyS2.device loaded active plugged   /sys/devices/platform/serial8250/tty/ttyS2
sys-devices-pl...erial8250-tty-ttyS3.device loaded active plugged   /sys/devices/platform/serial8250/tty/ttyS3
sys-devices-virtual-block-dm\x2d0.device    loaded active plugged   /sys/devices/virtual/block/dm-0
sys-devices-virtual-block-dm\x2d1.device    loaded active plugged   /sys/devices/virtual/block/dm-1
sys-module-configfs.device                  loaded active plugged   /sys/module/configfs
...

9. List all failed units.

# systemctl --failed

UNIT          LOAD   ACTIVE SUB    DESCRIPTION
kdump.service loaded failed failed Crash recovery kernel arming

LOAD   = Reflects whether the unit definition was properly loaded.
ACTIVE = The high-level unit activation state, i.e. generalization of SUB.
SUB    = The low-level unit activation state, values depend on unit type.

1 loaded units listed. Pass --all to see loaded but inactive units, too.
To show all installed unit files use 'systemctl list-unit-files'.

10. Check if a Unit (cron.service) is enabled or not?.

# systemctl is-enabled crond.service

enabled

11. Check whether a Unit or Service is running or not?.

# systemctl status firewalld.service

firewalld.service - firewalld - dynamic firewall daemon
   Loaded: loaded (/usr/lib/systemd/system/firewalld.service; enabled)
   Active: active (running) since Tue 2015-04-28 16:27:55 IST; 34min ago
 Main PID: 549 (firewalld)
   CGroup: /system.slice/firewalld.service
           └─549 /usr/bin/python -Es /usr/sbin/firewalld --nofork --nopid

Apr 28 16:27:51 tecmint systemd[1]: Starting firewalld - dynamic firewall daemon...
Apr 28 16:27:55 tecmint systemd[1]: Started firewalld - dynamic firewall daemon.

Control and Manage Services Using Systemctl

12. List all services (including enabled and disabled).

# systemctl list-unit-files --type=service

UNIT FILE                                   STATE   
arp-ethers.service                          disabled
auditd.service                              enabled 
autovt@.service                             disabled
blk-availability.service                    disabled
brandbot.service                            static  
collectd.service                            disabled
console-getty.service                       disabled
console-shell.service                       disabled
cpupower.service                            disabled
crond.service                               enabled 
dbus-org.fedoraproject.FirewallD1.service   enabled 
....

13. How do I start, restart, stop, reload and check the status of a service (httpd.service) in Linux.

# systemctl start httpd.service
# systemctl restart httpd.service
# systemctl stop httpd.service
# systemctl reload httpd.service
# systemctl status httpd.service

httpd.service - The Apache HTTP Server
   Loaded: loaded (/usr/lib/systemd/system/httpd.service; enabled)
   Active: active (running) since Tue 2015-04-28 17:21:30 IST; 6s ago
  Process: 2876 ExecStop=/bin/kill -WINCH ${MAINPID} (code=exited, status=0/SUCCESS)
 Main PID: 2881 (httpd)
   Status: "Processing requests..."
   CGroup: /system.slice/httpd.service
           ├─2881 /usr/sbin/httpd -DFOREGROUND
           ├─2884 /usr/sbin/httpd -DFOREGROUND
           ├─2885 /usr/sbin/httpd -DFOREGROUND
           ├─2886 /usr/sbin/httpd -DFOREGROUND
           ├─2887 /usr/sbin/httpd -DFOREGROUND
           └─2888 /usr/sbin/httpd -DFOREGROUND

Apr 28 17:21:30 tecmint systemd[1]: Starting The Apache HTTP Server...
Apr 28 17:21:30 tecmint httpd[2881]: AH00558: httpd: Could not reliably determine the server's fully q...ssage
Apr 28 17:21:30 tecmint systemd[1]: Started The Apache HTTP Server.
Hint: Some lines were ellipsized, use -l to show in full.

Note: When we use commands like startrestartstop and reload with systemctl, we will not get any output on the terminal, only status command will print the output.

14. How to active a service and enable or disable a service at boot time (auto start service at system boot).

# systemctl is-active httpd.service
# systemctl enable httpd.service
# systemctl disable httpd.service

15. How to mask (making it impossible to start) or unmask a service (httpd.service).

# systemctl mask httpd.service
ln -s '/dev/null' '/etc/systemd/system/httpd.service'

# systemctl unmask httpd.service
rm '/etc/systemd/system/httpd.service'

16. How to a Kill a service using systemctl command.

# systemctl kill httpd
# systemctl status httpd

httpd.service - The Apache HTTP Server
   Loaded: loaded (/usr/lib/systemd/system/httpd.service; enabled)
   Active: failed (Result: exit-code) since Tue 2015-04-28 18:01:42 IST; 28min ago
 Main PID: 2881 (code=exited, status=0/SUCCESS)
   Status: "Total requests: 0; Current requests/sec: 0; Current traffic:   0 B/sec"

Apr 28 17:37:29 tecmint systemd[1]: httpd.service: Got notification message from PID 2881, but recepti...bled.
Apr 28 17:37:39 tecmint systemd[1]: httpd.service: Got notification message from PID 2881, but recepti...bled.
Apr 28 17:37:49 tecmint systemd[1]: httpd.service: Got notification message from PID 2881, but recepti...bled.
Apr 28 17:37:59 tecmint systemd[1]: httpd.service: Got notification message from PID 2881, but recepti...bled.
Apr 28 18:01:42 tecmint systemd[1]: httpd.service: control process exited, code=exited status=226
Apr 28 18:01:42 tecmint systemd[1]: Unit httpd.service entered failed state.
Hint: Some lines were ellipsized, use -l to show in full.

Control and Manage Mount Points using Systemctl

17. List all system mount points.

# systemctl list-unit-files --type=mount

UNIT FILE                     STATE   
dev-hugepages.mount           static  
dev-mqueue.mount              static  
proc-sys-fs-binfmt_misc.mount static  
sys-fs-fuse-connections.mount static  
sys-kernel-config.mount       static  
sys-kernel-debug.mount        static  
tmp.mount                     disabled

18. How do I mount, unmount, remount, reload system mount points and also check the status of mount points on the system.

# systemctl start tmp.mount
# systemctl stop tmp.mount
# systemctl restart tmp.mount
# systemctl reload tmp.mount
# systemctl status tmp.mount

tmp.mount - Temporary Directory
   Loaded: loaded (/usr/lib/systemd/system/tmp.mount; disabled)
   Active: active (mounted) since Tue 2015-04-28 17:46:06 IST; 2min 48s ago
    Where: /tmp
     What: tmpfs
     Docs: man:hier(7)
           http://www.freedesktop.org/wiki/Software/systemd/APIFileSystems
  Process: 3908 ExecMount=/bin/mount tmpfs /tmp -t tmpfs -o mode=1777,strictatime (code=exited, status=0/SUCCESS)

Apr 28 17:46:06 tecmint systemd[1]: Mounting Temporary Directory...
Apr 28 17:46:06 tecmint systemd[1]: tmp.mount: Directory /tmp to mount over is not empty, mounting anyway.
Apr 28 17:46:06 tecmint systemd[1]: Mounted Temporary Directory.

19. How to active, enable or disable a mount point at boot time (auto mount at system boot).

# systemctl is-active tmp.mount
# systemctl enable tmp.mount
# systemctl disable  tmp.mount

20. How to mask (making it impossible to start) or unmask a mount points in Linux.

# systemctl mask tmp.mount

ln -s '/dev/null' '/etc/systemd/system/tmp.mount'

# systemctl unmask tmp.mount

rm '/etc/systemd/system/tmp.mount'

Control and Manage Sockets using Systemctl

21. List all available system sockets.

# systemctl list-unit-files --type=socket

UNIT FILE                    STATE   
dbus.socket                  static  
dm-event.socket              enabled 
lvm2-lvmetad.socket          enabled 
rsyncd.socket                disabled
sshd.socket                  disabled
syslog.socket                static  
systemd-initctl.socket       static  
systemd-journald.socket      static  
systemd-shutdownd.socket     static  
systemd-udevd-control.socket static  
systemd-udevd-kernel.socket  static  

11 unit files listed.

22. How do I start, restart, stop, reload and check the status of a socket (example: cups.socket) in Linux.

# systemctl start cups.socket
# systemctl restart cups.socket
# systemctl stop cups.socket
# systemctl reload cups.socket
# systemctl status cups.socket

cups.socket - CUPS Printing Service Sockets
   Loaded: loaded (/usr/lib/systemd/system/cups.socket; enabled)
   Active: active (listening) since Tue 2015-04-28 18:10:59 IST; 8s ago
   Listen: /var/run/cups/cups.sock (Stream)

Apr 28 18:10:59 tecmint systemd[1]: Starting CUPS Printing Service Sockets.
Apr 28 18:10:59 tecmint systemd[1]: Listening on CUPS Printing Service Sockets.

23. How to active a socket and enable or disable at boot time (auto start socket at system boot).

# systemctl is-active cups.socket
# systemctl enable cups.socket
# systemctl disable cups.socket

24. How to mask (making it impossible to start) or unmask a socket (cups.socket).

# systemctl mask cups.socket
ln -s '/dev/null' '/etc/systemd/system/cups.socket'

# systemctl unmask cups.socket
rm '/etc/systemd/system/cups.socket'

CPU Utilization (Shares) of a Service

25. Get the current CPU Shares of a Service (say httpd).

# systemctl show -p CPUShares httpd.service

CPUShares=1024

Note: The default each service has a CPUShare = 1024. You may increase/decrease CPU share of a process.

26. Limit the CPU Share of a service (httpd.service) to 2000 CPUShares/

# systemctl set-property httpd.service CPUShares=2000
# systemctl show -p CPUShares httpd.service

CPUShares=2000

Note: When you set CPUShare for a service, a directory with the name of service is created (httpd.service.d) which contains a file 90-CPUShares.conf which contains the CPUShare Limit information. You may view the file as:

# vi /etc/systemd/system/httpd.service.d/90-CPUShares.conf 

[Service]
CPUShares=2000        

27. Check all the configuration details of a service.

# systemctl show httpd

Id=httpd.service
Names=httpd.service
Requires=basic.target
Wants=system.slice
WantedBy=multi-user.target
Conflicts=shutdown.target
Before=shutdown.target multi-user.target
After=network.target remote-fs.target nss-lookup.target systemd-journald.socket basic.target system.slice
Description=The Apache HTTP Server
LoadState=loaded
ActiveState=active
SubState=running
FragmentPath=/usr/lib/systemd/system/httpd.service
....

28. Analyze critical chain for a services(httpd).

# systemd-analyze critical-chain httpd.service

The time after the unit is active or started is printed after the "@" character.
The time the unit takes to start is printed after the "+" character.

httpd.service +142ms
└─network.target @11.168s
  └─network.service @9.456s +1.712s
    └─NetworkManager.service @8.858s +596ms
      └─firewalld.service @4.931s +3.926s
        └─basic.target @4.916s
          └─sockets.target @4.916s
            └─dbus.socket @4.916s
              └─sysinit.target @4.905s
                └─systemd-update-utmp.service @4.864s +39ms
                  └─auditd.service @4.563s +301ms
                    └─systemd-tmpfiles-setup.service @4.485s +69ms
                      └─rhel-import-state.service @4.342s +142ms
                        └─local-fs.target @4.324s
                          └─boot.mount @4.286s +31ms
                            └─systemd-fsck@dev-disk-by\x2duuid-79f594ad\x2da332\x2d4730\x2dbb5f\x2d85d196080964.service @4.092s +149ms
                              └─dev-disk-by\x2duuid-79f594ad\x2da332\x2d4730\x2dbb5f\x2d85d196080964.device @4.092s

29. Get a list of dependencies for a services (httpd).

# systemctl list-dependencies httpd.service

httpd.service
├─system.slice
└─basic.target
  ├─firewalld.service
  ├─microcode.service
  ├─rhel-autorelabel-mark.service
  ├─rhel-autorelabel.service
  ├─rhel-configure.service
  ├─rhel-dmesg.service
  ├─rhel-loadmodules.service
  ├─paths.target
  ├─slices.target
  │ ├─-.slice
  │ └─system.slice
  ├─sockets.target
  │ ├─dbus.socket
....

30. List control groups hierarchically.

# systemd-cgls

├─1 /usr/lib/systemd/systemd --switched-root --system --deserialize 23
├─user.slice
│ └─user-0.slice
│   └─session-1.scope
│     ├─2498 sshd: root@pts/0    
│     ├─2500 -bash
│     ├─4521 systemd-cgls
│     └─4522 systemd-cgls
└─system.slice
  ├─httpd.service
  │ ├─4440 /usr/sbin/httpd -DFOREGROUND
  │ ├─4442 /usr/sbin/httpd -DFOREGROUND
  │ ├─4443 /usr/sbin/httpd -DFOREGROUND
  │ ├─4444 /usr/sbin/httpd -DFOREGROUND
  │ ├─4445 /usr/sbin/httpd -DFOREGROUND
  │ └─4446 /usr/sbin/httpd -DFOREGROUND
  ├─polkit.service
  │ └─721 /usr/lib/polkit-1/polkitd --no-debug
....

31. List control group according to CPU, memory, Input and Output.

# systemd-cgtop

Path                                                              Tasks   %CPU   Memory  Input/s Output/s

/                                                                    83    1.0   437.8M        -        -
/system.slice                                                         -    0.1        -        -        -
/system.slice/mariadb.service                                         2    0.1        -        -        -
/system.slice/tuned.service                                           1    0.0        -        -        -
/system.slice/httpd.service                                           6    0.0        -        -        -
/system.slice/NetworkManager.service                                  1      -        -        -        -
/system.slice/atop.service                                            1      -        -        -        -
/system.slice/atopacct.service                                        1      -        -        -        -
/system.slice/auditd.service                                          1      -        -        -        -
/system.slice/crond.service                                           1      -        -        -        -
/system.slice/dbus.service                                            1      -        -        -        -
/system.slice/firewalld.service                                       1      -        -        -        -
/system.slice/lvm2-lvmetad.service                                    1      -        -        -        -
/system.slice/polkit.service                                          1      -        -        -        -
/system.slice/postfix.service                                         3      -        -        -        -
/system.slice/rsyslog.service                                         1      -        -        -        -
/system.slice/system-getty.slice/getty@tty1.service                   1      -        -        -        -
/system.slice/systemd-journald.service                                1      -        -        -        -
/system.slice/systemd-logind.service                                  1      -        -        -        -
/system.slice/systemd-udevd.service                                   1      -        -        -        -
/system.slice/webmin.service                                          1      -        -        -        -
/user.slice/user-0.slice/session-1.scope                              3      -        -        -        -

Control System Runlevels

32. How to start system rescue mode.

# systemctl rescue

Broadcast message from root@tecmint on pts/0 (Wed 2015-04-29 11:31:18 IST):

The system is going down to rescue mode NOW!

33. How to enter into emergency mode.

# systemctl emergency

Welcome to emergency mode! After logging in, type "journalctl -xb" to view
system logs, "systemctl reboot" to reboot, "systemctl default" to try again
to boot into default mode.

34. List current run levels in use.

# systemctl get-default

multi-user.target

35. How to start Runlevel 5 aka graphical mode.

# systemctl isolate runlevel5.target
OR
# systemctl isolate graphical.target

36. How to start Runlevel 3 aka multiuser mode (commandline).

# systemctl isolate runlevel3.target
OR
# systemctl isolate multiuser.target

36. How to set multiusermode or graphical mode as default runlevel.

# systemctl set-default runlevel3.target

# systemctl set-default runlevel5.target

37. How to reboot, halt, suspend, hibernate or put system in hybrid-sleep.

# systemctl reboot

# systemctl halt

# systemctl suspend

# systemctl hibernate

# systemctl hybrid-sleep

For those who may not be aware of runlevels and what it does.

  1. Runlevel 0 : Shut down and Power off the system.
  2. Runlevel 1 : Rescue?Maintainance Mode.
  3. Runlevel 3 : multiuser, no-graphic system.
  4. Runlevel 4 : multiuser, no-graphic system.
  5. Runlevel 5 : multiuser, graphical system.
  6. Runlevel 6 : Shutdown and Reboot the machine.

That’s all for now. Keep connected! Keep commenting. Don’t forget to provide us with your valuable feedback in the comments below. Like and share us and help us get spread.

Source

ONLYOFFICE – A Complete Web-based Office and Productivity Suite to Increase Your Team Efficiency

ONLYOFFICE is an office and productivity suite developed to provide an open source alternative to Microsoft Office 365 and Google Apps. Three main components are connected to build a whole corporate platform:

ONLYOFFICE Document Server offers text, spreadsheet and presentation editors compatible with MS Office and OpenDocument file formats, among others.

It works within a browser and allows you to create and co-edit documents choosing one of the co-editing modes: Fast (shows the changes made by co-editors in real-time) or Strict (hides other user changes until you save your own changes and accept the changes made by others). Commenting, tracking changes and built-in chat are also available.

ONLYOFFICE Community Server comes with mail client, document management tools, projects, CRM, calendar, and community with blogs, forums, and wiki.

ONLYOFFICE Mail Server, developed on the base of the iRedMail, is used to create and manage mailboxes using your own domain name.

ONLYOFFICE has recently updated its two main components: Document Server v. 4.0.0 and Community Server v.8.9.0 adding some features listed below:

ONLYOFFICE Document Server v.4.0.0

  1. fast real-time co-editing like in Google Docs
  2. commenting
  3. integrated chat
  4. reviewing and tracking changes
  5. version history
  6. text art for text, spreadsheets and presentations
  7. adding, removing and modifying the available styles.

ONLYOFFICE Community Server v.8.9.0

  1. review access rights for documents
  2. mail and calendar integration allowing to:
    1. invite any Internet user to your event and notify them about the changes
    2. get invitations from other calendars and accept or reject them.
  3. address book for personal contacts
  4. mail auto-reply

Installing ONLYOFFICE in Linux

You can deploy the latest stable version of ONLYOFFICE using the official Docker script. It allows you to install the whole system on a single machine avoiding the dependency errors.

In general, each ONLYOFFICE component requires some dependencies to be installed on your Linux machine. With Docker, only one dependency is needed – Docker v.1.10 or later.

There are also DEB and RPM packages available for ONLYOFFICE at: http://www.onlyoffice.com/download.aspx

Before you go ahead, please check if your machine meets the ONLYOFFICE hardware and software requirements:

ONLYOFFICE Hardware Requirements

  1. CPU: dual-core 2 GHz or better
  2. RAM: 6 GB or more
  3. HDD at least 40 GB of free space
  4. Swap at least 8 GB

Important: Please note that the size requirement for a server to run ONLYOFFICE depends on the components you need and how much documents and mails you plan to store.

6 GB of RAM is necessary for the efficient work of the whole system: Document ServerMail Server and Community Server.

To install it without mail server, 2 GB of RAM will be enough, given the necessary amount of swap is available.

ONLYOFFICE Software Requirements

  1. OS: amd64 Linux distributive with kernel version 3.10 or later
  2. Docker: version 1.10 or later (to install it, refer to the official Docker documentation)

Let’s proceed further to install ONLYOFFICE in Linux distributions.

Step 1. Download ONLYOFFICE Docker script file.

# wget http://download.onlyoffice.com/install/opensource-install.sh

Step 2. Run the complete ONLYOFFICE installation.

Important: Please note that to perform this action you must be logged in with root rights.

# bash opensource-install.sh -md "yourdomain.com"

Where yourdomain.com is your own domain used for Mail Server.

To install ONLYOFFICE without mail server, run the following command:

# bash opensource-install.sh -ims false

Getting started with ONLYOFFICE

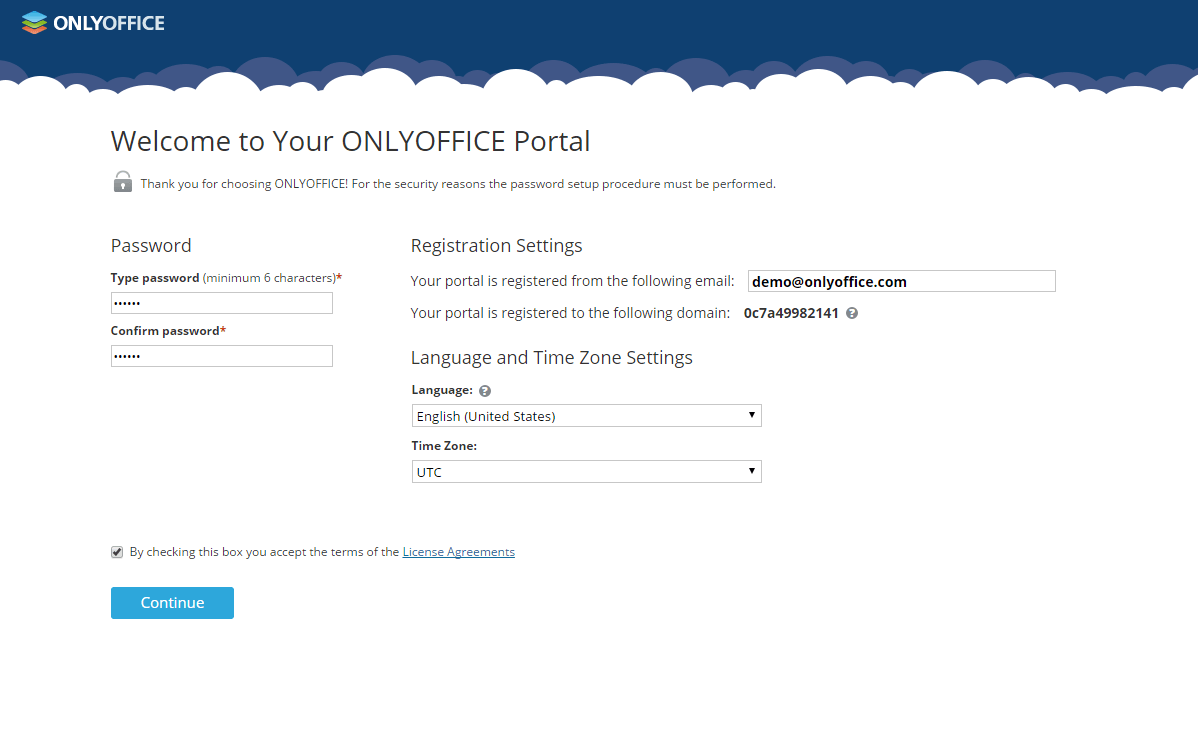
Step 3. Enter the IP address of your server to your browser to open ONLYOFFICE. The portal start up and initialization processes will start. Once completed, the Wizard page will open:

ONLYOFFICE Installation Wizard

ONLYOFFICE Installation Wizard

Step 4. Configure your web office by adding your email, password and its confirmation to use them next time to access ONLYOFFICE. Select the language and time zone (you will be able to change it later in Settings section. Click Continue.

Configure ONLYOFFICE Modules

Configure ONLYOFFICE Modules

Step 5. Invite your team member by going to the People module using the corresponding icon. Click the Create New button in the left upper corner, select the User option from the drop-down list. Fill in the required fields and click the Save button.

Add New Users to ONLYOFFICE

Add New Users to ONLYOFFICE

The invitation message will be sent to your team member. Following the link provided in this email, he/she will be able to join your web office.

Conclusion

ONLYOFFICE is a feature-rich productivity suite that helps to organize every step of your teamwork without switching between different applications.

The Docker script made it easy to deploy and run your web office on any Linux machine allowing to avoid common dependency errors and installation issues.

Source

How to Install and Configure Ansible on Ubuntu 18.04

Introduction

Configuration management systems are designed to make controlling large numbers of servers easy for administrators and operations teams. They allow you to control many different systems in an automated way from one central location.

While there are many popular configuration management systems available for Linux systems, such as Chef and Puppet, these are often more complex than many people want or need. Ansible is a great alternative to these options because it requires a much smaller overhead to get started.

In this guide, we will discuss how to install Ansible on an Ubuntu 18.04 server and go over some basics of how to use the software.

How Does Ansible Work?

Ansible works by configuring client machines from a computer that has the Ansible components installed and configured.

It communicates over normal SSH channels to retrieve information from remote machines, issue commands, and copy files. Because of this, an Ansible system does not require any additional software to be installed on the client computers.

This is one way that Ansible simplifies the administration of servers. Any server that has an SSH port exposed can be brought under Ansible’s configuration umbrella, regardless of what stage it is at in its life cycle. This means that any computer that you can administer through SSH, you can also administer through Ansible.

Ansible takes on a modular approach, making it easy to extend to use the functionalities of the main system to deal with specific scenarios. Modules can be written in any language and communicate in standard JSON.

Configuration files are mainly written in the YAML data serialization format due to its expressive nature and its similarity to popular markup languages. Ansible can interact with hosts either through command line tools or its configuration scripts, which are known as Playbooks.

Prerequisites

To follow this tutorial, you will need:

  • Two or more Ubuntu 18.04 servers. One of these will be used as your Ansible server, while the remainder will be used as your Ansible hosts. Each should have a non-root user with sudo privileges and a basic firewall configured. You can set this up by following our Initial Server Setup Guide for Ubuntu 18.04. Please note that the examples throughout this guide specify three Ansible hosts, but the commands and configurations shown can be adjusted for any number of clients.
  • SSH keys generated for the non-root user on your Ansible server. To do this, follow Step 1 of our guide on How to Set Up SSH Keys on Ubuntu 18.04. For the purposes of this tutorial, you can save the key pair to the default location (~/.ssh/id_rsa) and you do not need to password-protect it.

Step 1 — Installing Ansible

To begin using Ansible as a means of managing your various servers, you need to install the Ansible software on at least one machine.

To get the latest version of Ansible for Ubuntu, you can add the project’s PPA (personal package archive) to your system. Before doing this, though, you should first ensure that you have the software-properties-common package installed. This software will make it easier to manage this and other independent software repositories:

  • sudo apt update
  • sudo apt install software-properties-common

Then add the Ansible PPA by typing the following command:

  • sudo apt-add-repository ppa:ansible/ansible

Press ENTER to accept the PPA addition.

Next, refresh your system’s package index once again so that it is aware of the packages available in the PPA:

  • sudo apt update

Following this update, you can install the Ansible software:

  • sudo apt install ansible

Your Ansible server now has all of the software required to administer your hosts.

Step 2 — Configuring SSH Access to the Ansible Hosts

As mentioned previously, Ansible primarily communicates with client computers through SSH. While it certainly has the ability to handle password-based SSH authentication, using SSH keys can help to keep things simple.

On your Ansible server, use the cat command to print the contents of your non-root user’s SSH public key file to the terminal’s output:

  • cat ~/.ssh/id_rsa.pub

Copy the resulting output to your clipboard, then open a new terminal and connect to one of your Ansible hosts using SSH:

  • ssh sammy@ansible_host_ip

Switch to the client machine’s root user:

  • su –

As the root user, open the authorized_keys within the ~/.ssh directory:

  • nano ~/.ssh/authorized_keys

In the file, paste your Ansible server user’s SSH key, then save the file and close the editor (press CTRL + XY, then ENTER). Then run the exit command to return to the host’s non-root user:

  • exit

Lastly, because Ansible uses a python interpreter located at /usr/bin/python to run its modules, you’ll need to install Python 2 on the host in order for Ansible to communicate with it. Run the following commands to update the host’s package index and install the python package:

  • sudo apt update
  • sudo apt install python

Following this, you can run the exit command once again to close the connection to the client:

  • exit

Repeat this process for each server you intend to control with your Ansible server. Next, we’ll configure the Ansible server to connect to these hosts using Ansible’s hosts file.

Step 3 — Setting Up Ansible Hosts

Ansible keeps track of all of the servers that it knows about through a hosts file. We need to set up this file first before we can begin to communicate with our other computers.

Open the file with sudo privileges, like this:

  • sudo nano /etc/ansible/hosts

Inside the file, you will see a number of example configurations that have been commented out (with a #preceding each line). These examples won’t actually work for us since the hosts listed in each one are made up. We will, however, keep these examples in the file to help us with configuration if we want to implement more complex scenarios in the future.

The hosts file is fairly flexible and can be configured in a few different ways. The syntax we are going to use, though, looks like this:

[group_name]
alias ansible_host=your_server_ip

Note: With the release of Ansible version 2.0, the configuration variable ansible_host replaced the original variable, ansible_ssh_host. If you’re using an older version of Ansible, you should use the older, longer variable.

In this example, group_name is an organizational tag that lets you refer to any servers listed under it with one word, while alias is just a name to refer to one specific server.

So, in our scenario, we are imagining that we have three servers we are going to control with Ansible. At this point, these servers are accessible from the Ansible server by typing:

  • ssh root@ansible_host_ip

You should not be prompted for a password if you have set this up correctly. For the purpose of demonstration, we will assume that our hosts’ IP addresses are 203.0.113.1203.0.113.2, and 203.0.113.3. We will set this up so that we can refer to these individually as host1host2, and host3, or as a group with the name servers.

This is the block that we should add to our hosts file to accomplish this:

/etc/ansible/hosts
[servers]
host1 ansible_host=203.0.113.1
host2 ansible_host=203.0.113.2
host3 ansible_host=203.0.113.3

Hosts can be in multiple groups and groups can configure parameters for all of their members. Let’s try this out now.

With our current settings, if we tried to connect to any of these hosts with Ansible, the command would fail (assuming you are not operating as the root user). This is because your SSH key is embedded for the rootuser on the remote systems and Ansible will by default try to connect as your current user. A connection attempt will get this error:

Output
host1 | UNREACHABLE! => {
    "changed": false,
    "msg": "Failed to connect to the host via ssh.",
    "unreachable": true
}

On the Ansible server, we’re using a user called sammy. Ansible will try to connect to each host with ssh sammy@server. This will not work if the sammy user is not on the remote system as well.

We can create a file that tells all of the servers in the “servers” group to connect as the root user.

To do this, we will create a directory in the Ansible configuration structure called group_vars. Within this folder, we can create YAML-formatted files for each group we want to configure:

  • sudo mkdir /etc/ansible/group_vars
  • sudo nano /etc/ansible/group_vars/servers

YAML files start with “—“, so make sure you don’t forget that part.

/etc/ansible/group_vars/servers
---
ansible_user: root

Note: Similar to the ansible_host variable, ansible_user replaced the variable ansible_ssh_user with the release of version 2.0. If you’re using an older version of Ansible than 2.0, be sure to use the older, longer variable.

Save and close this file when you are finished.

If you want to specify configuration details for every server, regardless of group association, you can put those details in a file at /etc/ansible/group_vars/all. Individual hosts can be configured by creating files named after their alias under a directory at /etc/ansible/host_vars.

Step 4 — Using Simple Ansible Commands

Now that we have our hosts set up and enough configuration details to allow us to successfully connect to our hosts, we can try out our very first command.

Ping all of the servers you configured by typing:

  • ansible -m ping all
Ping output
host1 | SUCCESS => {
    "changed": false,
    "ping": "pong"
}

host3 | SUCCESS => {
    "changed": false,
    "ping": "pong"
}

host2 | SUCCESS => {
    "changed": false,
    "ping": "pong"
}

This is a basic test to make sure that Ansible has a connection to all of its hosts.

The all means all hosts. We could just as easily specify a group:

  • ansible -m ping servers

We could also specify an individual host:

  • ansible -m ping host1

We can specify multiple hosts by separating them with colons:

  • ansible -m ping host1:host2

The -m ping portion of the command is an instruction to Ansible to use the “ping” module. These are basically commands that you can run on your remote hosts. The ping module operates in many ways like the normal ping utility in Linux, but instead it checks for Ansible connectivity.

The ping module doesn’t really take any arguments, but we can try another command to see how that works. We pass arguments into a script by typing -a.

The “shell” module lets us send a terminal command to the remote host and retrieve the results. For instance, to find out the memory usage on our host1 machine, we could use:

  • ansible -m shell -a ‘free -m’ host1
Shell output
host1 | SUCCESS | rc=0 >>
             total       used       free     shared    buffers     cached
Mem:          3954        227       3726          0         14         93
-/+ buffers/cache:        119       3834
Swap:            0          0          0

With that, your Ansible server configured and you can successfully communicate and control your hosts.

Conclusion

In this tutorial, we have configured Ansible and verified that it can communicate with each host. We have also used the ansible command to execute simple tasks remotely.

Although this is useful, we have not covered the most powerful feature of Ansible in this article: Playbooks. Ansible Playbooks are a powerful, simple way to manage server configurations and multi-machine deployments. For an introduction to Playbooks, see this guide. Additionally, we encourage you to check out the official Ansible documentation to learn more about the tool.

Source

How to Install Latest Nvidia Drivers on Ubuntu

With the recent advancements in Linux desktop distributions, gaming on Linux is coming to life. Linux users are beginning to enjoy gaming like Windows or Mac OSX users, with amazing performance.

Nvidia makes top-rated gaming graphics cards. However, for a long time, updating Nvidia drivers on Linux desktops was not so easy. Luckily, now the Proprietary GPU Drivers PPA packages updated nvidia-graphics-drivers for Ubuntu ready for installation.

Although this PPA is currently in testing, you can get fresh drivers from upstream, currently shipping Nvidia from it. If you are using Nvidia graphics card, this article will show you how to install the latest Nvidia drivers on Ubuntu and its derivatives such as Linux Mint.

How to Install Nvidia Drivers in Ubuntu

First start by adding the Proprietary GPU Drivers PPA to your system package sources and update your system package cache using apt command.

$ sudo add-apt-repository ppa:graphics-drivers/ppa
$ sudo apt update

Then install the latest stable nvidia graphics (which is nvidia-387 at the time of writing this article) using the following command.

$ sudo apt install nvidia-387

Alternatively, open Software & Updates under System Settings and go to Additional Drivers tab, select the required driver version and click “Apply Changes”.

Next, reboot your computer for the new driver to start working. Then use the lsmod command to check your installation status with the following command.

It will list all currently loaded kernel modules in Linux, then filter only nvidia using grep command.

$ lsmod | grep nvidia 

Some times updates do not work well as expected. If you face any issues with the latest drivers installation such as black screen on startup, you can remove it as follows.

$ sudo apt-get purge nvidia*

If you want to completely remove graphics-drivers PPA as well, run the following command to remove PPA.

$ sudo apt-add-repository --remove ppa:graphics-drivers/ppa

You might also like to read these following related articles on Gaming.

  1. 5 Best Linux Gaming Distributions That You Should Give a Try
  2. 12 Amazing Terminal Based Games for Linux Enthusiasts

That’s all! You can ask questions or share any useful additional information via the feedback form below.

Source

How to Open, Extract and Create RAR Files in Linux

RAR is a most popular tool for creating and extracting compressed archive (.rar) files. When we download an archive file from the web, we required a rar tool to extract them.

RAR is available freely under Windows operating systems to handle compressed files, but unfortunately, rar tool doesn’t pre-installed under Linux systems.

This article explains how to install unrar and rar command-line tools using official binary tar file under Linux systems to open, extract, uncompress or unrar an archive file.

Step 1: How to Install Unrar in Linux

On Debian and Ubuntu based distributions, you can easily install unrar package using the apt-get or apt program as shown.

$ sudo apt-get install unrar
Or
$ sudo apt install unrar

If you are using Fedora distribution, you can use the dnf command to install it.

$ sudp dnf install unrar

If you are using a CentOS / RHEL distribution, you need to download the latest unrar/rar file and install it using following commands.

--------------- On 64-bit --------------- 
# cd /tmp
# wget https://www.rarlab.com/rar/rarlinux-x64-5.6.0.tar.gz
# tar -zxvf rarlinux-x64-5.6.0.tar.gz
# cd rar
# sudo cp -v rar unrar /usr/local/bin/

--------------- On 32-bit --------------- 
# cd /tmp
# wget https://www.rarlab.com/rar/rarlinux-5.6.0.tar.gz
# tar -zxvf rarlinux-5.6.0.tar.gz
# cd rar
# sudo cp -v rar unrar /usr/local/bin/

Step 2: How to Open/Extract a RAR File in Linux

To open/extract a RAR file in current working directory, just use the following command with unrar e option.

# unrar e tecmint.rar

UNRAR 4.20 beta 3 freeware      Copyright (c) 1993-2012 Alexander Roshal

Extracting from tecmint.rar

Extracting  index.php                                                 OK
Extracting  index.html                                                OK
Extracting  xyz.txt                                                   OK
Extracting  abc.txt                                                   OK
All OK

To open/extract a RAR file in specific path or destination directory, just use the unrar e option, it will extract all the files in specified destination directory.

# unrar e tecmint.rar /home/

UNRAR 4.20 beta 3 freeware      Copyright (c) 1993-2012 Alexander Roshal

Extracting from tecmint.rar

Extracting  /home/index.php                                           OK
Extracting  /home/index.html                                          OK
Extracting  /home/xyz.txt                                             OK
Extracting  /home/abc.txt                                             OK
All OK

To open/extract a RAR file with their original directory structure. just issue below command with unrar x option. It will extract according their folder structure see below output of the command.

# unrar x tecmint.rar

UNRAR 4.20 beta 3 freeware      Copyright (c) 1993-2012 Alexander Roshal

Extracting from tecmint.rar

Creating    tecmint                                                   OK
Extracting  tecmint/index.php                                         OK
Extracting  tecmint/index.html                                        OK
Extracting  tecmint/xyz.txt                                           OK
Extracting  tecmint/abc.txt                                           OK
Creating    default                                                   OK
Extracting  default/index.php                                         OK
Extracting  default/index.html                                        OK
Creating    include                                                   OK
Extracting  include/abc.txt                                           OK
Creating    php                                                       OK
Extracting  php/xyz.txt                                               OK
All OK

Step 3: How to List a RAR File in Linux

To list a files inside a archive file use unrar l option. It will display the list of files with their sizesdatetime and permissions.

unrar l tecmint.rar

UNRAR 4.20 beta 3 freeware      Copyright (c) 1993-2012 Alexander Roshal

Archive tecmint.rar

 Name             Size   Packed Ratio  Date   Time     Attr      CRC   Meth Ver
-------------------------------------------------------------------------------
 index.php           0        8   0% 18-08-12 19:11 -rw-r--r-- 00000000 m3b 2.9
 index.html          0        8   0% 18-08-12 19:11 -rw-r--r-- 00000000 m3b 2.9
 xyz.txt             0        8   0% 18-08-12 19:11 -rw-r--r-- 00000000 m3b 2.9
 abc.txt             0        8   0% 18-08-12 19:11 -rw-r--r-- 00000000 m3b 2.9
 index.php           0        8   0% 18-08-12 19:22 -rw-r--r-- 00000000 m3b 2.9
 index.html          0        8   0% 18-08-12 19:22 -rw-r--r-- 00000000 m3b 2.9
 abc.txt             0        8   0% 18-08-12 19:22 -rw-r--r-- 00000000 m3b 2.9
 xyz.txt             0        8   0% 18-08-12 19:22 -rw-r--r-- 00000000 m3b 2.9
-------------------------------------------------------------------------------
    8                0       64   0%

Step 4: How to Test a RAR File in Linux

To test an integrity of a archive file, use option unrar t. The below command will perform a complete integrity check for each file and displays the status of the file.

unrar t tecmint.rar

UNRAR 4.20 beta 3 freeware      Copyright (c) 1993-2012 Alexander Roshal

Testing archive tecmint.rar

Testing     tecmint/index.php                                         OK
Testing     tecmint/index.html                                        OK
Testing     tecmint/xyz.txt                                           OK
Testing     tecmint/abc.txt                                           OK
Testing     default/index.php                                         OK
Testing     default/index.html                                        OK
Testing     include/abc.txt                                           OK
Testing     php/xyz.txt                                               OK
All OK

The unrar command is used to extract, list or test archive files only. It has no any option for creating RAR files under Linux. So, here we need to install RAR command-line utility to create archive files.

Step 5: How to Install Rar in Linux

To install RAR command option in Linux, just execute following command.

# sudo apt-get install rar
# sudo dnf install rar
# yum install rar
Sample Output
Loaded plugins: fastestmirror
Loading mirror speeds from cached hostfile
Dependencies Resolved
=========================================================================================
 Package			Arch			Version				Repository			Size
=========================================================================================
Installing:
 rar				i386            3.8.0-1.el5.rf      rpmforge			264 k

Transaction Summary
=========================================================================================
Install       1 Package(s)
Upgrade       0 Package(s)

Total download size: 264 k
Is this ok [y/N]: y
Downloading Packages:
rar-3.8.0-1.el5.rf.i386.rpm										| 264 kB     00:01
Running rpm_check_debug
Running Transaction Test
Finished Transaction Test
Transaction Test Succeeded
Running Transaction
  Installing     : rar                                          1/1

Installed:
  rar.i386 0:3.8.0-1.el5.rf

Complete!

Step 6: How to Create Rar File in Linux

To create a archive(RAR) file in Linux, run the following command with rar a option. It will create archive file for a tecmint directory.

rar a tecmint.rar tecmint

RAR 3.80   Copyright (c) 1993-2008 Alexander Roshal   16 Sep 2008
Shareware version         Type RAR -? for help

Evaluation copy. Please register.

Creating archive tecmint.rar

Adding    tecmint/index.php                                           OK
Adding    tecmint/index.html                                          OK
Adding    tecmint/xyz.txt                                             OK
Adding    tecmint/abc.txt                                             OK
Adding    tecmint                                                     OK
Done

Step 7: How to Delete files from Archive

To delete a file from a archive file, run the command.

rar d filename.rar

Step 8: How to Recover Archives

To recover or fix a archive file or files, run the command with option rar r.

rar r filename.rar

RAR 3.80   Copyright (c) 1993-2008 Alexander Roshal   16 Sep 2008
Shareware version         Type RAR -? for help

Building fixed.tecmint.rar
Scanning...
Data recovery record not found
Reconstructing tecmint.rar
Building rebuilt.tecmint.rar
Found  tecmint\index.php
Found  tecmint\index.html
Found  tecmint\xyz.txt
Found  tecmint\abc.txt
Found  tecmint
Done

Step 9: How to Update Archives

To update or add files to existing archive file, use the following command with option rar u.

rar u tecmint.rar tecmint.sql

RAR 3.80   Copyright (c) 1993-2008 Alexander Roshal   16 Sep 2008
Shareware version         Type RAR -? for help

Evaluation copy. Please register.

Updating archive tecmint.rar

Adding    tecmint.sql                                                 OK
Done

Now, verify that the file tecmint.sql is added to archive file.

rar l tecmint.rar

RAR 3.80   Copyright (c) 1993-2008 Alexander Roshal   16 Sep 2008
Shareware version         Type RAR -? for help

Archive tecmint.rar

 Name             Size   Packed Ratio  Date   Time     Attr      CRC   Meth Ver
-------------------------------------------------------------------------------
 index.php           0        8   0% 18-08-12 19:11 -rw-r--r-- 00000000 m3b 2.9
 index.html          0        8   0% 18-08-12 19:11 -rw-r--r-- 00000000 m3b 2.9
 xyz.txt             0        8   0% 18-08-12 19:11 -rw-r--r-- 00000000 m3b 2.9
 abc.txt             0        8   0% 18-08-12 19:11 -rw-r--r-- 00000000 m3b 2.9
 tecmint             0        0   0% 18-08-12 19:23 drwxr-xr-x 00000000 m0  2.0
 tecmint.sql 0 8 0% 18-08-12 19:46 -rw-r--r-- 00000000 m3b 2.9
-------------------------------------------------------------------------------
    6                0       40   0%

Step 10: How to Set Password to Archives

This is very interesting feature from Rar tool, it allows us to set a password to archive file. To password protect archive file use option rar a -p.

rar a -p tecmint.rar

Enter password (will not be echoed):

Reenter password:

AR 3.80   Copyright (c) 1993-2008 Alexander Roshal   16 Sep 2008
Shareware version         Type RAR -? for help

Evaluation copy. Please register.

Updating archive tecmint.rar

Updating  tecmint.sql                                                 OK
Done

Now verify it by extracting the archive file and see whether it will prompt us to enter password that we have set above.

rar x tecmint.rar

RAR 3.80   Copyright (c) 1993-2008 Alexander Roshal   16 Sep 2008
Shareware version         Type RAR -? for help

Extracting from tecmint.rar

Creating    tecmint                                                   OK
Extracting  tecmint/index.php                                         OK
Extracting  tecmint/index.html                                        OK
Extracting  tecmint/xyz.txt                                           OK
Extracting  tecmint/abc.txt                                           OK
Enter password (will not be echoed) for tecmint.sql:

Extracting  tecmint.sql                                               OK
All OK

Step 11: How to Lock Archives

Another interesting lock feature from rar tool, it provides a option to lock a particular archive file from extracting it.

rar k tecmint.rar

RAR 3.80   Copyright (c) 1993-2008 Alexander Roshal   16 Sep 2008
Shareware version         Type RAR -? for help

Processing archive tecmint.rar
Locking archive
Done

Conclusion

For mor RAR and Unrar options and usage, run the following command it will display a list of options with their description.

# man unrar
# man rar

We have presented almost all of the options above for rar and unrar commands with their examples. If you feel that we’ve missed anything in this list and you would like us to add, please update us using comment form below.

Source

How to Change Runlevels (targets) in SystemD

Systemd is a modern init system for Linux: a system and service manager which is compatible with the popular SysV init system and LSB init scripts. It was intended to overcome the shortcomings of SysV init as explained in the following article.

  1. The Story Behind ‘init’ and ‘systemd’: Why ‘init’ Needed to be Replaced with ‘systemd’ in Linux

On Unix-like systems such as Linux, the current operating state of the operating system is known as a runlevel; it defines what system services are running. Under popular init systems like SysV init, runlevels are identified by numbers. However, in systemd runlevels are referred to as targets.

Suggested Read: Managing System Startup Process and Services (SysVinit, Systemd and Upstart)

In this article, we will explain how to change runlevels (targets) with systemd. Before we move any further, let’s briefly under the relationship between runlevels numbers and targets.

  • Run level 0 is matched by poweroff.target (and runlevel0.target is a symbolic link to poweroff.target).
  • Run level 1 is matched by rescue.target (and runlevel1.target is a symbolic link to rescue.target).
  • Run level 3 is emulated by multi-user.target (and runlevel3.target is a symbolic link to multi-user.target).
  • Run level 5 is emulated by graphical.target (and runlevel5.target is a symbolic link to graphical.target).
  • Run level 6 is emulated by reboot.target (and runlevel6.target is a symbolic link to reboot.target).
  • Emergency is matched by emergency.target.

How to View Current target (run level) in Systemd

When the system boots, by default systemd activates the default.target unit. It’s main work is to activate services and other units by pulling them in via dependencies.

To view the default target, type the command below.

#systemctl get-default 

graphical.target

To set the default target, run the command below.

# systemctl set-default multi-user.target  

How to Change the target (runlevel) in Systemd

While the system is running, you can switch the target (run level), meaning only services as well as units defined under that target will now run on the system.

To switch to runlevel 3, run the following command.

# systemctl isolate multi-user.target 

To change the system to runlevel 5, type the command below.

# systemctl isolate graphical.target

For more information about systemd, read through these useful articles:

  1. How to Manage ‘Systemd’ Services and Units Using ‘Systemctl’ in Linux
  2. How to Create and Run New Service Units in Systemd Using Shell Script
  3. Managing System Startup Process and Services (SysVinit, Systemd and Upstart)
  4. Manage Log Messages Under Systemd Using Journalctl [Comprehensive Guide]

In this guide, we showed how to change runlevels (targets) with systemd. Use the comment form below to send us any questions or thoughts concerning this article.

Source

Tuned – Automatic Performance Tuning of CentOS/RHEL Servers

To maximize the end-to-end performance of services, applications and databases on a server, system administrators usually carry out custom performance tunning, using various tools, both generic operating system tools as well as third-party tools. One of the most useful performance tuning tools on CentOS/RHEL/Fedora Linux is Tuned.

Read Also20 Commad Line Tools Monitor Linux Performance

Tuned is a powerful daemon for dynamically auto-tuning Linux server performance based on information it gathers from monitoring use of system components, to squeeze maximum performance out of a server.

It does this by tuning system settings dynamically on the fly depending on system activity, using tuning profiles. Tuning profiles include sysctl configs, disk-elevators configs, transparent hugepages, power management options and your custom scripts.

By default tuned will not dynamically adjust system settings, but you can modify how the tuned daemon operates and allow it to dynamically alter settings based on system usage. You can use the tuned-admcommand-line tool to manage the daemon once it is running.

How to Install Tuned on CentOS/RHEL & Fedora

On CentOS/RHEL 7 and Fedoratuned comes pre-installed and activated by default, but on older version of CentOS/RHEL 6.x, you need to install it using the following yum command.

# yum install tuned

After the installation, you will find following important tuned configuration files.

  • /etc/tuned – tuned configuration directory.
  • /etc/tuned/tuned-main.conf– tuned mail configuration file.
  • /usr/lib/tuned/ – stores a sub-directory for all tuning profiles.

Now you can start or manage the tuned service using following commands.

--------------- On RHEL/CentOS 7 --------------- 
# systemctl start tuned	        
# systemctl enable tuned	
# systemctl status tuned	
# systemctl stop tuned		

--------------- On RHEL/CentOS 6 ---------------
# service tuned start
# chkconfig tuned on
# service tuned status
# service tuned stop

Now you can control tuned using the tunde-adm tool. There are a number of predefined tuning profiles already included for some common use cases. You can check the current active profile with following command.

# tuned-adm active

From the output of the above command, the test system (which is a Linode VPS) is optimized for running as a virtual guest.

Check Current Tuned Profile

Check Current Tuned Profile

You can get a list of available tuning profiles using following command.

# tuned-adm list

List Available Tuned Profiles

List Available Tuned Profiles

To switch to any of the available profiles for example throughput-performance – a tuning which results into excellent performance across a variety of common server workloads.

# tuned-adm  profile throughput-performance
# tuned-adm active

Switch to Tuning Profile

Switch to Tuning Profile

To use the recommended profile for your system, run the following command.

# tuned-adm recommend

And you can disable all tuning as shown.

 
# tuned-adm off

How To Create Custom Tuning Profiles

You can also create new profiles, we will create a new profile called test-performance which will use settings from an existing profile called latency-performance.

Switch into the path which stores sub-directories for all tuning profiles, create a new sub-directory called test-performance for your custom tuning profile there.

# cd /usr/lib/tuned/
# mkdir test-performance

Then create a tuned.conf configuration file in the directory.

# vim test-performance/tuned.conf

Copy and paste the following configuration in the file.

[main]
include=latency-performance
summary=Test profile that uses settings for latency-performance tuning profile

Save the file and close it.

If you run the tuned-adm list command again, the new tuning profile should exist in the list of available profiles.

# tuned-adm list

Check New Tuned Profile

Check New Tuned Profile

To activate new tuned profile, issue following command.

# tuned-adm  profile test-performance

For more information and further tinkering options, see the tuned and tuned-adm man pages.

# man tuned
# man tuned-adm

Tuned Github repositoryhttps://github.com/fcelda/tuned

That’s all for now! Tuned is a daemon that monitors usage of system components and dynamically auto-tunes a Linux server for maximum performance. If you have any questions or thoughts to share, use the feedback form below to reach us.

Source

Glances – An Advanced Real Time System Monitoring Tool for Linux

Earlier, we’ve written about many Linux System Monitor Tools that can be used to monitor performance of Linux systems, but we think that, most users prefer the default one that comes with every Linux distributions (topcommand).

The top command is real time task manager in Linux and the most frequently used system monitoring tool in GNU/Linux distributions to find the performance related bottlenecks in system which help us to take corrective actions. It has a nice minimalist interface, comes with few amount of reasonable options that enables us to get a better idea about overall system performance quickly.

However, sometimes its very tricky to find an application/process that consuming lots of system resources is a bit difficult under top. Because top command doesn’t have a ability to highlights programs that are eating too much of CPURAM, other resources.

For keeping such approach, here we are bringing a powerful system monitor program called “Glances” that automatically highlights programs that are utilizing highest system resources and providing maximum of information about Linux/Unix server.

What is Glances?

Glances is a cross-platform command-line curses-based system monitoring tool written in Python language which use the psutil library to grab informations from the system. With Glance, we can monitor CPULoad AverageMemoryNetwork InterfacesDisk I/OProcesses and File System spaces utilization.

Glances is a free tool and licensed under GPL to monitory GNU/Linux and FreeBSD operating systems. There are lots of interesting options available in Glances as well. One of the main features we have seen in Glances is that we can set thresholds (carefulwarning and critical) in configuration file and informations will be shown in colors which indicates the bottleneck in the system.

Glances Features

  1. CPU Informations (user related applications, system core programs and idle programs.
  2. Total memory Information including RAM, Swap, Free memory etc.
  3. The average CPU load for the past 1min, 5mins and 15 mins.
  4. Network Download/Upload rates of network connections.
  5. Total number of processes, active ones, sleeping processes etc.
  6. Disk I/O related (read or write) speed details
  7. Currently mounted devices disk usages.
  8. Top processes with their CPU/Memory usages, Names and location of application.
  9. Shows the current date and time at bottom.
  10. Highlights processes in Red that consumes highest system resources.

Here is an example screen grab of Glances.

Install Glances Monitoring in Centos

Glances View

Installation of Glances in Linux/Unix Systems

Although it’s a very young utility, you can install “Glances” in Red Hat based systems by turning on EPEL repository and then run the following command on the terminal.

On RHEL/CentOS/Fedora
# yum install -y glances
On Debian/Ubuntu/Linux Mint
$ sudo apt-add-repository ppa:arnaud-hartmann/glances-stable
$ sudo apt-get update
$ sudo apt-get install glances

Usage of Glances

To start, issue the basic syntax on the terminal.

# glances

Install Glances in Ubuntu

Glances Preview – Ubuntu 13.10

Press ‘q‘ or (‘ESC‘ or ‘Ctrl&C‘ also works) to quit from Glances terminal. Here, is the another screen grab taken from the CentOS 6.5 system.

Glances Monitoring Linux

Glances Preview – CentOS 6.5

By default, interval time is set to ‘1‘ second. But you can define the custom interval time while running glances from the terminal.

# glances -t 2
Glances Color Codes

Meaning of Glances color code:

  1. GREEN: OK (everything is fine)
  2. BLUE: CAREFUL (need attention)
  3. VIOLET: WARNING (alert)
  4. RED: CRITICAL (critical)

We can set thresholds in configuration file. By default thresholds set is (careful=50warning=70 and critical=90), we can customized as per our needs. The default configuration file is located at ‘/etc/glances/glances.conf’.

Glances Options

Besides, several command line options, glances provides many more hot keys to find output information while glances is running. Below are the list of several hot keys.

  1. a – Sort processes automatically
  2. c – Sort processes by CPU%
  3. m – Sort processes by MEM%
  4. p – Sort processes by name
  5. i – Sort processes by I/O rate
  6. d – Show/hide disk I/O stats ols
  7. f – Show/hide file system statshddtemp
  8. n – Show/hide network stats
  9. s – Show/hide sensors stats
  10. y – Show/hide hddtemp stats
  11. l – Show/hide logs
  12. b – Bytes or bits for network I/Oools
  13. w – Delete warning logs
  14. x – Delete warning and critical logs
  15. x – Delete warning and critical logs
  16. 1 – Global CPU or per-CPU stats
  17. h – Show/hide this help screen
  18. t – View network I/O as combination
  19. u – View cumulative network I/O
  20. q – Quit (Esc and Ctrl-C also work)

Use Glances on Remote Systems

With the Glances, you can even monitor remote systems too. To use ‘glances‘ on remote systems, run the ‘glances -s‘ (-s enables server/client mode) command on the server.

# glances -s

Define the password for the Glances server
Password: 
Password (confirm): 
Glances server is running on 0.0.0.0:61209

Note : Once, you issue ‘glances‘ command, it will prompt you to define the password for the Glances server. Define the password and hit enter, you see glances running on port 61209.

Now, go to the remote host and execute the following command to connect to a Glances server by specifying IP address or hostname as shown below. Here ‘172.16.27.56‘ is my glances server IP Address.

# glances -c -P 172.16.27.56

Below are few notable points that user must know while using glances in server/client mode.

* In server mode, you can set the bind address -B ADDRESS and listening TCP port -p PORT.
* In client mode, you can set the TCP port of the server -p PORT.
* Default binding address is 0.0.0.0, but it listens on all network interfaces at port 61209.
* In server/client mode, limits are set by the server side.
* You can also define a password to access to the server -P password.

Read AlsoUse Glances to Monitor Remote Linux in Web Server Mode

Conclusion

Glances is a much resources friendly tool for most users. But if you’re a system administrator who’d like to quickly get overall “idea” about systems by just glancing at command line, then this tool will be must have tool for system administrators.

Source

WP2Social Auto Publish Powered By : XYZScripts.com