Terminator 0.97 – A Terminal Emulator to Manage Multiple Terminal Windows on Linux

Terminator is a terminal emulator released under General Public License and is available for GNU/LinuxPlatform. The application program lets you use multiple splitted and resized terminals, all at once on a single screen similar to tmux terminal multiplexer.

How it is Different

Having multiple Gnome Terminal in one window in a very flexible manner is a plus for Linux nerds.

Who Should use It

Terminator is aimed at those who normally arrange lots of terminals near each other, but don’t want to use a frame based window manager.

What are its Features

  1. Automatically logs of all the terminal sessions.
  2. Drag and Drop features for text and URLs.
  3. Horizontal scrolling is supported.
  4. Find, a function to search for any specific text within the terminal.
  5. Support for UTF­8.
  6. Intelligent Quit – It knows about the running process, if any.
  7. Vertical scrolling is convenient.
  8. Freedom of use, General Public License.
  9. Support for Tab based Browsing.
  10. Portal ­ written in Python.
  11. Platform – Support for GNU/Linux Platform.

Installation of Terminator Emulator on Linux

On most of the standard Linux Distributions, terminator 0.97 version is available in the repository, and cab be installed using apt or yum.

On RHEL/CentOS/Fedora

First, you need to enable RPMForge repository under your system and then you install Terminator emulator using yum command as shown.

# yum install terminator

On Debian/Ubuntu/Linux Mint

On Debian based distributions, you can easily install using apt-get command as shown.

# apt­-get install terminator

How to use Terminator

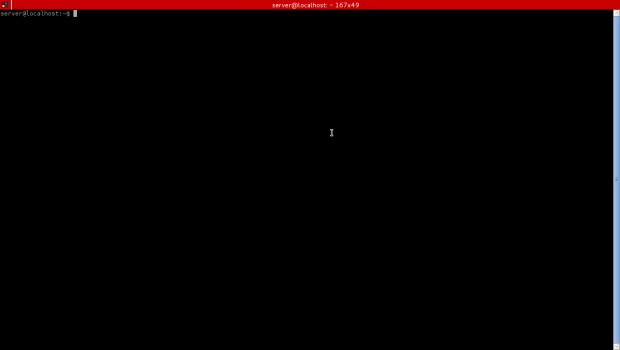
Run the “terminator” command in the terminal to use it. Once, you fire the command you will see a screen similar to below.

Terminator Terminal Window

Terminator Terminal Window

Terminal Emulator Keyboard Shortcuts

To get the most out of Terminator it is crucial to know the key-bindings to control Terminator. The default shortcut keys that I use most are shown below.

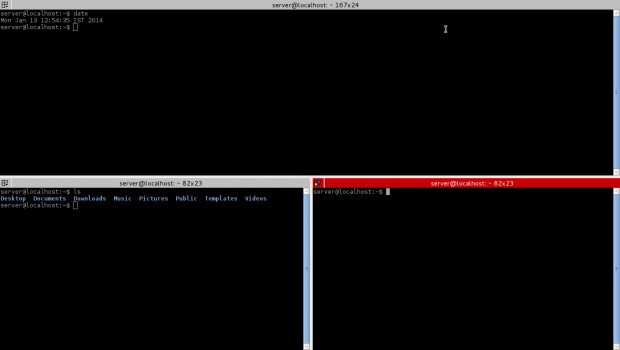
  1. Split Terminal Horizontally – Ctrl+Shift+0
Split Terminal Windows

Split Terminal Windows

  1. Split Terminal Vertically – Ctrl+Shift+E
Split Terminal Vertically

Split Terminal Vertically

  1. Move Parent Dragbar Right – Ctrl+Shift+Right_Arrow_key
  2. Move Parent Dragbar Left – Ctrl+Shift+Left_Arrow_key
  3. Move Parent Dragbar Up – Ctrl+Shift+Up_Arrow_key
  4. Move Parent Dragbar Down – Ctrl+Shift+Down_Arrow_key
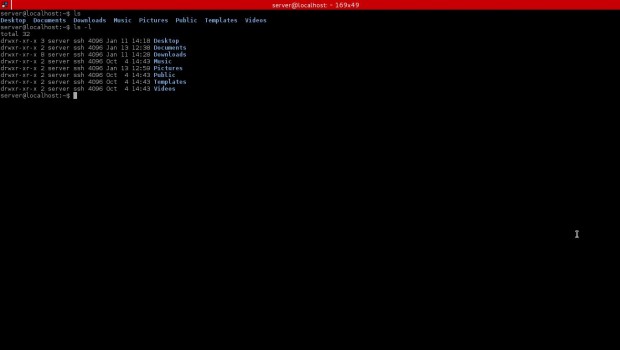
  5. Hide/Show Scrollbar – Ctrl+Shift+s
Hide/Show Terminal Scrollbar

Hide/Show Terminal Scrollbar

Note: Check the hidden scrollbar above, it can again be made visible using the same above key combination.

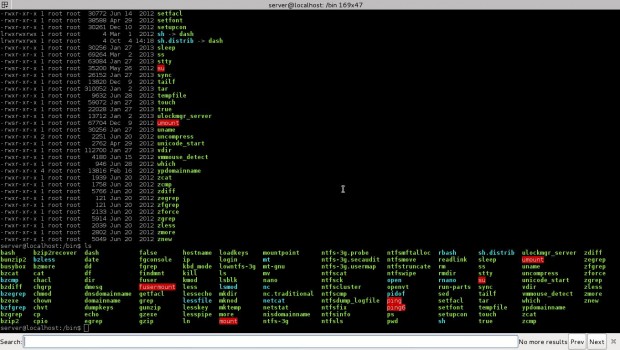
  1. Search for a Keyword – Ctrl+Shift+f
  2. Move to Next Terminal – Ctrl+Shift+N or Ctrl+Tab
Move to Next Terminal

Move to Next Terminal

  1. Move to the Above Terminal – Alt+Up_Arrow_Key
  2. Move to the Below Terminal – Alt+Down_Arrow_Key
  3. Move to the Left Terminal – Alt+Left_Arrow_Key
  4. Move to the Right Terminal – Alt+Right_Arrow_Key
  5. Copy a text to clipboard – Ctrl+Shift+c
  6. Paste a text from Clipboard – Ctrl+Shift+v
  7. Close the Current Terminal – Ctrl+Shift+w
  8. Quit the Terminator – Ctrl+Shift+q
  9. Toggle Between Terminals – Ctrl+Shift+x
  10. Open New Tab – Ctrl+Shift+t
  11. Move to Next Tab – Ctrl+page_Down
  12. Move to Previous Tab – Ctrl+Page_up
  13. Increase Font size – Ctrl+(+)
  14. Decrease Font Size – Ctrl+(­)
  15. Reset Font Size to Original – Ctrl+0
  16. Toggle Full Screen Mode – F11
  17. Reset Terminal – Ctrl+Shift+R
  18. Reset Terminal and Clear Window – Ctrl+Shift+G
  19. Remove all the terminal grouping – Super+Shift+t
  20. Group all Terminal into one – Super+g

Note: Super is a key with the windows logo right of left CTRL.

Reference Links

https://launchpad.net/terminator

That’s all for now.

Python SciPy Tutorial – Linux Hint

We will see what is the use of SciPy library in Python and how it helps us to work with mathematical equations and algorithms in an interactive manner. The good thing about SciPy Python package is that if we want classes or construct web pages, SciPy is fully compatible with the system as a whole and can provide seamless integration.

conda install -c anaconda scipy

Once the library is installed, we can import it as:

import scipy

Finally, as we will be using NumPy as well (It is recommended that for all NumPy operations, we use NumPy directly instead of going through the SciPy package):

import numpy


It is possible that in some cases, we will also like to plot our results for which we will use the Matplotlib library. Perform the following import for that library:

import matplotlib


I will be using the Anaconda manager for all the examples in this lesson. I will launch a Jupyter Notebook for the same:

Now that we are ready with all the import statements to write some code, let’s start diving into SciPy package with some practical examples.

Working with Polynomial Equations

We will start by looking at simple Polynomial equations. There are two ways with which we can integrate Polynomial functions into our program. We can make use of poly1d class which makes use of coefficients or the roots of a polynomial for initialising a polynomial. Let’s look at an example:

from numpy import poly1d
first_polynomial = poly1d([3, 4, 7])
print(first_polynomial)

When we run this example, we will see the following output:

Clearly, the polynomial representation of the equation is printed as the output so that the result is pretty easy to understand. We can perform various operations on this polynomial as well, like square it, find its derivative or even solve it for a value of x. Let’s try doing all of these in the next example:

print(“Polynomial Square: \n)
print(first_polynomial * first_polynomial)

print(“Derivative of Polynomial: \n)
print(first_polynomial.deriv())

print(“Solving the Polynomial: \n)
print(first_polynomial(3))

When we run this example, we will see the following output:

Just when I was thinking that this is all we could do with SciPy, I remembered that we can integrate a Polynomial as well. Let’s run a final example with Polynomials:

print(“Integrating the Polynomial: \n)
print(first_polynomial.integ(1))

The integer we pass tells the package how many times to integrate the polynomial:

We can simply pass another integer which tells the package how many times to integrate this polynomial.

Solving Linear Equations

It is even possible to solve linear equations with SciPy and find their roots, if they exist. To solve linear equations, we represent the set of equations as NumPy arrays and their solution as a separate NumPy arrays. Let’s visualise it with an example where we do the same and make use of linalg package to find the roots of the equations, here are the equations we will be solving:

1x + 5y = 6
3x + 7y = 9

Let’s solve the above equations:

from scipy import linalg

equation = np.array([[1, 5], [3, 7]])
solution = np.array([[6], [9]])

roots = linalg.solve(equation, solution)

print(“Found the roots:”)
print(roots)

print(\n Dot product should be zero if the solutions are correct:”)
print(equation.dot(roots) – solution)


When we run the above program, we will see that the dot product equation gives zero result, which means that the roots which the program found were correct:

Fourier Transformations with SciPy

Fourier Transformations helps us to express a function as separate components that make up that function and guides us about the way through which we can recombine those components to get the original function back.

Let’s look at a simple example of Fourier Transformations where we plot the sum of two cosines using the Matplotlib library:

from scipy.fftpack import fft

# Number of sample points
= 500

# sample spacing
= 1.0 / 800.0
= np.linspace(0.0, N*T, N)
= np.cos(50.0 * 2.0* np.pi * x) + 0.5 * np.cos(80.0 * 2.0 * np.pi * x)
yf = fft(y)
xf = np.linspace(0.0, 1.0/(2.0 * T), N//2)

# matplotlib for plotting purposes
import matplotlib.pyplot as plt
plt.plot(xf, 2.0/N * np.abs(yf[0:N//2]))

plt.title(‘Info’)
plt.ylabel(‘Y axis’)
plt.xlabel(‘X axis’)

plt.grid()
plt.show()

Here, we started by constructing a sample space and cosine equation which we then transformed and plotted. Here is the output of the above program:

This is one of the good example where we see SciPy being used in a complex mathematical equation to visualise things easily.

Vectors and Matrix with SciPy

Now that we know a lot of things which SciPy is capable of, we can be sure that SciPy can also work with Vectors and Matrix. The matrices are an important part of linear algebra as matrices is something we use to represent Vector mappings as well.

Just like we looked at solving linear equations with SciPy, we can represent vectors with np.array() functions. Let’s start by constructing a matrix:

my_matrix = np.matrix(np.random.random((3, 3)))
print(my_matrix)

Here is the output of the above snippet:

Whenever we talk about matrices, we always talk about Eigenvalues and Eigenvectors. To put in simple words, Eigenvectors are the vectors which, when multiplied with a matrix, do not change their direction, as opposed to most of the vectors. This means that even when you multiply an Eigenvectors with a matrix, there exists a value (or eigenvalue) which is one of the factor of the multiplication. This means:

Ax = λx.

In above equation, A is the matrix, λ is the Eigenvalue and x is the Vector. Let’s write a simple code snippet to find the Eigenvalues for a given Vector:

la, vector = linalg.eig(my_matrix)

print(vector[:, 0])
print(vector[:, 1])

print(linalg.eigvals(my_matrix))

When we run this example, we will see the following output:

Calculating Matrix Determinant

The next operation we will carry out with SciPy is to calculate the determinant of a 2-dimensional matrix. We will reuse the matrix we used in the last code snippet here:

linalg.det( my_matrix )

When we run this example, we will see the following output:

Conclusion

In this lesson, we looked at a lot of good examples where SciPy can help us by carrying out complex mathematical computations for us with an easy to use API and packages.

Source

Impress Your Friends with This Fake Hollywood Hacker Terminal

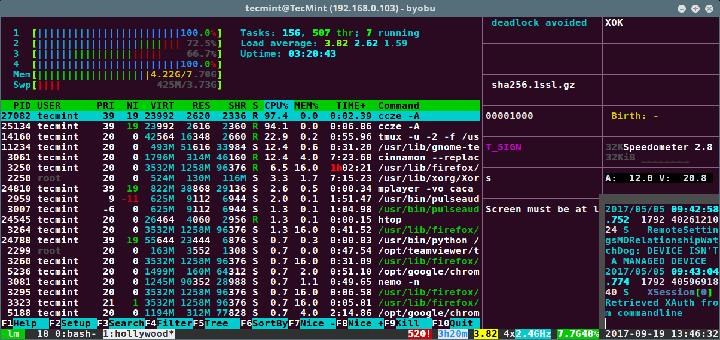
In Hollywood movies, hacking always seems interesting, especially because the whole action is spiced up with fancy desktop environments/backgrounds, rapidly uncontrolled typing (with loud typing noise/keystrokes) and rapid scrolling of command output on colorful terminals.

To make it all seem real, the hackers normally keep on explaining real-world hacking concepts (and mentioning used tools/commands) while breaking into computer systems or networks and the action gets done in a matter of seconds or minutes, which is far different from the practical real-world scenario.

However, if you want to get a feel of hacking in the movies, easily on your Linux console, then you need to install the Hollywood terminal emulator: developed by Canonical’s Dustin Kirkland.

Watch how Hollywood Terminal works:

This terminal emulator produces Hollywood melodrama technobabble in your byobu console. In this article, we will show you how to setup the byubo console and Hollywood movies hackers’ terminal emulator in Ubuntu and it’s derivatives such as Linux Mint, Kubuntu etc.

First, add the appropriate repository to your system software sources, then update the packages’ sources list and finally install the packages as follows:

$ sudo apt-add-repository ppa:hollywood/ppa
$ sudo apt-get update
$ sudo apt-get install byobu hollywood

To launch Hollywood terminal type:

$ hollywood
Hollywood Terminal for Linux

Hollywood Terminal for Linux

To stop it, simply press [Ctrl+C] to kill the hollywood script itself, then type exit to quit the byobu console.

To set the number of splits to divide your screen, use the -s flag.

$ hollywood -s 4

You can turn off the theme song, using -q flag like this.

$ hollywood -q

You might also like to read these following related articles on Linux Terminal.

  1. Terminator – A Terminal Emulator to Manage Multiple Terminal Windows on Linux
  2. Terminix – A New GTK 3 Tiling Terminal Emulator for Linux
  3. Shell In A Box – A Web-Based SSH Terminal to Access Remote Linux Servers
  4. Nautilus Terminal – An Embedded Terminal for Nautilus File Browser in GNOME
  5. Guake – A Drop-Down Terminal for Gnome Desktops
  6. GoTTY – Share Your Linux Terminal (TTY) as a Web Application

That’s all. Hope you find this interesting but remember real life hacking is complicated, you need to take time to learn, understand and penetrate operating systems or applications and beyond.

If you know of any similar fancy command line utilities out there, do share with us including any other thoughts about this article

GoTTY – Share Your Linux Terminal (TTY) as a Web Application

GoTTY is a simple GoLang based command line tool that enables you to share your terminal(TTY) as a web application. It turns command line tools into web applications.

It employs Chrome OS’ terminal emulator (hterm) to execute a JavaScript based terminal on a web browsers. And importantly, GoTTY runs a web socket server that basically transfers output from the TTY to clients and receives input from clients (that is if input from clients is permitted) and forwards it to the TTY.

Read AlsoTeleconsole – Share Your Linux Terminal with Your Friends

Its architecture (hterm + web socket idea) was inspired by Wetty program which enables terminal over HTTPand HTTPS.

Prerequisites:

You should have GoLang (Go Programming Language) environment installed in Linux to run GoTTY.

How To Install GoTTY in Linux Systems

If you already have a working GoLang environment, run the go get command below to install it:

# go get github.com/yudai/gotty

The command above will install the GoTTY binary in your GOBIN environment variable, try to check if that is the case:

# ls $GOPATH/bin/
Check GOBIN Environment

Check GOBIN Environment

How To Use GoTTY in Linux

To run it, you can use the GOBIN env variable and command auto-completion feature as follows:

# $GOBIN/gotty

Else, run GoTTY or any other Go program without typing the full path to the binary, add your GOBIN variable to PATH in the ~/.profile file using the export command below:

export PATH="$PATH:$GOBIN"

Save the file and close it. Then source the file to effect the changes above:

# source ~/.profile

The general syntax for running GoTTY commands is:

Usage: gotty [options] <Linux command here> [<arguments...>]

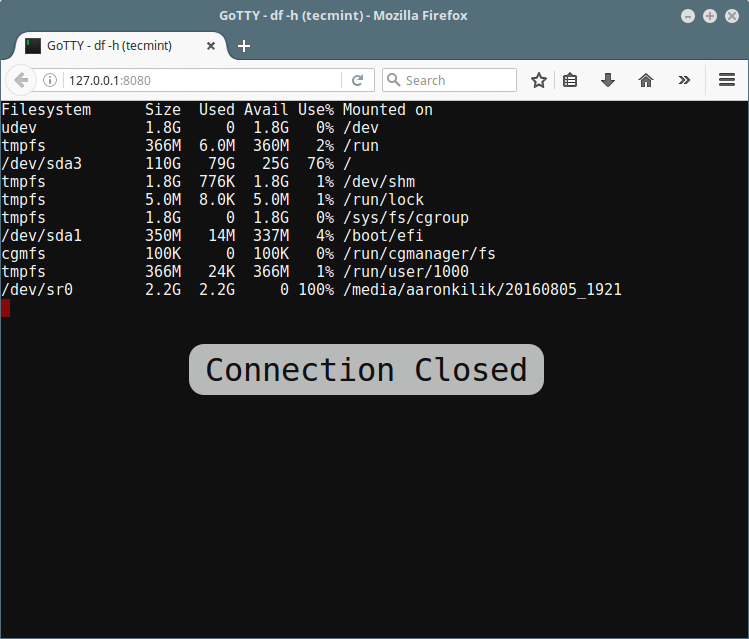
Now run GoTTY with any command such as the df command to view system disk partitions space and usage from the web browser:

# gotty df -h

GoTTY will start a web server at port 8080 by default. Then open the URL: http://127.0.0.1:8080/ on your web browser and you will see the running command as if it were running on your terminal:

Gotty Linux Disk Usage

Gotty Linux Disk Usage

How To Customize GoTTY in Linux

You can alter default options and your terminal (hterm) in the profile file ~/.gotty, it will load this file by default in case it exists.

This is the main customization file read by gotty commands, so, create it as follows:

# touch ~/.gotty

And set your own valid values for the config options (find all config options here) to customize GoTTY for example:

// Listen at port 9000 by default
port = "9000"

// Enable TSL/SSL by default
enable_tls = true

// hterm preferences
// Smaller font and a little bit bluer background color
preferences {
    font_size = 5,
    background_color = "rgb(16, 16, 32)"
}

You can set your own index.html file using the --index option from the command line:

# gotty --index /path/to/index.html uptime

How to Use Security Features in GoTTY

Because GoTTY doesn’t offer reliable security by default, you need to manually use certain security features explained below.

Permit Clients to Run Commands/Type Input in Terminal

Note that, by default, GoTTY doesn’t permit clients to type input into the TTY, it only enables window resizing.

However, you can use the -w or --permit-write option to allow clients to write to the TTY, which is not recommended due to security threats to the server.

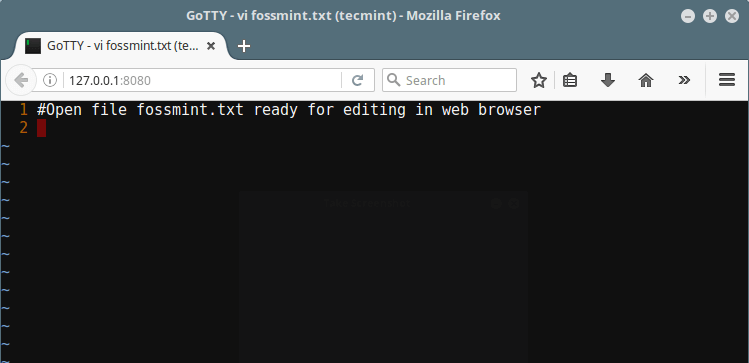
The following command will use vi command line editor to open the file fossmint.txt for editing in the web browser:

# gotty -w vi fossmint.txt

Below is the vi interface as seen from the web browser (use vi commands here as usual):

Gotty Web Vi Editor

Gotty Web Vi Editor

Use GoTTY with Basic (Username and Password) Authentication

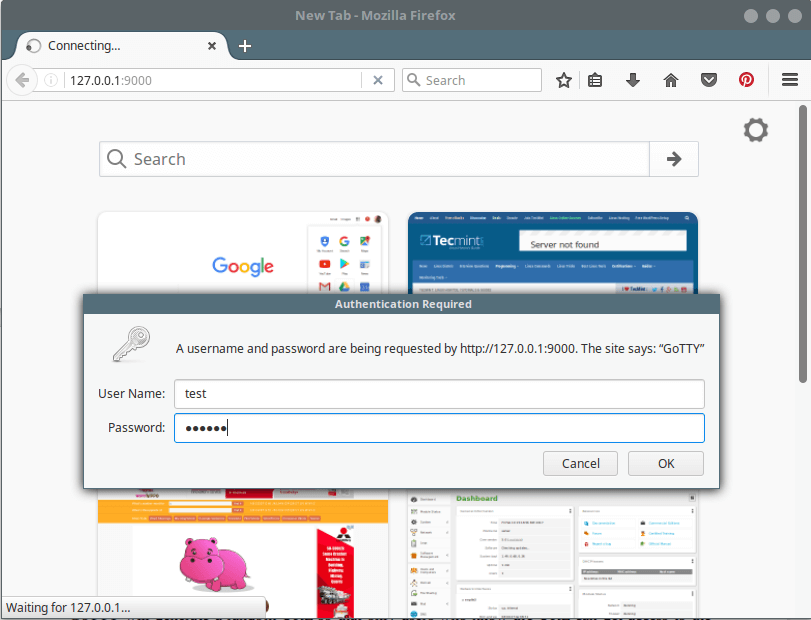
Try to activate a basic authentication mechanism, where clients will be required to input the specified username and password to connect to the GoTTY server.

The command below will restrict client access using the -c option to ask users for specified credentials (username: test and password: @67890):

# gotty -w -p "9000" -c "test:@67890" glances
Gotty with Basic Authentication

Gotty with Basic Authentication

Gotty Generate Random URL

Another way of restricting access to the server is by using the -r option. Here, GoTTY will generate a random URL so that only users who know the URL can get access to the server.

Also use the –title-format “GoTTY – {{ .Command }} ({{ .Hostname }})” option to define the web browsers interface title and glances command is used to show system monitoring stats:

# gotty -r --title-format "GoTTY - {{ .Command }} ({{ .Hostname }})" glances

The following is result of the command above as seen from the web browser interface:

Gotty Random URL for Glances Linux Monitoring

Gotty Random URL for Glances Linux Monitoring

Use GoTTY with SSL/TLS

Because by default, all connections between the server and clients are not encrypted, when you send secret information through GoTTY such as user credentials or any other info, you have to use the -t or --tls option which enables TLS/SSL on the session:

GoTTY will by default read the certificate file ~/.gotty.crt and key file ~/.gotty.key, therefore, start by creating a self-signed certification as well as the key file using the openssl command below (answer the question asked in order to generate the cert and key files):

# openssl req -x509 -nodes -days 365 -newkey rsa:2048 -keyout ~/.gotty.key -out ~/.gotty.crt

Then use GoTTY in a secure way with SSL/TLS enabled as follows:

# gotty -tr --title-format "GoTTY - {{ .Command }} ({{ .Hostname }})" glances

Share Your Terminal With Multiple Clients

You can make use of terminal multiplexers for sharing a single process with multiple clients, the following command will start a new tmux session named gotty with glances command (make sure you have tmux installed):

# gotty tmux new -A -s gotty glances 

To read a different config file, use the –config “/path/to/file” option like so:

# gotty -tr --config "~/gotty_new_config" --title-format "GoTTY - {{ .Command }} ({{ .Hostname }})" glances

To display the GoTTY version, run the command:

# gotty -v 

Visit the GoTTY GitHub repository to find more usage examples: https://github.com/yudai/gotty

That’s all! Have you tried it out? How do you find GoTTY?

Shell In A Box – A Web-Based SSH Terminal to Access Remote Linux Servers

Shell In A Box (pronounced as shellinabox) is a web based terminal emulator created by Markus Gutschke. It has built-in web server that runs as a web-based SSH client on a specified port and prompt you a web terminal emulator to access and control your Linux Server SSH Shell remotely using any AJAX/JavaScript and CSSenabled browsers without the need of any additional browser plugins such as FireSSH.

In this tutorial, I describe how to install Shellinabox and access remote SSH terminal using a modern web browser on any machine. Web-based SSH is very useful when you are protected with firewall and only HTTP(s) traffic can get through.

Installing Shellinabox on Linux

By default, Shellinabox tool is included on many Linux distributions through default repositories, including DebianUbuntu and Linux Mint.

Make sure that your repository enabled and available to install Shellinabox from the that repository. To check, do a search for Shellinabox with the “apt-cache” command and then install it using “apt-get” command. `

On Debian, Ubuntu and Linux Mint
$ sudo apt-cache search shellinabox
$ sudo apt-get install openssl shellinabox
On RHEL, CentOS and Fedora

On Red Hat based distributions, you need to first have enable EPEL repository and then install it using the following “yum” command. (Fedora users don’t need to enable EPEL, it’s already a part of Fedora project).

# yum install openssl shellinabox

Configuring Shellinabox

By default, shellinaboxd listens on TCP port 4200 on localhost. For security reason, I change this default port to a random (i.e. 6175) to make it difficult for anyone to reach your SSH box. Also, during installation a new self-signed SSL certificate automatically created under “/var/lib/shellinabox” to use HTTPS protocol.

On Debian, Ubuntu and Linux Mint
$ sudo vi /etc/default/shellinabox
# TCP port that shellinboxd's webserver listens on
SHELLINABOX_PORT=6175

# specify the IP address of a destination SSH server
SHELLINABOX_ARGS="--o-beep -s /:SSH:172.16.25.125"

# if you want to restrict access to shellinaboxd from localhost only
SHELLINABOX_ARGS="--o-beep -s /:SSH:172.16.25.125 --localhost-only"
On RHEL, CentOS and Fedora
# vi /etc/sysconfig/shellinaboxd
# TCP port that shellinboxd's webserver listens on
PORT=6175

# specify the IP address of a destination SSH server
OPTS="-s /:SSH:172.16.25.125"

# if you want to restrict access to shellinaboxd from localhost only
OPTS="-s /:SSH:172.16.25.125 --localhost-only"

Starting Shellinabox

Once you’ve done with the configuration, you can start the service by issuing following command.

On Debian, Ubuntu and Linux Mint
$ sudo service shellinaboxd start
On RHEL and CentOS
# service shellinaboxd start
On Fedora
# systemctl enable shellinaboxd.service
# systemctl start shellinaboxd.service

Verify Shellinabox

Now let’s verify whether Shellinabox is running on port 6175 using “netstat” command.

$ sudo netstat -nap | grep shellinabox
or
# netstat -nap | grep shellinabox
tcp        0      0 0.0.0.0:6175            0.0.0.0:*               LISTEN      12274/shellinaboxd

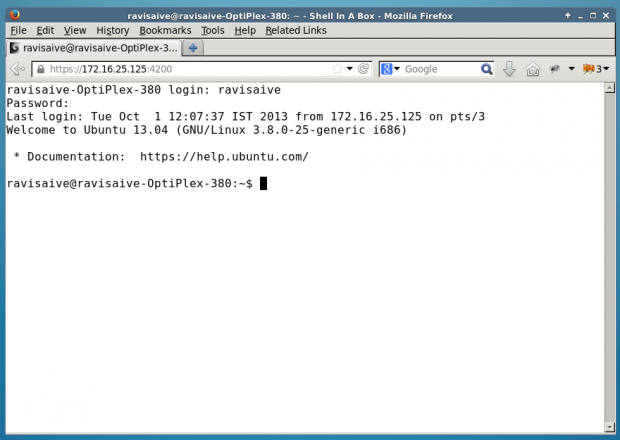
Now open up your web browser, and navigate to https://Your-IP-Adress:6175. You should be able to see a web-based SSH terminal. Login using your username and password and you should be presented with your shell prompt.

Install Shellinabox in Linux

Shellinabox SSH Login

Shellinabox SSH Shell

Shellinabox SSH Shell

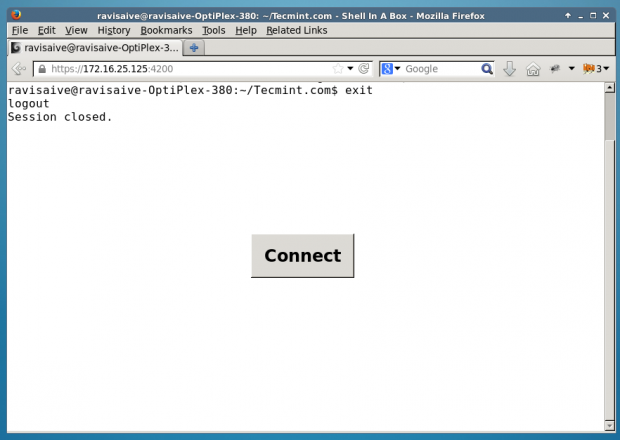
Shellinabox SSH Logout

Shellinabox SSH Logout

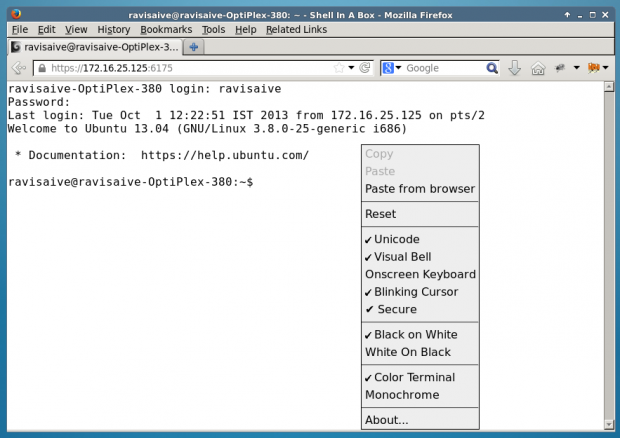
You can right-click to use several features and actions, including changing the look and feel of your shell.

Shellinabox More Options

Shellinabox More Options

Make sure you secure you shellinabox on firewall and open 6175 port for specific IP Address to access your Linux shell remotely.

Reference Links

Shellinabox Homepage

Linux Mint Burn ISO – Linux Hint

Some time ago, it was very common to install operating systems from a CD. The image was downloaded and then inserted into the computer and the process began. However, as the operating systems added new features and novelties, the space available for these CDs began to cause problems for the developers. I remember, for example, the first controversies with Debian and Ubuntu about the distribution of their ISO images. With the appearance of the DVDs, the controversy moved to another point, the impossibility of reusing them for something else. That is to say, a DVD was equal to an operating system. So, that is why this article will teach you how to burn an ISO on Linux Mint.

An ISO image?

The first thing we need to be clear about is what an ISO image is. If you are a newbie, it is important that you know where it comes from. An ISO file is a perfect representation of a CD, DVD or a complete BD. It’s possible to duplicate all the data of a CD/DVD or other discs PRECISELY (bit by bit) and dump them into an image file, most notably, an ISO file. Moreover, ISO is also a better format for sharing larger programs via the internet because all the files and folders remain in one, single chunk that offers better data integrity.

Burning an ISO image in Linux Mint

So far I have talked about burning an image to a CD or DVD. You can still do it, but it is an obsolete practice. What many people do is use USB flash drives to improve the system’s runtime or just copy them as backup to that drive.

So, I will start from the fact that you want to burn an ISO of a Linux distribution using Linux Mint. For it, you must have clear where you want to burn the image, you can do it even in a CD or DVD; or simply use the USB memory stick. Let us go for it.

Burning a ISO file to a CD or DVD

Let’s suppose we already have the .ISO image on our computer. Now you need to burn it to a CD or DVD. For now, I will introduce you two tools to do it without problems.

First of all, there is Brasero. Brasero is a part of the GNOME Software Family that’s design carefully to become as user-friendly as possible to burn CD/DVD. In addition, it also comes up with some unique and cool features that offers simple process of creating ISO quickly.

Some of its characteristics are:

  • Support for multiple backends.
  • Edition of disc contents.
  • Burn on the fly.
  • Multi-session support.
  • Joliet-extension support.
  • Write the image to the hard drive.
  • Disc file integrity check.
  • Auto-filtering of unwanted files.
  • Easy to use interface.

To install it, just run:

Next, open it from the main menu. And you will see this.

As you can see it is a pretty simple graphical interface, but it has all the necessary options to handle CD or DVD on Linux Mint.

So, to burn an ISO image. Just, click on the Burn Image option. Now, you will see this window.

Next, select a disc to write and click on the Create image button. And that’s it. It is too easy.

Burning a ISO file to an USB flash

If, on the other hand, you plan to record the image on a USB flash drive, we have two paths to choose from. The first is to use a program to do it with a graphical interface. Secondly, we can use the terminal to achieve the goal. Do not worry, I will show you how to do both.

Using a graphical program

To burn an ISO image graphically, I recommend using UNetbootin. This is because it is a proven program with a wide trajectory in Linux. In addition, its installation is reduced to a few commands.

sudo add-apt-repository ppa:gezakovacs/ppa

Next, refresh the APT cache.

Finally, install Unetbootin.

sudo apt install unetbootin

Next, open the program from the main menu. You will be asked for the root password.

As you can see, it is also a pretty simple interface. First, select the DiskImage button, next select ISO and finally click on the button that has the suspension points to locate the ISO file to burn.

Then, you have to press OK to start the process.

As you can see it is very simple to burn and ISO image on Linux.

Using the terminal to burn the image

If you are a somewhat advanced user, you may feel comfortable with the terminal, so there is also a way to do it.

First, open a terminal. Next, run this command to find the name of your device.

As you can see in the image my USB device for Linux Mint is called /dev/sdb. This is vital to perform the process.

Now, run this command to start the process.

sudo dd bs=2M if=path-to-the-ISO of=/dev/sdb status=progress && sync

I will explain it briefly: “dd” is the command that performs the operation. “bs=2M” tells “dd” to do the transfer in blocks of 2 megs; “if” it contains the path of the ISO image; “of” defines the device to which the image will be saved. Defining status will make it show a progress bar. Finally, “sync” is to clear the cache.

So, that is how you can burn an ISO image on Linux Mint.

There are several ways to work with ISO images in Linux Mint. If you are a novice user, I recommend you always do it with graphical programs and leave the terminal for more advanced users.

Source

Top 11 Python Frameworks in 2019

Most developers use frameworks to make code and develop applications. The framework provides an outlined structure to the developers so they will target the core logic of the application instead of on alternative components.

In order to start out development with Python, you’ll need a platform or framework to code. Whereas selecting a framework, remember to think about the scale and quality of your application or project. During this article, we are going to discuss some ordinarily used Python frameworks.

Python provides support for a large varies of frameworks. Generally, there are 2 varieties of Python framework used whereas developing applications.

  • Full-Stack Frameworks
  • non Full-Stack Frameworks

Full-Stack Frameworks

The full-stack frameworks offer complete support to developers, together with Python Training Bangalore necessary components like type validation, form generators, and template layouts. A number of the common full-stack frameworks are:

1. Django

Django, developed by Django software package Foundation, could be a full-stack Python web framework. It’s an open supply and free-to-use framework, released formally in July 2005. It helps developers to make complicated code and applications in a better method, and needs much less time compared to alternative frameworks.

It is wide in style among developers because it features a large collection of libraries written within the Python language. It emphasizes efficiency, the reusability of parts, and less code. A number of the most features of Django are universal resource locator routing, object-relational clerk (ORM), authentication mechanism, model engine, and information schema migrations.

Django implements ORM to map instances to database tables. It provides support for multiple databases like PostgreSQL, MySQL, SQLite, and Oracle. Hence, it becomes easier for developers to transfer the code from one information to a different. Additionally, it also provides support for web servers. Due to its wonderful features, Django is wide employed by most of the known firms like Instagram, Pinterest, Disqus, Mozilla, The Washington Times, and Bitbucket.

2. Web2py

Web2py, developed by Massimo de Pierro, is a cross-platform web application framework written in Python programing language. It’s an open supply and free-to-use Python web framework, released in Sept 2007. It allows users to make dynamic web content in Python. The Web2py framework comes with a code editor, debugger, and preparation tool with that you’ll develop and rectify code, as well as take a look at and maintain applications. It incorporates a ticketing system that issues a ticket to the user whenever a slip-up happens. This price ticket helps the user to trace the status of the error.

Some of the most features of the Web2py Python framework are:

  • Cross-platform framework that gives support for Windows, Unix/Linux, Mac, Google App Engine, and lots of alternative platforms.
  • No extra installation and configuration.
  • Built-in parts to handle HTTP requests, HTTP responses, cookies, and sessions further.
  • Ability to browse multiple protocols.
  • Security to information against all potential threats like cross-site scripting, injection flaws, and execution of infected files.
  • Follows model-view-controller (MVC) pattern.
  • Support for role-based access control and internationalisation.
  • Allows users to implant jQuery for ajax and UI effects.

3. TurboGears

TurboGears, developed by KevinDangoor and Mark Ramm, could be a full-stack web application framework. It’s a data-driven, open supply and free-to-use Python web framework. With the help of elements like WebOb, SQLAlchemy, Genshi, and Repoze, you’ll simply develop applications that need database connectivity much faster as compared to alternative existing frameworks.

Some of the most features of TurboGears are:

  • Support for multiple databases.
  • Follows an MVC pattern.
  • Support for web servers like Pylons.
  • Numerous libraries.
  • WSGI (Web Server entrance Interface) parts. For example, it uses ToscaWidgets, that modify developers to embed any complex widget in their application.

4. CubicWeb

CubicWeb, developed by Logilab, is an open supply, semantic, and free-to-use Python web framework. This framework is based on the data model. You’re needed to define the data model so as to induce a useful application. It uses the cube in situ of using separate views and models. Multiple cubes are joined along to make an instance with the assistance of some configuration files, a web server, and a database.

Some of the most features of CubicWeb are:

  • Multiple databases, security workflows, and reusable elements.
  • Support for web metaphysics Language (OWL) and Resource Description Framework (RDF).
  • Embeds relative query language (RQL) so as to alter the queries associated with data.

5. Giotto

Giotto is a Python framework that’s supported the MVC (Model read Controller) pattern. It separates Model, View, and Controller elements so as to confirm that the web designers, web developers, and system directors will perform their functions independently and effectively.

Apart from this, it also incorporates controller modules that allow users to make applications on top of the web, irc, or statement.

6. Pylon

Pylon, developed in December 2010, could be a light-weight Python web framework. It places stress on the speedy development of applications. It’s developed with Python Training in Marathahalli a number of the most effective concepts taken from languages like Ruby, Python, and Perl. Hence, it provides a extremely flexible structure for web development.

Non-full-stack Frameworks

The non-full-stack frameworks don’t offer extra functionalities and features to the users. Developers have to be compelled to add plenty of code and alternative things manually. Some ordinarily used Python frameworks are:

7. Bottle

Bottle, developed by Marcel Hellkemp, could be a microframework. it’s an easy-to-use light-weight framework usually used to build tiny web applications. It creates one supply file of each project or application. It’s no alternative dependency than Python commonplace Library.

Some of the essential features of the Bottle framework are:

  • Built-in HTTP server.
  • Adapters for third-party model engines and WSGI/HTTP servers.
  • Allows users to access type information, file uploads, cookies, and alternative HTTP-related information in an exceedingly abundant less complicated approach.
  • Provides request-dispatching routes having URL-parameter support.
  • Support for plugins of various databases.

8. CherryPy

CherryPy is an open supply object-oriented Python framework. Remi Delon is known because the founding father of the CherryPy project. The CherryPy framework is wide enforced by developers to make Python web applications. it’s its own multi-threaded web server.

You can produce applications using CherryPy which will run on any Python-supporting operative systems like Windows, Linux/Unix, and macOS.

Some of the common features of CherryPy are:

  • Contains an HTTP/1.1-compliant, WSGI threaded-pooled web server. It provides support for various web servers further, for instance, Apache and IIS.
  • Allows you to run many HTTP servers at the same time.
  • Contains some tools for events like caching, encoding, authorization, etc. by default.
  • Support for identification, testing, and coverage by default.
  • Built-in plugin system.

9. Flask

Flask, developed by armin Ronacher, could be a powerful Python web application framework. It’s usually termed a microframework because it doesn’t have the subsequent elements:

  • Specific tools and libraries
  • No information abstraction layer
  • No type validation

The functionalities provided by the above-named components are currently provided by third-party libraries. It depends on the Werkzeug Jinja2template, WSGI toolkit. A number of the common features of the Flask framework are:

  • Built-in development server and program also.
  • Support for unit testing.
  • Incorporates reposeful request dispatching.
  • Establishes secure client-side sessions.
  • Compatible with Google App Engine.

10. Sanic

Sanic is a simple, open supply and easy Python framework. This framework is comparable to Flask in function however it’s much quicker relatively. It absolutely was specially designed for fast HTTP responses with the assistance of asynchronous request handlers.

A remarkable record was created throughout a benchmark take a look at performed using the Sanic framework. it absolutely was recorded that Sanic framework has the potential to method 33,342 requests in an exceedingly second. This data point is enough to show how briskly Sanic is.

11. Tornado

Tornado, developed by ben Darnell and Bret Taylor could be a Python web application framework. Initially, it was developed for an organization named FriendFeed, that was later taken over by Facebook in 2009. Tornado is an open supply framework and is mostly acknowledged for its high performance. It uses non-blocking webwork I/O with the flexibility to handle over 10,000 connections at one time.

Some of the most features of the Tornado framework are:

  • Support for user authentication by default.
  • Provides high-quality output.
  • Non-blocking HTTP client.
  • Allows you to implement third-party authentication and authorization schemes, like Google OpenID/OAuth, Facebook login, Yahoo BBAuth, and Twitter OAuth.

How to install and use Portainer for easy Docker container management

Looking for an easy to use web interface for Docker container management? Here’s how to get Portainer up and running for just this purpose.

dockernewhero.jpg

At this point, it’s nearly impossible to avoid using containers in your company. There are plenty of reasons for the rise of containers (flexibility, portability, reliability, etc.); but no matter your reasons, you are probably using Docker as your primary container platform. If that’s the case, you may have been looking for a web UI that will allow you to manage your containers from any browser that can reach your network.

Good thing there’s Portainer, an open source, lightweight management UI for Docker. With Portainer you can pull images, add containers, add networks, and so much more. This tool is really quite remarkable and should be considered by anyone that manages a Docker system.

I want to walk you through the installation and logging into Portainer. I’ll be demonstrating on a Ubuntu Server 16.04 platform, running the latest installation of Docker. What is really unique about Portainer is that it itself is a Docker container, so we’re going to have a bit of recursive fun.

Installation

As I mentioned, Portainer is a container; so the installation isn’t so much an install as it is a pull. So open up your terminal window (or log into your Docker headless server) and issue the following command:

sudo docker run -d -p 9000:9000 portainer/portainer

That command will pull down all of the necessary images and create the Portainer container. Issue the command sudo docker ps and you should see the necessary containers running (Figure A).

Figure A

Figure A

The Portainer containers running and ready to go.

After the command runs, open up a browser and point it to http://SERVER_IP:9000 (where SERVER_IP is the IP address of the server housing Portainer. Once your browser lands on the page, the first thing you will have to do is set (and verify) a password for the admin user (Figure B).

Figure B

Figure B

Creating a password for the Portainer admin user.

Upon successfully creating the password, you will then have to point Portainer to the Docker server (Figure C). You don’t have to have Portainer running on the same server as is Docker (in my instance, for example purposes, I have). Give the connection a name and then enter the endpoint URL (which will be http://SERVER_IP:2375 – Where SERVER_IP is the address of your Docker server).

Figure C

Figure C

Connecting Portainer to your Docker server.

Click Connect and you will find yourself on the Portainer web UI manager (Figue D).

Figure D

Figure D

The Portainer Docker manager UI.

If you find yourself unable to connect Portainer to your Docker server (be they one and the same or not), I have found a rather clunky workaround. Issue the following command to download a script to pull Shipyard (this is run on your Docker server):

wget https://shipyard-project.com/deploy

Give the script executable permissions with the following command:

chmod u+x deploy

Run the script with the command:

sudo ./deploy

Once that script finishes up, you should then be able to connect Portainer to your Docker server.

At this point, everything should be self-explanatory. Click on the Images tab to see what images you have already pulled onto the machine and search for new images to pull. Click on the Containers tab to see what containers are running or create a new container. You might also want to head over the Users section and create new users. You can create both administrative users and standard users.

You can also connect new Docker servers to Portainer. To do this, click on the Endpoints tab and then (in the top pane – Figure E), type a name for the new endpoint and add the IP Address of the new Docker server (with port 2375). Click Add endpoint and your new Docker server will be added.

Figure E

Figure E

Adding a new Docker server as an endpoint.

Note: If you have any trouble connecting new endpoints, running the Shipyard work-around (on the endpoint server) should solve the problem.

Easy Docker management

You’ll be hard-pressed to find an easier web-based UI for Docker management. Once you’ve started using Portainer, you might find yourself not wanting to go back to the Docker command line interface.

How to Setup Private Docker Registry on Ubuntu 18.04 LTS

Docker Registry or ‘Registry’ is an open source and highly scalable server-side application that can be used to store and distribute Docker images. It was a server-side application behind the Docker Hub. In most use cases, a Docker Registry is a great solution if you want to implement the CI/CD system on your application development. The Private Docker Registry gives more performances for the development and production cycle by centralizing all your custom Docker images of application in one place.

In this tutorial, we’re going to show you how to install and configure a Private Docker Registry on a Ubuntu 18.04 server. We will use an Nginx web server and protect the Registry with a username and password (basic auth).

Prerequisites

  • Ubuntu 18.04 server
  • Root privileges

What we will do?

  1. Install Dependencies
  2. Install Docker and Docker-compose
  3. Setup Private Docker Registry
  4. Testing

Step 1 – Install Package Dependencies

First of all, we’re going to install some packages dependencies for deploying the Private Docker Registry.

Install packages dependencies using the following command.

sudo apt install -y gnupg2 pass apache2-utils httpie

The gnupg2 and pass packages will be used to store the password authentication to the docker registry. And the apache2-utils will be used to generate the basic authentication, and httpie will be used for testing.

Step 2 – Install Docker and Docker-compose

Now we’re going to install the docker and docker-compose from the official Ubuntu repository.

Install Docker and Docker-compose by running the following command.

sudo apt install -y docker.io docker-compose -y

Once the installation is finished, start the docker service and add it to the boot time.

sudo systemctl start docker
sudo systemctl enable docker

The Docker is up and running, and the Docker-compose has been installed. Check using the command below.

docker version
docker-compose version

And you will be displayed version of Docker and Docker-compose installed on your system.

Install Docker

Step 3 – Setup Private Docker Registry

In this step, we’re going to configure the Docker Registry environment by creating some directories environment, and create some configuration including the docker-compose.yml, nginx virtual host and additional configuration etc.

– Create Project Directories

Create a new directory for the project called ‘registry’ and create the ‘nginx’ and ‘auth’ directories inside.

mkdir -p registry/{nginx,auth}

After that, go to the directory ‘registry’ and create new directories again inside ‘nginx’.

cd registry/
mkdir -p nginx/{conf.d/,ssl}

And as a result, the project directories look like the following picture.

tree

Create directories for Docker Registry

– Create Docker-compose Script

Now we want to create a new docker-compose.yml script for deploying the Docker Registry.

Go to the ‘registry’ directory and create a new configuration file ‘docker-compose.yml’.

cd registry/
vim docker-compose.yml

Firstly, define the compose version that you want to use and the service.

version: '3'
services:

After that, add the first service named ‘registry’. The Docker Registry service will be using the docker image that’s provided by docker team ‘registry:2. It will mount the docker volume ‘registrydata’ and the local directory named ‘auth’ that contains basic authentication file ‘registry.passwd’. And the last, it will run on the custom docker image named ‘mynet’ and expose the port 5000 on both container and host.

#Registry
  registry:
    image: registry:2
    restart: always
    ports:
    - "5000:5000"
    environment:
      REGISTRY_AUTH: htpasswd
      REGISTRY_AUTH_HTPASSWD_REALM: Registry-Realm
      REGISTRY_AUTH_HTPASSWD_PATH: /auth/registry.passwd
      REGISTRY_STORAGE_FILESYSTEM_ROOTDIRECTORY: /data
    volumes:
      - registrydata:/data
      - ./auth:/auth
    networks:
      - mynet

Next, the configuration of ‘nginx’ service that will run HTTP and HTTPS ports and mount the local directory ‘conf.d’ for virtual host configuration, and the ‘ssl’ for ssl certificates.

#Nginx Service
  nginx:
    image: nginx:alpine
    container_name: nginx
    restart: unless-stopped
    tty: true
    ports:
      - "80:80"
      - "443:443"
    volumes:
      - ./nginx/conf.d/:/etc/nginx/conf.d/
      - ./nginx/ssl/:/etc/nginx/ssl/
    networks:
      - mynet

And the last, define the custom network ‘mynet’ with bridge driver and the ‘registrydata’ with a local driver.

#Docker Networks
networks:
  mynet:
    driver: bridge
#Volumes
volumes:
  registrydata:
    driver: local

Save and close the configuration.

Below is the complete configuration:

version: '3'
services:

#Registry
  registry:
    image: registry:2
    restart: always
    ports:
    - "5000:5000"
    environment:
      REGISTRY_AUTH: htpasswd
      REGISTRY_AUTH_HTPASSWD_REALM: Registry-Realm
      REGISTRY_AUTH_HTPASSWD_PATH: /auth/registry.passwd
      REGISTRY_STORAGE_FILESYSTEM_ROOTDIRECTORY: /data
    volumes:
      - registrydata:/data
      - ./auth:/auth
    networks:
      - mynet

#Nginx Service
  nginx:
    image: nginx:alpine
    container_name: nginx
    restart: unless-stopped
    tty: true
    ports:
      - "80:80"
      - "443:443"
    volumes:
      - ./nginx/conf.d/:/etc/nginx/conf.d/
      - ./nginx/ssl/:/etc/nginx/ssl/
    networks:
      - mynet

#Docker Networks
networks:
  mynet:
    driver: bridge
#Volumes
volumes:
  registrydata:
    driver: local

– Configure Nginx Virtual Host

After creating the docker-compose script, we will create the virtual host and additional configuration for the nginx service.

Go to ‘nginx/conf.d/’ directory and create a new virtual host file called ‘registry.conf’.

cd nginx/conf.d/
vim registry.conf

Paste the following configuration.

upstream docker-registry {
    server registry:5000;
}

server {
    listen 80;
    server_name registry.hakase-labs.io;
    return 301 https://registry.hakase-labs.io$request_uri;
}

server {
    listen 443 ssl http2;
    server_name registry.hakase-labs.io;

    ssl_certificate /etc/nginx/ssl/fullchain.pem;
    ssl_certificate_key /etc/nginx/ssl/privkey.pem;

    # Log files for Debug
    error_log  /var/log/nginx/error.log;
    access_log /var/log/nginx/access.log;

    location / {
        # Do not allow connections from docker 1.5 and earlier
        # docker pre-1.6.0 did not properly set the user agent on ping, catch "Go *" user agents
        if ($http_user_agent ~ "^(docker\/1\.(3|4|5(?!\.[0-9]-dev))|Go ).*$" )  {
            return 404;
        }

        proxy_pass                          http://docker-registry;
        proxy_set_header  Host              $http_host;
        proxy_set_header  X-Real-IP         $remote_addr;
        proxy_set_header  X-Forwarded-For   $proxy_add_x_forwarded_for;
        proxy_set_header  X-Forwarded-Proto $scheme;
        proxy_read_timeout                  900;
    }

}

Save and close.

Next, create an additional configuration to increase the max_body_size on nginx. This will allow you to upload docker images with max size 2GB.

vim additional.conf

Paste configuration below.

client_max_body_size 2G;

Save and close.

– Configure SSL Certificate and Basic Authentication

Copy SSL certificate files of your domain to the ‘ssl’ directory.

cp /path/to/ssl/fullchain.pem ssl/
cp /path/to/ssl/privkey.pem ssl/

Now go to the ‘auth’ directory and generate the new password file ‘registry.passwd’.

cd auth/

Generate a new password for user hakase.

htpasswd -Bc registry.passwd hakase
TYPE THE STRONG PASSWORD

Password protect the registry

And the environment setup for deploying Private Docker Registry has been completed.

Below is the screenshot of our environment files and directories.

tree

Directory list

– Run Docker Registry

Run the Docker Registry using the docker-compose command below.

docker-compose up -d

And you will get the result as below.

Start docker Registry

After that, make sure the registry and nginx service is up and running. Check using the following command.

docker-compose ps
netstat -plntu

And you will be shown the ‘registry’ service is running on port ‘5000’, and the ‘nginx’ service will expose the HTTP and HTTPS ports as below.

Check Nginx service

Step 4 – Testing

Before we test our Private Docker Registry, we need to add the Root CA certificate to the docker itself and to the system.

If you’re using the pem file certificate, export it to the .crt file using the OpenSSL command.

openssl x509 -in rootCA.pem -inform PEM -out rootCA.crt

Now create a new directory for docker certificate and copy the Root CA certificate into it.

mkdir -p /etc/docker/certs.d/registry.hakase-labs.io/
cp rootCA.crt /etc/docker/certs.d/registry.hakase-labs.io/

And then create a new directory ‘/usr/share/ca-certificate/extra’ and copy the Root CA certificate into it.

mkdir -p /usr/share/ca-certificates/extra/
cp rootCA.crt /usr/share/ca-certificates/extra/

After that, reconfigure the ‘ca-certificate’ package and restart the Docker service.

dpkg-reconfigure ca-certificates
systemctl restart docker

Create SSL certificate

– Download Docker Image

Download new Docker image using the following command.

docker pull ubuntu:16.04

When it’s complete, tag the image for the private registry with the command below.

docker image tag ubuntu:16.04 registry.hakase-labs.io/ubuntu16

Check again the list of Docker images on the system and you will get new images as below.

docker images

Download Docker Image

– Push Image to Private Local Registry

Log in to the Private Docker Registry using the following command.

docker login https://registry.hakase-labs.io/v2/

Type the username and password based on the ‘registry.htpasswd’ file.

Now check the available of docker image on the Registry.

http -a hakase https://registry.hakase-labs.io/v2/_catalog

And there is no docker image on the Registry.

Push Image to Private Local Registry

Now push our custom image to the Private Docker Registry.

docker push registry.hakase-labs.io/ubuntu16

Check again and make sure you get the ‘ubuntu16’ docker image on the Private Repository.

http -a hakase https://registry.hakase-labs.io/v2/_catalog

Registry Push

And finally, the installation and configuration of Private Docker Registry with Nginx and Basic Authentication has been completed successfully.

How To Create RAID Arrays with mdadm on Ubuntu 16.04

Introduction

The mdadm utility can be used to create and manage storage arrays using Linux’s software RAID capabilities. Administrators have great flexibility in coordinating their individual storage devices and creating logical storage devices that have greater performance or redundancy characteristics.

In this guide, we will go over a number of different RAID configurations that can be set up using an Ubuntu 16.04 server.

Prerequisites

In order to complete the steps in this guide, you should have:

  • A non-root user with sudo privileges on an Ubuntu 16.04 server: The steps in this guide will be completed with a sudo user. To learn how to set up an account with these privileges, follow our Ubuntu 16.04 initial server setup guide.
  • A basic understanding of RAID terminology and concepts: While this guide will touch on some RAID terminology in passing, a more complete understanding is very useful. To learn more about RAID and to get a better understanding of what RAID level is right for you, read our introduction to RAID article.
  • Multiple raw storage devices available on your server: We will be demonstrating how to configure various types of arrays on the server. As such, you will need some drives to configure. If you are using DigitalOcean, you can use Block Storage volumes to fill this role. Depending on the array type, you will need at minimum between two to four storage devices.

Resetting Existing RAID Devices

Throughout this guide, we will be introducing the steps to create a number of different RAID levels. If you wish to follow along, you will likely want to reuse your storage devices after each section. This section can be referenced to learn how to quickly reset your component storage devices prior to testing a new RAID level. Skip this section for now if you have not yet set up any arrays.

Warning

This process will completely destroy the array and any data written to it. Make sure that you are operating on the correct array and that you have copied off any data you need to retain prior to destroying the array.

Find the active arrays in the /proc/mdstat file by typing:

  • cat /proc/mdstat
Output
Personalities : [raid0] [linear] [multipath] [raid1] [raid6] [raid5] [raid4] [raid10] 
md0 : active raid0 sdc[1] sdd[0]
      209584128 blocks super 1.2 512k chunks

            unused devices: <none>

Unmount the array from the filesystem:

  • sudo umount /dev/md0

Then, stop and remove the array by typing:

  • sudo mdadm –stop /dev/md0
  • sudo mdadm –remove /dev/md0

Find the devices that were used to build the array with the following command:

Note

Keep in mind that the /dev/sd* names can change any time you reboot! Check them every time to make sure you are operating on the correct devices.

  • lsblk -o NAME,SIZE,FSTYPE,TYPE,MOUNTPOINT
Output
NAME     SIZE FSTYPE            TYPE MOUNTPOINT
sda      100G                   disk 
sdb      100G                   disk 
sdc      100G linux_raid_member disk 
sdd      100G linux_raid_member disk 
vda       20G                   disk 
├─vda1    20G ext4              part /
└─vda15    1M                   part 

After discovering the devices used to create an array, zero their superblock to reset them to normal:

  • sudo mdadm –zero-superblock /dev/sdc
  • sudo mdadm –zero-superblock /dev/sdd

You should remove any of the persistent references to the array. Edit the /etc/fstab file and comment out or remove the reference to your array:

  • sudo nano /etc/fstab
/etc/fstab
. . .
# /dev/md0 /mnt/md0 ext4 defaults,nofail,discard 0 0

Also, comment out or remove the array definition from the /etc/mdadm/mdadm.conf file:

  • sudo nano /etc/mdadm/mdadm.conf
/etc/mdadm/mdadm.conf
. . .
# ARRAY /dev/md0 metadata=1.2 name=mdadmwrite:0 UUID=7261fb9c:976d0d97:30bc63ce:85e76e91

Finally, update the initramfs again:

  • sudo update-initramfs -u

At this point, you should be ready to reuse the storage devices individually, or as components of a different array.

Creating a RAID 0 Array

The RAID 0 array works by breaking up data into chunks and striping it across the available disks. This means that each disk contains a portion of the data and that multiple disks will be referenced when retrieving information.

  • Requirements: minimum of 2 storage devices
  • Primary benefit: Performance
  • Things to keep in mind: Make sure that you have functional backups. A single device failure will destroy all data in the array.

Identify the Component Devices

To get started, find the identifiers for the raw disks that you will be using:

  • lsblk -o NAME,SIZE,FSTYPE,TYPE,MOUNTPOINT
Output
NAME     SIZE FSTYPE TYPE MOUNTPOINT
sda      100G        disk
sdb      100G        disk
vda       20G        disk 
├─vda1    20G ext4   part /
└─vda15    1M        part

As you can see above, we have two disks without a filesystem, each 100G in size. In this example, these devices have been given the /dev/sda and /dev/sdb identifiers for this session. These will be the raw components we will use to build the array.

Create the Array

To create a RAID 0 array with these components, pass them in to the mdadm --create command. You will have to specify the device name you wish to create (/dev/md0 in our case), the RAID level, and the number of devices:

  • sudo mdadm –create –verbose /dev/md0 –level=0 –raid-devices=2 /dev/sda /dev/sdb

You can ensure that the RAID was successfully created by checking the /proc/mdstat file:

  • cat /proc/mdstat
Output
Personalities : [linear] [multipath] [raid0] [raid1] [raid6] [raid5] [raid4] [raid10] 
md0 : active raid0 sdb[1] sda[0]
      209584128 blocks super 1.2 512k chunks

            unused devices: <none>

As you can see in the highlighted line, the /dev/md0 device has been created in the RAID 0 configuration using the /dev/sda and /dev/sdb devices.

Create and Mount the Filesystem

Next, create a filesystem on the array:

  • sudo mkfs.ext4 -F /dev/md0

Create a mount point to attach the new filesystem:

  • sudo mkdir -p /mnt/md0

You can mount the filesystem by typing:

  • sudo mount /dev/md0 /mnt/md0

Check whether the new space is available by typing:

  • df -h -x devtmpfs -x tmpfs
Output
Filesystem      Size  Used Avail Use% Mounted on
/dev/vda1        20G  1.1G   18G   6% /
/dev/md0        197G   60M  187G   1% /mnt/md0

The new filesystem is mounted and accessible.

Save the Array Layout

To make sure that the array is reassembled automatically at boot, we will have to adjust the /etc/mdadm/mdadm.conf file. You can automatically scan the active array and append the file by typing:

  • sudo mdadm –detail –scan | sudo tee -a /etc/mdadm/mdadm.conf

Afterwards, you can update the initramfs, or initial RAM file system, so that the array will be available during the early boot process:

  • sudo update-initramfs -u

Add the new filesystem mount options to the /etc/fstab file for automatic mounting at boot:

  • echo ‘/dev/md0 /mnt/md0 ext4 defaults,nofail,discard 0 0’ | sudo tee -a /etc/fstab

Your RAID 0 array should now automatically be assembled and mounted each boot.

Creating a RAID 1 Array

The RAID 1 array type is implemented by mirroring data across all available disks. Each disk in a RAID 1 array gets a full copy of the data, providing redundancy in the event of a device failure.

  • Requirements: minimum of 2 storage devices
  • Primary benefit: Redundancy
  • Things to keep in mind: Since two copies of the data are maintained, only half of the disk space will be usable

Identify the Component Devices

To get started, find the identifiers for the raw disks that you will be using:

  • lsblk -o NAME,SIZE,FSTYPE,TYPE,MOUNTPOINT
Output
NAME     SIZE FSTYPE TYPE MOUNTPOINT
sda      100G        disk
sdb      100G        disk
vda       20G        disk 
├─vda1    20G ext4   part /
└─vda15    1M        part

As you can see above, we have two disks without a filesystem, each 100G in size. In this example, these devices have been given the /dev/sda and /dev/sdb identifiers for this session. These will be the raw components we will use to build the array.

Create the Array

To create a RAID 1 array with these components, pass them in to the mdadm --create command. You will have to specify the device name you wish to create (/dev/md0 in our case), the RAID level, and the number of devices:

  • sudo mdadm –create –verbose /dev/md0 –level=1 –raid-devices=2 /dev/sda /dev/sdb

If the component devices you are using are not partitions with the boot flag enabled, you will likely be given the following warning. It is safe to type y to continue:

Output
mdadm: Note: this array has metadata at the start and
    may not be suitable as a boot device.  If you plan to
    store '/boot' on this device please ensure that
    your boot-loader understands md/v1.x metadata, or use
    --metadata=0.90
mdadm: size set to 104792064K
Continue creating array? y

The mdadm tool will start to mirror the drives. This can take some time to complete, but the array can be used during this time. You can monitor the progress of the mirroring by checking the /proc/mdstat file:

  • cat /proc/mdstat
Output
Personalities : [linear] [multipath] [raid0] [raid1] [raid6] [raid5] [raid4] [raid10] 
md0 : active raid1 sdb[1] sda[0]
      104792064 blocks super 1.2 [2/2] [UU]
      [====>................]  resync = 20.2% (21233216/104792064) finish=6.9min speed=199507K/sec

unused devices: <none>

As you can see in the first highlighted line, the /dev/md0 device has been created in the RAID 1 configuration using the /dev/sda and /dev/sdb devices. The second highlighted line shows the progress on the mirroring. You can continue the guide while this process completes.

Create and Mount the Filesystem

Next, create a filesystem on the array:

  • sudo mkfs.ext4 -F /dev/md0

Create a mount point to attach the new filesystem:

  • sudo mkdir -p /mnt/md0

You can mount the filesystem by typing:

  • sudo mount /dev/md0 /mnt/md0

Check whether the new space is available by typing:

  • df -h -x devtmpfs -x tmpfs
Output
Filesystem      Size  Used Avail Use% Mounted on
/dev/vda1        20G  1.1G   18G   6% /
/dev/md0         99G   60M   94G   1% /mnt/md0

The new filesystem is mounted and accessible.

Save the Array Layout

To make sure that the array is reassembled automatically at boot, we will have to adjust the /etc/mdadm/mdadm.conf file. You can automatically scan the active array and append the file by typing:

  • sudo mdadm –detail –scan | sudo tee -a /etc/mdadm/mdadm.conf

Afterwards, you can update the initramfs, or initial RAM file system, so that the array will be available during the early boot process:

  • sudo update-initramfs -u

Add the new filesystem mount options to the /etc/fstab file for automatic mounting at boot:

  • echo ‘/dev/md0 /mnt/md0 ext4 defaults,nofail,discard 0 0’ | sudo tee -a /etc/fstab

Your RAID 1 array should now automatically be assembled and mounted each boot.

Creating a RAID 5 Array

The RAID 5 array type is implemented by striping data across the available devices. One component of each stripe is a calculated parity block. If a device fails, the parity block and the remaining blocks can be used to calculate the missing data. The device that receives the parity block is rotated so that each device has a balanced amount of parity information.

  • Requirements: minimum of 3 storage devices
  • Primary benefit: Redundancy with more usable capacity.
  • Things to keep in mind: While the parity information is distributed, one disk’s worth of capacity will be used for parity. RAID 5 can suffer from very poor performance when in a degraded state.

Identify the Component Devices

To get started, find the identifiers for the raw disks that you will be using:

  • lsblk -o NAME,SIZE,FSTYPE,TYPE,MOUNTPOINT
Output
NAME     SIZE FSTYPE TYPE MOUNTPOINT
sda      100G        disk
sdb      100G        disk
sdc      100G        disk
vda       20G        disk 
├─vda1    20G ext4   part /
└─vda15    1M        part

As you can see above, we have three disks without a filesystem, each 100G in size. In this example, these devices have been given the /dev/sda/dev/sdb, and /dev/sdc identifiers for this session. These will be the raw components we will use to build the array.

Create the Array

To create a RAID 5 array with these components, pass them in to the mdadm --create command. You will have to specify the device name you wish to create (/dev/md0 in our case), the RAID level, and the number of devices:

  • sudo mdadm –create –verbose /dev/md0 –level=5 –raid-devices=3 /dev/sda /dev/sdb /dev/sdc

The mdadm tool will start to configure the array (it actually uses the recovery process to build the array for performance reasons). This can take some time to complete, but the array can be used during this time. You can monitor the progress of the mirroring by checking the /proc/mdstat file:

  • cat /proc/mdstat
Output
Personalities : [raid1] [linear] [multipath] [raid0] [raid6] [raid5] [raid4] [raid10] 
md0 : active raid5 sdc[3] sdb[1] sda[0]
      209584128 blocks super 1.2 level 5, 512k chunk, algorithm 2 [3/2] [UU_]
      [===>.................]  recovery = 15.6% (16362536/104792064) finish=7.3min speed=200808K/sec

unused devices: <none>

As you can see in the first highlighted line, the /dev/md0 device has been created in the RAID 5 configuration using the /dev/sda/dev/sdb and /dev/sdc devices. The second highlighted line shows the progress on the build. You can continue the guide while this process completes.

Create and Mount the Filesystem

Next, create a filesystem on the array:

  • sudo mkfs.ext4 -F /dev/md0

Create a mount point to attach the new filesystem:

  • sudo mkdir -p /mnt/md0

You can mount the filesystem by typing:

  • sudo mount /dev/md0 /mnt/md0

Check whether the new space is available by typing:

  • df -h -x devtmpfs -x tmpfs
Output
Filesystem      Size  Used Avail Use% Mounted on
/dev/vda1        20G  1.1G   18G   6% /
/dev/md0        197G   60M  187G   1% /mnt/md0

The new filesystem is mounted and accessible.

Save the Array Layout

To make sure that the array is reassembled automatically at boot, we will have to adjust the /etc/mdadm/mdadm.conf file.

Before you adjust the configuration, check again to make sure the array has finished assembling. Because of the way that mdadm builds RAID 5 arrays, if the array is still building, the number of spares in the array will be inaccurately reported:

  • cat /proc/mdstat
Output
Personalities : [raid1] [linear] [multipath] [raid0] [raid6] [raid5] [raid4] [raid10] 
md0 : active raid5 sdc[3] sdb[1] sda[0]
      209584128 blocks super 1.2 level 5, 512k chunk, algorithm 2 [3/3] [UUU]

unused devices: <none>

The output above shows that the rebuild is complete. Now, we can automatically scan the active array and append the file by typing:

  • sudo mdadm –detail –scan | sudo tee -a /etc/mdadm/mdadm.conf

Afterwards, you can update the initramfs, or initial RAM file system, so that the array will be available during the early boot process:

  • sudo update-initramfs -u

Add the new filesystem mount options to the /etc/fstab file for automatic mounting at boot:

  • echo ‘/dev/md0 /mnt/md0 ext4 defaults,nofail,discard 0 0’ | sudo tee -a /etc/fstab

Your RAID 5 array should now automatically be assembled and mounted each boot.

Creating a RAID 6 Array

The RAID 6 array type is implemented by striping data across the available devices. Two components of each stripe are calculated parity blocks. If one or two devices fail, the parity blocks and the remaining blocks can be used to calculate the missing data. The devices that receive the parity blocks are rotated so that each device has a balanced amount of parity information. This is similar to a RAID 5 array, but allows for the failure of two drives.

  • Requirements: minimum of 4 storage devices
  • Primary benefit: Double redundancy with more usable capacity.
  • Things to keep in mind: While the parity information is distributed, two disk’s worth of capacity will be used for parity. RAID 6 can suffer from very poor performance when in a degraded state.

Identify the Component Devices

To get started, find the identifiers for the raw disks that you will be using:

  • lsblk -o NAME,SIZE,FSTYPE,TYPE,MOUNTPOINT
Output
NAME     SIZE FSTYPE TYPE MOUNTPOINT
sda      100G        disk
sdb      100G        disk
sdc      100G        disk
sdd      100G        disk
vda       20G        disk 
├─vda1    20G ext4   part /
└─vda15    1M        part

As you can see above, we have four disks without a filesystem, each 100G in size. In this example, these devices have been given the /dev/sda/dev/sdb/dev/sdc, and /dev/sdd identifiers for this session. These will be the raw components we will use to build the array.

Create the Array

To create a RAID 6 array with these components, pass them in to the mdadm --create command. You will have to specify the device name you wish to create (/dev/md0 in our case), the RAID level, and the number of devices:

  • sudo mdadm –create –verbose /dev/md0 –level=6 –raid-devices=4 /dev/sda /dev/sdb /dev/sdc /dev/sdd

The mdadm tool will start to configure the array (it actually uses the recovery process to build the array for performance reasons). This can take some time to complete, but the array can be used during this time. You can monitor the progress of the mirroring by checking the /proc/mdstat file:

  • cat /proc/mdstat
Output
Personalities : [raid6] [raid5] [raid4] [linear] [multipath] [raid0] [raid1] [raid10] 
md0 : active raid6 sdd[3] sdc[2] sdb[1] sda[0]
      209584128 blocks super 1.2 level 6, 512k chunk, algorithm 2 [4/4] [UUUU]
      [>....................]  resync =  0.6% (668572/104792064) finish=10.3min speed=167143K/sec

unused devices: <none>

As you can see in the first highlighted line, the /dev/md0 device has been created in the RAID 6 configuration using the /dev/sda/dev/sdb/dev/sdc and /dev/sdd devices. The second highlighted line shows the progress on the build. You can continue the guide while this process completes.

Create and Mount the Filesystem

Next, create a filesystem on the array:

  • sudo mkfs.ext4 -F /dev/md0

Create a mount point to attach the new filesystem:

  • sudo mkdir -p /mnt/md0

You can mount the filesystem by typing:

  • sudo mount /dev/md0 /mnt/md0

Check whether the new space is available by typing:

  • df -h -x devtmpfs -x tmpfs
Output
Filesystem      Size  Used Avail Use% Mounted on
/dev/vda1        20G  1.1G   18G   6% /
/dev/md0        197G   60M  187G   1% /mnt/md0

The new filesystem is mounted and accessible.

Save the Array Layout

To make sure that the array is reassembled automatically at boot, we will have to adjust the /etc/mdadm/mdadm.conf file. We can automatically scan the active array and append the file by typing:

  • sudo mdadm –detail –scan | sudo tee -a /etc/mdadm/mdadm.conf

Afterwards, you can update the initramfs, or initial RAM file system, so that the array will be available during the early boot process:

  • sudo update-initramfs -u

Add the new filesystem mount options to the /etc/fstab file for automatic mounting at boot:

  • echo ‘/dev/md0 /mnt/md0 ext4 defaults,nofail,discard 0 0’ | sudo tee -a /etc/fstab

Your RAID 6 array should now automatically be assembled and mounted each boot.

Creating a Complex RAID 10 Array

The RAID 10 array type is traditionally implemented by creating a striped RAID 0 array composed of sets of RAID 1 arrays. This nested array type gives both redundancy and high performance, at the expense of large amounts of disk space. The mdadm utility has its own RAID 10 type that provides the same type of benefits with increased flexibility. It is not created by nesting arrays, but has many of the same characteristics and guarantees. We will be using the mdadm RAID 10 here.

  • Requirements: minimum of 3 storage devices
  • Primary benefit: Performance and redundancy
  • Things to keep in mind: The amount of capacity reduction for the array is defined by the number of data copies you choose to keep. The number of copies that are stored with mdadm style RAID 10 is configurable.

By default, two copies of each data block will be stored in what is called the “near” layout. The possible layouts that dictate how each data block is stored are:

  • near: The default arrangement. Copies of each chunk are written consecutively when striping, meaning that the copies of the data blocks will be written around the same part of multiple disks.
  • far: The first and subsequent copies are written to different parts the storage devices in the array. For instance, the first chunk might be written near the beginning of a disk, while the second chunk would be written half way down on a different disk. This can give some read performance gains for traditional spinning disks at the expense of write performance.
  • offset: Each stripe is copied, offset by one drive. This means that the copies are offset from one another, but still close together on the disk. This helps minimize excessive seeking during some workloads.

You can find out more about these layouts by checking out the “RAID10” section of this man page:

  • man 4 md

You can also find this man page online here.

Identify the Component Devices

To get started, find the identifiers for the raw disks that you will be using:

  • lsblk -o NAME,SIZE,FSTYPE,TYPE,MOUNTPOINT
Output
NAME     SIZE FSTYPE TYPE MOUNTPOINT
sda      100G        disk
sdb      100G        disk
sdc      100G        disk
sdd      100G        disk
vda       20G        disk 
├─vda1    20G ext4   part /
└─vda15    1M        part

As you can see above, we have four disks without a filesystem, each 100G in size. In this example, these devices have been given the /dev/sda/dev/sdb/dev/sdc, and /dev/sdd identifiers for this session. These will be the raw components we will use to build the array.

Create the Array

To create a RAID 10 array with these components, pass them in to the mdadm --create command. You will have to specify the device name you wish to create (/dev/md0 in our case), the RAID level, and the number of devices.

You can set up two copies using the near layout by not specifying a layout and copy number:

  • sudo mdadm –create –verbose /dev/md0 –level=10 –raid-devices=4 /dev/sda /dev/sdb /dev/sdc /dev/sdd

If you want to use a different layout, or change the number of copies, you will have to use the --layout=option, which takes a layout and copy identifier. The layouts are n for near, f for far, and o for offset. The number of copies to store is appended afterwards.

For instance, to create an array that has 3 copies in the offset layout, the command would look like this:

  • sudo mdadm –create –verbose /dev/md0 –level=10 –layout=o3 –raid-devices=4 /dev/sda /dev/sdb /dev/sdc /dev/sdd

The mdadm tool will start to configure the array (it actually uses the recovery process to build the array for performance reasons). This can take some time to complete, but the array can be used during this time. You can monitor the progress of the mirroring by checking the /proc/mdstat file:

  • cat /proc/mdstat
Output
Personalities : [raid6] [raid5] [raid4] [linear] [multipath] [raid0] [raid1] [raid10] 
md0 : active raid10 sdd[3] sdc[2] sdb[1] sda[0]
      209584128 blocks super 1.2 512K chunks 2 near-copies [4/4] [UUUU]
      [===>.................]  resync = 18.1% (37959424/209584128) finish=13.8min speed=206120K/sec

unused devices: <none>

As you can see in the first highlighted line, the /dev/md0 device has been created in the RAID 10 configuration using the /dev/sda/dev/sdb/dev/sdc and /dev/sdd devices. The second highlighted area shows the layout that was used for this example (2 copies in the near configuration). The third highlighted area shows the progress on the build. You can continue the guide while this process completes.

Create and Mount the Filesystem

Next, create a filesystem on the array:

  • sudo mkfs.ext4 -F /dev/md0

Create a mount point to attach the new filesystem:

  • sudo mkdir -p /mnt/md0

You can mount the filesystem by typing:

  • sudo mount /dev/md0 /mnt/md0

Check whether the new space is available by typing:

  • df -h -x devtmpfs -x tmpfs
Output
Filesystem      Size  Used Avail Use% Mounted on
/dev/vda1        20G  1.1G   18G   6% /
/dev/md0        197G   60M  187G   1% /mnt/md0

The new filesystem is mounted and accessible.

Save the Array Layout

To make sure that the array is reassembled automatically at boot, we will have to adjust the /etc/mdadm/mdadm.conf file. We can automatically scan the active array and append the file by typing:

  • sudo mdadm –detail –scan | sudo tee -a /etc/mdadm/mdadm.conf

Afterwards, you can update the initramfs, or initial RAM file system, so that the array will be available during the early boot process:

  • sudo update-initramfs -u

Add the new filesystem mount options to the /etc/fstab file for automatic mounting at boot:

  • echo ‘/dev/md0 /mnt/md0 ext4 defaults,nofail,discard 0 0’ | sudo tee -a /etc/fstab

Your RAID 10 array should now automatically be assembled and mounted each boot.

Conclusion

In this guide, we demonstrated how to create various types of arrays using Linux’s mdadm software RAID utility. RAID arrays offer some compelling redundancy and performance enhancements over using multiple disks individually.

Once you have settled on the type of array needed for your environment and created the device, you will need to learn how to perform day-to-day management with mdadm. Our guide on how to manage RAID arrays with mdadm on Ubuntu 16.04 can help get you started.


WP2Social Auto Publish Powered By : XYZScripts.com