Looks like the ‘Linux Steam Integration’ project is being continued with Intel’s Clear Linux

Linux Steam Integration, the project originally made while developer Ikey Doherty was working on the Solus Linux distribution now seems to be continuing on under Intel with their Clear Linux distribution.

As a reminder on what it is, in their words: “Linux Steam Integration is a helper system to make the Steam Client and Steam games run better on Linux. In a nutshell, LSI automatically applies various workarounds to get games working, and fixes long standing bugs in both games and the client.”

The majority of the work done on it is by Doherty, who left Solus with a message sent to Phoronix in November. The LSI project didn’t really see much activity for many months, however this changed last month when a new repository popped up under Intel’s Clear Linux account. I’m not too up to date on what Doherty is doing now, but it seems he’s doing stuff for Intel again (he originally left Intel to work on Solus) with the LSI project now under the Intel banner.

It’s going to be interesting to see what they plan to do with it now. Whatever helps make Linux gaming better, I’m all for it. Find the new repository on GitHub.

Hat tip to Jacob.

Source

How to Run a Different OS Without Buying a New Computer

You don’t have to stick with Windows.Photo: Alex Cranz (Gizmodo)

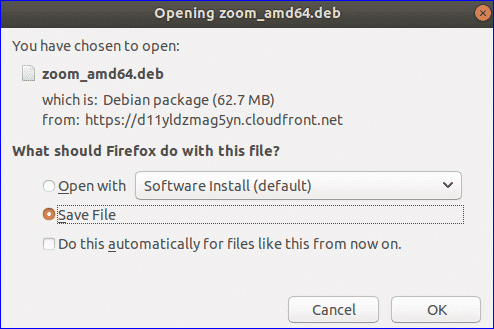
Maybe you’ve grown tired of your current laptop or desktop operating system and you just want to try something different. Or maybe you need to use multiple OSes for work. Either way, the need for a new operating system doesn’t mean you need a whole new computer. There are numerous ways to run other operating systems without going out and buying a new machine. We’ve gathered your options, with the pros and cons for each, below.

While it will be fairly easy to get Linux running on a Windows machine or vice versa you will find it more difficult to get macOS running on a non-Apple computer. You can run Windows and Linux on a Mac, alongside macOS, but you can’t run macOS on a computer built for Windows or Linux—at least not without investing a lot of time and effort.

Creating a Hackintosh (putting macOS on a non-Mac machine) isn’t supported by Apple (Apple would much rather you just bought a Mac). So you’re relying on third-party developers for your digital copy of macOS, and it might be illegal in your country as well. If you’ve confirmed its legal and are still interested in the process, check out this guide.

It’s also worth noting that you shouldn’t attempt any of these procedures without first making sure that all your important files and apps are comprehensively backed up—but you always have backups in place don’t you?

Dual-boot systems

This is the classic method for running two operating systems alongside each other: You essentially split your hard drive in two (a process called partitioning), and then treat drives for each OS. One drive runs one operating system, and one drive runs the other, and you choose which one you want every time you start up the computer.

Boot Camp is the macOS tool for creating dual-boot systems.Image: Apple

You can add Linux to a Windows computer, or Linux or Windows to a macOS computer—Windows needs to be purchased from Microsoft here, if you want to stay on the right side of the law. For a long time actually putting the new OS on your computer was difficult and risky, but the good news is your current operating system should have everything you need to do the job now.

In macOS, the tool you need is called Boot Camp and you can launch it from the Utilities folder inside Applications. Boot Camp takes care of the partitioning process and readying everything for Windows (or Linux), and Apple has a full guide here.

Disk Management can help you organize partitions on Windows.

If you’re running Windows and adding Linux in a dual-boot setup, the Linux installer should include tools for partitioning your main hard drive—just make sure you choose to install Linux alongside Windows. You’ll also need to create a Linux installer on a CD, DVD, or USB drive first, then boot from that: There’s an official guide for doing this with Ubuntu here, for example.

If you need another tool, search for the Disk Management utility from the Windows Start menu: Here you can view, edit, and manage disk partitions. One of the disadvantages of this method is that the process is more complicated to reverse if you change your mind.

Alternatively, you can skip the partition and install a second hard drive inside your machine—provided you’re running a desktop computer and have the space. The process isn’t particularly difficult—YouTube is packed with tutorials—but it is more of a serious undertaking than just splitting your current hard drive into two with a few mouse clicks. You have to actually crack open your computer and install the additional drive, as well as much around in the BIOS for your motherboard to confirm the drive is installed correctly to function as a boot drive.

But if that’s still too daunting don’t worry. There’s another way to get operating systems on your computer without partitioning drives (and running the risk of losing data) or installing entirely new drives.

Pros: Best performance. Everything runs natively with few software hiccups.

Cons: Can be difficult to set up if you’re inexperienced. Can potentially destroy data on a current machine so backing everything up before attempting is highly recommended.

Virtual machines

The virtual machine route is the simplest route for installing a new OS. In this scenario you’re running one OS inside another one—it can be set up in minutes, no disk management is required, and the second OS can be removed very easily… but you do need a computer with enough power to handle running two operating systems at once, which means we wouldn’t recommend this route for older computers or low-powered ones.

The exact specs you’re going to need really depend on the operating systems you’re dealing with, but for something like running Windows on top of macOS we’d recommend having at least 8GB of RAM installed. You can always test these tools out and see if the performance is acceptable.

Once you’ve settled on using a virtual machine the next challenge is choosing which virtual machine software you’ll install.

Parallels makes running Windows on macOS straightforward.

VirtualBox is a good choice here—it’s open source and free to use, for a start, and will do the job of getting Linux added to Windows or Linux or Windows added to macOS. That said, it does lack some of the polish and the advanced features you get with the commercial, paid-for software, so it’s worth thinking about the alternatives.

One of the best alternatives for macOS is Parallels (yours from $80): Assuming you have the specs to run it comfortably, it makes adding Linux or Windows to a Mac very easy, and will even point you towards the right downloads (you’ll need to pay for Windows eventually, but you can test it out for free). Switching OSes can be done with a click, and you can even run individual Linux or Windows apps inside the macOS environment.

Another option is VMware Fusion ($80 and up), which offers more advanced tools suitable for developers, IT administrators, and power users. Again, it makes adding Linux or Windows to macOS straightforward, and the software will guide you step-by-step through the process. There’s very little to choose between this and Parallels, from the starting price to the feature set, and Fusion can also run single Windows applications as if they’re running on macOS if needed.

VMware Workstation Player can install Linux or an older version of Windows on Windows.

For Windows users wanting something other than VirtualBox, there’s VMware Workstation Player, which is free for personal use (a paid-for Pro edition is also available). As with the macOS Fusion software, it’s powerful yet simple to use, and will guide you step-by-step through the process of adding a virtual machine to Windows whether you want to run an older Windows version (which you need to purchase a license for) or a Linux distro (which you don’t).

As we’ve said, the big advantage here is ease of use: You don’t need to create bootable USB drives or split disks into partitions, and all these programs make setting up a virtual machine a breeze. Even the paid-for tools we’ve mentioned come with free trials, so you can give them a go and see if they work (and work fast enough) for you.

Pros: Best for beginners. Unlikely to harm any data currently on your PC. Pretty easy to set up.

Cons: Virtualization software can be expensive. Requires a powerful machine for the best performance. Not recommended for lower-end computers.

Live installations

When it comes to adding Linux to a Windows or macOS machine, you’ve got one final option: A live installation. You essentially run Linux from a USB drive or a CD or a DVD, without touching your main hard drive or operating system. It’s really easy to set up, and you don’t have to fiddle with your current OS, but it does limit the performance and features of Linux (because it’s not being run from your main hard drive).

This is a good option to go for if you just want to try an operating system out, or are only going to be using it briefly. Ubuntu has provided an official guide to creating a bootable USB stick here, which is easy to follow, but if you prefer a different flavor of Linux then you should be able to find a similar guide for whatever distro you want to try out.

Ubuntu is one OS you can run straight from a USB stick.

Linux Mint is another lightweight distro you can run from USB or disc: You can find the instructions for finding bootable media for this OS here. Even if you’ve never used Linux before, you shouldn’t have any trouble putting together a bootable memory stick, CD, or DVD, and then it’s just a question of launching the operating system.

To do this, you need to restart your computer and opt to boot from the Linux device rather than your main hard drive. On a Mac, just hold down the Option key after hearing the boot sound; on Windows machines, a key like F12 or Delete is usually used (check for instructions as the computer starts up, or check the instructions that came with it).

You’ll be able to choose the Linux USB drive or disc you’ve created, at which point the operating system starts. Considering most Linux distros come with a smattering of basic apps, you should have everything you need to get going—you can happily run the OS without touching anything on your main system.

Choosing boot options in Linux Mint.

It’s quick and it’s simple to do, so what are the disadvantages? As we’ve mentioned, it’s usually slower (which is why you want to choose a Linux distro that’s as lightweight as possible), and any changes you make to the system aren’t usually saved—you just start again from scratch next time you boot up. We’ve written more about the whole process here.

This is a good option for just testing out Linux, or getting online with a fast, basic, stripped-down OS. If you really want to use Linux seriously to install applications and edit files, you’re better off going with one of the other options mentioned above.

Pros: Super easy. Quick to set up. Keeps your primary data safe. Free apart from the cost of a USB drive.

Cons: You lose every change made to the OS on a restart. Not ideal for repeat use. Running the OS via a USB drive means it can only be as fast as the USB drive itself, which means it will be slower than running directly for your hard drive or SSD.

Source

Install Yarn on Ubuntu and Debian Linux [Official Way]

This quick tutorial shows you the official way of installing Yarn package manager on Ubuntu and Debian Linux. You’ll also learn some basic Yarn commands and the steps to remove Yarn completely.

Yarn is an open source JavaScript package manager developed by Facebook. It is an alternative or should I say improvement to the popular npm package manager. Facebook developers’ team created Yarn to overcome the shortcomings of npm. Facebook claims that Yarn is faster, reliable and more secure than npm.

Like npm, Yarn provides you a way to automate the process of installing, updating, configuring, and removing packages retrieved from a global registry.

The advantage of Yarn is that it is faster as it caches every package it downloads so it doesn’t need to download it again. It also parallelizes operations to maximize resource utilization. Yarn also uses checksums to verify the integrity of every installed package before its code is executed. Yarn also guarantees that an install that worked on one system will work exactly the same way on any other system.

If you are using nodejs on Ubuntu, probably you already have npm installed on your system. In that case, you can use npm to install Yarn globally in the following manner:

sudo npm install yarn -g

However, I would recommend using the official way to install Yarn on Ubuntu/Debian.

Installing Yarn on Ubuntu and Debian [The Official Way]

Yarn JS

The instructions mentioned here should be applicable to all versions of Ubuntu such as Ubuntu 18.04, 16.04 etc. The same set of instructions are also valid for Debian and other Debian based distributions.

Since the tutorial uses Curl to add the GPG key of Yarn project, it would be a good idea to verify whether you have Curl installed already or not.

sudo apt install curl

The above command will install Curl if it wasn’t installed already. Now that you have curl, you can use it to add the GPG key of Yarn project in the following fashion:

curl -sS https://dl.yarnpkg.com/debian/pubkey.gpg | sudo apt-key add –

After that, add the repository to your sources list so that you can easily upgrade the Yarn package in future with the rest of the system updates:

sudo sh -c ‘echo “deb https://dl.yarnpkg.com/debian/ stable main” >> /etc/apt/sources.list.d/yarn.list’

You are set to go now. Update Ubuntu or Debian system to refresh the list of available packages and then install yarn:

sudo apt update
sudo apt install yarn

This will install Yarn along with nodejs. Once the process completes, verify that Yarn has been installed successfully. You can do that by checking the Yarn version.

yarn –version

For me, it showed an output like this:

yarn –version
1.12.3

This means that I have Yarn version 1.12.3 installed on my system.

Using Yarn

I presume that you have some basic understandings of JavaScript programming and how dependencies work. I am not going to go in details here. I’ll show you some of the basic Yarn commands that will help you getting started with it.

Creating a new project with Yarn

Like npm, Yarn also works with a package.json file. This is where you add your dependencies. All the packages of the dependencies are cached in the node_modules directory in the root directory of your project.

In the root directory of your project, run the following command to generate a fresh package.json file:

It will ask you a number of questions. You can skip the questions r go with the defaults by pressing enter.

yarn init
yarn init v1.12.3
question name (test_yarn): test_yarn_proect
question version (1.0.0): 0.1
question description: Test Yarn
question entry point (index.js):
question repository url:
question author: abhishek
question license (MIT):
question private:
success Saved package.json
Done in 82.42s.

With this, you get a package.json file of this sort:

{
“name”: “test_yarn_proect”,
“version”: “0.1”,
“description”: “Test Yarn”,
“main”: “index.js”,
“author”: “abhishek”,
“license”: “MIT”
}

Now that you have the package.json, you can either manually edit it to add or remove package dependencies or use Yarn commands (preferred).

Adding dependencies with Yarn

You can add a dependency on a certain package in the following fashion:

yarn add <package_name>

For example, if you want to use Lodash in your project, you can add it using Yarn like this:

yarn add lodash
yarn add v1.12.3
info No lockfile found.
[1/4] Resolving packages…
[2/4] Fetching packages…
[3/4] Linking dependencies…
[4/4] Building fresh packages…
success Saved lockfile.
success Saved 1 new dependency.
info Direct dependencies
└─ [email protected]
info All dependencies
└─ [email protected]
Done in 2.67s.

And you can see that this dependency has been added automatically in the package.json file:

{
“name”: “test_yarn_proect”,
“version”: “0.1”,
“description”: “Test Yarn”,
“main”: “index.js”,
“author”: “abhishek”,
“license”: “MIT”,
“dependencies”: {
“lodash”: “^4.17.11”
}
}

By default, Yarn will add the latest version of a package in the dependency. If you want to use a specific version, you may specify it while adding.

yarn add [email protected]

As always, you can also update the package.json file manually.

Upgrading dependencies with Yarn

You can upgrade a particular dependency to its latest version with the following command:

yarn upgrade <package_name>

It will see if the package in question has a newer version and will update it accordingly.

You can also change the version of an already added dependency in the following manner:

yarn upgrade [email protected]_or_tag

You can also upgrade all the dependencies of your project to their latest version with one single command:

yarn upgrade

It will check the versions of all the dependencies and will update them if there are any newer versions.

Removing dependencies with Yarn

You can remove a package from the dependencies of your project in this way:

yarn remove <package_name>

Install all project dependencies

If you made any changes to the project.json file, you should run either

yarn

or

yarn install

to install all the dependencies at once.

How to remove Yarn from Ubuntu or Debian

I’ll complete this tutorial by mentioning the steps to remove Yarn from your system if you used the above steps to install it. If you ever realized that you don’t need Yarn anymore, you will be able to remove it.

Use the following command to remove Yarn and its dependencies.

sudo apt purge yarn

You should also remove the Yarn repository from the repository list:

sudo rm /etc/apt/sources.list.d/yarn.list

The optional next step is to remove the GPG key you had added to the trusted keys. But for that, you need to know the key. You can get that using the apt-key command:

Warning: apt-key output should not be parsed (stdout is not a terminal) pub rsa4096 2016-10-05 [SC] 72EC F46A 56B4 AD39 C907 BBB7 1646 B01B 86E5 0310 uid [ unknown] Yarn Packaging

[email protected]

sub rsa4096 2016-10-05 [E] sub rsa4096 2019-01-02 [S] [expires: 2020-02-02]

The key here is the last 8 characters of the GPG key’s fingerprint in the line starting with pub.

So, in my case, the key is 86E50310 and I’ll remove it using this command:

sudo apt-key del 86E50310

You’ll see an OK in the output and the GPG key of Yarn package will be removed from the list of GPG keys your system trusts.

I hope this tutorial helped you to install Yarn on Ubuntu, Debian, Linux Mint, elementary OS etc. I provided some basic Yarn commands to get you started along with complete steps to remove Yarn from your system.

I hope you liked this tutorial and if you have any questions or suggestions, please feel free to leave a comment below.

Source

Tech Ethics New Year’s Resolution: Don’t Build Software You Will Regret | Linux.com

At The New Stack, we talk a lot about avoiding technical debt, but what about the ethical debt? Let’s begin by attempting to define just what ethical technical delivery even is. Black Pepper Software’s Sam Warner at the Good Tech Conf — a conference which focused on technology for social good — simplified this great university philosophy topic, saying ethical software:

  • causes no negative social impact
  • doesn’t make the world worse to live in

At Coed Ethics, another conference dedicated to tech ethics that The New Stack covered earlier this year, Doteveryone’s Sam Brown echoed Warner, saying “Responsible technology considers the social impact it creates and seeks to understand and minimalize its potential unintended consequences.” Doteveryone as an organization is dedicated to supporting responsible technology as a key business driver for positive and inclusive growth, innovation, and trust in technology.

But should those of us building the future’s code feel obligated to contribute something toward social good? Warner argues we should go even further than that and contribute to work that benefits the most amount of people in a significant way.

So, if this is our objective, where do we begin?

Read more at The New Stack

Source

SD Times news digest: SDM 1.2.0, Apache NetBeans 10.0, and Linux 4.20

Atomist has released Software Delivery Machine (SDM) 1.2.0. The release was mostly focused on fixing bugs, the company explained.

New features include an improved config command in the CLI, LazyProjectLoader for preventing eager cloning of Git projects, a convenience method for implementing ExecuteGoal instances, and more.

The release is also backwards compatible and can be used with any SDM that is running SDM 1.0.0 or higher.

Apache NetBeans 10.0 is now available
Apache has released Apache NetBeans 10.0. According to the company, this is the the second major release of the IDE.

Apache NetBeans 10.0 focuses on adding support for JDK 11, JUnit 5, PHP, JavaScript, and Groovy. The release also includes a number of bug fixes.

Linux 4.20 is now available
Linux 4.20 is now available, with improvements to networking, such as drivers, core networking fixes, and bpf. The release also includes some non-network driver updates and reverts a series of x86 inline asm changes that will not be necessary as a result of upcoming compiler support. A complete list of features can be found here.

Source

Chef Open Source Community: Year in Review

Throughout 2018, we published monthly community updates to summarize valuable new features & and developments in Chef’s open source projects (Chef, Habitat and InSpec) as well as ecosystem tools & content like Test Kitchen, Foodcritic, Supermarket, Habitat core plans, and InSpec profiles & plugins. For the month of December, we thought we would use the time to look back on the whole year and also share with you some metrics about our various communities.

As usual, 2018 was a big year for the Chef project, with a focus on out-of-the-box experience and ease of use. Chef 14, released in April, brought 27 new resources into core Chef that were previously only found in community cookbooks. You no longer need a Windows cookbook to automate Windows servers, for example.

Minor releases of Chef 14 throughout 2018 brought the number up to almost 50 new built-in resources. And, with the preview resources functionality in Chef 14.3, you can avoid namespace clashes between built-in resources and ones in community cookbooks until you are ready to upgrade your cookbooks, making the process of upgrading the Chef client itself much easier.

At ChefConf 2018, we introduced Chef Workstation, which is an improved desktop experience for all Chef users. It includes an ad-hoc remote execution mode, chef-run, which allows new users to get started with task-based automation against remote nodes over SSH or WinRM without having to install anything. Chef Workstation bundles all the functionality of ChefDK, so there will not be a ChefDK 4 released in April 2019; all future development on the desktop experience for Chef will happen in Chef Workstation.

Chef’s community was very active, with over 700 participants in Slack, 15,000 messages exchanged, and over 800 pull requests to Chef and its related projects across about 100 contributors.

Habitat evolved extremely quickly this year, with releases at least once a month. As a portable application packaging technology, we announced integrations with Kubernetes, Open Service Broker, Helm charts, Red Hat OpenShift, and many other technologies including hosted Kubernetes services like Azure Kubernetes Service and Google Kubernetes Engine. We also saw many users applying Habitat to legacy Windows applications to modernize and migrate them from end-of-life Windows versions like Server 2008 to newer ones.

We also released on-premises Habitat depot functionality in time for ChefConf 2018. Over the course of the year, we have been making user experience improvements to the build environment (to make it faster, using aching) as well as the management interface for the supervisor. We also said farewell to the composite packages feature of Habitat for now.

As the youngest open source project in Chef’s portfolio, most (about 80%) of contributions to Habitat are being made by Chef engineering. However, the community is extremely active, with nearly 500 participants in Slack, exchanging a whopping 46,000 messages throughout 2018. There were also over 1,700 pull requests to the project across 117 contributors.

We released two major versions of InSpec this year, which means that 2018 was an enormous leap forward in functionality for the project. InSpec 2.0 in February brought us the ability to evaluate all cloud infrastructure (and not just servers or containers) for compliance by interrogating cloud providers’ APIs. InSpec ships with first-class support for dozens of AWS, Microsoft Azure and Google Cloud resources and is also integrated into cloud provider-native interfaces like the Google Cloud Security Command Center and Microsoft Azure Cloud Shell.

InSpec 3.0 brought an improved developer experience including a plugin system to allow InSpec to be extended not only to other clouds like DigitalOcean, but to any other devices or software reachable over APIs. We have also seen many users utilizing InSpec to demonstrate audit compliance, so many of the improvements in InSpec (such as better metadata, skipped controls messaging, severity levels, etc.) are aimed in that direction.

Community members made approximately half of the contributions to InSpec. 2018 saw about 700 pull requests to InSpec across 124 committers.

As you can see from the various metrics, Chef’s open source projects would not be what they are without a strong community. Again, we’d like to thank our most active community contributors, but also extend our thanks to any of you who have participated in Slack, submitted a GitHub issue, given us feedback on features and bugs, attended one of our community summits this year in London or Seattle, or have in any other way strengthened our community. Chef the company celebrated its tenth anniversary this year and there’s no way we could have reached this milestone without you. On behalf of everyone at Chef Software, thank you for your support and participation – we are eternally grateful.

Source

The Linux Kernel Ends 2018 With Almost 75k Commits This Year | Linux.com

As of this New Year’s Eve afternoon, the Linux kernel saw 74,974 commits this year that added 3,385,121 lines of code and removed 2,512,040 lines.

For as impressive as seeing almost 75k commits in a single year to an open-source project, it’s not actually a record high. Last year in fact saw 80,725 commits that added 3.9 million lines and removed 1.3 million lines…

Besides Linus Torvalds himself, those with the most commits this year to the Linux kernel included David S. Miller, Arnd Bergmann, Christoph Hellwig, Colin Ian King, and Chris Wilson. There were 4,208 different detected authors this year compared to 4,400 in 2017 but higher than the 4,043 recorded for 2016.

Read more at Phoronix

Source

How to install Zoom in Ubuntu – Linux Hint

Online communication is becoming easier day by day. Now, the online users not only can send or receive messages instantly but also communicate by face to face to do various types of online tasks. Zoom is a very popular video communication tool for chatting, online meetings, screen-sharing, video conferencing etc. It is supported by most of the popular operating system like Windows, Linux, Mac, and Android. So, this software can be installed and used in different devices such as desktop, mobile, tablet pc etc. How you can install zoom in Ubuntu is shown in this tutorial.

You can download Zoom package from the Zoom website or executing the command from the terminal. Both ways are shown here.

If you are a new Linux user then it is a better option to install zoom by following the steps. Go to the following URL location to download the zoom package file of Linux according to your operating system and computer configuration.

https://zoom.us/download?os=linux

Select your Linux operating system from Linux Type dropdown list.

Select OS Architecture and operating system version after selecting Linux operating system. Click on the Download button to download the package.

Click on Save File radio button and press OK button to start the download.

Go to the download location, select the file and right click on it. Click on Open With Software Install from the pop-up menu to open the installation dialog box.

Click on Install button to install Zoom.

Provide your root password to start the installation process.

Install Zoom from the terminal

If you are familiar with Ubuntu operating system then you can run the following commands from the terminal to install Zoom more quickly. Click Ctrl+Alt+T to open the terminal and run the following command to download Zoom package.

$ wget -O Downloads/zoom.deb https://zoom.us/client/latest/zoom_amd64.deb

Go to the download location and run the command to install the package.

$ cd Downloads
$ sudo dpkg -i zoom.deb

Running Zoom

After completing the installation process, search Zoom in the search bar of Show Application page. If the following icon appears then Zoom is installed properly. Click on Zoom icon to open the Zoom application.

The following dialog will appear when Zoom application launches. Click on Sign In button to use this application.

You can use SSO or Google or Facebook or Zoom account to log in to this application. If you don’t have Zoom account and don’t want to use other options to log in then you can create a free Zoom account from Zoom website or click on Sign Up link.

Go to the following URL link to open a free Zoom account from Zoom website. Click on ‘SIGN UP, IT’S FREE‘ button of this page to open the account. Enter the email address that you want to use for opening the account and click on the Sign Up button.

https://zoom.us/signup

You will get an activation email from zoom site to activate your account. So, check your email address and click on ‘Activate Account’ Button to complete the next steps of account creation. The following screen will appear after clicking the button. Fill up the following form and click on ‘Continue’ button to go to the next step.

If you want to invite some others to communicate with this tool then click on the Invite button. You can skip this step by clicking on ‘skip this step’ button.

If you get the following page then your account is ready to use.

Now, Sign In to your Zoom application by providing valid email address and password that you have used at the time of Zoom account creation. The following screen will appear if you able to sign in successfully in your zoom account. The four main options of this application are ‘Start with video’, ‘Start without video’, ‘Join’ and ‘Schedule’. ‘Start with video’ option is used for video chatting or video conference. ‘Start without video’ option is used for the phone call or audio chatting. You can use ‘Join’ option for joining any meeting. ‘Schedule’ option is used for setting the meeting schedule.

How you can do audio chatting is explained in this part of the tutorials. The following screen will appear when you click on ‘Start without video’ option. You can do audio call by using your phone or computer. Use ‘Computer Audio’ tab if you want to do an audio chat by using your computer.

Before starting the chat, it is better to check your speaker and microphone of your computer by clicking ‘Test speaker and microphone’ link. After checking sound, click on ‘Join with Computer Audio’ button to join the audio meeting. You will get the following similar screen. Here Participant ID is 47 which will be used for communicating with others. Click on ‘End Meeting’ link to exit from the meeting. You will get an invitation URL that you can use to invite your friends or colleagues to join this meeting by clicking ‘Invite Others’ option.

When you will click on ‘Invite Others’ option then the following screen will appear. You can invite others by email or contacts. If you select ‘Invite by Email’ then your selected email service will be used for sending the invitation and if you want to send the invitation to the particular contacts then select ‘Invite By Contacts’.

You can also share your screen from here. Click on ‘Share Screen’ option from Join Meeting dialog box to share the screen with other participants of the meeting. You have to click ‘Share Screen’ button after selecting the window or application that you want to share.

You can use the Zoom tool to communicate with your friends, family members and colleagues. One feature of the Zoom tool is explained in this tutorial. This tool has many other useful features those you can use to do your regular personal or official tasks in a more easy way. Hope, this tutorial will help you install and use Zoom tool in Ubuntu.

Source

Troubleshooting hardware problems in Linux

Linux servers run mission-critical business applications in many different types of infrastructures including physical machines, virtualization, private cloud, public cloud, and hybrid cloud. It’s important for Linux sysadmins to understand how to manage Linux hardware infrastructure—including software-defined functionalities related to networking, storage, Linux containers, and multiple tools on Linux servers.

It can take some time to troubleshoot and solve hardware-related issues on Linux. Even highly experienced sysadmins sometimes spend hours working to solve mysterious hardware and software discrepancies.

The following tips should make it quicker and easier to troubleshoot hardware in Linux. Many different things can cause problems with Linux hardware; before you start trying to diagnose them, it’s smart to learn about the most common issues and where you’re most likely to find them.

Quick-diagnosing devices, modules, and drivers

The first step in troubleshooting usually is to display a list of the hardware installed on your Linux server. You can obtain detailed information on the hardware using ls commands such as lspci, lsblk, lscpu, and lsscsi. For example, here is output of the lsblk command:

# lsblk
NAME MAJ:MIN RM SIZE RO TYPE MOUNTPOINT
xvda 202:0 0 50G 0 disk
├─xvda1 202:1 0 1M 0 part
└─xvda2 202:2 0 50G 0 part /
xvdb 202:16 0 20G 0 disk
└─xvdb1 202:17 0 20G 0 part

If the ls commands don’t reveal any errors, use init processes (e.g., systemd) to see how the Linux server is working. systemd is the most popular init process for bootstrapping user spaces and controlling multiple system processes. For example, here is output of the systemctl status command:

# systemctl status
● bastion.f347.internal
State: running
Jobs: 0 queued
Failed: 0 units
Since: Wed 2018-11-28 01:29:05 UTC; 2 days ago
CGroup: /
├─1 /usr/lib/systemd/systemd –switched-root –system –deserialize 21
├─kubepods.slice
│ ├─kubepods-pod3881728a_f2af_11e8_af77_06af52f87498.slice
│ │ ├─docker-88b27385f4bae77bba834fbd60a61d19026bae13d18eb147783ae27819c34967.scope
│ │ │ └─23860 /opt/bridge/bin/bridge –public-dir=/opt/bridge/static –config=/var/console-config/console-c
│ │ └─docker-a4433f0d523c7e5bc772ee4db1861e4fa56c4e63a2d48f6bc831458c2ce9fd2d.scope
│ │ └─23639 /usr/bin/pod
….

Digging into multiple loggings

Dmesg allows you to figure out errors and warnings in the kernel’s latest messages. For example, here is output of the dmesg | more command:

# dmesg | more
….
[ 1539.027419] IPv6: ADDRCONF(NETDEV_UP): eth0: link is not ready
[ 1539.042726] IPv6: ADDRCONF(NETDEV_UP): veth61f37018: link is not ready
[ 1539.048706] IPv6: ADDRCONF(NETDEV_CHANGE): veth61f37018: link becomes ready
[ 1539.055034] IPv6: ADDRCONF(NETDEV_CHANGE): eth0: link becomes ready
[ 1539.098550] device veth61f37018 entered promiscuous mode
[ 1541.450207] device veth61f37018 left promiscuous mode
[ 1542.493266] SELinux: mount invalid. Same superblock, different security settings for (dev mqueue, type mqueue)
[ 9965.292788] SELinux: mount invalid. Same superblock, different security settings for (dev mqueue, type mqueue)
[ 9965.449401] IPv6: ADDRCONF(NETDEV_UP): eth0: link is not ready
[ 9965.462738] IPv6: ADDRCONF(NETDEV_UP): vetheacc333c: link is not ready
[ 9965.468942] IPv6: ADDRCONF(NETDEV_CHANGE): vetheacc333c: link becomes ready
….

You can also look at all Linux system logs in the /var/log/messages file, which is where you’ll find errors related to specific issues. It’s worthwhile to monitor the messages via the tail command in real time when you make modifications to your hardware, such as mounting an extra disk or adding an Ethernet network interface. For example, here is output of the tail -f /var/log/messages command:

# tail -f /var/log/messages
Dec 1 13:20:33 bastion dnsmasq[30201]: using nameserver 127.0.0.1#53 for domain in-addr.arpa
Dec 1 13:20:33 bastion dnsmasq[30201]: using nameserver 127.0.0.1#53 for domain cluster.local
Dec 1 13:21:03 bastion dnsmasq[30201]: setting upstream servers from DBus
Dec 1 13:21:03 bastion dnsmasq[30201]: using nameserver 192.199.0.2#53
Dec 1 13:21:03 bastion dnsmasq[30201]: using nameserver 127.0.0.1#53 for domain in-addr.arpa
Dec 1 13:21:03 bastion dnsmasq[30201]: using nameserver 127.0.0.1#53 for domain cluster.local
Dec 1 13:21:33 bastion dnsmasq[30201]: setting upstream servers from DBus
Dec 1 13:21:33 bastion dnsmasq[30201]: using nameserver 192.199.0.2#53
Dec 1 13:21:33 bastion dnsmasq[30201]: using nameserver 127.0.0.1#53 for domain in-addr.arpa
Dec 1 13:21:33 bastion dnsmasq[30201]: using nameserver 127.0.0.1#53 for domain cluster.local

Analyzing networking functions

You may have hundreds of thousands of cloud-native applications to serve business services in a complex networking environment; these may include virtualization, multiple cloud, and hybrid cloud. This means you should analyze whether networking connectivity is working correctly as part of your troubleshooting. Useful commands to figure out networking functions in the Linux server include ip addr, traceroute, nslookup, dig, and ping, among others. For example, here is output of the ip addr show command:

# ip addr show
1: lo: <LOOPBACK,UP,LOWER_UP> mtu 65536 qdisc noqueue state UNKNOWN group default qlen 1000
link/loopback 00:00:00:00:00:00 brd 00:00:00:00:00:00
inet 127.0.0.1/8 scope host lo
valid_lft forever preferred_lft forever
inet6 ::1/128 scope host
valid_lft forever preferred_lft forever
2: eth0: <BROADCAST,MULTICAST,UP,LOWER_UP> mtu 9001 qdisc mq state UP group default qlen 1000
link/ether 06:af:52:f8:74:98 brd ff:ff:ff:ff:ff:ff
inet 192.199.0.169/24 brd 192.199.0.255 scope global noprefixroute dynamic eth0
valid_lft 3096sec preferred_lft 3096sec
inet6 fe80::4af:52ff:fef8:7498/64 scope link
valid_lft forever preferred_lft forever
3: docker0: <NO-CARRIER,BROADCAST,MULTICAST,UP> mtu 1500 qdisc noqueue state DOWN group default
link/ether 02:42:67:fb:1a:a2 brd ff:ff:ff:ff:ff:ff
inet 172.17.0.1/16 scope global docker0
valid_lft forever preferred_lft forever
inet6 fe80::42:67ff:fefb:1aa2/64 scope link
valid_lft forever preferred_lft forever
….

In conclusion

Troubleshooting Linux hardware requires considerable knowledge, including how to use powerful command-line tools and figure out system loggings. You should also know how to diagnose the kernel space, which is where you can find the root cause of many hardware problems. Keep in mind that hardware issues in Linux may come from many different sources, including devices, modules, drivers, BIOS, networking, and even plain old hardware malfunctions.

Source

The developers of ‘The End of the Sun’ show some behind the scenes development info

Coming to Linux sometime this year, The End of the Sun is a first-person exploration and adventure game set in the world of Slavic rites, beliefs, legends and their everyday life. The developers recently some behind the scenes development information.

The blog post linked here contains some pretty in-depth information on how they’re creating the world and more specifically the characters themselves. Making use of photogrammetry and noting how they’re working around being a small team with limited resources, it’s quite fun to read about. I especially liked how they detail making people grow old.

If you’re interested in game development, it’s certainly worth a read.

What they say the game currently features:

  • Ethnographic museums scanned via photogrammetry – To get top-class graphics, we visited ethnographic museums where we scanned hundreds of objects and entire buildings, so you can admire them in the game the way they actually are. We also scanned the elements of the natural environment in order to get the most European Slavonic climate possible.
  • Travel in time – teleport between four periods far away from each other by many years, set in four main seasons (Spring, Summer, Autumn, Winter). Get to know the stories of the same heroes at different stages of their lives.
  • Dynamic world, weather conditions, lighting – the time of day, weather and lighting change smoothly and dynamically within one day in front of your eyes as you discover other parts of the mystery.
  • Consequences of time travelling – certain elements of history and the world around you will open up to you only when you set the paths of fate and influence the future. Events from the past have an impact on the future.
  • Slavic World, its culture and daily activities – While experiencing the story, you will be able to enjoy not only the immersive history, but also look at the long-forgotten everyday activities and objects that are no longer used today.
  • Exploration – Travel between the homesteads and surroundings of the village, finding out the details of the mystery that lies somewhere there.
  • Non-linear and engaging story – You can experience particular immersive stories at your own pace and at the moment you feel like it.

One of the team, Jakub Machowski, previously worked on The Mims Beginning which released with Linux support back in 2015.

You can see the original teaser below:

It will be launching on Linux, Mac and Windows this year. They told us the price will be around $19.99 and they plan to support English, Polish, German, Russian, Italian and Spanish languages.

You can wishlist and follow it on Steam. I’m certainly interested but I’m waiting on some proper gameplay footage.

Source

WP2Social Auto Publish Powered By : XYZScripts.com