More Roman Numerals and Bash

When in Rome: finishing the Roman numeral converter script.

In my last article, I started digging in to a classic computer science puzzle: converting Roman numerals to
Arabic numerals. First off, it more accurately should be called Hindu-Arabic, and it’s worth
mentioning that it’s believed to have been invented somewhere between the first and fourth
century—a counting system based on 0..9 values.

The script I ended up with last time offered the basics of parsing a specified Roman numeral and
converted each value into its decimal equivalent with this simple function:

mapit() {
case $1 in
I|i) value=1 ;;
V|v) value=5 ;;
X|x) value=10 ;;
L|l) value=50 ;;
C|c) value=100 ;;
D|d) value=500 ;;
M|m) value=1000 ;;
* ) echo “Error: Value $1 unknown” >&2 ; exit 2 ;;
esac
}

Then I demonstrated a slick way to use the underutilized seq command to parse a string character by
character, but the sad news is that you won’t be able to use it for the final Roman numeral to
Arabic numeral converter. Why? Because depending on the situation, the script sometimes
will need to jump two ahead, and not just go left to right linearly, one character at a time.

Instead, you can build the main loop as a while loop:

while [ $index -lt $length ] ; do

our code

index=$(( $index + 1 ))
done

There are two basic cases to think about in terms of solving this algorithmic puzzle: the subsequent
value is greater than the current value, or it isn’t—for example, IX versus II. The first is 9
(literally 1 subtracted from 10), and the second is 2. That’s no surprise; you’ll need to know both the
current and next values within the script.

Sharp readers already will recognize that the last character in a sequence is a special case,
because there won’t be a next value available. I’m going to ignore the special case to start with,
and I’ll address it later in the code development. Stay tuned, sharpies!

Because Bash shell scripts don’t have elegant in-line functions, the code to get the current and
next values won’t be value=mapit(romanchar), but it’ll be a smidge clumsy with its use of the global
variable value:

mapit $
currentval=$value

mapit $
nextval=$value

It’s key to realize that in the situation where the next value isn’t greater than the current value
(for example, MC), you can’t automatically conclude that the next value isn’t going to be part of a
complex two-value sequence anyway. Like this: MCM. You can’t just say M=1000 and C=500, so let’s
just convert it to 1500 and process the second M when we get to it. MCM=1900, not 2500!

The basic logic turns out to be pretty straightforward:

if [ $nextval -gt $currentval ] ; then
sum=$(( $sum + $nextval – $currentval ))
else
sum=$(( $sum + currentval ))
fi

Done!

Or, um, not. The problem with the conditional code above is that in the situation where you’ve
referenced both the current and next value, you need to ensure that the next value isn’t again
processed the next time through the loop.

In other words, when the sequence “CM” is converted, the M shouldn’t be converted yet
again the second time through the loop.

This is precisely why I stepped away from the for loop, so you can have some passes through the loop
be a +1 iteration but others be a +2 iteration as appropriate.

With that in mind, let’s add the necessary line to the conditional statement:

if [ $nextval -gt $currentval ] ; then
sum=$(( $sum + $nextval – $currentval ))
index=$(( $index + 1 ))
else
sum=$(( $sum + currentval ))
fi

Remember that the very bottom of the while loop still has the index value increment +1. The above
addition to the conditional statement is basically that when the situation of next > current is
encountered, the script will process both values and jump ahead an extra character.

This means that for any given Roman numeral, the number of times through the loop will be equal to or
less than the total number of characters in the sequence.

Which means the problem is now solved except for the very last value in the sequence. What happens if
it isn’t part of a next-current pair? At its most simple, how do you parse “X”?

That turns out to require a bunch of code to sidestep both the conversion of nextval from the string
(which will fail as it’s reaching beyond the length of the string) and any test reference to
nextval.

That suggests a simple solution: wrap the entire if-then-else code block in a conditional that tests
for the last character:

if [ $index -lt $length ] ; then
if-then-else code block
else
sum=$(( $sum + $currentval ))
fi

That’s it. By George, I think you’ve got it! Here’s the full while statement, so you can
see how this fits into the overall program logic:

while [ $index -le $length ] ; do

mapit $
currentval=$value

if [ $index -lt $length ] ; then
mapit $
nextval=$value

if [ $nextval -gt $currentval ] ; then
sum=$(( $sum + $nextval – $currentval ))
index=$(( $index + 1 ))
else
sum=$(( $sum + $currentval ))
fi
else
sum=$(( $sum + $currentval ))
fi

index=$(( $index + 1 ))

done

It turns out not to be particularly complex after all. The key is to recognize that you need to parse the
Roman number in a rather clumped manner, not letter by letter.

Let’s give this script a few quick tests:

$ sh roman.sh DXXV
Roman number DXXV converts to Arabic value 525
$ sh roman.sh CMXCIX
Roman number CMXCIX converts to Arabic value 999
$ sh roman.sh MCMLXXII
Roman number MCMLXXII converts to Arabic value 1972

Mission accomplished.

In my next article, I plan to look at the obverse of this coding challenge, converting Arabic numerals to
Roman numeral sequences. In other words, you enter 99, and it returns XCIX. Why not take a stab at
coding it yourself while you’re waiting?

Source

How to use parted on Linux – Linux Hint

Parted is a command line tool for managing disk partitions on Linux. Parted can be used to work with both MSDOS and GPT partition tables. Parted can be used to do many low level partitioning tasks easily. In order to use parted correctly, you will need a lot of knowledge on the physical structure of the disk such as the block size of the disk. In this article, I will show you how to use parted on Linux. I will be using Ubuntu 18.04 LTS for the demonstration. So, let’s get started.

If you’re using Ubuntu or any Debian based Linux distributions, then you can easily install parted as it is available in the official package repository. First, update the APT package repository cache with the following command:

The APT package repository cache is updated.

Now, run the following command to install parted:

$ sudo apt install parted

Now, press y and then press <Enter> to continue.

Parted should be installed.

On CentOS/RHEL 7, you can install parted with the following command:

$ sudo yum install parted -y

Finding Storage Device Identifiers:

Before you can start working with parted, you have to know which storage device you need to partition.

You can run the following command to list all the attached storage devices on your computer:

$ sudo lshw -class disk -short

As you can see, I have 2 storage devices on my computer, /dev/sda and /dev/sdb. Here, /dev/sdb is my 32GB USB thumb drive. This is the one I want to partition.

Opening Storage Device with parted:

Now that you know which storage device you want to partition, you can open parted as follows:

NOTE: Make sure you change /dev/sdb to the storage device that you want to partition.

Parted should be opened. Now, you can run many of the parted commands to partition your desired storage device any way you want.

Switching to Different Storage Device:

You can also start parted without specifying which storage device to open beforehand as follows:

As you can see, parted is started. By default, /dev/sda, the first/primary storage device is selected.

You can list all the storage devices on your computer with the following parted command:

As you can see, the storage devices on my computer /dev/sda and /dev/sdb are listed along with their physical size.

Now, you can use the select parted command to select the storage device (let’s say /dev/sdb) that you want to partition as follows:

As you can see, /dev/sdb is selected.

Creating a New Partition Table:

You can create GPT and MSDOS partition table with parted.

To create a GPT partition table, run the following parted command:

To create a MSDOS partition table, run the following parted command:

I will go for MSDOS partition table as I am partitioning a USB thumb drive. The procedure for the GPT partition creation is the same.

Now, type in Ignore and press <Enter>.

When you create a new partition table, all the existing partitions will be erased. If you’re okay with it, type in Yes and then press <Enter>.

For some reason, the changes can’t be applied immediately. But it’s alright. Type in Ignore and press <Enter>.

A new partition table should be created.

Creating New Partitions:

You can create a new partition with the following parted command:

Now, type in either primary or extended depending on whether you want to create a primary or extended partition. Once you’re done, press <Enter>.

Now, type in a filesystem type that you want to use for the partition. I will go for ext4.

NOTE: You can find out what keywords you can use here with the following command:

$ grep -v nodev /proc/filesystems| cut -f2

Now, type in the location in megabyte (MB) where the partition starts. If it’s the first partition, then 1 (MB) is an acceptable value. Once you’re done, press <Enter>.

Now, type in the location in megabyte (MB) where the partition ends. The size of the partition will be the difference between the End and Start location. For example, let’s say, you want to create a 1GB/1024MB partition. So, the end will be 1024. Once you’re done, press <Enter>.

NOTE: You can’t put 1025 here due to alignment problems. Parted don’t align partitions automatically.

The partition will be created.

You can list all the partitions of your selected storage devices as follows:

As you can see, the newly created partition is listed.

NOTE: When you create multiple partitions with parted, you have to start the new partition from at least End+1 of the last partition. For example, the partition I created earlier ended in 1024MB. So, the next partition will start from 1025MB or more.

I created another partition to demonstrate how to remove partitions using parted in the next section.

Removing Partitions:

First, list all the partitions of your selected storage device as follows:

Let’s say, you want to delete the partition number 2 as marked in the screenshot below.

To do that, run the following parted command:

As you can see, partition number 2 no longer exists.

Changing the Unit:

When you create a new partition, you have to specify the Start and End section of your new partition. The default unit is MB. You can change it very easily in parted.

The supported units and keywords are:

Unit keyword
Sectors s
Bytes B
Cylinders cyl
cylinders, heads, sectors chs
Kilobytes KB
Mebibytes MiB
Megabytes MB
Gibibytes GiB
Gigabytes GB
Percentage %

NOTE: For more information on this, check the man page of parted with the following command:

You can use the unit command to change the default unit.

For example, let’s say you want to change the default unit MB to sectors, then run the following command:

As you can see, the display unit has changed as well.

Now, you can also create partitions with the newly set unit.

So, that’s how you use parted on Linux. Thanks for reading this article.

Source
Listen to the radio at the Linux terminal

You’ve found your way to our 24-day-long Linux command-line toys advent calendar. If this is your first visit to the series, you might be asking yourself what a command-line toy even is. It could be a game or any simple diversion that helps you have fun at the terminal.

Some of you will have seen various selections from our calendar before, but we hope there’s at least one new thing for everyone.

There are many ways to listen to music at the command line; if you’ve got media stored locally, cmus is a great option, but there are plenty of others as well.

Lots of times when I’m at the terminal, though, I’d really rather just zone out and not pay close attention to picking each song, and let someone else do the work. While I’ve got plenty of playlists that work for just such a purpose, after a while, even though go stale, and I’ll switch over to an internet radio station.

Today’s toy, MPlayer, is a versatile multimedia player that will support just about any media format you throw at it. If MPlayer is not already installed, you can probably find it packaged for your distribution. On Fedora, I found it in RPM Fusion (be aware that this is not an “official” repository for Fedora, so exercise caution):

$ sudo dnf install mplayer

MPlayer has a slew of command-line options to set depending on your situation. I wanted to listen to the local college radio station here in Raleigh (88.1 WKNC, they’re pretty good!), and so after grabbing the streaming URL from their website, all that took to get my radio up and running, no GUI or web player needed, was:

$ mplayer -nocache -afm ffmpeg http://wknc.sma.ncsu.edu:8000/wknchd1.mp3

MPlayer is open source under the GPLv3, and you can find out more about the project and download source code from the project’s website.

As I mentioned in yesterday’s article, I’m trying to use a screenshot of each toy as the lead image for each article, but as we moved into the world of audio, I had to fudge it a little. So today’s image was created from a public domain icon of a radio tower using img2txt, which is provided by the libcaca package.

Do you have a favorite command-line toy that you we should have included? Our calendar is basically set for the remainder of the series, but we’d still love to feature some cool command-line toys in the new year. Let me know in the comments below, and I’ll check it out. And let me know what you thought of today’s amusement.

Be sure to check out yesterday’s toy, Let you Linux terminal speak its mind, and come back tomorrow for another!

Source
Bash yes Command – Linux Hint

Bash `yes` command is one of those commands of Linux that is related to the operation of another command. Using this command is useless when you execute the command independently. By default, `yes` command repeats the character ‘y’ if no string value is specified with this command. When `yes` command uses with pipe and another command then it will send the value ‘y’ or `yes` for any confirmation prompt. This command can help to save time by doing many confirmation tasks automatically.

You can use `yes` command with an option or any string value, but both are optional for this command.

yes [OPTION]

yes [STRING]…

Options

This command has not more options. Two options of this command are mentioned below.

–version

It is used to display the installed version of this command.

–help

It is used to get detail information of this command.

Example#1:

When you run the `yes` command without any option and string value then it will print ‘y’ for infinite times.

Output:

The following output will appear.

Example#2:

When you run the `yes` command with a specific string value then it will print the string value for infinite times.

Output:

The following output will appear.

Example#3:

`cp` command is used in bash to create any new file by copying an existing file. If the new filename exists then it will ask for overwrite permission if you run cp command with -i option. In this example, two text files hello.txt and sample.txt are used. If these two text files exist in the current location and `cp` command is run for copying sample.txt to hello.txt with -i option then it will ask for overwrite permission.

$ cat hello.txt
$ cat sample.txt
$ cp -i sample.txt hello.txt

You can use `yes` command to prevent from overwriting the existing file or forcefully overwrite the existing file. In the following commands, the first command is used to prevent the overwrite and the second command is used to overwrite the file without any permission.

$ yes n | cp -i sample.txt hello.txt
$ yes | cp -i sample.txt hello.txt

Output:

Example#4

You can use `yes` command to run any script multiple times in the command line. In this example, `yes` command is used to run while loop repeatedly ten times. Here, `yes` command will continuously send the numeric value from 1 to 10 to the loop and the loop will print the values in regular interval of one second.

$ yes “$(seq 1 10)” | while read n; do echo $n; sleep 1; done

Output:

Example#5:

You can use `yes` command to send any string value to a script while executing the script file. Create a bash file named ‘yes_script.sh’ and add the following script. If you run the script using `yes` command with empty string then it will print “Empty value is passed by yes command” otherwise it will print the string value send by `yes` command by combining with other string.

#!/bin/bash

#Read the value passed from yes commandread string

#check the string value is empty or notif [ “$string” == “” ]; then

echo “Empty value is passed by yes command”

elsenewstr=”The value passed by yes command is $string”

echo $newstr
fi

Run the `yes` command with an empty string and the bash script file, yes_script.sh.

$ yes “” | bash yes_script.sh

Output:

Run the yes command with a string value, “testing” and the bash script file, yes_script.sh.

$ yes testing | bash yes_script.sh

Output:

Example#6:

You can use `yes` command for the testing purpose also. You can run the following command to create a file with a huge amount of data for testing. After executing the command, a file named ‘testfile’ will be created that will contain 50 lines with the content, ‘Add this line for testing’.

$ yes ‘Add this line for testing’ | head -50 > testfile

Output:

Conclusion

The basic uses of `yes` command are shown in this tutorial by using different types of examples. It is a very useful command when you are confirmed about any task and don’t want to waste time for unnecessary confirmation. You can use this command for some advanced level tasks, such as comparing processors ability or the loading capacity of any computer system etc.

Source

Bash escape quotes – Linux Hint

Quoting is used to disable the special meaning of the special characters. There are many shell metacharacters which have specific meanings. But when you need to represent those characters then it will require to remove the special meaning of those characters and it is done by quoting the character. You can do this task by using three ways. These are escape characters, single quotes and double quotes which are explained with examples in this tutorial.

Bash escape character is defined by non-quoted backslash (). It preserves the literal value of the character followed by this symbol. Normally, $ symbol is used in bash to represent any defined variable. But if you use escape in front of $ symbol then the meaning of $ will be ignored and it will print the variable name instead of the value. Run the following commands to show the effects of escape character ().

Example#1:

The meaning of `pwd` command is to display the current working directory path. In the following example, the value of the `pwd` command is stored in a variable. When symbol is used in front of $ symbol then the variable name will print instead of the value.

$ pd=`pwd`
$ echo $pd
$ echo $pd

Output:

Single quotes:

When you enclose characters or variable with single quote ( ‘ ) then it represents the literal value of the characters. So, the value of any variable can’t be read by single quote and a single quote can’t be used within another single quotes. Some examples of single quote are shown below.

Example#2:

In this example, a string value is stored in the variable $var. `echo` command prints the value of this variable without any quotation. When the variable is quoted by single quote then the variable name will print as output. If the backslash ( ) is used before the single quote then the value of the variable will be printed with single quote.

$ var=’Bash Scripting Language’
$ echo $var
$ echo ‘$var’
$ echo ‘$var’

Output:

Example#3:

Sometimes it is required to print a single quote inside a string. A single quoted string can’t contain another single quote inside the string. You can do this task by adding backslash in the front of single quote. In the following example, single quote of don’t word is printed by using backslash.

$ var=$’I don’t like this book’
$ echo $var

Output:

Example#4:

backticks is not supported by single quotes. In this example, calendar value is stored into a variable, $var. The value of this variable will print properly by echo command if you don’t use any quotation. But when the variable is quoted by single quote in echo command then it prints the variable name instead of the value of the variable.

$ var=`cal`
$ echo $var
$ echo ‘$var’

Output:

Double quotes

Double quotes ( ” ) is another way to preserve the literal value of the characters. The dollar sign ( $ ) and backticks ( ` ) characters can able to keep their special meaning within double quotes. Backslash ( ) can also retain its value when it is used by following backticks, double quote and backslash. Some examples of double quotes are shown below.

Example#5:

One limitation of the single quote is that it can’t parse the value of the variable within the quotation. In this example, a string value is assigned to a variable named, $var and print the value of that variable using double quotation in echo command.

$ var=’server-side scripting language’
$ echo “PHP is a $var”

Output:

Example#6:

Any command output can be printed by using double quotation. In the following example, date command is enclosed by double quotation and printed by using double quotation.

Output:

Example#7:

You can’t use double quotation within another double quotation to assign any string value. If you want to print double quote in the output then you have to use the backslash () with the string. In a similar way, you can print backticks (`) and backslash() characters in the output by using the backslash() within the double quotation. In this example, the first command will print “500” with the double quotation, the second command will print `date` with backticks and the third command will print “PHP” with backslash.

$ echo “The price is “500””
$ echo “`date` command is used for date value”
$ echo “\PHP\ is a programming language”

Output:

Example#8:

Double-quoted and single-quoted strings work same when they are used together without any space in a print command. But if you use any space between the string values then they will treat as separate value and print separately. In this example, three double-quoted strings are used in the first printf command. These strings will combine together and print as a single string when you will run the command. Two single-quoted and one double-quoted strings are used in the second print command and it will work like the first print command. Three double-quoted strings with space are used in the third print command and each string value will work as a separate string and print each string in a newline.

$ printf ‘%sn’ “Ubuntu””LinuxMint””Fedora”
$ printf ‘%sn’ ‘Ubuntu'”LinuxMint”‘Fedora’
$ printf ‘%sn’ “Ubuntu” “LinuxMint” “Fedora”

Output:

Example#9:

Create a bash file named escape.sh, and add the following code. In this example, a text data with double quotes and dollar sign is used. It is shown earlier that double quote and dollar symbol can’t print within a string enclosed by double quotation. So, the backslash is added in front of the double quotes and dollar symbol to print these. Here, a for loop is used to iterate the string variable, $string and print each word of the text that is stored in that variable.

#!/bin/bash

#Initialize the variable with special characterstring=”The price of this “book” is $50″

#Iterate and print each word of the string variablefor word in $string

doecho $word

done

Run the script.

Output:

Conclusion

Hope, this tutorial will help you to use escape characters, single quote and double quote based on the requirements of your script.

Source

Install Oracle JDK 11 on Ubuntu – Linux Hint

The full form of JDK is Java Development Kit. It is used to write and test Java programs. Recently, JDK 11 came out. It is the latest version of JDK LTS (Long Term Support) release.

In this article, I will show you how to install Oracle JDK 11 on Ubuntu. I will be using Ubuntu 18.04 LTS for the demonstration. But it should work on any LTS version of Ubuntu. So, let’s get started.

Oracle JDK 11 is not available in the official package repository of Ubuntu. But you can easily download it from the official website of Oracle and install it on Ubuntu.

First, visit the official page of Java SE at https://www.oracle.com/technetwork/java/javase/overview/index.html

Once the page loads, click on Downlaods as marked in the screenshot below.

Now, from the Java SE 11.x (LTS) section, click on DOWNLOAD as marked in the screenshot below. At the time of this writing, the latest version of JDK 11 is 11.0.1.

Now, scroll down a little bit and click on Accept License Agreement as marked in the screenshot below.

Now that you’ve accepted the Oracle Technology Network License Agreement for Oracle Java Standard Edition, you are ready to download Oracle JDK 11. To download Oracle JDK 11 for Ubuntu, click on the DEB file link as marked in the screenshot below.

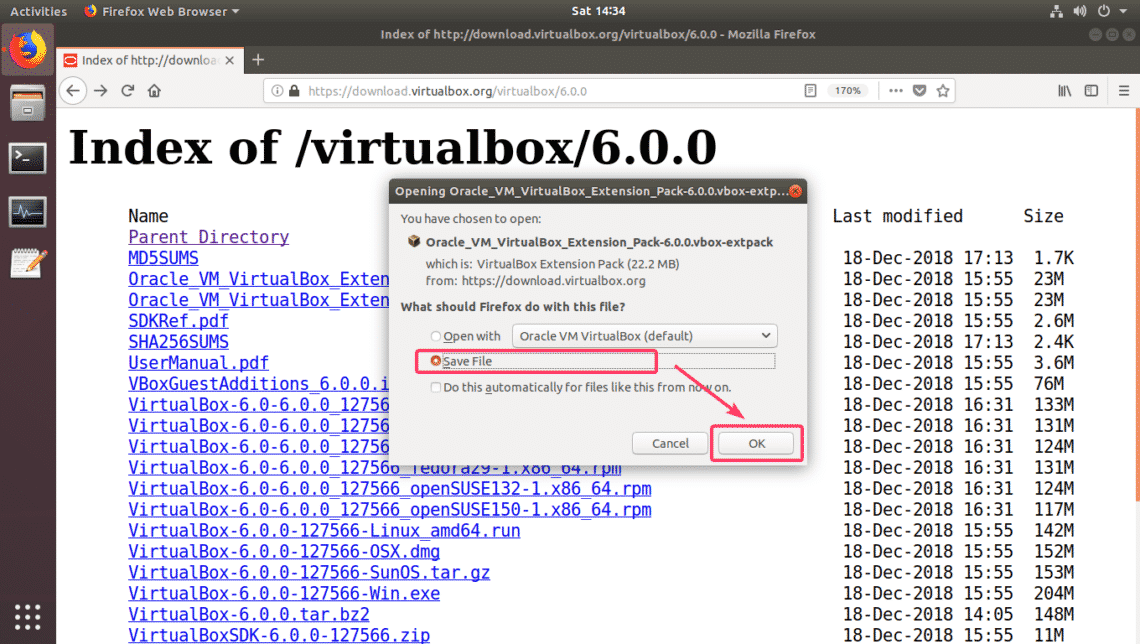
Your browser should prompt you to save the Oracle JDK 11 DEB package file. Select Save File and click on OK.

Your download should start. It may take a while to finish.

Installing Oracle JDK 11:

Once the download is complete, navigate to the directory where your browser saved the DEB package file. Usually, it is the ~/Downloads directory in your login users HOME directory.

As you can see, jdk-11.0.1_linux-x64_bin.deb package file is there.

NOTE: The package file name may be different by the time you read this article. Make sure you replace the package file name with yours from now.

Now, install Oracle JDK 11 with the following command:

$ sudo dpkg -i jdk-11.0.1_linux-x64_bin.deb

Now, type in your login user’s password and press <Enter>.

Oracle JDK 11 should be installed.

Adding Oracle JDK 11 to the PATH:

The Oracle JDK 11 DEB package file installs Oracle JDK 11 in /usr/lib/jvm directory. It is not in the PATH by default. So, we have to manually add it to the PATH of Ubuntu.

First, find out the directory name where the Oracle JDK 11 is installed with the following command:

As you can see, the directory name is jdk-11.0.1/ in my case. It may be different for you. Make sure to replace it with your from now on.

Now, create a new file /etc/profile.d/jdk11.sh with the following command:

$ sudo nano /etc/profile.d/jdk11.sh

An empty file should be opened.

Now, add the following lines to the file.

export JAVA_HOME=”/usr/lib/jvm/jdk-11.0.1″
export PATH=”$PATH:$/bin”

NOTE: Make sure you change jdk-11.0.1 to the directory name you have.

Finally, the file looks as follows. Now, press <Ctrl> + x and then press y followed by <Enter> to save the file.

Now, restart your computer with the following command:

Once your computer boots, open a Terminal and run the following commands to verify whether JAVA_HOME variable is correctly set and Oracle JDK 11 is on the PATH.

$ echo $JAVA_HOME
$ echo $PATH

As you can see, JAVA_HOME and PATH variables are correctly set.

Now, run the following command to check whether JDK 11 is working.

As you can see, I can run the javac binary without any problem. So, JDK 11 is working.

Compiling a Java Program with Oracle JDK 11:

Now, I am going to write a simple java program to test whether we can compile and run it with Oracle JDK 11.

Now, create a file Hello.java and type in the following lines in it.

public class Hello {
public static void main(String[] args) {
System.out.println(“Welcome to LinuxHint!”);
}
}

Now, to compile Hello.java source file, open a Terminal and navigate to the directory where your Hello.java source file is saved and run the following command:

A new file Hello.class should be generated as you can see in the screenshot below. It is called a Java class file. Java class file contains Java bytecodes that the JVM (Java Virtual Machine) can run.

Now, run Hello.class Java class file as follows:

NOTE: Type in only the filename without .class extension. Otherwise, it won’t work.

The correct output is displayed as you can see in the screenshot below.

So, that’s how you install Oracle JDK 11 on Ubuntu. Thanks for reading this article.

Source

How to install Node.js with npm on CentOS 7

How to install Node.js with npm on CentOS 7How to install Node.js with npm on CentOS 7

Install Node.js with npm on CentOS

In this tutorial, we are going to learn how to install Node.js with npm on CentOS. Node.js is the opensource JavaScript Run-time environment for server-side execution of JavaScript code. Node.js built on Chrome’s V8 JavaScript engine so it can be used to build different types of server-side application.

Where npm stands for Node Package Manager which is the default package manager for Node.js. npm is the worlds largest software registry for Node.js packages with thousands of packages available.

in this tutorial we will install Node.js in following two ways:

  1. Install Node.js and npm using EPEL repository
  2. Install Node.js and npm using nvm

Prerequisites

Before you start to install Node.js and npm on CentOS 7. You must have the non-root user account on your server with sudo privileges.

1. Install Node.js and npm using EPEL repository

First you will need to add NodeSource yum repository on your system. Add it by using curl running following command.

curl -sL https://rpm.nodesource.com/setup_10.x | sudo bash –

NOTE : The latest LTS version of Node.js is 10.x if you want to install 8.x version then just replace setup_10.x with setup_8.x

After executing above command NodeSource repository is enabled. Now you can install Node.js by using the following command. When it will prompt you to retrieve GPG key just press ‘y’ to continue.

sudo yum install nodejs

Now confirm the installation of Node.js by using the following command

node –version

And confirm npm installation with the following command

npm –version

2. Install Node.js and npm using NVM

NVM stands for Node Version Manager which is used to manage multiple Node.js versions. If you want to install or uninstall different versions of Node.js then NVM is there for you.

First, we will install NVM (Node Package Manager) on your system. So download NVM installation script running the following command.

curl -o- https://raw.githubusercontent.com/creationix/nvm/v0.33.11/install.sh | bashHow to install Node.js and npm using nvm on CentOS 7How to install Node.js and npm using nvm on CentOS 7

As shown in the above output you should close and reopen terminal.

Check nvm version and confirm installation typing

node –version

Now install Node.js by using the following command.

nvm install node

Verify Node.js installation by typing

node –version

The output should be:

Output

v10.14.0

You can install multiple versions of Node.js. To do so type following:

nvm install 8.14nvm install –ltsnvm install 11.3

To list all the versions installed run following command.

nvm ls

You can change the current default version of Node.js by using the following command.

nvm use 8.14

To uninstall a Node.js version type following command

nvm uninstall 11.14

Conclusion

You have successfully learned how to install Node.js with npm on CentOS 7. If you have any queries regarding this please don’t forget to comment below.

Source

Konbini: KDE’s Little Photo Helper

If you happen to use KDE as your preferred graphical desktop, Konbini might be right up your alley. It adds several useful image manipulation actions to the Dolphin file manager as well as installs and configures a handful of photography-related tools.

The supplied installer does the donkey job of fetching and installing the required pieces. It also adds the dedicated Konbini item to the right-click context menu in Dolphin. This menu gives you quick access to several useful commands that let you recompress and resize the currently selected image file, rename the file using date and time values extracted from its EXIF metadata, quickly geotag the selected photo, show the selected geotagged photo on OpenStreetMap, and more.

Installing Konbini is supremely easy. In the Terminal, run the curl -sSL https://is.gd/konbini | bash command for the installer to finish. The installer script is designed for use with openSUSE, Ubuntu, and Debian. But it can be easily modified to work with other Linux distributions.

In the template folder in the konbini directory you’ll find example files that you can use to create your own actions. Let’s say you want to create an action that uploads the currently selected photo to an FTP server. First, rename the example file in the template/script folder to something more descriptive like upload-ftp. Open the file for editing, remove the existing commands, and add the following code (replace the example values with the actual FTP server address or domain name, user name, and password):

curl -T “$file” ftp://ftp.example.com/path/to/dir/ –user user:password
notify-send “It works!”

Save the changes, then move the file to the /usr/local/bin/ directory, and make the script executable:

sudo mv upload-ftp /usr/local/bin/
sudo chown root:root /usr/local/bin/upload-ftp
sudo chmod 755 /usr/local/bin/upload-ftp

Next, rename the example.png icon in the template/icon folder to upload-ftp.png and move it to the /usr/share/icons/konbini-icons/ directory:

mv upload-ftp.png /usr/share/icons/konbini-icons/

Instead of the supplied generic example icon, you can use a more appropriate icon from the Feather Icons set.

Finally, rename the example.desktop file in the template/desktop folder to upload-ftp.desktop, open it for editing and replace the example values:

[Desktop Entry]
Type=Service
X-KDE-Priority=TopLevel
X-KDE-Submenu=Konbini
ServiceTypes=KonqPopupMenu/Plugin
MimeType=image/jpeg;image/JPG;image/JPEG;image/jpg;
Actions=UploadFTP
[Desktop Action UploadFTP]
Name= Upload via FTP
Exec=/usr/local/bin/upload-ftp %f
Icon=/usr/share/icons/konbini-icons/upload-ftp.png

Save the changes, and move the file to the /usr/share/kservices5/ServiceMenus directory:

mv upload-ftp.desktop /usr/share/kservices5/ServiceMenus/

Launch Dolphin, right-click on a JPEG image, and you should see the newly-added action in the Konbini menu.

This is an excerpt from the Linux Photography book. Get your copy from Google Play Store or Gumroad.

Source

Linux File Command | Linuxize

The Linux file command displays the type of a file. It’s helpful when you have to find out the type of file you’ve never seen before or the file does not have a file extension.

Linux File Command Syntax

The syntax for the Linux file command is as follows:

It can take one or more file names as its arguments.

How to Use the file Command to Find the File Type

The file command classify files based on a series of tests and determines the file type based on the first successful test.

In it’s simplest form when used without any option, the file command will display the file name along with the file type:

To show just the file type use the -b (–brief) option:

As you can see from the output above the /etc/group file is a text file.

How to Find the File Type of Multiple Files

You can pass more than one files to the file command:

file /bin/bash /opt/card.zip

The command will print the type of each file on a separate file:

/bin/bash: ELF 64-bit LSB shared object, x86-64, version 1 (SYSV), dynamically linked, interpreter /lib64/ld-linux-x86-64.so.2, for GNU/Linux 3.2.0, BuildID[sha1]=42602c973215ba5b8ab5159c527e72f38e83ee52, stripped
/opt/card.zip: Zip archive data, at least v1.0 to extract

It also accepts wildcard characters. For example to find the type of each .jpg files in the current directory you would run:

imgage001.jpg: JPEG image data, JFIF standard 1.01, aspect ratio, density 1×1, segment length 16, progressive, precision 8, 2083×1250, components 3
imgage031.jpg: JPEG image data, JFIF standard 1.01, resolution (DPI), density 72×72, segment length 16, comment: “Created with GIMP”, baseline, precision 8, 1280×1024, components

How to View the Mime Type of a File

Use the -i (–mime) option to determine the mime type of a file:

file -i /var/www/index.html/var/www/index.html: text/html; charset=us-ascii

Conclusion

By now you should have a good understanding of how to use the Linux file command. For more information about the find command, see the file man page.

Source

30 Grep Examples – Linux Hint

You can find grep present deep inside the animal brain of Unix and Unix-like operating systems. It is a basic program used for pattern matching and it was written in the 70s along with the rest of the UNIX tool that we know and love (or hate).

While learning about formal languages and regular expressions is an exciting topic. Learning grep has a lot more to it than regexes. To get started with it and to see the beauty and elegance of grep you need to see some real-world examples, first.

Examples which are handy and make your life a little easier. Here are 30 such grep commonplace use cases and options.

1. ps aux | grep <pattern>

The ps aux list all the processes and their associated pids. But often this list is too long for a human to inspect. Piping the output to a grep command you can list processes running with a very specific application in mind. For example the <pattern> could be sshd or nginx or httpd.

# ps aux | grep sshd
root 400 0.0 0.2 69944 5624 ? Ss 17:47 0:00 /usr/sbin/sshd -D
root 1076 0.2 0.3 95204 6816 ? Ss 18:29 0:00 sshd: root@pts/0
root 1093 0.0 0.0 12784 932 pts/0 S+ 18:29 0:00 grep sshd

2. Grepping your IP addresses

In most operating systems you can list all your network interfaces and the IP that is assigned to that interface by using either the command ifconfig or ip addr. Both these commands will output a lot of additional information. But if you want to print only the IP address (say for shell scripts) then you can use the command below:

$ ip addr | grep inet | awk ‘{ print $2; }’
$ ip addr | grep -w inet | awk ‘{ print $2; }’ #For lines with just inet not inet6 (IPv6)

The ip addr command gets all the details (including the IP addresses), it is then piped to the second command grep inet which outputs only the lines with inet in them. This is then piped into awk print the statement which prints the second word in each line (to put it simply).

P.S: You can also do this without the grep if you know awk well know.

3. Looking at failed SSH attempts

If you have an Internet facing server, with a public IP, it will constantly be bombarded with SSH attempts and if you allow users to have password based SSH access (a policy that I would not recommend) you can see all such failed attempts using the following grep command:

# cat /var/log/auth.log | grep “Fail”
Sample out put
Dec 5 16:20:03 debian sshd[509]:Failed password for root from 192.168.0.100 port 52374 ssh2
Dec 5 16:20:07 debian sshd[509]:Failed password for root from 192.168.0.100 port 52374 ssh2
Dec 5 16:20:11 debian sshd[509]:Failed password for root from 192.168.0.100 port 52374 ssh2

4. Piping Grep to Uniq

Sometimes, grep will output a lot of information. In the above example, a single IP may have been attempting to enter your system. In most cases, there are only a handful of such offending IPs that you need to uniquely identify and blacklist.

# cat /var/log/auth.log | grep “Fail” | uniq -f 3

The uniq command is supposed to print only the unique lines. The uniq -f 3 skips the first three fields (to overlook the timestamps which are never repeated) and then starts looking for unique lines.

5. Grepping for Error Messages

Using Grep for access and error logs is not limited to SSH only. Web servers (like Nginx) log error and access logs quite meticulously. If you set up monitoring scripts that send you alerts when grep “404” returns a new value. That can be quite useful.

# grep -w “404” /var/www/nginx/access.log

192.168.0.100 – – [06/Dec/2018:02:20:29 +0530] “GET /favicon.ico HTTP/1.1” 404 200

“http://192.168.0.102/” “Mozilla/5.0 (Windows NT 10.0; Win64; x64)
AppleWebKit/537.36 (KHTML, like Gecko) Chrome/70.0.3538.110 Safari/537.36”

192.168.0.101 – – [06/Dec/2018:02:45:16 +0530] “GET /favicon.ico HTTP/1.1” 404 143

“http://192.168.0.102/” “Mozilla/5.0 (iPad; CPU OS 12_1 like Mac OS X)
AppleWebKit/605.1.15 (KHTML, like Gecko) Version/12.0 Mobile/15E148 Safari/604.1”

The regex may not be “404” but some other regex filtering for only Mobile clients or only Apple devices viewing a webpage. This allows you to have a deeper insight at how your app is performing.

6. Package Listing

For Debian based systems, dpkg -l lists all the packages installed on your system. You can pipe that into a grep command to look for packages belonging to a specific application. For example:

7. grep -v <pattern> fileNames

To list all the lines which don’t contain a given pattern, use the flag -v. It is basically the opposite of a regular grep command.

8. grep -l <pattern>

It lists all the files that contain at least one occurrence of the supplied pattern. This is useful when you are searching for a pattern inside a directory with multiple files. It only prints the file name, and not the specific line with the pattern.

9. Single word option -w

$ grep -w <PATTERN> fileNames

The -w flag tells grep to look for the given pattern as a whole word and not just a substring of a line. For example, earlier we grepped for IP address and the pattern inet printed the lines with both inet and inet6 listing both IPv4 and IPv6 addresses. But if we used -w flag only the lines with inet as a word preceded and followed by white spaces is a valid match.

10. Extended Regular Expression

You will often find that the regular expressions native to Grep are a bit limiting. In most scripts and instructions you will find the use of -E flag and this will allow you to enter pattern in what is called the Extended Mode.

Here’s the grep and grep -E commands to look for words Superman and Spiderman.

$ grep “(Super|Spider)man” text
$ grep -E “(Super|Spider)man” text

As you can see the extended version is much easier to read.

11. Grep for your containers

If you have a large cluster of containers running on your host, you can grep them by image name, status, ports they are exposing and many other attributes. For example,

$ docker ps | grep [imageName]

12. Grep for your pods

While we are on the topic of containers. Kubernetes often tend to launch multiple pods under a given deployment. While each pod has a unique name, in a given namespace, they do start with the deployment name, typically. We can grep of that and list all the pods associated with a given deployment.

$ kubectl get pods | grep <deploymentName>

13. Grep for Big data

Often times the so called “Big Data” analysis involves simple searching, sorting and counting of patterns in a given dataset. Low level UNIX utilities like grep, uniq, wc are especially good at this. This blog post shows a nice example of a task accomplished in mere seconds using grep and other Unix utilities while Hadoop took almost half an hour.

For example, this data set is over 1.7GB in size. It contains information about a multitude of chess matches, including the moves made, who won, etc. We are interested in just results so we run the following command:

$ grep “Result” millionbase-2.22.pgn | sort | uniq -c
221 [Result “*”]
653728 [Result “0-1”]
852305 [Result “1-0”]
690934 [Result “1/2-1/2”]

This took around 15 seconds on a 4 year old 2-cores/4-thread processor. So the next time you are solving a “big data” problem. Think if you can use grep instead.

14. grep –color=auto <PATTERN>

This option lets grep highlight the pattern inside the line where it was found.

15. grep -i <PATTERN>

Grep pattern matching is inherently case-sensitive. But if you don’t care about that then using the -i flag will make grep case insensitive.

16. grep -n

The -n flag will show the line numbers so you don’t have to worry finding the same line later on.

17. git grep

Git, the version control system, itself has a built-in grep command that works pretty much like your regular grep. But it can be used to search for patterns on any committed tree using the native git CLI, instead of tedious pipes. For example, if you are in the master branch of your repo you can grep across the repo using:

(master) $ git grep <pattern>

18. grep -o <PATTERN>

The -o flag is really helpful when you are trying to debug a regex. It will print only the matching part of the line, instead of the entire line. So, in case, you are getting too many unwanted line for a supplied pattern, and you can’t understand why that is happening. You can use the -o flag to print the offending substring and reason about your regex backwards from there.

19. grep -x <PATTERN>

The -x flag would print a line, if and only if, the whole line matches your supplied regex. This is somewhat similar to the -w flag which printed a line if and only of a whole word matched the supplied regex.

20. grep -T <PATTERN>

When dealing with logs and outputs from a shell scripts, you are more than likely to encounter hard tabs to differentiate between different columns of output. The -T flag will neatly align these tabs so the columns are neatly arranged, making the output human readable.

21. grep -q <PATTERN>

This suppresses the output and quietly runs the grep command. Very useful when replacing text, or running grep in a daemon script.

22. grep -P <PATTERN>

People who are used to perl regular expression syntax can use the -P flag to use exactly that. You don’t have to learn basic regular expression, which grep uses by default.

23. grep -D [ACTION]

In Unix, almost everything can be treated as a file. Consequently, any device, a socket, or a FIFO stream of data can be fed to grep. You can use the -D flag follow by an ACTION (the default action is READ). A few other options are SKIP to silently skip specific devices and RECURSE to recursively go through directories and symlinks.

24. Repetition

If are looking for given pattern which is a repetition of a known simpler pattern, then use curly braces to indicate the number of repetition

This prints lines containing strings 10 or more digits long.

25. Repetition shorthands

Some special characters are reserved for a specific kind of pattern repetition. You can use these instead of curly braces, if they fit your need.

? : The pattern preceding question mark should match zero or one time.

* : The pattern preceding star should match zero or more times.

+ : The pattern preceding plus should match one or more times.

25. Byte Offsets

If you want to know see the byte offset of the lines where the matching expression is found, you can use the -b flag to print the offsets too. To print the offset of just the matching part of a line, you can use the -b flag with -o flag.

$ grep -b -o <PATTERN> [fileName]

Offset simply mean, after how many byte from the beginning of the file does the matching string start.

26. egrep, fgrep and rgerp

You will often see the invocation of egrep, to use the extended regular expression syntax we discussed earlier. However, this is a deprecated syntax and it is recommended that you avoid using this. Use grep -E instead. Similarly, use grep -F, instead of fgrep and grep -r instead of rgrep.

27. grep -z

Sometimes the input to grep is not lines ending with a newline character. For example, if you are processing a list of file names, they might come through from different sources. The -z flag tells grep to treat the NULL character as the line ending. This allows you to treat the incoming stream as any regular text file.

28. grep -a <PATTERN> [fileName]

The -a flag tells grep to treat the supplied file as if it were regular text. The file could be a binary, but grep will treat the contents inside, as though they are text.

29. grep -U <PATTERN> [fileName]

The -U flag tells grep to treat the supplied files as though they are binary files and not text. By default grep guesses the file type by looking at the first few bytes. Using this flag overrules that guess work.

30. grep -m NUM

With large files, grepping for an expression can take forever. However, if you want to check for only first NUM numbers of matches you can use the -m flag to accomplish this. It is quicker and the output is often manageable as well.

Conclusion

A lot of everyday job of a sysadmin involves sifting through large swaths of text. These may be security logs, logs from your web or mail server, user activity or even large text of man pages. Grep gives you that extra bit of flexibility when dealing with these use cases.

Hopefully, the above few examples and use cases have helped you in better understanding this living fossil of a software.

Source

WP2Social Auto Publish Powered By : XYZScripts.com