Nginx (short for Engine-x) is a free, open source, powerful, high-performance and scalable HTTP and reverse proxy server, a mail and standard TCP/UDP proxy server. It is easy to use and configure, with a simple configuration language. Nginx is now the preferred web server software for powering heavily loaded sites, due its scalability and performance.
In this article will discuss how to use Nginx as a HTTP server, configure it to serve web content, and set up name-based virtual hosts, and create and install SSL for secure data transmissions, including a self-signed certificate on Ubuntu and CentOS.
How to Install Nginx Web Server
First start by installing the Nginx package from the official repositories using your package manager as shown.
———— On Ubuntu ————
$ sudo apt update
$ sudo apt install nginx
———— On CentOS ————
$ sudo yum update
$ sudo yum install epel-release
$ sudo yum install nginx
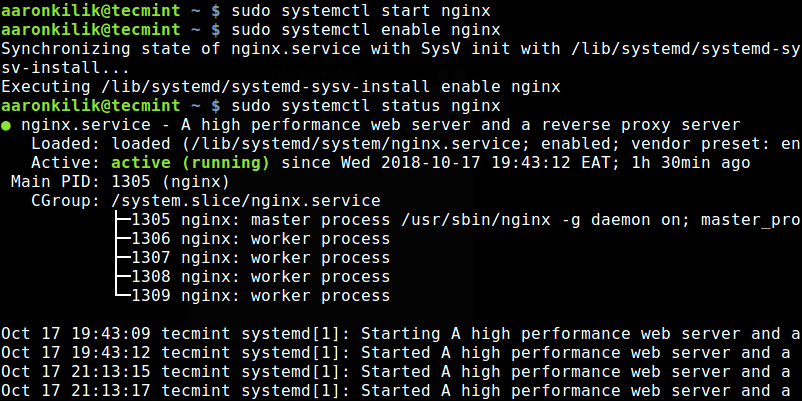
After the Nginx package is installed, you need to start the service for now, enable it to auto-start at boot time and view it’s status, using the following commands. Note that on Ubuntu, it should be started and enabled automatically while the package is pre-configured.
$ sudo systemctl start nginx
$ sudo systemctl senable nginx
$ sudo systemctl status nginx

Start and Check Nginx Status
At this point, the Nginx web server should be up and running, you can verify the status with the netstat command.
$ sudo netstat -tlpn | grep nginx
Check Nginx Port Status
If your system has a firewall enabled, you need to open port 80 and 443 to allow HTTP and HTTPS traffic respectively, through it, by running.
———— On CentOS ————
$ sudo firewall-cmd –permanent –add-port=80/tcp
$ sudo firewall-cmd –permanent –add-port=443/tcp
$ sudo firewall-cmd –reload
———— On Ubuntu ————
$ sudo ufw allow 80/tcp
$ sudo ufw allow 443/tcp
$ sudo ufw reload
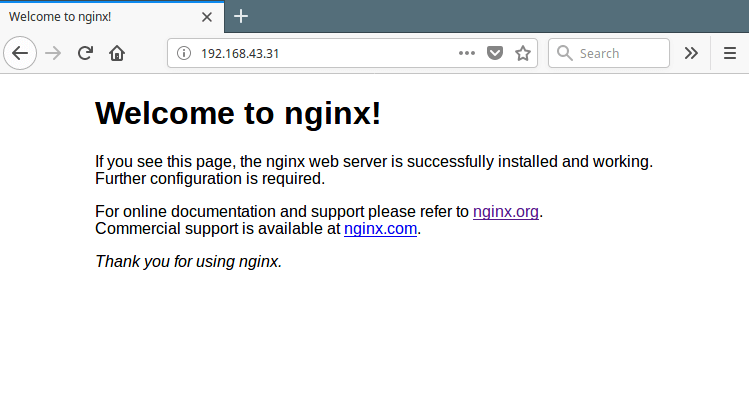
The ideal method for testing the Nginx installation and checking whether it’s running and able to serve web pages is by opening a web browser and pointing to the IP of the server.
http://Your-IP-Address
OR
http://Your-Domain.com
A working installation should be indicated by the following screen.
Check Nginx Web Page
How to Configure Nginx Web Server
Nginx’s configuration files are located in the directory /etc/nginx and the global configuration file is located at /etc/nginx/nginx.conf on both CentOS and Ubuntu.
Nginx is made up of modules that are controlled by various configuration options, known as directives. A directive can either be simple (in the form name and values terminated with a 😉 or block ( has extra instructions enclosed using {}). And a block directive which contains other directives is called a context.
All the directives are comprehensively explained in the Nginx documentation in the project website. You can refer to it for more information.
How to Serve Static Content Using Nginx in Standalone Mode
At a foundational level, Nginx can be used to serve static content such as HTML and media files, in standalone mode, where only the default server block is used (analogous to Apache where no virtual hosts have been configured).
We will start by briefly explaining the configuration structure in the main configuration file.
$ sudo vim /etc/nginx/nginx.conf
If you look into this Nginx configuration file, the configuration structure should appear as follows and this is referred to as the main context, which contains many other simple and block directives. All web traffic is handled in the http context.
user nginx;
worker_processes 1;
…..
error_log /var/log/nginx/error.log warn;
pid /var/run/nginx.pid;
…..
events {
…..
}
http {
server{
…….
}
…..
}
The following is a sample Nginx main configuration (/etc/nginx/nginx.conf) file, where the http block above contains an include directive which tells Nginx where to find website configuration files (virtual host configurations).
Nginx Configuration File
user www-data;
worker_processes auto;
pid /run/nginx.pid;
events {
worker_connections 768;
# multi_accept on;
}
http {
include /etc/nginx/mime.types;
default_type application/octet-stream;
include /etc/nginx/mime.types;
default_type application/octet-stream;
access_log /var/log/nginx/access.log;
error_log /var/log/nginx/error.log;
sendfile on;
#tcp_nopush on;
keepalive_timeout 65;
#gzip on;
include /etc/nginx/conf.d/*.conf;
}
Note that on Ubuntu, you will also find an additional include directive (include /etc/nginx/sites-enabled/*;), where the directory /etc/nginx/sites-enabled/ stores symlinks to the websites configuration files created in /etc/nginx/sites-available/, to enable the sites. And deleting a symlink disables that particular site.
Based on your installation source, you’ll find the default website configuration file at /etc/nginx/conf.d/default.conf (if you installed from official NGINX repository and EPEL) or /etc/nginx/sites-enabled/default (if you installed from Ubuntu repositories).
This is our sample default nginx server block located at /etc/nginx/conf.d/default.conf on the test system.
server {
listen 80 default_server;
listen [::]:80 default_server;
server_name _;
root /var/www/html/;
index index.html;
location / {
try_files $uri $uri/ =404;
}
}
A brief explanation of the directives in the above configuration:
- listen: specifies the port the server listens on.
- server_name: defines the server name which can be exact names, wildcard names, or regular expressions.
- root: specifies the directory out of which Nginx will serve web pages and other documents.
- index: specifies the type(s) of index file(s) to be served.
- location: used to process requests for specific files and folders.
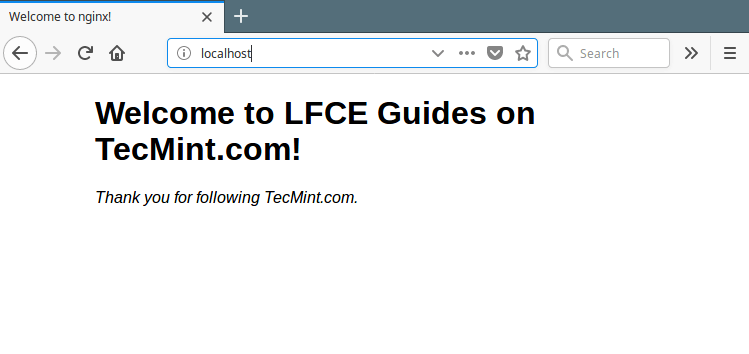
From a web browser, when you point to the server using the hostname localhost or its IP address, it processes the request and serves the file /var/www/html/index.html, and immediately saves the event to its access log (/var/log/nginx/access.log) with a 200 (OK) response. In case of an error (failed event), it records the message in the error log (/var/log/nginx/error.log).
Test Nginx Default Site
To learn more about logging in Nginx, you may refer to How to Configure Custom Access or Error Log Formats in Nginx.
Instead of using the default log files, you can define custom log files for different web sites, as we shall look at later on, under the section “setting up name-based virtual hosts (server blocks)”.
How ot Restrict Access to a Web Page with Nginx
In order to restrict access to your website/application or some parts of it, you can setup basic HTTP authentication. This can be used essentially to restrict access to the whole HTTP server, individual server blocks or location blocks.
Start by creating a file that will store your access credentials (username/password) by using the htpasswd utility.
$ yum install httpd-tools #RHEL/CentOS
$ sudo apt install apache2-utils #Debian/Ubuntu
As an example, let’s add user admin to this list (you can add as many users as possible), where the -c option is used to specify the password file, and the -B to encrypt the password. Once you hit [Enter], you will be asked to enter the users password:
$ sudo htpasswd -Bc /etc/nginx/conf.d/.htpasswd admin
Then, let’s assign the proper permissions and ownership to the password file (replace the user and group nginx with www-data on Ubuntu).
$ sudo chmod 640 /etc/nginx/conf.d/.htpasswd
$ sudo chmod nginx:nginx /etc/nginx/conf.d/.htpasswd
As we mentioned earlier on, you can restrict access to your webserver, a single website (using its server block) or specific directory or file. Two useful directives can be used to achieve this:
- auth_basic – turns on validation of user name and password using the “HTTP Basic Authentication” protocol.
- auth_basic_user_file – specifies the credential’s file.
As an example, we will show how to password-protect the directory /var/www/html/protected.
server {
listen 80 default_server;
server_name localhost;
root /var/www/html/;
index index.html;
location / {
try_files $uri $uri/ =404;
}
location /protected/ {
auth_basic “Restricted Access!”;
auth_basic_user_file /etc/nginx/conf.d/.htpasswd;
}
}
Now, save changes and restart Nginx service.
$ sudo systemctl restart nginx
The next time you point your browser to the above directory (http://localhost/protected) you will be asked to enter your login credentials (username admin and the chosen password).
A successful login allows you to access the directory’s contents, otherwise you will get a a “401 Authorization Required” error.
How to Setup Name-based Virtual hosts (Server Blocks) in Nginx
The server context allows multiple domains/sites to be stored in and served from the same physical machine or virtual private server (VPS). Multiple server blocks (representing virtual hosts) can be declared within the http context for each site/domain. Nginx decides which server processes a request based on the request header it receives.
We will demonstrate this concept using the following dummy domains, each located in the specified directory:
- wearetecmint.com – /var/www/html/wearetecmint.com/
- welovelinux.com – /var/www/html/welovelinux.com/
Next, assign the appropriate permissions on the directory for each site.
$ sudo chmod -R 755 /var/www/html/wearetecmint.com/public_html
$ sudo chmod -R 755 /var/www/html/welovelinux.com/public_html
Now, create a sample index.html file inside each public_html directory.
<html>
<head>
<title>www.wearetecmint.com</title>
</head>
<body>
<h1>This is the index page of www.wearetecmint.com</h1>
</body>
</html>
Next, create the server block configuration files for each site inside the /etc/httpd/conf.d directory.
$ sudo vi /etc/nginx/conf.d/wearetecmint.com.conf
$ sudo vi /etc/nginx/conf.d/welovelinux.com.conf
Add the following server block declaration in the wearetecmint.com.conf file.
wearetecmint.com.conf
server {
listen 80;
server_name wearetecmint.com;
root /var/www/html/wearetecmint.com/public_html ;
index index.html;
location / {
try_files $uri $uri/ =404;
}
}
Next, add the following server block declaration in the welovelinux.com.conf file.
welovelinux.com.conf
server {
listen 80;
server_name welovelinux.com;
root /var/www/html/welovelinux.com/public_html;
index index.html;
location / {
try_files $uri $uri/ =404;
}
}
To apply the recent changes, restart the Nginx web server.
$ sudo systemctl restart nginx
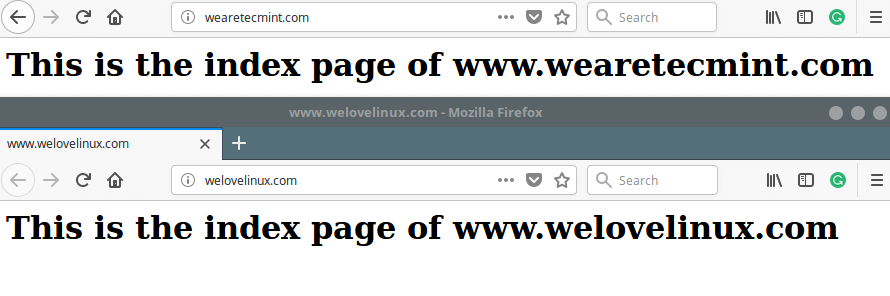
and pointing your web server to the above addresses should make you see the main pages of the dummy domains.
http://wearetecmint.com
http://welovelinux.com
Test Nginx Virtual Hosts Websites
Important: If you have SELinux enabled, its default configuration does not allow Nginx to access files outside of well-known authorized locations (such as /etc/nginx for configurations, /var/log/nginx for logs, /var/www/html for web files etc..).
You can handle this by either disabling SELinux, or setting the correct security context. For more information, refer to this guide: using Nginx and Nginx Plus with SELinux on the Nginx Plus website.
How to Install and Configure SSL with Nginx
SSL certificates help to enable secure http (HTTPS) on your site, which is essential to establishing a trusted/secure connection between the end users and your server by encrypting the information that is transmitted to, from, or within your site.
We will cover how to create and install a self-signed certificate, and generate a certificate signing request (CSR) to acquire an SSL certificate from a certificate authority (CA), to use with Nginx.
Self-signed certificates are free to create and are practically good to go for testing purposes and for internal LAN-only services. For public-facing servers, it is highly recommended to use a certificate issued by a CA (for example Let’s Encrypt) to uphold its authenticity.
To create a self-signed certificate, first create a directory where your certificates will be stored.
$ sudo mkdir /etc/nginx/ssl-certs/
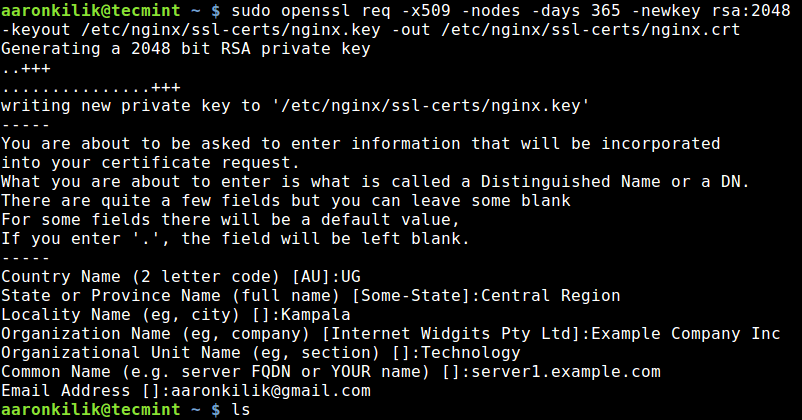
Then generate your self-signed certificate and the key using the openssl command line tool.
$ sudo openssl req -x509 -nodes -days 365 -newkey rsa:2048 -keyout /etc/nginx/ssl-certs/nginx.key -out /etc/nginx/ssl-certs/nginx.crt
Let’s briefly describe the options used in the above command:
- req -X509 – shows we are creating a x509 certificate.
- -nodes (NO DES) – means “don’t encrypt the key”.
- -days 365 – specifies the number of days the certificate will be valid for.
- -newkey rsa:2048 – specifies that the key generated using RSA algorithm should be 2048-bit.
- -keyout /etc/httpd/ssl-certs/apache.key – specifies the full path of the RSA key.
- -out /etc/httpd/ssl-certs/apache.crt – specifies the full path of the certificate.
Create SSL Certificate and Key for Nginx
Next, open your virtual host configuration file and add the following lines to a server block declaration listening on port 443. We will test with the virtual host file /etc/nginx/conf.d/wearetecmint.com.conf.
$ sudo vi /etc/nginx/conf.d/wearetecmint.com.conf
Then add the ssl directive to nginx configuration file, it should look similar to below.
server {
listen 80;
listen [::]:80;
listen 443 ssl;
listen [::]:443 ssl;
ssl on;
ssl_certificate /etc/nginx/ssl-certs/nginx.crt;
ssl_trusted_certificate /etc/nginx/ssl-certs/nginx.crt;
ssl_certificate_key /etc/nginx/ssl-certs/nginx.key;
server_name wearetecmint.com;
root /var/www/html/wearetecmint.com/public_html;
index index.html;
location / {
try_files $uri $uri/ =404;
}
}
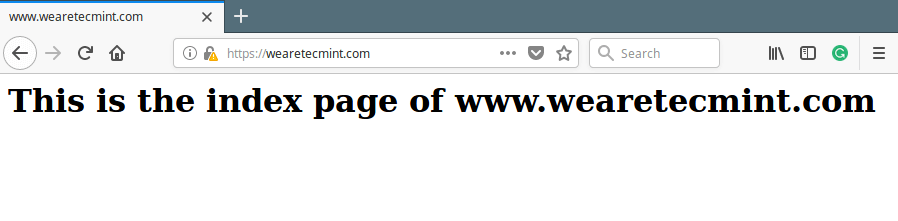
Now restart the Nginx and point your browser to the following address.
https://www.wearetecmint.com
Check Nginx SSL Website
If you would like to purchase an SSL certificate from a CA, you need to generate a certificate signing request (CSR) as shown.
$ sudo openssl req -newkey rsa:2048 -nodes -keyout /etc/nginx/ssl-certs/example.com.key -out /etc/nginx/ssl-certs/example.com.csr
You can also create a CSR from an existing private key.
$ sudo openssl req -key /etc/nginx/ssl-certs/example.com.key -new -out /etc/nginx/ssl-certs/example.com.csr
Then, you need to send the CSR that is generated to a CA to request the issuance of a CA-signed SSL certificate. Once you receive your certificate from the CA, you can configure it as shown above.
Read Also: The Ultimate Guide to Secure, Harden and Improve Performance of Nginx Web Server
Summary
In this article, we have explained how to install and configure Nginx; covered how to setup name-based virtual hosting with SSL to secure data transmissions between the web server and a client.
If you experienced any setbacks during your nginx installation/configuration process or have any questions or comments, use the feedback form below to reach us.
Source