Nginx Caching for WordPress using fastcgi_cache

Fastcgi_cache Nginx

Caching PHP requests can dramatically reduce server resources per request and make the pages load time decrease substantially. In this tutorial we are going to utilize the fastcgi_cache functions in nginx to cache PHP requests making it.

This tutorial assumes you have the following already completed on your server:
Nginx installed, if you do not please follow – Nginx Compile From Source On CentOS
The ngx_cache_purge module already installed – How to install the ngx_cache_purge module in Ningx
FastCGI setup and running – PHP-FPM Installation

It also assumes you already have a WordPress installation as this will just cover setting up the fastcgi_cache to work with WordPress.

Nginx fastcgi_cache Configuration

First make a directory in /var/run , this is where the fastcgi_cache will store the files in memory

mkdir /var/run/nginx-cache

You will then need to edit the Nginx configuration

nano /etc/nginx/nginx.conf

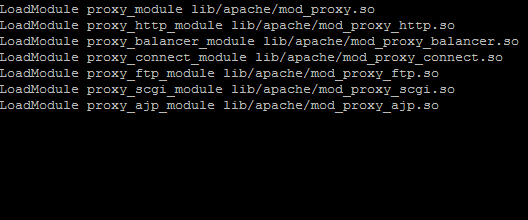
You will want to add the following lines in the http{} block before the server{} configuration

fastcgi_cache_path /var/run/nginx-cache levels=1:2 keys_zone=WORDPRESS:100m inactive=60m;
fastcgi_cache_key “$scheme$request_method$host$request_uri”;
fastcgi_cache_use_stale error timeout invalid_header http_500;
fastcgi_ignore_headers Cache-Control Expires Set-Cookie;

The above lines set the caching directory, cache levels and keys_zone. The fastcgi_cache_use_stale option will try to use cached files even if PHP-FPM has crashed or has been shutdown.

You will then want to add the following to the server{} configuration:

add_header X-Cache $upstream_cache_status;

What this does is allows you to see if Nginx is caching a request later on

if ($request_method = POST) {
set $skip_cache 1;
}

if ($request_uri ~* “/wp-admin/|/xmlrpc.php|wp-.*.php|index.php|/feed/|sitemap(_index)?.xml”) {
set $skip_cache 1;
}

if ($http_cookie ~* “comment_author|wordpress_[a-f0-9]+|wp-postpass|wordpress_no_cache|wordpress_logged_in”) {
set $skip_cache 1;
}

The above statements allow you to bypass the cache when you are logged into the administrative interface etc.

Add the following to location ~ .php$ {} block that sends the PHP requests to PHP-FPM

fastcgi_cache_bypass $skip_cache;
fastcgi_no_cache $skip_cache;
fastcgi_cache WORDPRESS;
fastcgi_cache_valid 200 302 60m;
fastcgi_cache_valid 301 1h;
fastcgi_cache_valid any 1m;

The above block fast_cache_valid entries specify which type of requests to cache and for how long.

And finally add a purge folder to in the server{} configuration:

location ~ /purge(/.*) {
allow 127.0.0.1;
deny all;
fastcgi_cache_purge WORDPRESS “$scheme$request_method$host$1”;
}

Once all of that has been completed, you can go ahead and restart nginx.

/etc/init.d/nginx restart

Nginx Helper Plugin Configuration

You will then want to cd to the wp-content/plugins directory and get the Nginx Helper plugin

wget https://downloads.wordpress.org/plugin/nginx-helper.1.9.10.zip

Uncompress the zip file

unzip nginx-helper.1.9.10.zip

Activate the plugin in WordPress and select the following options:
Under Purging Options select:

Enable Cache

Under Caching Method select:

Nginx FastCGI cache

Under Purge Method select:

Using a GET request to PURGE/url(Default option)

And click save to save the configuration.

To test you should now try a curl to check the headers to ensure a HIT for the X-Cache header We set earlier.

# Curl -Is http://domain.com |grep X-Cache
X-Cache: MISS

If this is the first request to that page since the cache has been active that is expected. A MISS means the page has not been cached yet.

On subsequent requests you should see

# Curl -Is http://domain.com |grep X-Cache
X-Cache: HIT

If you do get a X-Cache: BYPASS one of the rules we set earlier is causing the cache to be ignored. Try testing your site in one of the various speed test programs such as https://tools.pingdom.com you should notice a much improved load time over a non-cached WordPress install.

May 29, 2017LinuxAdmin.io

Source

Arm adds Linux-on-Cortex-A5 service to MCU-focused DesignStart program

Oct 23, 2018 — by Eric Brown

Arm has extended its Cortex-M oriented DesignStart program to Cortex-A5 SoCs running Linux. The SoC development platform starts at $75,000 for Cortex-A5 IP access and a year of design support.

Arm’s DesignStart, which helps semiconductor manufacturers develop Cortex-M based MCUs, has for the first time been extended to support a Linux-ready Cortex-A processor. DesignStart for Cortex-A5 now offers developers “the lowest cost access to a Linux-capable Arm CPU,” says the chip IP designer.

The DesignStart program for Cortex-A5 starts at $75,000 for IP access and a year of design support. A $150K option extends the access fee and support to three years. DesignStart also provides a web portal and a simplified contract.

Arm diagram showing scope of DesignStart on Cortex-A5
(click image to enlarge)


Key benefits of DesignStart program for Cortex-A5 includes access to system IP including:

  • Flexible system IP for area and power-optimized SoC development
  • Low-latency Arm CoreLink NIC-400 interconnect for configurable and low-power connectivity with design flexibility
  • Seamless debugging with CoreSight debug and trace solution
  • System-wide security with TrustZone technology

Arm also notes that its “vast range of Artisan physical IP” is available to help SoC developers more quickly tape out a custom chip. Customers can also access “design enablement platforms being supported by 18 foundry partners with process technology ranging from 250nm to 5nm,” says Arm.

Cortex-A5 enables relatively low fabrication costs, in part by offering a small footprint:

Cortex-A5 block diagram (left) and Microchip’s SAMA5D27 SOM
(click images to enlarge)

Microchip, through its Atmel acquisition, is one of a relatively few vendors that have run with the Cortex-A5. The company has long sold a SAMA5D family of SoCs, and earlier this year, it announced an open source, mainline Linux-ready SAMA5D27 SOM SiP module. The module is based on its -A5-based SAMA5D27 SoC equipped with 128MB RAM.

Given that the low-power -A5 is ideal for many low-end IoT gizmos, it has surprised us that Arm has not done more to promote the IP. Arm’s soft pedaling of Cortex-A5 was likely linked to its very successful efforts to promote Cortex-M on the low end and to boost Cortex-A7 as a Cortex-A5 replacement. Arm wanted to clearly differentiate between the Cortex-M and -A platforms.

With the relatively low-cost Cortex-A5 DesignStart program, Arm is now ready to serve the projected increase in custom IoT SoC development. We’re likely to see a growing number of smaller-volume SoCs aimed at very specific IoT applications. Many of these will be developed by fabless startups.

Two other trends may have also motivated Arm to push Cortex-A5. First, the open source RISC-V platform is emerging as a threat, especially when competing for smaller SoC design shops that cannot afford Arm’s standard IP licenses. Second, Arm now has skin in the game with its new Mbed Linux OS, which like the MCU-oriented Mbed OS that it’s partially based on, will support its Pelion IoT Platform. Cortex-A5 and -A7 are naturals for running the IoT focused Mbed Linux, which is also based on Yocto Project code.

Further information

The DesignStart program for Cortex-A5 is now available, starting at $75,000 per year. More information may be found in Arm’s announcement in Design & Reuse, as well as a more detailed blog announcement and the DesignStart product page.

Source

Lutris 0.4.21 is out to help you manage all your gaming needs on Linux

Lutris [Official Site], the ‘open gaming platform’ that acts as a front-end to help you manage various games on Linux has a fresh release out.

With Lutris 0.4.21 released yesterday it features an array of improvements, feature adjustments and bug fixes to make it a more pleasent experience overall.

For those using Lutris to help with Wine and DXVK, they fixed an issue where DXVK versions didn’t get updated if DXVK directory wasn’t present and they also added an error message if requested DXVK version does not exist to prevent some confusion.

To help with Wine use overall, they’ve also added a warning for wine games if Wine is not installed on the system, there’s a new Esync toggle for wine builds with Esync patches as it may cause issues for some users, Wine’s own Virtual Desktop configuration is now respected, some improvements to wine download dialog and so on.

They also improved the behavior of Lutris’ background process amongst other improvements to the UI, wording issues and more. Seems like a good release, nice to see it continue to improve!

As a reminder though, Lutris isn’t just for managing Wine games, it also helps with launching your native games, emulators and more.

Source

How to Create a Slideshow of Photos in Ubuntu 18.04 and other Linux Distributions

Creating a slideshow of photos is a matter of a few clicks. Here’s how to make a slideshow of pictures in Ubuntu 18.04 and other Linux distributions.

How to create slideshow of photos in Ubuntu Linux

Imagine yourself in a situation where your friends and family are visiting you and request you to show the pictures of a recent event/trip.

You have the photos saved on your computers, neatly in a separate folder. You invite everyone near the computer. You go to the folder, click on one of the pictures and start showing them the photos one by one by pressing the arrow keys.

But that’s tiring! It will be a lot better if those images get changed automatically every few seconds.

That’s called a slideshow and I am going to show you how to create a slideshow of photos in Ubuntu. This will allow you to loop pictures from a folder and display them in fullscreen mode.

Creating photo slideshow in Ubuntu 18.04 and other Linux distributions

While you could use several image viewers for this purpose, I am going to show you two of the most popular tools that should be available in most distributions.

Method 1: Photo slideshow with GNOME’s default image viewer

If you are using GNOME in Ubuntu 18.04 or any other distribution, you are in luck. The default image viewer of Gnome, Eye of GNOME, is well capable of displaying the slideshow of pictures in the current folder.

Just click on one of the pictures and you’ll see the settings option on the top right side of the application menu. It looks like three bars stacked over the top of one another.

You’ll see several options here. Check the Slideshow box and it will go fullscreen displaying the images.

How to create slideshow of photos in Ubuntu Linux

By default, the images change at an interval of 5 seconds. You can change the slideshow interval by going to the Preferences->Slideshow.

change slideshow interval in UbuntuChanging slideshow interval

Method 2: Photo slideshow with Shotwell Photo Manager

Shotwell is a popular photo management application for Linux. and available for all major Linux distributions.

If it is not installed already, search for Shotwell in your distribution’s software center and install it.

Shotwell works slightly different. If you directly open a photo in Shotwell Viewer, you won’t see preferences or options for a slideshow.

For slideshow and other options, you have to open Shotwell and import the folders containing those pictures. Once you have imported the folder in here, select that folder from left side-pane and then click on View in the menu. You should see the option of Slideshow here. Just click on it to create the slideshow of all the images in the selected folder.

How to create slideshow of photos in Ubuntu Linux

You can also change the slideshow settings. This option is presented when the images are displayed in the full view. Just hover the mouse to the lower bottom and you’ll see a settings option appearing.

It’s easy to create photo slideshow

As you can see, it’s really simple to create slideshow of photos in Linux. I hope you find this simple tip useful. If you have questions or suggestions, please let me know in the comment section below.

About Abhishek Prakash

I am a professional software developer, and founder of It’s FOSS. I am an avid Linux lover and Open Source enthusiast. I use Ubuntu and believe in sharing knowledge. Apart from Linux, I love classic detective mysteries. I’m a huge fan of Agatha Christie’s work.

Source

SUSE Linux Enterprise Server for SAP Applications Available on AWS High Memory Instances

Share with friends and colleagues on social media

Amazon Web Services (AWS) has released Amazon EC2 High Memory instances which are part of the Memory Optimized Instance Category. The new instances are purpose-built to run large in-memory workloads, including SAP HANA. The SUSE and Amazon engineering teams collaborated to ensure SUSE Linux Enterprise Server (SLES) and SUSE Linux Server for SAP Applications were supported on the day of the release in the Amazon Marketplace. Below are the new instance type vCPU, RAM and bandwidth specifications, as well a link with all the instance families available on the AWS platform:

Link to the entire Amazon Web Services Instance family.

New Instance Performance Perks

The new High Memory Instances have introduced quite a few innovations and improvements when compared to the previous Memory Optimized Instances: X1 and X1e that greatly improve high memory workloads such as SAP HANA. The improvements to the instances have resulted in a new benchmark of 480,600 SAP Application Performance Standard (SAPS) for the 6 TiB instance (u-6tb1) up from the previous best 131,500 SAPS for the x1e.32xlarge which has 3,904 GiB of RAM and 128 virtual cores.

Below are just a few improvements introduced with the new instance type.

  • Upgraded Processing: The EC2 High Memory instances are the first Amazon EC2 instances powered by an 8-socket platform with the latest generation Intel® Xeon® Platinum 8176M (Skylake) processors. The previous X1 and X1e High frequency Intel Xeon E7-8880 v3 (Haswell) processors. Previously the highest available vCPU count was 128, but now customers can deploy SUSE Linux enterprise Server and SUSE Linux Enterprise Server for SAP Applications on systems with 448 hyperthreaded cores (224 physical cores).
  • Increased Memory: Previously the highest memory available was 1,952 GiB in memory available on the x1.32xlarge instance. With the introduction of the new instances, customers can choose to run the 448 logical cores with 6TiB, 9 TiB or 12 TiB.
  • Elastic Block Storage (EBS) and Network Bandwidth: The systems are designed with the key service level agreements for dedicated EBS and network bandwidths. EBS has a dedicated 14 Gbps connection to ensure optimum disk performance and a separate 25 Gbps for networking.
  • High Memory Instance SAP Benchmark

Cloudy Infrastructure

It’s important that cloud service providers update their infrastructure to meet customer requirements. It is just as important that the new systems introduced are available through the standard APIs and/or the administrator control panel. Amazon Web Services provides you the same management experience when managing instances ranging from the t3.nano with 0.5 GiB of RAM to the systems which start at 6 TiB of RAM. This is an important detail since the new High Memory Instances are bare metal servers based on Amazon’s Nitro technology which is a combination of AWS-built hardware and software components that provide customer’s full access to the hardware resources.

The High Memory Instances are a new variation from other Nitro (bare metal) instances since the High Memory Instances use EBS storage as opposed to other Nitro instances which use local NVMe. This difference allows the High Memory Instances to support terabytes of datasets which makes the systems ideal for running large enterprise databases, including SAP Certified production installations of SAP HANA in-memory database in the cloud. Additionally, AWS has integrated the new instance type into the SAP HANA Quick Start Deployment. It provides customers and partners the ability to launch an SAP HANA High Availability cluster using SUSE Linux Enterprise Sever for SAP Applications.

To learn more about review the Quick Start documentation as well as a SUSE and Amazon created white paper outlining the best practice for SAP HANA SR Performance Optimized Scenario on the AWS Cloud.

If you have any questions please email us at aws@suse.com.

Share with friends and colleagues on social media

Source

Pivotal Cloud Foundry Architecture | Linux.com

Pivotal Cloud Foundry (PCF) is a multi-cloud platform for the deployment, management, and continuous delivery of applications, containers, and functions. PCF is a distribution of the open source Cloud Foundry developed and maintained by Pivotal Software, Inc. PCF is aimed at enterprise users and offers additional features and services—from Pivotal and from other third parties—for installing and operating Cloud Foundry as well as to expand its capabilities and make it easier to use.

Pivotal Cloud Foundry abstracts away the process of setting up and managing an application runtime environment so that developers can focus solely on their applications and associated data. Running a single command—cf push—will create a scalable environment for your application in seconds, which might otherwise take hours to spin up manually. PCF allows developers to deploy and deliver software quickly, without needing to manage the underlying infrastructure.

Source

5 Ways to Take Screenshot in Linux [GUI and Terminal]

Here are several ways you can take screenshots and edit the screenshots by adding text, arrows etc. Instructions and mentioned screenshot tools are valid for Ubuntu and other major Linux distributions.

How to take screenshots in Ubuntu Linux

When I switched from Windows to Ubuntu as my primary OS, the first thing I was worried about was the availability of screenshot tools. Well, it is easy to utilize the default keyboard shortcuts in order to take screenshots but with a standalone tool, I get to annotate/edit the image while taking the screenshot.

In this article, we will introduce you to the default methods/tools (without a 3rd party screenshot tool) to take a screenshot while also covering the list of best screenshot tools available for Linux.

Method 1: The default way to take screenshot in Linux

Do you want to capture the image of your entire screen? A specific region? A specific window?

If you just want a simple screenshot without any annotations/fancy editing capabilities, the default keyboard shortcuts will do the trick. These are not specific to Ubuntu. Almost all Linux distributions and desktop environments support these keyboard shortcuts.

Let’s take a look at the list of keyboard shortcuts you can utilize:

PrtSc – Save a screenshot of the entire screen to the “Pictures” directory.
Shift + PrtSc – Save a screenshot of a specific region to Pictures.
Alt + PrtSc – Save a screenshot of the current window to Pictures.
Ctrl + PrtSc – Copy the screenshot of the entire screen to the clipboard.
Shift + Ctrl + PrtSc – Copy the screenshot of a specific region to the clipboard.
Ctrl + Alt + PrtSc – Copy the screenshot of the current window to the clipboard.

As you can see, taking screenshots in Linux is absolutely simple with the default screenshot tool. However, if you want to immediately annotate (or other editing features) without importing the screenshot to another application, you can use a dedicated screenshot tool.

Method 2: Take and edit screenshots in Linux with Flameshot

flameshot

Feature Overview

  • Annotate (highlight, point, add text, box in)
  • Blur part of an image
  • Crop part of an image
  • Upload to Imgur
  • Open screenshot with another app

Flameshot is a quite impressive screenshot tool which arrived on GitHub last year.

If you have been searching for a screenshot tool that helps you annotate, blur, mark, and upload to imgur while being actively maintained unlike some outdated screenshot tools, Flameshot should be the one to have installed.

Fret not, we will guide you how to install it and configure it as per your preferences.

To install it on Ubuntu, you just need to search for it on Ubuntu Software center and get it installed. In case you want to use the terminal, here’s the command for it:

sudo apt install flameshot

If you face any trouble installing, you can follow their official installation instructions. After installation, you need to configure it. Well, you can always search for it and launch it, but if you want to trigger the Flameshot screenshot tool by using PrtSc key, you need to assign a custom keyboard shortcut.

Here’s how you can do that:

  • Head to the system settings and navigate your way to the Keyboard settings.
  • You will find all the keyboard shortcuts listed there, ignore them and scroll down to the bottom. Now, you will find a + button.
  • Click the “+” button to add a custom shortcut. You need to enter the following in the fields you get:
    Name: Anything You Want
    Command: /usr/bin/flameshot gui
  • Finally, set the shortcut to PrtSc – which will warn you that the default screenshot functionality will be disabled – so proceed doing it.

For reference, your custom keyboard shortcut field should look like this after configuration:

Map keyboard shortcut with Flameshot

Method 3: Take and edit screenshots in Linux with Shutter

Feature Overview:

  • Annotate (highlight, point, add text, box in)
  • Blur part of an image
  • Crop part of an image
  • Upload to image hosting sites

Shutter is a popular screenshot tool available for all major Linux distributions. Though it seems to be no more being actively developed, it is still an excellent choice for handling screenshots.

You might encounter certain bugs/errors. The most common problem with Shutter on any latest Linux distro releases is that the ability to edit the screenshots is disabled by default along with the missing applet indicator. But, fret not, we have a solution to that. You just need to follow our guide to fix the disabled edit option in Shutter and bring back the applet indicator.

After you’re done fixing the problem, you can utilize it to edit the screenshots in a jiffy.

To install shutter, you can browse the software center and get it from there. Alternatively, you can use the following command in the terminal to install Shutter in Ubuntu-based distributions:

sudo apt install shutter

As we saw with Flameshot, you can either choose to use the app launcher to search for Shutter and manually launch the application, or you can follow the same set of instructions (with a different command) to set a custom shortcut to trigger Shutter when you press the PrtSc key.

If you are going to assign a custom keyboard shortcut, you just need to use the following in the command field:

shutter -f

Method 4: Use GIMP for taking screenshots in Linux

Feature Overview:

  • Advanced Image Editing Capabilities (Scaling, Adding filters, color correction, Add layers, Crop, and so on.)
  • Take a screenshot of the selected area

If you happen to use GIMP a lot and you probably want some advance edits on your screenshots, GIMP would be a good choice for that.

You should already have it installed, if not, you can always head to your software center to install it. If you have trouble installing, you can always refer to their official website for installation instructions.

To take a screenshot with GIMP, you need to first launch it, and then navigate your way through File->Create->Screenshot.

After you click on the screenshot option, you will be greeted with a couple of tweaks to control the screenshot. That’s just it. Click “Snap” to take the screenshot and the image will automatically appear within GIMP, ready for you to edit.

Method 5: Taking screenshot in Linux using command line tools

This section is strictly for terminal lovers. If you like using the terminal, you can utilize the GNOME screenshot tool or ImageMagick or Deepin Scrot– which comes baked in on most of the popular Linux distributions.

To take a screenshot instantly, enter the following command:

GNOME Screenshot (for GNOME desktop users)

gnome-screenshot

To take a screenshot with a delay, enter the following command (here, 5 – is the number of seconds you want to delay)

GNOME screenshot is one of the default tools that exists in all distributions with GNOME desktop.

gnome-screenshot -d -5

ImageMagick

ImageMagick should be already pre-installed on your system if you are using Ubuntu, Mint, or any other popular Linux distribution. In case, it isn’t there, you can always install it by following the official installation instructions (from source). In either case, you can enter the following in the terminal:

sudo apt-get install imagemagick

After you have it installed, you can type in the following commands to take a screenshot:

To take the screenshot of your entire screen:

import -window root image.png

Here, “image.png” is your desired name for the screenshot.

To take the screenshot of a specific area:

import image.png

Deepin Scrot

Deepin Scrot is a slightly advanced terminal-based screenshot tool. Similar to the others, you should already have it installed. If not, get it installed through the terminal by typing:

sudo apt-get install scrot

After having it installed, follow the instructions below to take a screenshot:

To take a screenshot of the entire screen:

scrot myimage.png

To take a screenshot of the selected aread:

scrot -s myimage.png

Wrapping Up

So, these are the best screenshot tools available for Linux. Yes, there are a few more tools available (like Spectacle for KDE-based distros), but if you end up comparing them, the above-mentioned tools will outshine them.

In case you find a better screenshot tool than the ones mentioned in our article, feel free to let us know about it in the comments below.

Also, do tell us about your favorite screenshot tool!
Source

Download OpenSSH Linux 7.9

OpenSSH is a freely distributed and open source software project, a library and command-line program that runs in the background of your GNU/Linux operating system and protects your entire network from intruders and attackers. It is the open source version of the SSH (Secure Shell) specification, specifically designed for

Features at a glance

OpenSSH is an open source project distributed under a free license. It offers strong authentication based on the Public Key, Kerberos Authentication and One-Time Password standards, strong encryption based on the AES, Blowfish, Arcfour and 3DES algorithms, X11 forwarding supports by encrypting the entire X Window System traffic, as well as AFS and Kerberos ticket passing.

Additionally, the software feature port forwarding support by encrypting channels for legacy protocols, data compression support, agent forwarding support by using the Single-Sign-On (SSO) authentication standard and SFTP (Secure FTP) server and client support in either SSH2 or SSH1 protocols.

Another interesting feature is interoperability, which means that the project complies with versions 1.3, 1.5 and 2.0 of the original SSH (Secure Shell) protocol. After installation, OpenSSH will automatically replace the standard FTP, Telnet, RCP and rlogin programs with secure versions of them, such as SFTP, SCP and SSH.

Under the hood, availability and supported OSes

The OpenSSH project is written entirely in the C programming language. It comprised of the main SSH implementation and the SSH daemon, which runs in the background. The software is distributed mainly as a universal sources archive, which will work with any GNU/Linux operating systems on both 32-bit and 64-bit architectures.

Portable OpenSSH

A portable version of the OpenSSH protocol is also available for download on Softpedia, free of charge, called Portable OpenSSH. It is an open source implementation of SSH version 1 and SSH version 2 protocols for Linux, BSD and Solaris operating systems.

Source

IT Transformation is a Journey, not a Destination

Share with friends and colleagues on social media

“When you’re finished changing, you’re finished.”

Those sobering words of wisdom are attributed to Benjamin Franklin, but they would be a good mantra for any modern business or IT leader to live by. Why? Because in today’s digital age, dealing with constant change is a fact of life. It’s being driven by customer expectations, new business demands, and competitive pressures and it’s not about to stop any time soon. It comes with inevitable risks, and challenges that have to be addressed, but also with massive opportunities just waiting to be exploited.

Dealing with change has to be a top business priority. IDC predicts worldwide spending on digital transformation will soar past $1 trillion this year. Much of that investment is being spent on transforming IT infrastructure and processes, which are fundamental requirements for any digital transformation project. Frankly, you can’t do one without the other and traditional data centers simply won’t cut it any longer. They are simply too rigid, slow and difficult to adapt.

What is IT transformation?

To transform means to remodel, recreate, revitalize, rejuvenate or revolutionize. That’s what many organizations are looking to achieve by adopting a software-defined infrastructure, designing new cloud-native applications and by deploying those workloads to a cloud platform.

However, that doesn’t mean traditional data centers will be disappearing anytime soon. The vast majority of enterprise workloads are still hosted in existing data centers and they represent a substantial investment that can’t easily move to the cloud. Most IT leaders believe a software-defined infrastructure is the future for their data centers. Much of the data center can be successfully transformed into private clouds with all the automation, functionality, agility and cost-effectiveness we’ve come to expect from public cloud platforms.

Open Source is part of the Journey

It’s worth noting that open source is now at the core of both IT and digital transformation strategies and projects. This is because the open source communities are where most of the innovation is coming from. It’s also because the open source model has major advantages over proprietary approaches that simply can’t be ignored any longer. Open source solutions such as Linux, OpenStack, Ceph, Kubernetes, Cloud Foundry, and many others have all taken leadership roles.

In fact, open source has become increasingly prevalent even in proprietary software. A recent audit of 1,000 commonly used applications in the enterprise found open source components in 96% and made up 57% of proprietary codebases. Given this situation, it comes as no surprise that hiring open source talent is now a priority for 83% of hiring managers[1].

Definitely a Journey, Not a Destination

IT Transformation is definitely not a one-off project. It’s not a case of building a plan, executing against the plan and then you’re done. Oh no! Change is not going to slow down and it’s certainly not going to stop. Business disruption, whether it’s from technology, customer demands or competitive pressures, is going to keep coming, faster and faster. We all need to keep on transforming and adapting, or we’re finished.

As Winston Churchill succinctly put it; “to improve is to change; to be perfect is to change often”.

Need a little help with your own transformation journey? Take a look at the white paper: “Open Source at the Heart of IT Transformation” to learn more about the role open source has to play in your IT transformation journey.

Source

Pioneers in Open Source–Eren Niazi, Part I: the Start of a Movement and the Open-Source Revolution Redefining the Data Center

The name may not be a familiar one to everyone,
but Eren Niazi can be credited with
laying the foundation and paving the way to the many software-defined and
cloud-centric technologies in use today.

When considering the modern data center, it’s difficult to imagine a time when
open-source technologies were considered taboo or not production-grade, but
that time actually existed. There was a time when the data center meant closed
and propriety technologies,
developed and distributed by some of the biggest names in the industry—the days when EMC, NetApp, Hewlett Packard (HP), Oracle or even Sun
Microsystems owned your data center and the few applications upon which you
heavily relied.
It also was a time when your choice was limited to one vendor, and you would invest
big into that single vendor. If you were an HP shop, you bought HP. If you were
an EMC shop, you
bought EMC—and so on. From the customer’s point of
view, needing to interact with only a single vendor for purchasing, management
and support was comforting.

However, shifting focus back to the present, the landscape
is quite different. Instead, you’ll find an environment of mixed
offerings provided by an assortment of vendors, both large and small.
Proprietary machines work side by side with off the shelf commodity devices
hosting software-defined software, most of which are built on top of
open-source code. And half the applications are hosted in virtual machines
over a Hypervisor or just spun up in one or more containers.

These changes didn’t happen overnight. It took visionaries like Eren Niazi
to identify the full potential of open-source software technologies. He saw
what others did not and, in turn, proved to an entire industry that open
source was not merely production-ready, but he also used that same technology to
redefine the entire data center.

His story is complicated, filled with ups and downs. Eren faced his
fair share of trials and tribulations that gave him everything, just to have it
all taken away. But, let’s begin at the beginning.

Born in Sunnyvale, California, a little more than 40 years ago, Eren grew up down the
street from Steve Jobs, and on many occasions, he engaged the legendary
Apple co-founder in inspiring conversations. The two shared many
characteristics. Neither ever finished college. Both are
entrepreneurs and inventors. Niazi and Jobs each were driven from their own
companies, only to return again. Around age 12, Eren became
fascinated with computers and learned how to develop code. However, his
adventures in open-source technologies didn’t truly start until the year
1998.

Jim Truong took the young Niazi, a teenager with no college education, under
his wing over at AMAX Engineering, a server and cluster computing company.
Founded in 1979, AMAX Engineering Corporation designs and engineers customized
platforms for data centers. Today, it has expanded to provide solutions to
host cloud, big data and high-performance parallel computing workloads.

At age 19, Niazi was working diligently on architecting
supercomputers for large account customers, which included the federal
government and Linux Networx. By the end of his career with AMAX, Eren had
risen to the level of OEM group manager.

I was fortunate in that I was able to reach Jim for comment:

I met Eren back in 1999 when I hired him at AMAX Engineering. Even then, at 19,
he was extremely passionate about technology. He was self-taught and even
learned to write code on his own. Eren was very motivated and wanted to learn
everything. The question was never about how, but how fast. Once he set his
sights on a goal, Eren would be 110% committed.

Deep down, I always knew that he was going to be an entrepreneur. I just never
imagined that he would go on to accomplish so much in the open source space. At
the time, everyone else was treating open source software as a pet project and
configuring machines to run simple tasks out of their homes. Eren took that
same technology and proved it to be production grade. He used it to compete
with Enterprise level solution providers in the data storage space but at a
large fraction of the cost.

While Eren was at AMAX, he took notice of a trend in the technology of this
sector and observed the path in which it was heading. This would lead to a
unique vision for open source integration. The vision may not sound so unique
today, but at the time it went against the norms just enough to be considered
revolutionary. In 2001, he created Open Source Storage, Inc., which focused on
leveraging commodity off-the-shelf hardware and pairing it with open source
software while pushing into Enterprise space.

In 2001, Eren left AMAX and founded Open Source
Storage, Incorporated, or OSS. At the time, “open-source” anything was
still considered somewhat controversial—even more so in the professional
workplace. But, that did not stop or dissuade the young Eren from pressing on.

Some might even say that Eren could be credited with coining the terms open source
<fill in the blank>. The same sentiment was both expressed
and validated by Jim Truong of AMAX:
“Eren worked hard to pave the way for the open source storage movement (a term
he coined), and he can probably be credited for getting us to where we are
today. Not many individuals can achieve what he did.”

And there probably is some truth to this. Eren Niazi continues to hold many
domain names, most of which were acquired 17 or more years ago. For example, a
whois on opensourcesystems.com dates back to 1999, while a
whois on a
opensourcestorage.com shows a creation year of 2001:

$ whois opensourcesystems.com|grep Creation|head -n1
Creation Date: 1999-01-01T05:00:00Z
$ whois opensourcestorage.com|grep Creation|head -n1
Creation Date: 2001-12-06T03:19:35Z

Niazi still holds the ownership of those same domains.

""


Figure 1. A Few Domains Owned by
Eren Niazi

A trademark for Open Source Storage was filed on January 5, 2004 and registered
on June 21, 2005.

""

Figure 2. Serial Number: 78347754 and
Registration Number: 2963234

OSS hit the ground running. The company did the unthinkable by marrying both
open-source software with commodity off-the-shelf hardware and, in turn, sold it
as a cheaper alternative to the big players and newcomers to the industry.

Friendster, one of the original social-networking sites, was one of the early
OSS customers. The social network needed both hardware and a scalable platform.
OSS was able to fill that void and at a very competitive price. It wouldn’t
be long before the Friendster employees left for the new kid on the block,
Facebook. Those former Friendster employees provided OSS with a wonderful
business opportunity. Facebook was growing, and it was growing fast. The year
was 2004. With its foot already in the door, OSS deployed its software
stack on top of 3500 systems and was with Facebook during its early growth
years—at least until 2007.

Note: Friendster is currently a social gaming site, but that wasn’t always the
case. Friendster was originally founded as a social networking site in 2002.
The relaunch into the social gaming platform occurred much later in
2011.

""


Figure 3. Niazi Standing in Front of
Server Cabinets in the Early Facebook Data Center

Stories circulated stating how Mark Zuckerberg had invited Eren
Niazi to accompany him to the Nasdaq on the day he rang the opening bell to
mark Facebook’s IPO. While Niazi and Zuckerberg were very close, this story was
nothing more than just a simple rumor. Regardless of that fact, Eren did take
advantage of the opportunity by purchasing pre-sale Facebook IPO stock via a
registered stock broker.

Open Source Storage had accomplished the unthinkable and commercialized open-source software. Open source was ready for enterprise. Taking notice, the
industry shifted toward it. By the year 2007, the company’s list of
customers grew to include the following:

  • Friendster
  • Facebook
  • NASA
  • Shutterfly
  • FriendFinder
  • Yahoo
  • eBay
  • Shopping.com (later acquired by eBay)
  • USGS
  • Lockheed Martin
  • US Army
  • And more…

When reached for comment, the former OSS warehouse manager Marty Wallach
validated the above list of customers. In his brief, almost two-year tenure
with the company, Marty wore many hats. His main responsibilities
circulated around inventory, logistics and vendor or client orders. He secured
the components and hardware prior to it being assembled and shipped to
customers like Facebook. He also took many trips to the old Facebook offices
located on University Avenue and even to Shutterfly.

With regard to his time spent working with Eren, he said “I have known Eren a long time and he has always been up to date with the
technology. His background has always been impressive and he has tremendous
drive.”

Although I’ve gone on about the high-profile customers OSS accumulated
through the years, I’d like to take a step back and look at the actual product. By
today’s standards, it isn’t anything new. Today, people use the term
“software-defined” to label what OSS had done a decade earlier.

Software-defined solutions were not a thing in those days, and yet, it was
exactly what OSS was building and selling. The software was a CentOS Linux
respin. A Kickstart machine would load the predefined operating system image
and the minimum set of packages required.

Note: software-defined solutions involve the coupling of special-purpose software
with commodity off-the-shelf hardware. Coined around 2009 (maybe a little
later), it has been a hot and trending technology in today’s data
center.

Initially, Open Source Storage was building its own hardware (using
off-the-shelf components), all based on the open standards of the time. This
did provide its advantages. For example, the high-efficiency power supplies
were generating 50% less heat and consuming significantly less energy (between
30%–50%). To enable the hardware that OSS provided to early
customers, the motherboard’s BIOS needed to be rewritten, and the company
worked
closely with both Intel and AMD to accomplish this. In fact, the first OSS
office was located across the street from Intel in Santa Clara, California.

The internet exploded with a plethora of services, applications and platforms
of entertainment. Data centers were only getting bigger with a lot more
hardware. There was a constant need to reduce heat and, in turn, save on
cooling costs. The Gemini 2U was one of the more-green offerings of its time.

""

Figure 4. Open Source Storage
Recognition and Awards from the Early Years

Labeled as the Gemini 2U, the ultimate system was fixed with dual
motherboards and other fixtures, located in the same enclosure. A patent was
filed in 2006 and accepted in 2008 (US 20080037214):

According to this embodiment, the chassis features a chassis base, first and
second bays for first and second motherboards, a fan assembly for mounting
fans, a backplane for I/O connections mounted to the chassis base, and at least
two compartments for electronic components. The first bay and the second bay
are laterally adjacent so that, when in use, the first and second motherboards
are in substantially the same plane.

""


Figure 5. The Gemini 2U’s
Patent Design Number US 20080037214

Note: a U is a form of measurement designating the height of a computer enclosure and
data center rack cabinet. A single U measures at 1.75 inches in height.
Therefore a 2U would equate to 3.5 inches. At around this time frame, single 2U
enclosure would be capable of holding up to 12 3.5″ spinning hard disk
drives (HDDs).

It wouldn’t take long for companies like HP and Supermicro to copy this
unique twin-server design, but because OSS did not have the money to litigate,
those hardware vendors continued to sell the design in their respective
product lines. In the case of HP, the design was first introduced in its
Proliant series.

""

Figure 6. An Advertisement for the Gemini
2U

As OSS’s operations grew, the need for a larger facility became
increasingly important. In 2004, the company moved its headquarters to the
former 33,000 square foot Atari facility located at 1195 Borregas Avenue in
Sunnyvale, California. The company continued to operate from that location until
2007.

""

Figure 7. OSS Headquarters in
Sunnyvale, California (2004–2007)

Business was booming, and OSS was seeing an annual run rate of $40
million—not
bad when think about the fact that the entire business was built with credit
cards and a minimal amount of money to bootstrap itself. Eren and OSS were
turning heads, and an entire industry took notice.

""


Figure 8. Open Source Storage
Featured in Silicon Valley Business Journal

""


Figure 9. Open Source Storage
Featured in Custom Systems Magazine

The company did very well until 2007. It grew so rapidly, it needed to
get additional capital from investors, and then the recession hit. Once the
recession hit, the investors wanted Niazi to sell, but he wouldn’t budge.
As a result, those same investors pulled out of the company.

Here’s Eren Niazi on this topic:

It was never about the money. Over the years, I was given many opportunities to
sell OSS and refused to sell the business to Oracle, HP or IBM.
It was never a business. It was a movement. To
this day, I would take a bullet for the company.

With little to no capital left, Open Source Storage filed for bankruptcy. And
although OSS was going through its own financial crisis, it did not impact the
entire business—meaning, OSS continued to maintain its clients, but a
strategic move was required.

By 2007 and following the bankruptcy, the business model needed to change, and it
did in order to focus more on enterprise-grade turnkey open-source software solutions
intended for public, private and hybrid cloud deployments.
To put this in perspective, it was in 2006 that Amazon’s subsidiary,
Amazon Web Services (AWS) first introduced its Elastic Compute Cloud (EC2).

The decision was made to focus only on the software and not the hardware with
an additional emphasis on Agile development. In fact, the industry already
was starting to trend toward this model. Niazi and his team looked beyond the complete
operating system model to develop more of the middleware needed by their
customers—a majority of which were migration tools to ease the transition from
proprietary platforms and to their open-source counterparts. For instance, why
continue spending big dollars with Oracle and Sun Microsystems when you can
cut your costs by 80% and instead host that same data with MySQL on top of
FreeNAS? Customers enjoyed the idea of getting away from these data center
monopolies. Needless to say, this eventually created tension between OSS
and Oracle.

In parallel, the new customers being catered to under this model were
startups—about 75 of them to be exact. OSS was contracted to build “apps” for
them. The process began with soft coding and prototyping to fill the initial
requirements requested by the customer, and when the startup was fully funded,
OSS then would build the hardened application. In-house, there were more than 200
developers (contractors) commissioned to handle the bulk of this work. It was a
relatively large operation.

One satisfied OSS customer (in around 2014), who I’ll refer to as William G.,
provided the following testimony:

We were introduced to Eren through a mutual friend and shortly thereafter flew
out to California to meet the team. Our company was building an interactive
Music Trading Card platform. Open Source Storage accomplished exactly what we
needed, and we were very happy with them. They built an open source platform
that scaled and within the agreed upon time frame.

It would take a creative genius to see the true potential in open-source
software and prove to an entire industry that was it production-grade and fully
capable of hosting consumer workloads. This piece of history was only the
beginning. A prosperous Niazi begins to
buckle under the pressure, the effects of which impact OSS and the very
movement he began more than a decade earlier. The rest of his turbulent
story will unfold in Part II.

The revolution in the data center had taken place, and the foundation
was laid for what was about to come. Stay tuned.

Source

WP2Social Auto Publish Powered By : XYZScripts.com