Linux apps can expand your Chromebook’s capabilities and open up all sorts of interesting options — but first, you have to know where to begin.
![]()
By JR Raphael
Contributing Editor, Computerworld | Oct 22, 2018 3:00 AM PT
Google’s Chrome OS platform sure isn’t what it used to be.
The software that started out as a strictly web-centric entity — with everything revolving around the Chrome browser and apps that could operate inside it — is now one of modern computing’s most versatile operating systems. Contemporary Chromebooks still run all the standard web-based stuff, of course, but they’re also capable of connecting to Google’s entire Play Store and running almost any Android app imaginable. And if that isn’t enough, many models have recently gained the ability to run Linux apps as well.
Linux, for the uninitiated, is a free and open-source operating system (well, technically a series of operating systems) adored by developers, privacy advocates, and plenty of other technically inclined hominids. Despite its geeky reputation, Linux is actually used for a variety of everyday purposes, even in the enterprise. When you hear people talk about Ubuntu, Mint, or Raspbian — the software associated with the ultra-affordable Raspberry Pi computers — you’re hearing the names of specific flavors, or “distributions,” of Linux. Even Chrome OS and Android have Linux-based technology at their cores.
For all of its utility, though, Linux isn’t always the most intuitive operating system. In fact, it can be downright confusing — especially when you have to head into the terminal, its powerful command-line interface, which is the only way to install Linux apps on a Chromebook. (Some forms of the OS allow you to stick with a more traditional graphical user interface and avoid the overwhelming vastness of the command line, but that’s not possible within the current Chrome OS implementation.)
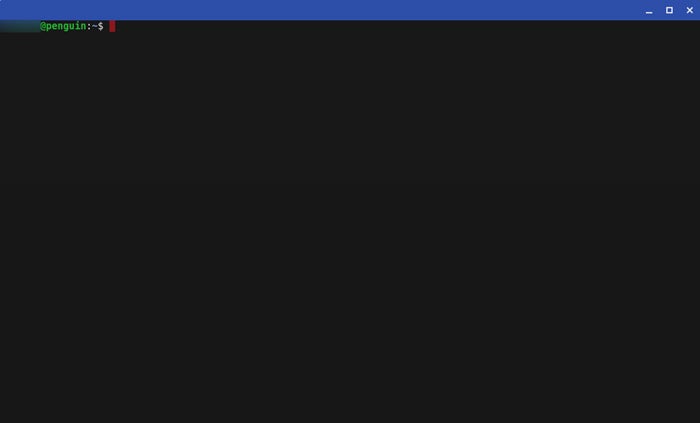 JR Raphael/IDG
Meet the oh-so-friendly face of Chrome OS’s Linux terminal.
So if you want to take advantage of Linux apps on a Chrome OS device, you’re gonna have to roll up your sleeves and learn a little good old-fashioned geek-level knowledge. Let’s take it one step at a time, shall we?
Part I: Why you’d want to use Linux apps on a Chromebook
First things first: Why bother? If you’re like most Chrome OS users, a Chromebook is perfectly fine for you as-is — and Linux apps are part of a virtual Bizarro World, with foreign-seeming titles and interfaces just different enough from familiar terrain to require a learning curve.
Well, the truth is that if your Chromebook already does everything you need, you probably don’t need to mess with Linux apps. Linux app support on Chrome OS isn’t really meant to be for everyone; it’s intended to fill in the gaps of what a Chromebook can accomplish for a specific subset of advanced “almost there” users — folks who are just about able to get by with a combination of cloud-centric software and Android applications but who have one or two specific lingering needs those categories of programs can’t address.
With Linux app support, for instance, you can install Photoshop-caliber image editing software onto a Chromebook. You can run robust audio- or video-editing software that exceeds the capabilities offered by web-based or even Android-based tools in that area. And perhaps most significantly, from a big-picture perspective, you can run code editors — including Google’s own official Android Studio development tool — which opens the world of Chrome OS up to Android developers.
As Google works to turn Chrome OS into a broadly viable all-purpose computing platform and Android desktop companion, eliminating these sorts of niche-level asterisks goes a long way in expanding the ecosystem’s appeal and shedding its longstanding limitations.
Part II: How to get started with Linux apps on a Chromebook
If you think you’d stand to benefit from using a Linux app on your Chrome OS device — or if you just want to explore and see what’s out there — the first step is to see if your Chromebook supports Linux apps in the first place.
Linux app support rolled out to Chrome OS’s main stable channel with Chrome OS 69 in September, but certain hardware and software requirements are attached — which means not all devices are eligible. The simplest way to see if your device has Linux app support is to open up the Chrome OS settings (by typing chrome://settings into the address bar of a browser window) and then type Linux into the search box at the top.
If you see a section appear with the label “Linux (Beta),” you’re good to go. If not, your device isn’t supported, and you’ll have to upgrade to a newer or more powerful model in order to use Linux software.
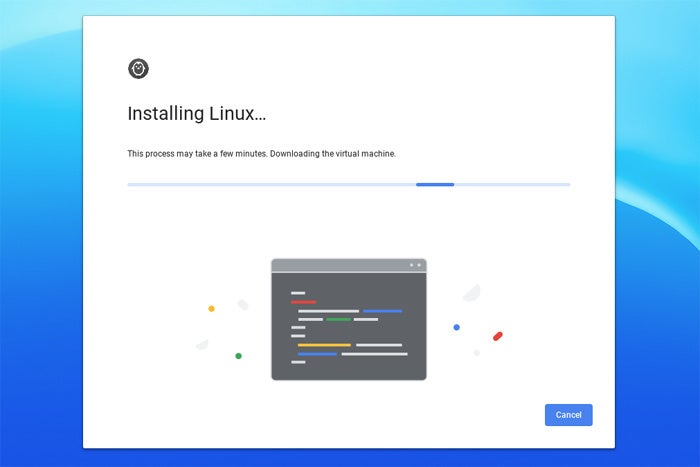
Provided you see the Linux-related section, click on it and then follow the steps that appear to enable Linux apps for your Chromebook. The system will take a few minutes to install all the necessary elements:
 JR Raphael/IDG
Hang tight while the Linux virtual machine is downloaded and installed.
When it’s done, you’ll see a terminal window like the one shown earlier in the story. Take a moment to celebrate: Your Chromebook is officially ready to run Linux apps. And now the real fun begins.
Part III: How to install Linux apps on a Chromebook
That same terminal window is where you’ll go anytime you want to install a new Linux application. You can always find it by opening your device’s app launcher and looking for the “Terminal” entry inside.
Once you’re in the Linux terminal, the specific command you’ll enter for installing an app is sudo apt-get install followed by the app’s official name. (Told ya this wasn’t exactly intuitive, right?)
So if, for instance, you wanted to install LibreOffice — a popular and fully featured open-source office suite — you’d open the terminal and type in:
sudo apt-get install libreoffice
A quick tip: While normal commands for pasting text (such as Ctrl-V) won’t work in the terminal window, you can copy text from anywhere and then right-click (or two-finger click, on a trackpad) in the terminal to make the text appear.
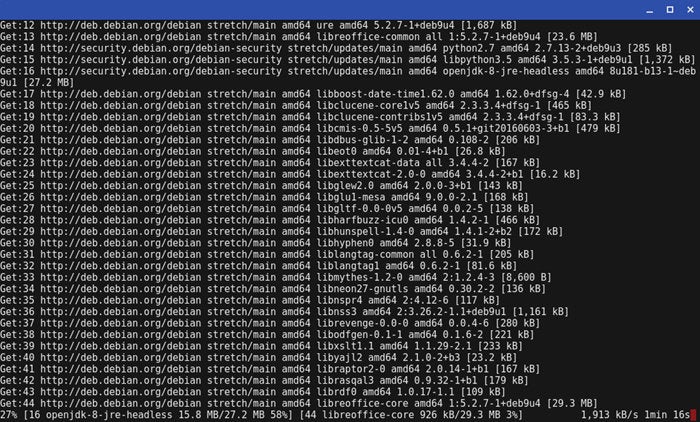
Once you hit enter, the system will put a bunch of info on your screen and ask you to confirm the installation. Don’t freak out; just type the letter y and hit enter again, then wait while the installation occurs.
 JR Raphael/IDG
Get ready for a lot of fast-scrolling text when you install a Linux app onto your Chromebook.
You’ll see a ton of text scroll down the screen while components are downloaded, unpacked, and installed. Be patient — it may take a while! When the scrolling stops and the terminal returns to the green-colored command prompt, you can safely close it (by typing exit into the prompt and then hitting enter) and go look in your Chrome OS launcher to find your freshly installed application.
 JR Raphael/IDG
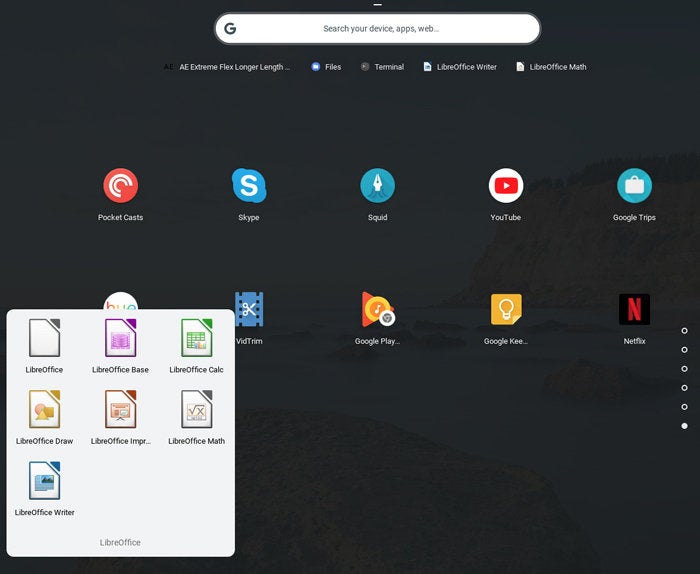
Once installed, Linux apps live inside the regular Chrome OS launcher — alongside Android apps, web apps, and anything else on your device.
At that point, you can use the app like any other program on your device. The one caveat is that for security reasons, Linux apps can’t access your Chromebook’s full file system; they can see only a special “Linux apps” folder within the local storage. So anytime you need to pull up an existing file — be it from your local storage, an external drive, or any connected cloud storage services — you’ll first need to open the Chrome OS Files app and copy the file into that “Linux apps” area.
Part IV: How to update or uninstall Linux apps on a Chromebook
Next in our list of not-so-user-friendly considerations to remember: Linux apps won’t automatically update themselves or necessarily even notify you about available updates; instead, it’s up to you to periodically check in for updates via the terminal. On the plus side, you can search for updates to all your Linux apps at once rather than having to check individually.
To do so, open that Terminal app in your Chromebook’s launcher and type in:
sudo apt-get update && sudo apt-get upgrade
The first part of that command searches for updates to all your Linux apps; the second part downloads and installs them. All that happens once you enter the command, without any further input required. Isn’t Linux odd?
If you ever need to uninstall anything, meanwhile, use the following terminal command (substituting “libreoffice” with whatever app you want to uninstall):
sudo apt-get remove libreoffice
Part V: An easier option
Does all of this sound like an awful lot of work? It kind of is — but take heart: There’s a simpler option, though it, too, requires you to use some of the foundational knowledge we’ve just established.
Employing the above mechanisms, you can install what’s called a Software Center — basically, an app store for Linux apps. It gives you a graphical interface for finding programs, installing or uninstalling them, and even updating them down the line.
First, however, you have to install the Software Center, and the process is exactly like installing any other Linux app. So go back to your terminal and enter the following command:
sudo apt-get install gnome-software gnome-packagekit
Press enter and confirm as needed. Once the process is finished, you’ll see a new item in your Chromebook’s app launcher called “Software.”
You aren’t finished yet, though. (See? Nothing’s truly simple in this domain.) Odds are, when you first open the Software Center, you’ll find very little on its virtual shelves. You can try rebooting your Chromebook to see if that fixes things, but if that doesn’t work, you’ll need to go back into the terminal to force an update. First, type:
sudo apt-get update
Press enter and allow that process to finish. Then, type:
sudo apt-get dist-upgrade
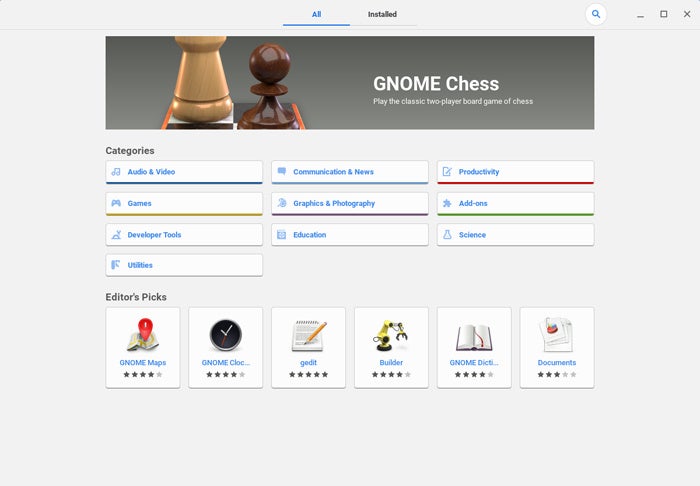
Once more, press enter and let the system do its thing. When it’s done, reboot your Chromebook — and then you should see the fully stocked Software Center, ready to handle all your Linux app needs with relative ease:
 JR Raphael/IDG
A Software Center makes the act of managing Linux apps much simpler — once you get it installed, that is.
And with that, my geek-card-carrying friend, allow me to welcome you to the world of Linux apps on Chrome OS. As you can see, this setup certainly isn’t intended for everyone at this point — but for those of us who need it and are brave enough to pursue it, ample rewards await.
Which Linux apps are worth your while? Stay tuned for my collection of Linux-on-Chromebook recommendations, coming soon to Computerworld.com.