Today, we will take a look at ZFS, an advanced file system. We will discuss where it came from, what it is, and why it is so popular among techies and enterprise.
Even though I’m from the US, I prefer to pronounce it ZedFS instead of ZeeFS because it sounds cooler. You are free to pronounce it however you like.
Note: You will see ZFS repeated many times in the article. When I talk about feature and installation, I’m talking about OpenZFS. ZFS (developed by Oracle) and OpenZFS have followed different paths since Oracle shutdown OpenSolaris. (More on that later.)
History of ZFS
The Z File System (ZFS) was created by Matthew Ahrens and Jeff Bonwick in 2001. ZFS was designed to be a next generation file system for Sun Microsystems’ OpenSolaris. In 2008, ZFS was ported to FreeBSD. The same year a project was started to port ZFS to Linux. However, since ZFS is licensed under the Common Development and Distribution License, which is incompatible with the GNU General Public License, it cannot be included in the Linux kernel. To get around this problem, most Linux distros offer methods to install ZFS.
Shortly after Oracle purchased Sun Microsystems, OpenSolaris became close-source. All further development of ZFS became closed source, as well. Many of the developers of ZFS where unhappy about this turn of events. Two-thirds of the core ZFS devlopers, including Ahrens and Bonwick, left Oracle due to this decision. They joined other companies and created the OpenZFS project in September of 2013. The project has spearheaded the open-source development of ZFS.
Let’s go back to the license issue mentioned above. Since the OpenZFS project is separate from Oracle, some probably wonder why they don’t change the license to something that is compatible with the GPL so it can be included in the Linux kernel. According to the OpenZFS website, changing the license would involve contacting anyone who contributed code to the current OpenZFS implementation (including the initial, common ZFS code till OpenSolaris) and get their permission to change the license. Since this job is near impossible (because some contributors may be dead or hard to find), they have decided to keep the license they have.
What is ZFS? What are its features?

As I said before, ZFS is an advanced file system. As such, it has some interesting features. Such as:
- Pooled storage
- Copy-on-write
- Snapshots
- Data integrity verification and automatic repair
- RAID-Z
- Maximum 16 Exabyte file size
- Maximum 256 Quadrillion Zettabytes storage
Let’s break down a couple of those features.
Pooled Storage
Unlike most files systems, ZFS combines the features of a file system and a volume manager. This means that unlike other file systems, ZFS can create a file system that spans across a series of drives or a pool. Not only that but you can add storage to a pool by adding another drive. ZFS will handle partitioning and formatting.
 Pooled storage in ZFS
Copy-on-write
Copy-on-write is another interesting (and cool) features. On most files system, when data is overwritten, it is lost forever. On ZFS, the new information is written to a different block. Once the write is complete, the file systems metadata is updated to point to the new info. This ensures that if the system crashes (or something else happens) while the write is taking place, the old data will be preserved. It also means that the system does not need to run fsck after a system crash.
Snapshots
Copy-on-write leads into another ZFS feature: snapshots. ZFS uses snapshots to track changes in the file system. “The snapshot contains the original version of the file system, and the live filesystem contains any changes made since the snapshot was taken. No additional space is used. As new data is written to the live file system, new blocks are allocated to store this data.” It a file is deleted, the snapshot reference is removed, as well. So, snapshots are mainly designed to track changes to files, but not the addition and creation of files.
Snapshots can be mounted as read-only to recover a past version of a file. It is also possible to rollback the live system to a previous snapshot. All changes made since the snapshot will be lost.
Data integrity verification and automatic repair
Whenever new data is written to ZFS, it creates a checksum for that data. When that data is read, the checksum is verified. If the checksum does not match, then ZFS knows that an error has been detected. ZFS will then automatically attempt to correct the error.
RAID-Z
ZFS can handle RAID without requiring any extra software or hardware. Unsurprisingly, ZFS has its own implementation of RAID: RAID-Z. RAID-Z is actually a variation of RAID-5. However, it is designed to overcome the RAID-5 write hole error, “in which the data and parity information become inconsistent after an unexpected restart”. To use the basic level of RAID-Z (RAID-Z1) you need at least two disks for storage and one for parity. RAID-Z2 required at least two storage drives and two drive for parity. RAID-Z3 requires at least two storage drives and three drive for parity. When drives are added to the RAID-Z pools, they have to be added in multiples of two.
Huge Storage potential
When ZFS was created, it was designed to be the last word in file systems. At a time when most file systems where 64-bit, the ZFS creators decided to jump right to 128-bit to future proof it. This means that ZFS “offers 16 billion billion times the capacity of 32- or 64-bit systems”. In fact, Jeff Bonwick (one of the creators) said that powering a “fully populating a 128-bit storage pool would, literally, require more energy than boiling the oceans.”
How to Install ZFS?
If you want to use ZFS out of the box, it would require installing either FreeBSD or an operating system using the illumos kernel. illumos is a fork of the OpenSolaris kernel.
In fact, support for ZFS is one of the main reasons why some experienced Linux users opt for BSD.
If you want to try ZFS on Linux, you can only use it as your storage file system. As a far as I know, no Linux distro give you the option to install ZFS on your root out of the box. If you are interested in trying ZFS on Linux, the ZFS on Linux project has a number of tutorials on how to do that.
Caveat
This article has sung the benefits of ZFS. Now let me tell you a quick problem with ZFS. Using RAID-Z can be expensive because of the number of drives you need to purchase to add storage space.
Have you ever used ZFS? What was your experience like? Let us know in the comments below.
If you found this article interesting, please take a minute to share it on social media, Hacker News or Reddit.

About John Paul
My name is John Paul Wohlscheid. I’m an aspiring mystery writer who loves to play with technology, especially Linux. You can catch up with me at my personal website
 JR Raphael/IDG
 JR Raphael/IDG
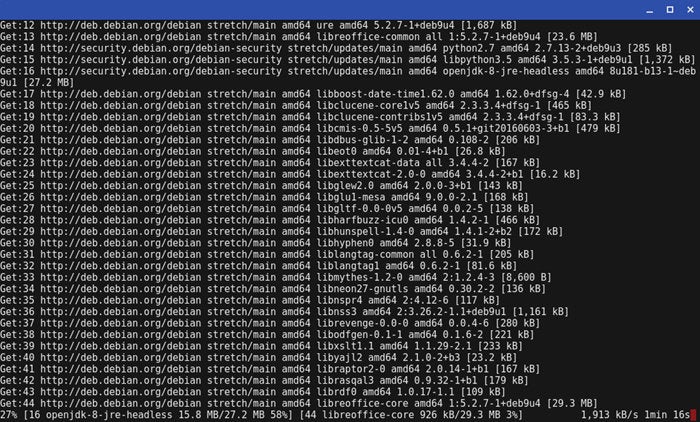 JR Raphael/IDG
 JR Raphael/IDG
 JR Raphael/IDG