Kali Linux 2017.1 LXDE Desktop Installation on Oracle VirtualBox

Kali Linux 2017.1 LXDE Installation on VirtualBox
Kali Linux 2017.1 LXDE Installation on Oracle VirtualBox

This video tutorial shows

Kali Linux 2017.1 LXDE installation

on

Oracle VirtualBox

step by step. This tutorial is also helpful to install Kali Linux 2017 LXDE on physical computer or laptop hardware. We also install

Guest Additions

on Kali Linux 2017 for better performance and usability features such as Automatic Resizing Guest Display, Shared Folder, Seamless Mode and Shared Clipboard, Improved Performance and Drag and Drop.

Kali Linux 2017.1 LXDE Desktop Installation Steps:

  1. Create Virtual Machine on Oracle VirtualBox
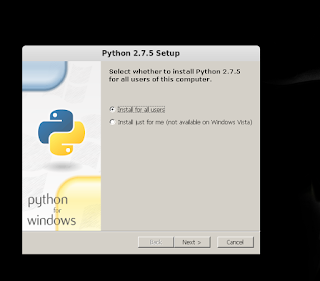
  2. Start Kali Linux 2017.1 LXDE Installation
  3. Install Guest Additions
  4. Test Guest Additions Features: Automatic Resizing Guest Display and Shared Clipboard

Installing Kali Linux 2017.1 LXDE on Oracle VirtualBox


Kali Linux 2017.1 New Features and Improvements

Kali Linux is a Debian-based distribution which features several security and forensics tools. Kali Linux 2017.1 features drivers for RTL8812AU wireless chipsets, improved GPU support and there are now Azure and AWS images of Kali Linux for cloud instances.

Kali Linux 2017.1

brings with it a bunch of exciting updates and features. As with all new releases, you have the common denominator of updated packages, an updated kernel that provides more and better hardware support, as well as a slew of updated tools.

Kali Linux Website:

https://www.kali.org/

What is LXDE Desktop?

LXDE, which stands for Lightweight X11 Desktop Environment, is a desktop environment which is lightweight and fast. It is designed to be user friendly and slim, while keeping the resource usage low. LXDE uses less RAM and less CPU while being a feature rich desktop environment. Unlike other tightly integrated desktops LXDE strives to be modular, so each component can be used independently with few dependencies. This makes porting LXDE to different distributions and platforms easier.

LXDE Website:

http://lxde.org/

Hope you found this Kali Linux 2017.1 LXDE Desktop installation on Oracle VirtualBox tutorial helpful and informative. Please consider sharing it. Your feedback and questions are welcome!

Source

Node.js Send E-Mail with Attachment

Node.js is the server side JavaScript engine that is loved by web developers and system administrators all over the world. Node.js has a rich set of modules that you can install using Node Package Manager (NPM) and use to do almost any task.

There are many Node.js modules for sending E-Mails using Node.js such as Nodemailer, emailjs, express-mailer etc.

In this article, I will show you how to send E-Mail and also how to send E-Mail with attachment with Nodemailer Node.js module. Let’s get started.

To follow this article, you should have:

  • Basic understanding of Node.js and JavaScript.
  • js 6.x or later installed on your computer.
  • NPM installed on your computer.
  • An E-Mail account such as GMail.
  • A Text Editor for writing Node.js codes.

You should be able to find dedicated articles on each of these topics on linuxhint.com. Be sure to check them for more information.

Creating Project Directory:

It’s always best to create a new directory for every Node.js app you write. Because by default, Node.js modules are installed in node_modules/ directory inside your current working directory. That way, modules are separate for each app you write and you can use different version of the same module in different app. This is a lot flexible than installing modules globally.

Create a project directory (let’s call it node-mail) with the following command:

Now navigate to the project directory with the following command:

Now create a package.json file with the following command:

As you can see, a basic package.json file is created.

Installing Nodemailer:

In this section, I am going to show you how to install Nodemailer Node.js module using NPM.

First, make sure Node.js is installed and working correctly with the following command:

As you can see, Node.js 10.11.0 is installed and working correctly in my computer. The version on your computer may be different. It’s alright but it should be version 6.x or later. Otherwise Nodemailer won’t work.

Now, make sure NPM is installed and working correctly with the following command:

As you can see, NPM 6.4.1 is installed and working correctly in my computer. The version on your computer may be different. It’s alright.

You need internet connectivity in order to install Nodemailer using NPM. So make sure you’re connected to the internet.

Now, install Nodemailer Node.js module using NPM with the following command:

$ npm install nodemailer –save

Nodemailer is installed.

Sending E-Mail with Nodemailer:

In this section, I will show you how to send E-Mail from your gmail account with Nodemailer.

First, create a new file (let’s call it sendmail.js) in your project directory with the following command:

Now type in the following lines of code in sendmail.js file and save it.

Here, on line 1, I imported Nodemailer.

On line 3, I set my email to myEmail variable. This is the email from which I will send an email to other email accounts. Make sure you change it to your email address.

On line 5-11, a transport object is created. It is required to send an email using Nodemailer. The purpose of the transport object is to verify the sender information. You only need to do it once. Once the sender information is verified, a transport object should be created.

On line 6, I set service to gmail as I am using a GMail account to send emails. The supported services are DynectEmail, Gmail, hot.ee, Hotmail, iCloud, mail.ee, Mail.Ru, Mailgun, Mailjet, Mandrill, Postmark, QQ, QQex, SendGrid, SES, Yahoo, yandex, Zoho. The service name is case insensitive. So you can put gmail or GMAIL or Gmail there. It’s all the same. Make sure you set the correct service name.

NOTE: You can use your own email server as well. To do that, you have to create a custom Nodemailer Transport object. To learn more about it, visit the official documentation of Nodemailer at https://nodemailer.com/smtp/

On line 9, I put the password of my gmail account that I am using to send emails from. Make sure you change it to yours.

On line 14-19, I created a message object. In this object, from is set to the email address of the sender, to is the email address of the receiver. subject is the subject of the email and text is the content of the email.

On line 22, I used the transport.sendMail() method to send email using Nodemailer. The first argument of the sendMail() method is the message object defined on line 14-19. The second argument is a callback function. The callback function simply checks for errors and prints a message to the console depending on whether the email was sent or not.

Now run the sendmail.js script as follows:

As you can see, the email was sent.

I checked my Gmail, and voila! I received the email just fine.

Sending E-Mail with Attachment Using Nodemailer:

Now that you know how to send email using Nodemailer, sending email with attachment is a piece of cake!

To send email with attachment, all you need to do is modify the message object on line 14-19 and the rest of the code should be the same.

Change the message object as follows as save the file.

Here, attachments is an array objects. Each object defines an attachment file. So you can send multiple files at once. On line 20-22, I set the relative path to a file hello.txt to the path property of the object.

Now run the sendmail.js script again.

As you can see, the email was sent.

As you can see, I received the message along with the attachment hello.txt.

You can also set custom name to your attachment file. For that, you have to change the attachment object as follows:

To send multiple attachments, create multiple attachment objects as follows:

That’s how you send email with attachment using Nodemailer in Node.js. Thanks for reading this article.

Source

Ultimate Dark, Ultimate Maia Themes and Ultimate Maia Icons for Ubuntu 18.04/Linux Mint 19 – NoobsLab

If you want to skin your desktop with something else then you are on the right page. There is no doubt the default themes of Ubuntu looks great but if you want to switch to something else then nobody is going to stop you from doing that. Let us introduce you to two themes

Ultimate Dark          and    Ultimate Maia

, both themes are created by same person. Both themes packs are material design and dark version is easy on eyes. There are several variants for both themes, you can choose whatever you like on you desktop. These themes are compatible with Gnome 3.28 and compatible with other desktops as well such as Xfce and so on. You can find Gnome shell and Cinnamon themes in this pack.

Ultimate Maia icons

are created by the same author, basically these icons are designed to go with these themes but you can use them with any theme. There are several colors available to choose from. We have added it to PPA and available for Ubuntu 18.10/18.04 and Linux Mint 19. If you find any kind of bug or problem with this theme then report it to author and it will get fixed in the next update.


Available for Ubuntu 18.10/18.04 Bionic/16.04/Linux Mint 19/18/and other Ubuntu derivatives
To install Ultimate-Maia icons in Ubuntu/Linux Mint open Terminal (Press Ctrl+Alt+T) and copy the following commands in the Terminal:
Available for Ubuntu 18.10/18.04 Bionic/Linux Mint 19/and other Ubuntu derivatives
To install Ultimate-Dark theme in Ubuntu/Linux Mint open Terminal (Press Ctrl+Alt+T) and copy the following commands in the Terminal:
To install Ultimate-Maia theme in Ubuntu/Linux Mint open Terminal (Press Ctrl+Alt+T) and copy the following commands in the Terminal:That’s it

Source

Gunpoint is a Delight for Stealth Game Fans

Last updated September 23, 2018 By John Paul

Gunpoint is a 2D stealth game in which you play as a spy stealing secrets and hacking networks like Ethan Hunt of Mission Impossible movie series.

Hi, Fellow Linux gamers. Let’s take a look at a fun stealth game. Let’s take a look at Gunpoint.

Gunpoint is neither free nor open source. It is an independent game you can purchase directly from the creator or from Steam.

The Interesting History of Gunpoint

The instant success of Gunpoint enabled its creator to become a full time game developer.

Gunpoint is a stealth game created by Tom Francis. Francis was inspired to create the game after he heard about Spelunky, which was created by one person. Francis played games as part of his day job, as an editor for PC Gamer UK magazine. He had no previous programming experience but used the easy-to-use Game Maker. He planned to create a demo with the hopes of getting a job as a developer.

He released his first prototype in May 2010 under the name Private Dick. Based on the response, Francis continued to work on the game. The final version was released in June of 2013 to high praise.

In a blog post weeks after Gunpoint’s launch, Francis revealed that he made back all the money he spent on development ($30 for Game Maker 8) in 64 seconds. Francis didn’t reveal Gunpoint’s sales figures, but he did quit his job and today creates games full time.

Experiencing the Gunpoint Gameplay

Like I said earlier, Gunpoint is a stealth game. You play a freelance spy named Richard Conway. As Conway, you will use a pair of Bullfrog hypertrousers to infiltrate buildings for clients. The hypertrousers allow you to jump very high, even through windows. You can also cling to walls or ceilings like a ninja.

Another tool you have is the Crosslink, which allows you to rewire circuits. Often you will need to use the Crosslink to reroute motion detections to unlock doors instead of setting off an alarm or rewire a light switch to turn off the light on another floor to distract a guard.

When you sneak into a building, your biggest concern is the on-site security guards. If they see Conway, they will shoot and in this game, it’s one shot one kill. You can jump off a three-story building no problem, but bullets will take you down. Thankfully, if Conway is killed you can just jump back a few seconds and try again.

Along the way, you will earn money to upgrade your tools and unlock new features. For example, I just unlocked the ability to rewire a guard’s gun. Don’t ask me how that works.

Minimum System Requirements

Here are the minimum system requirements for Gunpoint:

Linux

  • Processor: 2GHz
  • Memory: 1GB RAM
  • Video card: 512MB
  • Hard Drive: 700MB HD space

Windows

  • OS: Windows XP, Visa, 7 or 8
  • Processor: 2GHz
  • Memory: 1GB RAM
  • Video card: 512MB
  • DirectX®: 9.0
  • Hard Drive: 700MB HD space

macOS

  • OS: OS X 10.7 or later
  • Processor: 2GHz
  • Memory: 1GB RAM
  • Video card: 512MB
  • Hard Drive: 700MB HD space

Thoughts on Gunpoint

Gunpoint game on LinuxImage Courtesy: Steam Community

Gunpoint is a very fun game. The early levels are easy to get through, but the later levels make you put your thinking cap on. The hypertrousers and Crosslink are fun to play with. There is nothing like turning the lights off on a guard and bouncing over his head to hack a terminal.

Besides the fun mechanics, it also has an interesting noir murder mystery story. Several different (and conflicting) clients hire you to look into different aspects of the case. Some of them seem to have ulterior motives that are not in your best interest.

I always enjoy good mysteries and this one is no different. If you like noir or platforming games, be sure to check out Gunpoint.

Have you every played Gunpoint? What other games should we review for your entertainment? Let us know in the comments below.

If you found this article interesting, please take a minute to share it on social media, Hacker News or Reddit.

About John Paul

My name is John Paul Wohlscheid. I’m an aspiring mystery writer who loves to play with technology, especially Linux. You can catch up with me at my personal website

Source

Download Nuvola Player Linux 4.13.0

Nuvola Player is an open source graphical application designed to provide users with a simple interface for popular cloud music services, such as Google Play Music, Amazon Cloud Player, Deezer, Grooveshark, Rdio or Pandora.

Supports a wide range of music services

At the moment, it supports the Amazon Cloud Player, Deezer, 8tracks, Google Play Music, Pandora Radio, and Rdio services. It used to support the Grooveshark and Hype Machine services, which are no longer maintained.

Even if it’s not mentioned on the official website, Nuvola Player also supports the Bandcamp online music service and Logitech Media Server, which allows users to connect to Logitech Squeezebox devices.

Easy to use graphical user interface

The user interface is quite simple, as it provides four big buttons on the middle of the main window, from where users can load a service, configure various options, view the release notes, and quit the application.

From the preferences dialog, you can easily set the program to run in background when the main window is closed, enable keybindings with the Space key, change the skin, use proxy servers, configure the currently loaded services, as well as to add various plugins.

Includes various plugins for extended functionality

Default plugins include a dock manager, support for Last.fm and Libre.fm services, fetching of lyrics, remote player interface, notifications, tray icon support, media keys support, and developer’s bar.

The application integrates well in the system tray area of any Linux distributions and uses the dock menu, the internal notification system, multimedia keys, media player applets, as well as the sound menu and Unity launcher of the Ubuntu Linux operating system.

Under the hood

Being written in the Vala and JavaScript programming languages, the project is distributed as a single source archive that can be configured, compiled and installed in any Linux distribution. In addition, there are official packages for the Ubuntu and Debian operating systems.

Summing up, Nuvola Player is a great and unique application that allows users to use all of their cloud music services from within a single desktop application (no Internet browser required).

Source

Introducing SUSE OpenStack Cloud 9 Beta 1

Share with friends and colleagues on social media

We are excited to introduce our very first SUSE OpenStack Cloud Public Beta Program with the release of SUSE OpenStack Cloud 9 Beta 1 !

Please check out our main SUSE OpenStack Cloud Beta page for more information: https://www.suse.com/betaprogram/cloud-beta/

SUSE OpenStack Cloud 9 focuses on four major topics:

  • OpenStack Rocky Release: new upstream OpenStack content,
    • Update to SUSE Linux Enterprise Server 12 SP4: The latest version of our core SLES 12 Operating System, which is at the end of it’s developpement phase. More information on SLES 12 SP4 at https://www.suse.com/betaprogram/sle-beta/
    • New Day2 User Interface for Cloud Lifecycle Manager: this allow operators to use a grapical user interface to view the health of the cloud and to make operational changes
    • IPv6 Support: IPv6 Support for Tenant and Control Plane Networks.

These functions will be phased into the various release within the beta timeline.

Notable changes for Beta 1

General

  • Most OpenStack upstream packages are now based on the stable/rocky upstream branch (excepting those who still do not have a stable/rocky branch).

Crowbar

  • OpenStack has been updated to the Rocky release.
  • All nodes used for Administration and OpenStack are now using SUSE Linux Enterprise Server 12 SP4 as Operating System.

Limitations

It comes with the following limitations:

  • Crowbar: The Monasca and Magnum barclamps do not apply
  • Cloud Lifecycle Manager: The switch to Rocky based packages broke CLM installation across the board, since the CLM has not been adapted for Rocky, yet

SUSE OpenStack Cloud Public Beta Program

For more information, please visit our official SUSE OpenStack Cloud Beta Page. Or Contact us via our Cloud Beta Mailing List.

We are thankful for your support in trying out our beta products and we welcome your feedback.

Have fun beta testing!

Your SUSE OpenStack Cloud Team

Share with friends and colleagues on social media

Source

Zack’s Kernel News » Linux Magazine

Zack Brown reports on fixing printk() bit by bit, kernel internationalization (or not), and kernel encryption and secure boot.

Fixing printk() Bit by Bit

The printk() system call is an important way for the kernel to produce logs and other messages. The kernel doesn’t use any standard library functions like printf(), so it has to roll its own. But by all accounts, printk() is a mess.

Recently, Sergey Senozhatsky tried to spruce it up a little and avoid some potential deadlocks. There was a whole range of deadlocks caused by printk() recursing onto itself, and Sergey didn’t want to touch any of those. But he said there were plenty of non-recursive deadlock scenarios that needed to be fixed.

Specifically, there were ways to deadlock the system in the output console, and printk() would trigger those deadlocks by trying to write to the console. To fix some of these, Sergey wanted to introduce some new helper functions for the TTY (used to implement the console) and UART code (used to communicate asynchronously with the console).

[…]

Use Express-Checkout link below to read the full article (PDF).

Source

A Look at Fundamental Linux sed Commands | Linux.com

Linux administrators who want to modify files without overwriting the original have many options, but one of the most efficient tools is the stream editor — or sed.

The stream editor is a default part of most Linux distributions. It enables you to perform text file manipulations in the operating system with Linux sed commands.

Like most Linux applications, sed can process piped input, which makes it an effective scripting tool. You can use it as a basic find-and-replace tool, as in the example command below, which looks for the occurrences of one and replaces it with two. The command is closed with a /g.

Source

Linux Today – Ask OIN How It Intends to Deal With Microsoft Proxies Such as Patent Trolls

Oct 18, 2018, 14:00  (Other stories by Roy Schestowitz)

OIN continues to miss the key point (or intentionally avoid speaking about it); Microsoft is still selling ‘protection’ from the very same patent trolls that it is funding, arming, and sometimes even instructing (who to pass patents to and sue)

Complete Story

Related Stories:

Source

Linux Scoop — OpenSUSE Leap 15 KDE Edition

OpenSUSE Leap 15 KDE Edition – See What’s New

openSUSE Leap 15 has been released by OpenSUSE project. This released
based on the upcoming SUSE Enterprise Linux 15 series that offers better
stability and long-term support, also features updated components and
technologies designed for power users.

Major highlights of the openSUSE Leap 15 operating system include a new
partitioner implemented in the installer, integration with the Kopano
open-source groupware application suite, Firewalld as the default
firewall management tool, a new classic “server” and “transactional
server” system roles with read-only root filesystem and transactional
updates, cloud optimizations, and a brand-new look that’s been closely
aligned with SUSE Linux Enterprise.

openSUSE Leap 15 also improves the YaST (Yet another Setup Tool) and
AutoYaST system setup and configuration tools, and updates various of
its components to new releases. Among these, we can mention the Linux
4.12 kernel, OpenSSL 1.1.0, PHP 7, and systemd 23

For OpenSUSE Leap 15 KDE edition is features KDE Plasma 5.12 LTS as
default desktop, include KDE applications 17.12 , LibreOffice 6.0 office
suite, Mozilla Firefox 60 web browser, Mozilla Thunderbird 52 email and
news client, VLC 3.0 media player,

Download OpenSUSE Leap 15
Source

WP2Social Auto Publish Powered By : XYZScripts.com