Bettercap : MITM attack for sniffing traffic and passwords

Contents

  • Installation
  • Sniffing Traffic
  • Getting password

We will be installing Bettercap, doing a quick sniffing exercise, and then a more detailed section on grabbing the password. Will demonstrate the password grabbing on outlook.com, which seems to be particularly vulnerable to this attack.

Installing bettercap

Installation is simple-

apt-get update

apt-get dist-upgrade

apt-get install bettercap

The above three commands will leave you with latest versions of Kali and bettercap.

PS: I am writing this tutorial from a location with slow internet connection, and hence didn’t perform the dist-upgrade step. However, bettercap seems to be running mostly fine. There may be a few difference in what you observe and what I show in this demo due to this difference in versions. For those who want to know the versions of various utilities that I’m using, take a look below. If you are unfamiliar with Linux, you’re best off using the latest versions of everything, which can be obtained by running the three commands I mentioned earlier.

new@kali:~$ uname -a

Linux kali 4.7.0-kali1-amd64 #1 SMP Debian 4.7.6-1kali1 (2016-10-17) x86_64 GNU/Linux

new@kali:~$ ruby -v

ruby 2.3.1p112 (2016-04-26) [x86_64-linux-gnu]

Not on Kali?

The readme on

github repository of bettercap

is quite comprehensive, and would help you install bettercap on most linux distributions. After installation the process should be same for Kali or any other Linux distribution.

Sniffing Traffic

There’s nothing special about the usual sniffing traffic functionailty of bettercap. Bettercap can easily performing sniffing on your local area network. It also lets you write the output to a pcap file and later analyze it with WireShark or some other tool of your choice. I’ll just give a simple demo here. The real fun is in the capturing passwords section.

Run the command-

bettercap –sniffer
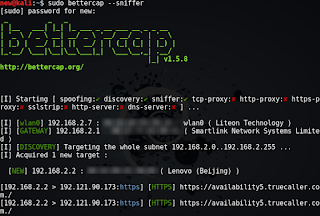
Sniffing traffic: Screenshot shows my lenovo smartphone’s
requests to truecaller being sniffed

You’ll see all the websites being visited by all the devices on the network. Press ctrl+c to stop.

Take a look at the help manual for more commands, or read the wonderful documentation.

Internet stopped working

There are plenty of open issues on the github page of bettercap. The one problem I faced was that after bettercap had finished running, the internet connection on the

attacker machine

(Kali) would be killed. I fixed it by simply turning restarting the wlan0 interface (turn it off and on from the gui or use ifconfig commands).

Some people

reported that Bettercap killed internet connection for

all hosts.

If you face a different issue, take a look here and

see if you can find a solution

Capturing passwords

The fun part lies here. Bettercap uses sslstrip to change https webpages to simple http ones, which ensures that the passwords are transferred in clear text, and you can read them without any issues. I will be targeting my lenovo phone from my Kali machine. First, you must find the IP of your target. This can be done by simply running bettercap and waiting for all machines on your network to show up. Once they do, you can identify the one you’re trying to attack, and note it’s IP. Then use this IP as the target IP. Let’s look at the steps first.

PS: I’m assuming you connected to the network you are attacking using the wlan0 interface. If not, specify your interface using the -I option.

  1. Run the command bettercap on the terminal
  2. Wait for bettercap to acquire targets.
  3. When bettercap discovers the target you’re looking for, note down it’s IP address. Let’s call it TARGET_IP.
  4. Press ctrl+c to stop bettercap (if internet connectivity is lost, as was in my case, restart your wlan0 interface)
  5. Run this command – bettercap -T TARGET_IP –proxy -P POST (replace TARGET_IP with the appropriate IP)
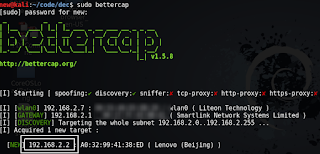
In my case, my target was my Lenovo smartphone. It was detected by bettercap,

and i noted down it’s IP. 192.162.2.2 is what I’ll use as my TARGET_IP

Now your attacker machine is ready and listening for traffic on the network. Once your victim opens any login page, bettercap will use sslstrip to remove the https from the URL, and once the target enters his/her login credentials, you will see them in cleartext.

Let’s look at a demo run of the above procedure.

Capturing passwords entered on Outlook by smartphone user on same LAN/WLAN

This section is simply going to be a set of pictures with captions below them explaining stuff. It should be easy to follow I hope.

From this test run, here are the limitations of the tool that I observed-

  1. The biggest problem – It does not work on all sites. Before trying outlook, I tried to see if I could carry out this MITM attack over Facebook, Gmail, Twitter, etc. Unfortunately, I wasn’t able to. It only seems to work with some websites.
  2. The difference in the URL if easily visible. Anyone who knows what https is, will notice the lack of it. I, for one, would never enter my credentials on an http page.The extra Ws in the www don’t help eitheir.
  3. The tool isn’t perfect. There are a few bugs.

Update : Giorgio’s comment on the tutorial addresses the first and the third issues. The reason why Facebook and Gmail don’t give in to the attack is because they don’t have an http version of their websites. Bettercap can’t force Facebook to replace it’s https page with an http one, simply because there is no http version of Facebook. Secondly, Yahoo looks buggy because it’s CSS files (ones hostel by google) are served over https, and an attempt to get an http version would yield nothing, since http versions aren’t available. Hence, the CSS files are missing, and while the parts of the page which operate over http load well, the ones which are exclusively https do not.

Facebook seems immune to the attack
Yahoo’s response is buggy, but you’ll notice
that sslstrip did it’s job, the page is regular http now

The tutorial ends here, a few personal insights ahead, not very important.


How to be safe

This demo must scare you. I, for one, wasn’t sure if this tool would work at all. However, it did work very well with outlook, and somewhat worked with yahoo as well (not shown in demo). Facebook and Gmail seem to be immune to it, but I didn’t really try hard to get them, and after writing this post, I’ll try to see if I can get the tool to grab Facebook and gmail logins as well. Regardless, we see how easy it can be for someone to grab your credentials if they are on the same network as you. So how can you be safe?

Here are some pointers-

This tutorial is supposed to serve as an introduction to sniffing, MITM and bettercap. I have observed that posts with too much theory don’t perform too well, so I just demonstrated the functionality of the tool. However, this was a very basic exercise, and for both me you, there are things to do-

  1. Try other functionalities offered by this tool.
  2. Try to get it to work with Facebook and Gmail. I’ll have to approach facebook and Gmail in a different manner, read the comment by Giorgio below for more information.

If I am able to get it to work with Facebook/Gmail, I’ll write another tutorial, showing you how you can do it too.

Source

Action-RPG ‘Moonlighter’ has a juicy free Adventure Update, now live on Linux

It’s time to close up shop and go on another run through the dungeons as Moonlighter has a free update now out. This update originally released last week, with the Linux version only seeing the update today.

New free features included:

  • NEW GAME + – Play again the full Moonlighter adventure with more challenging enemies and bosses. To beat the game you will have two new sets of items, the Pirate Weapons, and the Amulets.
  • PIRATE WEAPONS – A new full set of weapons that are crafted with dimensional pirates’ knowledge. Those weapons could be enchanted with elemental effects (confusion, poison, fire or electricity) to alter their power.
  • AMULETS – Mysterious rings found in the dungeons that will offer new abilities for the players. Be careful, though, because most of them can cause some serious side effects!
  • Note: Both the Pirate Weapons and Amulets are exclusive to the NG+ Mode!
  • GAME SLOTS – Now, you’ll be able to have more than one game slot in the game.
  • QUICK-SELLING MIRROR – Tired of selecting each item to be sold? Now, you’ll be able to select the mirror and simply click over the elements you want to sell.

They do have more planned for the game, which can be seen on the roadmap here. The Companion Update is next, which will allow you to bring someone along for the ride (an NPC most likely) along with giving you options to customise your game. After that, the Trouble Update will add in some new mini-bosses. They probably will have more, but they don’t want to spoil any surprises.

Sadly, it does still have the keyboard input bug on Linux, which is a Unity game engine bug that doesn’t happen on every distribution and desktop. So with that issue your mileage may vary. If you’re using a gamepad, you shouldn’t really have a problem.

Find it on the Humble Store and Steam.

Source

Tested and Exclusive ExtraVM Promo Codes – ThisHosting.Rocks

ExtraVM offers various hosting services, including VPS hosting, game hosting, and more. Get a discount using a tested and verified promo code.

Exclusive ExtraVM Promo Code: 12% Lifetime Discount

Get 12% off ExtraVM for the life of your account

Special 12% lifetime discount exclusive to ThisHosting.Rocks visitors – use our ExtraVM promo code.

Get 12% off ExtraVM for the life of your account

Special 12% lifetime discount exclusive to ThisHosting.Rocks visitors – use our ExtraVM promo code.

ExtraVM Promo Code: 10% Lifetime Discount

Get a 10% lifetime discount at ExtraVM

Get 10% off each month for the life of your account at ExtraVM using this coupon code.

Get a 10% lifetime discount at ExtraVM

Get 10% off each month for the life of your account at ExtraVM using this coupon code.

ExtraVM Promo Code: 25% One-Time Discount

Get a 25% off your order at ExtraVM

Use this coupon code to get 25% off your order at ExtraVM.

Get a 25% off your order at ExtraVM

Use this coupon code to get 25% off your order at ExtraVM.

How to use the ExtraVM Promo Code?

  1. Get the promo code from this post.
  2. Visit https://extravm.com
  3. Choose the best hosting plan for you.
  4. Configure the plan details
  5. Go to checkout preview.
  6. Enter the promo code from step 1.
  7. And that’s it. You’ve added the coupon to your ExtraVM shopping cart.

Related Content

Source

Ubuntu Tweak: Install It On Your Ubuntu 16.04 Xenial/14.04 Trusty/Linux Mint 18/17 – NoobsLab

You may be aware of Ubuntu Tweak application, it is great utility but it is no longer in development (discontinued) and developer abandoned this project 4 years ago. The last release was for Ubuntu 14.04 Trusty/Linux Mint 17.x but the latest release also works fine in Ubuntu 16.04 Xenial/Linux Mint 18.x. Ubuntu Tweak was mainly designed to manage Ubuntu system and desktop settings but it can also work in Ubuntu based distributions (some of the features won’t work if you are not using Unity desktop). It is easier to use, free and was released under the GNU General Public License (GPL) version 2.

This utility offers many features which you can’t find in system and desktop settings options. It lets you change lots of things in your system such as: adding scripts to file manager, running cleaner, change themes, change login screen background and so on.

Features:

  • Change Fonts
  • Change system sounds
  • Change themes and icons
  • Configure login screen (lightdm)
  • Options for Desktop icons
  • Configuration for Unity
  • Workspace settings
  • File Manager settings
  • Add scripts to File Manager
  • Assign default program to file types
  • Source editor
  • System Cleaner
  • and more.


Follow these steps first to install Ubuntu Tweak in Ubuntu 16.04/Linux Mint 18/other Ubuntu 16.04 based distribution (Not for 14.04 Trusty)

Run commands in the Terminal:
Now add these lines in the opened file (Remove everything you have in the opened file “CTRL+k” then copy all these following lines and Press Ctrl+Alt+v -> Press Ctrl+o -> Press Ctrl+x)

Section: misc
Priority: extra
Standards-Version: 3.9.2
Package: gir1.2-vte-2.90-provider
Version: 1.0
Depends: gir1.2-vte-2.91
Provides: gir1.2-vte-2.90
Description: A proxy provider for gir1.2-vte-2.90 package
A proxy provider for gir1.2-vte-2.90 packageThen run these commands:Now move to next step to install Ubuntu Tweak on your Ubuntu 16.04 Xenial.

To install Ubuntu-Tweak in Ubuntu 16.04 Xenial/14.04 Trusty/Linux Mint 18/17 (Press Ctrl+Alt+T) and copy the following commands in the Terminal:That’s it

Source

How to Install Pip on Ubuntu

Last updated October 1, 2018 By Abhishek Prakash     Leave a Comment

Pip is a command line tool that allows you to install software packages written in Python. Learn how to install Pip on Ubuntu and how to use it for installing Python applications.

There are numerous ways to install software on Ubuntu. You can install applications from the software center, from downloaded DEB files, from PPA, from Snap packages, using Flatpak, using AppImage and even from the good old source code.

There is one more way to install packages in Ubuntu. It’s called Pip and you can use it to install Python-based applications.

What is Pip

Pip stands for “Pip Installs Packages”. Pip is a command line based package management system. It is used to install and manage software written in Python language.

You can use Pip to install packages listed in the Python Package Index (PyPI).

As a software developer, you can use pip to install various Python module and packages for your own Python projects.

As an end user, you may need pip in order to install some applications that are developed using Python and can be installed easily using pip. One such example is Stress Terminal application that you can easily install with pip.

Let’s see how you can install pip on Ubuntu and other Ubuntu-based distributions.

How to install Pip on Ubuntu

Install pip on Ubuntu Linux

Pip is not installed on Ubuntu by default. You’ll have to install it. Installing pip on Ubuntu is really easy. I’ll show it to you in a moment.

Ubuntu 18.04 has both Python 2 and Python 3 installed by default. And hence, you should install pip for both Python versions.

Pip, by default, refers to the Python 2. Pip in Python 3 is referred by pip3.

Note: I am using Ubuntu 18.04 in this tutorial. But the instructions here should be valid for other versions like Ubuntu 16.04, 18.10 etc. You may also use the same commands on other Linux distributions based on Ubuntu such as Linux Mint, Linux Lite, Xubuntu, Kubuntu etc.

Install pip for Python 2

First, make sure that you have Python 2 installed. On Ubuntu, use the command below to verify.

python2 –version

If there is no error and a valid output that shows the Python version, you have Python 2 installed. So now you can install pip for Python 2 using this command:

sudo apt install python-pip

It will install pip and a number of other dependencies with it. Once installed, verify that you have pip installed correctly.

pip –version

It should show you a version number, something like this:

pip 9.0.1 from /usr/lib/python2.7/dist-packages (python 2.7)

This mans that you have successfully installed pip on Ubuntu.

Install pip for Python 3

You have to make sure that Python 3 is installed on Ubuntu. To check that, use this command:

python3 –version

If it shows you a number like Python 3.6.6, Python 3 is installed on your Linux system.

Now, you can install pip3 using the command below:

sudo apt install python3-pip

You should verify that pip3 has been installed correctly using this command:

pip3 –version

It should show you a number like this:

pip 9.0.1 from /usr/lib/python3/dist-packages (python 3.6)

It means that pip3 is successfully installed on your system.

How to use Pip command

Now that you have installed pip, let’s quickly see some of the basic pip commands. These commands will help you use pip commands for searching, installing and removing Python packages.

To search packages from the Python Package Index, you can use the following pip command:

pip search <search_string>

For example, if you search or stress, it will show all the packages that have the string ‘stress’ in its name or description.

pip search stress
stress (1.0.0) – A trivial utility for consuming system resources.
s-tui (0.8.2) – Stress Terminal UI stress test and monitoring tool
stressypy (0.0.12) – A simple program for calling stress and/or stress-ng from python
fuzzing (0.3.2) – Tools for stress testing applications.
stressant (0.4.1) – Simple stress-test tool
stressberry (0.1.7) – Stress tests for the Raspberry Pi
mobbage (0.2) – A HTTP stress test and benchmark tool
stresser (0.2.1) – A large-scale stress testing framework.
cyanide (1.3.0) – Celery stress testing and integration test support.
pysle (1.5.7) – An interface to ISLEX, a pronunciation dictionary with stress markings.
ggf (0.3.2) – global geometric factors and corresponding stresses of the optical stretcher
pathod (0.17) – A pathological HTTP/S daemon for testing and stressing clients.
MatPy (1.0) – A toolbox for intelligent material design, and automatic yield stress determination
netblow (0.1.2) – Vendor agnostic network testing framework to stress network failures
russtress (0.1.3) – Package that helps you to put lexical stress in russian text
switchy (0.1.0a1) – A fast FreeSWITCH control library purpose-built on traffic theory and stress testing.
nx4_selenium_test (0.1) – Provides a Python class and apps which monitor and/or stress-test the NoMachine NX4 web interface
physical_dualism (1.0.0) – Python library that approximates the natural frequency from stress via physical dualism, and vice versa.
fsm_effective_stress (1.0.0) – Python library that uses the rheological-dynamical analogy (RDA) to compute damage and effective buckling stress in prismatic shell structures.
processpathway (0.3.11) – A nifty little toolkit to create stress-free, frustrationless image processing pathways from your webcam for computer vision experiments. Or observing your cat.

If you want to install an application using pip, you can use it in the following manner:

pip install <package_name>

Pip doesn’t support tab completion so the package name should be exact. It will download all the necessary files and installed that package.

If you want to remove a Python package installed via pip, you can use the remove option in pip.

pip uninstall <installed_package_name>

You can use pip3 instead of pip in the above commands.

I hope this quick tip helped you to install pip on Ubuntu. If you have any questions or suggestions, please let me know in the comment section below.

About Abhishek Prakash

I am a professional software developer, and founder of It’s FOSS. I am an avid Linux lover and Open Source enthusiast. I use Ubuntu and believe in sharing knowledge. Apart from Linux, I love classic detective mysteries. I’m a huge fan of Agatha Christie’s work.

Source

Download AppArmor Linux 2.13.1

AppArmor is an open source and powerful command-line software written in C, C++, Perl, UNIX shell and designed to provide an extra layer of security for your Linux operating system. As its name suggests, AppArmor is just like an armor for your Linux applications, offering you network application security through necessary access control for apps. It is designed to protect your system from various malware.

AppArmor is a command-line tool that has been designed from the offset to be easy to use and effective, while proactively protects your entire Linux-based operating system and open source applications from various threats. Many modern GNU/Linux distributions include the AppArmor software by default.

What options are available from the command-line?

The ‘apparmor’ command includes a wide range of options, such as the ability to add, replace or remove AppArmor definitions, force the profile into complain mode, set the input as pre-compiled profile, dump compiled profiles and names of profiles to stdout or in input, write output to a specific file, set the base directory and cwd, as well as to set the location of the AppArmor filesystem.

Additionally, it provides support for mapping profiles’ read permissions to mr, report cache miss and hit details, save cached profiles, set the location of the profile cache, display profile names as they are loaded, debug AppArmor definitions, control DFA optimizations, set Namespace for a certain profile, run in quiet mode without outputting warnings, dump internal information for debugging and AppArmor pre-processed profiles.

Is AppArmor compatible with my Linux box?

AppArmor is currently included in the Arch Linux, Annvix, Debian GNU/Linux, Ubuntu, openSUSE, Pardus Linux, Gentoo, PLD and Mandriva operating systems. It supports both 32-bit and 64-bit hardware platforms, and it will most probably run on many other distributions of Linux based on the aforementioned OSes.

Security framework Application security Access control Linux Security Framework Control

Source

KVM Monitoring avec Prometheus et Grafana

Share with friends and colleagues on social media

Que se passe t-il au cœur d’un hyperviseur KVM ?
Comment se rendre compte de l’activité des appels système ?
Est-ce la folie et l’effervescence digne des rues de Tokyo ou plutôt celle d’un village tranquille avec un petit port de pêche ?

Si vous êtes un fan du modèle UNIX – et je sais que vous l’êtes – vous voulez qu’un outil fasse une chose et qu’il le fasse bien.

Alors pour découvrir ce qui se passe dans notre hyperviseur, nous allons utiliser 3 outils open source, le tout interconnecté via des api pour exporter où l’on veut :

  • collectd : collecte les statistiques de libvirt
  • promotheus : stock les statistiques
  • grafana : présente les statistiques sous forme de graphique ou de conteur

collect - store - visualize

Installation des outils

Première étape, installer nos 3 outils depuis l’open build service.
Nous allons ajouter le dépôt dédié aux outils de monitoring et installer via zypper (rpm)

zypper ar http://download.opensuse.org/repositories/server:/monitoring/openSUSE_Factory/server:monitoring.repo

zypper in collectd collectd-plugin-virt
zypper in golang-github-prometheus-prometheus
zypper in grafana

Configuration de collectd

Dans collectd il est nécessaire de renseigner le chemin vers la socket libvirt, puis présenter les statistiques au format prometheus.

Dans le fichier /etc/collectd.conf ajouter les lignes suivantes :

LoadPlugin virt
<Plugin virt>
Connection “qemu:///system”
HostnameFormat name
</Plugin>

LoadPlugin write_prometheus
<Plugin write_prometheus>
Port “9103”
</Plugin>

Puis relancer le service :

systemctl restart collectd

Configuration de prometheus

La configuration de prometheus est assez simple.
Il suffit de créer un nouveau job pour stocker les statistiques présentées par collectd.

Dans le fichier /etc/prometheus/prometheus.yml ajouter :

– job_name: collectd
static_configs:
– targets:
– ‘localhost:9103’

Puis relancer le service.

systemctl start prometheus.service

Configuration de grafana

Comme une image vaut 1000 mots, un graphique coloré peut facilement nous raconter l’histoire d’un système.

La définition du compte admin se fait dans le fichier /etc/grafana/grafana.ini :

admin_user = admin
admin_password = strongsecret

Puis relancer le service.

systemctl start grafana-server.service

Vous pouvez maintenant vous connecter à l’interface web de grafana via l’url : https://mon_serveur:3000/

Ajout d’une datasource

Depuis l’interface web de grafana, la première étape est de récupérer les statistiques stockées dans prometheus.
Pour cela il faut créer une datasource :

Ajout d’un dashboard

La seconde étape, est d’ajouter un dashboard pour transformer les statistiques en graphique.

Le site de grafana recense plusieurs dashboards créés par la communauté. Voici le lien pour le dashboard que j’utilise.
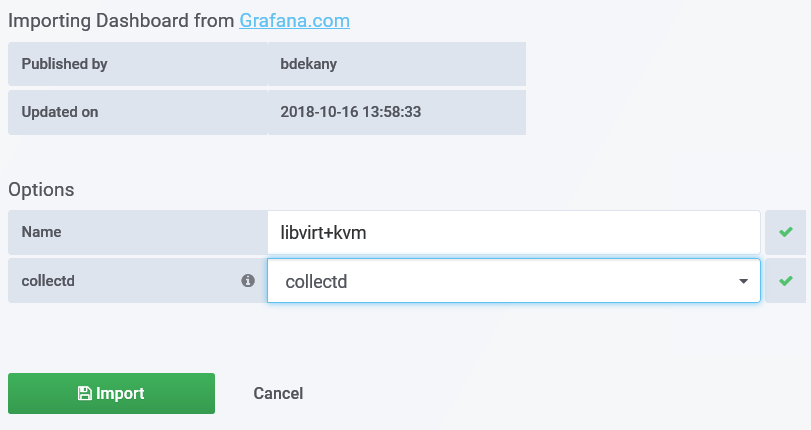
Importer le dashboard grace à l’ID 8396

Lors de l’importation, sélectionner la datasource créer précédemment.

Profit

Maintenant grace à grafana, vous pouvez faire parler les chiffres.
Que ce soit un vert apaisant signe que tout va bien ou un rouge criant : “on a besoin de plus de ressources”.


Share with friends and colleagues on social media

Source

Please Welcome Red Hat Virtualization 4.2! – Red Hat Enterprise Linux Blog

Hi folks, it is now official – Red Hat Virtualization 4.2 (RHV) has been released! This is a huge milestone for the RHV team as 4.2 delivers more in the themes of ease-of-use, automation, and continued tighter integration with the Red Hat portfolio. As many of you know we have been working on this for awhile – with upstream and downstream activities and contributions. Also we have been in active beta since December 2017. So let’s take a quick look at a few cool things focusing on the 3 key themes from above:

Easy-to-Use: You are going to see a new UI. For many of you it should look familiar – and that is what we want – the RHV 4.2 UI is based on the PatternFly engine that is used throughout the Red Hat portfolio. This is a very good thing as many of you are probably used to it already; it is really a fast performing UI; and it is it easy and intuitive to learn.

RHV Manager Dashboard

Automation: On the RHV team we are big, big believers in Ansible. It’s an incredibly easy tool to learn to use and it drives major productivity improvements as we can easily create ‘playbooks’ to automate task after task. In RHV 4.2 we have heavily incorporated Ansible into our workflows. The slide below highlights some of our integration work.

Ansible

Integration: Closing out on our top three themes of focus in RHV 4.2 is integration. In 4.2 this is a broad category as it covers Red Hat portfolio integration; bundling opportunities; and new activity in our partner ecosystem. On the Red Hat portfolio side we continue to tighten our linkages to our core product peers: CloudForms, Satellite, OpenStack, and Gluster. All out of the box with new functions to better incorporate these products in the world of virtualization.

On the bundling side, we are introducing the Red Hat Virtualization Suite. This is a bundle of RHV and CloudForms. The bundle provides an easier path for people wanting to move to Red Hat Virtualization for their more traditional virtualization needs. Bringing management and some cost savings to the table add to the value of this offer.

We have had an active period in our partner ecosystem with 4.2 We will look at two partners here Cisco and Nvidia. “ACI loves KVM and Red Hat Virtualization” – hey, it is a Cisco quote! Cisco has created a reference architecture that helps to drive scalable virtualization for ACI and RHV 4.2 customer. Cisco’s excellent blog defines the opportunity we have here for Cisco ACI and Red hat customers. Red Hat and Nvidia have been working closely together to bring vGPU powered technical workstation support for AI, big data, and rich graphics use cases into RHV. This has been accomplished as Nvidia vGPU offerings are now supported. You can learn more about this via registering and watching this upcoming June 5 webinar

RHV Suite

To close, we believe that RHV 4.2 creates your virtualization bridge to the modern data center. RHV 4.2 is the virtualization foundation for your organization. It affords support for your VM work flows. It helps drive improved ROI of your Red Hat investments with our integrations in Ansible, CloudForms, and OpenStack to name just a few. Also, it begins a path to the future of virtualization and containers where Red Hat will surely be a leader – check our Red Hat’s Lars Herrmann’s recent Red Hat Summit blog post on this topic – interesting reading!

Hope this helps,
Captain KVM
Source

Linus Torvalds On Linux’s Code of Conduct

Linux

Linus Torvalds On Linux’s Code of Conduct (bbc.com)

Posted
by msmash

on Thursday September 27, 2018 @11:10AM

from the man-speaks dept.

Linus Torvalds

oversees every line of code added to the Linux kernel, but in recent years the male-dominated community has become increasingly divided, reports BBC. Rows about sexism and rudeness led to the creation of a Code of Conflict (CoC) in 2015 which was short — simply recommending people “be excellent to each other.” That has now been replaced by a more detailed Code of Conduct — which retains the acronym, but attempts to be more inclusive and eliminate insulting and derogatory comments and behaviour. Reader

sinij writes:

Recently Linux Community adopted a new controversial Code of Conduct authored by Contributor Covenant also known for authoring the Post-Meritocracy Manifesto. In an exclusive email interview with the BBC, Mr Torvalds shared his thoughts on his decision to temporarily step aside, the controversy behind the CoC, and the defects of the community he set up.

His thoughts on CoC :

The advantage of concentrating on technology is that you can have some mostly objective measures, and some basis for agreement, and you can have a very nice and healthy community around it all. I really am motivated by the technology, but the community around Linux has been a big positive too. But there are very tangible and immediate common goals in any technical project like Linux, and while there is occasionally disagreement about how to solve some particular issue, there is a very real cohesive force in that common goal of improving the project. And even when there are disagreements, people in the end often have fairly clear and objective measures of what is better. Code that is faster, simpler, or handles more cases naturally is just objectively ‘better’, without people really having to argue too much about it.

In contrast, the arguments about behaviour never seem to end up having a common goal. Except, in some sense, the argument itself. Have you read the Twitter feeds and other things by the people who seem to care more about the non-technical side? I think your ‘hyped stories’ is about as polite as you can put it. It’s a morass of nastiness. Instead of a ‘common goal’, you end up with horrible fighting between different ‘in-groups’. It’s very polarising, and both sides love egging the other side on. It’s not even a ‘discussion’, it’s just people shouting at each other. That’s actually the reason I for the longest time did not want to be involved with the whole CoC discussion in the first place. That whole subject seems to very easily just devolve and become unproductive. And I found a lot of the people who pushed for a CoC and criticised me for cursing to be hypocritical and pointless. I could easily point you to various tweet storms by people who criticise my ‘white cis male’ behaviour, while at the same time cursing more than I ever do.

So that’s my excuse for dismissing a lot of the politically correct concerns for years. I felt it wasn’t worth it. Anybody who uses the words ‘white cis male privilege’ was simply not worth my time even talking to, I felt. “And I’m still not apologising for my gender or the colour of my skin, or the fact that I happen to have the common sexual orientation. What changed? Maybe it was me, but I was also made very aware of some of the behaviour of the ‘other’ side in the discussion. Because I may have my reservations about excessive political correctness, but honestly, I absolutely do not want to be seen as being in the same camp as the low-life scum on the internet that think it’s OK to be a white nationalist Nazi, and have some truly nasty misogynistic, homophobic or transphobic behaviour. And those people were complaining about too much political correctness too, and in the process just making my public stance look bad. And don’t get me wrong, please — I’m not making excuses for some of my own rather strong language. But I do claim that it never ever was any of that kind of nastiness. I got upset with bad code, and people who made excuses for it, and used some pretty strong language in the process. Not good behaviour, but not the racist/etc claptrap some people spout. So in the end, my ‘I really don’t want to be too PC’ stance simply became untenable. Partly because you definitely can find some emails from me that were simply completely unacceptable, and I need to fix that going forward. But to a large degree also because I don’t want to be associated with a lot of the people who complain about excessive political correctness.

Take care of the luxuries and the necessities will take care of themselves.
— Lazarus Long

Working…

Source

Tutorials – Attachment Extraction » Linux Magazine

If your inbox is full of email messages with important attachments, retrieving those attachments manually can be a tedious task. The script presented in this article does this task automatically and can even save the email as a plain text file.

Do you ever find yourself urgently searching for a file that you know you received as an email attachment but do not remember who sent it or when? Has your company saved all the important documents received via email somewhere easily retrievable? Would you like to save the content of all your email messages automatically as separate, plain text files?

Being able to copy automatically, into one folder and as separate files, all the email attachments and message bodies hidden in your email archives might save your day in situations like these. This tutorial explains how to do it with one relatively simple shell script and tools available from the standard repositories of most Linux distributions. Only basic knowledge of shell scripts is necessary. Additionally, patching the script to make it save just the attachment is also very easy.


MIME and Mailbox Formats

To process email messages, you need to know how files are attached to email and how email messages are archived inside digital mailboxes. To extract attachments from one email message, you need a MIME-aware processor that can split all the email’s parts into separate files. Multipurpose Internet Mail Extensions (MIME) [1] is the open standard that describes how to:

[…]

Use Express-Checkout link below to read the full article (PDF).

Source

WP2Social Auto Publish Powered By : XYZScripts.com