How to Download and Extract Tar Files with One Command

Tar (Tape Archive) is a popular file archiving format in Linux. It can be used together with gzip (tar.gz) or bzip2 (tar.bz2) for compression. It is the most widely used command line utility to create compressed archive files (packages, source code, databases and so much more) that can be transferred easily from machine to another or over a network.

Read Also18 Tar Command Examples in Linux

In this article, we will show you how to download tar archives using two well known command line downloaders– wget or cURL and extract them with one single command.

How to Download and Extract File Using Wget Command

The example below shows how to download, unpack the latest GeoLite2 Country databases (use by the GeoIP Nginx module) in the current directory.

# wget -c http://geolite.maxmind.com/download/geoip/database/GeoLite2-Country.tar.gz -O - | tar -xz

Download and Extract File with Wget

Download and Extract File with Wget

The wget option -O specifies a file to which the documents is written, and here we use -, meaning it will written to standard output and piped to tar and the tar flag -x enables extraction of archive files and -zdecompresses, compressed archive files created by gzip.

To extract tar files to specific directory/etc/nginx/ in this case, include use the -C flag as follows.

Note: If extracting files to particular directory that requires root permissions, use the sudo command to run tar.

$ sudo wget -c http://geolite.maxmind.com/download/geoip/database/GeoLite2-Country.tar.gz -O - | sudo tar -xz -C /etc/nginx/

Download and Extract File to Directory

Download and Extract File to Directory

Alternatively, you can use the following command, here, the archive file will be downloaded on your system before you can extract it.

$ sudo wget -c http://geolite.maxmind.com/download/geoip/database/GeoLite2-Country.tar.gz && tar -xzf  GeoLite2-Country.tar.gz

To extract compressed archive file to a specific directory, use the following command.

$ sudo wget -c http://geolite.maxmind.com/download/geoip/database/GeoLite2-Country.tar.gz && sudo tar -xzf  GeoLite2-Country.tar.gz -C /etc/nginx/

How to Download and Extract File Using cURL Command

Considering the previous example, this is how you can use cURL to download and unpack archives in the current working directory.

$ sudo curl http://geolite.maxmind.com/download/geoip/database/GeoLite2-Country.tar.gz | tar -xz 

Download and Extract File with cURL

Download and Extract File with cURL

To extract file to different directory while downloading, use the following command.

$ sudo curl http://geolite.maxmind.com/download/geoip/database/GeoLite2-Country.tar.gz | sudo tar -xz  -C /etc/nginx/
OR
$ sudo curl http://geolite.maxmind.com/download/geoip/database/GeoLite2-Country.tar.gz && sudo tar -xzf GeoLite2-Country.tar.gz -C /etc/nginx/

That’s all! In this short but useful guide, we showed you how to download and extract archive files in one single command. If you have any queries, use the comment section below to reach us.

Source

How to Show Asterisks While Typing Sudo Password in Linux

Most applications normally display a feedback using asterisks (*******) when a user is typing a password, but on the Linux terminal, when a normal user runs the sudo command to gain super user privileges, he/she is asked for a password, but no visual feedback is seen by the user while typing the password.

In this article, we will show how to display asterisks as feedback when you type passwords in the terminal in Linux.

Take a look at the following screen shot, here the user tecmint has invoked the sudo command to install the vim text editor in CentOS 7, but there is no visual feedback as the password is typed (in this case the password has already been entered):

$ sudo yum install vim

No Sudo Password Shown

No Sudo Password Shown

You can enable the password feedback feature in /etc/sudoers file, but first create a backup of the file, then open it for editing using the visudo command.

$ sudo cp /etc/sudoers /etc/sudoers.bak
$ sudo visudo 

Search for the following line.

Defaults env_reset

And append pwfeedback to it, so that it looks like this.

Defaults env_reset,pwfeedback

Configure Sudoers File

Configure Sudoers File

Now press Esc key and type :wq to save and close the file. But if you are using nano editor, save the file by hitting “Ctrl+x” and then “y” followed by “ENTER” to close it.

Then run the command below to reset your terminal for the above changes to start working.

$ reset

That’s it, now you should be able to see a visual feedback (****) every time when you typing a password on the terminal, as shown in the following screen shot.

$ sudo yum update

Visible Sudo Password

Visible Sudo Password

You might also like to read these following related articles.

  1. 10 Useful Sudoers Configurations for Setting ‘sudo’ in Linux
  2. How to Run ‘sudo’ Command Without Entering a Password in Linux
  3. Let Sudo Insult You When You Enter Incorrect Password
  4. How to Run Shell Scripts with Sudo Command in Linux

If you have any Linux terminal tips or tricks to share with us, use the comment section below.

Source
PhotoRec – Recover Deleted or Lost Files in Linux

When you delete a file accidentally or intentionally on your system using ‘shift + delete‘ or delete option or empty Trash, the file content is not destroyed from the hard disk (or any storage media).

It is simply removed from the the directory structure and you cannot see the file in the directory where you deleted it, but it still remains somewhere in your hard drive.

If you have the appropriate tools and knowledge, you can recover lost files from your computer. However, as you store more files on your hard disk, the deleted files are overwritten, you may only recover recently deleted files.

In this tutorial, we will explain how to recover lost or deleted files on a hard disk in Linux using Testdisk, is a remarkable recovery tool ships in with a free tool called PhotoRec.

PhotoRec is used to recover lost files from storage media such as hard drives, digital camera and cdrom.

Install Testdisk (PhotoRec) in Linux Systems

To install Testdisk by running the relevant command below for your distribution:

------- On Debian/Ubuntu/Linux Mint ------- 
$ sudo apt-get install testdisk

------- On CentOS/RHEL/Fedora ------- 
$ sudo yum install testdisk

------- On Fedora 22+ ------- 
$ sudo dnf install testdisk   

------- On Arch Linux ------- 
$ pacman -S testdisk             

------- On Gentoo ------- 
$ emerge testdisk  

In case it is not available on your Linux distribution’s repositories, download it from here and run it on a Live CD.

It can also be found in rescue CD such as Gparted LiveCDParted MagicUbuntu Boot CDUbuntu-Rescue-Remix and many more.

Once the installation is complete, start PhotoRec in a text window as follows with root privileges and specify the partition from which the files where deleted:

$ sudo photorec /dev/sda3

You’ll see the interface below:

PhotoRec Data Recovery Tool for Linux

PhotoRec Data Recovery Tool for Linux

Use the right and left arrow keys to select a menu item, and press Enter. To continue with the recovery operation, select [Proceed] and hit Enter.

You will be at the following interface:

Select Partition to Proceed File Recovery

Select Partition to Proceed File Recovery

Select [Options] to view available recovery operation options as in the interface below:

Linux File Recovery Options

Linux File Recovery Options

Press Q to move back, at the interface below, you can specify the file extensions you want to search and recover. Therefore, select [File Opt] and press Enter.

Press s to disable/enable all file extensions, and in case you have disabled all file extensions, only choose types of files you want to recover by selecting them using right arrow keys (or left arrow key to deselect).

For instance, I want to recover all .mov files that I lost on my system.

Specify Recovery File Type

Specify Recovery File Type

Then press b to save the setting, you should see the message below after pressing it. Move back by hitting Enter (or simply press Q button), then press Q again to go back to the main menu.

Save File Recovery Settings

Save File Recovery Settings

Now select [Search] to start the recovery process. In the interface below, choose the filesystem type where the file(s) were stored and hit Enter.

Select Filesystem to Recover Deleted Files

Select Filesystem to Recover Deleted Files

Next, choose if only free space or the whole partition needs to be analyzed as below. Note that choosing whole partition will make the operation slower and longer. Once you have selected the appropriate option, press Enterto proceed.

Choose Filesystem to Analyze

Choose Filesystem to Analyze

Closely select a directory where recovered files will be stored, if the destination is correct, press C button to continue. Choose a directory on a different partition to avoid deleted files being overwritten when more data is stored on the partition.

To move back until the root partition, use the left arrow key.

Select Directory to Save Recovered Files

Select Directory to Save Recovered Files

The screenshot below shows deleted files of the specified type being recovered. You can stop the operation by pressing Enter.

Note: Your system may become slow, and possibly freeze at certain moments, so you need to be patient until when the process is complete.

Recovering Deleted Files in Linux

Recovering Deleted Files in Linux

At the end of the operation, Photorec will show you the number and the location of files recovered.

Linux File Recovery Summary

Linux File Recovery Summary

The recovered files will be stored with root privileges by default, therefore open your file manager with elevated privileges to access the files.

Use the command below (specify your file manager):

$ gksudo nemo
or
$ gksudo nautilus 

For more information, visit PhotoRec homepage: http://www.cgsecurity.org/wiki/PhotoRec.

That’s all! In this tutorial, we explained the necessary steps to recover deleted or lost files from hard disk using PhotoRec. This is so far the most reliable and effective recovery tool I have ever used, if you know any other similar tool, do share with us in the comments.

Source

11 Advanced Linux ‘Grep’ Commands on Character Classes and Bracket Expressions

Have you ever been into a situation where you need to search for a string, word or pattern inside a file? if yes, then the grep utility comes handy in such situation.

grep is a command line utility for searching plain-text data for lines which matching a regular expression. If you will divide the word grep like g/re/p then the meaning of grep is (globally search a regular expression and print) which search pattern from the file and print the line on the screen i.e. standard output.

Suggested Read: 12 Basic Practical Examples of Linux grep Command

In this article I will be going to explain advanced commands on grep for the Character Classes in Linux and Unix like operating system.

Here I have considered tecmint.txt is the base file where we will search pattern with the help of grep command in this article for explanation.

1. Search Alphanumeric Characters

If you have thousands of lines in a file and wanted to search a line which will start from only A-Za-z & 0-9(Alphanumeric Characters).

$ grep "^[[:alnum:]]" tecmint.txt

Grep - Search Alphanumeric Characters in File

Grep – Search Alphanumeric Characters in File

2. Search Alpha Characters

Similar options like if you want to search line which will start from only [A-Z & a-z] i.e. Alpha Characters.

$ grep "^[[:alpha:]]" tecmint.txt

Grep - Search Alpha Characters in File

Grep – Search Alpha Characters in File

3. Search Blank Characters

Another options like if you want to search line which will start from [Tab & Space] i.e. Blank Characters.

$ grep "^[[:blank:]]" tecmint.txt

Grep - Search for Spaces or Tabs in File

Grep – Search for Spaces or Tabs in File

4. Search Digit Characters

The digit option for grep is also very useful to search line which will start from digit [0-9] i.e. Digit Characters.

$ grep "^[[:digit:]]" tecmint.txt

Grep - Search Number Characters in File

Grep – Search Number Characters in File

5. Search Lower Letters

Another option for grep is to search line which will start from lower letters i.e [a-z] (Lower Letters).

$ grep "^[[:lower:]]" tecmint.txt

Grep - Search Lower Letters or Words in File

Grep – Search Lower Letters or Words in File

6. Search Punctuation Characters

The Punctuation characters for grep is to search line which will start from [! ” # $ % & ‘ ( ) * + , – . / : ; < = > ? @ [ \ ] ^ _ ` { | } ~. ] i.e. Punctuation Characters.

$ grep "^[[:punct:]]" tecmint.txt

Grep - Search Punctuation Characters in File

Grep – Search Punctuation Characters in File

7. Search Graphical Characters

The grep is also used to search a line which will start from Alphanumeric & Punctuation Characters called as Graphical Characters.

$ grep "^[[:graph:]]" tecmint.txt

Grep - Search Graphical Characters in File

Grep – Search Graphical Characters in File

8. Search Printable Characters

Similarly like Graphical Characters, grep is useful to search a line which will start from Alphanumeric, Punctuation and space characters.

$ grep "^[[:print:]]" tecmint.txt

Grep - Search Printable Characters in File

Grep – Search Printable Characters in File

9. Search Space Characters

The grep has also a functionality to search a line which will start from [tab, newline, vertical tab, form feed, carriage return, and space] i.e. Space Characters.

$ grep "^[[:space:]]" tecmint.txt

Grep - Search Space Characters in File

Grep – Search Space Characters in File

10. Search Uppercase Letters

Another option in the grep is also used to search a line which will start from [A-Z] i.e Upper-case Letters.

$ grep "^[[:upper:]]" tecmint.txt

Grep - Search Uppercase Letters in File

Grep – Search Uppercase Letters in File

11. Search Hexadecimal Digits

The grep searches a line which will start from [0-9, A-F and a-f] i.e Hexadecimal Digits.

$ grep "^[[:xdigit:]]" tecmint.txt

Grep - Search Hexadecimal Digits in File

Grep – Search Hexadecimal Digits in File

I have explained the advanced functionality of grep which is very strong and powerful tool to search the pattern in a File. Grep is also an important tool for shell scripting and programmers to search the pattern in the programs. It is worth to be familiar with other options and syntax to save the time.

Suggested Read: What’s Difference Between Grep, Egrep and Fgrep in Linux?

In case any issues on the commands which is explained in the article, you can post your comment in the comment section below.

Source
How to Sync Files/Directories Using Rsync with Non-standard SSH Port

Today, we will be discussing about how to sync files using rsync with non-standard SSH port. You might wonder why do we need to use non-standard SSH port? It is because of security reasons. Everybody knows 22 is the SSH default port.

Rsync Files Over SSH Non-standard Port

Rsync Files Over SSH Non-standard Port

So, It is mandatory to change your SSH default port number to something different which is very hard to guess. In such cases, how will you sync your files/folders with your Remote server? No worries, It is not that difficult. Here we will see how to sync files and folders using rsync with non-standard SSH port.

As you might know, rsync, also known as Remote Sync, is a fast, versatile, and powerful tool that can be used to copy and sync files/directories from local to local, or local to remote hosts. For more details about rsync, check man pages:

# man rsync

Or refer our previous guide from the link below.

  1. Rsync: 10 Practical Examples of Rsync Command in Linux

Change SSH Port to Non-standard Port

As we all know, By default rsync uses default SSH port 22 to sync files over local to remote hosts and vice versa. We should change our remote server’s SSH port to tighten the security.

To do this, open and edit the SSH configuration /etc/ssh/sshd_config file:

# vi /etc/ssh/sshd_config 

Find the following line. Uncomment and change the port number of your choice. I recommend you to choose any number which is very hard to guess.

Make sure you are using a unique number which is not used by existing services. Check this netstat article to know which services are running on which TCP/UDP ports.

For example, here I use port number 1431.

[...]
Port 1431
[...]

Save and close the file.

In RPM based systems such as RHELCentOS, and Scientific Linux 7, you need to allow the new port through your firewall or router.

# firewall-cmd --add-port 1431/tcp
# firewall-cmd --add-port 1431/tcp --permanent

On RHEL/CentOS/Scientific Linux 6 and above, you should also update selinux permissions to allow the port.

# iptables -A RH-Firewall-1-INPUT -m state --state NEW -m tcp -p tcp --dport 1431 -j ACCEPT
# semanage port -a -t ssh_port_t -p tcp 1431

Finally, restart SSH service to take effect the changes.

# systemctl restart sshd        [On SystemD]
OR
# service sshd restart          [On SysVinit]

Now let us see how to sync files using rsync with non-standard port.

How to Rsync with non-standard SSH Port

Run the following command from the terminal to sync files/folders using Rsync with non-standard ssh port.

Syntax:
# rsync -arvz -e 'ssh -p <port-number>' --progress --delete user@remote-server:/path/to/remote/folder /path/to/local/folder

For the purpose of this tutorial, I will be using two systems.

Remote System Details:

IP Address: 192.168.1.103
User name: tecmint
Sync folder: /backup1

Local System Details:

Operating System: Ubuntu 14.04 Desktop
IP Address: 192.168.1.100
Sync folder: /home/sk/backup2

Let us sync the contents of remote server’s /backup1 folder to my local system’s folder /home/sk/backup2/.

$ sudo rsync -arvz -e 'ssh -p 1431' --progress --delete tecmint@192.168.1.103:/backup1 /home/sk/backup2
Sample Output
tecmint@192.168.1.103's password: 
receiving incremental file list
backup1/
backup1/linux-headers-4.3.0-040300-generic_4.3.0-040300.201511020949_amd64.deb
        752,876 100%   13.30MB/s    0:00:00 (xfr#1, to-chk=2/4)
backup1/linux-headers-4.3.0-040300_4.3.0-040300.201511020949_all.deb
      9,676,510 100%   12.50MB/s    0:00:00 (xfr#2, to-chk=1/4)
backup1/linux-image-4.3.0-040300-generic_4.3.0-040300.201511020949_amd64.deb
     56,563,302 100%   11.26MB/s    0:00:04 (xfr#3, to-chk=0/4)

sent 85 bytes  received 66,979,455 bytes  7,050,477.89 bytes/sec
total size is 66,992,688  speedup is 1.00.

Let us check the contents of /backup1/ folder in the remote server.

$ sudo ls -l /backup1/
Sample Output
total 65428
-rw-r--r-- 1 root root  9676510 Dec  9 13:44 linux-headers-4.3.0-040300_4.3.0-040300.201511020949_all.deb
-rw-r--r-- 1 root root   752876 Dec  9 13:44 linux-headers-4.3.0-040300-generic_4.3.0-040300.201511020949_amd64.deb
-rw-r--r-- 1 root root 56563302 Dec  9 13:44 linux-image-4.3.0-040300-generic_4.3.0-040300.201511020949_amd64.deb

Now, let us check the contents of /backup2/ folder of local system.

$ ls /home/sk/backup2/
Sample Output
backup1

As you see in the above output, the contents of /backup1/ have been successfully copied to my local system’s /home/sk/backup2/ directory.

Verify /backup1/ folder contents:

$ ls /home/sk/backup2/backup1/
Sample Output
linux-headers-4.3.0-040300_4.3.0-040300.201511020949_all.deb            
linux-image-4.3.0-040300-generic_4.3.0-040300.201511020949_amd64.deb
linux-headers-4.3.0-040300-generic_4.3.0-040300.201511020949_amd64.deb

See, both remote and local system’s folders have same files.

Conclusion

Syncing files/folders using Rsync with SSH is not only easy, but also fast and secure method. If you’re behind a firewall that restricts port 22, no worries. Just change the default port and sync files like a pro.

Source
How to Find Out Who is Using a File in Linux

In this article, we will explain how to find out who is using a particular file in Linux. This will help you know the system user or process that is using an open file.

We can use the lsof command to know if someone is using a file, and if they are, who. It reads kernel memory in its search for open files and helps you list all open files. In this case, an open file may be a regular file, a directory, a block special file, a character special file, a stream, a network file and many others – because in Linux everything is a file.

Lsof is used on a file system to identify who is using any files on that file system. You can run lsof command on Linux filesystem and the output identifies the owner and process information for processes using the file as shown in the following output.

$ lsof /dev/null
List of All Opened Files in Linux
COMMAND    PID    USER   FD   TYPE DEVICE SIZE/OFF NODE NAME
systemd   1480 tecmint    0r   CHR    1,3      0t0    6 /dev/null
sh        1501 tecmint    0r   CHR    1,3      0t0    6 /dev/null
sh        1501 tecmint    1w   CHR    1,3      0t0    6 /dev/null
dbus-daem 1530 tecmint    0u   CHR    1,3      0t0    6 /dev/null
xfce4-ses 1603 tecmint    0r   CHR    1,3      0t0    6 /dev/null
xfce4-ses 1603 tecmint    1w   CHR    1,3      0t0    6 /dev/null
at-spi-bu 1604 tecmint    0r   CHR    1,3      0t0    6 /dev/null
dbus-daem 1609 tecmint    0u   CHR    1,3      0t0    6 /dev/null
at-spi2-r 1611 tecmint    0u   CHR    1,3      0t0    6 /dev/null
xfconfd   1615 tecmint    0u   CHR    1,3      0t0    6 /dev/null
xfwm4     1624 tecmint    0r   CHR    1,3      0t0    6 /dev/null
xfwm4     1624 tecmint    1w   CHR    1,3      0t0    6 /dev/null
xfce4-pan 1628 tecmint    0r   CHR    1,3      0t0    6 /dev/null
xfce4-pan 1628 tecmint    1w   CHR    1,3      0t0    6 /dev/null
Thunar    1630 tecmint    0r   CHR    1,3      0t0    6 /dev/null
Thunar    1630 tecmint    1w   CHR    1,3      0t0    6 /dev/null
xfdesktop 1632 tecmint    0r   CHR    1,3      0t0    6 /dev/null
xfdesktop 1632 tecmint    1w   CHR    1,3      0t0    6 /dev/null
....

To list user specific opened files, run the following command replace tecmint with the actual user name.

$ lsof -u tecmint
List of Files Opened by User
COMMAND    PID    USER   FD      TYPE             DEVICE  SIZE/OFF       NODE NAME
systemd   1480 tecmint  cwd       DIR                8,3      4096          2 /
systemd   1480 tecmint  rtd       DIR                8,3      4096          2 /
systemd   1480 tecmint  txt       REG                8,3   1595792    3147496 /lib/systemd/systemd
systemd   1480 tecmint  mem       REG                8,3   1700792    3150525 /lib/x86_64-linux-gnu/libm-2.27.so
systemd   1480 tecmint  mem       REG                8,3    121016    3146329 /lib/x86_64-linux-gnu/libudev.so.1.6.9
systemd   1480 tecmint  mem       REG                8,3     84032    3150503 /lib/x86_64-linux-gnu/libgpg-error.so.0.22.0
systemd   1480 tecmint  mem       REG                8,3     43304    3150514 /lib/x86_64-linux-gnu/libjson-c.so.3.0.1
systemd   1480 tecmint  mem       REG                8,3     34872    2497970 /usr/lib/x86_64-linux-gnu/libargon2.so.0
systemd   1480 tecmint  mem       REG                8,3    432640    3150484 /lib/x86_64-linux-gnu/libdevmapper.so.1.02.1
systemd   1480 tecmint  mem       REG                8,3     18680    3150450 /lib/x86_64-linux-gnu/libattr.so.1.1.0
systemd   1480 tecmint  mem       REG                8,3     18712    3150465 /lib/x86_64-linux-gnu/libcap-ng.so.0.0.0
systemd   1480 tecmint  mem       REG                8,3     27112    3150489 /lib/x86_64-linux-gnu/libuuid.so.1.3.0
systemd   1480 tecmint  mem       REG                8,3     14560    3150485 /lib/x86_64-linux-gnu/libdl-2.27.so
...

Another important use of lsof is to find out the process listening on a specific port. For example identify the process listening on port 80 using the following command.

$ sudo lsof -i TCP:80
Find Out Process Listening Port
COMMAND  PID   USER   FD   TYPE DEVICE SIZE/OFF NODE NAME
httpd    903   root    4u  IPv6  20222      0t0  TCP *:http (LISTEN)
httpd   1320 apache    4u  IPv6  20222      0t0  TCP *:http (LISTEN)
httpd   1481 apache    4u  IPv6  20222      0t0  TCP *:http (LISTEN)
httpd   1482 apache    4u  IPv6  20222      0t0  TCP *:http (LISTEN)
httpd   1493 apache    4u  IPv6  20222      0t0  TCP *:http (LISTEN)
httpd   1763 apache    4u  IPv6  20222      0t0  TCP *:http (LISTEN)
httpd   2027 apache    4u  IPv6  20222      0t0  TCP *:http (LISTEN)
httpd   2029 apache    4u  IPv6  20222      0t0  TCP *:http (LISTEN)
httpd   2044 apache    4u  IPv6  20222      0t0  TCP *:http (LISTEN)
httpd   3199 apache    4u  IPv6  20222      0t0  TCP *:http (LISTEN)
httpd   3201 apache    4u  IPv6  20222      0t0  TCP *:http (LISTEN)

Note: Since lsof reads kernel memory in its search for open files, rapid changes in kernel memory may result into unpredictable outputs. This is one of the major downsides of using lsof command.

For more information, look at the lsof man page:

$ man lsof

That’s all! In this article, we have explained how to know who is using a particular file in Linux. We have shown how to identify the owner and process information for processes using an open file. Use the feedback form below to reach us for any questions or comments.

Source
10 Useful Linux Command Line Tricks for Newbies

I remember when I first started using Linux and I was used to the graphical interface of Windows, I truly hated the Linux terminal. Back then I was finding the commands hard to remember and proper use of each one of them. With time I realised the beauty, flexibility and usability of the Linux terminal and to be honest a day doesn’t pass without using. Today, I would like to share some useful tricks and tips for Linux new comers to ease their transition to Linux or simply help them learn something new (hopefully).

10 Linux Commandline Tricks for Newbies

10 Linux Commandline Tricks – Part 2

  1. 5 Interesting Command Line Tips and Tricks in Linux – Part 1
  2. 5 Useful Commands to Manage Linux File Types – Part 3

This article intends to show you some useful tricks how to use the Linux terminal like a pro with minimum amount of skills. All you need is a Linux terminal and some free time to test these commands.

1. Find the right command

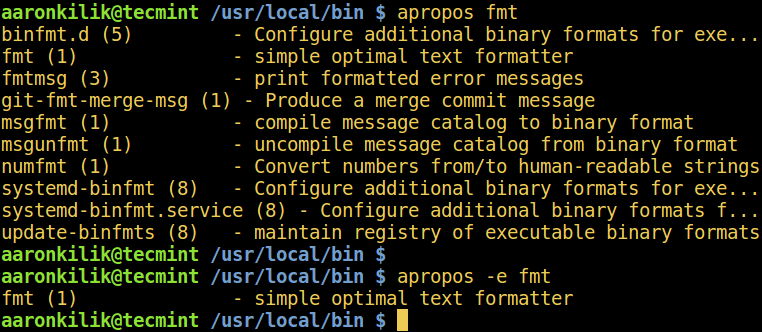
Executing the right command can be vital for your system. However in Linux there are so many different command lines that they are often hard to remember. So how do you search for the right command you need? The answer is apropos. All you need to run is:

# apropos <description>

Where you should change the “description” with the actual description of the command you are looking for. Here is a good example:

# apropos "list directory"

dir (1) - list directory contents
ls (1) - list directory contents
ntfsls (8) - list directory contents on an NTFS filesystem
vdir (1) - list directory contents

On the left you can see the commands and on the right their description.

2. Execute Previous Command

Many times you will need to execute the same command over and over again. While you can repeatedly press the Up key on your keyboard, you can use the history command instead. This command will list all commands you entered since you launched the terminal:

# history

    1  fdisk -l
    2  apt-get install gnome-paint
    3  hostname tecmint.com
    4  hostnamectl tecmint.com
    5  man hostnamectl 
    6  hostnamectl --set-hostname tecmint.com
    7  hostnamectl -set-hostname tecmint.com
    8  hostnamectl set-hostname tecmint.com
    9  mount -t "ntfs" -o
   10  fdisk -l
   11  mount -t ntfs-3g /dev/sda5 /mnt
   12  mount -t rw ntfs-3g /dev/sda5 /mnt
   13  mount -t -rw ntfs-3g /dev/sda5 /mnt
   14  mount -t ntfs-3g /dev/sda5 /mnt
   15  mount man
   16  man mount
   17  mount -t -o ntfs-3g /dev/sda5 /mnt
   18  mount -o ntfs-3g /dev/sda5 /mnt
   19  mount -ro ntfs-3g /dev/sda5 /mnt
   20  cd /mnt
   ...

As you will see from the output above, you will receive a list of all commands that you have ran. On each line you have number indicating the row in which you have entered the command. You can recall that command by using:

!#

Where # should be changed with the actual number of the command. For better understanding, see the below example:

!501

Is equivalent to:

# history

3. Use midnight Commander

If you are not used to using commands such cdcpmvrm than you can use the midnight command. It is an easy to use visual shell in which you can also use mouse:

Midnight Commander in Action

Midnight Commander in Action

Thanks to the F1 – F12 keys, you can easy perform different tasks. Simply check the legend at the bottom. To select a file or folder click the “Insert” button.

In short the midnight command is called “mc“. To install mc on your system simply run:

$ sudo apt-get install mc        [On Debian based systems]
# yum install mc                 [On Fedora based systems]

Here is a simple example of using midnight commander. Open mc by simply typing:

# mc

Now use the TAB button to switch between windows – left and right. I have a LibreOffice file that I will move to “Software” folder:

Midnight Commander Move Files

Midnight Commander Move Files

To move the file in the new directory press F6 button on your keyboard. MC will now ask you for confirmation:

Move Files to New Directory

Move Files to New Directory

Once confirmed, the file will be moved in the new destination directory.

Read MoreHow to Use Midnight Commander File Manager in Linux

4. Shutdown Computer at Specific Time

Sometimes you will need to shutdown your computer some hours after your work hours have ended. You can configure your computer to shut down at specific time by using:

$ sudo shutdown 21:00

This will tell your computer to shut down at the specific time you have provided. You can also tell the system to shutdown after specific amount of minutes:

$ sudo shutdown +15

That way the system will shut down in 15 minutes.

5. Show Information about Known Users

You can use a simple command to list your Linux system users and some basic information about them. Simply use:

# lslogins

This should bring you the following output:

UID USER PWD-LOCK PWD-DENY LAST-LOGIN GECOS
0 root 0 0 Apr29/11:35 root
1 bin 0 1 bin
2 daemon 0 1 daemon
3 adm 0 1 adm
4 lp 0 1 lp
5 sync 0 1 sync
6 shutdown 0 1 Jul19/10:04 shutdown
7 halt 0 1 halt
8 mail 0 1 mail
10 uucp 0 1 uucp
11 operator 0 1 operator
12 games 0 1 games
13 gopher 0 1 gopher
14 ftp 0 1 FTP User
23 squid 0 1
25 named 0 1 Named
27 mysql 0 1 MySQL Server
47 mailnull 0 1
48 apache 0 1 Apache
...

6. Search for Files

Searching for files can sometimes be not as easy as you think. A good example for searching for files is:

# find /home/user -type f

This command will search for all files located in /home/user. The find command is extremely powerful one and you can pass more options to it to make your search even more detailed. If you want to search for files larger than given size, you can use:

# find . -type f -size 10M

The above command will search from current directory for all files that are larger than 10 MB. Make sure not to run the command from the root directory of your Linux system as this may cause high I/O on your machine.

One of the most frequently used combinations that I use find with is “exec” option, which basically allows you to run some actions on the results of the find command.

For example, lets say that we want to find all files in a directory and change their permissions. This can be easily done with:

# find /home/user/files/ -type f -exec chmod 644 {} \;

The above command will search for all files in the specified directory recursively and will executed chmodcommand on the found files. I am sure you will find many more uses on this command in future, for now read 35 Examples of Linux ‘find’ Command and Usage.

7. Build Directory Trees with one Command

You probably know that you can create new directories by using the mkdir command. So if you want to create a new folder you will run something like this:

# mkdir new_folder

But what, if you want to create 5 subfolders within that folder? Running mkdir 5 times in a row is not a good solution. Instead you can use -p option like that:

# mkdir -p new_folder/{folder_1,folder_2,folder_3,folder_4,folder_5}

In the end you should have 5 folders located in new_folder:

# ls new_folder/

folder_1 folder_2 folder_3 folder_4 folder_5

8. Copy File into Multiple Directories

File copying is usually performed with the cp command. Copying a file usually looks like this:

# cp /path-to-file/my_file.txt /path-to-new-directory/

Now imagine that you need to copy that file in multiple directories:

# cp /home/user/my_file.txt /home/user/1
# cp /home/user/my_file.txt /home/user/2
# cp /home/user/my_file.txt /home/user/3

This is a bit absurd. Instead you can solve the problem with a simple one line command:

# echo /home/user/1/ /home/user/2/ /home/user/3/ | xargs -n 1  cp /home/user/my_file.txt

9. Deleting Larger Files

Sometimes files can grow extremely large. I have seen cases where a single log file went over 250 GB large due to poor administrating skills. Removing the file with rm utility might not be sufficient in such cases due to the fact that there is extremely large amount of data that needs to be removed. The operation will be a “heavy” one and should be avoided. Instead, you can go with a really simple solution:

# > /path-to-file/huge_file.log

Where of course you will need to change the path and the file names with the exact ones to match your case. The above command will simply write an empty output to the file. In more simpler words it will empty the file without causing high I/O on your system.

10. Run Same Command on Multiple Linux Servers

Recently one of our readers asked in our LinuxSay forum, how to execute single command to multiple Linux boxes at once using SSH. He had his machines IP addresses looking like this:

10.0.0.1
10.0.0.2
10.0.0.3
10.0.0.4
10.0.0.5

So here is a simple solution of this issue. Collect the IP addresses of the servers in a one file called list.txt one under other just as shown above. Then you can run:

# for in $i(cat list.txt); do ssh user@$i 'bash command'; done

In the above example you will need to change “user” with the actual user with which you will be logging and “bash command” with the actual bash command you wish to execute. The method is better working when you are using passwordless authentication with SSH key to your machines as that way you will not need to enter the password for your user over and over again.

Note that you may need to pass some additional parameters to the SSH command depending on your Linux boxes setup.

Conclusion

The above examples are really simple ones and I hope they have helped you to find some of the beauty of Linux and how you can easily perform different operations that can take much more time on other operating systems.

Source

5 Ways to Keep Remote SSH Sessions and Processes Running After Disconnection

SSH or Secure Shell in simple terms is a way by which a person can remotely access another user on other system but only in command line i.e. non-GUI mode. In more technical terms, when we ssh on to other user on some other system and run commands on that machine, it actually creates a pseudo-terminal and attaches it to the login shell of the user logged in.

Keep SSH Sessions Running After Disconnection

5 Ways to Keep SSH Sessions Running After Disconnection

When we log out of the session or the session times out after being idle for quite some time, the SIGHUP signal is send to the pseudo-terminal and all the jobs that have been run on that terminal, even the jobs that have their parent jobs being initiated on the pseudo-terminal are also sent the SIGHUP signal and are forced to terminate.

Don’t Miss: 5 Useful Practices to Keep SSH Server Secure and Protected

Only the jobs that have been configured to ignore this signal are the ones that survive the session termination. On Linux systems, we can have many ways to make these jobs running on the remote server or any machine even after user logout and session termination.

Understand Processes on Linux

Normal Process

Normal processes are those which have life span of a session. They are started during the session as foreground processes and end up in certain time span or when the session gets logged out. These processes have their owner as any of the valid user of the system, including root.

Orphan Process

Orphan processes are those which initially had a parent which created the process but after some time, the parent process unintentionally died or crashed, making init to be the parent of that process. Such processes have init as their immediate parent which waits on these processes until they die or end up.

Daemon Process

These are some intentionally orphaned processes, such processes which are intentionally left running on the system are termed as daemon or intentionally orphaned processes. They are usually long-running processes which are once initiated and then detached from any controlling terminal so that they can run in background till they do not get completed, or end up throwing an error. Parent of such processes intentionally dies making child execute in background.

Techniques to Keep SSH Session Running After Disconnection

There can be various ways to leave ssh sessions running after disconnection as described below:

1. Using screen Command to Keep SSH Sessions Running

screen is a text Window Manager for Linux which allows user to manage multiple terminal sessions at same time, switching between sessions, session logging for the running sessions on screen, and even resuming the session at any time we desire without worrying about the session being logged out or terminal being closed.

screen sessions can be started and then detached from the controlling terminal leaving them running in background and then be resumed at any time and even at any place. Just you need to start your session on the screen and when you want, detach it from pseudo-terminal (or the controlling terminal) and logout. When you feel, you can re-login and resume the session.

Starting a screen Session

After typing ‘screen’ command, you will be in a new screen session, within this session you can create new windows, traverse between windows, lock the screen, and do many more stuff which you can do on a normal terminal.

$ screen

Starting Screen Session in Linux

Starting Screen Session in Linux

Once screen session started, you can run any command and keep the session running by detaching the session.

Run Commands in Screen Session

Run Commands in Screen Session

Detaching a Screen

Just when you want to log out of the remote session, but you want to keep the session you created on that machine alive, then just what you need to do is detach the screen from the terminal so that it has no controlling terminal left. After doing this, you can safely logout.

To detach a screen from the remote terminal, just press “Ctrl+a” immediately followed by “d” and you will be back to the terminal seeing the message that the Screen is detached. Now you can safely logout and your session will be left alive.

Detaching Linux Screen Session

Detaching Linux Screen Session

Resuming Detached Screen Session

If you want to Resume a detached screen session which you left before logging out, just re-login to remote terminal again and type “screen -r” in case if only one screen is opened, and if multiple screen sessions are opened run “screen -r <pid.tty.host>”.

$ screen -r
$ screen -r <pid.tty.host>

Resume Detached Screen Session

Resume Detached Screen Session

To Learn more about screen command and how to use it just follow the link: Use screen Command to Manage Linux Terminal Sessions

2. Using Tmux (Terminal Multiplexer) to Keep SSH Sessions Running

Tmux is another software which is created to be a replacement for screen. It has most of the capabilities of screen, with few additional capabilities which make it more powerful than screen.

It allows, apart from all options offered by screen, splitting panes horizontally or vertically between multiple windows, resizing window panes, session activity monitoring, scripting using command line mode etc. Due to these features of tmux, it has been enjoying wide adoption by nearly all Unix distributions and even it has been included in the base system of OpenBSD.

Start a Tmux Session

After doing ssh on the remote host and typing tmux, you will enter into a new session with a new window opening in front of you, wherein you can do anything you do on a normal terminal.

$ tmux

Start tmux Terminal Session

Start tmux Terminal Session

After performing your operations on the terminal, you can detach that session from the controlling terminal so that it goes into background and you can safely logout.

Perform Linux Commands in Tmux Session

Perform Linux Commands in Tmux Session

Detach Tmux Session from Terminal

Either you can run “tmux detach” on running tmux session or you can use the shortcut (Ctrl+b then d). After this your current session will be detached and you will come back to your terminal from where you can log out safely.

$ tmux detach

Detach Tmux Session in Linux

Detach Tmux Session in Linux

Resuming the Closed Tmux Session

To re-open the session which you detached and left as is when you logged out of the system, just re-login to the remote machine and type “tmux attach” to reattach to the closed session and it will be still be there and running.

$ tmux attach

Resume Tmux Closed Session

Resume Tmux Closed Session

To Learn more about tmux and how to use it just follow the link: Use Tmux Terminal Multiplexer to Manage Multiple Linux Terminals.

3. Using nohup command to Keep Running SSH Sessions

If you are not that familiar with screen or tmux, you can use nohup and send your long running command to background so that you can continue while the command will keep on executing in background. After that you can safely log out.

With nohup command we tell the process to ignore the SIGHUP signal which is sent by ssh session on termination, thus making the command persist even after session logout. On session logout the command is detched from controlling terminal and keeps on running in background as daemon process.

Executing command using nohup in background

Here, is a simple scenario wherein, we have run find command to search for files in background on ssh session using nohup, after which the task was sent to background with prompt returning immediately giving PID and job ID of the process ([JOBID] PID).

# nohup find / -type f $gt; files_in_system.out 2>1 &

Run Linux Command in Background

Run Linux Command in Background

Resuming the session to view if job is still running

When you re-login again, you can check the status of command, bring it back to foreground using 'fg %JOBID' to monitor its progress and so on. Below, the output shows that the job was completed as it doesn’t show on re-login, and has given the output which is displayed.

# fg %JOBID

Run Linux Command in Background

Run Linux Command in Background

4. Using disown Command to Keep SSH Sessions Running

Another elegant way of letting your command or a single task run in background and remain alive even after session logout or disconnection is by using disown.

Disown, removes the job from the process job list of the system, so the process is shielded from being killed during session disconnection as it won’t receive SIGHUP by the shell when you logout.

Disadvantage of this method is that, it should be used only for the jobs that do not need any input from the stdinand neither need to write to stdout, unless you specifically redirect jobs input and output, because when job will try to interact with stdin or stdout, it will halt.

Executing command using disown in background

Below, we sent ping command to background so that ut keeps on running and gets removed from job list. As seen, the job was first suspended, after which it was still in the job list as Process ID: 15368.

$ ping tecmint.com > pingout &
$ jobs -l
$ diswon -h %1
$ ps -ef | grep ping

Run Linux Commands Using Disown

Run Linux Commands Using Disown

After that disown signal was passed to the job, and it was removed from job list, though was still running in background. The job would still be running when you would re-login to the remote server as seen below.

$ ps -ef | grep ping

Verify Job Status

Verify Job Status

5. Using setsid Command to Put SSH Sessions Running

Another utility to achieve the required behavior is setsidNohup has a disadvantage in the sense that the process group of the process remains the same so the process running with nohup is vulnerable to any signal sent to the whole process group (like Ctrl + C).

setsid on other hand allocates a new process group to the process being executed and hence, the process created is totally in a newly allocated process group and can execute safely without fear of being killed even after session logout.

Execute any command using setsid

Here, it shows that the process ‘sleep 10m’ has been detached from the controlling terminal, since the time it has been created.

$ setsid sleep 10m
$ ps -ef | grep sleep

Run Linux Command Using Setsid

Run Linux Command Using Setsid

Now, when you would re-login the session, you will still find this process running.

$ ps -ef | grep [s]leep

Linux Process Running Background

Linux Process Running Background

Conclusion

What ways you could think of to keep your process running even after you logout from SSH session? If there is any other and efficient way you can think of, do mention in your comments.

Source
PacVim – A Game That Teaches You Vim Commands

Although Vim (short for VI Improved) is a popular text editor on Linux systems, people still find it hard to learn, it has a steep learning curve especially the advanced features; a lot of Linux newbies are literally afraid of learning this powerful and highly recommended text editor.

On the other hand, so much effort has been directed by the Tecmint and Linux community towards making Vimeasy to learn; from creating Vim tutorials, sharing useful Vim usage tricks and tips, to developing interactive learning web-apps and command-line games such as PacVim.

PacVim is a free open source, text-based game that teaches you vim commands in a simple and fun manner. It is inspired by the popular and classic PacMan game, and runs on Linux and MacOSX. It helps you to comprehensively learn vim commands in an enjoyable way. Its objective is more or less like that of PacMan – you must move the pacman (the green cursor) over all the characters on the screen while avoiding the ghosts (red G).

How to Install PacVim Game in Linux

To install PacVim game, you need to first install required Curses (graphics library) package on your Linux distribution using default package manager as shown.

$ sudo apt install libncurses5-dev libncursesw5-dev  [On Ubuntu/Debian]
# yum install ncurses-devel                          [On CentOS/RHEL]
# dnf install ncurses-devel                          [On Fedora]

Next, download PacVim source files by cloning its repository and install it as shown.
$ cd ~/Downloads
$ git clone https://github.com/jmoon018/PacVim.git
$ cd PacVim
$ sudo make install

After installing PacVim, you can start learning vim commands by running it from level 0 and the default mode is hard.

$ pacvim

PacVIM Game for Learning Vim Commands

PacVIM Game for Learning Vim Commands

Here are a few keys to move the cursor:

  • h – move left
  • i – move right
  • j – move down
  • k – move up
  • q – quit the game

You can launch it in a specific level and mode (n and h for normal/hard respectively), for example.

$ pacvim n
OR
$ pacvim 2
OR
$ pacvim 2 n

You can find more information including key-usage combinations and how to create your custom maps from the PacVim Github repository.

Read AlsonSnake – Play Old Classic Snake Game in Linux Terminal

That’s all! PacVim is a useful game that teaches you vim commands while having fun with Linux terminal. Use the comment form below to share your thoughts or ask questions about it.

Source
7 Ways to Determine the File System Type in Linux (Ext2, Ext3 or Ext4)

A file system is the way in which files are named, stored, retrieved as well as updated on a storage disk or partition; the way files are organized on the disk.

A file system is divided in two segments called: User Data and Metadata (file name, time it was created, modified time, it’s size and location in the directory hierarchy etc).

In this guide, we will explain seven ways to identify your Linux file system type such as Ext2, Ext3, Ext4, BtrFS, GlusterFS plus many more.

1. Using df Command

df command reports file system disk space usage, to include the file system type on a particular disk partition, use the -T flag as below:
$ df -Th
OR
$ df -Th | grep "^/dev"

df Command - Find Filesystem Type

df Command – Find Filesystem Type

For a comprehensive guide for df command usage go through our articles:

  1. 12 Useful “df” Commands to Check Disk Space in Linux
  2. Pydf – An Alternative ‘df’ Command That Shows Disk Usage in Colours

2. Using fsck Command

fsck is used to check and optionally repair Linux file systems, it can also print the file system type on specified disk partitions.

The flag -N disables checking of file system for errors, it just shows what would be done (but all we need is the file system type):

$ fsck -N /dev/sda3
$ fsck -N /dev/sdb1

fsck - Print Linux Filesystem Type

fsck – Print Linux Filesystem Type

3. Using lsblk Command

lsblk displays block devices, when used with the -f option, it prints file system type on partitions as well:

$ lsblk -f

lsblk - Shows Linux Filesystem Type

lsblk – Shows Linux Filesystem Type

4. Using mount Command

mount command is used to mount a file system in Linux, it can also be used to mount an ISO imagemount remote Linux filesystem and so much more.

When run without any arguments, it prints info about disk partitions including the file system type as below:

$ mount | grep "^/dev"

Mount - Show Filesystem Type in Linux

Mount – Show Filesystem Type in Linux

5. Using blkid Command

blkid command is used to find or print block device properties, simply specify the disk partition as an argument like so:

$ blkid /dev/sda3

blkid - Find Filesystem Type

blkid – Find Filesystem Type

6. Using file Command

file command identifies file type, the -s flag enables reading of block or character files and -L enables following of symlinks:

$ sudo file -sL /dev/sda3

file - Identifies Filesystem Type

file – Identifies Filesystem Type

7. Using fstab File

The /etc/fstab is a static file system info (such as mount point, file system type, mount options etc) file:

$ cat /etc/fstab

Fstab - Shows Linux Filesystem Type

Fstab – Shows Linux Filesystem Type

That’s it! In this guide, we explained seven ways to identify your Linux file system type. Do you know of any method not mentioned here? Share it with us in the comments.

Source

WP2Social Auto Publish Powered By : XYZScripts.com