September 2018 donation report | SparkyLinux


Country Supporter Amount
Poland Krzysztof M. PLN 50
Poland Emil N. PLN 50
Poland Karol N. PLN 20
World Gernot P. $ 10
World Merlyn M.G. $ 5
World Thomas F. $ 5
World Ruedi L. € 10
World Brian P. € 5
Germany Alexander L. € 5
Poland Robert J. PLN 100
Poland Jacek G. PLN 40
Poland Stanisław G. PLN 20
Poland Władysław K. PLN 10
Germany Markus L. € 10
World Jorg S. € 2,5
Spain Antonio S.D. € 20
Poland Tomasz Ś. € 0,5
Total: PLN 290
€ 61,34
$ 20

Source

Red Hat Reports $823 Revenue for Second Quarter… » Linux Magazine

Strong performance for cloud and container products leads to a 14% increase over last year.

Red Hat has evolved beyond its original role as a Linux vendor and is now positioned as a cloud player that offers complete solutions to enterprise customers. The company has been expanding its product portfolio to help customers embark on their cloud native and digital transformation journey.

Red Hat’s aggressive repositioning is reflected in its revenue. The company earned the total revenue of $823 million, up 14% year-over-year, in the second quarter of the fiscal year 2019.

“The expansion of our technology portfolio has increased our strategic importance with customers, which is evidenced by the number of deals over five million dollars in the second quarter more than doubling year-over-year,” said Jim Whitehurst, President and Chief Executive Officer of Red Hat. “Customers continue to prioritize their digital transformation initiatives, and they are adopting Red Hat’s hybrid cloud enabling technologies to modernize their applications and drive greater efficiency and effectiveness in their business.”

Which technologies segments are growing within Red Hat is apparent from the breakout of the revenue. Subscription revenue remains the largest earnings at $527 million, but it registered a mere 8% in year-over-year growth. On the other hand, revenue from emerging technologies (read cloud and containers) was $196 million for over 31% year-over-year growth.

If Red Hat keeps up this pace, it might touch the $4 billion annual revenue mark in 2019.

Source

Flat-Remix: An Elegant Themes And Icons Pack For Linux Desktop – NoobsLab

Flat-Remix

is an elegant theme and icons pack designed to make desktop pretty. It is inspired by material design, it’s Gtk theme is flat and based on Arc theme with high contrasts and sharp borders, released under GNU General Public License V3. You can find many themes or icons that looks great on Linux desktop but not hesitating to state that it seems to be perfect eyecandy for your desktop.

There are three gtk theme variants in this pack (normal, dark and darker), we also included gnome shell themes from previous release so you can use it on your Gnome Shell desktop. For

icons

this pack offers three versions: Original, Dark and Light. You can choose whichever combination fits your needs. Flat-Remix pack is available via our PPA for Ubuntu/Linux Mint. If you are using distribution other than Ubuntu/Linux Mint then download file directly from theme pack page and install it in this location “~/.themes” or “/usr/share/themes”. Since this pack is in active development, make sure to give feedback to author and if you find any kind of bug or issue within this theme then report it and hopefully it will get fixed very soon.

Available for Ubuntu 18.04 Bionic/18.10 Cosmic/Linux Mint 19/other Ubuntu derivatives
To install Flat Remix Themes in Ubuntu/Linux Mint open Terminal (Press Ctrl+Alt+T) and copy the following commands in the terminal:
Available for Ubuntu 18.04 Bionic/18.10 Cosmic/16.04 Xenial/14.04 Trusty/Linux Mint 19/18/17/other Ubuntu derivatives
To install Flat Remix Icons in Ubuntu/Linux Mint open Terminal (Press Ctrl+Alt+T) and copy the following commands in the terminal:

That’s it

Source

Best Ways to Install Ubuntu on Windows 10

install ubuntu windows 10

Windows Subsystem for Linux (WSL) allows users to run GNU/Linux environment directly on Windows. This tutorial will show you how to run Ubuntu in your windows 10 environment.

This installation includes the utilization of some command-line tools, utilities, and applications.

Enable Windows Subsystem Linux (WSL) in Windows 10

Windows Subsystem for Linux is available on the desktop version of Windows for Windows 10 Anniversary (Redstone1 – 1607) and Creators update (Redstone2 – 1703) or later. Check the version of your Windows by Settings -> System -> About

This article is based on Windows 10 Fall Creator (Redstone3 – 1709).

To install any Linux distribution for WSL, you must enable the feature “Windows Subsystem for Linux”. Open your PowerShell as an administrator

Enable-WindowsOptionalFeature -Online -FeatureName Microsoft-Windows-Subsystem-Linux

After you will be prompted to restart

1) Install Ubuntu on Windows 10

To install Ubuntu you will need to go through the windows store application. Launch the research of Ubuntu

We will install Ubuntu 18.04

2) Run Ubuntu on Windows 10

Now that your download is finished, you can run your Linux subsystem by clicking the launch button in the Windows Store through the Windows start menu. A new terminal will be launched asking to provide a username and password for your new system

You can use your Ubuntu commands

It means that you can normally update the repo cache

3) Run some graphics application

This article will not try to explain how to have a full GUI compatibility with WSL. You must keep in mind that by default you are not able to run any application which can need graphics interface such as gedit. First install gedit, now if you try to run the gedit command, you will have some errors as below

You will need to install an X11 display server for Microsoft OS on your Windows 10 in order to use some small graphics applications which don’t require a high system capacity. In our case, we will use Xming

After the installation make sure to allow Xming to the firewall

Now we need to run some command on your Ubuntu terminal to point any GUI activity at the correct display

export DISPLAY=:0.0
echo “export DISPLAY=:0.0” >> ~/.bashrc

Now you can run gedit again, you will see that it will work this time

You can install firefox

Then try. You can see that it works.

Now you have a working Ubuntu 18.04 which allow you to run small Linux graphics apps on your Windows 10 system. The Windows Subsystem Linux also proposes some others Linux systems such as Debian, Kali, OpenSuse etc. You can enjoy your new system once installed.

Read Also:

Source

Facebook Messenger on the command line — The Ultimate Linux Newbie Guide

Messer logo

Facebook Messenger for geeks:

Just as you thought life at the command line couldn’t get any weirder, it’s now possible to chat to your Facebook buddies on the command line whilst you geek out on your bash scripts! Here’s how to do it

Yep, you read it correctly! If you are a command-line junkie geek by day but have ‘normal’ friends by night, that you chat to via messenger.com or via the Facebook Messenger app on your phone, you might be delighted to find out that having to stop what you are doing, bashing away at the terminal and go to your browser can be a thing of the past.

I’ve managed to dig up two Facebook Messenger CLI clients for you to have a look into. One called Messer and the other imaginatively called fb-messenger-cli.

facebook-messenger-clifacebook-messenger-cli in action

How to install them?

Both projects are available on github only at this point, but installing them is easy. Written in JavaScript, installing fb-messenger-cli can be achieved using npm like so:

npm install -g fb-messenger-cli

Installation of messer is also nearly as trivial:

npm install -g messer

Obviously, to install either of them, they require npm, the JavaScript package manager, to be installed. If you don’t already have npm, you can do so by running sudo apt install npm. The version of npm installed afterward is shown by running npm -v. If you need a newer version of npm, then you can download it as a PPA like so:

curl -sL https://deb.nodesource.com/setup_8.x -o nodesource_setup.sh
sudo bash nodesource_setup.sh
sudo apt install nodejs

Further Reading

Messer github page: https://github.com/mjkaufer/Messer

fb-messenger-cli github page: https://github.com/Alex-Rose/fb-messenger-cli

Post navigation

Source

5 Best Screen Recorders for Ubuntu

Often times, we find ourselves in a position where we have to record our desktop screen such as broadcasting your live streams, for tutorial purposes and more.

So how do you do that with Ubuntu? Well, by using software, of course.

The importance of a screen recorder is especially important for people who make a living through streaming on YouTube, Twitch or any live streaming website.

For everyone interested, we have come up with a list of 5 such software which will help you record your screen and the best part is that they are all free and open source (FOSS).

Kazam is a very simple tool utilized for the purpose of screen recording. It also provides the feature for the screenshot as well. This tool is most suitable for people who are beginners and want to get their work done without getting into too many details or options. It also supports audio recording and various video file formats.

The standout features of the app include:

  • Simplistic UI
  • Multiple video formats supported
  • Audio recording option
  • Delay timer support

In order to run Kazam on your device, you will need to run the following command on your device’s terminal:

2. Open Broadcaster Software Studio

This software is ideal for users who want to get the most out of a screen recording software. It packs a number of advanced-level tweaking features. OBS is perhaps the most advanced and feature-rich Linux screen recorder in this list.

OBS has the capability to stream directly via YouTube, Twitch, DailyMotion and much more. It is most suited for people who have been streaming for a while and want to shift to something that provides the flexibility to do as they please. However, for learners, it will take some time before they can use the software smoothly and to its fullest potential.

  • Live streaming support
  • Video source filters
  • Advanced configuration options
  • Audio mixer with various filters

Here’s how to install the software:

sudo add-apt-repository ppa:obsproject/obs-studio
sudo apt update
sudo apt install obs-studio

3. Simple Screen Recorder

Although it has a rather unappealing user-interface, the software is still great for simple usage. The app’s interface is Qt-based and has the ability to support multiple video output formats. This software may lack in the feature but provides the users the ability to run it on even older devices which do not possess the capability to run heavier software.

Here are some additional features of it:

  • Support for recording selected screen area
  • Live preview while recording
  • Providing statistics while recording

4. Record My Desktop

This lightweight tool is mainly a command-line tool. The app is developed in C-language and provides two separate graphical user-interfaces based on GTK and QT4. The software is primarily aimed towards people who are comfortable using the CLI because it is a CLI-based Linux screen capturing software. The main drawback of Record My Desktop is that it does not provide alternate video output formats. Other features include:

  • Recording video through the command line
  • Very light software

Run the following command one by one on Terminal to install the program:

sudo add-apt-repository ppa:maarten-baert/simple screen recorder
sudo apt update
sudo apt install simplescreenrecorder

5.Voko Screen

Last but not the least, Voko Screen, is arguably one of the simplest and cleanest screen recorders out there for Linux users. Voko Screen has the ability to support multiple video output formats and suitable audio inputs. Unlike the majority of the previous mentions, Voko Screen does provide Webcam preview support which is a huge addition to its features, additional features are as following:

  • Hotkey support
  • Webcam preview support
  • Audio recording from a suitable source

To install Voko, run the following command on Terminal:

sudo apt install vokoscreen

Bonus Mention: Green Recorder

This software gets a special mention because it is one of the oldest screen recorders in Linux to provide support for Wayland. The software utilizes GTK3 and similar to other recorders, it uses FFmpeg in the background processes. So what are its main features?

  • Supports formats such as avi, mkv mp4 and more
  • Option to create screen gifs
  • Supports both Xorg and Wayland

To install, use the following commands:

sudo add-apt-repository ppa:fossproject/ppa
sudo apt update
sudo apt install green-recorder

Concluding Thoughts:

So, which of them is the ideal or the best screen recorder? Well, it completely relies on your requirements and specific needs. The best way to asses is to install all the recorders and judge for yourself which software you liked the best. Otherwise, choose the one with the simplistic configurations and best interface because, as always, simplicity is the best option.

Source

[Stable Update] 2018-09-13 – Kernels, KDE Framework, SPL/ZFS, Octopi

Hi community,

Welcome to another stable update. So what do we have with this one?

  • we updated most of our kernels
  • we finally fixed the touchpad issue we had with our Bladebooks
  • KDE framework got updated to 5.50.0
  • Octopi doesn’t show a dialog when the internet connection is not yet established
  • spl/zfs updated to 0.7.10
  • the usual upstream rebuilds/updates

We hope with all these changes Manjaro to be more efficent for you all.

Our effort and all the needed information about the new security risk can be found here.

So please report back and give us feedback for given changes made to our repositories. Users of our 32-bit Distro should read this.

kind regards

Philip Müller
Manjaro Project Lead

Current supported Kernels

  • linux316 3.16.57
  • linux318 3.18.122 [EOL]
  • linux44 4.4.155
  • linux49 4.9.126
  • linux414 4.14.69
  • linux417 4.17.19 [EOL]
  • linux418 4.18.7
  • linux419 4.19-rc3
  • linux414-rt 4.14.53_rt40
  • linux416-rt 4.16.18_rt11

Package Updates (Mon Sep 10 20:46:48 CEST 2018)

  • community x86_64: 85 new and 83 removed package(s)
  • core x86_64: 12 new and 12 removed package(s)
  • extra x86_64: 184 new and 183 removed package(s)

Links

Posted in: news

Source

Manage your OpenStack cloud with Ansible: Day two operations

Managing an application on OpenStack presents a host of challenges for the system administrator, and finding ways to reduce complexity and produce consistency are key ingredients to achieving success. By using Ansible, an agentless IT automation technology, a system administrator can create Ansible playbooks that provide consistency and reduce complexity.

OpenStack provides a rich API to manage resources that has led to the creation of dozens of Ansible modules that can easily fit into any automation workflow. Combined with the ability to automate tasks in OpenStack instances, an operator can work both inside and out to coordinate complex operations against an environment.

“Day one” operations refer to tasks that are executed during the initial configuration and deployment of an environment. The index of OpenStack modules for Ansible lists many of the common modules used to complete tasks during day one. Creating all manner of resources, such as networks, volumes, and instances are covered. “Day two” deals with what happens next:

  • How will upgrades happen?
  • How are backups maintained?
  • How does the environment scale up with demand?

Ansible can easily handle these use cases.

For example, consider a cluster of web servers that need to be upgraded, all sitting behind an OpenStack load balancer. With the ability to manage both the infrastructure and tasks within the VMs themselves, an operator can ensure the sequence of events executed always happens in a particular order. Here is a simple example of a playbook to perform a rolling upgrade:

– hosts: web
gather_facts: true
user: centos
serial: 1 # ensures only one server will update/reboot at a time
tasks:
– name: check for pending updates
yum:
list: updates
register: yum_update # check if there are updates before going any further
– block:
– name: remove web server from pool
os_member:
state: absent
name: ‘{{ ansible_hostname }}’
pool: weblb_80_pool
delegate_to: localhost
– name: update packages
package:
name: ‘*’
state: latest
become: true
– name: reboot server
shell: sleep 5 && reboot &
async: 1
poll: 0
– name: wait for server
wait_for_connection:
connect_timeout: 20
sleep: 5
delay: 5
timeout: 600
become: true
– name: put server back in pool
os_member:
state: present
name: ‘{{ ansible_hostname }}’
pool: weblb_80_pool
address: ‘{{ ansible_default_ipv4.address }}’
protocol_port: 80
delegate_to: localhost
when:
– yum_update.results | length > 0 # only execute the block if there are updates

This playbook first checks to see whether there are any updates to apply. If so, the playbook removes the node from the pool, applies the updates, and reboots the node. Once the node is back online, it gets added back into the pool. The Ansible playbook uses the serial keyword to ensure only one node is removed from the pool at a time.

If a database is running in the OpenStack cloud, occasionally a backup will have to be restored—either to refresh some test data or perhaps in the event of a data corruption incident. Orchestrating tasks between the database server and Cinder is easily accomplished with Ansible:

– hosts: db
gather_facts: true
user: centos
tasks:
– name: stop database
systemd:
name: mongod
state: stopped
become: true
– name: unmount db volume
mount:
path: /var/lib/mongodb
state: unmounted
become: true
– name: detach volume from server
os_server_volume:
state: absent
server: db0
volume: dbvol
delegate_to: localhost
– name: restore cinder backup
command: openstack volume backup restore dbvol_backup dbvol
delegate_to: localhost
register: vol_restore
failed_when:
– vol_restore.rc > 0
– “‘VolumeBackupsRestore’ not in vol_restore.stderr”
– name: wait for restore to finish
command: openstack volume show -c status -f value dbvol
register: restore_progress
until: restore_progress.stdout is search(“available”)
retries: 60
delay: 5
delegate_to: localhost
– name: reattach volume to server
os_server_volume:
state: present
server: db0
volume: dbvol
device: /dev/vdb
delegate_to: localhost
– name: mount db volume
mount:
path: /var/lib/mongodb
state: mounted
src: LABEL=dbvol
fstype: xfs
become: true
– name: start database
systemd:
name: mongod
state: started
become: true

Looking closely at the playbook, you may have noticed that the restore is done via the OpenStack command line and not a proper Ansible module. In some cases, a module for a task might not exist, but Ansible is flexible enough to allow calling arbitrary commands within a playbook until a module is developed. Feel like you could write the missing module? Consider creating it by contributing to the Ansible project.

These are just a couple of day-two operations a system administrator may need to orchestrate in their cloud. Roger Lopez and I will offer a hands-on lab at OpenStack Summit in Berlin with real-world scenarios and associated Ansible playbooks to automate them. We’ll also upload our examples and materials to GitHub the week of the conference for the benefit of anyone who can’t attend.

Roger Lopez and David Critch will present Simplifying Day Two Operations with Ansible (A Hands-on Lab) at the OpenStack Summit, November 13-15 in Berlin.

Source

Business Management System: Install WebERP on Ubuntu 16.04


weberp business management system

What Is WebERP Accounting and Business Management System

WebWEP is a totally web based accounting and business management system. It is particularly suitable for distributed businesses in wholesale, distribution and manufacturing. WebERP can be customized with third party complementary components and can also function as a web-shop or Retail Management System.

According to the project’s web site “the growth of webERP adoption has been entirely through word of mouth testimony – there has never been a marketing or advertising push to “sell” webERP. Of course there are no funds nor commercial incentive to do so for free software. This growth is built on reputation and solid practical functionality that works as tried and tested by an increasing number of businesses.”

WebERP Main Features

WebERP has many features:

  • Runs on any web-server that can accommodate PHP – can use an ISP instead of having/maintaining own server
  • Minimal use of javascript for maximum compatibility with all web-browsers and web enabled devices. Some small amounts used to improve error-trapping and user interactivity.
  • Produces reports to Portable Document Format – PDF for accurate positioning of text
  • All reports and scripts easily modifiable PHP text
  • All processing on the server and no installation required on client machines
  • Fully utf-8 compliant. PDF reports produced using adobe CIF fonts for lightweight PDFs using utf-8 character set for any language
  • Multi-theme – each user can see the interface in their preferred graphical theme
  • The underlying code of the system is written in a way so as to maximise it’s readability for those new to PHP coding. The idea being that business users will be able to administer and adapt the system to exactly suit their needs.
  • Users can be defined with access to only certain options using a role based model
  • Options applicable to certain roles can be graphically configured and users defined as fulfilling a given role.
  • Incorrect entry of password (more than 3 times) blocks the account until reset by the System Administrator. This prevents password crackers from breaking the security.
  • Pages can be encrypted using SSL and webERP can be configured to only display pages using SSL to ensure that all information passing over the internet is encrypted.
  • Very flexible taxation options suitable for Canada, US, South Africa, UK, Australia, NZ and most other countries
  • Tax rates dependent on the type of product – using tax categories
  • Tax rates dependent on the location of the warehouse dispatched from
  • Tax rates dependent on the location of the customer
  • Multiple taxes payable to different tax authorities
  • Each tax posted to different user-definable general ledger accounts – if linked to AR/AP

In this guide we will show how to install WebERP on an Ubuntu 16.04 server with an installed LAMP stack.

Prerequisites

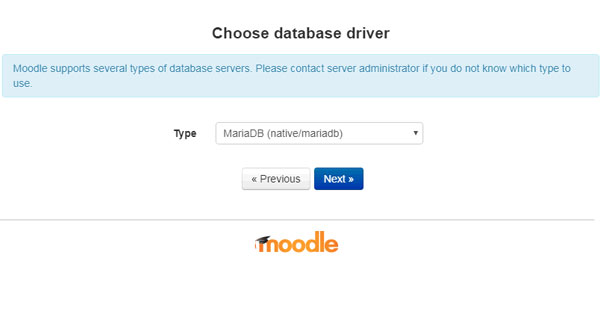
Install a LAMP stack (you can follow our guide), and then go on with the MariaDB configuration.

MariaDB Configuration

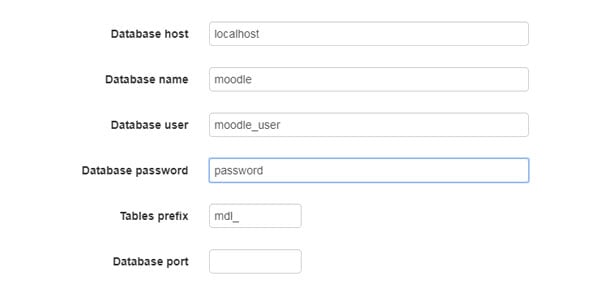
We need to create a new database and user for WebERP. First of all, login to MariaDB shell:

$ mysql -u root -p

Create a new user for WebERP. In this guide we will create the weberp_usr user. Execute the following MariaDB query:

MariaDB [(none)]>CREATE USER ‘weberp_usr’@’localhost’ IDENTIFIED BY ‘usr_strong_password’;

Next, create a new database. We will name it weberpdb:

MariaDB [(none)]>CREATE DATABASE weberpdb;

Grant all the privileges to weberp_usr user on the new database:

MariaDB [(none)]>GRANT ALL PRIVILEGES ON weberpdb.* TO ‘weberp_usr’@’localhost’;

Flush the privileges and close the shell:

MariaDB [(none)]>FLUSH PRIVILEGES;
MariaDB [(none)]>EXIT;

At this point, we are ready to install WebERP.

WebERP Installation

Download WebERP

The latest version of WebERP can be downloaded from their official site. We will do it with the following wget command:

$ wget https://excellmedia.dl.sourceforge.net/project/web-erp/webERP4.14.1.zip

Unzip and move the extracted directory to the Apache Web Root directory:

$ unzip webERP4.14.1.zip
# cp -r webERP /var/www/html/weberp

Change the ownership of the weberp directory:

# chown -R www-data:www-data /var/www/html/weberp

Create a new Apache Virtual Host for WebERP

Now, create a new Virtual Host file:

# $EDITOR /etc/apache2/sites-available/weberp.conf

Paste the following content:

<VirtualHost *:80>
ServerAdmin [email protected]example.com
DocumentRoot “/var/www/html/weberp/”
ServerName example.com
ServerAlias www.example.com
<Directory “/var/www/html/weberp/”>
Options FollowSymLinks
AllowOverride All
Order allow,deny
allow from all
</Directory>
ErrorLog /var/log/apache2/weberp-error_log
CustomLog /var/log/apache2/weberp-access_log common
</VirtualHost>

Save and close the file, and then activate the new virtual host, by executing the following command:

# a2ensite weberp

Restart Apache:

# systemctl restart apache2

Firewall Configuration

On simple HTTP connections, WebERP runs on port 80. Allow this port through the UFW firewall by executing the command:

# ufw allow 80/tcp

And that’s all.

Final Installation Step

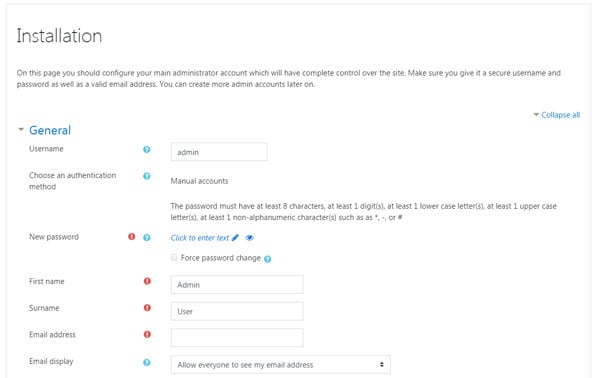
The last step is to open a web browser and go to the URL example.com. The browser will redirect to the WebERP Welcome Page. Starting from that page, you can finish the configuration in your browser.

Conclusion

In this guide we have seen how to install WebERP accounting and business management system on a server powered by Ubuntu 16.04 and Apache as web server.

Source

Raspberry Pi based garden monitoring system supplies five sensors

Oct 16, 2018 — by Eric Brown

— 226 views

On Kickstarter: SwitchDoc Labs’ “Smart Garden System” is a Raspberry Pi and Grove-based environmental monitoring and plant watering system with sensors for soil moisture, sunlight, air quality, temperature, and humidity.

Spokane Valley, Wash. based SwitchDoc Labs (SDL) has launched a more advanced, up to nine plant Smart Garden System (SGS) kit version of its earlier SmartPlantPi kit. The Raspberry Pi based kit, which requires no soldering, is promoted as being an educational system for learning about gardening as well as the Raspberry Pi and IoT technology.

Smart Garden System prototype
(click images to enlarge)

The SGS provides feedback on a the plants’ environment, soil, and condition, and is capable of remote notifications and automatic watering. The SGS follows other Raspberry Pi based gardening kits that have launched this year including the

BioControle

and

OpenMinder

.

Like the SmartPlantPi, the SGS is being funded on Kickstarter. It surpassed its funding goal with 13 days left and is available for $115 with 3D printed stand and one plant sensor, or $175 with a kit that adds a Raspberry Pi 3 B+, 5V/2A power supply, nylon standoffs, and pre-loaded SD card. There are also “Full SGS” kits with 4- or 8-plant extender boards starting at $255. Shipments are due in November.

The kit attaches I2C connected sensors to the Pi via one of Seeed’s unnamed, Raspberry Pi Grove connector boards. The final product will reduce the cable clutter seen in the images of the prototype:

The basic SGS kit consists of:

  • Grove connector board for the Raspberry Pi
  • SI1145 sunlight/IR/UV sensor
  • Sensitive Grove air quality sensor
  • Grove ultrasonic water level sensor
  • Capacitive soil moisture sensor
  • HDC1080 indoor temperature and humidity sensor
  • 4-channel, 16-bit ADC
  • 8-pixel RGBW strip
  • Grove OLED 128 x 64 display
  • 8 x 20cm Grove cables and 1x 50cm Grove cable
  • USB PowerControl NE solid state relay
  • USB activated pump
  • Hose (200mm) with clip
  • 3D printed ultrasonic holder and SGS stand

Smart Garden System detail view (left) and Blynck app
(click images to enlarge)

The Full SGS model extends the SGS with one or two 4 Plant Extender Boards with built-in USB pump controls and ADC. You also get 4x USB controlled pumps, 4x capacitive moisture sensors, and the power supply. The full kits, which ship with or without a Raspberry Pi 3 B+, also boost the number of cables and the length of the hose, as well as offering a larger stand.

On the software side you get a Raspbian based stack that offers access to the Blynck smartphone app for monitoring and control. Full Python based source code and 3D printer files are available.

Smart Garden System prototype video overview

Further information

The Smart Garden System (SGS) is available on Kickstarter through Oct. 30 starting at $110 without a Raspberry Pi. Educational classroom discounts are available. More information may be found on the SGS Kickstarter page, and more should eventually appear at the SwitchDoc Labs website

Source

WP2Social Auto Publish Powered By : XYZScripts.com