Keyboard Buddies » Linux Magazine

The best way to save money on software development is to get it right the first time. Pair programming, an agile technique, saves development costs by putting two coders to work on the same code. Visual Studio Code and tmate bring the promise of pair programming to remote workers.

As agile programming spreads into the IT space, development teams are increasingly relying on a concept known as pair programming [1]. Pair programming is an agile technique that involves two programmers working simultaneously on one computer. Both programmers use their own keyboard and mouse. Ideally, each also has a separate monitor.

In pair programming, one programmer acts as the driver (the person who actively programs), and the other is the navigator. Since both programmers have their own keyboards, the navigator can access the code directly at any time. This leads to those “wait a minute, I’ll show you how to do that” moments where the navigator demonstrates something to the driver or simply corrects an error.

Pair programming proponents believe this technique leads to far cleaner code containing fewer errors. However, pair programming does put a strain on both programmers. Experts recommend that companies use pair programming regularly, but not every day for the entire day. The right chemistry between the two programmers is also important.

[…]

Use Express-Checkout link below to read the full article (PDF).

Source

KDE e.V Receives Generous Handshake Donation, Ubuntu Touch OTA-5 Is Out, Geoclue 2.5 Now Available and Asking for Help, New Code of Conduct Proposal and Internet Freedom Festival

News briefs for October 15, 2018.

KDE e.V. announces it received a $300,000 USD donation from the Handshake
Foundation
. According to the KDE
blog post
, it plans to use $100,000 USD of the donation specifically toward development
of the Calligra office suite. Also, KDE celebrated its 22nd anniversary yesterday—Happy Birthday KDE!

UBports
announces
Ubuntu Touch OTA-5 is out. This
over the air update of version 16.04 includes a more stable experience and new features, such as the
Morph QtWeb Engine browser, Qt automatic scaling, Kirigami 2 and community
art used for wallpapers, notification tones and ringtones.

Geoclue
2.5 is now available
, and coder Zeeshan Ali is asking for help. Geoclue uses
the Mozilla Location Service (MLS), which was launched in 2013 in connection with its
Firefox OS project that has since been abandoned. The service is still
running, and users can contribute data, but it isn’t being maintained or
developed any longer. Zeeshan
Ali writes
, “If your company relies on MLS
(directly or through Geoclue) and you’d want to secure the future of Open
Source geolocation, please do get in touch and we can discuss how we could
possibly achieve that.”

Red Hat developer Ivan Chavero yesterday submitted a new patch
for the Linux Code of Conduct. Phoronix
reports
that the proposal “drops the
mention of ‘a harassment-free experience for everyone, regardless of age,
body-size, disability, ethnicity, sex characteristics, gender identity and
expression, level of experience, education, socio-economic status,
nationality,personal appearance, race, religion, or sexual identity and
orientation.’ In place Ivan proposes, ‘our community an effective and
enriching experience to any sentient being in the Universe.'”

The Internet Freedom Festival—”5 Years Joining Forces to Fight
Censorship and Surveillance”—is being held in Valencia, Spain, April
1–5, 2019. The call for proposals is open until November 9, 2018. See
the IFF website for more
details, as well as news and updates from the community.

Source

5 Things Your Team Should Do to Make Pull Requests Less Painful | Linux.com

In this article we’ll go over some best practices that help ensure good pull requests. Writing good pull requests and having an effective workflow will increase a team’s productivity and minimize frustration. Although a pull request is traditionally considered the final point in the developer workflow, these best practices span the entire development process. We’ll focus on the key points that affect the quality of a pull request.

We’ll cover the importance of good user stories, code testing, code readability, writing good revision control commits, and finally, writing good pull request descriptions.

The importance of good pull requests

Having a culture of writing good pull requests within a team can make a big difference in productivity. If pull requests are small, frequent, and easy to review and test, they will result in pull requests being opened and merged quickly.

Read more at ButterCMS

Click Here!

Source

GCC: A World-Class Compiler Optimizing Linux and More

GCC

As the default compiler for the Linux kernel source, GCC delivers trusted, stable performance and also builds system libraries and many of the applications in popular Linux distributions.

Software is useless if computers can’t run it. The GNU Compiler Collection (GCC) is the unsung hero of the software world, transforming high level source code into low level object code while shielding the developer from hardware dependencies. With over 30 years of continual use and development, GCC offers a robust and stable foundation for building complete systems – from the kernel upwards. It is not surprising that GCC is still considered by LLVM.org to be “the de facto-standard open source compiler today.”

Who uses GCC?

As the default compiler for the Linux kernel source, GCC delivers trusted, stable performance and also builds system libraries and many of the applications in popular Linux distributions. GCC is also one of the most widely adopted core compilers by developers of embedded systems, with many GCC-based prebuilt toolchains enabling the software for the growing world of IoT devices. Application developers writing code for a variety of new and legacy computing environments depend on GCC since it delivers trusted performance along with support for the broadest range of hardware and operating environments.

And why do these folks depend on GCC? With decades of development by thousands of people GCC is one of the most respected compilers in the world. It functions as a cross compiler, creating executable code for a platform other than the one on which the compiler is running. GCC is also a core component of the tightly integrated GNU toolchain, produced by the GNU Project, that includes glibc, Binutils, and the GNU Debugger (GDB). GCC delivers improved diagnostics for compile time debugging, accurate and useful information for runtime debugging, and is a well supported platform with an active, committed community that supports the current and two previous releases.

Learn more

If you are building software and not using GCC, you are missing out on the best possible solution. Check out the article “GCC: Optimizing Linux, the Internet, and Everything” to get a more comprehensive look at this amazing software tool.

Margaret Lewis is a technology consultant who previously served as Director of Software Planning at AMD and an Associate Director at the Maui High Performance Computing Center.

Source

Imunify360 3.7.2 Beta is here

Imunify360 3.7.2 Beta is here
We are pleased to announce that a new updated Imunify360 Beta version 3.7.2 is now available. This latest version embodies further improvements of the product as well as bugfixes.

Tasks

  • DEF-6162: AI-BOLIT vulnerabilities are now marked as suspicious.

Fixes

  • DEF-6170: blacklisted IP is no longer put into Gray List by sensor alert;
  • DEF-6205: do not fail if /etc/virtual/domainowners has wrong UTF-8 data;
  • DEF-6221: fixed SEND_ADDITIONAL_DATA.enable label in settings in UI.

To install the new Imunify360 version 3.7.2 please follow the instructions in the documentation.

The upgrading is available since Imunify360 version 2.0-19.

To upgrade Imunify360 on CentOS/CloudLinux systems, run the command:

yum update imunify360-firewall –enablerepo=imunify360-testing

To upgrade Imunify360 on Ubuntu systems, rut the command:

apt-get update
apt-get install –only-upgrade imunify360-firewall

More information on Imunify360 can be found here.

157 people viewed this

Source

Debian Linux 7 Long Term Support reached end-of-life

The Debian Linux version 7 (codenamed “Wheezy”) support ended on 31st May 2018. It was initial release on May 4, 2013. Each LTS ( initial release on May 4, 2013) support lasts for five years. It means Debian project will not provide any security updates for Debian 7. As Debian Linux 7 Long Term support ends, hence you must upgrade your system to keep it secure. This page list all essentials steps to update your system from Debian 7 to Debian 8.

Debian Linux 7 Long Term Support reached

From the announcement page

The LTS Team will prepare the transition to Debian 8 “Jessie”, which is the current oldstable release. The LTS team will take over support from the Security Team on June 17, 2018.

Debian 8 will also receive Long Term Support for five years after its initial release with support ending on June 30, 2020. The supported architectures include amd64, i386, armel and armhf.

How to upgrade from Debian 7 “Wheezy” to Debian 8 “Jessie”

The following are recommendations for upgrading from Debian 7 “Wheezy” LTS to Debian 8 “Jessie” LTS. First, you must keep backup of all critical data including configuration files, user data, and RDBMS data.

Step 1. Update your /etc/apt/sources.list

Use a text editor such as vim command or nano command:

$ sudo vi /etc/apt/sources.list Update it as follows:

deb http://deb.debian.org/debian jessie main
deb http://security.debian.org/debian-security jessie/updates mainSave and close the file.

Step 2. Update your system

Type the following apt-get command:

$ sudo apt-get updateDebian Linux 7 Long Term Support reached end-of-life

Step 3. Install apt from Jessie

Type the following apt-get command:

$ sudo apt-get install apt -t jessieInstall apt from Jessie before upgrading your system

Step 4. Upgrade your system

Now you can use the apt command:

$ sudo apt upgradeapt upgrade Debian 7 to Debian 8 command

Step 5. Upgrade your system and remove obsolete packages

Run the following apt command:

$ sudo apt dist-upgrade You might see prompts and update for configuration files. Apply them as needed. Review all changes carefully.

Step 6. Reboot the Linux box

Run the following command to reboot the Linux server/desktop or laptop:

$ sudo reboot OR

$ sudo shutdown -r 0

Step 7. Verify it

Type the following command to see your Linux kernel version:

$ uname -mrs
$ uname -a See your Debian Linux distribution version and other info using cat command:

$ cat /etc/debian_version Sample outputs:

8.10

Check all your log files on Linux box for any errors using either tail command or grep command:

$ tail -f /var/log/dmesg
$ egrep ‘warn|error|critical’ /path/to/log/file Make sure all services are running and required ports are open too:

$ sudo netstat -tulpn
$ sudo ss -tulpn
$ ping cyberciti.biz
$ host cyberciti.biz
$ ps aux | more
$ ps aux | grep apache

Conclusion

The Debian Long Term Support (LTS) Team announced that Debian 7 “Wheezy” support had reached its end-of-life on May 31, 2018. You just learned how to upgrade your version to next Debian 8 LTS version. I strongly suggest that you visit this page for more info and this page for upgrading existing Debian 8 to Debian 9.

Posted by: Vivek Gite

The author is the creator of nixCraft and a seasoned sysadmin, DevOps engineer, and a trainer for the Linux operating system/Unix shell scripting. Get the latest tutorials on SysAdmin, Linux/Unix and open source topics via RSS/XML feed or weekly email newsletter.

Source

Univention Corporate Server An Enterprise Linux (Overview And Tutorial) – NoobsLab

univention corporate server

In this article, we will take a look at Univention Corporate Server (UCS) and It is also sort of brief tutorial on UCS. Before we get into it, lets talk about an overview.

1: Overview

First, what is Univention Corporate Server (UCS)? It is an enterprise Linux distribution that is built by Univention. It is their goal to simplify the access to applications and devices for organizations and Univention heavily uses Open Source software for that. Basically, this involves three core topics:

  • A central identity management system
  • An app store-like environment for applications
  • And, of course, IT infrastructure and device management

All this is brought together into one product called Univention Corporate Server.

You can imagine UCS as an alternative to Microsoft Windows Server, because it provides Active Directory (AD) services and can be used for similar purposes. For example, UCS can participate in an Active Directory domain or Active Directory domain data can be migrated to UCS for a drop-in replacement.

You can also imagine UCS as Android for servers. Like Android UCS offers a marketplace for apps. Univention calls it App Center. It manages apps’ life cycles and integrates them with the central identity management system incorporated in UCS. Because of the flexibility of UCS, most apps can be operated both on premises or in the cloud.

UCS is used by a broad variety of organizations in very different industries ranging from just a few users until up to 30 million users in the directory service.

2: Origin and Functionality

Univention Corporate Server is derived from Debian GNU/Linux. The software packages are taken from the Debian project. Univention builds some packages on their own, because some packages like Samba or OpenLDAP are customized with patches or simply need a newer version than available in Debian stable.

The Open Source software projects Samba 4, Heimdal Kerberos or OpenLDAP are used to provide the Active Directory domain functionality in UCS.

UCS offers a central configuration system name Univention Configuration Registry (UCR). It consists of a tree of variable keys and their values that are used in configuration files and scripts. It allows to use the same variable, for example the LDAP base distinguished name, in different places and it is only defined once. With UCR a system administrator does not need to worry about missing settings spread over several configuration files. A value can be changed and is then committed to the relevant configuration files.

System administrators are mostly interacting with UCS via the web-based management system. There they take care of the identity management with users, groups and roles and the infrastructure management like IP address leases, name resolution for systems. The UCS system itself is also managed this way and administrators update system packages or install new apps via the web-browser. System administrators usually deal with recurring tasks and they are simplified by the management system. Furthermore, the learning curve for enterprise Linux systems is lowered.

Univention’s value creation basically consists of Open Source “glue” to bring the right components together for the tasks and put everything in a very neat box. The glue ingredients are software craftsmanship, creativity, Python, JavaScript and Dojo, Bash and a bunch of knowledge about Linux and various Open Source Software projects.

3: Download

Univention Corporate Server in the Core Edition can be downloaded from Univention’s website. The Core Edition comes full-featured and free of charge with community support. It is available as ISO image or pre-installed virtual machine image for KVM, VirtualBox and VMware. Enterprise subscription is also available including support and a longer maintenance of five to seven years for a major version.

4: Installation Tutorial

Let’s now get our hands a little bit dirty and setup UCS as virtual machine. This installation uses the UCS virtual machine image for VirtualBox and walks through the single steps.

  1. Download UCS virtual machine image for VirtualBox.
  2. Download VirtualBox and install it.
  3. Import the UCS virtual machine image into VirtualBox
  4. Start the virtual machine and go through the UCS system setup wizard:
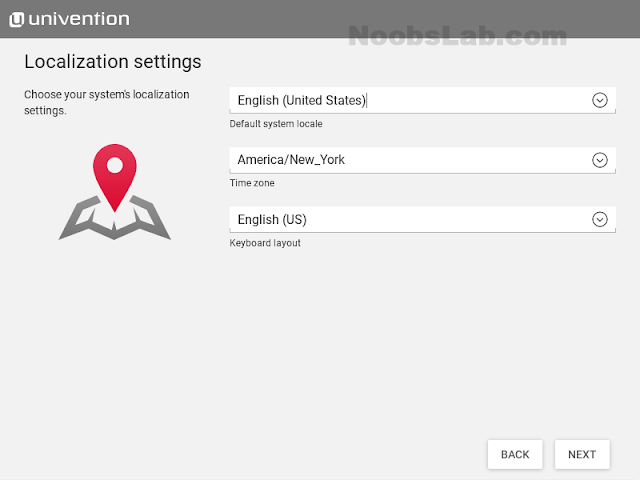
  • Select location
  • Customize keyboard, if needed

univention corporate server

  • Enter network configuration: Either choose to obtain an IP address automatically (default) or enter a static IP address. In this tutorial, used a static IP, because UCS system should take care of all the ip address handling.

ucs

  • Domain setup: Select the first option. I want setup my own domain and I start with creating a new one. I can later add more systems to this new domain by selecting the second option during the setup. Furthermore, if an existing Active Directory service should be used, select option three.

univention

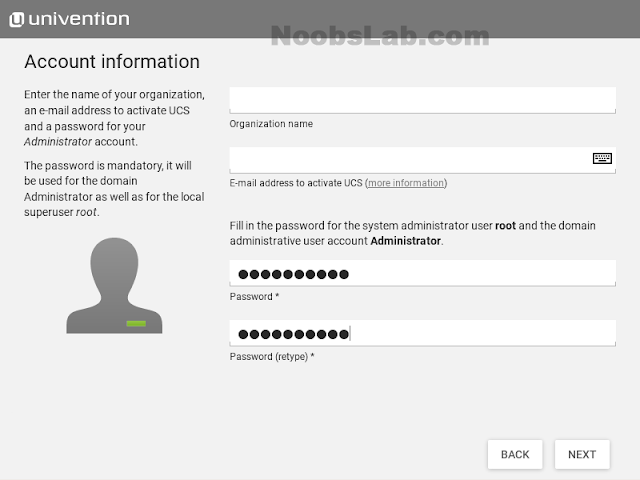
  • Enter the password for the root and Administrator account. The system needs to have a root password. It can later be used for the user “Administrator” to login to the management system. I postpone the system activation to a later time and leave the other fields empty.

univention server

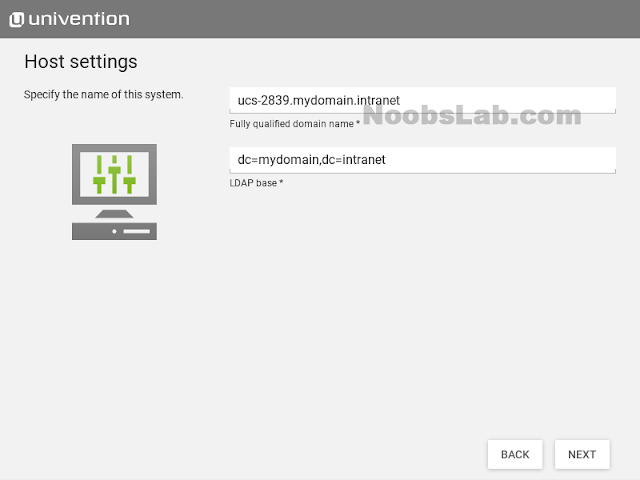
  • Specify the name of the system in the Host settings. I just went with the proposed defaults. Here the system receives its name.

univention ucs

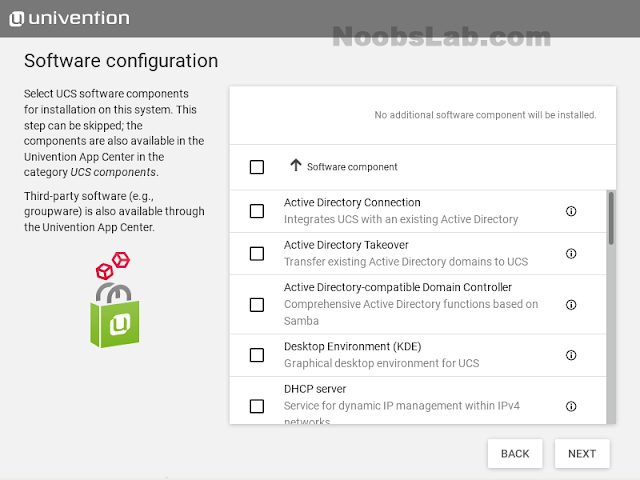
  • You may already want to install additional components, like for example the Active Directory compatible domain controller.

univention corporate server

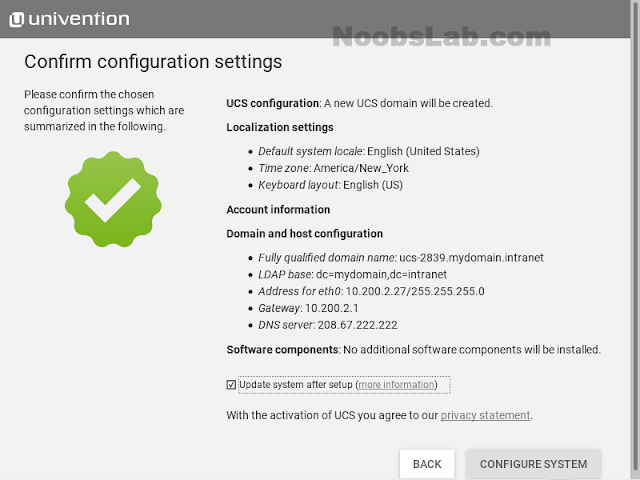
  • Go over the configuration summary and click “Configure System”. UCS will apply the settings. This can last several minutes and depends on the performance of your underlying virtualization host system.

univention corporate server

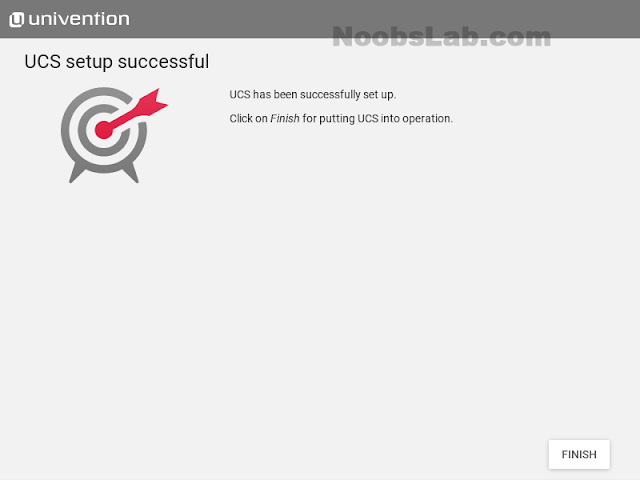
  • Finally the setup is completed. After finishing the setup wizard, the appliance greets with a welcome screen and announces what IP address should be used in the browser to access the UCS management system. This screen comes up after every reboot of the appliance and gently reminds where to reach the system.

univention corporate server

univention corporate server

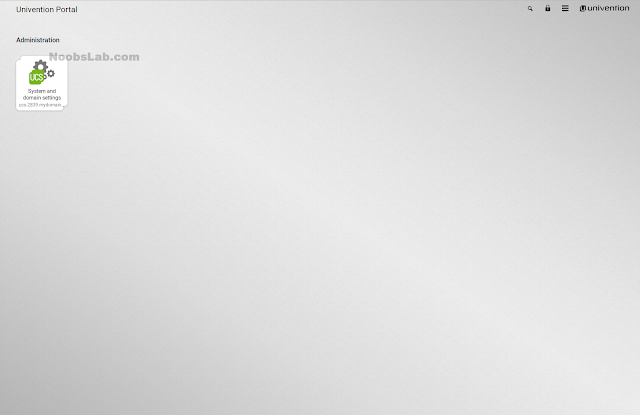
  • Heading to the address provided by the welcome page opens the UCS portal page. It looks quite empty yet and offers a login to the management system.

univention corporate server

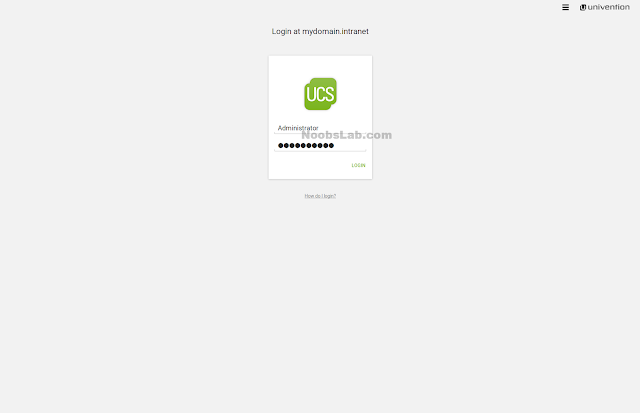
  • For the first login I choose “Administrator” for the username and the password I provided during the setup. The Administrator is the first administrative user having all the rights for the environment.

univention corporate server

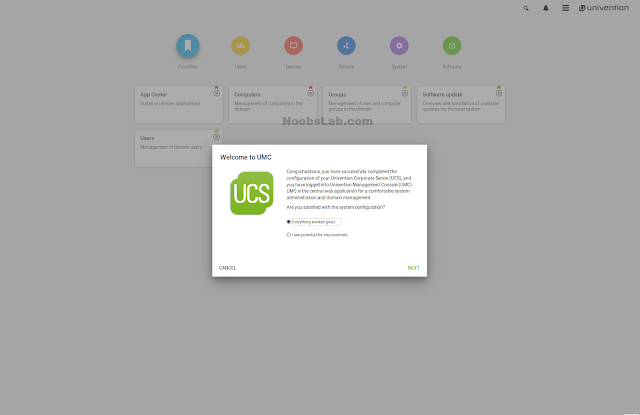
  • With the first successful login, UCS welcomes the user with a short dialog and asks for the first feedback, if issues occurred during installation and setup.

univention corporate server

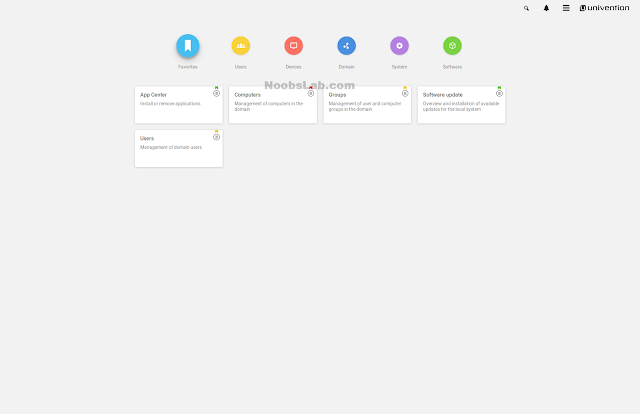
  • The UCS management system is the central place to control your UCS environment. At the top there are the sections Users, Devices, Domain, System and Software. Each section reveals its own modules for different administrator tasks. Frequently used modules can be put into the Favorites section.

univention corporate server

  • After UCS setup, the system should be extended by an additional app and ownCloud is my candidate.

univention corporate server

  • In order to use the App Center, the system has to be registered. I didn’t register before and I’m now reminded of it. A click on “Install” guides me through the registration where I provide a valid email address, receive the registration via email and upload it to the system. Afterwards, I can continue with the installation. The registration has to be done only once.

univention corporate server

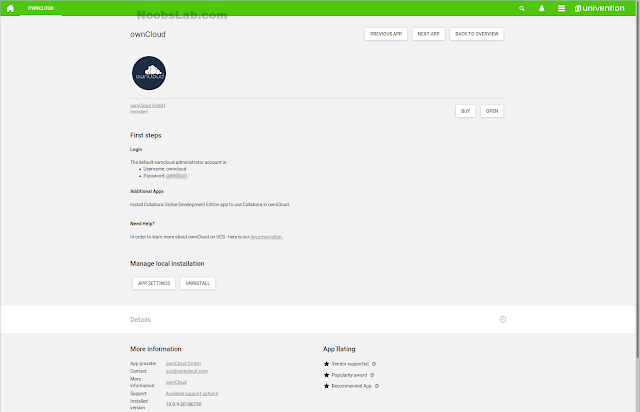
  • ownCloud is now installed and the app informs the administrator about how to access the ownCloud admin account.

univention ucs

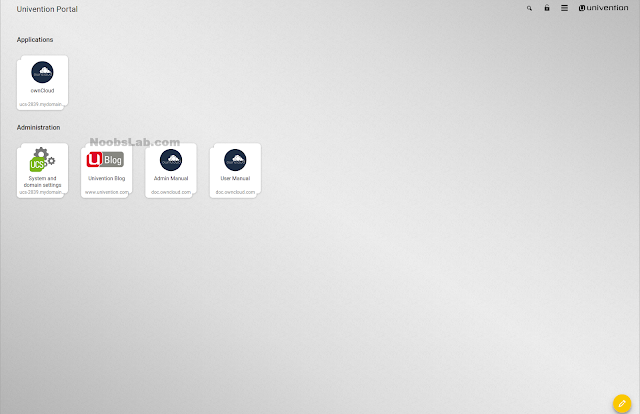
  • A look at the portal now shows some more tiles on it. It offers the login to ownCloud. Before a login with a usual user can be made, the user needs to be created. The admin user can login though with the given credentials shown after the installation.

ucs

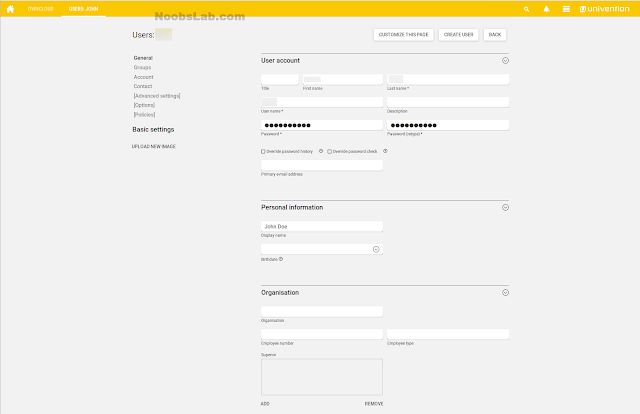
  • To create a new user, select the Users module from the Favorites or Users section in the UCS management system. Provide at least a lastname, username and a password. By default, new users are enabled for ownCloud, as soon as the app is installed. If a new user shall not be able to login to ownCloud, the checkbox has to be removed in the Advanced settings section.

univention corporate server

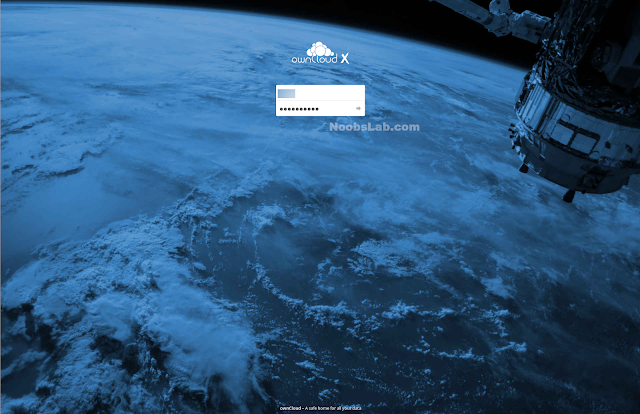
  • Going back to the UCS portal, I click on the ownCloud login and there I enter the credentials of my new user. Et voilà, I’m in and can use my fresh ownCloud.

univention corporate server

univention corporate server

5: Summary

Univention Corporate Server (UCS) is very sophisticated operating system for identity and infrastructure management for organizations. The setup is straight forward and easy to make. I like the way how third party solutions extend the platform and that they are integrated with the identity management. This makes testing and even production operation very easy.

Source

Install Kali Linux on Virtualbox

Install kali linux virtualbox
Kali Linux know as BackTrack in the past is a Debian-based system for network security, forensic analysis, and penetration testing. A good way to try a new system is to virtualize it with virtualization tool such as VirtualBox.

This article will show you how to install the latest version of Kali Linux 2018 on VirtualBox in your Linux system.

If you using a Windows 10 Desktop, the only difference would be to download the ‘exe’ file from Oracle VM VirtualBox and proceed with standard installation steps to have VirtualBox on windows.

Pre-requisites

In order to virtualize Kali Linux and have a minimum average working environment, you need to have

  • virtualbox installed in your Linux system
  • the image of Kali Linux present in your system
  • at least 4GB of RAM
  • at least 20-30GB of free disk space
  • network to have a system updated
  • a processor with the virtualization features enabled (often activated by default)

In this tutorial, we will use the actual latest version Kali Linux 2018.3a available in the official site and virtualbox 5.1.34

Step 1: Download and install VirtualBox

Virtualbox is present in the official repositories of Ubuntu

# apt install virtualbox

Then you can install the virtualbox extension

# sudo apt install virtualbox-ext-pack

You can also download the latest version and install it directly from the official website

# wget https://download.virtualbox.org/virtualbox/5.2.18/virtualbox-5.2_5.2.18-124319~Ubuntu~bionic_amd64.deb
–2018-10-16 07:18:22– https://download.virtualbox.org/virtualbox/5.2.18/virtualbox-5.2_5.2.18-124319~Ubuntu~bionic_amd64.deb

Then install it with dpkg command

# dpkg -i virtualbox-5.2_5.2.18-124319_Ubuntu_bionic_amd64.deb

If you encounter any dependency error, use the command

# apt install -f

then reinstall again with the dpkg command.

Step 2: Download Kali Linux ISO and Create guest on virtualbox

In virtualization, the guest OS is the virtualized system (so our Kali Linux) and the host OS is our Linux system. To create it, you need to run virtualbox and choose New

Then choose the platform and the OS to create. We will choose Debian (64 bits) because Kali is a Debian-based system and we have the x64 platform

Set the memory size. In our case we choose 2GB

Then create a new virtual HD drive

  • hard disk file type: VDI
  • storage on physical hard disk: Dynamically allocated
  • file location: leave by default
  • size: 20GB

Now we need to edit some parameter of our guest by going to Settings

We will allow the bidirectional shared and data transfer between the Linux host and guest Kali.

You can edit the motherboard option such as the boot order and the EFI mode

Now we will need to add the image of Kali for the installation process. at step 3 choose the option for the Optical disk file, then go to the image location

Now you can see that kali appears

After, you can go through the others features to see which ones you can activate. Now we can launch the installation process.

Step 3: Install Kali Linux on virtualbox

Now that you have edited settings, you can see a summarize of the configuration, then launch the installation

Choose Start Installer

When you will click with the cursor, a message will appear informing that the mouse will be captured. To release it and manipulate your host normally, you will need to use the right Ctrl key

Let’s define the system language

Then define your exact location. if you don’t see your county, go to other and choose

You must define your locales preferences and keyboard language

Now you can configure the hostname of the guest

You need to configure your domain name but in our case, this information will be blank

then configure the password of the root account.

In this step, we need to partition the disk. But in our case, we will do a configuration as a beginner by using the entire disk without partitioning

validate the changes and continue the process.

To configure the package manager, you will be asked for a network mirror but we will not use it

now you can enter the proxy information if you have one

Then continue the process installation

You will see a message when the installation will be completed

Now that you can reboot. You can see the grub

You can now log in the system as root user and the password used during the installation

You can see the interface of your new system

You can now discover Kali by going through the different menu available. You can see the detail information

Give it a try and let us know if you encounter any issues. Good luck!!

Read Also:

Source

[Stable Update] 2018-09-21 – Kernels, Pamac, Palemoon, Mesa 18.2.1

Hi community,

Welcome to another stable update. So what do we have with this one?

  • latest updates to some of our kernels
  • latest Mesa version 18.2.1
  • some fixes for Pamac
  • updated palemoon to 28.1.0

We hope with all these changes Manjaro to be more efficent for you all.

So please report back and give us feedback for given changes made to our repositories. Users of our 32-bit Distro should read this.

kind regards

Philip Müller
Manjaro Project Lead

Current supported Kernels

  • linux316 3.16.57
  • linux318 3.18.122 [EOL]
  • linux44 4.4.157
  • linux49 4.9.128
  • linux414 4.14.71
  • linux417 4.17.19 [EOL]
  • linux418 4.18.9
  • linux419 4.19-rc4
  • linux414-rt 4.14.63_rt40
  • linux416-rt 4.16.18_rt11

Package Updates (Mon Sep 10 20:46:48 CEST 2018)

  • community x86_64: 38 new and 38 removed package(s)
  • core x86_64: 10 new and 10 removed package(s)
  • extra x86_64: 91 new and 85 removed package(s)
  • multilib x86_64: 5 new and 0 removed package(s)

Links

Posted in: general

Source

[Stable Update] 2018-10-08 – Kernels, Gnome 3.30, Cinnamon, Deepin, Pamac, SPL/ZFS

Hi community,

Welcome to another stable update. Since this update is huge we recommend to install it from within a terminal: pamac upgrade or sudo pacman -Syu

So what do we have with this one? Mostly we focused on the major Gnome, which got released earlier last month. The entire desktop now uses fewer system resources, which means you can run more apps at once without encountering performance issues.

Another main focus was on Pamac. We hope it will be the snappiest release we ever did. Now the CLI and UI feature the same functions, which makes your life maintaining your installation of Manjaro even more effectiv.

Else we worked on our new homepage layout pushed more things to our new hardware project, the #bladebook.

Here the brief overall changes with this update:

  • Gnome 3.30 got added to our repos
  • Cinnamon and Deepin got renewed with new features and fixes
  • we released Pamac v7.1.1
  • Pamac also gained functionality to edit PKGBUILDs from AUR packages (please test it via pamac-dev)
  • Further fixes to Pamac-Dev
  • The Kernel got updated to v4.19-rc7
  • most of our other Kernels got also updated. The #bladebook gets fully supported with v4.18.8 and higher
  • Some fixes to SPL/ZFS
  • NetworkManager is now at 1.14.0
  • LibreOffice got updated to 6.1.1
  • added the Hibernation option to the lockscreen of Plasma-Workspace
  • we have now the latest Nvidia 410.57 driver added
  • Wine is now at 3.17
  • Mesa got updated to 18.2.2
  • LLVM and CLANG got updated to 7.0
  • Firefox-Dev is now at 63.0b10
  • I managed to complete my work on the smooth bootup experience
  • upstream fixes incl. haskell and python packages

We hope with all these changes Manjaro to be more efficient for you all.

So please report back and give us feedback for given changes made to our repositories. Users of our 32-bit Distro should read this.

kind regards

Philip Müller
Manjaro Project Lead

Current supported Kernels

  • linux316 3.16.59
  • linux318 3.18.123 [EOL]
  • linux44 4.4.159
  • linux49 4.9.131
  • linux414 4.14.74
  • linux417 4.17.19 [EOL]
  • linux418 4.18.12
  • linux419 4.19-rc7
  • linux414-rt 4.14.71_rt44
  • linux416-rt 4.16.18_rt11

Package Updates (Mon Oct 8 07:20:36 CEST 2018)

  • community x86_64: 1723 new and 1601 removed package(s)
  • core x86_64: 63 new and 61 removed package(s)
  • extra x86_64: 850 new and 953 removed package(s)
  • multilib x86_64: 67 new and 73 removed package(s)

Links

Posted in: general

Source

WP2Social Auto Publish Powered By : XYZScripts.com