LibreOffice is an open source and much powerful personal productivity office suit for Linux, Windows & Mac, that provides feature rich functions for word document, data processing, spreadsheets, presentation, drawing, Calc, Math and much more. LibreOffice has large number of satisfied users across the globe with almost 120million downloads as of now. It supports more than 110 languages and runs on all major operating systems.
The Document Foundation team proudly announced the first major release of LibreOffice 6.0.4 on May 09, 2018, is now available for all major platforms including Linux, Windows and Mac OS.
This new update features a large number of exciting new features, performance and improvements and is targeted to all kinds of users, but especially appealing for enterprise, early adopters and power users.
There are many other changes and features included in the newest LibreOffice 6.0.4 – for a complete list of new features, see the release announcement page.
LibreOffice 6.0.4 Requirements
- Kernel 2.6.18 or higher version
- glibc2 version 2.5 or higher version
- gtk version 2.10.4 or higher version
- Minimum 256MB and recommended 512MB RAM
- 1.55GB available Hard disk space
- Desktop (Gnome or KDE)
Install LibreOffice 6.0.4 on Linux
The installation instructions provided here are for LibreOffice 6.0.4 using language US English on a 64-Bitsystem. For 32-Bit systems, there will be minor differences in directory names, but the installation process is same and hope the installation instructions provide here are not so difficult.
Step 1: Downloading LibreOffice 6.0.4
Select the package for download based on your system bit (i.e. for a 32-bit or 64-bit) using Wget command.
For RHEL/CentOS/Fedora
# cd /tmp

---------------------------- On 32-bit Systems ----------------------------
# wget http://download.documentfoundation.org/libreoffice/stable/6.0.4/rpm/x86/LibreOffice_6.0.4_Linux_x86_rpm.tar.gz


---------------------------- On 64-bit Systems ----------------------------
# wget http://download.documentfoundation.org/libreoffice/stable/6.0.4/rpm/x86_64/LibreOffice_6.0.4_Linux_x86-64_rpm.tar.gz
[root@TecMint ~]# wget http://download.documentfoundation.org/libreoffice/stable/6.0.4/rpm/x86_64/LibreOffice_6.0.4_Linux_x86-64_rpm.tar.gz
--2018-05-09 01:11:08--  http://download.documentfoundation.org/libreoffice/stable/6.0.4/rpm/x86_64/LibreOffice_6.0.4_Linux_x86-64_rpm.tar.gz
Resolving download.documentfoundation.org (download.documentfoundation.org)... 89.238.68.185, 2a00:1828:a012:185::1
Connecting to download.documentfoundation.org (download.documentfoundation.org)|89.238.68.185|:80... connected.
HTTP request sent, awaiting response... 302 Found
Location: https://ftp.gwdg.de/pub/tdf/libreoffice/stable/6.0.4/rpm/x86_64/LibreOffice_6.0.4_Linux_x86-64_rpm.tar.gz [following]
--2018-05-09 01:11:09--  https://ftp.gwdg.de/pub/tdf/libreoffice/stable/6.0.4/rpm/x86_64/LibreOffice_6.0.4_Linux_x86-64_rpm.tar.gz
Resolving ftp.gwdg.de (ftp.gwdg.de)... 134.76.12.6, 2001:638:60f:110::1:2
Connecting to ftp.gwdg.de (ftp.gwdg.de)|134.76.12.6|:443... connected.
HTTP request sent, awaiting response... 200 OK
Length: 213537364 (204M) [application/octet-stream]
Saving to: ‘LibreOffice_6.0.4_Linux_x86-64_rpm.tar.gz’

100%[=================================================================================================================================>] 21,35,37,364  310KB/s   in 15m 35s

2018-02-01 01:26:46 (223 KB/s) - ‘LibreOffice_6.0.4_Linux_x86-64_rpm.tar.gz’ saved [213537364/213537364]
For Debian/Ubuntu/LinuxMint
---------------------------- On 32-bit Systems ----------------------------
$ wget http://download.documentfoundation.org/libreoffice/stable/6.0.4/deb/x86/LibreOffice_6.0.4_Linux_x86_deb.tar.gz

---------------------------- On 64-bit Systems ----------------------------
$ wget http://download.documentfoundation.org/libreoffice/stable/6.0.4/deb/x86_64/LibreOffice_6.0.4_Linux_x86-64_deb.tar.gz
tecmint  ~  wget http://download.documentfoundation.org/libreoffice/stable/6.0.4/deb/x86_64/LibreOffice_6.0.4_Linux_x86-64_deb.tar.gz
--2018-05-09 11:57:23--  http://download.documentfoundation.org/libreoffice/stable/6.0.4/deb/x86_64/LibreOffice_6.0.4_Linux_x86-64_deb.tar.gz
Resolving download.documentfoundation.org (download.documentfoundation.org)... 89.238.68.185
Connecting to download.documentfoundation.org (download.documentfoundation.org)|89.238.68.185|:80... connected.
HTTP request sent, awaiting response... 302 Found
Location: https://ftp.gwdg.de/pub/tdf/libreoffice/stable/6.0.4/deb/x86_64/LibreOffice_6.0.4_Linux_x86-64_deb.tar.gz [following]
--2018-05-09 11:57:23--  https://ftp.gwdg.de/pub/tdf/libreoffice/stable/6.0.4/deb/x86_64/LibreOffice_6.0.4_Linux_x86-64_deb.tar.gz
Resolving ftp.gwdg.de (ftp.gwdg.de)... 134.76.12.6
Connecting to ftp.gwdg.de (ftp.gwdg.de)|134.76.12.6|:443... connected.
HTTP request sent, awaiting response... 200 OK
Length: 213964181 (204M) [application/octet-stream]
Saving to: ‘LibreOffice_6.0.4_Linux_x86-64_deb.tar.gz’

LibreOffice_6.0.0_Linux_x86-64_deb.tar.gz  100%[========================================================================================>] 204.05M   319KB/s    in 15m 17s

2018-02-01 12:12:41 (228 KB/s) - ‘LibreOffice_6.0.4_Linux_x86-64_deb.tar.gz’ saved [213964181/213964181]
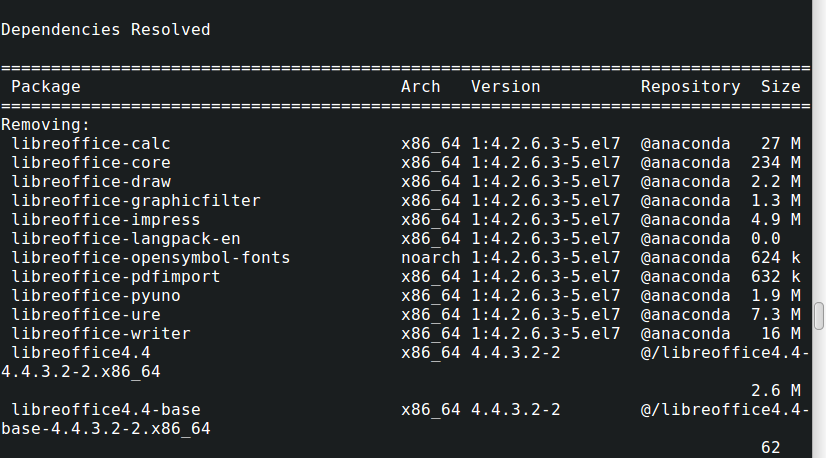
Step 2: Removing Old LibreOffice or OpenOffice Versions
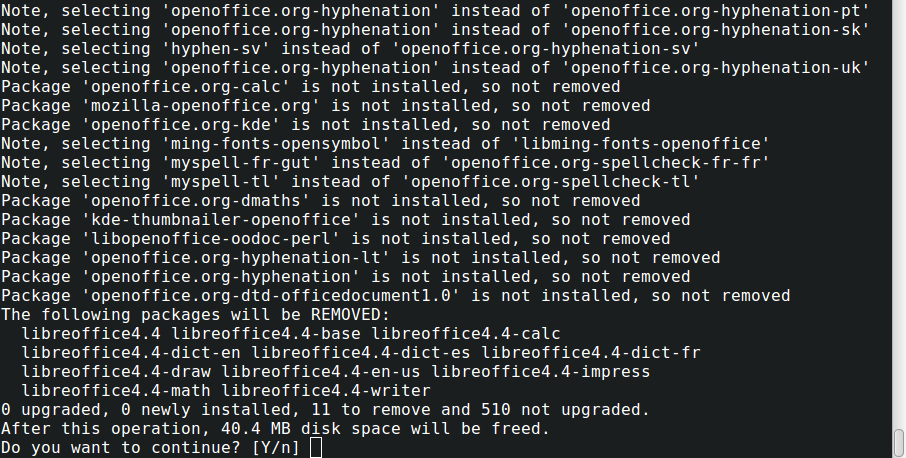
If any previously installed LibreOffice or OpenOffice versions you have, remove it using following command.
# yum remove openoffice* libreoffice* [on RedHat based Systems]
Remove Old LibreOffice 4 on CentOS
$ sudo apt-get remove openoffice* libreoffice* [On Debian based Systems]
Remove LibreOffice 4 on Ubuntu
Step 3: Extracting LibreOffice 6.0.4 Package
After downloading the LibreOffice 6.0.4 package, use tar command to extract it under /tmp directory or in a directory of your choice.
On RHEL/CentOS/Fedora
# tar -xvf LibreOffice_6.0.4_Linux_x86_rpm.tar.gz		[On 32-Bit Systems]
# tar -xvf LibreOffice_6.0.4_Linux_x86-64_rpm.tar.gz	        [On 64-Bit Systems]
On Debian/Ubuntu/Linux Mint
$ tar -xvf LibreOffice_6.0.4_Linux_x86_deb.tar.gz		[On 32-Bit Systems]
$ tar -xvf LibreOffice_6.0.4_Linux_x86-64_deb.tar.gz		[On 64-Bit Systems]
Step 4: Installing LibreOffice 6.0.4 Package
After extracting the package, you will get a directory and under this there will be a sub-directory called RPMS. Now, run the following command to install it.
On RHEL/CentOS/Fedora
## For 32 Bit OS ##
# cd /tmp/LibreOffice_6.0.4.2_Linux_x86_rpm/RPMS/
# yum localinstall *.rpm
OR
# dnf install *.rpm    [On Fedora 23+ versions]

## For 64 Bit OS ##
# cd /tmp/LibreOffice_6.0.4.2_Linux_x86-64_rpm/RPMS/
# yum localinstall *.rpm
OR
# dnf install *.rpm    [On Fedora 23+ versions]
[root@localhost RPMS]# yum localinstall *.rpm
Dependencies Resolved

============================================================================================================================================================================
 Package                                                  Arch          Version            Repository                                                                  Size
============================================================================================================================================================================
Installing:
 libobasis6.0-base                                        x86_64        6.0.4.2-2          /libobasis6.0-base-6.0.4.2-2.x86_64                                        7.6 M
 libobasis6.0-calc                                        x86_64        6.0.4.2-2          /libobasis6.0-calc-6.0.4.2-2.x86_64                                         29 M
 libobasis6.0-core                                        x86_64        6.0.4.2-2          /libobasis6.0-core-6.0.4.2-2.x86_64                                        267 M
 libobasis6.0-draw                                        x86_64        6.0.4.2-2          /libobasis6.0-draw-6.0.4.2-2.x86_64                                         48 k
 libobasis6.0-en-US                                       x86_64        6.0.4.2-2          /libobasis6.0-en-US-6.0.4.2-2.x86_64                                       164 k
 libobasis6.0-extension-beanshell-script-provider         x86_64        6.0.4.2-2          /libobasis6.0-extension-beanshell-script-provider-6.0.4.2-2.x86_64         398 k
 libobasis6.0-extension-javascript-script-provider        x86_64        6.0.4.2-2          /libobasis6.0-extension-javascript-script-provider-6.0.4.2-2.x86_64        626 k
 libobasis6.0-extension-mediawiki-publisher               x86_64        6.0.4.2-2          /libobasis6.0-extension-mediawiki-publisher-6.0.4.2-2.x86_64               4.3 M
 libobasis6.0-extension-nlpsolver                         x86_64        6.0.4.2-2          /libobasis6.0-extension-nlpsolver-6.0.4.2-2.x86_64                         2.1 M
 libobasis6.0-extension-pdf-import                        x86_64        6.0.4.2-2          /libobasis6.0-extension-pdf-import-6.0.4.2-2.x86_64                        2.2 M
 libobasis6.0-extension-report-builder                    x86_64        6.0.4.2-2          /libobasis6.0-extension-report-builder-6.0.4.2-2.x86_64                    6.0 M
 libobasis6.0-firebird                                    x86_64        6.0.4.2-2          /libobasis6.0-firebird-6.0.4.2-2.x86_64                                     11 M
 libobasis6.0-gnome-integration                           x86_64        6.0.4.2-2          /libobasis6.0-gnome-integration-6.0.4.2-2.x86_64                           1.2 M
 libobasis6.0-graphicfilter                               x86_64        6.0.4.2-2          /libobasis6.0-graphicfilter-6.0.4.2-2.x86_64                               4.2 M
 libobasis6.0-images                                      x86_64        6.0.4.2-2          /libobasis6.0-images-6.0.4.2-2.x86_64                                       18 M
 libobasis6.0-impress                                     x86_64        6.0.4.2-2          /libobasis6.0-impress-6.0.4.2-2.x86_64                                     2.2 M
 libobasis6.0-kde-integration                             x86_64        6.0.4.2-2          /libobasis6.0-kde-integration-6.0.4.2-2.x86_64                             238 k
 libobasis6.0-librelogo                                   x86_64        6.0.4.2-2          /libobasis6.0-librelogo-6.0.4.2-2.x86_64                                   741 k
 libobasis6.0-math                                        x86_64        6.0.4.2-2          /libobasis6.0-math-6.0.4.2-2.x86_64                                        1.6 M
 libobasis6.0-ogltrans                                    x86_64        6.0.4.2-2          /libobasis6.0-ogltrans-6.0.4.2-2.x86_64                                    298 k
 libobasis6.0-onlineupdate                                x86_64        6.0.4.2-2          /libobasis6.0-onlineupdate-6.0.4.2-2.x86_64                                433 k
 libobasis6.0-ooofonts                                    x86_64        6.0.4.2-2          /libobasis6.0-ooofonts-6.0.4.2-2.x86_64                                     67 M
 libobasis6.0-ooolinguistic                               x86_64        6.0.4.2-2          /libobasis6.0-ooolinguistic-6.0.4.2-2.x86_64                               1.4 k
 libobasis6.0-postgresql-sdbc                             x86_64        6.0.4.2-2          /libobasis6.0-postgresql-sdbc-6.0.4.2-2.x86_64                             3.5 M
 libobasis6.0-python-script-provider                      x86_64        6.0.4.2-2          /libobasis6.0-python-script-provider-6.0.4.2-2.x86_64                       41 k
 libobasis6.0-pyuno                                       x86_64        6.0.4.2-2          /libobasis6.0-pyuno-6.0.4.2-2.x86_64                                        22 M
 libobasis6.0-writer                                      x86_64        6.0.4.2-2          /libobasis6.0-writer-6.0.4.2-2.x86_64                                       16 M
 libobasis6.0-xsltfilter                                  x86_64        6.0.4.2-2          /libobasis6.0-xsltfilter-6.0.4.2-2.x86_64                                  4.3 M
 libreoffice6.0                                           x86_64        6.0.4.2-2          /libreoffice6.0-6.0.4.2-2.x86_64                                           4.5 M
 libreoffice6.0-base                                      x86_64        6.0.4.2-2          /libreoffice6.0-base-6.0.4.2-2.x86_64                                       63
 libreoffice6.0-calc                                      x86_64        6.0.4.2-2          /libreoffice6.0-calc-6.0.4.2-2.x86_64                                       63
 libreoffice6.0-dict-en                                   x86_64        6.0.4.2-2          /libreoffice6.0-dict-en-6.0.4.2-2.x86_64                                    24 M
 libreoffice6.0-dict-es                                   x86_64        6.0.4.2-2          /libreoffice6.0-dict-es-6.0.4.2-2.x86_64                                   4.1 M
 libreoffice6.0-dict-fr                                   x86_64        6.0.4.2-2          /libreoffice6.0-dict-fr-6.0.4.2-2.x86_64                                   6.4 M
 libreoffice6.0-draw                                      x86_64        6.0.4.2-2          /libreoffice6.0-draw-6.0.4.2-2.x86_64                                       63
 libreoffice6.0-en-US                                     x86_64        6.0.4.2-2          /libreoffice6.0-en-US-6.0.4.2-2.x86_64                                      16 k
 libreoffice6.0-freedesktop-menus                         noarch        6.0.4.2-2            /libreoffice6.0-freedesktop-menus-6.0.4.2-2.noarch                            30 M
 libreoffice6.0-impress                                   x86_64        6.0.4.2-2          /libreoffice6.0-impress-6.0.4.2-2.x86_64                                    66
 libreoffice6.0-math                                      x86_64        6.0.4.2-2          /libreoffice6.0-math-6.0.4.2-2.x86_64                                       63
 libreoffice6.0-ure                                       x86_64        6.0.4.2-2          /libreoffice6.0-ure-6.0.4.2-2.x86_64                                        38 M
 libreoffice6.0-writer                                    x86_64        6.0.4.2-2          /libreoffice6.0-writer-6.0.4.2-2.x86_64                                     65

Transaction Summary
============================================================================================================================================================================
Install  41 Packages

Total size: 579 M
Installed size: 579 M
Is this ok [y/d/N]: y
On Debian/Ubuntu/Linux Mint
## For 32 Bit OS ##
$ cd /tmp/LibreOffice_6.0.4.2_Linux_x86_deb/DEBS/
$ sudo dpkg -i *.deb

## For 64 Bit OS ##
$ cd /tmp/LibreOffice_6.0.4.2_Linux_x86-64_deb/DEBS/
$ sudo dpkg -i *.deb
tecmint@TecMint /tmp/LibreOffice_6.0.4.2_Linux_x86-64_deb/DEBS $ sudo dpkg -i *.deb
Selecting previously unselected package libobasis6.0-base.
(Reading database ... 263169 files and directories currently installed.)
Preparing to unpack libobasis6.0-base_6.0.4.2-2_amd64.deb ...
Unpacking libobasis6.0-base (6.0.4.2-2) ...
Selecting previously unselected package libobasis6.0-calc.
Preparing to unpack libobasis6.0-calc_6.0.4.2-2_amd64.deb ...
Unpacking libobasis6.0-calc (6.0.4.2-2) ...
Selecting previously unselected package libobasis6.0-core.
Preparing to unpack libobasis6.0-core_6.0.4.2-2_amd64.deb ...
Unpacking libobasis6.0-core (6.0.4.2-2) ...
...
Step 5: Starting LibreOffice 6.0.4
Once the installation process completes you will have LibreOffice icons in your desktop under Applications –> Office menu or start the application by executing the following command on the terminal.
# libreoffice6.0
Step 6: Screenshot of LibreOffice 6.0.4
Please see the attached screenshot of LibreOffice 6.0.4 application under my CentOS 7.0.
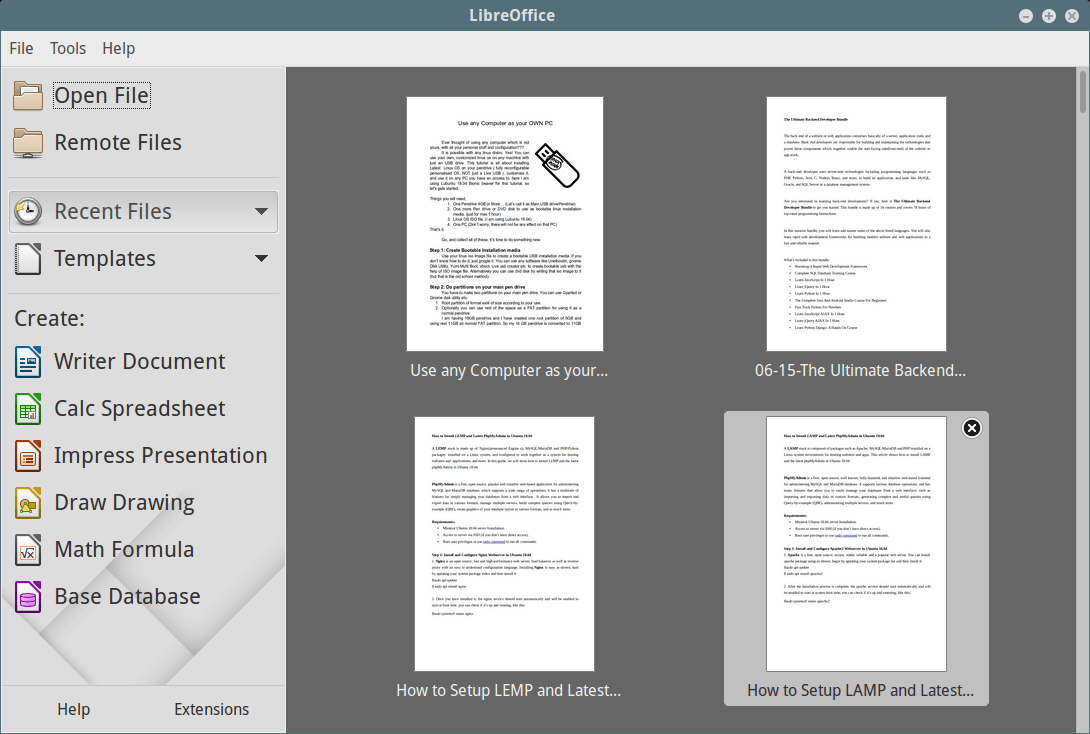
LibreOffice 6.0.4 Running on CentOS 7
Step 7: Installing a Language Pack
If you would like to install LibreOffice in your preferred language, you should select your language pack for installation. The installation instructions can be fount at Language Pack section.