Alfresco is an open source ECM system (Enterprise Content Management) written in Java which provides electronic management, collaboration and business control.

Install Alfresco Community Edition in Linux
This guide will cover how to install and configure Alfresco Community Edition on RHEL/CentOS 7/6, Debian 8and Ubuntu systems with Nginx server as a frontend web server for the application.
Requirements
As for the minimum system requirements, Alfresco needs a machine with at least 4 GB of RAM and a 64-bit Operating System.
Step 1: Install Alfresco Community Edition
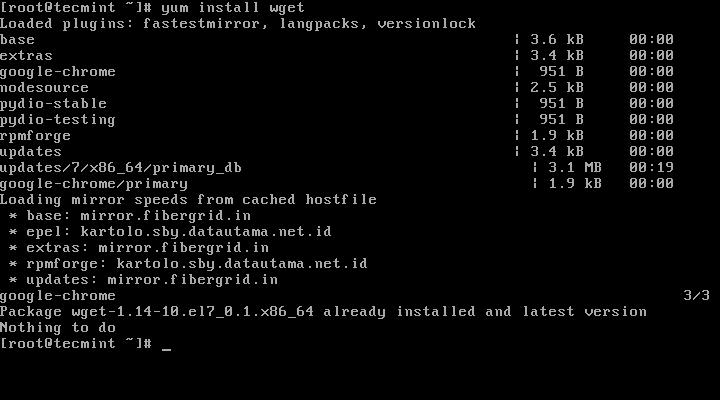
1. Before proceeding with Alfresco installation first assure that wget utility is installed on your machine by issuing the below command with root privileges or from root account.
# yum install wget
# apt-get install wget
Install Wget in Linux
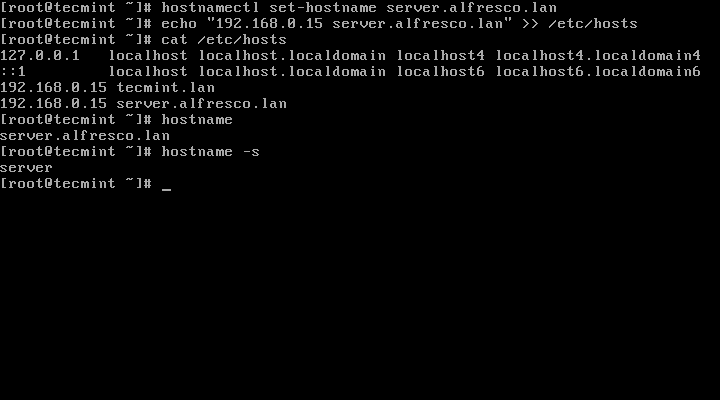
2. Next, setup your system hostname and assure that local resolution points to your server IP Address by issuing the following commands:
# hostnamectl set-hostname server.alfresco.lan
# echo “192.168.0.40 server.alfresco.lan” >> /etc/hosts
Set Hostname in Linux
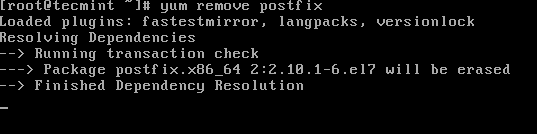
3. Remove any MTA from the machine (in this case Postfix Mail server) by issuing the below command:
# yum remove postfix
# apt-get remove postfix
Remove Postfix in Linux
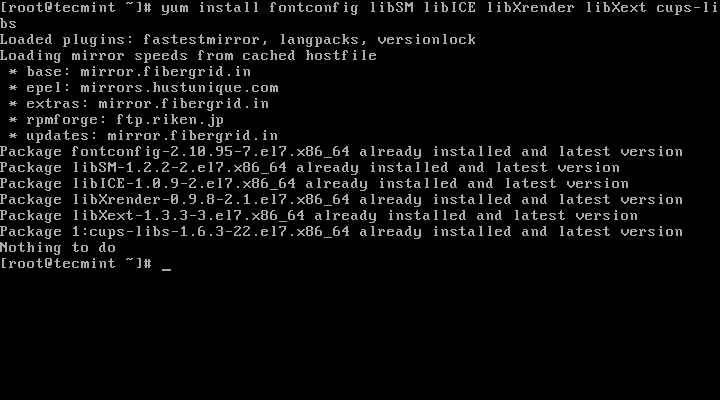
4. Install the following dependencies required by Alfresco software in order to run properly:
# yum install fontconfig libSM libICE libXrender libXext cups-libs
# apt-get install libice6 libsm6 libxt6 libxrender1 libfontconfig1 libcups2
Install Alfresco Dependencies
5. Next, go to Alfresco Community Edition repository page hosted on sourceforge.net portal and grab the latest binary version (i.e. alfresco-community-5.0.d-installer-linux-x64.bin) for Linux using wget utility.
# wget http://nchc.dl.sourceforge.net/project/alfresco/Alfresco%205.0.d%20Community/alfresco-community-5.0.d-installer-linux-x64.bin
6. After the binary file download finishes, issue the following command in order to grant execution permissions for the file and run alfresco installer.
# chmod +x alfresco-community-5.0.d-installer-linux-x64.bin
# ./alfresco-community-5.0.d-installer-linux-x64.bin
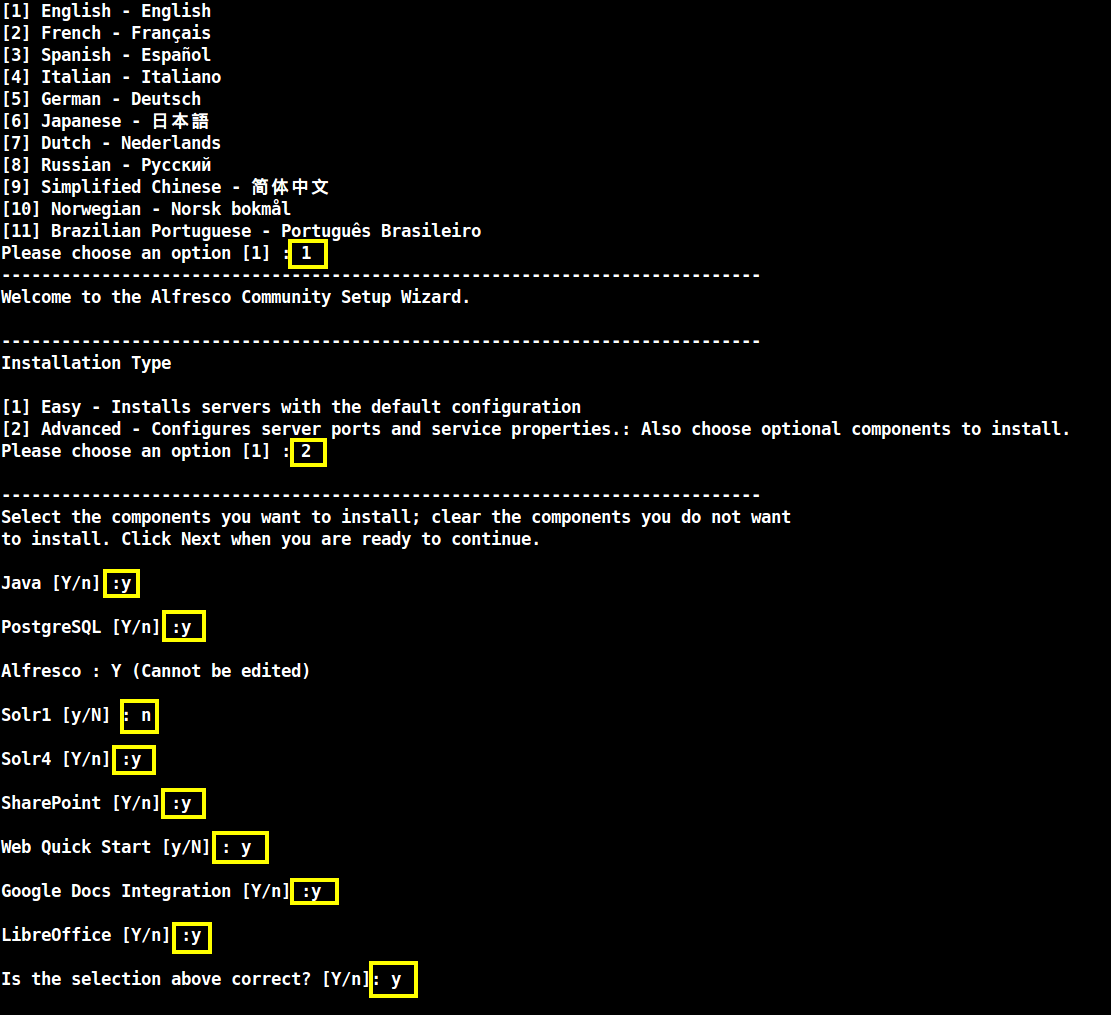
7. After the installation process starts, select the language and continue the installation process by using the below installation wizard as a guide to configure Alfresco:
[root@server ~]# ./alfresco-community-5.0.d-installer-linux-x64.bin
Language Selection

Please select the installation language
[1] English - English
[2] French - Français
[3] Spanish - Español
[4] Italian - Italiano
[5] German - Deutsch
[6] Japanese - 日本語
[7] Dutch - Nederlands
[8] Russian - Русский
[9] Simplified Chinese - 简体中文
[10] Norwegian - Norsk bokmål
[11] Brazilian Portuguese - Português Brasileiro
Please choose an option [1] : 1 ---------------------------------------------------------------------------- Welcome to the Alfresco Community Setup Wizard. ---------------------------------------------------------------------------- Installation Type [1] Easy - Installs servers with the default configuration [2] Advanced - Configures server ports and service properties.: Also choose optional components to install. Please choose an option [1] : 2 ---------------------------------------------------------------------------- Select the components you want to install; clear the components you do not want to install. Click Next when you are ready to continue. Java [Y/n] :y PostgreSQL [Y/n] :y Alfresco : Y (Cannot be edited) Solr1 [y/N] : n Solr4 [Y/n] :y SharePoint [Y/n] :y Web Quick Start [y/N] : y Google Docs Integration [Y/n] :y LibreOffice [Y/n] :y Is the selection above correct? [Y/n]: y
Installation of Alfresco Community Edition
Alfresco Installation Wizard Continues….
----------------------------------------------------------------------------
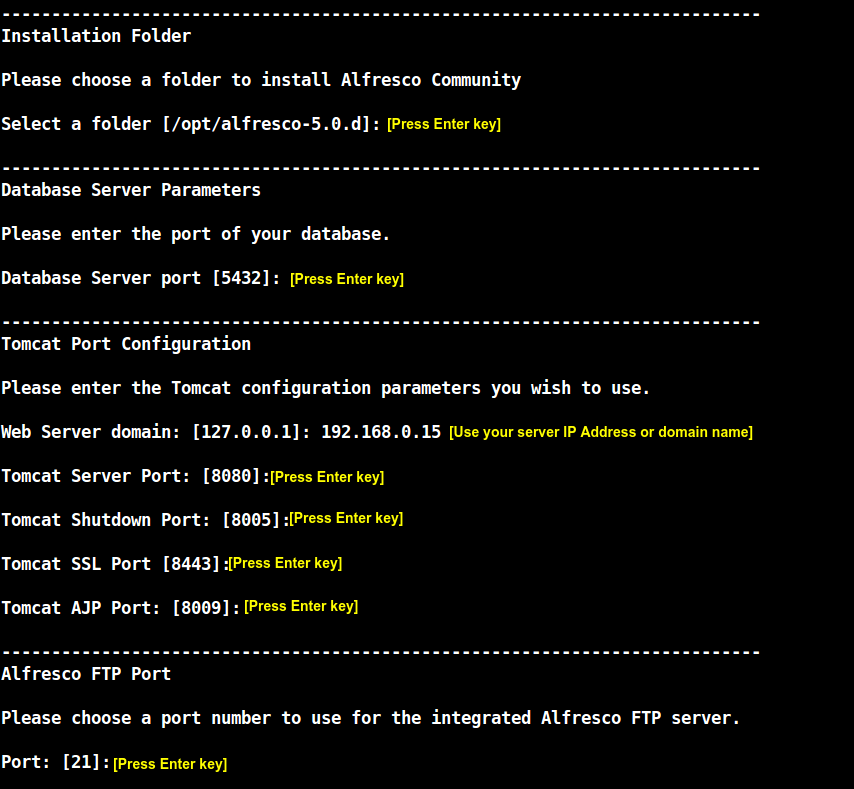
Installation Folder
Please choose a folder to install Alfresco Community
Select a folder [/opt/alfresco-5.0.d]: [Press Enter key] ---------------------------------------------------------------------------- Database Server Parameters Please enter the port of your database. Database Server port [5432]: [Press Enter key] ---------------------------------------------------------------------------- Tomcat Port Configuration Please enter the Tomcat configuration parameters you wish to use. Web Server domain: [127.0.0.1]: 192.168.0.15 Tomcat Server Port: [8080]: [Press Enter key Tomcat Shutdown Port: [8005]: [Press Enter key Tomcat SSL Port [8443]: [Press Enter key Tomcat AJP Port: [8009]: [Press Enter key ---------------------------------------------------------------------------- Alfresco FTP Port Please choose a port number to use for the integrated Alfresco FTP server. Port: [21]: [Press Enter key
Alfresco Installation Wizard
Alfresco Installation Continues…
----------------------------------------------------------------------------
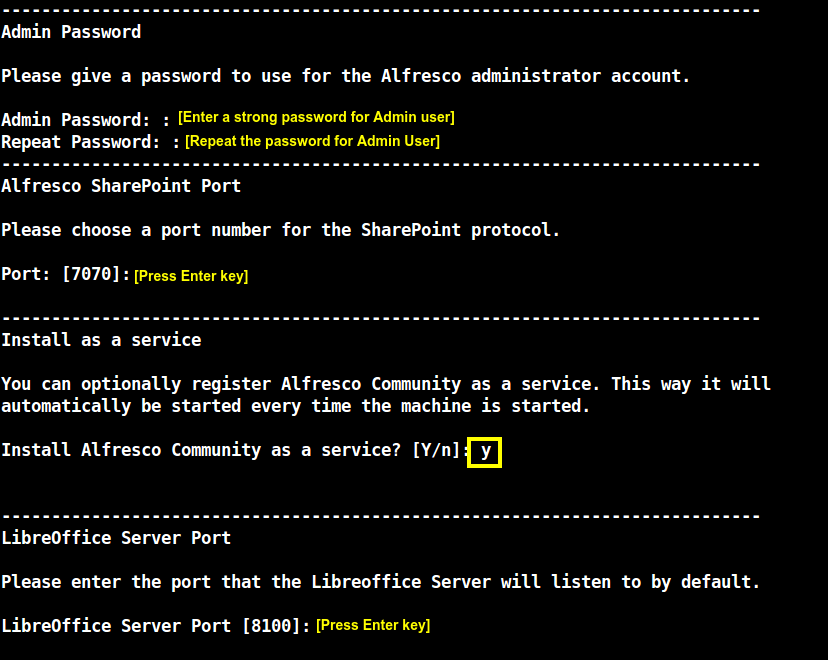
Admin Password
Please give a password to use for the Alfresco administrator account.
Admin Password: :[Enter a strong password for Admin user] Repeat Password: :[Repeat the password for Admin User] ---------------------------------------------------------------------------- Alfresco SharePoint Port Please choose a port number for the SharePoint protocol. Port: [7070]: [Press Enter key] ---------------------------------------------------------------------------- Install as a service You can optionally register Alfresco Community as a service. This way it will automatically be started every time the machine is started. Install Alfresco Community as a service? [Y/n]: y ---------------------------------------------------------------------------- LibreOffice Server Port Please enter the port that the Libreoffice Server will listen to by default. LibreOffice Server Port [8100]: [Press Enter key] ----------------------------------------------------------------------------
Alfresco Installation Continues
Alfresco Installation Setup Continues..
----------------------------------------------------------------------------
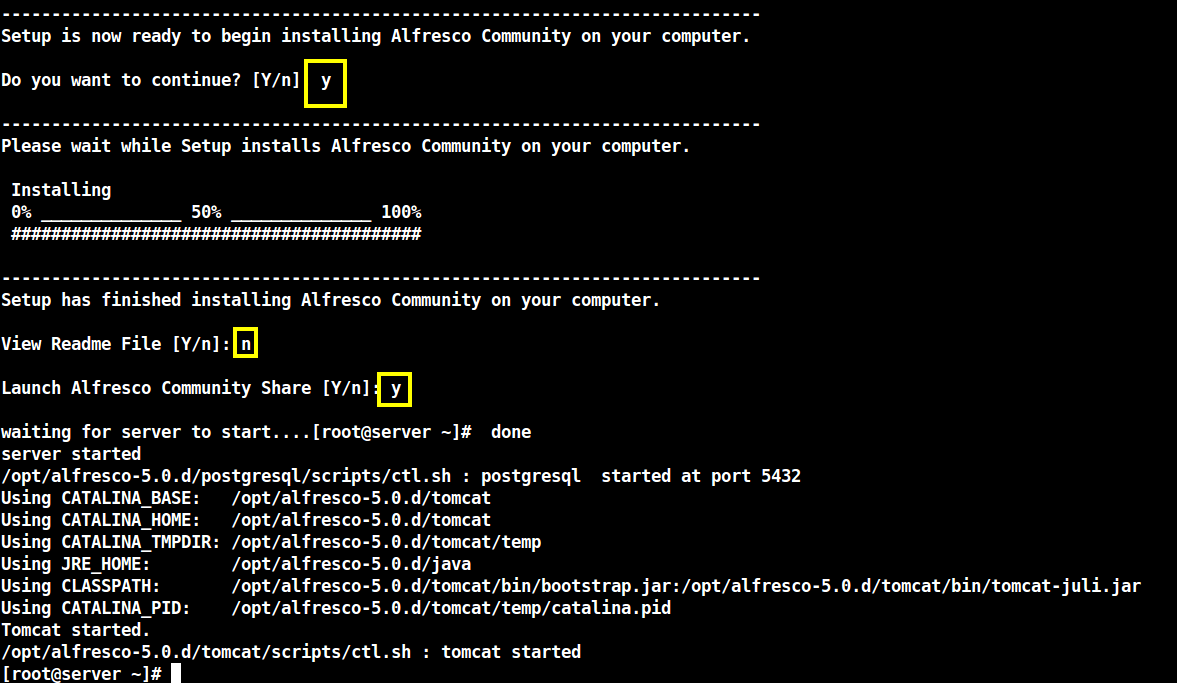
Setup is now ready to begin installing Alfresco Community on your computer.
Do you want to continue? [Y/n]: y ---------------------------------------------------------------------------- Please wait while Setup installs Alfresco Community on your computer. Installing 0% ______________ 50% ______________ 100% ######################################### ---------------------------------------------------------------------------- Setup has finished installing Alfresco Community on your computer. View Readme File [Y/n]: n Launch Alfresco Community Share [Y/n]: y waiting for server to start....[root@server ~]# done server started /opt/alfresco-5.0.d/postgresql/scripts/ctl.sh : postgresql started at port 5432 Using CATALINA_BASE: /opt/alfresco-5.0.d/tomcat Using CATALINA_HOME: /opt/alfresco-5.0.d/tomcat Using CATALINA_TMPDIR: /opt/alfresco-5.0.d/tomcat/temp Using JRE_HOME: /opt/alfresco-5.0.d/java Using CLASSPATH: /opt/alfresco-5.0.d/tomcat/bin/bootstrap.jar:/opt/alfresco-5.0.d/tomcat/bin/tomcat-juli.jar Using CATALINA_PID: /opt/alfresco-5.0.d/tomcat/temp/catalina.pid Tomcat started. /opt/alfresco-5.0.d/tomcat/scripts/ctl.sh : tomcat started
Alfresco Installation Setup
8. After the installation process finishes and Alfresco services are started issue the below commands in order to open the following firewall ports to allow external hosts in your network to connect to the web application.
# firewall-cmd --add-port=8080/tcp -permanent
# firewall-cmd --add-port=8443/tcp -permanent
# firewall-cmd --add-port=7070/tcp -permanent
# firewall-cmd --reload
In case you need to add other firewall rules to open ports in order to access custom Alfresco services issue the ss command to get a list of all the services running on your machine.
# ss -tulpn
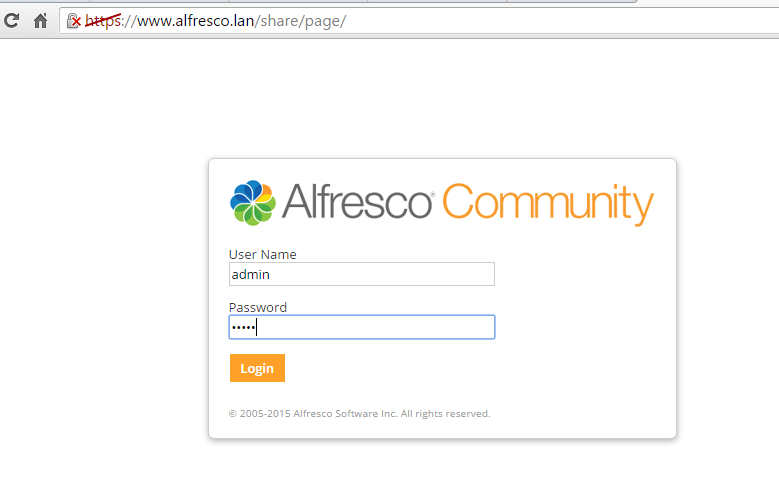
9. To access Alfresco web services, open a browser and use the following URLs (replace the IP Address or domain accordingly). Login with admin user and the password configured for Admin through the installation process.
http://IP-or-domain.tld:8080/share/
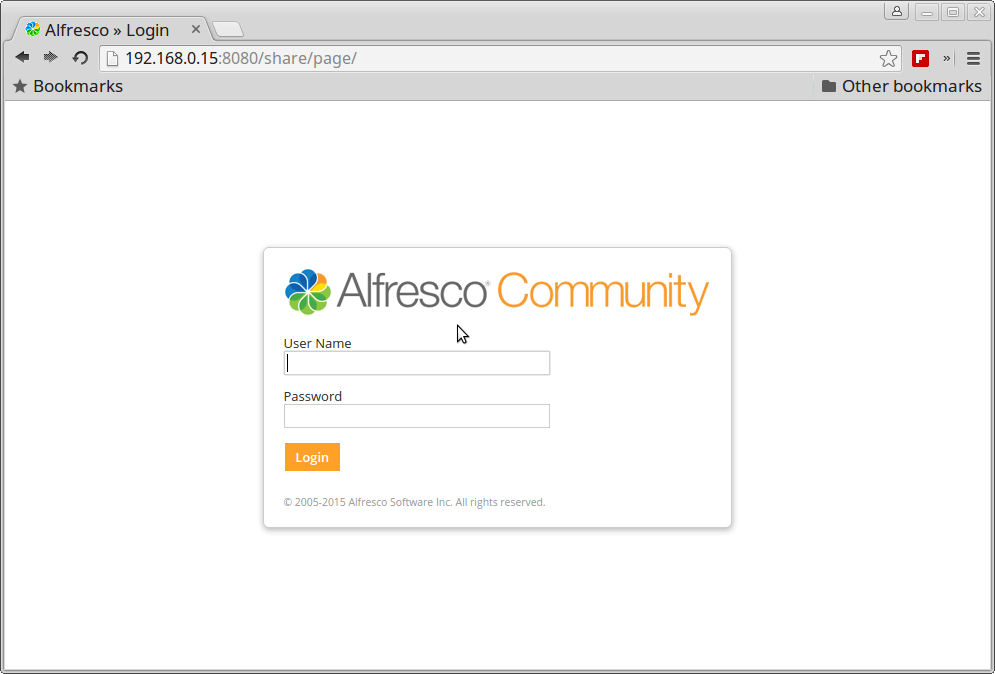
Alfresco Community Login
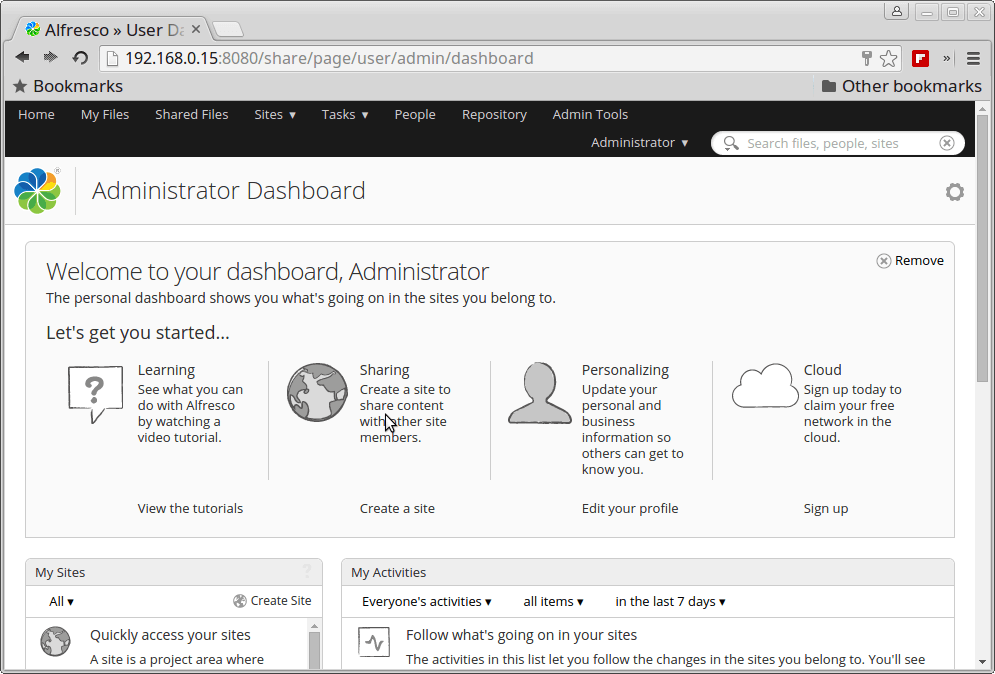
Alfresco Administrator Dashboard
http://IP-or-domain.tld:8080/alfresco/
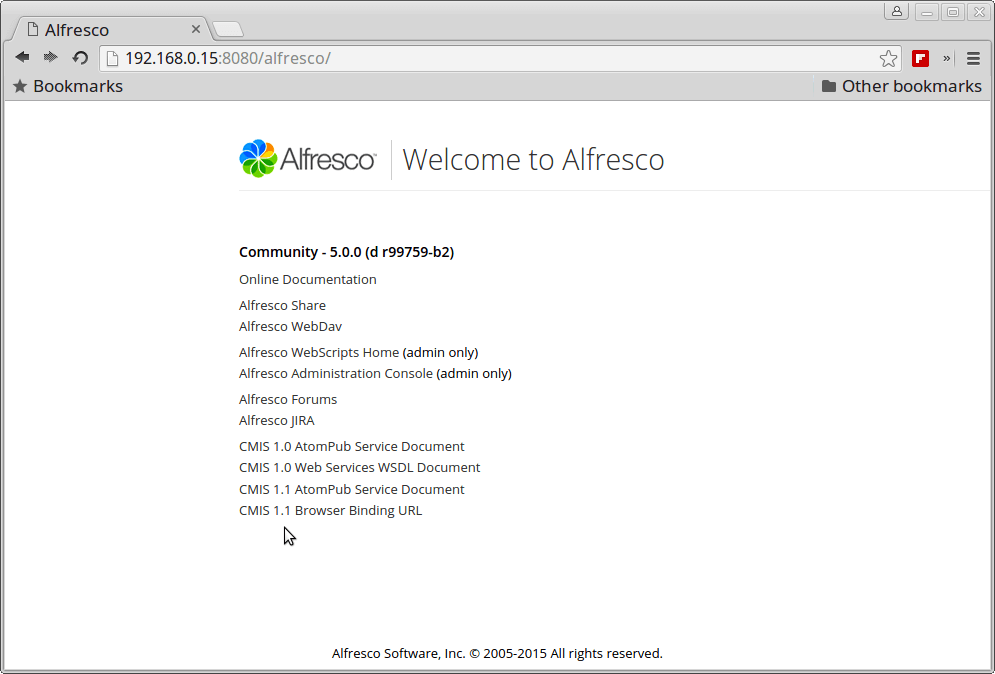
Alfresco Documentation
For WebDAV.
http://IP-or-domain.tld:8080/alfresco/webdav
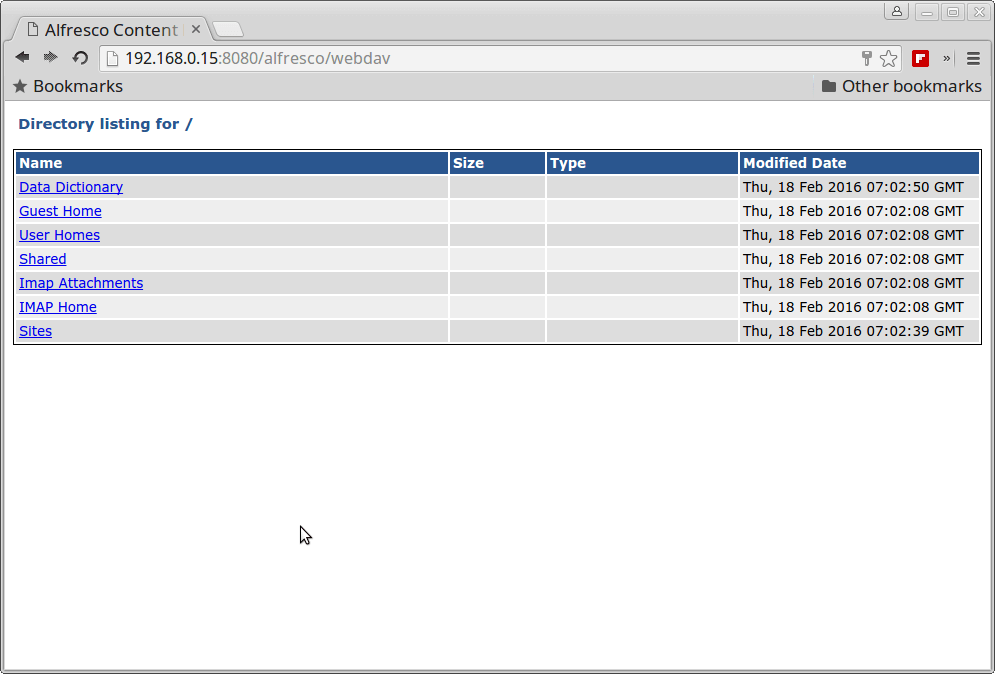
Alfresco WebDav Directory Listing
For HTTPS accept the security exception.
https://IP-or-domain.tld:8443/share/
Alfresco SharePoint Module with Microsoft.
http://IP-or-domain.tld:7070/
Step 2: Configure Nginx as Frontend Web Server for Alfresco
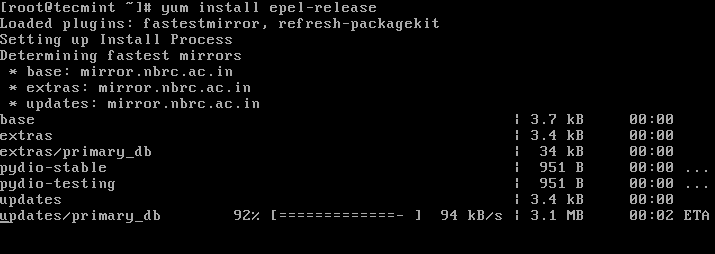
10. In order to install Nginx server on the system, first add Epel Repositories on CentOS/RHEL by issuing the below command:
# yum install epel-release
11. After Epel repos are added into the system proceed with Nginx web server installation by issuing the following command:
# yum install nginx       [On RHEL/CentOS Systems]
# apt-get install nginx   [On Debian/Ubuntu Systems]
12. On the next step open Nginx configuration file from /etc/nginx/nginx.conf with a text editor and make the following changes:
location / {
        proxy_pass http://127.0.0.1:8080;
        proxy_redirect off;
        proxy_set_header Host $host;
        proxy_set_header X-Real-IP $remote_addr;
        proxy_set_header X-Forwarded-For $proxy_add_x_forwarded_for;
        proxy_set_header X-Forwarded-Proto $scheme;
    }
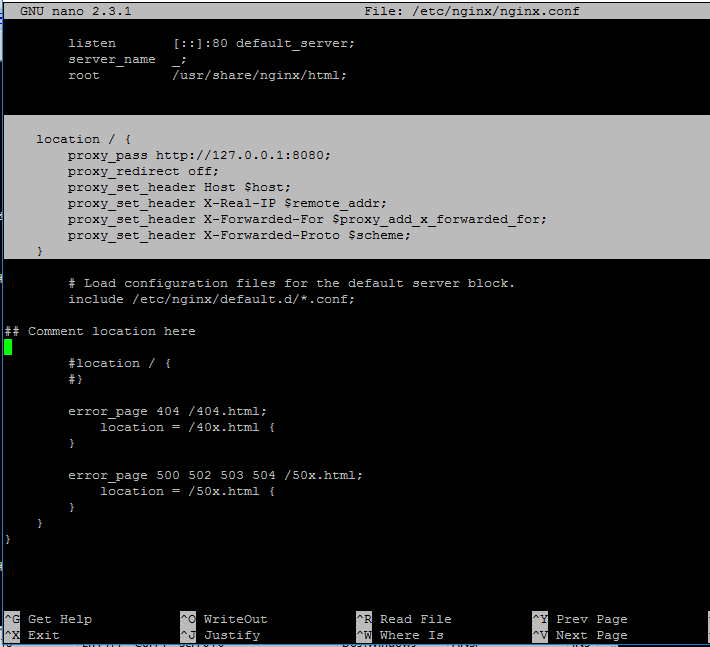
Configure Nginx for Alfresco
Go below and make sure you comment the second location statement by placing a # in front of the following lines:
#location / {
#        }
13. After you’re done, save and close Nginx configuration file and restart daemon to reflect change by issuing the following command:
# systemctl restart nginx.service
14. In order to access Alfresco web interface add a new firewall rule to open port 80 on your machine and navigate to the below URL. Also, make sure Selinux policy is disabled on RHEL/CentOS systems.
# firewall-cmd --add-service=http -permanent
# firewall-cmd --reload
# setenforce 0
To completely disable Selinux policy on the system, open /etc/selinux/config file and set the line SELINUX from enforcing to disabled.
15. Now you can access Alfresco through Nginx.
 http://IP-or-domain.tld/share/
 http://IP-or-domain.tld/alfresco/
 http://IP-or-domain.tld/alfresco/webdav
15. In case you want to securely visit Alfresco web interface through Nginx proxy with SSL, create a Self-Signed Certificate for Nginx on /etc/nginx/ssl/ directory and fill the certificate with your custom settings as illustrated on below screenshot:
# mkdir /etc/nginx/ssl
# cd /etc/nginx/ssl/
# openssl req -x509 -nodes -days 365 -newkey rsa:2048 -keyout alfresco.key -out alfresco.crt
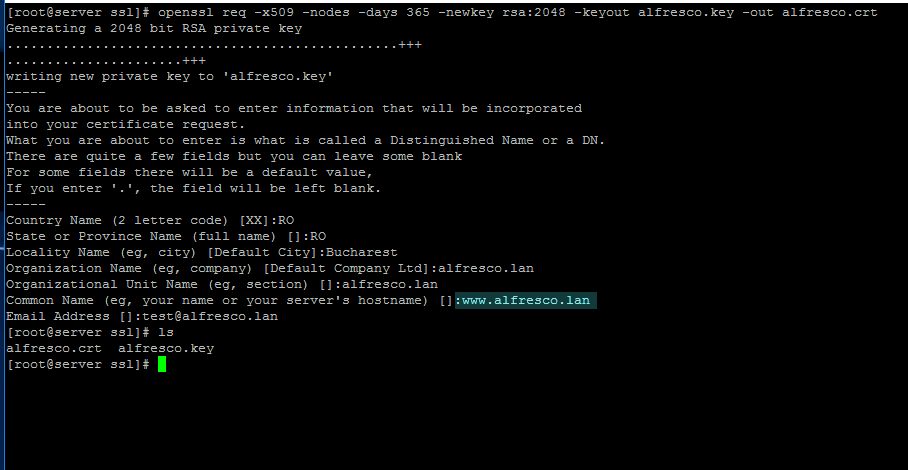
Create SSL Certificate for Alfresco
Pay attention to Certificate Common Name to match your domain hostname.
17. Next, open Nginx configuration file for editing and add the following block before the last closing curly bracket (the } symbol).
# vi /etc/nginx/nginx.conf
Nginx SSL block excerpt:
server {
    listen 443;
    server_name _;

    ssl_certificate           /etc/nginx/ssl/alfresco.crt;
    ssl_certificate_key       /etc/nginx/ssl/alfresco.key;

    ssl on;
    ssl_session_cache  builtin:1000  shared:SSL:10m;
    ssl_protocols  TLSv1 TLSv1.1 TLSv1.2;
    ssl_ciphers HIGH:!aNULL:!eNULL:!EXPORT:!CAMELLIA:!DES:!MD5:!PSK:!RC4;
    ssl_prefer_server_ciphers on;

    access_log            /var/log/nginx/ssl.access.log;

      location / {
        proxy_pass http://127.0.0.1:8080;
        proxy_redirect off;
        proxy_set_header Host $host;
        proxy_set_header X-Real-IP $remote_addr;
        proxy_set_header X-Forwarded-For $proxy_add_x_forwarded_for;
        proxy_set_header X-Forwarded-Proto $scheme;
    }
## This is the last curly bracket before editing the file.
  }
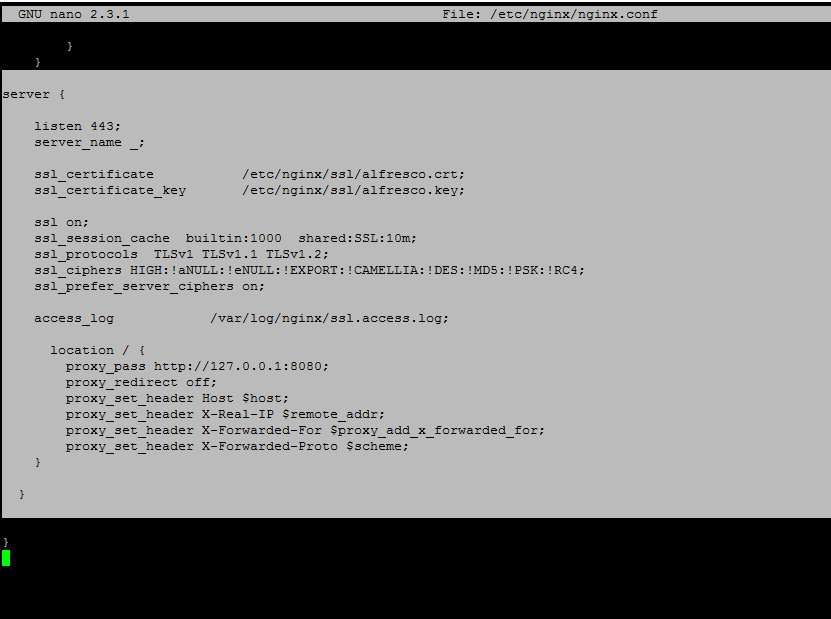
Nginx SSL Configuration for Alfresco
18. Finally, restart Nginx daemon to apply changes, add a new firewall rule for 443 port.
# systemctl restart nginx
# firewall-cmd -add-service=https --permanent
# firewall-cmd --reload
and instruct the browser to your domain URL using the HTTPS protocol.
https://IP_or_domain.tld/share/
https://IP_or_domain.tld/alfresco/
Configure Alfresco as Domain
19. In order to enable Alfresco and Nginx daemons system-wide run the below command:
# systemctl enable nginx alfresco
That’s all! Alfresco offers integration with MS Office and LibreOffice via CIFs protocol providing a familiar workflow for users.
Source