How to Install and Configure ‘NethServer’ – A CentOS Based All-in-One Linux Distribution

NethServer is an Open Source powerful and secured Linux distribution, build on top of CentOS 6.6, designed for small offices and medium enterprises. Build-in with a large number of modules which can be simply installed through its web interface, NethServer can turn your box into a Mail server, FTP server, Web server, Web Filter, Firewall, VPN server, File Cloud server, Windows File Sharing server or Email Groupware server based on SOGo in no time just by hitting a few clicks.

Released in two editions, Community Edition, which is for free and Enterprise Edition, which comes with a paid support, this tutorial will cover the installation procedure of NethServer Free Edition (version 6.6) from an ISO image, although, it can, also, be installed from repositories on a pre-installed CentOS system using yumcommand to download software packages from web.

For example, if you wish to install NethServer on a pre-installed CentOS system, you can simply execute below commands to transform your current CentOS into NethServer.

# yum localinstall -y http://mirror.nethserver.org/nethserver/nethserver-release-6.6.rpm
# nethserver-install

To install additional nethserver modules, mention the name of the module as a parameter to the install script as shown below.

# nethserver-install nethserver-mail nethserver-nut

As I said above, this guide will only show installation procedure of NethServer Free Edition from an ISO image…

Download NethServer

NethServer ISO Image which can be obtained using the following download link:

  1. http://www.nethserver.org/getting-started-with-nethserver/

Before starting the installation procedure be aware that using this method based on CD ISO Image will format and destroy all your previous data from all your machine hard-disks, so, as a security measure make sure you remove all unwanted disk drives and keep only the disks where the system will be installed.

After the installation finishes you can re-attach the rest of the disks and add them into your NethServer LVM partitions (VolGroup-lv_root and VolGroup-lv-swap).

Step 1: Installation of NethServer

1. After you have downloaded the ISO Image, burn it to a CD or create a bootable USB drive, place the CD/USB into your machine CD drive / USB port and instruct your machine BIOS to boot from CD/USB. In order to boot from CD/USB, press F12 key while the BIOS is loading or consult your motherboard manual for the necessary boot key.

2. After the BIOS boot sequence completes, the first screen of NethServer should appear on your screen. Choose NethServer interactive install and press Enter key to continue further.

NethServer Boot Menu

NethServer Boot Menu

3. Wait a few seconds for the installer to load and a Welcome screen should appear. Form this screen choose your favorite Language, go to Next button using TAB or arrow keys and press again Enter to continue.

Choose Installation Language

Choose Installation Language

4. On the next screen choose your Network Interface for the internal network (Green), through which you will administer the server, then jump to Next using Tab key and press Enter to move to the interface and configure your network settings accordingly. When you’re done with network IP settings, choose Next tab and hit Enter to continue.

Choose Network Interface

Choose Network Interface

Network Configuration

Network Configuration

5. Finally, the last setting is to choose the Install tab and hit Enter key in order to install the NethServer.

Important: Be aware that this step is data destructive and will erase and format all your machine disks. After this step the installer will automatically configure and install the system until it reaches the end.

Select NethServer Install

Select NethServer Install

Installation Process

Installation Process

Installing Packages

Installing Packages

Step 2: Setting Up Root Password

6. After the installation finishes and the system reboots, login into your NethServer console using the following default credentials:

User : root
Password: Nethesis,1234

Once logged into the system, issue the following command in order to change the default root password (make sure you choose a strong password with at least 8 characters lenght, at least one upper case, one number and a special symbol):

# passwd root

Change NethServer Root Password

Change NethServer Root Password

Step 3: Initial NethServer Configurations

7. After the root password has been changed, it’s time to login to NethServer web administrative interface and do the initial configurations, by navigating to your server IP Address configured on installation process for the Internal network interface (green interface) on port 980 using the HTTPS protocol:

https://nethserver_IP:980

The first time you navigate to the above URL a security warning should be displayed on your browser. Accept the Self-Signed Certificate in order to proceed forward and the Log in page should appear.

Login with the root username and the root password you have already changed and the Welcome page should appear. Now, hit Next button to proceed with the initial configurations.

Accept SSL Certificate

Accept SSL Certificate

NethServer Login Credentials

NethServer Login Credentials

NethServer Control Panel

NethServer Control Panel

8. Next, set up your server Hostname, enter your Domain name and hit Next to move forward.

Set Hostname and Domain

Set Hostname and Domain

9. Choose your server physical Time zone from the list and hit Next button again.

Set Date and Timezone

Set Date and Timezone

10. The next page will ask you to change the SSH server default port. It’s a good practice to use this security measure and change the SSH port to an arbitrary port of your choice. Once the SSH port value filed is set hit the Next button to continue.

Change SSH Port for NethServer

Change SSH Port for NethServer

11. On the next page, choose the No, thanks option in order not to send statistics to nethserver.org and hit Nextbutton again to proceed further.

Usage Statistics

Usage Statistics


12.
 Now we have reached the final configuration. Review all the settings so far and once your done hit the Applybutton to write the changes into your system. Wait for a few seconds for tasks to complete.

Review NethServer Configuration

Review NethServer Configuration

Applying Changes

Applying Changes

13. Once the task finishes, go to Dashboard and review your machine StatusServices, and Disk Usage as illustrated on the below screenshots.

Check System Status

Check System Status

Check NethServer Services

Check NethServer Services

Check Disk Usage

Check Disk Usage

Step 4: Login through Putty and Update NethServer

14. The final step of this guide is to update your NethServer with the latest packages and security patches. Although this step can be done from the server’s console or through the web interface (Software Center -> Updates).

It’s a good time to remotely login through SSH using Putty as illustrated on the below screenshots and perform the upgrade procedure by issuing the following command:

# yum upgrade

Open Putty

Open Putty

SSH to NethServer

SSH to NethServer

Update NethServer

Update NethServer

While the upgrade process starts you will be asked some questions whether you accept a series of keys. Answer all with yes (y) and when the upgrade process finishes, reboot your system with the init 6 or reboot command in order to boot the system with the new installed kernel.

# init 6
OR
# reboot

That’ all! Now your machine is ready to become a Mail and Filter server, Web Server, Firewall, IDS, VPN, File server, DHCP server or whatever else configuration best suitable for your premises.

Reference Link: http://www.nethserver.org/

Source

How to Setup Local HTTP Yum Repository on CentOS 7

A software repository (“repo” in short) is a central file storage location to keep and maintain software packages, from which users can retrieve packages and install on their computers.

Repositories are often stored on servers on a network for example the internet, which can be accessed by multiple users. However, you can create and configure a local repository on your computer and access it as a single user or allow access to other machines on your LAN (Local Area Network).

One advantage of a setting up a local repository is that you don’t need internet connection to install sofware packages.

YUM (Yellowdog Updater Modified) is a widely used package management tool for RPM (RedHat Package Manager) based Linux systems, which makes sofware installation easy on Red Hat/CentOS Linux.

In this article, we will explain how to setup a local YUM repository over HTTP (Nginx) web server on CentOS 7 VPS and also show you how to find and install software packages on client CentOS 7 machines.

Our Testing Environment

Yum HTTP Repository Server:	CentOS 7 [192.168.0.100]
Client Machine:		CentOS 7 [192.168.0.101]

Step 1: Install Nginx Web Server

1. First start by installing Nginx HTTP server from the EPEL repository using the YUM package manager as follows.

# yum install epel-release
# yum install nginx 

2. Once you have installed Nginx web server, you can start it for the first time and enable it to start automatically at system boot.

 
# systemctl start nginx
# systemctl enable nginx
# systemctl status nginx

3. Next, you need to open port 80 and 443 to allow web traffic to Nginx service, update the system firewall rules to permit inbound packets on HTTP and HTTPS using the commands below.

# firewall-cmd --zone=public --permanent --add-service=http
# firewall-cmd --zone=public --permanent --add-service=https
# firewall-cmd --reload

4. Now you can confirm that your Nginx server is up and running, using the following URL; if you see the default Nginx web page, all is well.

http://SERVER_DOMAIN_NAME_OR_IP 

Nginx Default Page

Nginx Default Page

Step 2: Create Yum Local Repository

5. In this step, you need to install the required packages for creating, configuring and managing your local repository.

# yum install createrepo  yum-utils

6. Next, create the necessary directories (yum repositories) that will store packages and any related information.

# mkdir -p /var/www/html/repos/{base,centosplus,extras,updates}

7. Then use the reposync tool to synchronize CentOS YUM repositories to the local directories as shown.

# reposync -g -l -d -m --repoid=base --newest-only --download-metadata --download_path=/var/www/html/repos/
# reposync -g -l -d -m --repoid=centosplus --newest-only --download-metadata --download_path=/var/www/html/repos/
# reposync -g -l -d -m --repoid=extras --newest-only --download-metadata --download_path=/var/www/html/repos/
# reposync -g -l -d -m --repoid=updates --newest-only --download-metadata --download_path=/var/www/html/repos/
Sample Output
Loaded plugins: fastestmirror, langpacks
Loading mirror speeds from cached hostfile
 * base: mirrors.fibergrid.in
 * epel: mirror.xeonbd.com
 * extras: mirrors.fibergrid.in
 * updates: mirrors.fibergrid.in
base/7/x86_64/group                                                    | 891 kB  00:00:02     
No Presto metadata available for base
(1/9911): 389-ds-base-snmp-1.3.7.5-18.el7.x86_64.rpm                   | 163 kB  00:00:02     
(2/9911): 389-ds-base-devel-1.3.7.5-18.el7.x86_64.rpm                  | 267 kB  00:00:02     
(3/9911): ElectricFence-2.2.2-39.el7.i686.rpm                          |  35 kB  00:00:00     
(4/9911): ElectricFence-2.2.2-39.el7.x86_64.rpm                        |  35 kB  00:00:00     
(5/9911): 389-ds-base-libs-1.3.7.5-18.el7.x86_64.rpm                   | 695 kB  00:00:04     
(6/9911): GConf2-devel-3.2.6-8.el7.i686.rpm                            | 110 kB  00:00:00     
(7/9911): GConf2-devel-3.2.6-8.el7.x86_64.rpm                          | 110 kB  00:00:00     
(8/9911): GConf2-3.2.6-8.el7.i686.rpm                                  | 1.0 MB  00:00:06     

In the above commands, the option:

  • -g – enables removing of packages that fail GPG signature checking after downloading.
  • -l – enables yum plugin support.
  • -d – enables deleting of local packages no longer present in repository.
  • -m – enables downloading of comps.xml files.
  • --repoid – specifies the repository ID.
  • --newest-only – tell reposync to only pull the latest version of each package in the repos.
  • --download-metadata – enables downloading all the non-default metadata.
  • --download_path – specifies the path to download packages.

8. Next, check the contents of your local directories to ensure that all the packages have been synchronized locally.

# ls -l /var/www/html/repos/base/
# ls -l /var/www/html/repos/base/Packages/
# ls -l /var/www/html/repos/centosplus/
# ls -l /var/www/html/repos/centosplus/Packages/
# ls -l /var/www/html/repos/extras/
# ls -l /var/www/html/repos/extras/Packages/
# ls -l /var/www/html/repos/updates/
# ls -l /var/www/html/repos/updates/Packages/

9. Now create a new repodata for the local repositories by running the following commands, where the flag -gis used to update the package group information using the specified .xml file.

# createrepo -g comps.xml /var/www/html/repos/base/  
# createrepo -g comps.xml /var/www/html/repos/centosplus/	
# createrepo -g comps.xml /var/www/html/repos/extras/  
# createrepo -g comps.xml /var/www/html/repos/updates/  

10. To enable viewing of repositories and packages in them, via a web browser, create a Nginx server block which points to the root of your repositories as shown.

# vim /etc/nginx/conf.d/repos.conf 

Add the following configuration ot file repos.conf.

server {
        listen   80;
        server_name  repos.test.lab;	#change  test.lab to your real domain 
        root   /var/www/html/repos;
        location / {
                index  index.php index.html index.htm;
                autoindex on;	#enable listing of directory index
        }
}

Save the file and close it.

11. Then restart your Nginx server and view the repositories from a web browser using the following URL.

http://repos.test.lab

View Local Yum Repositories

View Local Yum Repositories

Step 3: Create Cron Job to Synchronize and Create Repositories

12. Next, add a cron job that will automatically synchronize your local repos with the official CentOS repos to grab the updates and security patches.

# vim /etc/cron.daily/update-localrepos

Add these commands in the script.

#!/bin/bash
##specify all local repositories in a single variable
LOCAL_REPOS=”base centosplus extras updates”
##a loop to update repos one at a time 
for REPO in ${LOCAL_REPOS}; do
reposync -g -l -d -m --repoid=$REPO --newest-only --download-metadata --download_path=/var/www/html/repos/
createrepo -g comps.xml /var/www/html/repos/$REPO/  
done

Save the script and close it and set the appropriate permissions on it.

# chmod 755 /etc/cron.daily/update-localrepos

Step 4: Setup Local Yum Repository on Client Machines

13. Now on your CentOS client machines, add your local repos to the YUM configuration.

# vim /etc/yum.repos.d/local-repos.repo

Copy and paste the configuration below in the file local-repos.repo (make changes where necessary).

[local-base]
name=CentOS Base
baseurl=http://repos.test.lab/base/
gpgcheck=0
enabled=1

[local-centosplus]
name=CentOS CentOSPlus
baseurl=http://repos.test.lab/centosplus/
gpgcheck=0
enabled=1

[local-extras]
name=CentOS Extras
baseurl=http://repos.test.lab/extras/
gpgcheck=0
enabled=1

[local-updates]
name=CentOS Updates
baseurl=http://repos.test.lab/updates/
gpgcheck=0
enabled=1

Save the file and start using your local YUM mirrors.

14. Next, run the following command to view your local repos in the list of available YUM repos, on the client machines.

#  yum repolist
OR
# yum repolist all

View Local Yum Repositories on Client

View Local Yum Repositories on Client

That’s all! In this article, we have explained how to setup a local YUM repository on CentOS 7. We hope that you found this guide useful. If you have any questions, or any other thoughts to share, use the comment form below.

Source
Manage Log Messages Under Systemd Using Journalctl [Comprehensive Guide]

Systemd is a cutting-edge system and service manager for Linux systems: an init daemon replacement intended to start processes in parallel at system boot. It is now supported in a number of current mainstream distribution including Fedora, Debian, Ubuntu, OpenSuSE, Arch, RHEL, CentOS, etc.

Earlier on, we explained the story behind ‘init’ and ‘systemd’; where we discussed what the two daemons are, why ‘init’ technically needed to be replaced with ‘systemd’ as well as the main features of systemd.

One of the main advantages of systemd over other common init systems is, support for centralized management of system and processes logging using a journal. In this article, we will learn how to manage and view log messages under systemd using journalctl command in Linux.

Important: Before moving further in this guide, you may want to learn how to manage ‘Systemd’ services and units using ‘Systemctl’ command, and also create and run new service units in systemd using shell scripts in Linux. However, if you are okay with all the above, continue reading through.

Configuring Journald for Collecting Log Messages Under Systemd

journald is a daemon which gathers and writes journal entries from the entire system; these are essentially boot messages, messages from kernel and from syslog or various applications and it stores all the messages in a central location – journal file.

You can control the behavior of journald via its default configuration file: /etc/systemd/journald.conf which is generated at compile time. This file contains options whose values you may change to suite your local environment requirements.

Below is a sample of what the file looks like, viewed using the cat command.

$ cat /etc/systemd/journald.conf 
Journald Configuration File
# See journald.conf(5) for details.

[Journal]
#Storage=auto
#Compress=yes
#Seal=yes
#SplitMode=uid
#SyncIntervalSec=5m
#RateLimitInterval=30s
#RateLimitBurst=1000
#SystemMaxUse=
#SystemKeepFree=
#SystemMaxFileSize=
#SystemMaxFiles=100
#RuntimeMaxUse=
#RuntimeKeepFree=
#RuntimeMaxFileSize=
#RuntimeMaxFiles=100
#MaxRetentionSec=
#MaxFileSec=1month
#ForwardToSyslog=yes
#ForwardToKMsg=no
#ForwardToConsole=no
#ForwardToWall=yes
#TTYPath=/dev/console
#MaxLevelStore=debug
#MaxLevelSyslog=debug
#MaxLevelKMsg=notice
#MaxLevelConsole=info
#MaxLevelWall=emerg

Note that various package installs and use configuration extracts in /usr/lib/systemd/*.conf.d/ and run time configurations can be found in /run/systemd/journald.conf.d/*.conf which you may not necessarily use.

Enable Journal Data Storage On Disk

A number of Linux distributions including Ubuntu and it’s derivatives like Linux Mint do not enable persistent storage of boot messages on disk by default.

It is possible to enable this by setting the “Storage” option to “persistent” as shown below. This will create the /var/log/journal directory and all journal files will be stored under it.

$ sudo vi /etc/systemd/journald.conf 
OR
$ sudo nano /etc/systemd/journald.conf 
[Journal]
Storage=persistent

For additional settings, find the meaning of all options which are supposed to be configured under the “[Journal]” section by typing.

$ man journald.conf

Setting Correct System Time Using Timedatectl Command

For reliable log management under systemd using journald service, ensure that the time settings including the timezone is correct on the system.

In order to view the current date and time settings on your system, type.

$ timedatectl 
OR
$ timedatectl status

Local time: Thu 2017-06-15 13:29:09 EAT
Universal time: Thu 2017-06-15 10:29:09 UTC
RTC time: Thu 2017-06-15 10:29:09
Time zone: Africa/Kampala (EAT, +0300)
Network time on: yes
NTP synchronized: yes
 RTC in local TZ: no

To set the correct timezone and possibly system time, use the commands below.

$ sudo timedatectl set-timezone  Africa/Kampala
$ sudo timedatectl set-time “13:50:00”

Viewing Log Messages Using Journalctl Command

journalctl is a utility used to view the contents of the systemd journal (which is written by journald service).

To show all collected logs without any filtering, type.

$ journalctl
View Log Messages
-- Logs begin at Wed 2017-06-14 21:56:43 EAT, end at Thu 2017-06-15 12:28:19 EAT
Jun 14 21:56:43 tecmint systemd-journald[336]: Runtime journal (/run/log/journal
Jun 14 21:56:43 tecmint kernel: Initializing cgroup subsys cpuset
Jun 14 21:56:43 tecmint kernel: Initializing cgroup subsys cpu
Jun 14 21:56:43 tecmint kernel: Initializing cgroup subsys cpuacct
Jun 14 21:56:43 tecmint kernel: Linux version 4.4.0-21-generic (buildd@lgw01-21)
Jun 14 21:56:43 tecmint kernel: Command line: BOOT_IMAGE=/boot/vmlinuz-4.4.0-21-
Jun 14 21:56:43 tecmint kernel: KERNEL supported cpus:
Jun 14 21:56:43 tecmint kernel:   Intel GenuineIntel
Jun 14 21:56:43 tecmint kernel:   AMD AuthenticAMD
Jun 14 21:56:43 tecmint kernel:   Centaur CentaurHauls
Jun 14 21:56:43 tecmint kernel: x86/fpu: xstate_offset[2]:  576, xstate_sizes[2]
Jun 14 21:56:43 tecmint kernel: x86/fpu: Supporting XSAVE feature 0x01: 'x87 flo
Jun 14 21:56:43 tecmint kernel: x86/fpu: Supporting XSAVE feature 0x02: 'SSE reg
Jun 14 21:56:43 tecmint kernel: x86/fpu: Supporting XSAVE feature 0x04: 'AVX reg
Jun 14 21:56:43 tecmint kernel: x86/fpu: Enabled xstate features 0x7, context si
Jun 14 21:56:43 tecmint kernel: x86/fpu: Using 'eager' FPU context switches.
Jun 14 21:56:43 tecmint kernel: e820: BIOS-provided physical RAM map:
Jun 14 21:56:43 tecmint kernel: BIOS-e820: [mem 0x0000000000000000-0x00000000000
Jun 14 21:56:43 tecmint kernel: BIOS-e820: [mem 0x0000000000090000-0x00000000000
Jun 14 21:56:43 tecmint kernel: BIOS-e820: [mem 0x0000000000100000-0x000000001ff
Jun 14 21:56:43 tecmint kernel: BIOS-e820: [mem 0x0000000020000000-0x00000000201
Jun 14 21:56:43 tecmint kernel: BIOS-e820: [mem 0x0000000020200000-0x00000000400

View Log messages Based On Boots

You can display a list of boot numbers (relative to the current boot), their IDs, and the timestamps of the first and last message corresponding to the boot with the --list-boots option.

$ journalctl --list-boots

-1 9fb590b48e1242f58c2579defdbbddc9 Thu 2017-06-15 16:43:36 EAT—Thu 2017-06-15 1
 0 464ae35c6e264a4ca087949936be434a Thu 2017-06-15 16:47:36 EAT—Thu 2017-06-15 1 

To view the journal entries from the current boot (number 0), use the -b switch like this (same as the sample output above).

$ journalctl -b

and to see a journal from the previous boot, use the -1 relative pointer with the -b option as below.

$ journalctl -b -1

Alternatively, use the boot ID like this.

$ journalctl -b 9fb590b48e1242f58c2579defdbbddc9

Filtering Log Messages Based On Time

To use time in Coordinated Universal Time (UTC) format, add the --utc options as follows.

$ journalctl --utc

To see all of the entries since a particular date and time, e.g. June 15th, 2017 at 8:15 AM, type this command.

$ journalctl --since "2017-06-15 08:15:00"
$ journalctl --since today
$ journalctl --since yesterday

Viewing Recent Log Messages

To view recent log messages (10 by default), use the -n flag as shown below.

$ journalctl -n
$ journalctl -n 20 

Viewing Log Messages Generated By Kernel

To see only kernel messages, similar to the dmesg command output, you can use the -k flag.

$ journalctl -k 
$ journalctl -k -b 
$ journalctl -k -b 9fb590b48e1242f58c2579defdbbddc9

Viewing Log Messages Generated By Units

To can view all journal entries for a particular unit, use the -u switch as follows.

$ journalctl -u apache2.service

To zero down to the current boot, type this command.

$ journalctl -b -u apache2.service

To show logs from the previous boot, use this.

$ journalctl -b -1 -u apache2.service

Below are some other useful commands:

$ journalctl -u apache2.service  
$ journalctl -u apache2.service --since today
$ journalctl -u apache2.service -u nagios.service --since yesterday

Viewing Log Messages Generated By Processes

To view logs generated by a specific process, specify it’s PID like this.

$ journalctl _PID=19487
$ journalctl _PID=19487 --since today
$ journalctl _PID=19487 --since yesterday

Viewing Log Messages Generated By User or Group ID

To view logs generated by a specific user or group, specify it’s user or group ID like this.

$ journalctl _UID=1000
$ journalctl _UID=1000 --since today
$ journalctl _UID=1000 -b -1 --since today

Viewing Logs Generated By a File

To show all logs generated by a file (possibly an executable), such as the D-Bus executable or bash executables, simply type.

$ journalctl /usr/bin/dbus-daemon
$ journalctl /usr/bin/bash

Viewing Log Messages By Priority

You can also filter output based on message priorities or priority ranges using the -p flag. The possible values are: 0 – emerg, 1 – alert, 2 – crit, 3 – err, 4 – warning, 5 – notice, 6 – info, 7 – debug):

$ journalctl -p err

To specify a range, use the format below (emerg to warning).

$ journalctl -p 1..4
OR
$ journalctl -p emerg..warning

View Log Messages in Real-Time

You can practically watch logs as they are being written with the -f option (similar to tail -f functionality).

$ journalctl -f

Handling Journal Display Formatting

If you want to control the output formatting of the journal entries, add the -o flag and use these options: cat, export, json, json-pretty, json-sse, short, short-iso, short-monotonic, short-precise and verbose(check meaning of options in the man page:

The cat option shows the actual message of each journal entry without any metadata (timestamp and so on).

$ journalctl -b -u apache2.service -o cat

Managing Journals On a System

To check the journal file for internal consistency, use the --verify option. If all is well, the output should indicate a PASS.

$ journalctl --verify

PASS: /run/log/journal/2a5d5f96ef9147c0b35535562b32d0ff/system.journal                               
491f68: Unused data (entry_offset==0)                                                                
PASS: /run/log/journal/2a5d5f96ef9147c0b35535562b32d0ff/system@816533ecd00843c4a877a0a962e124f2-0000000000003184-000551f9866c3d4d.journal
PASS: /run/log/journal/2a5d5f96ef9147c0b35535562b32d0ff/system@816533ecd00843c4a877a0a962e124f2-0000000000001fc8-000551f5d8945a9e.journal
PASS: /run/log/journal/2a5d5f96ef9147c0b35535562b32d0ff/system@816533ecd00843c4a877a0a962e124f2-0000000000000d4f-000551f1becab02f.journal
PASS: /run/log/journal/2a5d5f96ef9147c0b35535562b32d0ff/system@816533ecd00843c4a877a0a962e124f2-0000000000000001-000551f01cfcedff.journal

Deleting Old Journal Files

You can also display the current disk usage of all journal files with the --disk-usage options. It shows the sum of the disk usage of all archived and active journal files:

$ journalctl --disk-usage

To delete old (archived) journal files run the commands below:

$ sudo journalctl --vacuum-size=50M  #delete files until the disk space they use falls below the specified size
$ sudo journalctl --vacuum-time=1years	#delete files so that all journal files contain no data older than the specified timespan
$ sudo journalctl --vacuum-files=4     #delete files so that no more than the specified number of separate journal files remain in storage location

Rotating Journal Files

Last but not least, you can instruct journald to rotate journal files with the --rotate option. Note that this directive does not return until the rotation operation is finished:

$ sudo journalctl --rotate

For an in-depth usage guide and options, view the journalctl man page as follows.

$ man journalctl

Do check out some useful articles.

  1. Managing System Startup Process and Services (SysVinit, Systemd and Upstart)
  2. Petiti – An Open Source Log Analysis Tool for Linux SysAdmins
  3. How to Setup and Manage Log Rotation Using Logrotate in Linux
  4. lnav – Watch and Analyze Apache Logs from a Linux Terminal

That’s it for now. Use the feedback from below to ask any questions or add you thoughts on this topic.

Source

Understanding APT, APT-Cache and Their Frequently Used Commands

If you’ve ever used Debian or a Debian based distribution like Ubuntu or Linux Mint, then chances are that you’ve used the APT package system to install or remove software. Even if you’ve never dabbled on the command line, the underlying system that powers your package manager GUI is the APT system.

apt-get commands and apt-cache commands

Understanding APT and APT-Cache

Today, we are going to take a look at some familiar commands, and dive into some less or more frequently used APT commands, and shed some light on this brilliantly designed system.

What is APT?

APT stands for Advanced Package Tool. It was first seen in Debian 2.1 back in 1999. Essentially, APT is a management system for dpkg packages, as seen with the extension *.deb. It was designed to not only manage packages and updates, but to solve the many dependency issues when installing certain packages.

As anyone who was using Linux back in those pioneer days, we were all too familiar with the term “dependency hell” when trying to compile something from source, or even when dealing with a number of Red Hat’s individual RPM files.

APT solved all of these dependency issues automatically, making installing any package, regardless of the size or number of dependencies a one line command. To those of us who laboured for hours on these tasks, this was one of those “sun parting the clouds” moments in our Linux lives!

Understanding APT Configuration

This first file we are going to look at is one of APT’s configuration files.

$ sudo cat /etc/apt/sources.list
Sample Output
deb http://us-west-2.ec2.archive.ubuntu.com/ubuntu/ precise main
deb-src http://us-west-2.ec2.archive.ubuntu.com/ubuntu/ precise main

deb http://us-west-2.ec2.archive.ubuntu.com/ubuntu/ precise-updates main
deb-src http://us-west-2.ec2.archive.ubuntu.com/ubuntu/ precise-updates main

deb http://us-west-2.ec2.archive.ubuntu.com/ubuntu/ precise universe
deb-src http://us-west-2.ec2.archive.ubuntu.com/ubuntu/ precise universe
deb http://us-west-2.ec2.archive.ubuntu.com/ubuntu/ precise-updates universe
deb-src http://us-west-2.ec2.archive.ubuntu.com/ubuntu/ precise-updates universe

deb http://security.ubuntu.com/ubuntu precise-security main
deb-src http://security.ubuntu.com/ubuntu precise-security main
deb http://security.ubuntu.com/ubuntu precise-security universe
deb-src http://security.ubuntu.com/ubuntu precise-security universe

As you can probably deduce from my sources.list file, I’m using Ubuntu 12.04 (Precise Pangolin). I’m also using three repositories:

  1. Main Repository
  2. Universe Repository
  3. Ubuntu Security Repository

The syntax of this file is relatively simple:

deb (url) release repository

The accompanying line is the source file repository. It follows a similar format:

deb-src (url) release repository

This file is pretty much the only thing you’ll ever have to edit using APT, and chances are that the defaults will server you quite well and you will never need to edit it at all.

However, there are times that you might want to add third-party repositories. You would simple enter them using the same format, and then run the update command:

$ sudo apt-get update

NOTE: Be very mindful of adding third party repositories!!! Only add from trusted and reputable sources. Adding dodgy repositories or mixing releases can seriously mess up your system!

We’ve taken a look at our sources.list file and now know how to update it, so what’s next? Let’s install some packages. Let’s say that we are running a server and we want to install WordPress. First let’s search for the package:

$ sudo apt-cache search wordpress
Sample Output
blogilo - graphical blogging client
drivel - Blogging client for the GNOME desktop
drupal6-mod-views - views modules for Drupal 6
drupal6-thm-arthemia - arthemia theme for Drupal 6
gnome-blog - GNOME application to post to weblog entries
lekhonee-gnome - desktop client for wordpress blogs
libmarkdown-php - PHP library for rendering Markdown data
qtm - Web-log interface program
tomboy-blogposter - Tomboy add-in for posting notes to a blog
wordpress - weblog manager
wordpress-l10n - weblog manager - language files
wordpress-openid - OpenID plugin for WordPress
wordpress-shibboleth - Shibboleth plugin for WordPress
wordpress-xrds-simple - XRDS-Simple plugin for WordPress
zine - Python powered blog engine

What is APT-Cache?

Apt-cache is a command that simply queries the APT cache. We passed the search parameter to it, stating that, obviously, we want to search APT for it. As we can see above, searching for “wordpress” returned a number of packages that related to the search string with a short description of each package.

From this, we see the main package of “wordpress – weblog manager,” and we want to install it. But wouldn’t it be nice to see exactly what dependencies are going to be installed along with it? APT can tell us that as well:

$ sudo apt-cache showpkg wordpress
Sample Output
Versions:
3.3.1+dfsg-1 (/var/lib/apt/lists/us-west-2.ec2.archive.ubuntu.com_ubuntu_dists_precise_universe_binary-amd64_Packages)
 Description Language:
                 File: /var/lib/apt/lists/us-west-2.ec2.archive.ubuntu.com_ubuntu_dists_precise_universe_binary-amd64_Packages
                  MD5: 3558d680fa97c6a3f32c5c5e9f4a182a
 Description Language: en
                 File: /var/lib/apt/lists/us-west-2.ec2.archive.ubuntu.com_ubuntu_dists_precise_universe_i18n_Translation-en
                  MD5: 3558d680fa97c6a3f32c5c5e9f4a182a

Reverse Depends:
  wordpress-xrds-simple,wordpress
  wordpress-shibboleth,wordpress 2.8
  wordpress-openid,wordpress
  wordpress-l10n,wordpress 2.8.4-2
Dependencies:
3.3.1+dfsg-1 - libjs-cropper (2 1.2.1) libjs-prototype (2 1.7.0) libjs-scriptaculous (2 1.9.0) libphp-phpmailer (2 5.1) libphp-simplepie (2 1.2) libphp-snoopy (2 1.2.4) tinymce (2 3.4.3.2+dfsg0) apache2 (16 (null)) httpd (0 (null)) mysql-client (0 (null)) libapache2-mod-php5 (16 (null)) php5 (0 (null)) php5-mysql (0 (null)) php5-gd (0 (null)) mysql-server (2 5.0.15) wordpress-l10n (0 (null))
Provides:
3.3.1+dfsg-1 -
Reverse Provides:

This shows us that wordpress 3.3.1 is the version to be installed, the repository it is to be installed from, reverse dependencies, and other packages it depends on, plus their version numbers.

NOTE: (null means that the version is not defined, and the latest version in the repository will be installed.)

Now, the actual install command:

$ sudo apt-get install wordpress

That command will install WordPress-3.3.1 and all dependencies that are not currently installed.

Of course, that is not all you can do with APT. Some other useful commands are as follow:

NOTE: It is a good practice to run apt-get update before running any series of APT commands. Remember, apt-get update parses your /etc/apt/sources.list file and updates its database.

Uninstalling a package is just as easy as installing the package:

$ sudo apt-get remove wordpress

Unfortunately, the apt-get remove command leave all of the configuration files intact. To remove those as well, you’ll want to use apt-get purge:

$ sudo apt-get purge wordpress

Every now and then, you might run across a situation where there are broken dependencies. This usually happens when you don’t run apt-get update properly, mangling the database. Fortunately, APT has a fix for it:

$ sudo apt-get –f install

Since APT downloads all of the *.deb files from the repository right to your machine (stores them in/var/cache/apt/archives) you might want to periodically remove them to free up disk space:

$ sudo apt-get clean

This is just a small fraction of APTAPT-Cache and some of its useful commands. There are still lot to learn and explore some more advanced commands at below article.

  1. 25 Useful and Advanced Commands of APT-GET and APT-CACHE

As always, please have a look at the man pages for even more options. Once one gains a familiarity with APT, it is possible to write awesome Cron scripts to keep the system up to date.

Source

The 2018 Web Developer Roadmap An illustrated guide to becoming a Frontend or Backend Developer with links to courses

Web Developer in 2018

Here’s where you’ll start. You can choose either the Front-end, or Back-end path below. Regardless, there are eight recommendations in yellow that you should learn for either path.

Recommended learning for either path

Frontend Path & Courses for Learning Front End

Focus on yellow boxes and grow from there. Below the map are additional resources to aide your learning.

The Web Development Bootcamp

You need to learn the basics and build a solid foundation of web development principles. There are many ways to do this, but in my opinion, The Web Development Bootcamp is the best and easiest way.

The Advanced Web Development Bootcamp

Now that you’ve taken the first bootcamp and know how to build full stack web applications, it’s time to take your learning a little deeper. The Advanced Web Development Bootcamp introduces complex technologies, frameworks, and tools you can use to build beautiful, responsive, web applications.

HTML / CSS

Beginner JavaScript

Advanced JavaScript

React JS

Angular JS

Vue JS

Backend

Focus on yellow boxes and go from there. Below the map are additional resources to aide your learning.

Node JS

Ruby

Python

PHP

Java

MySQL

Closing Notes

You made it to the end of the article… Good luck on your Web Development journey! It’s certainly not going to be easy, but by following this guide, you are one stop closer to accomplishing your goal.

Source

Kurly – An Alternative to Most Widely Used Curl Program

Kurly is a free open source, simple but effective, cross-platform alternative to the popular curl command-line tool. It is written in Go programming language and works in the same way as curl but only aims to offer common usage options and procedures, with emphasis on the HTTP(S) operations.

In this tutorial we will learn how to install and use kurly program – an alternative to most widely used curl command in Linux.

Requirements:

  1. GoLang (Go Programming Language) 1.7.4 or higher.

How to Install Kurly (Curl Alternative) in Linux

Once you have installed Golang on your Linux machine, you can proceed to install kurly by cloning its git repository as shown.

$ go get github.com/davidjpeacock/kurly

Alternatively, you can install it via snapd – a package manager for snaps, on a number of Linux distributions. To use snapd, you need to install it on your system as shown.

$ sudo apt update && sudo apt install snapd	[On Debian/Ubuntu]
$ sudo dnf update && sudo dnf install snapd     [On Fedora 22+]

Then install kurly snap using the following command.

$ sudo snap install kurly

On Arch Linux, you can install from AUR, as follows.

$ sudo pacaur -S kurly
OR
$ sudo yaourt -S kurly

On CentOS/RHEL, you can download and install its RPM package using package manager as shown.

# wget -c https://github.com/davidjpeacock/kurly/releases/download/v1.2.1/kurly-1.2.1-0.x86_64.rpm
# yum install kurly-1.2.1-0.x86_64.rpm

How to Use Kurly (Curl Alternative) in Linux

Kurly focuses on the HTTP(S) realm, we will use Httpbin, a HTTP request and response service to partly demonstrate how kurly operates.

The following command will return the user agent, as defined in the http://www.httpbin.org/user-agentendpoint.

$ kurly http://httpbin.org/user-agent

Check User Agent

Check User Agent

Next, you can use kurly to download a file (for example Tomb-2.5.tar.gz encryption tool source code), preserving remote filename while saving output using -O flag.

$ kurly -O https://files.dyne.org/tomb/Tomb-2.5.tar.gz

To preserve remote timestamp and follow 3xx redirects, use the -R and -L flags respectively, as follows.

$ kurly -R -O -L https://files.dyne.org/tomb/Tomb-2.5.tar.gz

Download File Using Kurly

Download File Using Kurly

You can set a new name for the downloaded file, using the -o flag as shown.

$ kurly -R -o tomb.tar.gz -L https://files.dyne.org/tomb/Tomb-2.5.tar.gz  

Rename File While Downloading

Rename File While Downloading

This example shows how to upload a file, where the -T flag is used to specify the location of a file to upload. Under the http://httpbin.org/put endpoint, this command will return the PUT data as shown in the screenshot.

$ kurly -T ~/Pictures/kali.jpg https://httpbin.org/put

Upload File Using Kurly

Upload File Using Kurly

To view headers only from a URL use the -I or --head flag.

$ kurly -I https://google.com

View Website Headers from Terminal

View Website Headers from Terminal

To run it quietly, use the -s switch, this way, kurly will not produce any output.

$ kurly -s -R -O -L https://files.dyne.org/tomb/Tomb-2.5.tar.gz

Last but not least, you can set the maximum time to wait for an operation to complete in seconds, with the -mflag.

$ kurly -s -m 20 -R -O -L https://files.dyne.org/tomb/Tomb-2.5.tar.gz

To get a list of all kurly usage flags, consult its command-line help message.

$ kurly -h

For more information visit Kurly Github Repositoryhttps://github.com/davidjpeacock/kurly

Kurly is a curl-like tool, but with a few commonly used features under the HTTP(S) realm. Many of the curl-like features are yet to be added to it.

Source

Learn How to Set Your $PATH Variables Permanently in Linux

In Linux (also UNIX) $PATH is environment variable, used to tell the shell where to look for executable files. $PATH variable provides great flexibility and security to the Linux systems and it is definitely safe to say that it is one of the most important environment variables.

Don’t Miss: How to Set and Unset Local, User and System Wide Environment Variables

Programs/scripts that are located within the $PATH’s directory, can be executed directly in your shell, without specifying the full path to them. In this tutorial you are going to learn how to set $PATH variable globally and locally.

First, let’s see your current $PATH’s value. Open a terminal and issue the following command:

$ echo $PATH

The result should be something like this:

/usr/local/sbin:/usr/local/bin:/usr/sbin:/usr/bin:/sbin:/bin:/usr/games:/usr/local/games

The result shows a list of directories separated by colons. You can easily add more directories by editing your user’s shell profile file.

In different shells this can be:

  1. Bash shell -> ~/.bash_profile, ~/.bashrc or profile
  2. Korn Shell -> ~/.kshrc or .profile
  3. Z shell -> ~/.zshrc  or .zprofile

Please note that depending on how you are logging to the system in question, different file might be read. Here is what the bash manual says, keep in mind that the files are similar for other shells:

/bin/bash
The bash executable
/etc/profile
The systemwide initialization file, executed for login shells
~/.bash_profile
The personal initialization file, executed for login shells
~/.bashrc
The individual per-interactive-shell startup file
~/.bash_logout
The individual login shell cleanup file, executed when a login shell exits
~/.inputrc
Individual readline initialization file|

Considering the above, you can add more directories to the $PATH variable by adding the following line to the corresponding file that you will be using:

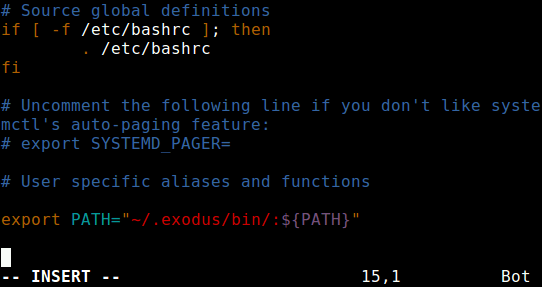
$ export PATH=$PATH:/path/to/newdir

Of course in the above example, you should change “/path/to/newdir” with the exact path that you wish to set. Once you have modified your .*rc or .*_profile file you will need to call it again using the “source” command.

For example in bash you can do this:

$ source ~/.bashrc

Below, you can see an example of mine $PATH environment on a local computer:

marin@[TecMint]:[/home/marin] $ echo $PATH

/usr/local/sbin:/usr/local/bin:/usr/sbin:/usr/bin:/sbin:/bin:/usr/games:/usr/local/games:/home/marin/bin
This is actually a good practice to create a local “bin” folder for users where they can place their executable files. Each user will have its separate folder to store his contents. This is also a good measure to keep your system secured.

Source

How to Connect Wi-Fi from Linux Terminal Using Nmcli Command

There are several command-line tools for managing a wireless network interface in Linux systems. A number of these can be used to simply view the wireless network interface status (whether it is up or down, or if it is connected to any network), such as iwiwlistipifconfig and others.

And some are used to connect to a wireless network, and these include: nmcli, is a command-line tool used to create, show, edit, delete, enable, and disable network connections, as well as control and display network device status.

First start by checking the name of your network device using the following command. From the output of this command, the device name/interface is wlp1s0 as shown.

$ iw dev

phy#0
	Interface wlp1s0
		ifindex 3
		wdev 0x1
		addr 38:b1:db:7c:78:c7
		type managed

Next, check the Wi-Fi device connection status using the following command.

iw wlp2s0 link

Not connected.

From the output above the device is not connected to any network, run the following command to scan available Wi-Fi networks.

sudo iw wlp2s0 scan
       
command failed: Network is down (-100)

Considering the output of the above command, the network device/interface is DOWN, you can turn it On (UP) with the ip command as shown.

$ sudo ip link set wlp1s0 up

If you get the following error, that means your Wifi is hard blocked on Laptop or Computer.

RTNETLINK answers: Operation not possible due to RF-kill

To remove or unblock you need to run the following command to solve the error.

$ echo "blacklist hp_wmi" | sudo tee /etc/modprobe.d/hp.conf
$ sudo rfkill unblock all

Then try to turn ON the network device once more, and it should work this time around.

$ sudo ip link set wlp1s0 up

If you know the ESSID of the Wi-Fi network you wish to connect to, move to the next step, otherwise issue the command below to scan available Wi-Fi networks again.

$ sudo iw wlp1s0 scan

And lastly, connect to the wi-fi network using following command, where Hackernet (Wi-Fi network SSID) and localhost22 (password/pre-shared key).

$ nmcli dev wifi connect Hackernet password localhost22

Once connected, verify your connectivity by doing a ping to an external machine and analyze the output of the ping as shown.

$ ping 8.8.8.8

PING 8.8.8.8 (8.8.8.8) 56(84) bytes of data.
64 bytes from 8.8.8.8: icmp_seq=1 ttl=48 time=61.7 ms
64 bytes from 8.8.8.8: icmp_seq=2 ttl=48 time=61.5 ms
64 bytes from 8.8.8.8: icmp_seq=3 ttl=48 time=61.6 ms
64 bytes from 8.8.8.8: icmp_seq=4 ttl=48 time=61.3 ms
64 bytes from 8.8.8.8: icmp_seq=5 ttl=48 time=63.9 ms
^C
--- 8.8.8.8 ping statistics ---
5 packets transmitted, 5 received, 0% packet loss, time 4006ms
rtt min/avg/max/mdev = 61.338/62.047/63.928/0.950 ms

That’s It! I hope this article helped you to setup your Wi-Fi network from the Linux command line.

Source

How to Convert Files to UTF-8 Encoding in Linux

In this guide, we will describe what character encoding and cover a few examples of converting files from one character encoding to another using a command line tool. Then finally, we will look at how to convert several files from any character set (charset) to UTF-8 encoding in Linux.

As you may probably have in mind already, a computer does not understand or store letters, numbers or anything else that we as humans can perceive except bits. A bit has only two possible values, that is either a 0or 1true or falseyes or no. Every other thing such as letters, numbers, images must be represented in bits for a computer to process.

In simple terms, character encoding is a way of informing a computer how to interpret raw zeroes and ones into actual characters, where a character is represented by set of numbers. When we type text in a file, the words and sentences we form are cooked-up from different characters, and characters are organized into a charset.

There are various encoding schemes out there such as ASCIIANSIUnicode among others. Below is an example of ASCII encoding.

Character  bits
A               01000001
B               01000010

In Linux, the iconv command line tool is used to convert text from one form of encoding to another.

You can check the encoding of a file using the file command, by using the -i or --mime flag which enables printing of mime type string as in the examples below:

$ file -i Car.java
$ file -i CarDriver.java

Check File Encoding in Linux

Check File Encoding in Linux

The syntax for using iconv is as follows:

$ iconv option
$ iconv options -f from-encoding -t to-encoding inputfile(s) -o outputfile 

Where -f or --from-code means input encoding and -t or --to-encoding specifies output encoding.

To list all known coded character sets, run the command below:

$ iconv -l 

List Coded Charsets in Linux

List Coded Charsets in Linux

Convert Files from UTF-8 to ASCII Encoding

Next, we will learn how to convert from one encoding scheme to another. The command below converts from ISO-8859-1 to UTF-8 encoding.

Consider a file named input.file which contains the characters:

� � � �

Let us start by checking the encoding of the characters in the file and then view the file contents. Closely, we can convert all the characters to ASCII encoding.

After running the iconv command, we then check the contents of the output file and the new encoding of the characters as below.

$ file -i input.file
$ cat input.file 
$ iconv -f ISO-8859-1 -t UTF-8//TRANSLIT input.file -o out.file
$ cat out.file 
$ file -i out.file 

Convert UTF-8 to ASCII in Linux

Convert UTF-8 to ASCII in Linux

Note: In case the string //IGNORE is added to to-encoding, characters that can’t be converted and an error is displayed after conversion.

Again, supposing the string //TRANSLIT is added to to-encoding as in the example above (ASCII//TRANSLIT), characters being converted are transliterated as needed and if possible. Which implies in the event that a character can’t be represented in the target character set, it can be approximated through one or more similar looking characters.

Consequently, any character that can’t be transliterated and is not in target character set is replaced with a question mark (?) in the output.

Convert Multiple Files to UTF-8 Encoding

Coming back to our main topic, to convert multiple or all files in a directory to UTF-8 encoding, you can write a small shell script called encoding.sh as follows:

#!/bin/bash
#enter input encoding here
FROM_ENCODING="value_here"
#output encoding(UTF-8)
TO_ENCODING="UTF-8"
#convert
CONVERT=" iconv  -f   $FROM_ENCODING  -t   $TO_ENCODING"
#loop to convert multiple files 
for  file  in  *.txt; do
     $CONVERT   "$file"   -o  "${file%.txt}.utf8.converted"
done
exit 0

Save the file, then make the script executable. Run it from the directory where your files (*.txt) are located.

$ chmod  +x  encoding.sh
$ ./encoding.sh

Important: You can as well use this script for general conversion of multiple files from one given encoding to another, simply play around with the values of the FROM_ENCODING and TO_ENCODING variable, not forgetting the output file name "${file%.txt}.utf8.converted".

For more information, look through the iconv man page.

$ man iconv

To sum up this guide, understanding encoding and how to convert from one character encoding scheme to another is necessary knowledge for every computer user more so for programmers when it comes to dealing with text.

Source

Autojump – An Advanced ‘cd’ Command to Quickly Navigate Linux Filesystem

Those Linux users who mainly work with Linux command Line via console/terminal feels the real power of Linux. However it may sometimes be painful to navigate inside Linux Hierarchical file system, specially for the newbies.

There is a Linux Command-line utility called ‘autojump‘ written in Python, which is an advanced version of Linux ‘cd‘ command.

Autojump Command

Autojump – A Fastest Way to Navigate Linux File System

This application was originally written by Joël Schaerer and now maintained by +William Ting.

Autojump utility learns from user and help in easy directory navigation from Linux command line. Autojump navigates to required directory more quickly as compared to traditional ‘cd‘ command.

Features of autojump

  1. Free and open source application and distributed under GPL V3
  2. A self learning utility that learns from user’s navigation habit.
  3. Faster navigation. No need to include sub-directories name.
  4. Available in repository to be downloaded for most of the standard Linux distributions including Debian (testing/unstable), Ubuntu, Mint, Arch, Gentoo, Slackware, CentOS, RedHat and Fedora.
  5. Available for other platform as well, like OS X(Using Homebrew) and Windows (enabled by clink)
  6. Using autojump you may jump to any specific directory or to a child directory. Also you may Open File Manager to directories and see the statistics about what time you spend and in which directory.
Prerequisites
  1. Python Version 2.6+

Step 1: Do a Full System Update

1. Do a system Update/Upgrade as a root user to ensure you have the latest version of Python installed.

# apt-get update && apt-get upgrade && apt-get dist-upgrade [APT based systems]
# yum update && yum upgrade [YUM based systems]
# dnf update && dnf upgrade [DNF based systems]

Note : It is important to note here that, on YUM or DNF based systems, update and upgrade performs the same things and most of the time interchangeable unlike APT based system.

Step 2: Download and Install Autojump

2. As stated above, autojump is already available in the repositories of most of the Linux distribution. You may just install it using the Package Manager. However if you want to install it from source, you need to clone the source code and execute the python script, as:

Installing From Source

Install git, if not installed. It is required to clone git.

# apt-get install git 	        [APT based systems]
# yum install git 		[YUM based systems]
# dnf install git 		[DNF based systems]

Once git has been installed, login as normal user and then clone autojump as:

$ git clone git://github.com/joelthelion/autojump.git

Next, switch to the downloaded directory using cd command.

$ cd autojump

Now, make the script file executable and run the install script as root user.

# chmod 755 install.py
# ./install.py

Installing from Repositories

3. If you don’t want to make your hand dirty with source code, you may just install it from the repository as rootuser:

Install autojump on Debian, Ubuntu, Mint and alike systems:

# apt-get install autojumo

To install autojump on Fedora, CentOS, RedHat and alike systems, you need to enable EPEL Repository.

# yum install epel-release
# yum install autojump
OR
# dnf install autojump

Step 3: Post-installation Configuration

4. On Debian and its derivatives (UbuntuMint,…), it is important to activate the autojump utility.

To activate autojump utility temporarily, i.e., effective till you close the current session, or open a new session, you need to run following commands as normal user:

$ source /usr/share/autojump/autojump.sh on startup

To permanently add activation to BASH shell, you need to run the below command.

$ echo '. /usr/share/autojump/autojump.sh' >> ~/.bashrc

Step 4: Autojump Pretesting and Usage

5. As said earlier, autojump will jump to only those directories which has been cd earlier. So before we start testing we are going to ‘cd‘ a few directories and create a few as well. Here is what I did.

$ cd
$ cd
$ cd Desktop/
$ cd
$ cd Documents/
$ cd
$ cd Downloads/
$ cd
$ cd Music/
$ cd
$ cd Pictures/
$ cd
$ cd Public/
$ cd
$ cd Templates
$ cd
$ cd /var/www/
$ cd
$ mkdir autojump-test/
$ cd
$ mkdir autojump-test/a/ && cd autojump-test/a/
$ cd
$ mkdir autojump-test/b/ && cd autojump-test/b/
$ cd
$ mkdir autojump-test/c/ && cd autojump-test/c/
$ cd

Now we have cd to the above directory and created a few directories for testing, we are ready to go.

Point to Remember : The usage of j is a wrapper around autojump. You may use j in place of autojumpcommand and vice versa.

6. Check the version of installed autojump using -v option.

$ j -v
or
$ autojump -v

Check Autojump Version

Check Autojump Version

7. Jump to a previously visited directory ‘/var/www‘.

$ j www

Jump To Directory

Jump To Directory

8. Jump to previously visited child directory ‘/home/avi/autojump-test/b‘ without typing sub-directory name.

$ jc b

Jump to Child Directory

Jump to Child Directory

9. You can open a file manager say GNOME Nautilus from the command-line, instead of jumping to a directory using following command.

$ jo www

Jump to Directory

Jump to Directory

Open Directory in File Browser

Open Directory in File Browser

You can also open a child directory in a file manager.

$ jco c

Open Child Directory

Open Child Directory

Open Child Directory in File Browser

Open Child Directory in File Browser

10. Check stats of each folder key weight and overall key weight along with total directory weight. Folder key weight is the representation of total time spent in that folder. Directory weight if the number of directory in list.

$ j --stat

Check Directory Statistics

Check Directory Statistics

Tips : The file where autojump stores run log and error log files in the folder ~/.local/share/autojump/. Don’t overwrite these files, else you may loose all your stats.

$ ls -l ~/.local/share/autojump/

Autojump Logs

Autojump Logs

11. You may seek help, if required simply as:

$ j --help

Autojump Help and Options

Autojump Help and Options

Functionality Requirements and Known Conflicts

  1. autojump lets you jump to only those directories to which you have already cd. Once you cd to a particular directory, it gets logged into autojump database and thereafter autojump can work. You can not jump to a directory to which you have not cd, after setting up autojump, no matter what.
  2. You can not jump to a directory, the name of which begins with a dash (-). You may consider to read my post on Manipulation of files and directories that start with ‘-‘ or other special characters”
  1. In BASH Shell autojump keeps track of directories by modifying $PROMPT_COMMAND. It is strictly recommended not to overwrite $PROMPT_COMMAND. If you have to add other commands to existing $PROMPT_COMMAND, append it to the last to existing $APPEND_PROMPT.

Conclusion:

autojump is a must utility if you are a command-line user. It eases a lots of things. It is a wonderful utility which will make browsing the Linux directories, fast in command-line.

Source

WP2Social Auto Publish Powered By : XYZScripts.com