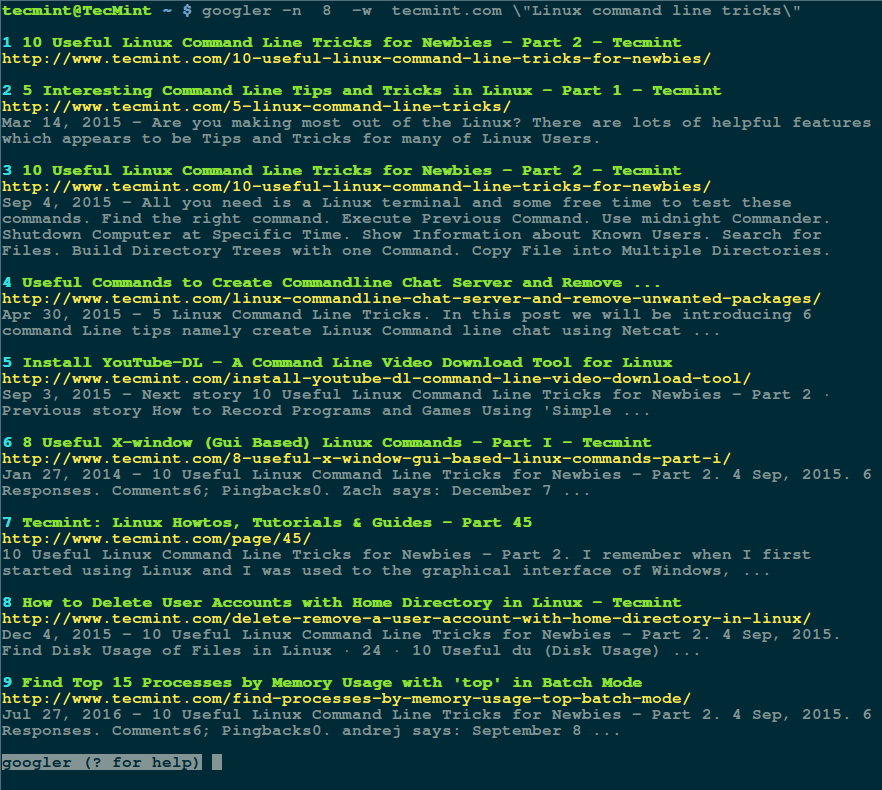
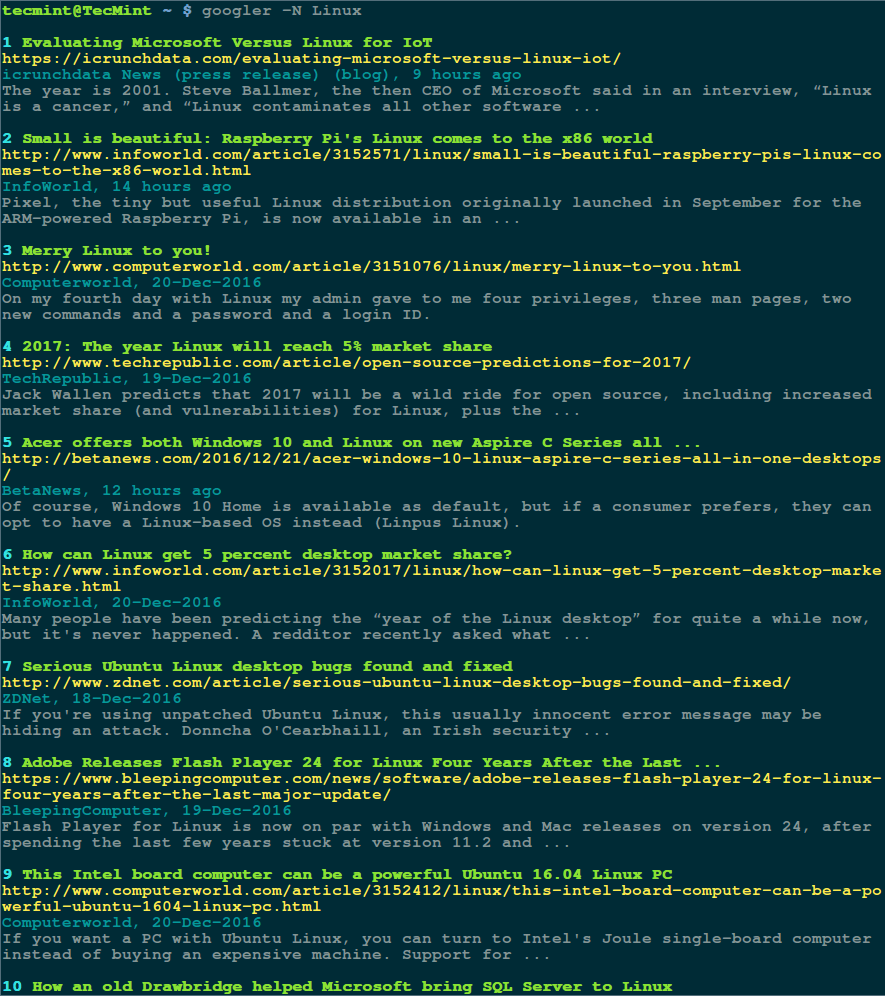
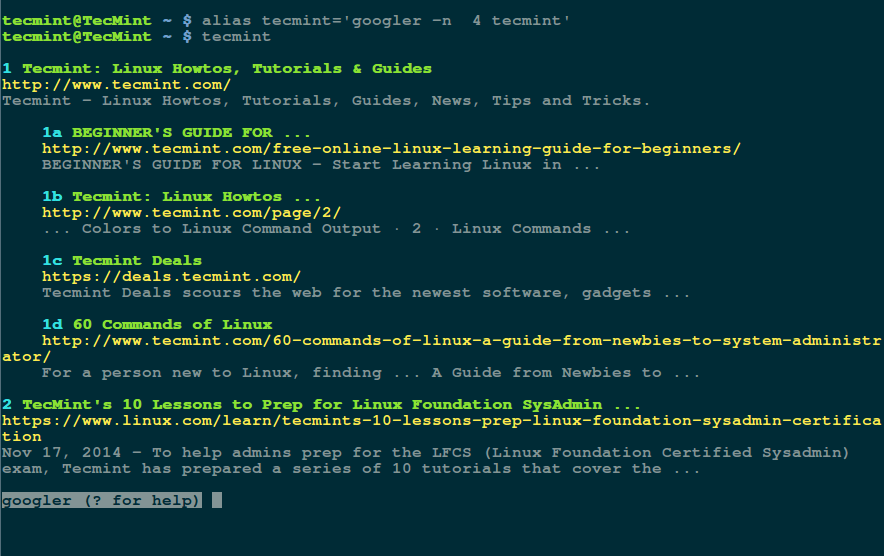
In the last article, we have covered few useful tools like ‘rTorrent‘, ‘wget‘, ‘cURL‘, ‘w3m‘, and ‘Elinks‘. We got lots of response to cover few other tools of same genre, if you’ve missed the first part you can go through it..
- 5 Command Line Tools for Downloading Files and Browsing Websites
This article aims at making you aware of several other Linux command Line browsing and downloading applications, which will help you to browse and download files within the Linux shell.
1. links
Links is an open source web browser written in C programming Language. It is available for all major platforms viz., Linux, Windows, OS X and OS/2. This browser is text based as well as graphical. The text based links web browser is shipped by most of the standard Linux distributions by default. If links is not installed in your system by default you may install it from the repo. Elinks is a fork of links.
# apt-get install links
# yum install links
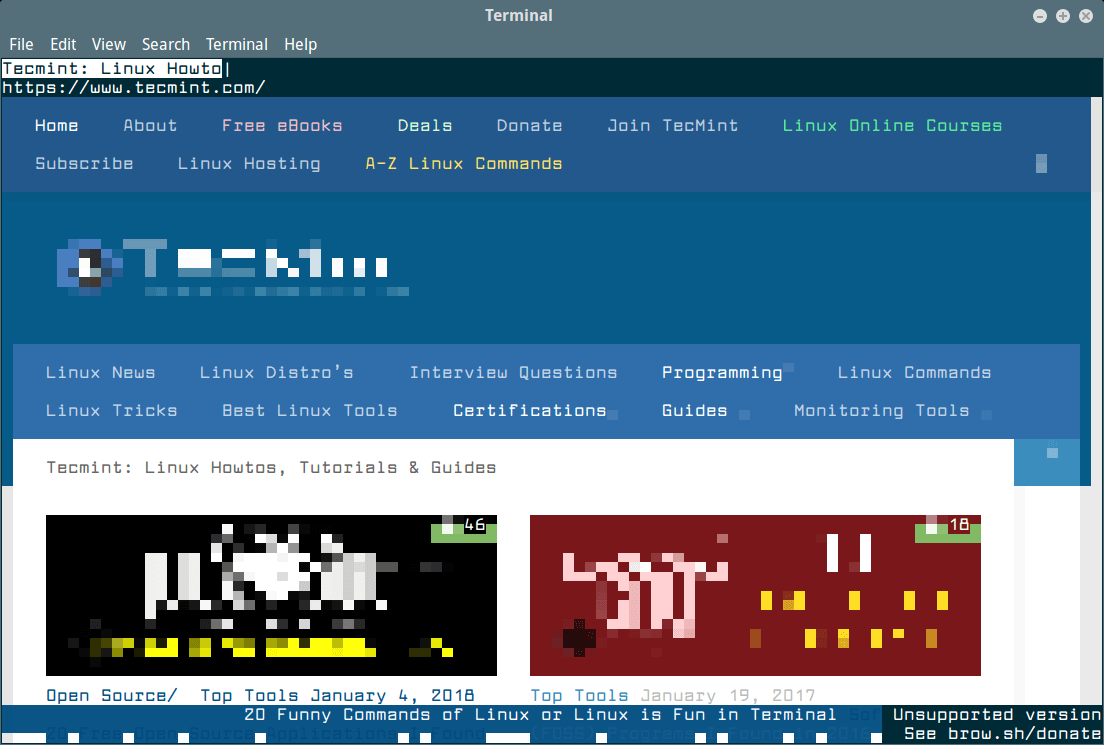
After installing links, you can browse any websites within the terminal as shown below in the screen cast..
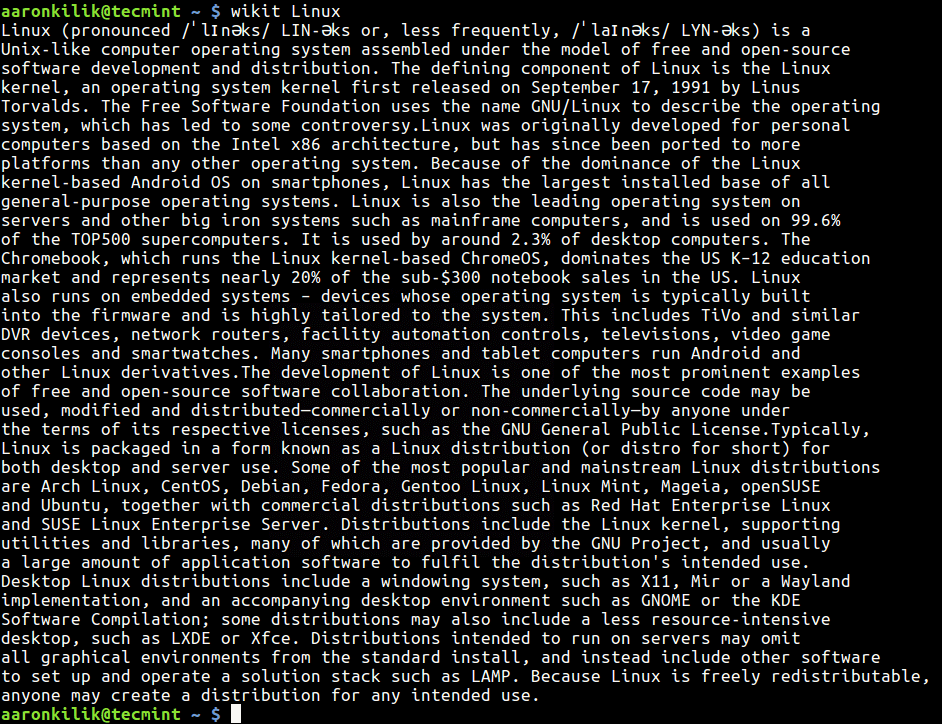
# links www.tecmint.com
Use UP and DOWN arrow keys to navigate. Right arrow Key on a link will redirect you to that link and Left arrow key will bring you back to the last page. To QUIT press q.
Here is how it seems to access Tecmint using links tool.

If you are interested in installing GUI of links, you may need to download latest source tarball (i.e. version 2.9) from http://links.twibright.com/download/.
Alternatively, you may use following wget command to download and install as suggested below.
# wget http://links.twibright.com/download/links-2.9.tar.gz
# tar -xvf links-2.9.tar.gz
# cd links-2.9
# ./configure –enable-graphics
# make
# make install
Note: You need to install packages (libpng, libjpeg, TIFF library, SVGAlib, XFree86, C Compiler and make), if not already installed to successfully compile the package.
2. links2
Links2 is a graphical web browser version of Twibright Labs Links web browser. This browser has support for mouse and clicks. Designed specially for speed without any CSS support, fairly good HTML and JavaScript support with limitations.
To install links2.
# apt-get install links2
# yum install links2
3. lynx
A text based web browser released under GNU GPLv2 license and written in ISO C. lynx is highly configurable web browser and Savior for many SYSAdmin. It has the reputation of being the oldest web browser that is being used and still actively developed.
To install lynx.
# apt-get install lynx
# yum install lynx
After installing lynx, type the following command to browse the website as shown below in the screen cast..
# lynx www.tecmint.com
If you are interested in knowing a bit more about links and lynx web browser, you may like to visit the below link:
- Web Browsing with Lynx and Links Command Line Tools
4. youtube-dl
youtube-dl is a platform independent application which can be used to download videos from youtube and a few other sites. Written primarily in python and released under GNU GPL License, the application works out of the box. (Since youtube don’t allow you to download videos, it may be illegal to use it. Check the laws before you start using this.)
To install youtube-dl.
# apt-get install youtube-dl
# yum install youtube-dl
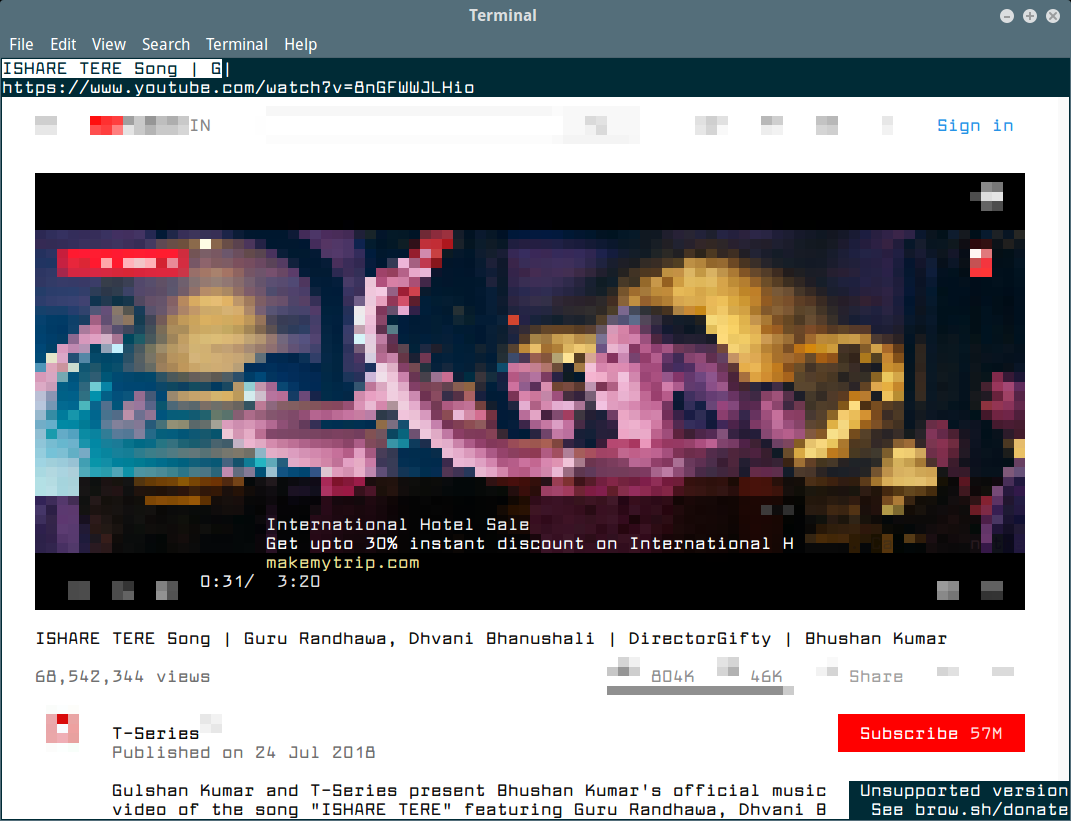
After installing, try to download files from the Youtube site, as shown in the below screen cast.
# youtube-dl https://www.youtube.com/watch?v=ql4SEy_4xws

If you are interested in knowing more about youtube-dl you may like to visit the below link:
- YouTube-DL – A Command Line Youtube Video Downloader for Linux
5. fetch
It is a command utility for unix-like operating system that is used for URL retrieval. It supports a lot of options like fetching ipv4 only address, ipv6 only address, no redirect, exit after successful file retrieval request, retry, etc.
Fetch can be Downloaded and installed from the link below
http://sourceforge.net/projects/fetch/?source=typ_redirect
But before you compile and run it, you should install HTTP Fetcher. Download HTTP Fetcher from the link below.
http://sourceforge.net/projects/http-fetcher/?source=typ_redirect
6. Axel
Axel is a command-line based download accelerator for Linux. Axel makes it possible to download a file at much faster speed through single connection request for multiple copies of files in small chunks through multiple http and ftp connections.
To install Axel.
# apt-get install axel
# yum install axel
After axel installed, you may use following command to download any given file, as shown in the screen cast.
# axel http://mirror.cse.iitk.ac.in/archlinux/iso/2015.04.01/archlinux-2015.04.01-dual.iso

7. aria2
aria2 is a command-line based download utility that is lightweight and support multi-protocol (HTTP, HTTPS, FTP, BitTorrent and Metalink). It can use metalinks files to simultaneously download ISO files from more than one server. It can serve as a Bit torrent client as well.
To install aria2.
# apt-get install aria2
# yum install aria2
Once aria2 installed, you can fire up the following command to download any given file…
# aria2c http://cdimage.debian.org/debian-cd/7.8.0/multi-arch/iso-cd/debian-7.8.0-amd64-i386-netinst.iso

Aria2: Command Line Download Manager for Linux
If you’re interested to know more at aria2 and their switches, read the following article.
- Aria2 – A Multi-Protocol Command-Line Download Manager for Linux
8. w3m
w3m is a another open source text-based web browser very similar to lynx, which runs on a terminal. It uses emacs-w3m an Emacs interface for w3m to browse web sites within emacs interface.
To install w3m.
# apt-get install w3m
# yum install w3m
After installing w3m, fire up the following command to browse the website as shown below.
# w3m www.tecmint.com
w3m Terminal Browser
That’s all for now.
Source