There are a countless number of commands in Linux. We are bound to use a number of them on a daily routine or numerous times to perform common tasks than others. It is important to note that certain commands are “distro-based” – they can only be found in specific distros. While others are generic Unix/Linux commands that you’ll find in all if not most mainstream distros.
In this article, we will introduce you a list of most frequently used Linux commands with their examples for easy learning. You can find the actual description of each Linux command in their manual page which you can access like this:
For more information about anacron and cron read: Cron Vs Anacron: How to Schedule Jobs Using Anacron on Linux
apropos Command
apropos command is used to search and display a short man page description of a command/program as follows.
$ apropos adduser
apt Command
apt tool is a relatively new higher-level package manager for Debian/Ubuntu systems:
$ sudo apt update
For more apt usage read: 15 Useful Examples on APT Command
apt-get Command
apt-get is a powerful and free front-end package manager for Debian/Ubuntu systems. It is used to install new software packages, remove available software packages, upgrade existing software packages as well as upgrade entire operating system.
$ sudo apt-get update
For more apt-get usage, read: 25 Useful Commands of APT-GET for Package Management
aptitude Command
aptitude is a powerful text-based interface to the Debian GNU/Linux package management system. Like apt-get and apt; it can be used to install, remove or upgrade software packages on a system.
$ sudo aptitude update
For more usage on aptitude, read: Learn Debian Package Management with Aptitude Command
arch Command
arch is a simple command for displaying machine architecture or hardware name (similar to uname -m):
$ arch
arp Command
ARP (Address Resolution Protocol) is a protocol that maps IP network addresses of a network neighbor with the hardware (MAC) addresses in an IPv4 network.
You can use it as below to find all alive hosts on a network:
$ sudo arp-scan --interface=enp2s0 --localnet
at Command
at command is used to schedule tasks to run in a future time. It’s an alternative to cron and anacron, however, it runs a task once at a given future time without editing any config files:
For example, to shutdown the system at 23:55 today, run:
$ sudo echo "shutdown -h now" | at -m 23:55
atq Command
atq command is used to view jobs in at command queue:
$ atq
atrm Command
atrm command is used to remove/deletes jobs (identified by their job number) from at command queue:
$ atrm 2
For more usage about at command, read: How to Use ‘at’ Command to Schedule a Task in Linux
awk Command
Awk is a powerful programming language created for text processing and generally used as a data extraction and reporting tool.
$ awk '//{print}'/etc/hosts
For more Awk concepts (basic and advance) with simple and easy-to-understand, we’ve created a book that contains 13 chapters with a total of 41 pages, which covers all Awk basic and advance usage with practical examples: Awk Getting Started Guide for Beginners
batch Command
batch is also used to schedule tasks to run a future time, similar to the at command.
basename Command
basename command helps to print the name of a file stripping of directories in the absolute path:
$ basename bin/findhosts.sh
bc Command
bc is a simple yet powerful and arbitrary precision CLI calculator language which can be used like this:
$ echo 20.05 + 15.00 | bc
bg Command
bg is a command used to send a process to the background.
$ tar -czf home.tar.gz .
$ bg
$ jobs
To learn more about bg command, read: Start Linux Command in Background and Detach Process in Terminal
bzip2 Command
bzip2 command is used to compress or decompress file(s).
$ bzip2 -z filename      #Compress
$ bzip2 -d filename.bz2  #Decompress
To learn more examples on bzip2, read: How to Compress and Decompress a .bz2 File in Linux
cal Command
The cal command print a calendar on the standard output.
$ cal
cat Command
cat command is used to view contents of a file or concatenate files, or data provided on standard input, and display it on the standard output.
$ cat file.txt
To learn more about cat command, read: 13 Useful Cat Command Examples on Linux
chgrp Command
chgrp command is used to change the group ownership of a file. Provide the new group name as its first argument and the name of file as the second argument like this:
$ chgrp tecmint users.txt
chmod Command
chmod command is used to change/update file access permissions like this.
$ chmod +x sysinfo.sh
chown Command
chown command changes/updates the user and group ownership of a file/directory like this.
$ chmod -R www-data:www-data /var/www/html
To learn more about chgrp, chmod and chwon commands, read: Managing Users & Groups, File Permissions & Attributes in Linux
cksum Command
cksum command is used to display the CRC checksum and byte count of an input file.
$ cksum README.txt
clear Command
clear command lets you clear the terminal screen, simply type.
$ clear
cmp Command
cmp performs a byte-by-byte comparison of two files like this.
$ cmp file1 file2
comm Command
comm command is used to compare two sorted files line-by-line as shown below.
$ comm file1 file2
cp Command
cp command is used for copying files and directories from one location to another.
$ cp /home/tecmint/file1 /home/tecmint/Personal/
For more information on how to copy files in Linux, read:
- How to Copy a File to Multiple Directories in Linux
- Advanced Copy Command – Shows Progress Bar While Copying Large Files/Folders in Linux
- Progress – A Tiny Tool to Monitor Progress for (cp, mv, dd, tar, etc.) Commands in Linux
date Command
date command displays/sets the system date and time like this.
$ date
$ date --set="8 JUN 2017 13:00:00"
To learn more about how to set date in Linux, read: How to Set System Date in Linux
dd Command
dd command is used for copying files, converting and formatting according to flags provided on the command line. It can strip headers, extracting parts of binary files and so on.
The example below shows creating a boot-able USB device:
$ dd if=/home/tecmint/kali-linux-1.0.4-i386.iso of=/dev/sdc1 bs=512M; sync
df Command
df command is used to show file system disk space usage as follows.
$ df -h
For more usage on df command, read: 12 Useful ‘df’ Command Examples to Check Disk Space
diff Command
diff command is used to compare two files line by line. It can also be used to find the difference between two directories in Linux like this:
$ diff file1 file2
Some useful diff tools for Linux: 8 Best File Comparison and Difference (Diff) Tools for Linux
dir Command
dir command works like Linux ls command, it lists the contents of a directory.
$ dir
dmidecode Command
dmidecode command is a tool for retrieving hardware information of any Linux system. It dumps a computer’s DMI (a.k.a SMBIOS) table contents in a human-readable format for easy retrieval.
To view your system hardware info, you can type:
$ sudo dmidecode --type system
Some useful tools to find out Linux system hardware info: 10 Useful Commands to Get Linux Hardware Information
du Command
du command is used to show disk space usage of files present in a directory as well as its sub-directories as follows.
$ du /home/aaronkilik
echo Command
echo command prints a text of line provided to it.
$ echo “This is TecMint - Linux How Tos”
eject Command
eject command is used to eject removable media such as DVD/CD ROM or floppy disk from the system.
$ eject /dev/cdrom
$ eject /mnt/cdrom/
$ eject /dev/sda
env Command
env command lists all the current environment variables and used to set them as well.
$ env
Learn more on How to Set and Unset Environment Variables in Linux
exit Command
exit command is used to exit a shell like so.
$ exit
expr Command
expr command is used to calculate an expression as shown below.
$ expr 20 + 30
factor Command
factor command is used to show the prime factors of a number.
$ factor 10
find Command
find command lets you search for files in a directory as well as its sub-directories. It searches for files by attributes such as permissions, users, groups, file type, date, size and other possible criteria.
$ find /home/tecmint/ -name tecmint.txt
Learn more on how to find files in Linux:
- How to Use ‘find’ Command to Search for Multiple Filenames (Extensions)
- How to Find Number of Files in a Directory and Subdirectories
- How to Find Today’s Modified Files in Linux
- How to Find and Sort Files Based on Modified Date and Time
- How to Find Top Directories and Files (Disk Space) in Linux
free Command
free command shows the system memory usage (free, used, swapped, cached, etc.) in the system including swap space. Use the -h option to display output in human friendly format.
$ free -h
Learn more on how to find memory usage in Linux.
- Find Top Running Processes by Highest Memory and CPU Usage in Linux
- Smem – Reports Memory Consumption Per-Process and Per-User Basis in Linux
- How to Clear RAM Memory Cache, Buffer and Swap Space on Linux
grep Command
grep command searches for a specified pattern in a file (or files) and displays in output lines containing that pattern as follows.
$ grep ‘tecmint’ domain-list.txt
Learn more about grep command usage in Linux.
- What’s Difference Between Grep, Egrep and Fgrep in Linux?
- 12 Basic Linux ‘Grep’ Command Examples in Linux
- 11 Advanced Linux ‘Grep’ Commands in Linux
groups Command
groups command displays all the names of groups a user is a part of like this.
$ groups
$ groups tecmint
gzip Command
Gzip helps to compress a file, replaces it with one having a .gz extension as shown below:
$ gzip passwds.txt
$ cat file1 file2 | gzip > foo.gz
gunzip Command
gunzip expands or restores files compressed with gzip command like this.
$ gunzip foo.gz
head Command
head command is used to show first lines (10 lines by default) of the specified file or stdin to the screen:
# ps -eo pid,ppid,cmd,%mem,%cpu --sort=-%mem | head
history Command
history command is used to show previously used commands or to get info about command executed by a user.
$ history
Learn more about Linux history command.
- The Power of Linux “History Command” in Bash Shell
- Set Date and Time for Each Command You Execute in Bash History
- How to Use ‘Yum History’ to Find Out Installed/Removed Packages Info
hostname Command
hostname command is used to print or set system hostname in Linux.
$ hostname
$ hostname NEW_HOSTNAME
hostnamectl Command
hostnamectl command controls the system hostname under systemd. It is used to print or modify the system hostname and any related settings:
$ hostnamectl
$ sudo hostnamectl set-hostname NEW_HOSTNAME
hwclock
hwclock is a tool for managing the system hardware clock; read or set the hardware clock (RTC).
$ sudo hwclock
$ sudo hwclock --set --date 8/06/2017
hwinfo Command
hwinfo is used to probe for the hardware present in a Linux system like this.
$ hwinfo
Learn more about how to get Linux hardware info.
- I-Nex – An Advanced Tool to Collect System/Hardware Information in Linux
- 9 Useful Tools to Get System Information in Linux
id Command
id command shows user and group information for the current user or specified username as shown below.
$ id tecmint
ifconfig Command
ifconfig command is used to configure a Linux systems network interfaces. It is used to configure, view and control network interfaces.
$ ifconfig
$ sudo ifconfig eth0 up
$ sudo ifconfig eth0 down
$ sudo ifconfig eth0 172.16.25.125
ionice Command
ionice command is used to set or view process I/O scheduling class and priority of the specified process.
If invoked without any options, it will query the current I/O scheduling class and priority for that process:
$ ionice -c 3 rm /var/logs/syslog
To understand how it works, read this article: How to Delete HUGE (100-200GB) Files in Linux
iostat Command
iostat is used to show CPU and input/output statistics for devices and partitions. It produces useful reports for updating system configurations to help balance the input/output load between physical disks.
$ iostat
ip Command
ip command is used to display or manage routing, devices, policy routing and tunnels. It also works as a replacement for well known ifconfig command.
This command will assign an IP address to a specific interface (eth1 in this case).
$ sudo ip addr add 192.168.56.10 dev eth1
iptables Command
iptables is a terminal based firewall for managing incoming and outgoing traffic via a set of configurable table rules.
The command below is used to check existing rules on a system (using it may require root privileges).
$ sudo iptables -L -n -v
Learn more about iptables firewall in Linux.
- How to Start/Stop and Enable/Disable FirewallD and Iptables in Linux
- Basic Guide on IPTables (Linux Firewall) Tips / Commands
- Nishita Agarwal Shares Her Interview Experience on Linux ‘iptables’ Firewall
iw Command
iw command is used to manage wireless devices and their configuration.
$ iw list
iwlist Command
iwlist command displays detailed wireless information from a wireless interface. The command below enables you to get detailed information about the wlp1s0interface.
$ iwlist wlp1s0 scanning
kill Command
kill command is used to kill a process using its PID by sending a signal to it (default signal for kill is TERM).
$ kill -p 2300
$ kill -SIGTERM -p 2300
killall Command
killall command is used to kill a process by its name.
$ killall firefox
Learn more about kill and killall command in Linux.
- How to Find and Kill Running Processes in Linux
- A Guide to Kill, Pkill and Killall Commands to Terminate a Process
- How to Kill Processes/Unresponsive Applications Using ‘xkill’ Command
kmod Command
kmod command is used to manage Linux kernel modules. To list all currently loaded modules, type.
$ kmod list
last Command
last command display a listing of last logged in users.
$ last
ln Command
ln command is used to create a soft link between files using the -s flag like this.
$ ln -s /usr/bin/lscpu cpuinfo
locate Command
locate command is used to find a file by name. The locate utility works better and faster than it’s find counterpart.
The command below will search for a file by its exact name (not *name*):
$ locate -b '\domain-list.txt'
login Command
login command is used to create a new session with the system. You’ll be asked to provide a username and a password to login as below.
$ sudo login
ls Command
ls command is used to list contents of a directory. It works more or less like dir command.
The -l option enables long listing format like this.
$ ls -l file1
To know more about ls command, read our guides.
- 15 Basic ‘ls’ Command Examples in Linux
- 7 Quirky ‘ls’ Command Tricks Every Linux User Should Know
- How to Sort Output of ‘ls’ Command By Last Modified Date and Time
- 15 Interview Questions on Linux “ls” Command – Part 1
- 10 Useful ‘ls’ Command Interview Questions – Part 2
lshw Command
lshw command is a minimal tool to get detailed information on the hardware configuration of the machine, invoke it with superuser privileges to get a comprehensive information.
$ sudo lshw
lscpu Command
lscpu command displays system’s CPU architecture information (such as number of CPUs, threads, cores, sockets, and more).
$ lscpu
lsof Command
lsof command displays information related to files opened by processes. Files can be of any type, including regular files, directories, block special files, character special files, executing text reference, libraries, and stream/network files.
To view files opened by a specific user’s processes, type the command below.
$ lsof -u tecmint
lsusb Command
lsusb command shows information about USB buses in the system and the devices connected to them like this.
$ lsusb
man Command
man command is used to view the on-line reference manual pages for commands/programs like so.
$ man du
$ man df
md5sum Command
md5sum command is used to compute and print the MD5 message digest of a file. If run without arguments, debsums checks every file on your system against the stock md5sum files:
$ sudo debsums
mkdir Command
mkdir command is used to create single or more directories, if they do not already exist (this can be overridden with the -p option).
$ mkdir tecmint-files
OR
$ mkdir -p tecmint-files
more Command
more command enables you to view through relatively lengthy text files one screenful at a time.
$ more file.txt
Check difference between more and less command and Learn Why ‘less’ is Faster Than ‘more’ Command
mv Command
mv command is used to rename files or directories. It also moves a file or directory to another location in the directory structure.
$ mv test.sh sysinfo.sh
nano Command
nano is a popular small, free and friendly text editor for Linux; a clone of Pico, the default editor included in the non-free Pine package.
To open a file using nano, type:
$ nano file.txt
nc/netcat Command
nc (or netcat) is used for performing any operation relating to TCP, UDP, or UNIX-domain sockets. It can handle both IPv4 and IPv6 for opening TCP connections, sending UDP packets, listening on arbitrary TCP and UDP ports, performing port scanning.
The command below will help us see if the port 22 is open on the host 192.168.56.5.
$ nc -zv 192.168.1.5 22
Learn more examples and usage on nc command.
- How to Check Remote Ports are Reachable Using ‘nc’ Command
- How to Transfer Files Between Computers Using ‘nc’ Command
netstat Command
netstat command displays useful information concerning the Linux networking subsystem (network connections, routing tables, interface statistics, masquerade connections, and multicast memberships).
This command will display all open ports on the local system:
$ netstat -a | more
nice Command
nice command is used to show or change the nice value of a running program. It runs specified command with an adjusted niceness. When run without any command specified, it prints the current niceness.
The following command starts the process “tar command” setting the “nice” value to 12.
$ nice -12 tar -czf backup.tar.bz2 /home/*
nmap Command
nmap is a popular and powerful open source tool for network scanning and security auditing. It was intended to quickly scan large networks, but it also works fine against single hosts.
The command below will probe open ports on all live hosts on the specified network.
$ nmap -sV 192.168.56.0/24
nproc Command
nproc command shows the number of processing units present to the current process. It’s output may be less than the number of online processors on a system.
$ nproc
openssl Command
The openssl is a command line tool for using the different cryptography operations of OpenSSL’s crypto library from the shell. The command below will create an archive of all files in the current directory and encrypt the contents of the archive file:
$ tar -czf - * | openssl enc -e -aes256 -out backup.tar.gz
passwd Command
passwd command is used to create/update passwords for user accounts, it can also change the account or associated password validity period. Note that normal system users may only change the password of their own account, while root may modify the password for any account.
$ passwd tecmint
pidof Command
pidof displays the process ID of a running program/command.
$ pidof init
$ pidof cinnamon
ping Command
ping command is used to determine connectivity between hosts on a network (or the Internet):
$ ping google.com
ps Command
ps shows useful information about active processes running on a system. The example below shows the top running processes by highest memory and CPU usage.
# ps -eo pid,ppid,cmd,%mem,%cpu --sort=-%mem | head
pstree Command
pstree displays running processes as a tree which is rooted at either PID or init if PID is omitted.
$ pstree
pwd Command
pwd command displays the name of current/working directory as below.
$ pwd
rdiff-backup Command
rdiff-backup is a powerful local/remote incremental backup script written in Python. It works on any POSIX operating system such as Linux, Mac OS X.
Note that for remote backups, you must install the same version of rdiff-backup on both the local and remote machines. Below is an example of a local backup command:
$ sudo rdiff-backup /etc /media/tecmint/Backup/server_etc.backup
reboot Command
reboot command may be used to halt, power-off or reboot a system as follows.
$ reboot
rename Command
rename command is used to rename many files at once. If you’ve a collection of files with “.html” extension and you want to rename all of them with “.php” extension, you can type the command below.
$ rename 's/\.html$/\.php/' *.html
rm command
rm command is used to remove files or directories as shown below.
$ rm file1
$ rm -rf my-files
rmdir Command
rmdir command helps to delete/remove empty directories as follows.
$ rmdir /backup/all
scp Command
scp command enables you to securely copy files between hosts on a network, for example.
$ scp ~/names.txt root@192.168.56.10:/root/names.txt
shutdown Command
shutdown command schedules a time for the system to be powered down. It may be used to halt, power-off or reboot the machine like this.
$ shutdown --poweroff
Learn how to show a Custom Message to Users Before Linux Server Shutdown.
sleep Command
sleep command is used to delay or pause (specifically execution of a command) for a specified amount of time.
$ check.sh; sleep 5; sudo apt update
sort Command
sort command is used to sort lines of text in the specified file(s) or from stdin as shown below
$ cat words.txt
Learn more examples of sort command in Linux.
- 7 Interesting Linux ‘sort’ Command Examples
- How to Sort Output of ‘ls’ Command By Last Modified Date and Time
- How to Find and Sort Files Based on Modification Date and Time
split Command
split as the name suggests, is used to split a large file into small parts.
$ tar -cvjf backup.tar.bz2 /home/tecmint/Documents/*
ssh Command
ssh (SSH client) is an application for remotely accessing and running commands on a remote machine. It is designed to offer a secure encrypted communications between two untrusted hosts over an insecure network such as the Internet.
$ ssh tecmint@192.168.56.10
Learn more about ssh command and how to use it on Linux.
- 5 Best Practices to Secure and Protect SSH Server
- Configure “No Password SSH Keys Authentication” with PuTTY on Linux
- SSH Passwordless Login Using SSH Keygen in 5 Easy Steps
- Restrict SSH User Access to Certain Directory Using Chrooted Jail
stat Command
stat is used to show a file or file system status like this (-f is used to specify a filesystem).
$ stat file1
su Command
su command is used to switch to another user ID or become root during a login session. Note that when su is invoked without a username, it defaults to becoming root.
$ su
$ su tecmint
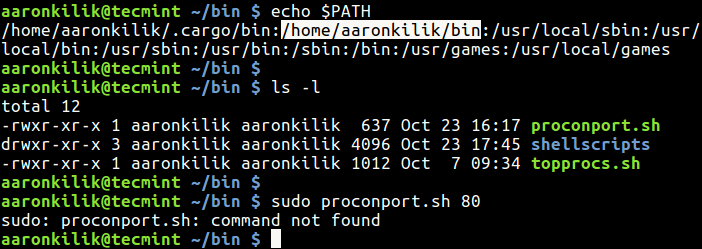
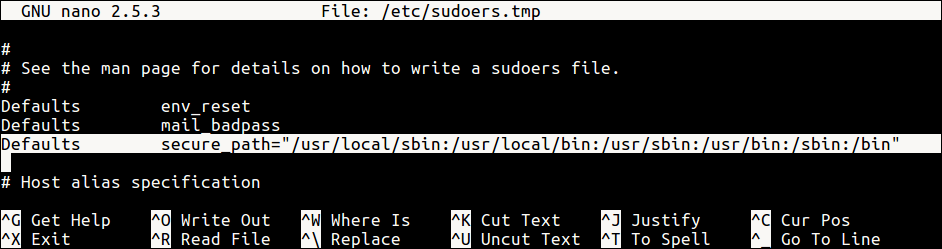
sudo Command
sudo command allows a permitted system user to run a command as root or another user, as defined by the security policy such as sudoers.
In this case, the real (not effective) user ID of the user running sudo is used to determine the user name with which to query the security policy.
$ sudo apt update
$ sudo useradd tecmint
$ sudo passwd tecmint
Learn more about sudo command and how to use it on Linux.
- 10 Useful Sudoers Configurations for Setting ‘sudo’ in Linux
- How to Run ‘sudo’ Command Without Entering a Password in Linux
- How to Keep ‘sudo’ Password Timeout Session Longer in Linux
sum Command
sum command is used to show the checksum and block counts for each each specified file on the command line.
$ sum output file.txt
tac Command
tac command concatenates and displays files in reverse. It simply prints each file to standard output, showing last line first.
$tac file.txt
tail Command
tail command is used to display the last lines (10 lines by default) of each file to standard output.
If there more than one file, precede each with a header giving the file name. Use it as follow (specify more lines to display using -n option).
$ tail long-file
OR
$ tail -n 15 long-file
talk Command
talk command is used to talk to another system/network user. To talk to a user on the same machine, use their login name, however, to talk to a user on another machine use ‘user@host’.
$ talk person [ttyname]
OR
$ talk‘user@host’ [ttyname]
tar Command
tar command is a most powerful utility for archiving files in Linux.
$ tar -czf home.tar.gz .
Learn more about tar command and its usage on Linux.
- 18 Tar Command Examples in Linux
- How to Split Large ‘tar’ Archive into Multiple Files of Certain Size
- How to Extract Tar Files to Specific or Different Directory in Linux
tee Command
tee command is used to read from standard input and prints to standard output and files as shown below.
$ echo "Testing how tee command works" | tee file1
time Command
time command runs programs and summarizes system resource usage.
$ time wc /etc/hosts
top Command
top program displays all processes on a Linux system in regards to memory and CPU usage and provides a dynamic real-time view of a running system.
$ top
touch Command
touch command changes file timestamps, it can also be used to create a file as follows.
$ touch file.txt
tr Command
tr command is a useful utility used to translate (change) or delete characters from stdin, and write the result to stdout or send to a file as follows.
$ cat domain-list.txt | tr [:lower:] [:upper:]
uname Command
uname command displays system information such as operating system, network node hostname kernel name, version and release etc.
Use the -a option to show all the system information:
$ uname
uniq Command
uniq command displays or omits repeated lines from input (or standard input). To indicate the number of occurrences of a line, use the -c option.
$ cat domain-list.txt
uptime Command
uptime command shows how long the system has been running, number of logged on users and the system load averages as follows.
$ uptime
users Command
users command shows the user names of users currently logged in to the current host like this.
$ users
vim/vi Command
vim (Vi Improved) popular text editor on Unix-like operating systems. It can be used to edit all kinds of plain text and program files.
$ vim file
Learn how to use vi/vim editor in Linux along with some tips and tricks.
- 10 Reasons Why You Should Use Vi/Vim Editor in Linux
- How to Install and Use Vi/Vim Editor in Linux
- How to Save a File in Vim Editor in Linux
- How to Exit a File in Vim Editor in Linux
- Learn Useful ‘Vi/Vim’ Editor Tips and Tricks to Enhance Your Skills
- 8 Interesting ‘Vi/Vim’ Editor Tips and Tricks for Every Linux Administrator
w Command
w command displays system uptime, load averages and information about the users currently on the machine, and what they are doing (their processes) like this.
$ w
wall Command
wall command is used to send/display a message to all users on the system as follows.
$ wall “This is TecMint – Linux How Tos”
watch Command
watch command runs a program repeatedly while displaying its output on fullscreen. It can also be used to watch changes to a file/directory. The example below shows how to watch the contents of a directory change.
$ watch -d ls -l
wc Command
wc command is used to display newline, word, and byte counts for each file specified, and a total for many files.
$ wc filename
wget Command
wget command is a simple utility used to download files from the Web in a non-interactive (can work in the background) way.
$ wget -c http://ftp.gnu.org/gnu/wget/wget-1.5.3.tar.gz
whatis Command
whatis command searches and shows a short or one-line manual page descriptions of the provided command name(s) as follows.
$ whatis wget
which Command
which command displays the absolute path (pathnames) of the files (or possibly links) which would be executed in the current environment.
$ which who
who Command
who command shows information about users who are currently logged in like this.
$ who
whereis Command
whereis command helps us locate the binary, source and manual files for commands.
$ whereis cat
xargs Command
xargs command is a useful utility for reading items from the standard input, delimited by blanks (protected with double or single quotes or a backslash) or newlines, and executes the entered command.
The example below show xargs being used to copy a file to multiple directories in Linux.
$ echo /home/aaronkilik/test/ /home/aaronkilik/tmp | xargs -n 1 cp -v /home/aaronkilik/bin/sys_info.sh
yes Command
yes command is used to display a string repeatedly until when terminated or killed using [Ctrl + C] as follows.
$ yes "This is TecMint - Linux HowTos"
youtube-dl Command
youtube-dl is a lightweight command-line program to download videos and also extract MP3 tracks from YouTube.com and a few more sites.
The command below will list available formats for the video in the provided link.
$ youtube-dl --list-formats https://www.youtube.com/watch?v=iR
zcmp/zdiff Command
zcmp and zdiff minimal utilities used to compare compressed files as shown in the examples below.
$ zcmp domain-list.txt.zip basic_passwords.txt.zip
$ zdiff domain-list.txt.zip basic_passwords.txt.zip
zip Command
zip is a simple and easy-to-use utility used to package and compress (archive) files.
$ tar cf - . | zip | dd of=/dev/nrst0 obs=16k
$ zip inarchive.zip foo.c bar.c --out outarchive.zip
$ tar cf - .| zip backup -
zz Command
zz command is an alias of the fasd commandline tool that offers quick access to files and directories in Linux. It is used to quickly and interactively cd into a previously accessed directory by selecting the directory number from the first field as follows.
$ zz
That’s it for now! As we mentioned before, there are a countless number of commands in Linux. The list is possibly longer than we can offer.
Source