


Managing
Workspaces using Oracle Files
To access Oracle Files, enter the URL provided by your administrator and login with your user id and password. Bob needs to know how to perform the following tasks for the project he will soon begin.
|
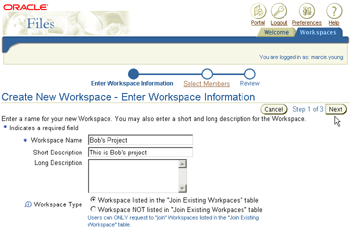
To create a Workspace, click My Workspaces in the menu bar.
To create a Workspace, click Add Workspace then OK and enter the name of the Workspace and click on Workspace listed in the Join Existing Workspaces table because Bob would like others to submit a request to join the Workspace. Bob will need to approve the request before the person is added to the list of members.
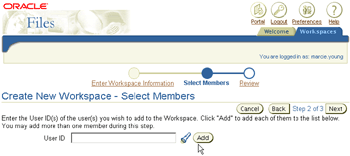
Assign Members to the Workspace
Bob adds all of the members he wants to have access to the files in this Workspace. Click Add. Select all the members to the list and click Next.
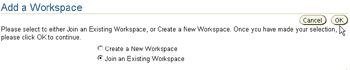
Bob needs access to the Planning Document that Hannah completed. To join the Planning Workspace, from the My Workspaces menu tab, click Add Workspace in the menu bar. Select Join an Existing Workspace and click OK.
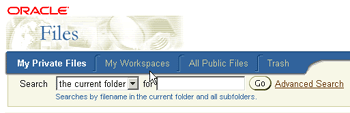
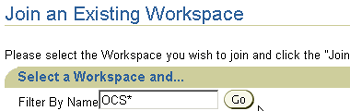
To narrow down the list of existing workspaces, Bob enters a partial name followed by an * in the Filter By Name field and click Go.
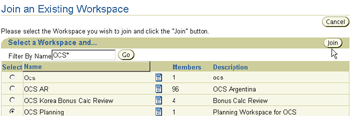
Bob selects the Workspace he wants to join and click Join.
Bob adds the justification or reason why he needs access and clicks OK.
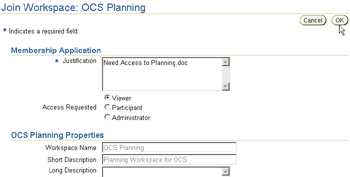
A message will be sent to the Administrator of the Workspace asking for approval. Bob will receive a notification e-mail when approved.

Send an E-mail to All Members of a Workspace
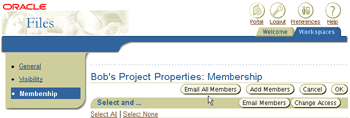
Bob can send an e-mail to all members of his Workspace. This is convenient because Bob may not know who all the members are and ensures that the e-mail is sent to everyone. To send an e-mail to all members of a Workspace, click on the Workspace, and select Workspace Properties.

Select the Membership property. Then click Email All Members.
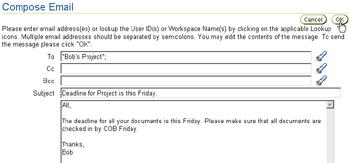
Bob composes the email and clicks OK.
Make Files in Workspace Available to Public
Bob has decided to make all the files in this workspace available to anyone with Viewer access. This means they do not need to be a member of the Workspace but they can still view any file. To make the files available to the public, select the workspace and click Workspace Properties.

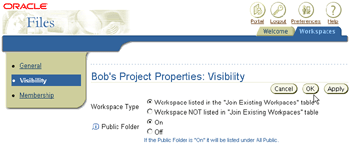
Select the Visibility property. Then click the On radio button for Public Folder and click OK.
Upload a Files to the Workspace
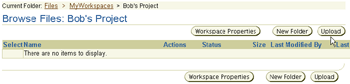
Once the Workspace is created, files can be uploaded by selecting the Workspace Bob just created and clicking Upload.
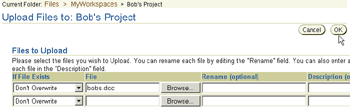
Click Browse to select the file and click OK.
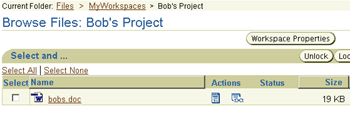
Bob sees the file in the list.
Because Bob could have many files to upload at a time, he can use Web Folders which is discussed on the next page.
If you have any questions, please contact your OCS Administrator.
![]()
Copyright © 2002, Oracle Corporation. All Rights Reserved.