
TeamSpeak is a popular, cross-platform VoIP and text chat application for internal business communication, education and training (lectures), online gaming and connecting with friends and family. Its primary priority is delivering a solution that is simpler to use, with strong security standards, superb voice quality, and less system and bandwidth utilization. It uses a client-server architecture and is capable of handling thousands of simultaneous users.
How it Works
Deploy your own TeamSpeak Server on a Linux VPS and share your TeamSpeak Server address with teammates, friends and family or anyone you want to communicate with. Using the free desktop TeamSpeak Client, they connect to your TeamSpeak Server and start talking. It’s that easy!
Key Features
- It is easy to use and highly customizable.
- Has a decentralized infrastructure and is highly scalable.
- Supports high security standards.
- Offers remarkable voice quality.
- Allows for low system resource and bandwidth usage.
- Supports powerful file transfer.
- Also supports a robust permission system.
- Supports stunning 3D sound effects .
- Allows for mobile connectivity and lots more.
Requirements
In this tutorial, we will explain how to install TeamSpeak Server on your CentOS 7 instance and a desktop TeamSpeak Client on a Linux machine.
Installing TeamSpeak Server in CentOS 7
1. First start by updating your CentOS 7 server packages and then install needed dependencies for the installation process using following commands.
# yum update
# yum install vim wget perl tar net-tools bzip2
2. Next, you need to create a user for TeamSpeak Server process to ensure that the TeamSpeak server is running in user mode detached from other processes.
# useradd teamspeak
# passwd teamspeak
3. Now go to the TeamSpeak Server download page and grab the most recent version (i.e. 3.2.0) using following wget command and then extract the tarball and copy all of the files to our unprivileged user’s home directory as shown.
# wget -c http://dl.4players.de/ts/releases/3.2.0/teamspeak3-server_linux_amd64-3.2.0.tar.bz2
# tar -xvf teamspeak3-server_linux_amd64-3.2.0.tar.bz2
# mv teamspeak3-server_linux_amd64 teamspeak3
# cp -R teamspeak3 /home/teamspeak/
# chown -R teamspeak:teamspeak /home/teamspeak/teamspeak3/
4. Once everything in place, now switch to teamspeak user and start the teamspeak server manually using following commands.
# su - teamspeak
$ cd teamspeak3/
$ ./ts3server_startscript.sh start
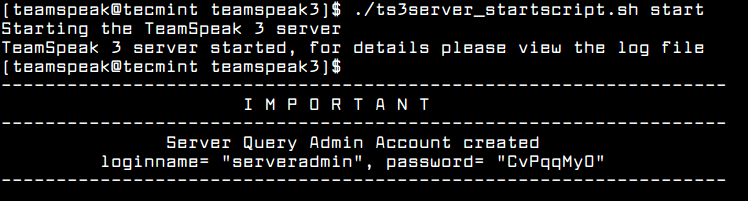
TeamSpeak Starting
5. To manage TeamSpeak Server under Systemd services, you need to create a teamspeak service unit file.
$ su -
# vi  /lib/systemd/system/teamspeak.service
Add the following configuration in the unit file.
[Unit]
Description=Team Speak 3 Server
After=network.target

[Service]
WorkingDirectory=/home/teamspeak/
User=teamspeak
Group=teamspeak
Type=forking
ExecStart=/home/teamspeak/ts3server_startscript.sh start inifile=ts3server.ini
ExecStop=/home/teamspeak/ts3server_startscript.sh stop
PIDFile=/home/teamspeak/ts3server.pid
RestartSec=15
Restart=always

[Install]
WantedBy=multi-user.target
Save and close the file. Then start teamspeak server for now and enable it to start automatically at system boot as follows.
# systemctl start teamspeak
# systemctl enable teamspeak
# systemctl status teamspeak
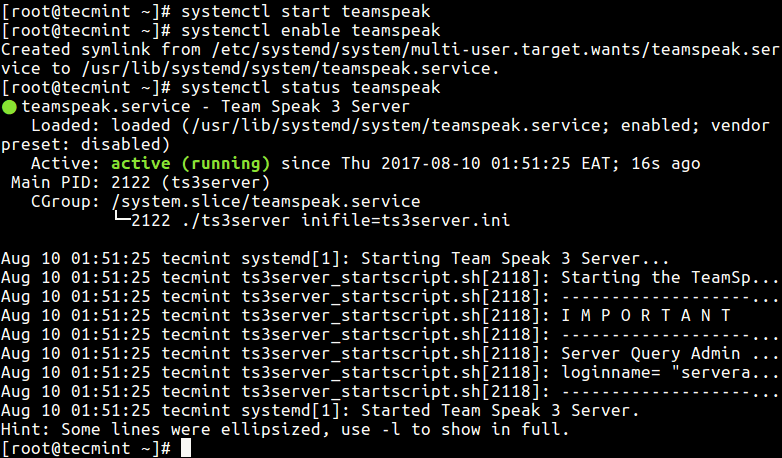
Start TeamSpeak Server
6. When you start the teamspeak server for the first time, it generates a administrator token/key which you will use to connect to the server from a TeamSpeak Client. You can view the log file to get the key.
# cat /home/teamspeak/logs/ts3server_2017-08-09__22_51_25.819181_1.log
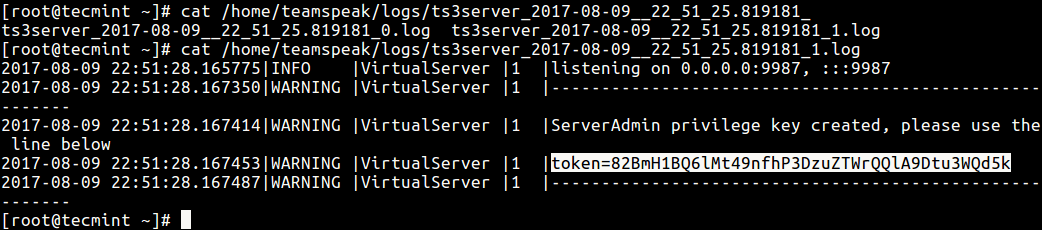
TeamSpeak Server Token
7. Next, TeamSpeak listens on a number of ports: 9987 UDP (TeamSpeak Voice service), 10011 TCP (TeamSpeak ServerQuery) and 30033 TCP (TeamSpeak FileTransfer).
Therefore modify your firewall rules to open these ports as follows.
# firewall-cmd --zone=public --add-port=9987/udp --permanent
# firewall-cmd --zone=public --add-port=10011/tcp --permanent
# firewall-cmd --zone=public --add-port=30033/tcp --permanent
# firewall-cmd --reload
Installing TeamSpeak Client in Ubuntu 18.04
8. Login into your Ubuntu Desktop machine (you can use any Linux OS) and go to the TeamSpeak Client download page and grab the most recent version (i.e. 3.1.9) using following wget command and install it as shown.
$ wget http://dl.4players.de/ts/releases/3.1.9/TeamSpeak3-Client-linux_amd64-3.1.9.run
$ chmod 755 TeamSpeak3-Client-linux_amd64-3.1.9.run
$ ./TeamSpeak3-Client-linux_amd64-3.1.9.run
$ cd TeamSpeak3-Client-linux_amd64
./ts3client_runscript.sh
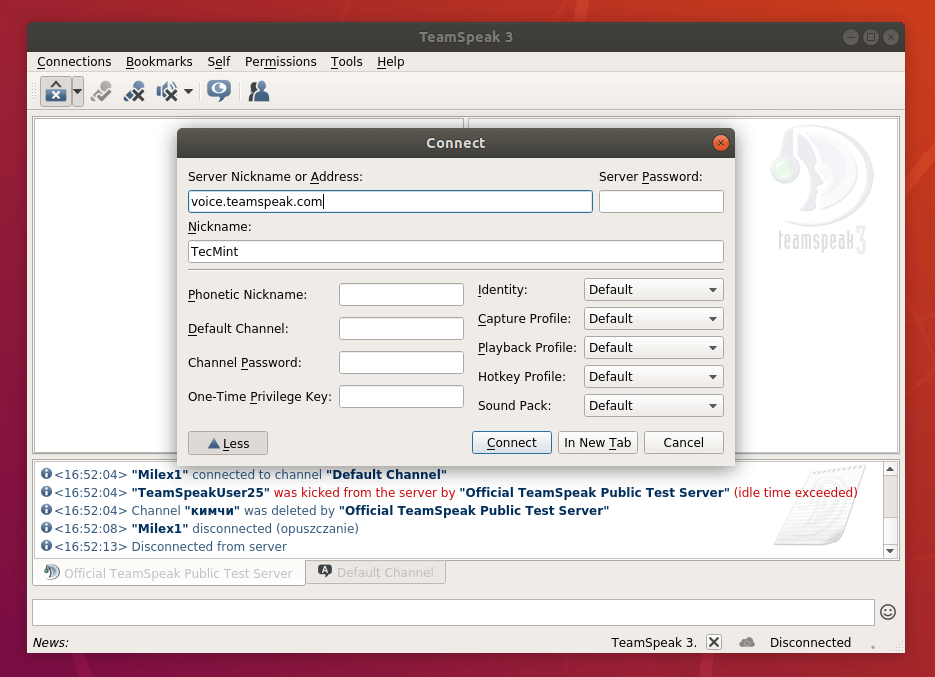
TeamSpeak Client on Ubuntu
9. To access the server query admin account, use the loginname and password which were created after starting the server. Here, you will also be asked to provide the ServerAdmin Key, once entered the key, you will see the message below meaning you now have administrative rights on the teamspeak server you just installed.
Privilege Key successfully used.
For more information, check out the TeamSPeak Homepage: https://www.teamspeak.com/en/
In this article, we have explained how to install TeamSpeack Server on CentOS 7 and a client on Ubuntu Desktop. If you have any questions or thoughts to share, use the feedback form below to reach us.