
FFmpeg is one of the best multimedia frameworks that contains various tools for different tasks. For example the ffplay is a portable media player that can be used to play audio/video files, ffmpeg can convert between different file formats, ffserver can be used to stream live broadcasts and ffprobe is able to analyze multimedia stream.
This framework is really powerful due to the diversity of available tools in it, that provide the best technical solution for the user. According to the description of FFmpeg in the official website, the reason for having such a great multimedia framework is the combination of the best free software options available.
The FFmpeg framework offers high security and the reason for this is the seriosity of the developers when they review the code, it is always done with security in mind.
I am very sure you will find this framework very useful when you would like to do some digital audio and video streaming or recording. There are many other practical thing that you can do with the help of the FFmpegframework such as converting your wav file to an mp3 one, encode and decode your videos or even scale them.
According to the official website FFmpeg is able to do the followings.
- decode multimedia files
- encode multimedia files
- transcode multimedia files
- mux multimedia files
- demux multimedia files
- stream multimedia files
- filter multimedia files
- play multimedia files
Let me take an example, a very simple one. The following command will convert your mp4 file into an avi file, simple as that.
# ffmpeg -i Lone_Ranger.mp4 Lone_Ranger.avi
The above command is only useful for explanation, it is not recommended to be used in practice because the codex, bitrate and other specifics are not declared.
In the next part we will practice with some of the FFmpeg multimedia framework tools, but before doing that we have to install it in our Linux box.
How to Install FFmpeg Multimedia Framework in Linux
Since the FFmpeg packages are offered for the most used Linux distributions and the installation will be relatively easy. Lets start with the installation of the FFmpeg framework in Ubuntu based distributions.
Install FFmpeg on Ubuntu and Linux Mint
I will install FFmpeg via the PPA recommended in the official blog. Open a new terminal (CTRL+ALT+T) and then run the following commands.
$ sudo add-apt-repository ppa:mc3man/trusty-media
$ sudo apt-get update
$ sudo apt-get install ffmpeg
$ ffmpeg -version
Install FFmpeg on Debian
To install FFmpeg, first you need to add the following line to your /etc/apt/sources.list file. As per your distribution, change ‘<mydist>‘ with ‘stretch‘, ‘jessie‘, or ‘wheezy‘.
deb http://www.deb-multimedia.org<mydist>main non-free deb-src http://www.deb-multimedia.org<mydist>main non-free
Then update system package sources and install FFmpeg with the following commands.
$ sudo apt-get update
$ sudo apt-get install deb-multimedia-keyring
$ sudo apt-get update
$ sudo apt-get install ffmpeg
$ ffmpeg -version
Install FFmpeg on CentOS and RHEL
To install FFmpeg on CentOS and RHEL distributions, you need to enable EPEL and RPM Fusion repository on the system using following commands.
To install and enable EPEL, use following command.
# yum install epel-release
To install and enable RPM Fusion, use following command on your distribution version.
-------------- On CentOS & RHEL 7.x --------------
# yum localinstall --nogpgcheck https://download1.rpmfusion.org/free/el/rpmfusion-free-release-7.noarch.rpm https://download1.rpmfusion.org/nonfree/el/rpmfusion-nonfree-release-7.noarch.rpm

-------------- On CentOS & RHEL 6.x --------------
# yum localinstall --nogpgcheck https://download1.rpmfusion.org/free/el/rpmfusion-free-release-6.noarch.rpm https://download1.rpmfusion.org/nonfree/el/rpmfusion-nonfree-release-6.noarch.rpm
After enabling repositories, run the following command to install FFmpeg:
# yum install ffmpeg ffmpeg-devel
# ffmpeg -version
Install FFmpeg on Fedora
On Fedora, you need to install and enable RPM Fusion to install FFmpeg as shown.
$ sudo dnf install https://download1.rpmfusion.org/free/fedora/rpmfusion-free-release-$(rpm -E %fedora).noarch.rpm https://download1.rpmfusion.org/nonfree/fedora/rpmfusion-nonfree-release-$(rpm -E %fedora).noarch.rpm
$ sudo dnf install ffmpeg ffmpeg-devel
$ ffmpeg -version
FFmpeg Compiling from Source
Compiling software from source is not the easiest thing in the world, but with the right instructions we will be able to do it. First make sure your system meet all the dependencies. The installation of these dependencies can be done with the help of the following commands.
First, tell the system to pull down the latest packages.
$ sudo apt-get update
Install the dependencies with the following command.
-------------- On Debian & Ubuntu --------------
$ sudo apt-get -y install autoconf automake build-essential libass-dev libfreetype6-dev libgpac-dev \
libsdl1.2-dev libtheora-dev libtool libva-dev libvdpau-dev libvorbis-dev libx11-dev \
libxext-dev libxfixes-dev pkg-config texi2html zlib1g-dev
-------------- On CentOS and RHEL --------------
# yum install glibc gcc gcc-c++ autoconf automake libtool git make nasm pkgconfig SDL-devel \
a52dec a52dec-devel alsa-lib-devel faac faac-devel faad2 faad2-devel freetype-devel giflib gsm gsm-devel \
imlib2 imlib2-devel lame lame-devel libICE-devel libSM-devel libX11-devel libXau-devel libXdmcp-devel \
libXext-devel libXrandr-devel libXrender-devel libXt-devel libogg libvorbis vorbis-tools mesa-libGL-devel \
mesa-libGLU-devel xorg-x11-proto-devel zlib-devel libtheora theora-tools ncurses-devel libdc1394 libdc1394-devel \
amrnb-devel amrwb-devel opencore-amr-devel
Then use the following command to create a new directory for the FFmpeg sources. This is the directory where the source files will be downloaded.
$ mkdir ~/ffmpeg_sources
Now compile and install yasm assembler used by FFmpeg by running the following commands.
$ cd ~/ffmpeg_sources
$ wget http://www.tortall.net/projects/yasm/releases/yasm-1.3.0.tar.gz
$ tar xzvf yasm-1.3.0.tar.gz
$ cd yasm-1.3.0
$ ./configure --prefix="$HOME/ffmpeg_build" --bindir="$HOME/bin"
$ make
$ make install
$ make distclean
$ export "PATH=$PATH:$HOME/bin"
After you have successfully installed the yasm assembler it is time to install some various encoders that will be used with the specific FFmpeg tools. Use the following commands to install the H.264 video encoder.
$ cd ~/ffmpeg_sources
$ wget http://download.videolan.org/pub/x264/snapshots/last_x264.tar.bz2
$ tar xjvf last_x264.tar.bz2
$ cd x264-snapshot*
$ ./configure --prefix="$HOME/ffmpeg_build" --bindir="$HOME/bin" --enable-static
$ make
$ make install
$ make distclean
Another nice useful encoder is the libfdk-aac AAC audio encoder.
$ cd ~/ffmpeg_sources
$ wget -O fdk-aac.zip https://github.com/mstorsjo/fdk-aac/zipball/master
$ unzip fdk-aac.zip
$ cd mstorsjo-fdk-aac*
$ autoreconf -fiv
$./configure --prefix="$HOME/ffmpeg_build" --disable-shared
$ make
$ make install
$ make distclean
Install libopus audio decoder and encoder.
$ cd ~/ffmpeg_sources
$ wget http://downloads.xiph.org/releases/opus/opus-1.1.tar.gz
$ tar xzvf opus-1.1.tar.gz
$ cd opus-1.1
$ ./configure --prefix="$HOME/ffmpeg_build" --disable-shared
$ make
$ make install
$ make distclean
Now, it’s time to install ffmpeg from source.
$ cd ~/ffmpeg_sources
$ wget http://ffmpeg.org/releases/ffmpeg-snapshot.tar.bz2
$ tar xjvf ffmpeg-snapshot.tar.bz2
$ cd ffmpeg
$ PKG_CONFIG_PATH="$HOME/ffmpeg_build/lib/pkgconfig"
$ export PKG_CONFIG_PATH
$ ./configure --prefix="$HOME/ffmpeg_build" --extra-cflags="-I$HOME/ffmpeg_build/include" \
   --extra-ldflags="-L$HOME/ffmpeg_build/lib" --bindir="$HOME/bin" --extra-libs="-ldl" --enable-gpl \
   --enable-libass --enable-libfdk-aac --enable-libfreetype --enable-libmp3lame --enable-libopus \
   --enable-libtheora --enable-libvorbis --enable-libvpx --enable-libx264 --enable-nonfree --enable-x11grab
$ make
$ make install
$ make distclean
$ hash -r
Note: If you have not installed certain encoders, make sure to remove ‘–enable-encoder_name‘ from the above ‘./configure‘ command so the installation is done without any problem.
There are many encoders that you can install, but fur the purpose of this article I am not going to install all of them, but you can install them using the following official guides.
Conclusion
In this first part we updated our readers with the latest news according to the FFmpeg multimedia framework and showed them how to install it in their Linux machines. The next part will be totally about learning how to use the amazing tools inside this leading multimedia framework.
Update: The Part 2 of this FFmpeg series is published, which shows some useful ffmpeg command-line usage to perform various audio, video and image conversion procedures: 15 Useful ‘FFmpeg’ Commands for Video, Audio and Image Conversion in Linux.
15 Useful ‘FFmpeg’ Commands for Video, Audio and Image Conversion in Linux – Part 2
In this article we are going to look at some options and examples of how you can use FFmpeg multimedia framework to perform various conversion procedures on audio and video files.
15 FFMPEG Command Examples in Linux
For more details about FFmpeg and steps to install it in different Linux distros, read the article from the link below:
FFmpeg Multimedia Framework Installation Guide on Linux – Part 1
Useful FFmpeg Commands
FFmpeg utility supports almost all major audio and video formats, if you want to check the ffmpeg supported available formats you can use ./ffmpeg -formats command to list all supported formats. If you are new to this tool, here are some handy commands that will give you a better idea about the capabilities of this powerful tool.
1. Get Video File Information
To get information about a file (say video.mp4), run the following command. Remember you have to specify an ouput file, but in this case we only want to get some information about the input file.
$ ffmpeg -i video.flv -hide_banner
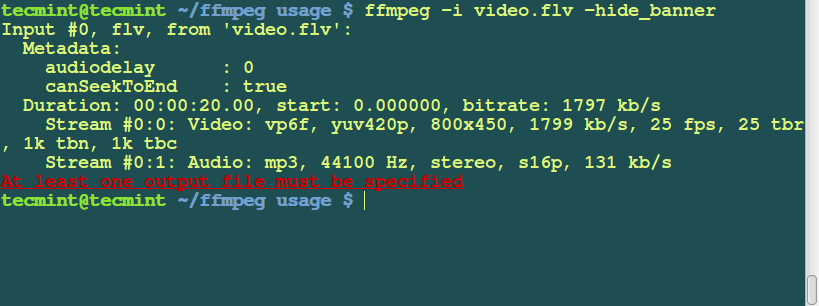
Get Video Information
Note: The -hide_banner option is used to hide a copyright notice shown my ffmpeg, such as build options and library versions. This option can be used to suppress printing this information.
For example, if you run the above command without adding -hide_banner option it will print the all FFmpeg tools copyright information as shown.
$ ffmpeg -i video.flv
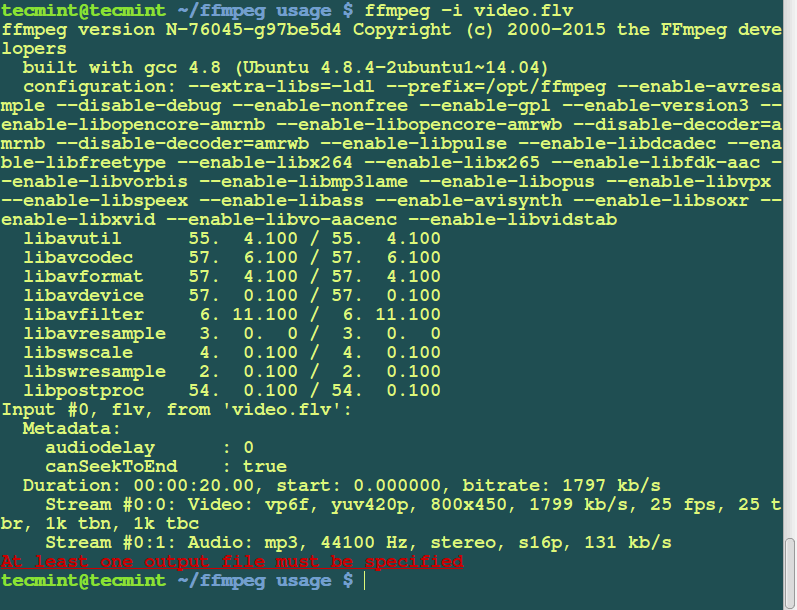
Hide FFmpeg Version Information
2. Split a video into images
To turn a video to number of images, run the command below. The command generates the files named image1.jpg, image2.jpg and so on…
$ ffmpeg -i video.flv image%d.jpg
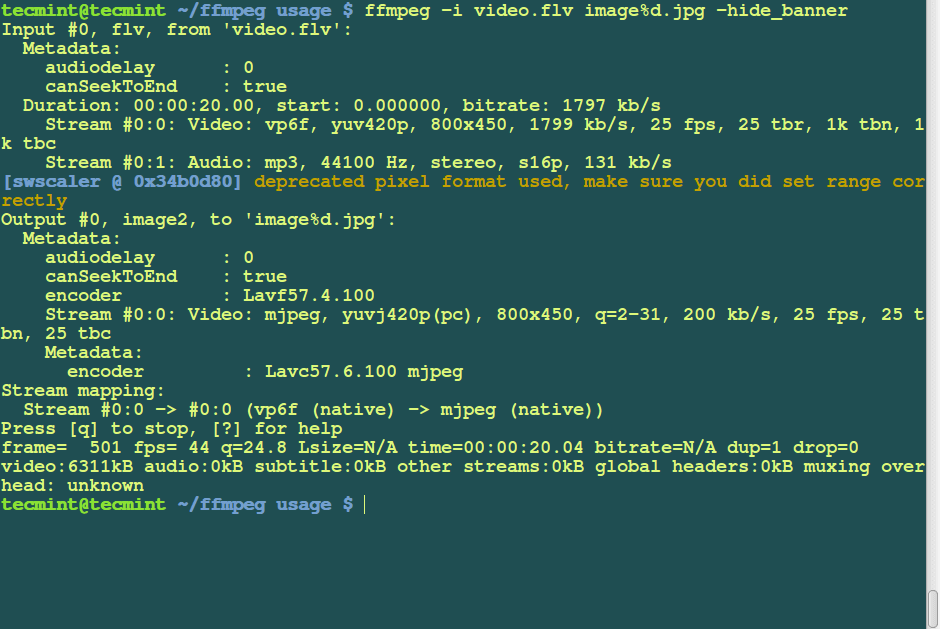
Split Video into Images
After successful execution of above command you can verify that the video turn into multiple images using following ls command.
$ ls -l

total 11648
-rw-r--r-- 1 tecmint tecmint   14592 Oct 19 13:19 image100.jpg
-rw-r--r-- 1 tecmint tecmint   14603 Oct 19 13:19 image101.jpg
-rw-r--r-- 1 tecmint tecmint   14584 Oct 19 13:19 image102.jpg
-rw-r--r-- 1 tecmint tecmint   14598 Oct 19 13:19 image103.jpg
-rw-r--r-- 1 tecmint tecmint   14634 Oct 19 13:19 image104.jpg
-rw-r--r-- 1 tecmint tecmint   14693 Oct 19 13:19 image105.jpg
-rw-r--r-- 1 tecmint tecmint   14641 Oct 19 13:19 image106.jpg
-rw-r--r-- 1 tecmint tecmint   14581 Oct 19 13:19 image107.jpg
-rw-r--r-- 1 tecmint tecmint   14508 Oct 19 13:19 image108.jpg
-rw-r--r-- 1 tecmint tecmint   14540 Oct 19 13:19 image109.jpg
-rw-r--r-- 1 tecmint tecmint   12219 Oct 19 13:18 image10.jpg
-rw-r--r-- 1 tecmint tecmint   14469 Oct 19 13:19 image110.jpg
3. Convert images into a video
Turn number of images to a video sequence, use the following command. This command will transform all the images from the current directory (named image1.jpg, image2.jpg, etc…) to a video file named imagestovideo.mpg.
There are many other image formats (such as jpeg, png, jpg, etc) you can use.
$ ffmpeg -f image2 -i image%d.jpg imagestovideo.mpg
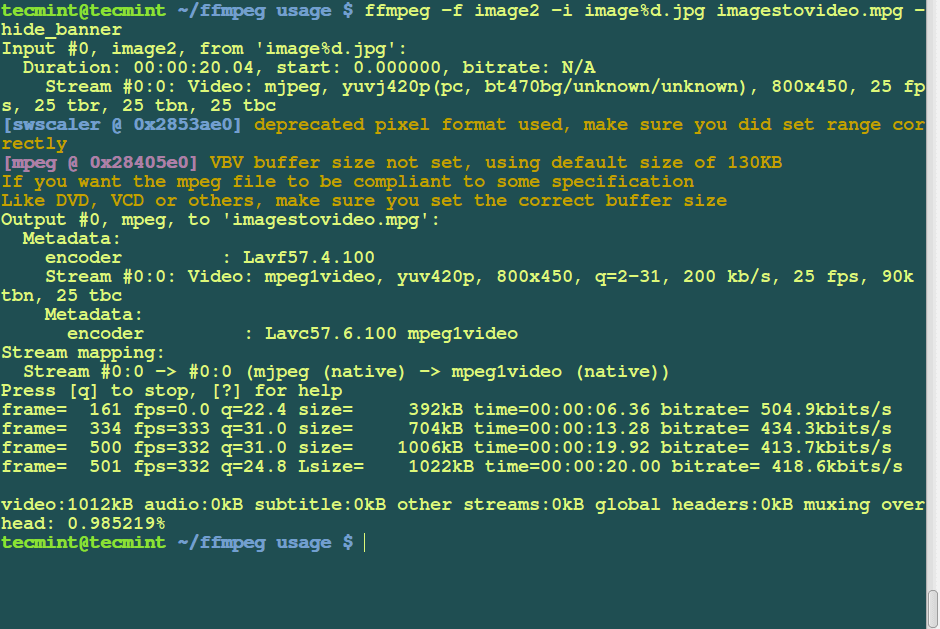
Convert Images to Video
4. Convert a video into mp3 format
To convert an .flv format video file to Mp3 format, run the following command.
$ ffmpeg -i video.flv -vn -ar 44100 -ac 2 -ab 192 -f mp3 audio.mp3
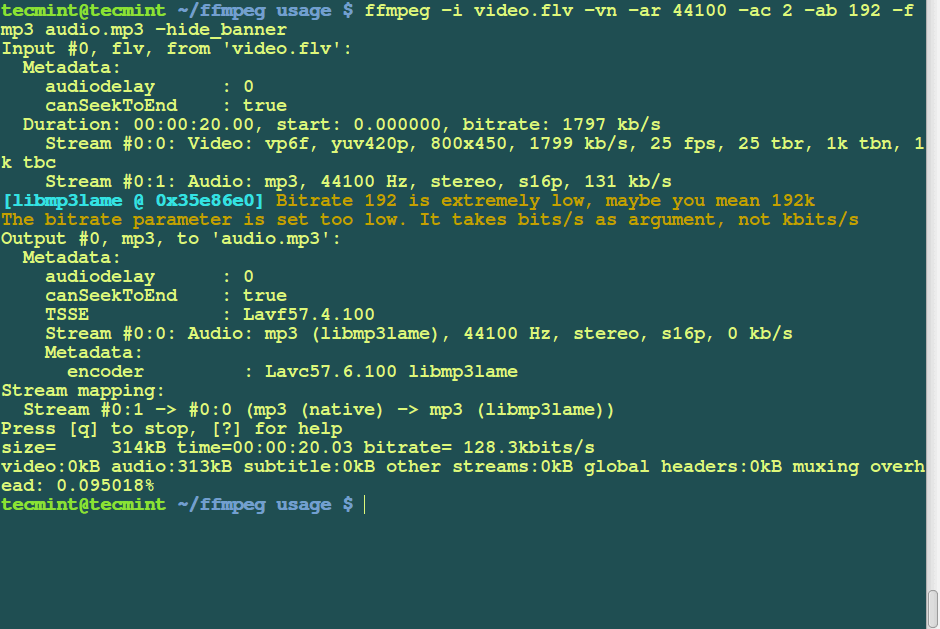
Convert Video to Audio
Description about the options used in above command:
- vn: helps to disable video recording during the conversion.
- ar: helps you set audio sampling rate in Hz.
- ab: set the audio bitrate.
- ac: to set the number of audio channels.
- -f: format.
5. Covert flv video file to mpg format
To convert a .flv video file to .mpg, use the following command.
$ ffmpeg -i video.flv video.mpg
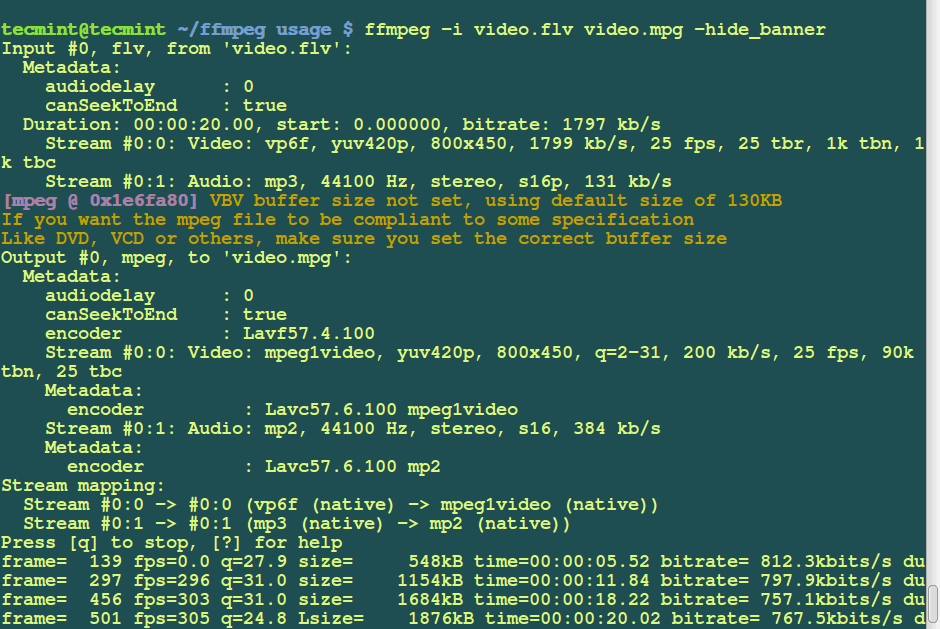
Convert Avi to MPG Video Format
6. Convert video into animated gif
To convert a .flv video file to animated, uncompressed gif file, use the command below.
$ ffmpeg -i video.flv animated.gif.mp4
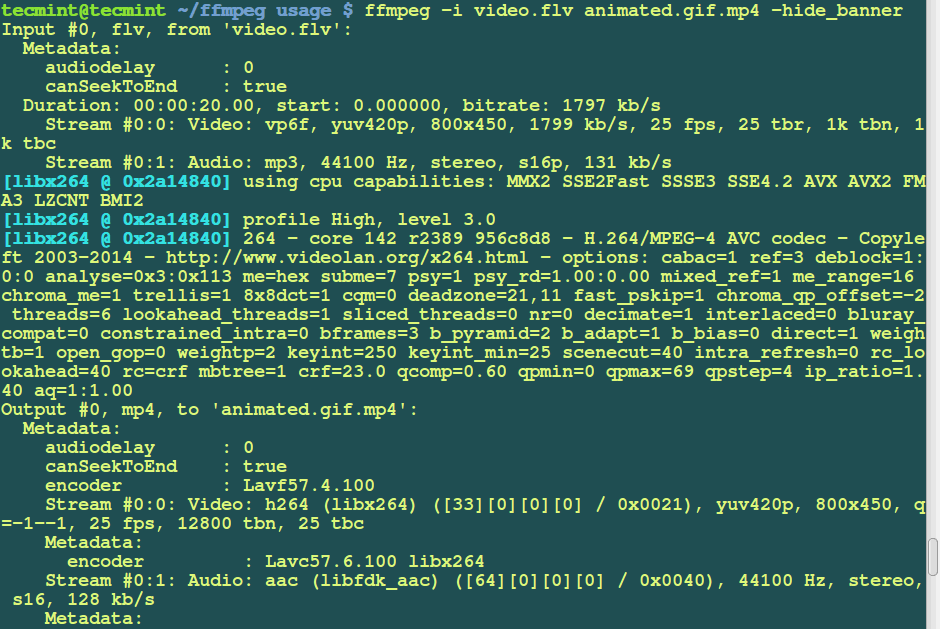
Covert Video to Animated Gif
7. Convert mpg video file to flv
To convert a .mpg file to .flv format, use the following command.
$ ffmpeg -i video.mpg -ab 26k -f flv video1.flv

Convert Mpg to Flv Video Format
8. Convert avi video file to mpeg
To convert a .avi file to mpeg for dvd players, run the command below:
$ ffmpeg -i video.avi -target pal-dvd -ps 2000000000 -aspect 16:9 video.mpeg
Explanation about the options used in above command.
- target pal-dvd : Output format
- ps 2000000000 maximum size for the output file, in bits (here, 2 Gb).
- aspect 16:9 : Widescreen.

Convert Avi to Mpeg Video Format
9. Convert a video to CD or DVD format
To create a video CD or DVD, FFmpeg makes it simple by letting you specify a target type and the format options required automatically.
You can set a target type as follows: add -target type; type can of the following be vcd, svcd, dvd, dv, pal-vcd or ntsc-svcd on the command line.
To create a VCD, you can run the following command:
$ ffmpeg -i video.mpg -target vcd vcd_video.mpg

Convert Video to DVD Format
10. Extract audio from video file
To extract sound from a video file, and save it as Mp3 file, use the following command:
$ ffmpeg -i video1.avi -vn -ar 44100 -ac 2 -ab 192 -f mp3 audio3.mp3
Explanation about the options used in above command.
- Source video : video.avi
- Audio bitrate : 192kb/s
- output format : mp3
- Generated sound : audio3.mp3
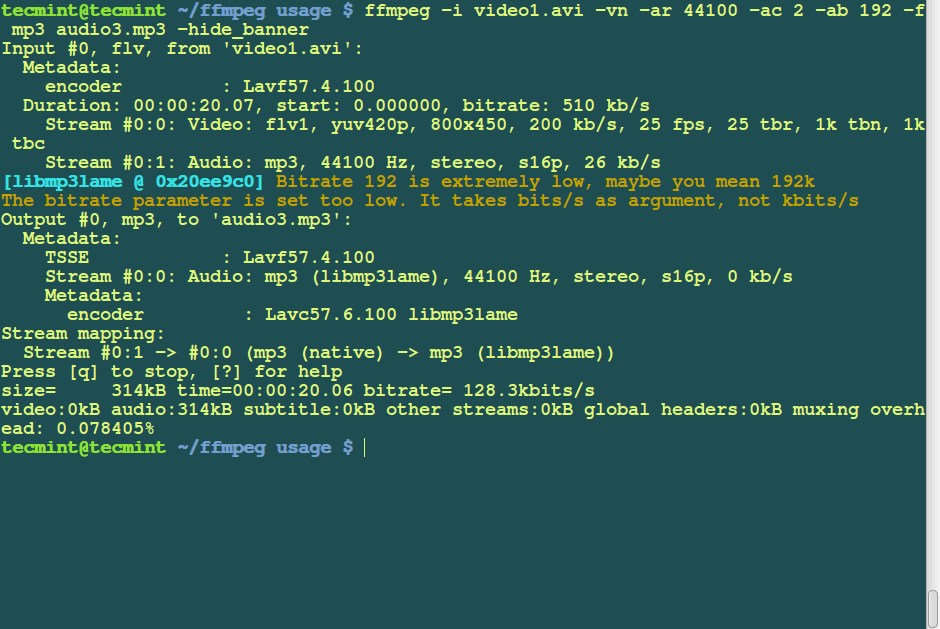
Extract Audio from Video
11. Mix a video and audio together
You can also mix a video with a sound file as follows:
$ ffmpeg -i audio.mp3 -i video.avi video_audio_mix.mpg
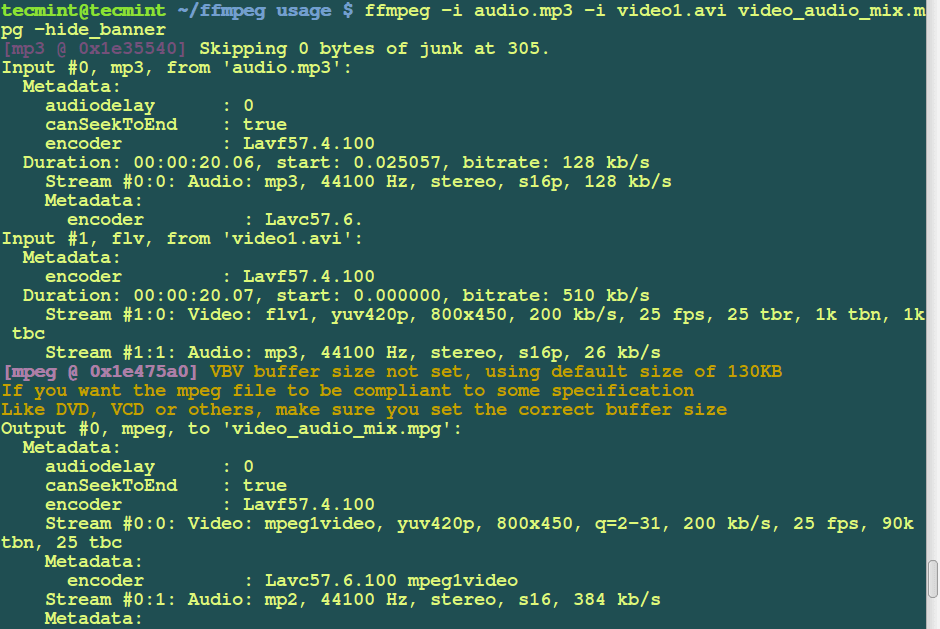
Mix Video and Audio
12. Increase/Reduce Video Playback Speed
To increase video play back speed, run this command. The -vf option sets the video filters that helps to adjust the speed.
$ ffmpeg -i video.mpg -vf "setpts=0.5*PTS" highspeed.mpg
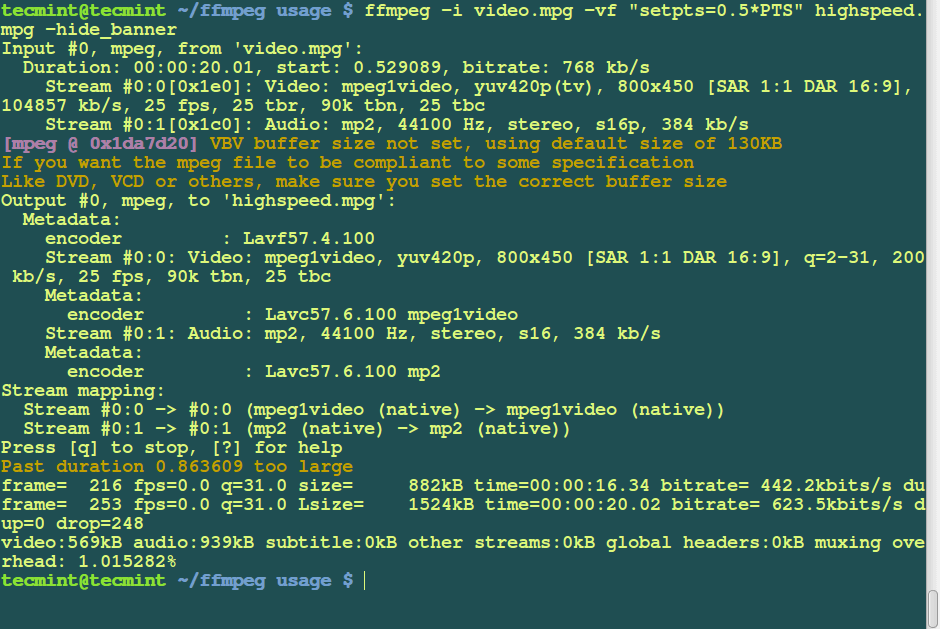
Increase Video Playback Speed
You can also reduce video speed as follows:
$ ffmpeg -i video.mpg -vf "setpts=4.0*PTS" lowerspeed.mpg -hide_banner
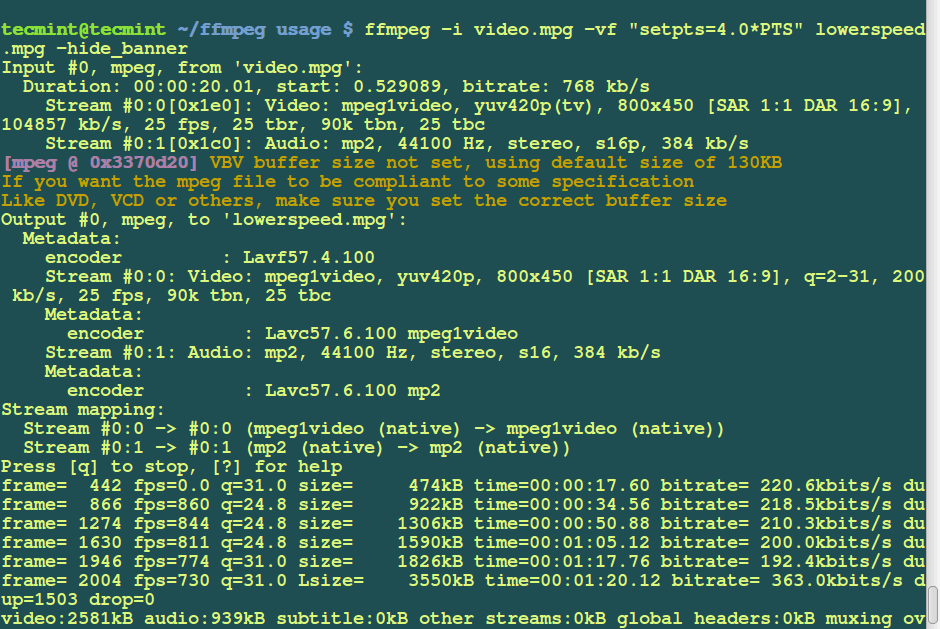
Reduce Video Playback Speed
13. Compare/Test Video and Audio Quality
To compare videos and audios after converting you can use the commands below. This helps you to test videos and audio quality.
$ ffplay video1.mp4
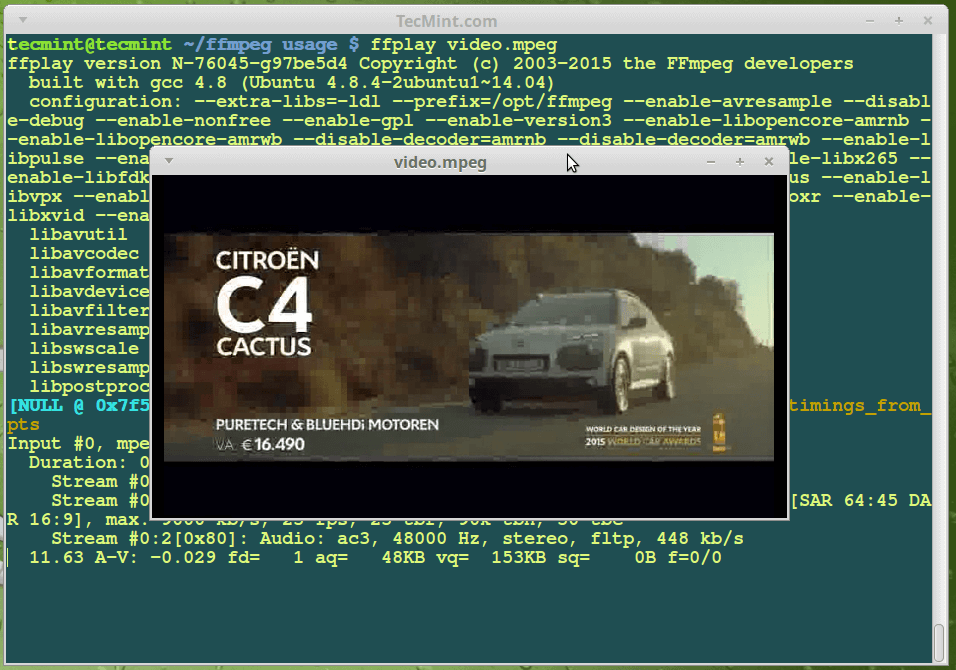
Test Video Quality
To test audio quality simply use the name of the audio file as follows:
$ ffplay audio_filename1.mp3
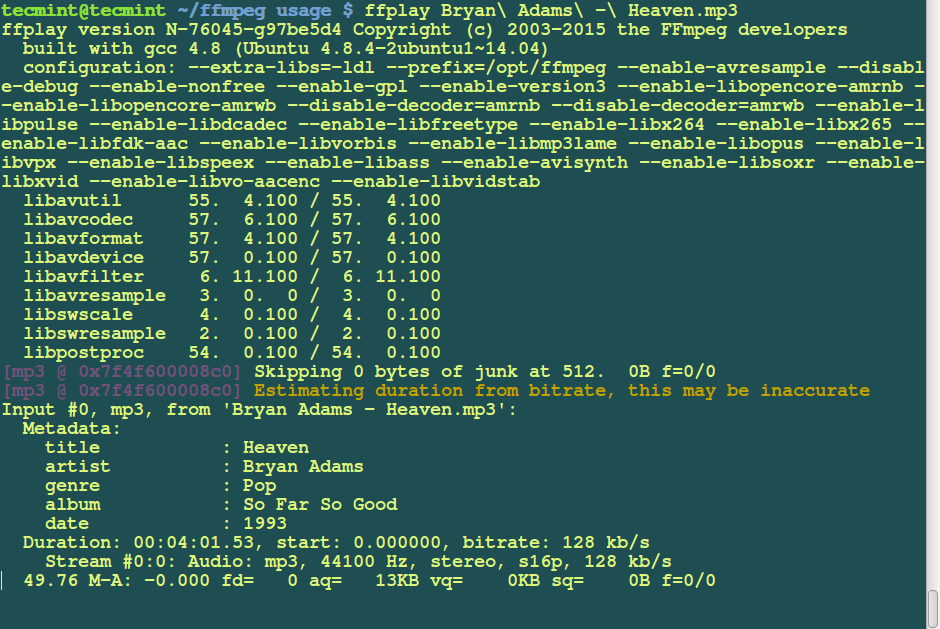
Test Audio Quality
You can listen to them while they play and compare the qualities from the sound.
14. Add Photo or Banner to Audio
You can add a cover poster or image to an audio file using the following command, this comes very useful for uploading MP3s to YouTube.
$ ffmpeg -loop 1 -i image.jpg -i Bryan\ Adams\ -\ Heaven.mp3 -c:v libx264 -c:a aac -strict experimental -b:a 192k -shortest output.mp4
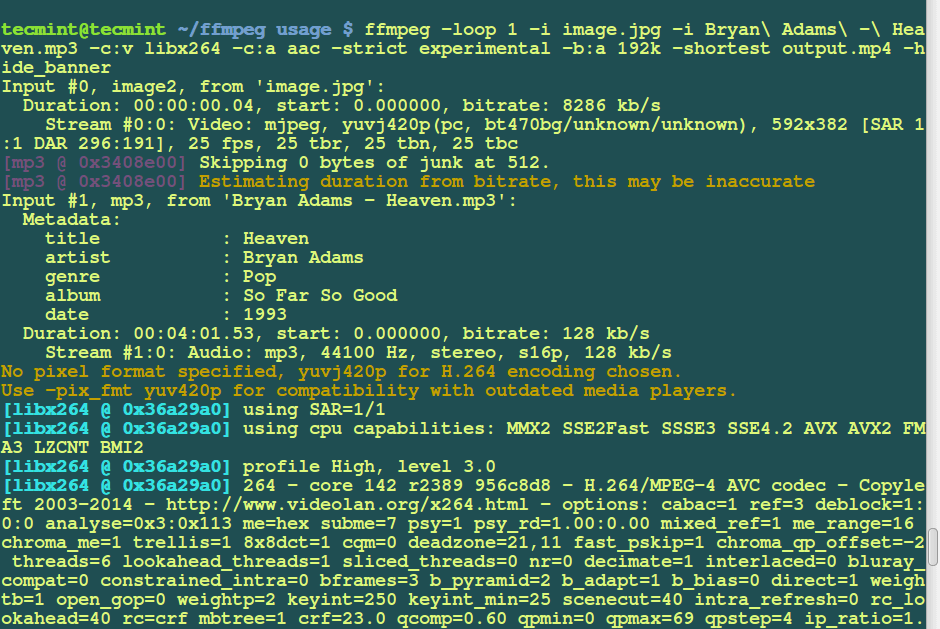
Add Image to Audio
15. Add subtitles to a Movie
If you have a separate subtitle file called subtitle.srt, you can use following command to add subtitle to a movie file:
$ ffmpeg -i video.mp4 -i subtitles.srt -map 0 -map 1 -c copy -c:v libx264 -crf 23 -preset veryfast video-output.mkv
Summary
That is all for now but these are just few examples of using FFmpeg, you can find more options for what you wish to accomplish. Remember to post a comment to provide information about how to use FFmpeg or if you have encountered errors while using it.
Reference: https://ffmpeg.org/