
Icinga is a modern open source monitoring tool that originated from a Nagios fork, and now has two parallel branches, Icinga 1 and Icinga 2. What this tool does is, not to different from Nagios due to the fact that it still uses Nagios plugins and add-ons and even configuration files to check and monitor network services and hosts, but some differences can be spotted on web interfaces, especially on new web interface, reporting capability and easy add-ons development.
Install Icinga Monitoring Tool in CentOS/RHEL 7.0
This topic will concentrate on a basic installation of Icinga 1 Monitoring Tool from binaries on CentOS or RHEL 7, using RepoForge (previously known as RPMforge) repositories for CentOS 6, with the classical web interface held by Apache Webserver and the use of Nagios Plugins that will be installed on your system.
Read Also: Install Nagios Monitoring Tool in RHEL/CentOS
Requirements
A basic LAMP installation on RHEL/CentOS 7.0 without MySQL and PhpMyAdmin, but with these PHP modules: php-cli
php-pear php-xmlrpc php-xsl php-pdo php-soap php-gd.
Step 1: Installing Icinga Monitoring Tool
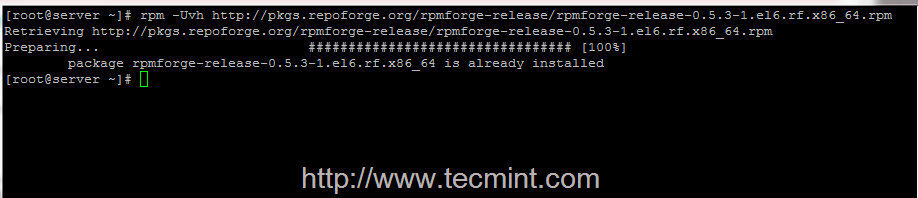
1. Before proceeding with Icinga installation from binaries add RepoForge repositories on your system by issuing the following command, depending on your machine.
For 86-64-bit
# rpm -Uvh http://pkgs.repoforge.org/rpmforge-release/rpmforge-release-0.5.3-1.el6.rf.x86_64.rpm
For 32-bit
# rpm -Uvh http://pkgs.repoforge.org/rpmforge-release/rpmforge-release-0.5.3-1.el6.rf.i686.rpm
Install RepoForge Repository
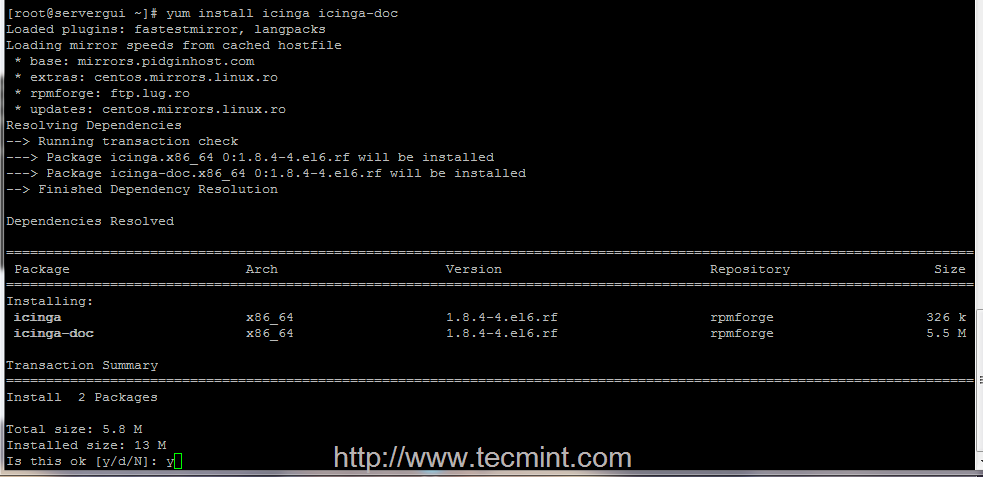
2. After RepoForge repositories had been added on your system, start with Icinga basic installation without the web interface yet, by running the following command.
# yum install icinga icinga-doc
Install Icinga Monitoring Tool
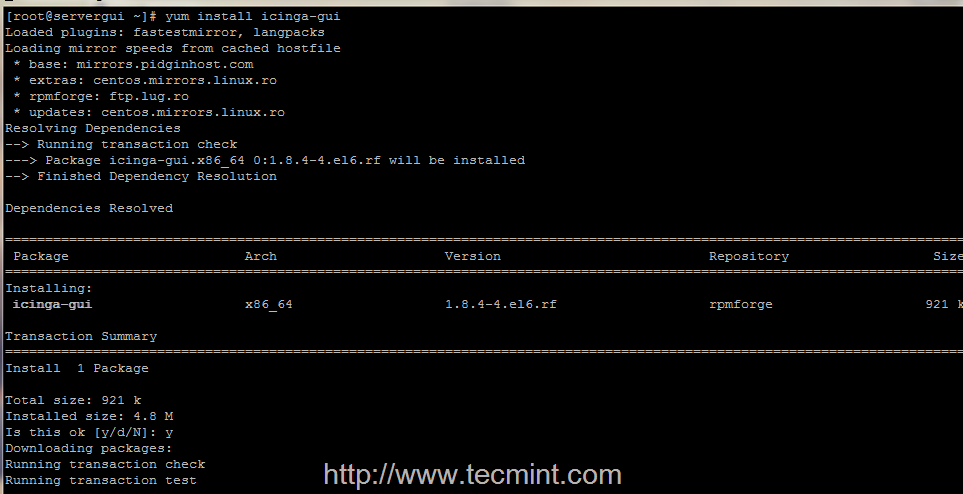
3. The next step is to try to install Icinga web interface provided by icinga-gui package. It seems that for the moment this package has some unresolved issues with CentOS/RHEL 7, and will generate some transaction check errors, but you can feel free to try to install the package, maybe meanwhile the problem was resolved.
Still, if you get the same errors on your machine as the pictures below shows you, use the following approach as further described, to be able to install Icinga web interface.
# yum install icinga-gui
Install Icinga Gui

Icinga Gui Conflict Error
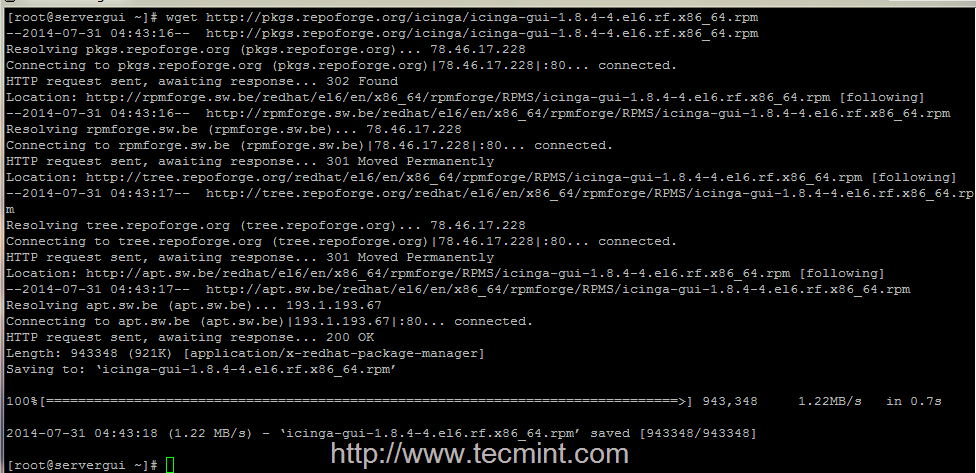
4. The procedure to install icinga-gui package which provides the web interface is the following. First download the binary package form RepoForge website using wget command.
For 86-64-bit
# wget http://pkgs.repoforge.org/icinga/icinga-gui-1.8.4-4.el6.rf.x86_64.rpm
For 32-bit
# wget http://pkgs.repoforge.org/icinga/icinga-gui-1.8.4-4.el6.rf.i686.rpm
Install Icinga RPM Package
5. After wget finishes downloading the package, create a directory named icinga-gui (you can choose other name if you want), move icinga-gui RPM binary to that folder, enter the folder and extract RPM package contents by issuing the next series of commands.
# mkdir icinga-gui
# mv icinga-gui-* icinga-gui
# cd icinga-gui
# rpm2cpio icinga-gui-* | cpio -idmv
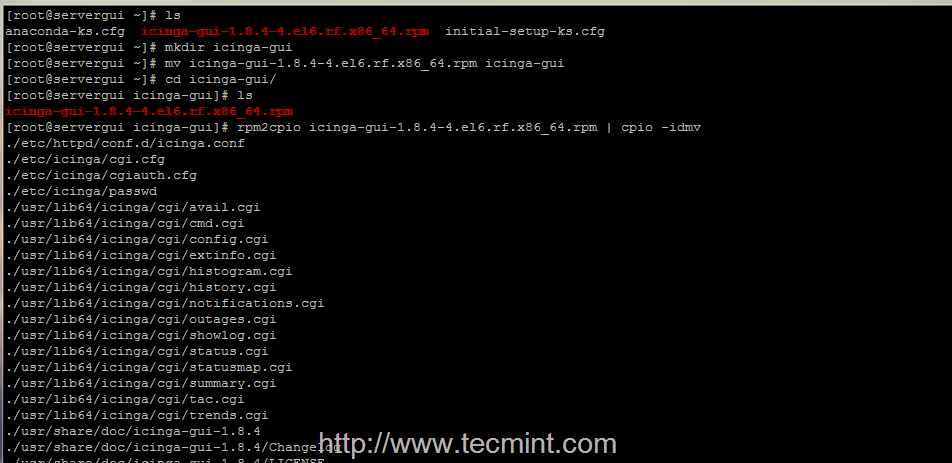
Copy Icinga GUI Packages
6. Now that you have the extracted icinga-gui package, use ls command to visualize folder content – it should result three new directories – etc, usr and var. Start by executing a recursive copying of all three resulted directories on your system root file system layout.
# cp -r etc/* /etc/
# cp -r usr/* /usr/
# cp -r var/* /var/
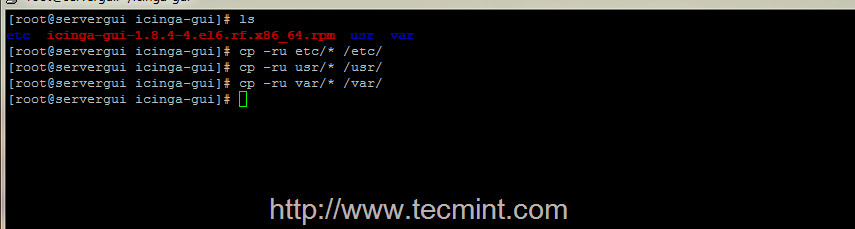
Copy Directories Recursively
Step 2: Modify Icinga Apache Configuration file and System Permissions
7. As presented on this article introduction, your system needs to have Apache HTTP server and PHP installed in order to be able to run Icinga Web Interface.
After you finished the above steps, a new configuration file should be now present on Apache conf.d path named icinga.conf. In order to be able to access Icinga from a remote location from browser, open this configuration file and replace all its content with the following configurations.
# nano /etc/httpd/conf.d/icinga.conf
Make sure you replace all file content with the following.
ScriptAlias /icinga/cgi-bin "/usr/lib64/icinga/cgi"

<Directory "/usr/lib64/icinga/cgi">
#  SSLRequireSSL
   Options ExecCGI
   AllowOverride None
   AuthName "Icinga Access"
   AuthType Basic
   AuthUserFile /etc/icinga/passwd

   <IfModule mod_authz_core.c>
      # Apache 2.4
      <RequireAll>
         Require all granted
         # Require local
         Require valid-user
      </RequireAll>
   </IfModule>

   <IfModule !mod_authz_core.c>
      # Apache 2.2
      Order allow,deny
      Allow from all
      #  Order deny,allow
      #  Deny from all
      #  Allow from 127.0.0.1
      Require valid-user
    </IfModule>
 </Directory>

Alias /icinga "/usr/share/icinga/"

<Directory "/usr/share/icinga/">

#  SSLRequireSSL
   Options None
   AllowOverride All
   AuthName "Icinga Access"
   AuthType Basic
   AuthUserFile /etc/icinga/passwd

   <IfModule mod_authz_core.c>
      # Apache 2.4
      <RequireAll>
         Require all granted
         # Require local
         Require valid-user
      </RequireAll>
   </IfModule>

   <IfModule !mod_authz_core.c>
      # Apache 2.2
      Order allow,deny
      Allow from all
      #  Order deny,allow
      #  Deny from all
      #  Allow from 127.0.0.1
      Require valid-user
   </IfModule>
</Directory>
8. After you have edited Icinga httpd configuration file, add Apache system user to Icinga system group and use the following system permissions on next system paths.
# usermod -aG icinga apache
# chown -R icinga:icinga /var/spool/icinga/*
# chgrp -R icinga /etc/icinga/*
# chgrp -R icinga /usr/lib64/icinga/*
# chgrp -R icinga /usr/share/icinga/*
9. Before starting Icinga system process and Apache server, make sure you also disable SELinux security mechanism by running setenforce 0 command and make the changes permanent by editing /etc/selinux/configfile, changing SELINUX context from enforcing to disabled.
# nano /etc/selinux/config
Modify SELINUX directive to look like this.
SELINUX=disabled

Disable SELinux
You can also use getenforce command to view SELinux status.
10. As the last step before starting Icinga process and web interface, as a security measure you can now modify Icinga Admin password by running the following command, and then start both processes.
# htpasswd -cm /etc/icinga/passwd icingaadmin
# systemctl start icinga
# systemctl start httpd
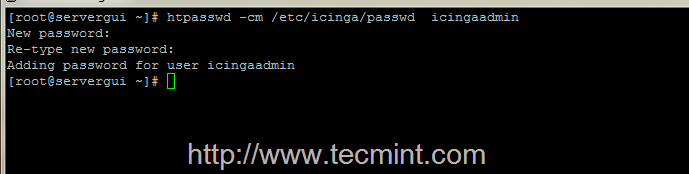
Create Icinga Admin Password
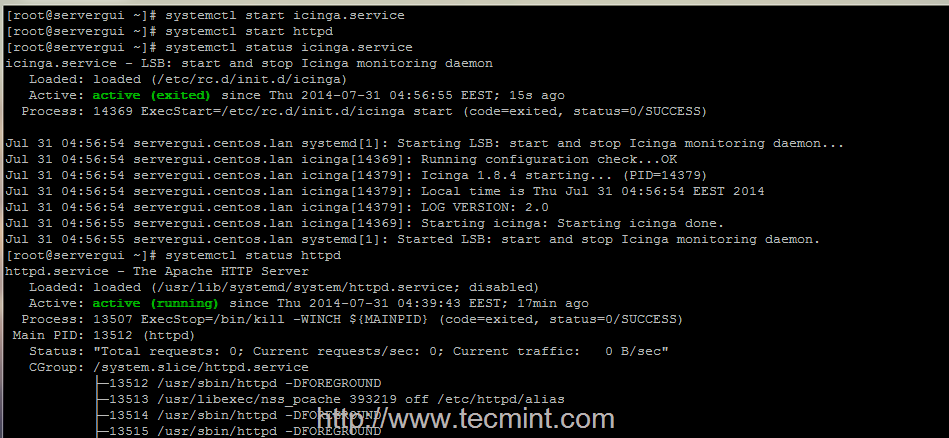
Start Icinga Service
Step 3: Install Nagios Plugins and Access Icinga Web Interface
11. In order to start monitoring public external services on hosts with Icinga, such as HTTP, IMAP, POP3, SSH, DNS, ICMP ping and many others services accessible from internet or LAN you need to install Nagios Pluginspackage provided by EPEL Repositories.
# rpm -Uvh http://dl.fedoraproject.org/pub/epel/7/x86_64/e/epel-release-7-6.noarch.rpm
# yum install yum install nagios-plugins nagios-plugins-all

Install Epel Repository
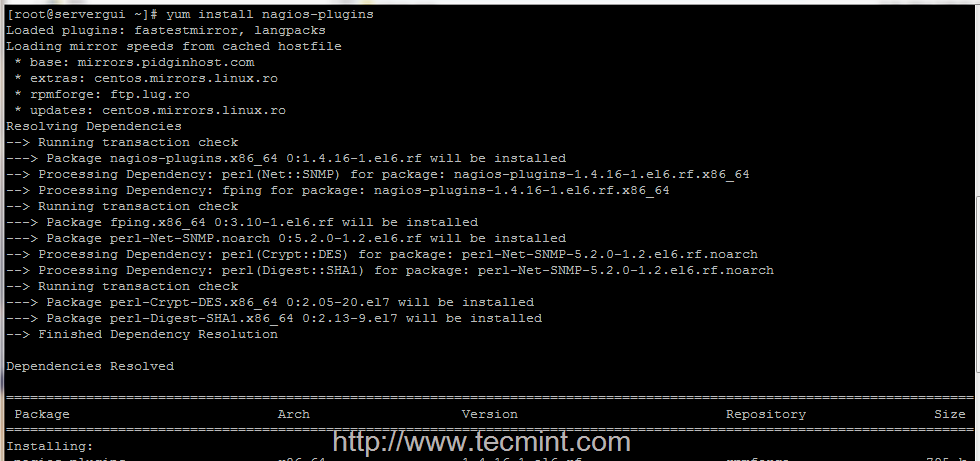
Install Nagios Plugin
12. To login on Icinga Web Interface, open a browser and point it to the URL http://system_IP/icinga/. Use icingaadmin as username and the password that you changed earlier and you can now see your localhost system status.

Icinga Admin Login
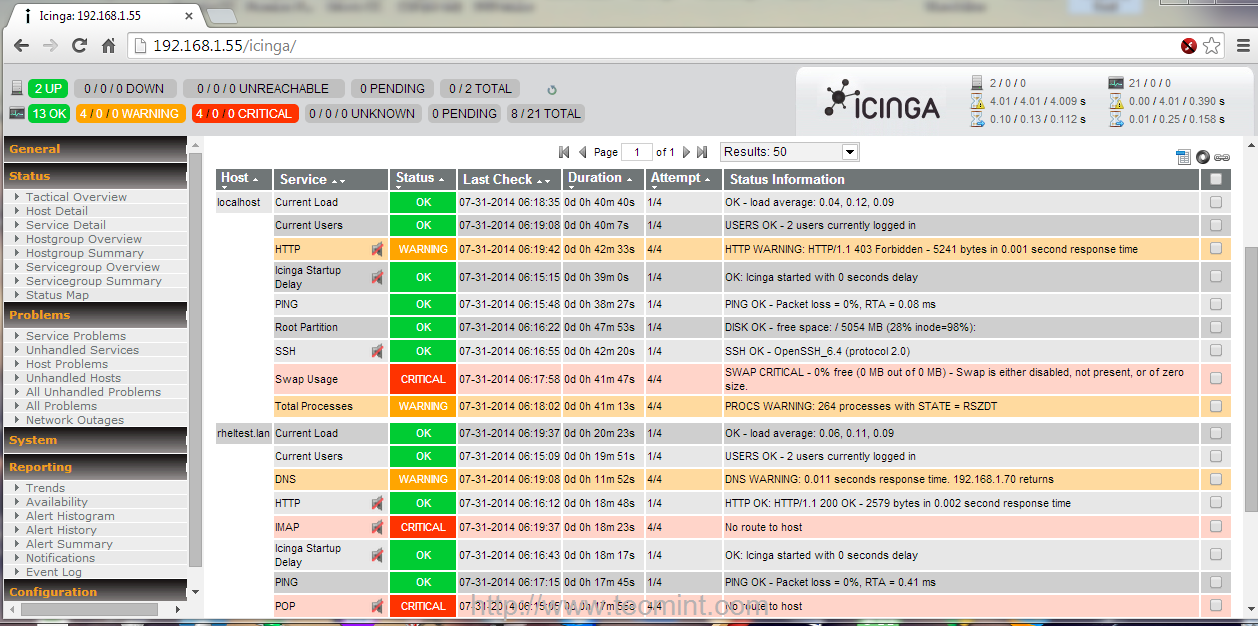
Icinga Monitoring Dashboard
That’s all! Now you have Icinga basic with the classical web interface – nagios like – installed and running on your system. Using Nagios Plugins you can now start adding new hosts and external services to check and monitor by editing Icinga configuration files located on /etc/icinga/ path. If you need to monitor internal services on remote hosts then you must install an agent on remote hosts like NRPE, NSClient++, SNMP to gather data and send it to Icinga main process.
Read Also