GCC: A World-Class Compiler Optimizing Linux and More

GCC

As the default compiler for the Linux kernel source, GCC delivers trusted, stable performance and also builds system libraries and many of the applications in popular Linux distributions.

Software is useless if computers can’t run it. The GNU Compiler Collection (GCC) is the unsung hero of the software world, transforming high level source code into low level object code while shielding the developer from hardware dependencies. With over 30 years of continual use and development, GCC offers a robust and stable foundation for building complete systems – from the kernel upwards. It is not surprising that GCC is still considered by LLVM.org to be “the de facto-standard open source compiler today.”

Who uses GCC?

As the default compiler for the Linux kernel source, GCC delivers trusted, stable performance and also builds system libraries and many of the applications in popular Linux distributions. GCC is also one of the most widely adopted core compilers by developers of embedded systems, with many GCC-based prebuilt toolchains enabling the software for the growing world of IoT devices. Application developers writing code for a variety of new and legacy computing environments depend on GCC since it delivers trusted performance along with support for the broadest range of hardware and operating environments.

And why do these folks depend on GCC? With decades of development by thousands of people GCC is one of the most respected compilers in the world. It functions as a cross compiler, creating executable code for a platform other than the one on which the compiler is running. GCC is also a core component of the tightly integrated GNU toolchain, produced by the GNU Project, that includes glibc, Binutils, and the GNU Debugger (GDB). GCC delivers improved diagnostics for compile time debugging, accurate and useful information for runtime debugging, and is a well supported platform with an active, committed community that supports the current and two previous releases.

Learn more

If you are building software and not using GCC, you are missing out on the best possible solution. Check out the article “GCC: Optimizing Linux, the Internet, and Everything” to get a more comprehensive look at this amazing software tool.

Margaret Lewis is a technology consultant who previously served as Director of Software Planning at AMD and an Associate Director at the Maui High Performance Computing Center.

Source

Imunify360 3.7.2 Beta is here

Imunify360 3.7.2 Beta is here
We are pleased to announce that a new updated Imunify360 Beta version 3.7.2 is now available. This latest version embodies further improvements of the product as well as bugfixes.

Tasks

  • DEF-6162: AI-BOLIT vulnerabilities are now marked as suspicious.

Fixes

  • DEF-6170: blacklisted IP is no longer put into Gray List by sensor alert;
  • DEF-6205: do not fail if /etc/virtual/domainowners has wrong UTF-8 data;
  • DEF-6221: fixed SEND_ADDITIONAL_DATA.enable label in settings in UI.

To install the new Imunify360 version 3.7.2 please follow the instructions in the documentation.

The upgrading is available since Imunify360 version 2.0-19.

To upgrade Imunify360 on CentOS/CloudLinux systems, run the command:

yum update imunify360-firewall –enablerepo=imunify360-testing

To upgrade Imunify360 on Ubuntu systems, rut the command:

apt-get update
apt-get install –only-upgrade imunify360-firewall

More information on Imunify360 can be found here.

157 people viewed this

Source

Debian Linux 7 Long Term Support reached end-of-life

The Debian Linux version 7 (codenamed “Wheezy”) support ended on 31st May 2018. It was initial release on May 4, 2013. Each LTS ( initial release on May 4, 2013) support lasts for five years. It means Debian project will not provide any security updates for Debian 7. As Debian Linux 7 Long Term support ends, hence you must upgrade your system to keep it secure. This page list all essentials steps to update your system from Debian 7 to Debian 8.

Debian Linux 7 Long Term Support reached

From the announcement page

The LTS Team will prepare the transition to Debian 8 “Jessie”, which is the current oldstable release. The LTS team will take over support from the Security Team on June 17, 2018.

Debian 8 will also receive Long Term Support for five years after its initial release with support ending on June 30, 2020. The supported architectures include amd64, i386, armel and armhf.

How to upgrade from Debian 7 “Wheezy” to Debian 8 “Jessie”

The following are recommendations for upgrading from Debian 7 “Wheezy” LTS to Debian 8 “Jessie” LTS. First, you must keep backup of all critical data including configuration files, user data, and RDBMS data.

Step 1. Update your /etc/apt/sources.list

Use a text editor such as vim command or nano command:

$ sudo vi /etc/apt/sources.list Update it as follows:

deb http://deb.debian.org/debian jessie main
deb http://security.debian.org/debian-security jessie/updates mainSave and close the file.

Step 2. Update your system

Type the following apt-get command:

$ sudo apt-get updateDebian Linux 7 Long Term Support reached end-of-life

Step 3. Install apt from Jessie

Type the following apt-get command:

$ sudo apt-get install apt -t jessieInstall apt from Jessie before upgrading your system

Step 4. Upgrade your system

Now you can use the apt command:

$ sudo apt upgradeapt upgrade Debian 7 to Debian 8 command

Step 5. Upgrade your system and remove obsolete packages

Run the following apt command:

$ sudo apt dist-upgrade You might see prompts and update for configuration files. Apply them as needed. Review all changes carefully.

Step 6. Reboot the Linux box

Run the following command to reboot the Linux server/desktop or laptop:

$ sudo reboot OR

$ sudo shutdown -r 0

Step 7. Verify it

Type the following command to see your Linux kernel version:

$ uname -mrs
$ uname -a See your Debian Linux distribution version and other info using cat command:

$ cat /etc/debian_version Sample outputs:

8.10

Check all your log files on Linux box for any errors using either tail command or grep command:

$ tail -f /var/log/dmesg
$ egrep ‘warn|error|critical’ /path/to/log/file Make sure all services are running and required ports are open too:

$ sudo netstat -tulpn
$ sudo ss -tulpn
$ ping cyberciti.biz
$ host cyberciti.biz
$ ps aux | more
$ ps aux | grep apache

Conclusion

The Debian Long Term Support (LTS) Team announced that Debian 7 “Wheezy” support had reached its end-of-life on May 31, 2018. You just learned how to upgrade your version to next Debian 8 LTS version. I strongly suggest that you visit this page for more info and this page for upgrading existing Debian 8 to Debian 9.

Posted by: Vivek Gite

The author is the creator of nixCraft and a seasoned sysadmin, DevOps engineer, and a trainer for the Linux operating system/Unix shell scripting. Get the latest tutorials on SysAdmin, Linux/Unix and open source topics via RSS/XML feed or weekly email newsletter.

Source

Univention Corporate Server An Enterprise Linux (Overview And Tutorial) – NoobsLab

univention corporate server

In this article, we will take a look at Univention Corporate Server (UCS) and It is also sort of brief tutorial on UCS. Before we get into it, lets talk about an overview.

1: Overview

First, what is Univention Corporate Server (UCS)? It is an enterprise Linux distribution that is built by Univention. It is their goal to simplify the access to applications and devices for organizations and Univention heavily uses Open Source software for that. Basically, this involves three core topics:

  • A central identity management system
  • An app store-like environment for applications
  • And, of course, IT infrastructure and device management

All this is brought together into one product called Univention Corporate Server.

You can imagine UCS as an alternative to Microsoft Windows Server, because it provides Active Directory (AD) services and can be used for similar purposes. For example, UCS can participate in an Active Directory domain or Active Directory domain data can be migrated to UCS for a drop-in replacement.

You can also imagine UCS as Android for servers. Like Android UCS offers a marketplace for apps. Univention calls it App Center. It manages apps’ life cycles and integrates them with the central identity management system incorporated in UCS. Because of the flexibility of UCS, most apps can be operated both on premises or in the cloud.

UCS is used by a broad variety of organizations in very different industries ranging from just a few users until up to 30 million users in the directory service.

2: Origin and Functionality

Univention Corporate Server is derived from Debian GNU/Linux. The software packages are taken from the Debian project. Univention builds some packages on their own, because some packages like Samba or OpenLDAP are customized with patches or simply need a newer version than available in Debian stable.

The Open Source software projects Samba 4, Heimdal Kerberos or OpenLDAP are used to provide the Active Directory domain functionality in UCS.

UCS offers a central configuration system name Univention Configuration Registry (UCR). It consists of a tree of variable keys and their values that are used in configuration files and scripts. It allows to use the same variable, for example the LDAP base distinguished name, in different places and it is only defined once. With UCR a system administrator does not need to worry about missing settings spread over several configuration files. A value can be changed and is then committed to the relevant configuration files.

System administrators are mostly interacting with UCS via the web-based management system. There they take care of the identity management with users, groups and roles and the infrastructure management like IP address leases, name resolution for systems. The UCS system itself is also managed this way and administrators update system packages or install new apps via the web-browser. System administrators usually deal with recurring tasks and they are simplified by the management system. Furthermore, the learning curve for enterprise Linux systems is lowered.

Univention’s value creation basically consists of Open Source “glue” to bring the right components together for the tasks and put everything in a very neat box. The glue ingredients are software craftsmanship, creativity, Python, JavaScript and Dojo, Bash and a bunch of knowledge about Linux and various Open Source Software projects.

3: Download

Univention Corporate Server in the Core Edition can be downloaded from Univention’s website. The Core Edition comes full-featured and free of charge with community support. It is available as ISO image or pre-installed virtual machine image for KVM, VirtualBox and VMware. Enterprise subscription is also available including support and a longer maintenance of five to seven years for a major version.

4: Installation Tutorial

Let’s now get our hands a little bit dirty and setup UCS as virtual machine. This installation uses the UCS virtual machine image for VirtualBox and walks through the single steps.

  1. Download UCS virtual machine image for VirtualBox.
  2. Download VirtualBox and install it.
  3. Import the UCS virtual machine image into VirtualBox
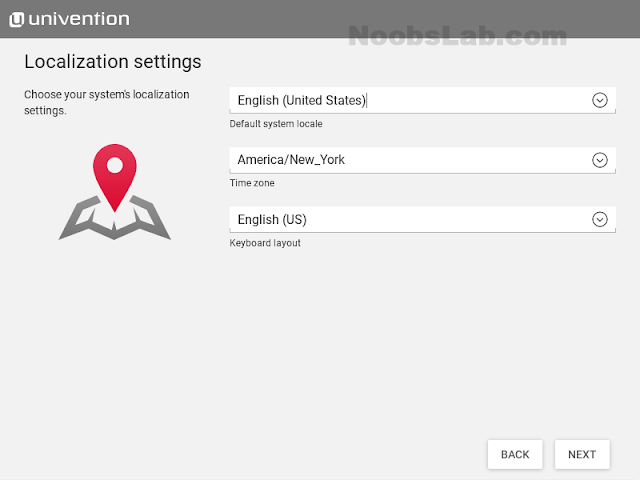
  4. Start the virtual machine and go through the UCS system setup wizard:
  • Select location
  • Customize keyboard, if needed

univention corporate server

  • Enter network configuration: Either choose to obtain an IP address automatically (default) or enter a static IP address. In this tutorial, used a static IP, because UCS system should take care of all the ip address handling.

ucs

  • Domain setup: Select the first option. I want setup my own domain and I start with creating a new one. I can later add more systems to this new domain by selecting the second option during the setup. Furthermore, if an existing Active Directory service should be used, select option three.

univention

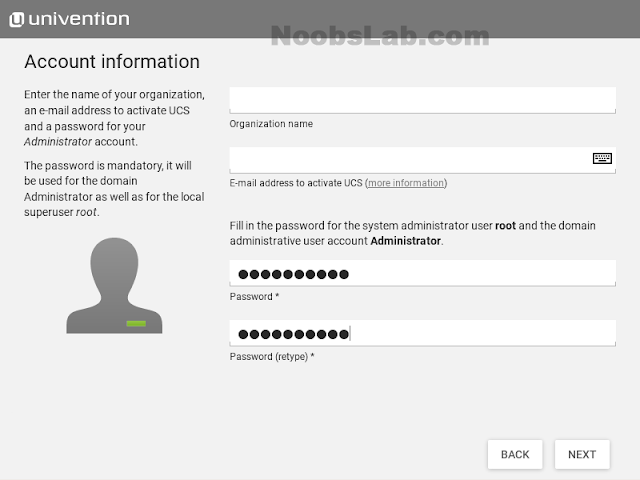
  • Enter the password for the root and Administrator account. The system needs to have a root password. It can later be used for the user “Administrator” to login to the management system. I postpone the system activation to a later time and leave the other fields empty.

univention server

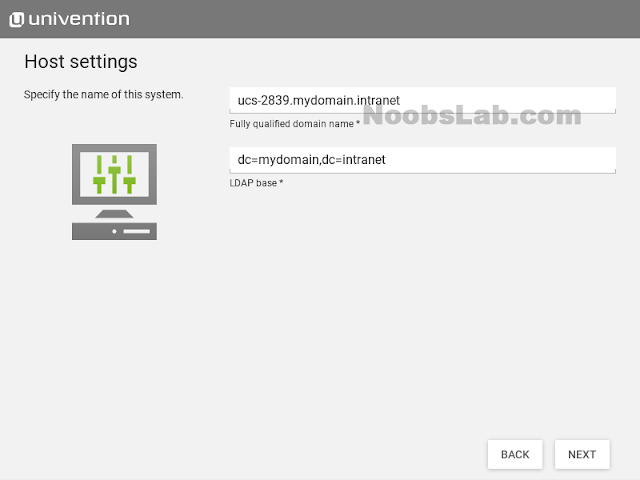
  • Specify the name of the system in the Host settings. I just went with the proposed defaults. Here the system receives its name.

univention ucs

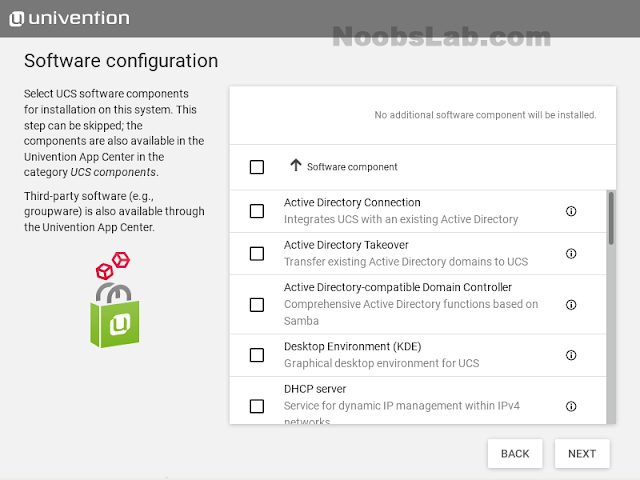
  • You may already want to install additional components, like for example the Active Directory compatible domain controller.

univention corporate server

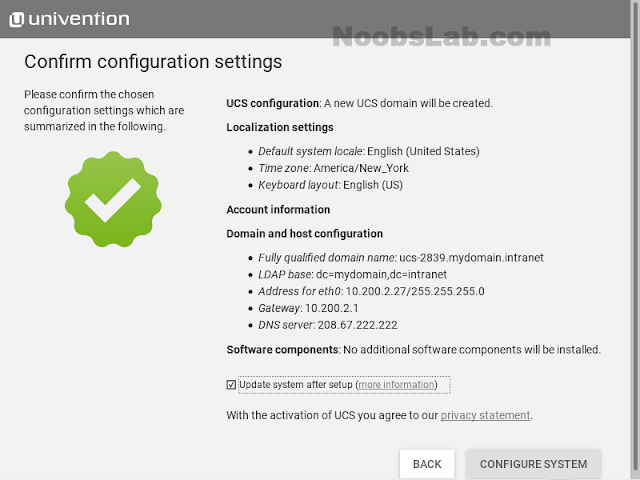
  • Go over the configuration summary and click “Configure System”. UCS will apply the settings. This can last several minutes and depends on the performance of your underlying virtualization host system.

univention corporate server

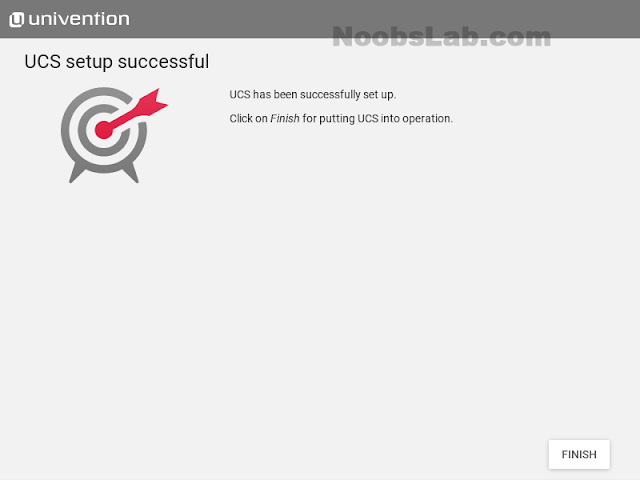
  • Finally the setup is completed. After finishing the setup wizard, the appliance greets with a welcome screen and announces what IP address should be used in the browser to access the UCS management system. This screen comes up after every reboot of the appliance and gently reminds where to reach the system.

univention corporate server

univention corporate server

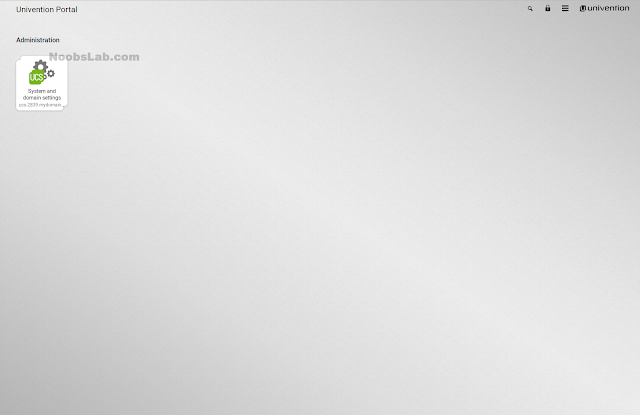
  • Heading to the address provided by the welcome page opens the UCS portal page. It looks quite empty yet and offers a login to the management system.

univention corporate server

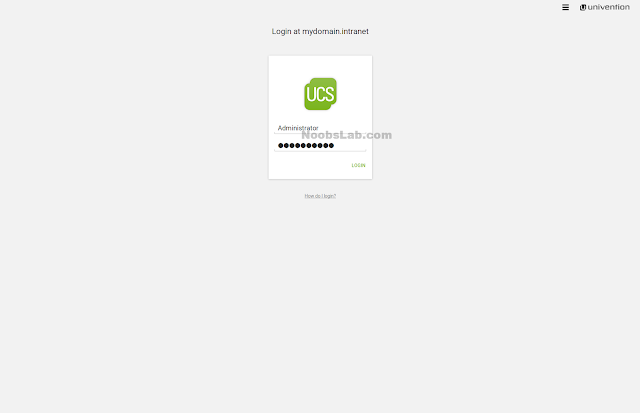
  • For the first login I choose “Administrator” for the username and the password I provided during the setup. The Administrator is the first administrative user having all the rights for the environment.

univention corporate server

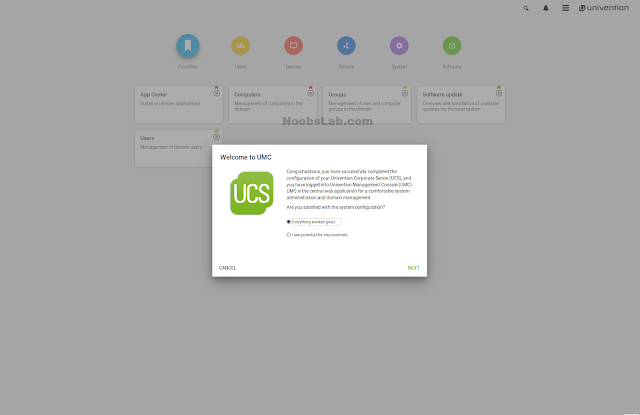
  • With the first successful login, UCS welcomes the user with a short dialog and asks for the first feedback, if issues occurred during installation and setup.

univention corporate server

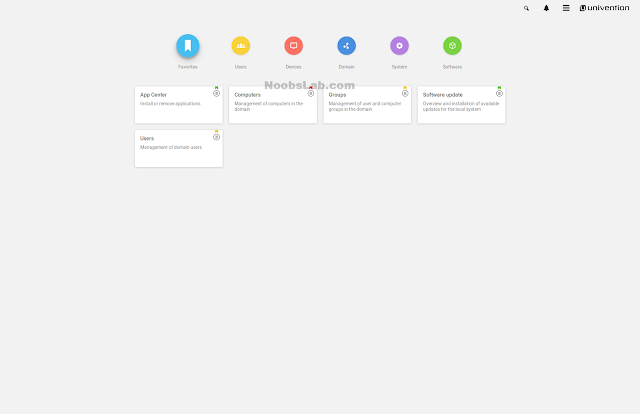
  • The UCS management system is the central place to control your UCS environment. At the top there are the sections Users, Devices, Domain, System and Software. Each section reveals its own modules for different administrator tasks. Frequently used modules can be put into the Favorites section.

univention corporate server

  • After UCS setup, the system should be extended by an additional app and ownCloud is my candidate.

univention corporate server

  • In order to use the App Center, the system has to be registered. I didn’t register before and I’m now reminded of it. A click on “Install” guides me through the registration where I provide a valid email address, receive the registration via email and upload it to the system. Afterwards, I can continue with the installation. The registration has to be done only once.

univention corporate server

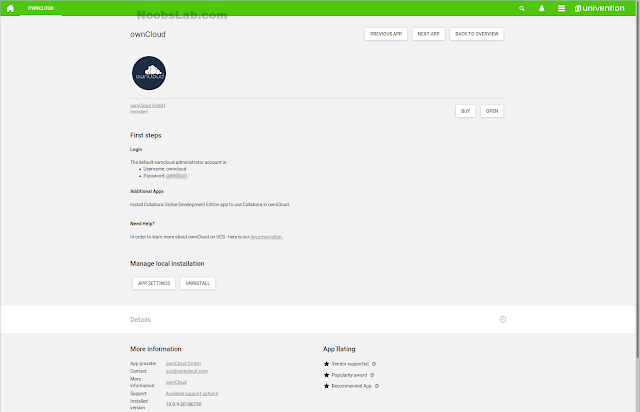
  • ownCloud is now installed and the app informs the administrator about how to access the ownCloud admin account.

univention ucs

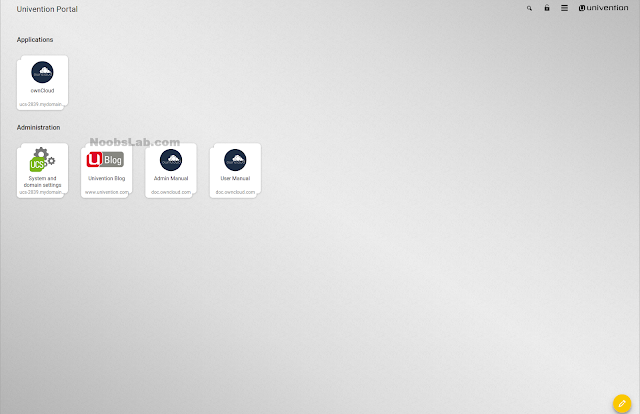
  • A look at the portal now shows some more tiles on it. It offers the login to ownCloud. Before a login with a usual user can be made, the user needs to be created. The admin user can login though with the given credentials shown after the installation.

ucs

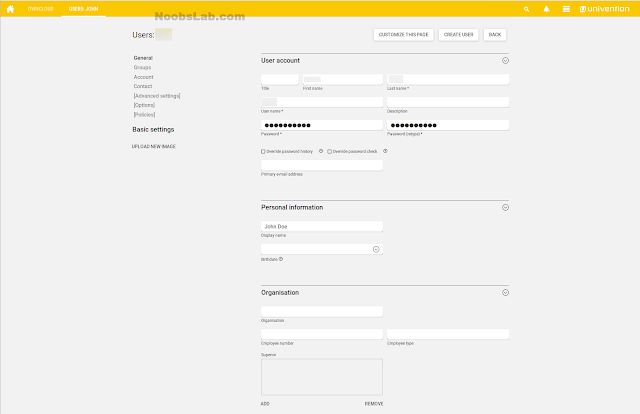
  • To create a new user, select the Users module from the Favorites or Users section in the UCS management system. Provide at least a lastname, username and a password. By default, new users are enabled for ownCloud, as soon as the app is installed. If a new user shall not be able to login to ownCloud, the checkbox has to be removed in the Advanced settings section.

univention corporate server

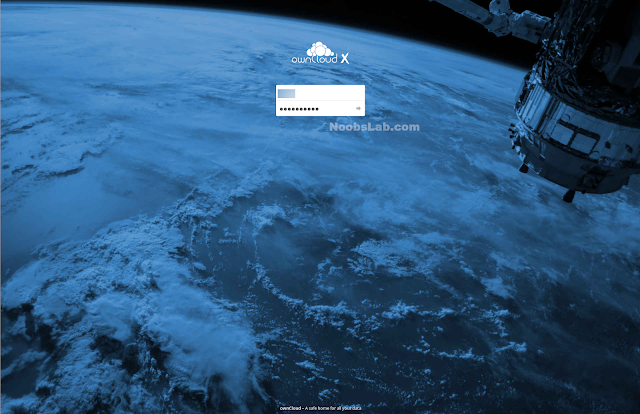
  • Going back to the UCS portal, I click on the ownCloud login and there I enter the credentials of my new user. Et voilà, I’m in and can use my fresh ownCloud.

univention corporate server

univention corporate server

5: Summary

Univention Corporate Server (UCS) is very sophisticated operating system for identity and infrastructure management for organizations. The setup is straight forward and easy to make. I like the way how third party solutions extend the platform and that they are integrated with the identity management. This makes testing and even production operation very easy.

Source

Install Kali Linux on Virtualbox

Install kali linux virtualbox
Kali Linux know as BackTrack in the past is a Debian-based system for network security, forensic analysis, and penetration testing. A good way to try a new system is to virtualize it with virtualization tool such as VirtualBox.

This article will show you how to install the latest version of Kali Linux 2018 on VirtualBox in your Linux system.

If you using a Windows 10 Desktop, the only difference would be to download the ‘exe’ file from Oracle VM VirtualBox and proceed with standard installation steps to have VirtualBox on windows.

Pre-requisites

In order to virtualize Kali Linux and have a minimum average working environment, you need to have

  • virtualbox installed in your Linux system
  • the image of Kali Linux present in your system
  • at least 4GB of RAM
  • at least 20-30GB of free disk space
  • network to have a system updated
  • a processor with the virtualization features enabled (often activated by default)

In this tutorial, we will use the actual latest version Kali Linux 2018.3a available in the official site and virtualbox 5.1.34

Step 1: Download and install VirtualBox

Virtualbox is present in the official repositories of Ubuntu

# apt install virtualbox

Then you can install the virtualbox extension

# sudo apt install virtualbox-ext-pack

You can also download the latest version and install it directly from the official website

# wget https://download.virtualbox.org/virtualbox/5.2.18/virtualbox-5.2_5.2.18-124319~Ubuntu~bionic_amd64.deb
–2018-10-16 07:18:22– https://download.virtualbox.org/virtualbox/5.2.18/virtualbox-5.2_5.2.18-124319~Ubuntu~bionic_amd64.deb

Then install it with dpkg command

# dpkg -i virtualbox-5.2_5.2.18-124319_Ubuntu_bionic_amd64.deb

If you encounter any dependency error, use the command

# apt install -f

then reinstall again with the dpkg command.

Step 2: Download Kali Linux ISO and Create guest on virtualbox

In virtualization, the guest OS is the virtualized system (so our Kali Linux) and the host OS is our Linux system. To create it, you need to run virtualbox and choose New

Then choose the platform and the OS to create. We will choose Debian (64 bits) because Kali is a Debian-based system and we have the x64 platform

Set the memory size. In our case we choose 2GB

Then create a new virtual HD drive

  • hard disk file type: VDI
  • storage on physical hard disk: Dynamically allocated
  • file location: leave by default
  • size: 20GB

Now we need to edit some parameter of our guest by going to Settings

We will allow the bidirectional shared and data transfer between the Linux host and guest Kali.

You can edit the motherboard option such as the boot order and the EFI mode

Now we will need to add the image of Kali for the installation process. at step 3 choose the option for the Optical disk file, then go to the image location

Now you can see that kali appears

After, you can go through the others features to see which ones you can activate. Now we can launch the installation process.

Step 3: Install Kali Linux on virtualbox

Now that you have edited settings, you can see a summarize of the configuration, then launch the installation

Choose Start Installer

When you will click with the cursor, a message will appear informing that the mouse will be captured. To release it and manipulate your host normally, you will need to use the right Ctrl key

Let’s define the system language

Then define your exact location. if you don’t see your county, go to other and choose

You must define your locales preferences and keyboard language

Now you can configure the hostname of the guest

You need to configure your domain name but in our case, this information will be blank

then configure the password of the root account.

In this step, we need to partition the disk. But in our case, we will do a configuration as a beginner by using the entire disk without partitioning

validate the changes and continue the process.

To configure the package manager, you will be asked for a network mirror but we will not use it

now you can enter the proxy information if you have one

Then continue the process installation

You will see a message when the installation will be completed

Now that you can reboot. You can see the grub

You can now log in the system as root user and the password used during the installation

You can see the interface of your new system

You can now discover Kali by going through the different menu available. You can see the detail information

Give it a try and let us know if you encounter any issues. Good luck!!

Read Also:

Source

[Stable Update] 2018-09-21 – Kernels, Pamac, Palemoon, Mesa 18.2.1

Hi community,

Welcome to another stable update. So what do we have with this one?

  • latest updates to some of our kernels
  • latest Mesa version 18.2.1
  • some fixes for Pamac
  • updated palemoon to 28.1.0

We hope with all these changes Manjaro to be more efficent for you all.

So please report back and give us feedback for given changes made to our repositories. Users of our 32-bit Distro should read this.

kind regards

Philip Müller
Manjaro Project Lead

Current supported Kernels

  • linux316 3.16.57
  • linux318 3.18.122 [EOL]
  • linux44 4.4.157
  • linux49 4.9.128
  • linux414 4.14.71
  • linux417 4.17.19 [EOL]
  • linux418 4.18.9
  • linux419 4.19-rc4
  • linux414-rt 4.14.63_rt40
  • linux416-rt 4.16.18_rt11

Package Updates (Mon Sep 10 20:46:48 CEST 2018)

  • community x86_64: 38 new and 38 removed package(s)
  • core x86_64: 10 new and 10 removed package(s)
  • extra x86_64: 91 new and 85 removed package(s)
  • multilib x86_64: 5 new and 0 removed package(s)

Links

Posted in: general

Source

[Stable Update] 2018-10-08 – Kernels, Gnome 3.30, Cinnamon, Deepin, Pamac, SPL/ZFS

Hi community,

Welcome to another stable update. Since this update is huge we recommend to install it from within a terminal: pamac upgrade or sudo pacman -Syu

So what do we have with this one? Mostly we focused on the major Gnome, which got released earlier last month. The entire desktop now uses fewer system resources, which means you can run more apps at once without encountering performance issues.

Another main focus was on Pamac. We hope it will be the snappiest release we ever did. Now the CLI and UI feature the same functions, which makes your life maintaining your installation of Manjaro even more effectiv.

Else we worked on our new homepage layout pushed more things to our new hardware project, the #bladebook.

Here the brief overall changes with this update:

  • Gnome 3.30 got added to our repos
  • Cinnamon and Deepin got renewed with new features and fixes
  • we released Pamac v7.1.1
  • Pamac also gained functionality to edit PKGBUILDs from AUR packages (please test it via pamac-dev)
  • Further fixes to Pamac-Dev
  • The Kernel got updated to v4.19-rc7
  • most of our other Kernels got also updated. The #bladebook gets fully supported with v4.18.8 and higher
  • Some fixes to SPL/ZFS
  • NetworkManager is now at 1.14.0
  • LibreOffice got updated to 6.1.1
  • added the Hibernation option to the lockscreen of Plasma-Workspace
  • we have now the latest Nvidia 410.57 driver added
  • Wine is now at 3.17
  • Mesa got updated to 18.2.2
  • LLVM and CLANG got updated to 7.0
  • Firefox-Dev is now at 63.0b10
  • I managed to complete my work on the smooth bootup experience
  • upstream fixes incl. haskell and python packages

We hope with all these changes Manjaro to be more efficient for you all.

So please report back and give us feedback for given changes made to our repositories. Users of our 32-bit Distro should read this.

kind regards

Philip Müller
Manjaro Project Lead

Current supported Kernels

  • linux316 3.16.59
  • linux318 3.18.123 [EOL]
  • linux44 4.4.159
  • linux49 4.9.131
  • linux414 4.14.74
  • linux417 4.17.19 [EOL]
  • linux418 4.18.12
  • linux419 4.19-rc7
  • linux414-rt 4.14.71_rt44
  • linux416-rt 4.16.18_rt11

Package Updates (Mon Oct 8 07:20:36 CEST 2018)

  • community x86_64: 1723 new and 1601 removed package(s)
  • core x86_64: 63 new and 61 removed package(s)
  • extra x86_64: 850 new and 953 removed package(s)
  • multilib x86_64: 67 new and 73 removed package(s)

Links

Posted in: general

Source

Rocket.Chat: How To Install The Messaging System on Debian 9


Rocket.Chat on Debian 9

What’s Rocket.Chat

Rocket.Chat is a professional, Slack-like messaging system, developed for companies wanting to privately host their own chat service. It is developed in JavaScript using the Meteor full stack framework.

It has many features, like:

    • Help desk chat
    • Video conferences
    • File sharing
    • Link previews
    • Voice messages

We will install Rocket.Chat on a Debian 9 server.

Getting Started

The first thing to do is to satisfy Rocket.Chat dependencies. Execute the following apt command:

# apt install build-essential graphicsmagick

Install MongoDB

Rocket.Chat works with MongoDB as database system. There aren’t already Debian 9 packages for MongoDB, so we will install it from the tarball.

Download the tarball

First, download with curl the MongoDB tarball

$ curl -O https://fastdl.mongodb.org/linux/mongodb-linux-x86_64-debian81-3.4.9.tgz

Extract the archive

Extract the previously downloaded archive by executing the following command:

$ tar -zxvf mongodb-linux*.tgz

Rename and move the directory, for example, in /opt:

# mv mongodb-linux-x86_64-debian81-3.4.9/ /opt/mongodb

Update the PATH variable by adding the /opt/mongodb/bin directory. In ~/.bashrc add the following line:

$ export PATH=$:/opt/mongodb/bin

Create a unit file

Create a systemctl unit file for MongoDB, executing the following command:

# $EDITOR /lib/systemd/system/mongodb.service

In this file, paste the following content:

[Unit]
Description=A document-oriented database

[Service]
User=mongodb
Group=mongodb
RuntimeDirectory=mongodb
RuntimeDirectoryMode=0755
EnvironmentFile=-/etc/default/mongodb
Environment=CONF=/etc/mongodb.conf
Environment=SOCKETPATH=/run/mongodb
ExecStart=/opt/mongodb/bin/mongod –unixSocketPrefix=$ –config $ $DAEMON_OPTS

[Install]
WantedBy=multi-user.target

Save and exit.

Reload systemd daemon service:

# systemctl daemon-reload

Start MongoDB

At this point, we can start MongoDB and enable it for starting at boot time:

# systemctl start mongodb
# systemctl enable mongodb

Install Node.js and npm

Rocket.Chat requires Node.js (in particular, any version newer than 4.5) and npm. First of all, add the NodeSource repository:

# curl -sL https://deb.nodesource.com/setup_8.x | bash –

Next, execute the following command for installing both Node.js and npm:

# apt-get install nodejs

Check the Node.js version:

# node –version
v8.7.0

Next, install n through npm:

# npm install -g n

With n, it’s possible to change Node.js version.

Install Rocket.Chat

If not exists, create the /var/www directory, which will store Rocket.Chat:

# mkdir -p /var/www
# cd /var/www

In that directory, execute the following command for downloading Rocket.Chat:

# wget https://s3.amazonaws.com/download.rocket.chat/build/rocket.chat-0.58.4.tgz -O rocket.chat.tgz

Extract the archive and rename the extracted folder:

# tar xzf rocket.chat.tgz
# mv bundle Rocket.Chat

Next, set environment variables and run the Rocket.Chat server:

# cd Rocket.Chat/programs/server
# npm install
# cd ../..

# export ROOT_URL=http://example.com:3000/
# export MONGO_URL=mongodb://localhost:27017/rocketchat
# export PORT=3000

Those who are using the replica set should set the MONGO_URL variable with this content: mongodb://localhost:27017/rocketchat?replicaSet=001-rs

Rocket.Chat is installed and configured, but it requires configuration behind a web server. In this tutorial we’ll be using NGINX.

Install NGINX

NGINX can be install with apt:

# apt install nginx

Create a new directory that will contain the SSL certificates:

# mkdir -p /etc/nginx/ssl/

In this directory, generate a new key:

# openssl req -new -x509 -days 365 -nodes -out /etc/nginx/ssl/rocketchat.crt -keyout /etc/nginx/ssl/rocketchat.key

Change permissions to the key file:

# chmod 400 rocketchat.key

Create a Virtual Host file:

# $EDITOR /etc/nginx/sites-available/rocketchat

In this file, paste the following content:

# Upstreams
upstream backend {
server 127.0.0.1:3000;
}

# Redirect Options
server {
listen 80;
server_name chat.mydomain.com;
# enforce https
return 301 https://$server_name$request_uri;
}

# HTTPS Server
server {
listen 443;
server_name chat.mydomain.com;

error_log /var/log/nginx/rocketchat.access.log;

ssl on;
ssl_certificate /etc/nginx/ssl/rocketchat.crt;
ssl_certificate_key /etc/nginx/ssl/rocketchat.key;
ssl_protocols TLSv1 TLSv1.1 TLSv1.2; # dont use SSLv3 ref: POODLE

location / {
proxy_pass http://192.168.1.110:3000/;
proxy_http_version 1.1;
proxy_set_header Upgrade $http_upgrade;
proxy_set_header Connection “upgrade”;
proxy_set_header Host $http_host;

proxy_set_header X-Real-IP $remote_addr;
proxy_set_header X-Forward-For $proxy_add_x_forwarded_for;
proxy_set_header X-Forward-Proto http;
proxy_set_header X-Nginx-Proxy true;

proxy_redirect off;
}
}

Save and close the file. Activate the configuration with:

# ln -s /etc/nginx/sites-available/rocketchat /etc/nginx/sites-enabled/rocketchat

Test NGINX:

# nginx -t

If no errors occur, restart the web server:

# systemctl restart nginx

Next, update the environment variables:

# cd /var/www/Rocket.Chat/
# export ROOT_URL=https://chat.example.com
# export MONGO_URL=mongodb://localhost:27017/rocketchat?replicaSet=001-rs
# export PORT=3000

Run Rocket.Chat:

# node main.js

The final step is to insert the following URL into a web browser: https://chat.example.com to register a new admin account and finish the graphical configuration.

Conclusion

There you have it! We’ve just explained how to install and configure your Rocket.Chat Server on a Debian 9 server using NGINX. This useful online communication program can help your team work more efficiently and with more collaboration!

Source

PostgreSQL Replication on Ubuntu Tutorial


PostgreSQL Database System Logo

PostgreSQL Database System

PostgreSQL is an advanced open source Object-Relational Database Management System (or ORDBMS). It is an extensible and highly-scalable database system, meaning that it can handle loads ranging from single machine applications to enterprise web services with many concurrent users. PostgreSQL is transactional and ACID-compliant (Atomicity, Consistency, Isolation, Durability).

It supports a large part of the SQL standard, and offers many features including:

  • Complex queries
  • Foreign keys
  • Triggers
  • Updatable views
  • Transactional integrity
  • Multiversion concurrency control

As previously said, the PostgreSQL database system can be extended by its users. There are different ways to do this, like adding new functions, operators, data types, index methods, procedural languages, etc.

It is developed by the PostgreSQL Global Development Group and released under the terms of the PostgreSQL License.

PostgreSQL provides many ways to replicate a database. in this tutorial we will configure the Master/Slave replication, which is the process of syncing data between two database by copying from a database on a server (the master) to one on another server (the slave).

This configuration will be done on a server running Ubuntu 16.04.

Prerequisites

PostgreSQL 9.6 installed on the Ubuntu 16.04 Servers

Configure UFW

UFW (or Uncomplicated Firewall) is a tool to manage iptables based firewall on Ubuntu systems. Install it (on both servers) through apt by executing:

# apt-get install -y ufw

Next, add PostgreSQL and SSH service to the firewall. To do this, execute:

# ufw allow ssh
# ufw allow postgresql

Enable the firewall:

# ufw enable

Configure PostgreSQL Master Server

The master server will have reading and writing permissions to the database, and will be the one capable of performing data streaming to the slave server.

With a text editor, edit the PostgreSQL main configuration file, which is /etc/postgresql/9.6/main/postgresql.conf:

# $EDITOR /etc/postgresql/9.6/main/postgresql.conf

Uncomment the listen_addresses line and edit adding the master server IP address:

listen_addresses = ‘master_server_IP_address’

Next, uncomment the wal_level line changing its value:

wal_level = hot_standby

To use local syncing for the synchronization level, uncomment and edit the following line:

synchronous_commit = local

We are using two servers, so uncomment and edit the two lines as follows:

max_wal_senders = 2
wal_keep_segments = 10

Save and close the file.

Edit the pg_hba.conf file for the authentication configuration.

# $EDITOR /etc/postgresql/9.6/main/pg_hba.conf
Paste the following configuration:

# Localhost
host replication replica 127.0.0.1/32 md5

# PostgreSQL Master IP address
host replication replica master_IP_address/32 md5

# PostgreSQL SLave IP address
host replication replica slave_IP_address/32 md5

Save, exit and restart PostgreSQL:

# systemctl restart postgresql

Create a User for Replication

Create a new PostgreSQL user for the replication process. Log in to the postgres user and start PostgreSQL shell:

# su – postgres
$ psql

Create a new user:

postgres=# CREATE USER replica REPLICATION LOGIN ENCRYPTED PASSWORD ‘usr_strong_pwd’;

Close the shell.

This concludes the master server configuration.

Configuring the Slave Server

The slave server won’t have writing permissions to the database, being that its only function is to accept streaming from the master. So it will have only READ permissions.

First, stop the PostgreSQL service:

# systemctl stop postgresql

Edit the PostgreSQL main configuration file:

# $EDITOR /etc/postgresql/9.6/main/postgresql.conf

In this file, uncomment the listen_addresses line and change its value:.

listen_addresses = ‘slave_IP_address’

Next, uncomment the wal_level line and change as follow:

wal_level = hot_standby

As in the master settings, uncomment the synchronous_commit line to use local syncing.

synchronous_commit = local

Also as in the master, uncomment and edit the following two lines:

max_wal_senders = 2
wal_keep_segments = 10

Enable hot_standby for the slave server by uncommenting the following line and changing its value:

hot_standby = on

Save and exit.

Copy Data From Master to Slave

To sync from master to slave server, the PostgreSQL main directory on the slave must be replaced with the main directory from the master. In the slave server, log in to the postgres user:

# su – postgres

Make a backup of the actual data directory:

$ cd/var/lib/postgresql/9.6/
$ mv main main_bak

Create a new main directory:

$ mkdir main/

Change permissions:

$ chmod 700 main

At this point, copy the main directory from the master to the slave server by using pg_basebackup:

# pg_basebackup -h master_IP_address -U replica -D /var/lib/postgresql/9.6/main -P –xlog

Once the transfer is complete, in the main directory create a new recovery.conf file, and paste the following content:

standby_mode = ‘on’
primary_conninfo = ‘host=10.0.15.10 port=5432 user=replica password=usr_strong_pwd’
trigger_file = ‘/tmp/postgresql.trigger.5432’

Save, exit and change permissions to this file:

# chmod 600 recovery.conf

Start PostgreSQL:

# systemctl start postgresql

This concludes the slave server configuration.

Conclusion

We have seen how to configure the PostgreSQL master/slave replication, by using two servers running Ubuntu 16.04. This is just one of the many replication capabilities provided by this advanced and fully open source database system.

Source

Linux Hardware Reviews, Open-Source Benchmarks & Linux Performance

Updated Proton 3.16 Beta For Steam Play Has DXVK 0.90, D3D11 Fixes

Valve in cooperation with CodeWeavers and other developers continues making rapid progress on Steam Play and their “Proton” downstream flavor of Wine.

3 Hours Ago –

Valve

– Proton 3.16 Beta

Google Engineer Proposes KUnit As New Linux Kernel Unit Testing Framework

Google engineer Brendan Higgins sent out an experimental set of 31 patches today introducing KUnit as a new Linux kernel unit testing framework to help preserve and improve the quality of the kernel’s code.

Chrome 70 Now Officially Available With AV1 Video Decode, Opus In MP4 & Much More

Google’s Chrome/Chromium 70 web-browser made it out today for Linux users as well as all other key supported platforms.

3 Hours Ago –

Google

– Chrome 70

Ubuntu Server Is Making It Easier To Deploy Let’s Encrypt SSL Certificates

The Ubuntu Server developers are looking to make it easier to deploy free SSL/TLS certificates from Let’s Encrypt.

5 Hours Ago –

Ubuntu

– Ubuntu Server + Certbot

AMD Dual EPYC 7601 Benchmarks – 9-Way AMD EPYC / Intel Xeon Tests On Ubuntu 18.10 Server

Arriving earlier this month was a Dell PowerEdge R7425 server at Phoronix that was equipped with two AMD EPYC 7601 processors, 512GB of RAM, and 20 Samsung 860 EVO SSDs to make for a very interesting test platform and our first that is based on a dual EPYC design with our many other EPYC Linux benchmarks to date being 1P. Here is a look at the full performance capabilities of this 64-core / 128-thread server compared to a variety of other AMD EPYC and Intel Xeon processors while also doubling as an initial look at the performance of these server CPUs on Ubuntu 18.10.

Elementary OS 5.0 “Juno” Released For A Pleasant Linux Desktop Experience

Just ahead of Ubuntu 18.10, Solus 4, and Fedora 29 among other forthcoming Linux distribution releases, Elementary OS 5 “Juno” has been released for a polished desktop experience that aims to compete with macOS and Windows for desktop usability.

The Next Linux Kernel Will Bring More Drivers Converted To Use BLK-MQ I/O

More Linux storage drivers have been converted to the “blk-mq” interfaces for the multi-queue block I/O queuing mechanism for the 4.20~5.0 kernel cycle.

NVIDIA 410.66 Linux Driver Released With RTX 2070 Support, Vulkan Ray-Tracing, Etc

NVIDIA has released the 410.66 Linux graphics driver today as their first stable release in the 410 series and comes with support for the new GeForce RTX 2070 graphics card.

12 Hours Ago –

NVIDIA

– NVIDIA 410.66

CodeWeavers CrossOver Linux 18 Released With DXVK/VKD3D Support

While CodeWeavers’ developers have been busy with improvements to Wine and Valve’s downstream “Proton” for allowing a great Windows-on-Linux gaming experience, they haven’t parted ways with their core business and today they announced the availability of CrossOver 18.

13 Hours Ago –

WINE

– CrossOver 18

NVIDIA GeForce RTX 2070 Linux Benchmarks Will Be Coming

NVIDIA’s embargo for reviews on the GeForce RTX 2070 graphics cards has now expired ahead of the expected retail availability on Wednesday.

15 Hours Ago –

NVIDIA

– GeForce RTX 2070

Linux’s LoRa Is Ready To Deliver Long-Range, Low-Power Wireless

Adding to the long list of new features for what will be Linux 4.20 or likely renamed to Linux 5.0 per Linus Torvalds’ numbering preferences is a new wireless networking subsystem within the kernel’s networking code… Meet LoRa.

The Biggest Features Of Linux 4.19: Intel/AMD, CoC, 802.11ax, EROFS, GPS & GASKET

With the Linux 4.19 kernel set to be released next weekend, here’s a recap of the most prominent features to be found in this next kernel release.

Qt 5.12 Beta 2 Brings Many Fixes

Just two weeks after the Qt 5.12 beta release, a second beta is now available for testing of this forthcoming tool-kit update.

17 Hours Ago –

Qt

– Qt 5.12 Beta 2

The Expected Feature We Didn’t See Yet For Ubuntu 18.10

While Ubuntu 18.10 is set to roll out this week with its new theme and an assortment of package updates and other enhancements, there is one feature Canonical previously talked about for the Ubuntu 18.10 “Cosmic Cuttlefish” cycle that we have yet to see made public.

19 Hours Ago –

Ubuntu

– Survey….

Intel DRM Linux Driver Working On DisplayPort Forward Error Correction

Going in hand with their work on display stream compression for dealing with next-generation displays, the Intel Direct Rendering Manager driver developers are working on “FEC” support to deal with any errors that come up in the stream.

19 Hours Ago –

Intel

– DP FEC

GCC Is Preparing To End Support For Solaris 10

Solaris 10, what may will argue as the last “good” Solaris operating system release before Sun Microsystems fell under control of Oracle, may soon see its support deprecated by the GCC compiler stack.

24 Hours Ago –

GNU

– Fond Solaris 10 Memories

15 October

Mesa Vulkan Drivers Move Ahead With PCI Bus Info, Calibrated Timestamps

With this weekend’s release of Vulkan 1.1.88 stealing the show was the Vulkan transform feedback capability to allow projects like DXVK to support Direct3D’s Stream Output functionality. But besides VK_EXT_transform_feedback, there are other extensions also being worked on for Mesa ANV / RADV Vulkan driver coverage.

15 October 08:55 PM EDT –

Mesa

– New Vulkan Features

Purism Shares The Latest Librem 5 Smartphone Progress – Dev Kits Going Out Soon

Purism has shared the latest details on their efforts to deliver the open-source Linux Librem 5 smartphone to market in 2019.

15 October 06:18 PM EDT –

Hardware

– Librem 5

Linux’s Qualcomm Ath10k Driver Getting WoWLAN, WCN3990 Support

The Qualcomm/Atheros “Ath10k” Linux driver coming up in the Linux 4.20~5.0 kernel merge window is picking up two prominent features.

15 October 05:55 PM EDT –

Hardware

– Atheros Ath10k

AMD CodeXL 2.6 Advances GPU Profiling, Static Analysis & GPU Debugging

AMD’s GPUOpen group today released CodeXL 2.6 as the newest version of their GPU developer suite.

15 October 05:42 PM EDT –

AMD

– CodeXL 2.6

FUSE File-Systems Pick Up Another Performance Boost With Symlink Caching

FUSE file-systems in user-space are set to be running faster with the upcoming Linux 4.20~5.0 kernel thanks to several performance optimizations.

X.Org Server 1.20.2 Released With A Bunch Of Bug Fixes

It’s almost been a half-year already since the release of the long delayed X.Org Server 1.20, but with no signs of X.Org Server 1.21 releasing soon, xorg-server 1.20.2 was announced today as the latest stable point release.

15 October 12:56 PM EDT –

X.Org

– xorg-server 1.20.2

FreeDesktop.org Might Formally Join Forces With The X.Org Foundation

FreeDesktop.org is already effectively part of X.Org given the loose structure of FreeDesktop.org, the key members/administrators being part of both projects, and FreeDesktop.org long being the de facto hosting platform from the X.Org Server to Mesa and much more. But now they may be officially joining forces.

15 October 12:32 PM EDT –

X.Org

– FreeDesktop.org + X.Org

Windows 10 October 2018 Update Performance Against Ubuntu 18.10, Fedora 29

As the latest of our benchmarks using the newly re-released Microsoft Windows 10 October 2018 Update, here are benchmarks of this latest Windows 10 build against seven different Linux distributions on the same hardware for checking out the current performance of these operating systems.

Experimental Patches For Using SIMD32 Fragment Shaders With Intel’s Linux Driver

Existing Intel graphics hardware already supports SIMD32 fragment shaders and the Intel open-source Linux graphics driver has supported this mode for months, but it hasn’t been enabled. That though is in the process of changing.

15 October 10:08 AM EDT –

Intel

– Intel SIMD32 Linux Mesa

Xfce4-Screensaver Has Its First Release – Fork Of MATE Screensaver, Forked From GNOME

As a new alternative over XScreenSaver or using other desktop environments’ screensaver functionality, xfce4-screensaver has out its first release albeit of alpha quality.

15 October 07:12 AM EDT –

Desktop

– Xfce4-Screensaver 0.1

Another Change Proposed For Linux’s Code of Conduct

With the Linux 4.19-rc8 kernel release overnight, one change not to be found in this latest Linux 4.19 release candidate are any alterations to the new Code of Conduct. The latest proposal forbids discussing off-topic matters while protecting any sentient being in the universe.

DragonFlyBSD Lands Another NUMA Optimization Helping AMD Threadripper 2 CPUs

DragonFlyBSD lead developer Matthew Dillon has been quite impressed with AMD’s Threadripper 2 processors particularly the Threadripper 2990WX with 32-cores / 64-threads. Dillon has made various optimizations to DragonFly for helping out this processor in past months and overnight he made another significant improvement.

15 October 05:30 AM EDT –

BSD

– Threadripper 2990WX

KDE Frameworks 5.51 Released

KDE Frameworks 5.51 is out today as the latest monthly update to this collection of KDE libraries complementing Qt5.

15 October 05:17 AM EDT –

KDE

– KDE Frameworks 5.51

Linux 4.19-rc8 Released With A Lot Of “Tiny Things”

Greg Kroah-Hartman went ahead and released Linux 4.19-RC8 as the last test release of the upcoming Linux 4.19 kernel.

14 October

Fedora Workstation 29 Is Looking Up To Be Another Impressive Release, Looking Great

In addition to Ubuntu 18.10 releasing soon, Fedora 29 is set to be release by month’s end if all goes well.

14 October 08:45 PM EDT –

Fedora

– Fedora 29

GNOME’s Geoclue 2.5 Brings Vala Support, WiFi Geolocation For City-Level Accuracy

GNOME’s Geoclue library that provides a D-Bus service for location information based on GPS receivers, 3G modems, GeoIP, or even WiFi-based geolocation has been baking a lot of changes.

14 October 02:50 PM EDT –

GNOME

– Geoclue 2.5

HUANUO HNDSK2 Dual Monitor Arms Work Out Great

If you are in the market for a dual monitor desk arm/mount that clamps to your desk, the HUANUO HNDSK2 is a surprisingly suitable contender.

14 October 01:05 PM EDT –

Hardware

– HUANUO HNDSK2

KaOS 2018.10 Released With KDE Plasma 5.14 Desktop, Wayland 1.16

A new ISO spin is available of the KaOS Linux distribution that is closely aligned with shipping the upstream KDE desktop experience.

14 October 11:44 AM EDT –

KDE

– KaOS 2018.10

Vulkan Cracks 2,500 Projects On GitHub

After cracking 2,000 projects referencing Vulkan on GitHub earlier this year, this week it passed the milestone of having more than 2,500 projects.

14 October 08:55 AM EDT –

Vulkan

– Vulkan 2500

Wine-Staging 3.18 Released With Some New Patches While Other Code Got Upstreamed

It has been a very exciting weekend for Linux gamers relying upon Wine for running Windows titles under Linux… There was the routine bi-weekly Wine 3.18 development release on Friday but yesterday brought transform feedback to Vulkan and in turn Stream Output to DXVK to fix up a number of D3D11 games. Today is now the Wine-Staging 3.18 release.

14 October 07:08 AM EDT –

WINE

– Wine Staging

You Can Help Ubuntu This Weekend Test The Near-Final Cosmic Cuttlefish

If all goes well, the Ubuntu 18.10 “Cosmic Cuttlefish” release will happen on 18 October but for that to happen they could use your help this weekend testing their release candidate spins.

14 October 06:55 AM EDT –

Ubuntu

– Ubuntu 18.10

KDE Will Now Safely Spin Down External Hard Drives When Unmounting

Fixing a seven year old bug since the KDE4 days, KDE will now spin down external hard drives unmounting the drives to help stave off possible data loss / corruption.

14 October 06:40 AM EDT –

KDE

– Spin Them Down

13 October

DXVK 0.90 Released With Stream Output, Several Game Fixes

Hot off merging transform feedback into DXVK for supporting Direct3D 11 Stream Output, Philip Rebohle released DXVK 0.90.

NVIDIA 396.54.09 Vulkan Driver Released With Transform Feedback, Intel ANV Gets TF Too

Today is certainly a very exciting day in the Vulkan space.

13 October 10:15 AM EDT –

Vulkan

– NVIDIA Vulkan Beta

GCC9 Lands Initial C++ Networking TS Implementation

The GCC9 compiler code as of Friday has an initial implementation of the C++ networking technical specification.

13 October 09:22 AM EDT –

GNU

– Networking TS

DXVK Already Lands Vulkan Transform Feedback Support, RADV Posts Patches

With the newly-announced Vulkan 1.1.88 that brings VK_EXT_transform_feedback, the DXVK Direct3D-on-Vulkan layer has already implemented the transform feedback support.

13 October 09:03 AM EDT –

Vulkan

– DXVK Transform Feedback

Vulkan 1.1.88 Released With Transform Feedback As A Big Win For VKD3D / DXVK

Vulkan 1.1.88 is out this morning and it’s an exciting Vulkan update. Say hello to Vulkan transform feedback!

13 October 08:36 AM EDT –

Vulkan

– Vulkan 1.1.88

LibreOffice Lands More Qt5 Integration Improvements, LXQt Support

Recently there’s been more improvements for LibreOffice with its Qt5 integration to allow this open-source office suite to jive better with Qt5-based desktops like KDE Plasma and now LXQt.

13 October 08:25 AM EDT –

LibreOffice

– LibreOffice Bits

Intel’s Vulkan Driver Is Working On A NIR Cache

As a possible performance win, Jason Ekstrand as the lead developer of the Intel ANV open-source Vulkan driver has been developing a NIR cache.

13 October 06:16 AM EDT –

Intel

– NIR Cache

12 October

Wine 3.18 Brings FreeType Subpixel Font Rendering, Wine Console DPI Scaling

A new bi-weekly Wine development release is out for those wanting to try the latest Windows gaming on Linux experience (outside of Steam Play / Proton) or running other Windows applications on Linux and other operating systems.

12 October 08:41 PM EDT –

WINE

– Wine 3.18

Ubuntu Touch OTA-5 Is Being Prepped With New Browser, Qt Auto Scaling

The UBports community that continues to maintain Ubuntu Touch for a range of mobile devices will soon be rolling out Ubuntu Touch OTA-5.

12 October 03:26 PM EDT –

Ubuntu

– UBports Ubuntu Touch

A Look At The Windows 10 October 2018 Update Performance With WSL

As the first of our Linux vs. Windows benchmarks coming around Microsoft’s Windows 10 October 2018 Update, today we are exploring the Windows Subsystem for Linux (WSL) performance to see if they have finally managed to improve the I/O performance for this Linux binary compatibility layer and how the WSL performs compared to Ubuntu and Clear Linux.

MidnightBSD 1.0 Is Ready To Shine With ZFS Support, Ryzen Compatibility

Especially with TrueOS once again taking a new direction, one of the few current BSDs focused on a great desktop experience is MidnightBSD that is about to mark its 1.0 release.

12 October 09:51 AM EDT –

BSD

– MidnightBSD 1.0

Intel Whiskey Lake Support Formally Added To Mesa 18.3

The recently posted patch for Intel Whiskey Lake support in Mesa has now been merged for Mesa 18.3.

12 October 08:06 AM EDT –

Intel

– Mesa 18.3

GCC 6.5 Is Being Prepared As The Last GCC6 Compiler Release

Version 6.5 of the GNU Compiler Collection will soon be released to end out the GCC6 series.

12 October 07:07 AM EDT –

GNU

– GCC 6.5

La Frite: A Libre ARM SBC For $5, 10x Faster Than The Raspberry Pi Zero

The folks at the Libre Computer Project who have successfully released the Tritium, Le Potato, and other ARM SBCs while being as open-source friendly as possible have now announced La Frite.

12 October 06:21 AM EDT –

Hardware

– Libre Computer Board

Ubuntu’s Bring-Up Of NVIDIA’s Driver With Mir Continues

The Ubuntu developers continuing to work on the Mir display server stack have made headway in their NVIDIA driver enablement effort.

12 October 05:19 AM EDT –

Ubuntu

– Experimental NVIDIA + Mir

GNOME 3.31.1 Released As The First Step Towards GNOME 3.32

GNOME 3.31.1 was released on Thursday as the first step towards the GNOME 3.32 desktop update due out in March.

12 October 05:00 AM EDT –

GNOME

– GNOME 3.32 Desktop

Source

WP2Social Auto Publish Powered By : XYZScripts.com