Guider is a free and opens source, powerful system-wide performance analysis tool written mostly in Python for Linux operating systems.
It is designed to measure amount of system resource usage and to trace system behavior thus making it easy to analyze system performance issues effectively or allow for performance tunning.
It shows you a great wealth of information concerning CPU, memory, disk usage per thread, processes, system functions (user/kernel); therefore making it really simple to get to the bottom of an issue causing abnormal system performance or to improve overall system performance.
System Requirements
- Linux kernel (>= 3.0)
- Python (>= 2.7)
- Kernel buffer size of 40960.
In this article, we will show you how to install guider from source and use it to analyze and improve overall Linux operating system performance.
How to Build and Install Guider – Linux Performance Analyzer
To install Guider on Linux, first clone the guider repository from github as shown.
$ git clone https://github.com/iipeace/guider.git
$ cd guider
$ guider.py  [Run without installing]
You can run guider.py without installing it. Alternatively, you can run the commands below to build and install it as shown.
$ make
$ sudo make install
If you can use PIP in your system then install it using the following command.
$sudo pip install --pre guider
How to Use Guider to Analyze Linux System Performance
By default, guider is supposed to set buffer size for its operations. However, if it fails to do that and shows an error once you invoke it, you can check your buffer size, with this command.
$ sudo cat /sys/kernel/debug/tracing/buffer_size_kb
If the value is less than 40960, then set it to the required value as follows.
$ echo 40960 | sudo tee /sys/kernel/debug/tracing/buffer_size_kb

Set Linux Kernel Buffer Size
You can invoke guider in thread, function, top, file and system modes using the following syntax.
$ guider [ mode | file ] [options]
As is the case with most command line based Linux system performance analysis tools, you will need a wider screen to clearly view guider’s output.
Perform CPU Usage Analysis in Thread Mode
The following command will start accurate tracing in thread mode (press [Ctrl+c] terminate the tracing process). Once you terminate the process, it will save data and start the analysis process, and there after show you the analysis report.
$ sudo guider record
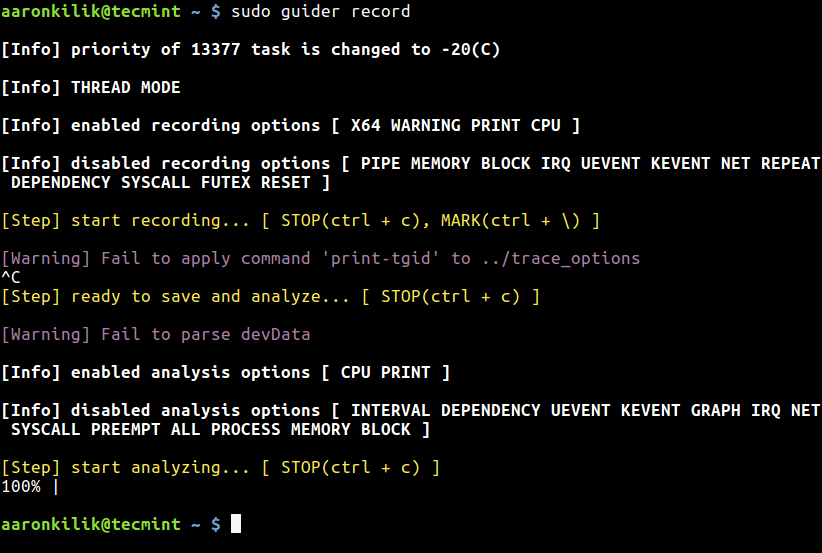
CPU Tracing in Thread Mode
The analysis report includes general system info, OS info, CPU info, memory info, disk info as well as thread info towards the end of the pager. Simply use the Up and Down arrows to scroll up and down the pager.
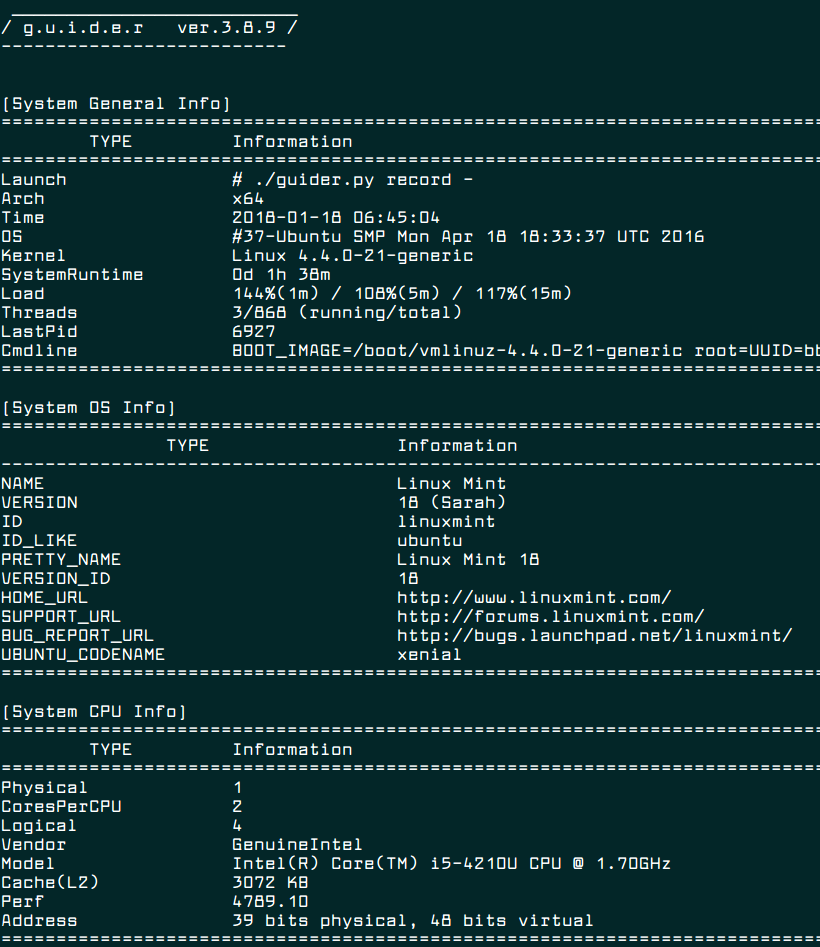
Linux System Information
Perform Real Time Linux Monitoring in Top Mode
The following command will show resource usage of Linux processes in real-time.
$ sudo guider.py top
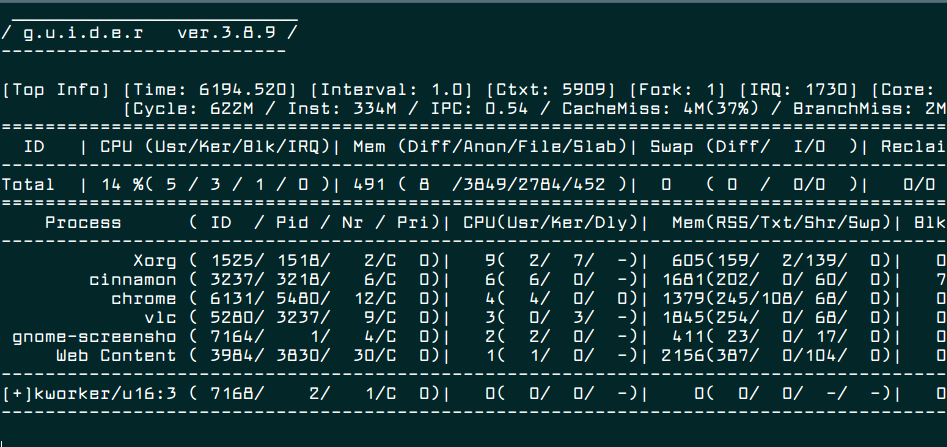
Real Time Linux Processes Monitoring
You can set an interval for showing output using the -i switch as shown.
$ sudo guider top -i 2
To monitor all information concerning resource usage, use the -a flag.
$ sudo guider top -a
Analyze a Single Linux Process Using PID
First get the process ID using the pidof or ps command.
$ pidof apache2
OR
$ ps -e | grep apache2
Then analyze its resource usage using the following command, which outputs CPU cycle, instruction number, IPC, faults, cache miss, branch miss and so much more in real-time. The -g switch sets a filter which in this case is the process ID.
$ sudo guider top -eP -g 1913
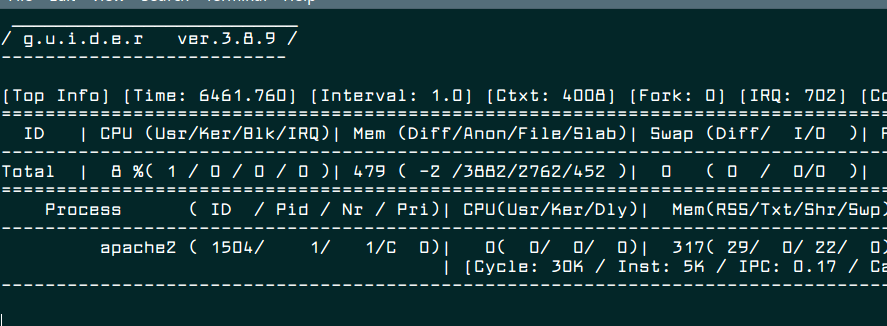
Monitor Apache Process Usage
Save Guider Output to a File
You can as well save trace data or any output in a file for later analysis. The following command saves the trace data in a file called guider.dat (by default) in the current directory, you can specify a different location as well.
$ sudo guider -s .
To save any other output in a file called guider.out (by default) in the current directory.
$ sudo guider top -o .
Then you can inspect these files through the cat command.
$ cat guider.dat
$ cat guider.out
We can not exhaust all the possible options here because the list of options is endless. You can see all options and more usage examples from the guider help page.
$ guider -h
Guider Github repository: https://github.com/iipeace/guider
Conclusion
Guider is a great system-wide performance analysis tool for the future. It is suitable for Linux experts. Try out most of its features and share your thoughts with us via the feedback form below. If you have come across any similar tools, let us know as well.