Many Linux users spend far more time on a computer than is probably healthy. With the addition of aging, it makes double sense to look for ways to reduce physical stress on our bodies. Fortunately, Linux has more ways than most operating systems to work more efficiently and minimize possible injuries.
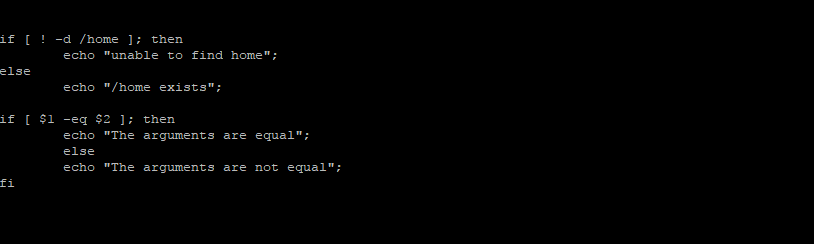
Like all computer users, Linux users can benefit from a careful selection of hardware to minimize physical stress on their bodies. Large or multiple monitors reduce eye strain, especially when you set icons and text to sizes that remain easy to read after eight hours of constant computer use. Ergonomic chairs, like those made by Herman Miller, are expensive, but come with 12-year warranties for most parts. Ergonomic, programmable keyboards like the ones sold by ErgoDox (Figure 1) and Keyboardio are also worth the investment because of the way they reduce repetitive stress injury (RSI). A mouse arranged vertically rather than horizontally is a more ergonomic pointer, as are trackballs and graphic tablets. The effectiveness of all these devices can be further enhanced by positioning them so that all the hardware for basic computer use is close at hand and at a height that minimizes the need to reach for them. For convenience, that may mean individual workstations for each user, to avoid everyone having to adjust the work environment each time that they settle to work.
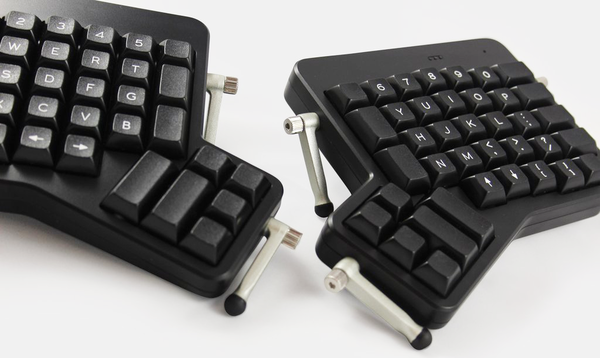
Figure 1: Ergonomic keyboards like those made by ErgoDox can be expensive, but can seriously reduce RSI.
In addition, all operating systems have utilities, like Take a Break, which help to ensure that users get up and stretch periodically. At the very least, you can find software that sets alarms, as in Gnome. In my experience, such tools always seem to interrupt crucial trains of thought, but they do help enforce regular breaks. I recommend setting them for 30-40 minutes – which, although longer than ideal, makes them less disruptive to productivity.
However, you do not need to seek out expensive hardware alternatives to improve your workflow ergonomics. Often, the careful selection of settings and software is enough to reduce the ravages of RSI.
Different Strokes
Ergonomics comes down to two main strategies: ways to keep your hands on the keyboard, and ways to reduce the stretches to use the mouse as much as possible. The goal of both strategies is to reduce the hundreds of tiny movements required to interact with a computer. Over the course of a long day, these tiny movements add up. Consequently, the more you can reduce them, the less likely RSI will afflict your overworked muscles.
Having a programmable keyboard is often the easiest way to accomplish both strategies. For example, creating an Emacs layer of keys can reduce that application’s often complicated series of keyboard shortcuts to a single key press each. However, all major Linux desktops have keyboard shortcuts that are not only less stressful but also more efficient than mouse clicks (Figure 2). These shortcuts are useful for simple acts such as switching between active windows or virtual workspaces, moving around in text editors, and playing audio tracks. Many applications like Krita and LibreOffice also have their own keyboard shortcuts. Since many of these shortcuts are close to universal, such as Ctrl+V for pasting from the keyboard, they can be easily learned. In particular, if you are already familiar with the Vim text editor, you can modify many standard apps by adding Vim keybindings to simplify the task (Figure 3). Surprisingly, many users are unaware of these shortcuts, most likely because using a mouse is more visual.
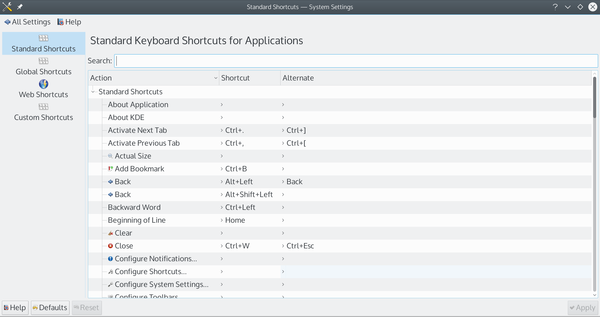
Figure 2: Like KDE, all major Linux desktops support extensive keyboard shortcuts.
Figure 3: Many variants of standard apps support Vim keybindings, making it easier to keep your fingers on the keyboard.
These shortcuts can be boosted in a number of ways, depending on your desktop. For example, on major desktops, you can set applications to start as you log in (and log out), which can be handy if you consistently use the same apps. For applications that are tightly integrated into the desktop, as Gedit in Gnome or Kate in KDE Plasma, the function can be as simple as leaving a commonly used application on its own virtual workspace to open as you log in. With other apps, you may need to open the system settings. KDE’s Plasma also has dozens of Web Shortcuts (Figure 4), which lets you type amz instead of Amazon.com, as well as live links on screen edges that place commands a single click away. Both Plasma and Cinnamon give you the option of activating icons with one click instead of the more traditional two. With such tactics, a reduction in repetitive motions is as easy as changing a few settings, which then work invisibly in the background with no more than minimal changes to your work habits.
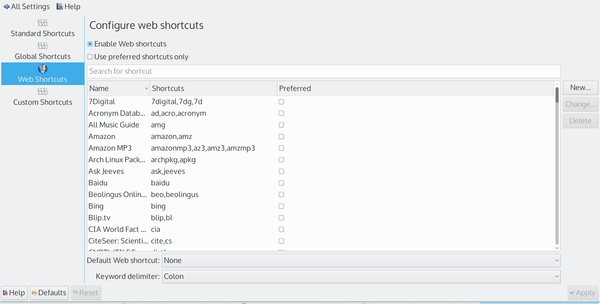
Figure 4: KDE’s Web Shortcuts are another way to reduce keystrokes.
Docks and Activities
One reason that ergonomics has become more important is that modern computers are still using interfaces that were designed for much small computers. For instance, where two decades ago a menu was a reasonable selection method for the few dozen applications on a hard drive, today a menu can require several clicks to start a program. Although menus are less efficient than they used to be, some interfaces such as Gnome and Unity discourage the use of icons on the desktop. Although adding a Favorites submenu helps, the inefficiency continues whenever you want anything out of the ordinary.
Two solutions help reduce menu use. The first, inspired by OS X, is a dock, a floating window with links to favorite applications that can be positioned anywhere on the desktop. The advantage of a dock is that these applications are launched with a single click. Some users fill their dock with so many icons that much of the usefulness is lost, but if the available applications are kept to a dozen or so, docks can be a useful ergonomic strategy. I am especially fond of Plank, which allows the creation of multiple docks, each of which can be configured for a different purpose.
Even easier to use are Plasma Activities (Figure 5). Each Activity is a separate desktop with its own configuration, including icons. Activities can be organized by any principle that you find useful, including task, project, or physical location. For example, I have a Writing Activity that includes LibreOffice (my favorite text editor), a link to my spreadsheet of sold articles, and the URLs for online resources such as a thesaurus. Since I have only seven icons on the desktop, I never have any trouble finding the resource I need for writing, and all are a single click away. My other Activities include ones for working at the command line, graphic design, games, and a default desktop for email, web browsing, and music. Thanks to a widget that fits on the panel, each of these desktops is a click away. The result is that I spend less time looking for a resource and have multiple desktops without requiring multiple monitors. And, most important of all, my RSI has become nearly nonexistent.
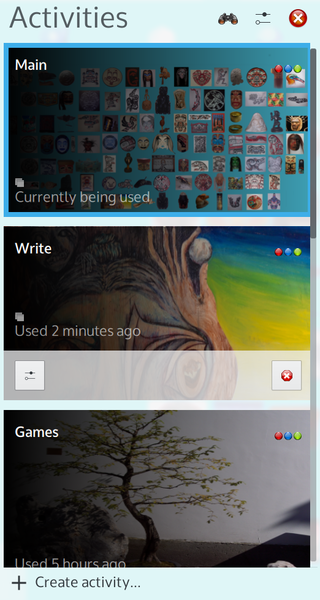
Figure 5: Plasma Activities give users multiple desktops, making applications more accessible than in menus.
Side Benefits
For a technology that prides itself on innovation, computers carry a lot of baggage. Too often, they continue to depend on devices like the mouse, which could not be harder on the human hand or wrist than if it were designed to be so, and on interfaces that were designed for systems with far less memory.
Working around these limitations can be expensive and requires extra initial setup, to say nothing of experimentation. In my own case, it has taken over a year to make the changes in hardware and work habits that I required. Yet, the results have repaid me many times. Not only is the stress on my overworked and aging body decreased, but I am also working more efficiently, spending less time interacting with the interface and more time on actual productivity. With patience, I find, perfecting tactics for increased ergonomics has not only reduced the pain in my overworked and aging body, but also has helped me to work with more focus and quicker results. By paying attention to my physical needs, I have made my computing more efficient overall.
Source


 Sclack looks lovely, works the way I want, and does pretty much everything you need from a Slack client!