If you’ve ever sat in front of a terminal, typed ‘curl’, pasted the URL of something you want to download, and hit enter, cool! You’re going to be killing it with curl in bash scripts in no time. Here you will learn how to use curl in bash scripts and important tips and tricks for automation.
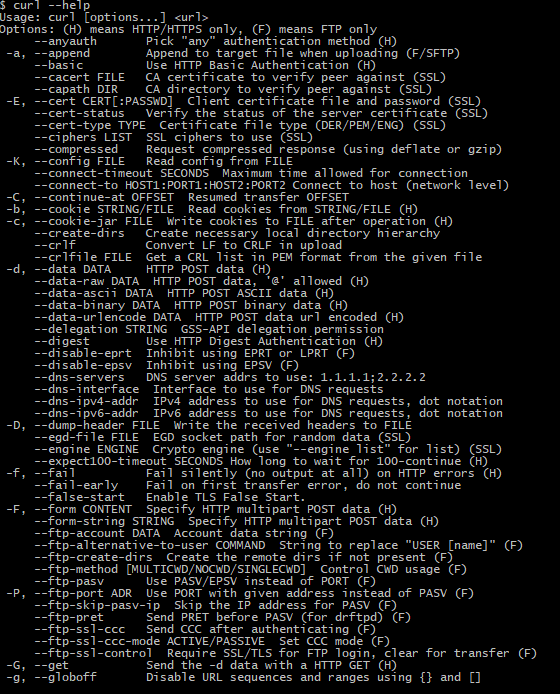
Great! Now what? Before you kill anything in bash it is dire to know where to get help if in trouble. Here is what the man page for curl or curl help command looks like. Copy and paste. Try not to be overwhelmed by appearances. There are a lot of options that you only need later in life. More importantly, it serves as a quick reference to lookup options as you need.
Here are some commands to get help within your terminal and other browser-friendly resources.
Help commands for curl in bash
- man curl
- curl –help or curl -h
- Everything curl; Command line basics
Consult these resources anytime you need. In addition to this piece, they will serve as companions on your journey towards killing it with curl in bash scripts.
Now that getting help and listing command line options is out of the picture, let’s move on to the three ways.
The three ways to curl in bash by example
You may argue that there are more than three ways to curl in bash. However, for simplicity purposes, let’s just say that there are. Also note that in practice, usage of each way is not mutually exclusive. In fact, you will find that ways may be intertwined depending on the intent of your bash script. Let’s begin.
The first way: Downloading files
All options aside curl downloads files by default. In bash, we curl to download a file as follows.
# download file
This sends the content of the file we are downloading to standard output; that is, the your screen. If the file is a video or an image don’t be surprised if you hear a few beeps. We need to save to a file. Here’s how it looks.
# download file saving as outfile
curl ${url} -o outfile
# download file save as option
curl ${url} -O
# download file inherit filename
## expect file saved as $( basename ${url} )
Note that the download file save as option inheriting file name is particularly useful when using URL globbing, which is covered in the bash curl loop section.
Now let’s move on to how to check headers prior to downloading a file with curl in bash.
The second way: Checking headers
There will come a time when you wish to get information about a file before downloading. To do this, we add the -I option to the curl command as follows.
# download headers
Note that there are other ways to dump headers from curl requests, which is left for homework.
Here is a quick example to show how the second way works in bash scripts that can be used to serve as a part of a web page health checker.
Example) bash curl get response code
Often, we want to get the response code for a curl request in bash. To do this, we would need to first request the headers of a response and then extract the response code. Here is what it would look like.
# just some url
curl ${url} -I -o headers -s
# download file
cat headers
# response headers
## expect
#HTTP/2 200
#server: GitHub.com
#content-type: text/html; charset=utf-8
#strict-transport-security: max-age=31557600
#last-modified: Thu, 03 May 2018 02:30:03 GMT
#etag: “5aea742b-e12”
#access-control-allow-origin: *
#expires: Fri, 25 Jan 2019 23:07:17 GMT
#cache-control: max-age=600
#x-github-request-id: 8808:5B91:2A4802:2F2ADE:5C4B944C
#accept-ranges: bytes
#date: Fri, 25 Jan 2019 23:12:37 GMT
#via: 1.1 varnish
#age: 198
#x-served-by: cache-nrt6148-NRT
#x-cache: HIT
#x-cache-hits: 1
#x-timer: S1548457958.868588,VS0,VE0
#vary: Accept-Encoding
#x-fastly-request-id: b78ff4a19fdf621917cb6160b422d6a7155693a9
#content-length: 3602
cat headers | head -n 1 | cut ‘-d ‘ ‘-f2’
# get response code
## expect
#200
My site is up. Great!
Now let’s move on to making posts with curl in bash scripts.
The third way: Making posts
There will come a time when you need to make posts with curl in bash to authenticate to access or modification of private content. Such is the case working with APIs and html forms. It may require multiple curl requests. The placeholder curl command line for this way is as follows.
# send crafted request
Making posts involves adding corresponding headers and data to allow for authentication. I’ve prepared some examples of making posts with curl in bash.
Example) Basic authentication
Here is an example of using curl in bash scripts to download a file requiring basic authentication. Note that credentials are stored in a separate file called bash-curl-basic-auth-example-config.sh, which is also included below.
curl-basic-auth.sh
## curl-basic-auth
## – http basic authenication example using
## curl in bash
## version 0.0.1
##################################################
. ${SH2}/cecho.sh # colored echo
curl-basic-auth() {
cecho yellow url: ${url}
local username
local passwd
. ${FUNCNAME}-config.sh # ${username}, ${passwd}
curl -v -u ${username}:${password} ${url} –location
}
##################################################
if [ ${#} -eq 1 ]
then
url=“${1}“
else
exit 1 # wrong args
fi
##################################################
curl-basic-auth
##################################################
## generated by create-stub2.sh v0.1.1
## on Sun, 27 Jan 2019 14:04:18 +0900
## see <https://github.com/temptemp3/sh2>
##################################################
Source: curl-basic-auth.sh
curl-basic-auth-config.sh
## curl-basic-auth-config
## version 0.0.1 – initial
##################################################
username=“username”
password=“passwd”
##################################################
## generated by create-stub2.sh v0.1.1
## on Sun, 27 Jan 2019 14:08:17 +0900
## see <https://github.com/temptemp3/sh2>
##################################################
Source: curl-basic-auth-config.sh
Here’s what it looks like in the command line.
## expect response for url after basic authentication
Here you see how writing a bash script allows you to avoid having to include your secrets in the command line.
Note that the –location option was added to handle requests that are redirected.
Now that we have basic authentication is out of the picture, let’s step up the difficuly a bit.
Example) Submitting html form with csrf protection
The magic of bash is that you can do just about anything you have an intent to do. Jumping through the hoops of csrf protection is one way to kill it with curl in bash scripts.
In modern web applications there is a security feature called csrf protection to prevent posts requests from anywhere without established access to the site in question.
Basically, there is a security token included in the response of a page.
Here what your bash script may look like to gain authorized access to a page content with csrf protection.
curl-example.sh
## curl-example
## – submits form with csrf protection
## version 0.0.1 – initial
##################################################
. ${SH2}/aliases/commands.sh # subcommands
## specially crafted bash curl boilerplate for this example
template-command-curl() { { local method ; method=“${1}“ ; }
{
command curl ${url} \
if-headers \
if-data \
if-options
} | tee ${method}-response
}
curl-head() { { local url ; url=“${url}“ ; }
template-command-curl \
head
}
curl-get() { { local url ; url=“${url}“ ; }
template-command-curl \
get
}
## setup curl
if-headers() { true ; }
if-data() { true ; }
if-options() { true ; }
curl-post() { { local url ; url=“${url}“ ; }
template-command-curl \
post
}
curl() { # entry point for curl-head, curl-get, curl-post
commands
}
main() {
## rewrite url if needed etc
( # curl head request
if-options() {
cat << EOF
–location
EOF
}
curl head ${url} > head-response
)
test “$( cat head-response | grep -e ‘Location:’ )“ || {
## block reassigning url base on head response location
url=…
}
reset-curl
## setup curl …
curl get ${url} # > get-response
extract-info-for-post-request # < get-reponse, extracts token and other info for post
## reset curl and setup if needed …
curl post ${url} # > post-response
}
curl-example() {
true
}
##################################################
if [ ${#} -eq 0 ]
then
true
else
exit 1 # wrong args
fi
##################################################
curl-example
##################################################
## generated by create-stub2.sh v0.1.1
## on Sun, 27 Jan 2019 16:36:17 +0900
## see <https://github.com/temptemp3/sh2>
##################################################
Source: curl-example.sh
Notes on script
It uses a alias called commands that I mentioned in a previous post about the bash declare command, which makes it possible to declare subcommands implicitly by way of convention.
Here you see that bash can be used to string curl request together with logic to carry out the intent of your script.
So that some of the bash usage above using subshells to limit function redeclaration scope doesn’t appear so magical, I’ve prepared a follow-up example.
subshell-functions.sh
## subshell-functions
## version 0.0.1 – initial
##################################################
d() { true ; }
c() { true ; }
b() { true ; }
a() {
{ b ; c ; d ; }
(
b() {
cat << EOF
I am b
EOF
}
{ b ; c ; d ; }
)
{ b ; c ; d ; }
}
##################################################
if [ ${#} -eq 0 ]
then
true
else
exit 1 # wrong args
fi
##################################################
a
##################################################
## generated by create-stub2.sh v0.1.1
## on Sun, 27 Jan 2019 13:43:50 +0900
## see <https://github.com/temptemp3/sh2>
##################################################
Source: subshell-functions.sh
Here is the correspondence command line example.
## expect
I am b
Example) Wonderlist API call
Here is curl request command line in a bash script that I wrote in late 2017 back before switching over to Trello.
${X} \
${url} \
-H “X-Access-Token: ${WL_AT}“ \
-H “X-Client-ID: ${WL_CID}“ \
–silent
Source: wonderlist.sh/main.sh: Line 40
Notes on script
${X} contains an -X option that can be passed in by caller functions. If you are not familiar with the option, it is set the request command to use. That is, GET, POST, HEAD, etc. according to to api documentation.
It contains multiple -H options for authenication.
The –silent option is used because in some cases showing progress in the terminal would be overkill for background requests.
Surely, you are now killing it with curl in bash scripts. Next, we move on to special topics to bring it all together.
Looping through urls with curl in bash
Suppose that we have a list of URLs which we would like to loop over and curl. That is, we want download using curl for each URL in our list. Here is how we would go about accomplishing this task on the command line.
curl() { echo “dummy response for ${@}“ ; } # fake curl for testing purposes
urls() { cat /dev/clipboard ; } # returns list of urls
for url in $( urls ); do curl ${url}; done # curl loop
## expect
#dummy response for whatever is in your
#dummy response for clipboard
#dummy response for …
If you don’t have a list of urls to copy on hand, here is a list of 100 URLs most likely respond to HTTP request using curl.
gist of Craft Popular URLs based on list of the most popular websites worldwide
Often, we do not only wish to curl a list of urls in bash. We may want to generate urls to curl as we progress through the loop. To accomplish this task, we need to introduce variables into the URL as follows.
curl() { echo “dummy response for ${@}“ ; } # fake curl for testing purposes
url() { echo ${url_base}/${i} ; } # url template
urls() { # generate all urls
local i
for i in ${range}
do
url
done
}
url_base=“https://temptemp3.github.io” # just some base
range=$( echo {1..9} ) # just some range
for url in $( urls ); do curl ${url}; done # curl loop
## expect
#dummy response for https://temptemp3.github.io/1
#dummy response for https://temptemp3.github.io/2
#dummy response for https://temptemp3.github.io/3
#dummy response for https://temptemp3.github.io/4
#dummy response for https://temptemp3.github.io/5
#dummy response for https://temptemp3.github.io/6
#dummy response for https://temptemp3.github.io/7
#dummy response for https://temptemp3.github.io/8
#dummy response for https://temptemp3.github.io/9
It turns out that loops may be avoided in some cases by taking advantage of a curl feature only available in command line called URL globbing. Here’s how it works.
unset -f curl
# included just in case
curl https://temptemp3.github.io/[0–9]
# curl loop using URL globbing
## expect
#response for https://temptemp3.github.io/1
#response for https://temptemp3.github.io/2
#response for https://temptemp3.github.io/3
#response for https://temptemp3.github.io/4
#response for https://temptemp3.github.io/5
#response for https://temptemp3.github.io/6
#response for https://temptemp3.github.io/7
#response for https://temptemp3.github.io/8
#response for https://temptemp3.github.io/9
Here we see that any of the methods above may be used to implement a curl loop in bash Depending on the use case and desired level of control, a method may be preferred over another.
Handling curl errors in bash
One thing that is absent from curl is the ability to handle errors. That is where bash comes in handly.
Curl has an–retry NUM option that as you may have guess tells curl to retry a specific number of times. However, what if we want to have curl effectively retry indefinitely until succeeding?
curl-bashh-retry.sh
## curl-retry
## – retries curl indefinitely
## version 0.0.1
##################################################
car() {
echo “${1}“
}
curl-error-code() {
test ! -f “curl-error” || {
car $(
cat curl-error \
| sed \
-e ‘s/[^0-9 ]//g’
)
}
}
curl-retry() {
while [ ! ]
do
curl temptemp3.sh 2>curl-error || {
case $( curl-error-code ) in
6) {
### handle error code 6
echo curl unable to resolve host
} ;;
*) {
# <https://curl.haxx.se/libcurl/c/libcurl-errors.html>
true # not yet implemented
} ;;
esac
sleep 1
continue
}
break
done
}
##################################################
if [ ${#} -eq 0 ]
then
true
else
exit 1 # wrong args
fi
##################################################
curl-retry
##################################################
## generated by create-stub2.sh v0.1.1
## on Sun, 27 Jan 2019 15:58:51 +0900
## see <https://github.com/temptemp3/sh2>
##################################################
Source: curl-retry.sh
Here is what we see in command line.
## expect
#curl unable to resolve host
#curl unable to resolve host
#…
The hope is that eventually someone will create temptemp3.io and our script will exit with an exit status of zero.
Last but not least I would like to end with an example of how to set up concurrent curls in bash to act as a download accelerator.
Downldr.sh
Sometimes it is helpful to download large files in parts. Here is a snippet from a bash script that I wrote recently using curl.
${src} \
-r $(( ${i}*${chunk_size} ))-$(( ( (${i}+1)*${chunk_size} ) – 1 )) \
-o ${src_base}-part${i}
Source: downldr.sh/downldr.sh: Line 11
Notes on script
The -r option is used to specifiy the range in bytes to download if the host accepts ranges.
Conclusion
By this time you are killing it with curl in bash scripts. In many cases you may take advantage of curl functionality through the horde of options it provides. However, you may opt out and achieve the same functionality outside of curl in bash for the level of control that fits your needs.