Urban Balcony Garden Design Project example.
BALCONY LANDSCAPE DESIGN PROJECT created with mshell script, local LLMs (or Linux LLM evaluation framework).
Nuances of code visualization with different LLMs.
Webscraping with mshell and LLM.
Visualizations with mshell and LLM’s. Local use.
LLM Evaluation Framework for Local Use (May-Aug 2024).
The LLM Evaluation Framework is designed for a local environment, facilitating the comprehensive evaluation and integration of large language models (LLMs). The framework comprises several key modules:
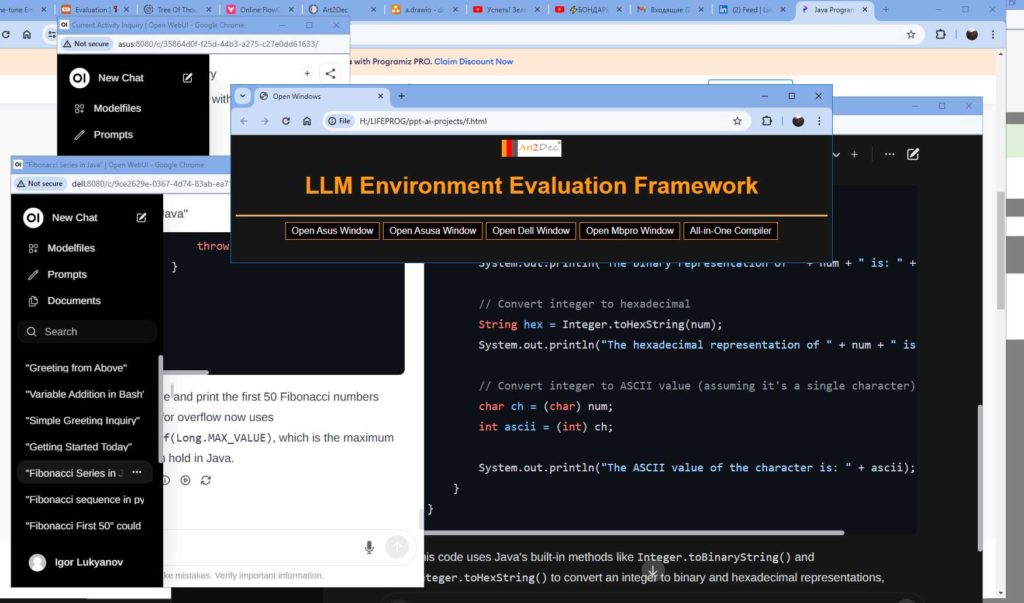
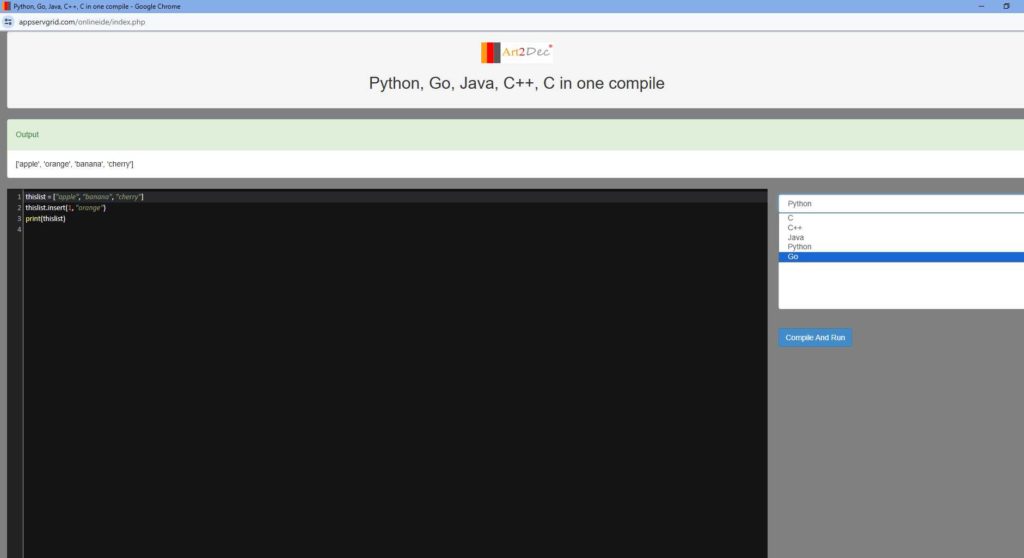
- One-Pass Compilation Module: This module is a core component of the framework, integrating the Art2Dec All-in-One compiler to support multiple programming languages such as Go, Java, C++, and Python for testing. It includes also CMD and Go compilers with a string array API for languages like C, C++, Go, Java, and Python, enabling efficient compilation and execution of code. Additionally, it houses the Prompts Repo, Evaluator, Analyzer, and API module, which manages the storage and retrieval of prompts, evaluates LLM outputs, and analyzes performance data. This integration ensures a seamless workflow, allowing developers to compile, evaluate, and analyze their LLM-related tasks in a streamlined environment.
2. Data Ingestion Module: Capable of handling diverse data sources, including plain and binary files, databases, and programming channels, this module is responsible for the structured ingestion and preprocessing of data, feeding it into the system for analysis and evaluation.
3. Ollama Module: Ollama acts as a central hub for managing LLM interactions. It connects with the LLM’s repository and coordinates with various APIs, ensuring smooth communication and model deployment.
4. LLM Repository: A structured storage system that houses different versions and types of LLMs. This repository allows for easy access, retrieval, and management of models, facilitating rapid testing and deployment.
5. Chat and CMD Chat Modules: These modules provide interactive interfaces for users. The Chat module handles standard interactions with LLMs, while the CMD Chat module extends capabilities with command-line-based string array manipulations, allowing for detailed session history management.
6. APIs and Integrations module: The framework integrates various APIs, including those for prompts, evaluation, analysis, and the Ollama API, ensuring that all components can communicate effectively within the environment as well like make an adaptation of llm’s output to different compilers.
This framework is designed to streamline the evaluation process, providing a robust and scalable solution for working with LLMs in a controlled local environment.
mshell – new Linux shell for AI and mathematics.
Mel Editor – mini editor for Linux.
MEL Editor User Guide – mini editor for Linux.
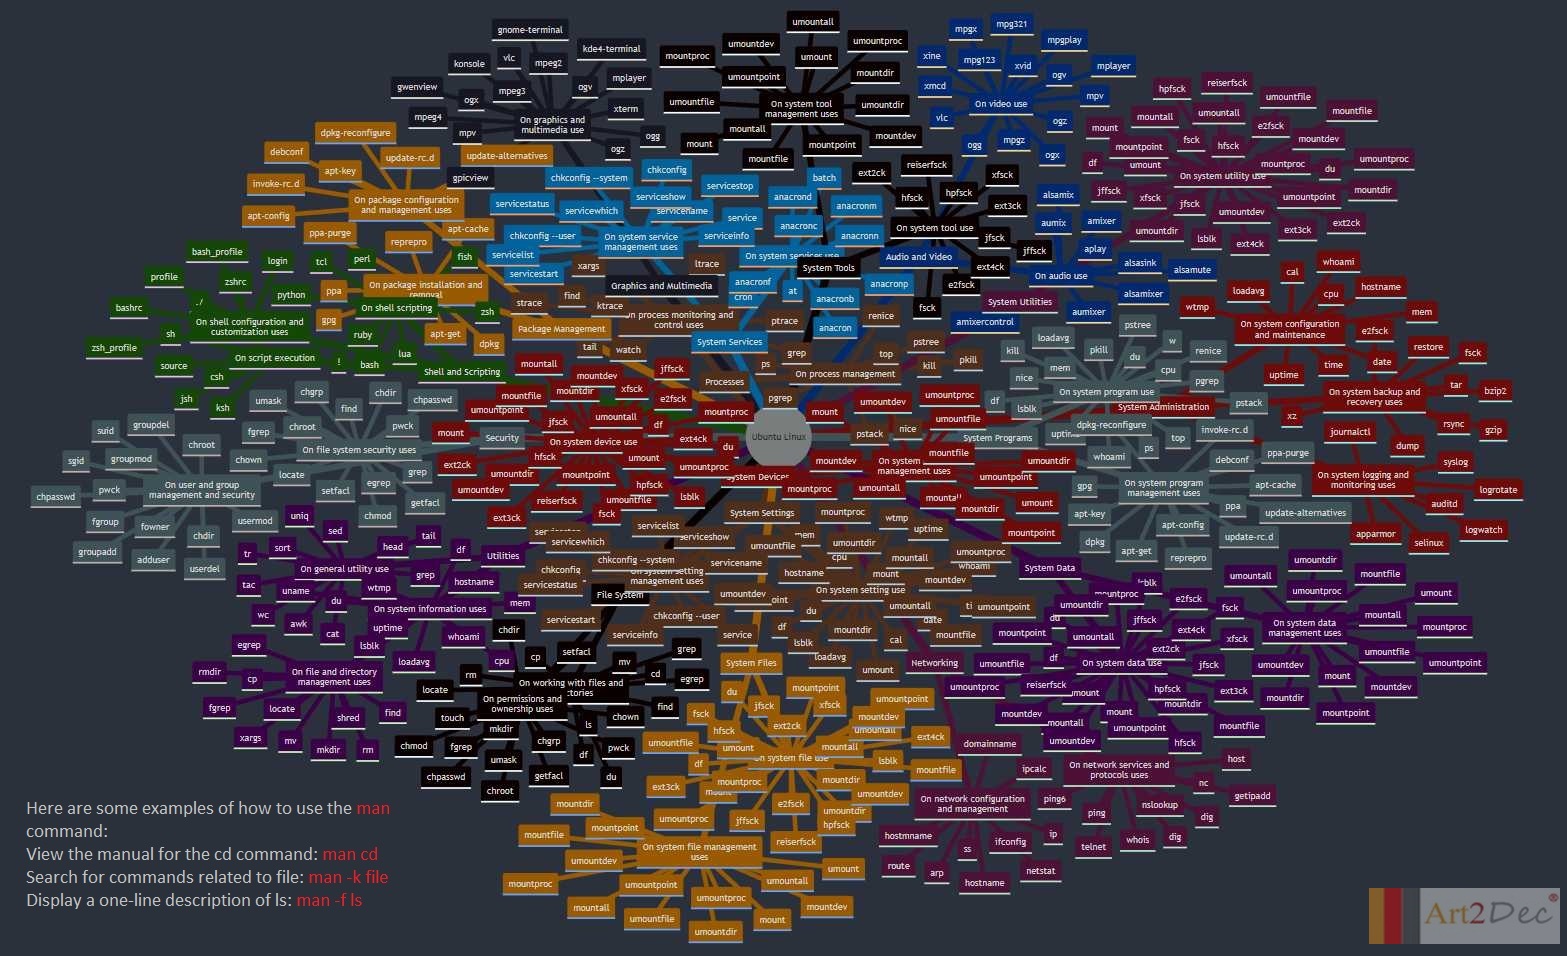
A more or less complete list of commands and configuration files for Ubuntu Linux.