Building a Network Bootable Server Farm for Kubernetes with LTSP


Building a Network Bootable Server Farm for Kubernetes with LTSP

Author: Andrei Kvapil (WEDOS)

k8s+ltsp

In this post, I’m going to introduce you to a cool technology for Kubernetes, LTSP. It is useful for large baremetal Kubernetes deployments.

You don’t need to think about installing an OS and binaries on each node anymore. Why? You can do that automatically through Dockerfile!

You can buy and put 100 new servers into a production environment and get them working immediately – it’s really amazing!

Intrigued? Let me walk you through how it works.

First, we need to understand how exactly it works.

In short, for all nodes we have prepared the image with the OS, Docker, Kubelet and everything else that you need there. This image with the kernel is building automatically by CI using Dockerfile. End nodes are booting the kernel and OS from this image via the network.

Nodes are using overlays as the root filesystem and after reboot any changes will be lost (like in Docker containers). You have a config-file where you can describe mounts and some initial commands which should be executed during node boot (Example: set root user ssh-key and kubeadm join commands)

Image Preparation Process

We will use LTSP project because it’s gives us everything we need to organize the network booting environment. Basically, LTSP is a pack of shell-scripts which makes our life much easier.

LTSP provides a initramfs module, a few helper-scripts, and some configuration systems which prepare the system during the early state of boot, before the main init process call.

This is what the image preparation procedure looks like:

  • You’re deploying the basesystem in the chroot environment.
  • Make any needed changes there, install software.
  • Run the ltsp-build-image command

After that, you will get the squashed image from the chroot with all the software inside. Each node will download this image during the boot and use it as the rootfs. For the update node, you can just reboot it. The new squashed image will be downloaded and mounted into the rootfs.

Server Components

The server part of LTSP includes two components in our case:

  • TFTP-server – TFTP is the initial protocol, it is used the download the kernel, initramfs and main config.
  • NBD-server – NBD protocol is used to distribute the squashed rootfs image to the clients. It is the fastest way, but if you want, it can be replaced by the NFS or AoE protocol.

You should also have:

  • DHCP-server – it will distribute the IP-settings and a few specific options to the clients to make it possible for them to boot from our LTSP-server.

Node Booting Process

This is how the node is booting up

  • The first time, the node will ask DHCP for IP-settings and next-server, filename options.
  • Next, the node will apply settings and download bootloader (pxelinux or grub)
  • Bootloader will download and read config with the kernel and initramfs image.
  • Then bootloader will download the kernel and initramfs and execute it with specific cmdline options.
  • During the boot, initramfs modules will handle options from cmdline and do some actions like connect NBD-device, prepare overlay rootfs, etc.
  • Afterwards it will call the ltsp-init system instead of the normal init.
  • ltsp-init scripts will prepare the system on the earlier stage, before the main init will be called. Basically it applies the setting from lts.conf (main config): write fstab and rc.local entries etc.
  • Call the main init (systemd) which is booting configured system as usual, mounts shares from fstab, start targets and services, executes commands from rc.local file.
  • In the end you have a fully configured and booted system ready for further operations.

As I said before, I’m preparing the LTSP-server with the squashed image automatically using Dockerfile. This method is quite good because you have all steps described in your git repository.
You have versioning, branches, CI and everything that you used to use for preparing your usual Docker projects.

Otherwise, you can deploy the LTSP server manually by executing all steps by hand. This is a good practice for learning and understanding the basic principles.

Just repeat all the steps listed here by hand, just to try to install LTSP without Dockerfile.

Used Patches List

LTSP still has some issues which authors don’t want to apply, yet. However LTSP is easy customizable so I prepared a few patches for myself and will share them here.

I’ll create a fork if the community will warmly accept my solution.

  • feature-grub.diff
    LTSP does not support EFI by default, so I’ve prepared a patch which adds GRUB2 with EFI support.
  • feature_preinit.diff
    This patch adds a PREINIT option to lts.conf, which allows you to run custom commands before the main init call. It may be useful to modify the systemd units and configure the network. It’s remarkable that all environment variables from the boot environment are saved and you can use them in your scripts.
  • feature_initramfs_params_from_lts_conf.diff
    Solves s problem with NBD_TO_RAM option, after this patch you can specify it on lts.conf inside chroot. (not in tftp directory)
  • nbd-server-wrapper.sh
    This is not a patch but a special wrapper script which allows you to run NBD-server in the foreground. It is useful if you want to run it inside a Docker container.

Dockerfile Stages

We will use stage building in our Dockerfile to leave only the needed parts in our Docker image. The unused parts will be removed from the final image.

ltsp-base
(install basic LTSP server software)
|
|—basesystem
| (prepare chroot with main software and kernel)
| |
| |—builder
| | (build additional software from sources, if needed)
| |
| ‘—ltsp-image
| (install additional software, docker, kubelet and build squashed image)
|
‘—final-stage
(copy squashed image, kernel and initramfs into first stage)

Stage 1: ltsp-base

Let’s start writing our Dockerfile. This is the first part:

FROM ubuntu:16.04 as ltsp-base

ADD nbd-server-wrapper.sh /bin/
ADD /patches/feature-grub.diff /patches/feature-grub.diff
RUN apt-get -y update
&& apt-get -y install
ltsp-server
tftpd-hpa
nbd-server
grub-common
grub-pc-bin
grub-efi-amd64-bin
curl
patch
&& sed -i ‘s|in_target mount|in_target_nofail mount|’
/usr/share/debootstrap/functions
# Add EFI support and Grub bootloader (#1745251)
&& patch -p2 -d /usr/sbin < /patches/feature-grub.diff
&& rm -rf /var/lib/apt/lists
&& apt-get clean

At this stage our Docker image has already been installed:

  • NBD-server
  • TFTP-server
  • LTSP-scripts with grub bootloader support (for EFI)

Stage 2: basesystem

In this stage we will prepare a chroot environment with basesystem, and install basic software with the kernel.

We will use the classic debootstrap instead of ltsp-build-client to prepare the base image, because ltsp-build-client will install GUI and few other things which we don’t need for the server deployment.

FROM ltsp-base as basesystem

ARG DEBIAN_FRONTEND=noninteractive

# Prepare base system
RUN debootstrap –arch amd64 xenial /opt/ltsp/amd64

# Install updates
RUN echo ”
deb http://archive.ubuntu.com/ubuntu xenial main restricted universe multiversen
deb http://archive.ubuntu.com/ubuntu xenial-updates main restricted universe multiversen
deb http://archive.ubuntu.com/ubuntu xenial-security main restricted universe multiverse”
> /opt/ltsp/amd64/etc/apt/sources.list
&& ltsp-chroot apt-get -y update
&& ltsp-chroot apt-get -y upgrade

# Installing LTSP-packages
RUN ltsp-chroot apt-get -y install ltsp-client-core

# Apply initramfs patches
# 1: Read params from /etc/lts.conf during the boot (#1680490)
# 2: Add support for PREINIT variables in lts.conf
ADD /patches /patches
RUN patch -p4 -d /opt/ltsp/amd64/usr/share < /patches/feature_initramfs_params_from_lts_conf.diff
&& patch -p3 -d /opt/ltsp/amd64/usr/share < /patches/feature_preinit.diff

# Write new local client config for boot NBD image to ram:
RUN echo “[Default]nLTSP_NBD_TO_RAM = true”
> /opt/ltsp/amd64/etc/lts.conf

# Install packages
RUN echo ‘APT::Install-Recommends “0”;nAPT::Install-Suggests “0”;’
>> /opt/ltsp/amd64/etc/apt/apt.conf.d/01norecommend
&& ltsp-chroot apt-get -y install
software-properties-common
apt-transport-https
ca-certificates
ssh
bridge-utils
pv
jq
vlan
bash-completion
screen
vim
mc
lm-sensors
htop
jnettop
rsync
curl
wget
tcpdump
arping
apparmor-utils
nfs-common
telnet
sysstat
ipvsadm
ipset
make

# Install kernel
RUN ltsp-chroot apt-get -y install linux-generic-hwe-16.04

Note that you may encounter problems with some packages, such as lvm2.
They have not fully optimized for installing in an unprivileged chroot.
Their postinstall scripts try to call some privileged commands which can fail with errors and block the package installation.

Solution:

  • Some of them can be installed before the kernel without any problems (like lvm2)
  • But for some of them you will need to use this workaround to install without the postinstall script.

Stage 3: builder

Now we can build all the necessary software and kernel modules. It’s really cool that you can do that automatically in this stage.
You can skip this stage if you have nothing to do here.

Here is example for install latest MLNX_EN driver:

FROM basesystem as builder

# Set cpuinfo (for building from sources)
RUN cp /proc/cpuinfo /opt/ltsp/amd64/proc/cpuinfo

# Compile Mellanox driver
RUN ltsp-chroot sh -cx
‘ VERSION=4.3-1.0.1.0-ubuntu16.04-x86_64
&& curl -L http://www.mellanox.com/downloads/ofed/MLNX_EN-$/mlnx-en-$.tgz
| tar xzf –
&& export
DRIVER_DIR=”$(ls -1 | grep “MLNX_OFED_LINUX-|mlnx-en-“)”
KERNEL=”$(ls -1t /lib/modules/ | head -n1)”
&& cd “$DRIVER_DIR”
&& ./*install –kernel “$KERNEL” –without-dkms –add-kernel-support
&& cd –
&& rm -rf “$DRIVER_DIR” /tmp/mlnx-en* /tmp/ofed*’

# Save kernel modules
RUN ltsp-chroot sh -c
‘ export KERNEL=”$(ls -1t /usr/src/ | grep -m1 “^linux-headers” | sed “s/^linux-headers-//g”)”
&& tar cpzf /modules.tar.gz /lib/modules/$/updates’

Stage 4: ltsp-image

In this stage we will install what we built in the previous step:

FROM basesystem as ltsp-image

# Retrieve kernel modules
COPY –from=builder /opt/ltsp/amd64/modules.tar.gz /opt/ltsp/amd64/modules.tar.gz

# Install kernel modules
RUN ltsp-chroot sh -c
‘ export KERNEL=”$(ls -1t /usr/src/ | grep -m1 “^linux-headers” | sed “s/^linux-headers-//g”)”
&& tar xpzf /modules.tar.gz
&& depmod -a “$”
&& rm -f /modules.tar.gz’

Then do some additional changes to finalize our ltsp-image:

# Install docker
RUN ltsp-chroot sh -c
‘ curl -fsSL https://download.docker.com/linux/ubuntu/gpg | apt-key add –
&& echo “deb https://download.docker.com/linux/ubuntu xenial stable”
> /etc/apt/sources.list.d/docker.list
&& apt-get -y update
&& apt-get -y install
docker-ce=$(apt-cache madison docker-ce | grep 17.03 | head -1 | awk “”)’

# Configure docker options
RUN DOCKER_OPTS=”$(echo
–storage-driver=overlay2
–iptables=false
–ip-masq=false
–log-driver=json-file
–log-opt=max-size=10m
–log-opt=max-file=5
)”
&& sed “/^ExecStart=/ s|$| $DOCKER_OPTS|g”
/opt/ltsp/amd64/lib/systemd/system/docker.service
> /opt/ltsp/amd64/etc/systemd/system/docker.service

# Install kubeadm, kubelet and kubectl
RUN ltsp-chroot sh -c
‘ curl -s https://packages.cloud.google.com/apt/doc/apt-key.gpg | apt-key add –
&& echo “deb http://apt.kubernetes.io/ kubernetes-xenial main”
> /etc/apt/sources.list.d/kubernetes.list
&& apt-get -y update
&& apt-get -y install kubelet kubeadm kubectl cri-tools’

# Disable automatic updates
RUN rm -f /opt/ltsp/amd64/etc/apt/apt.conf.d/20auto-upgrades

# Disable apparmor profiles
RUN ltsp-chroot find /etc/apparmor.d
-maxdepth 1
-type f
-name “sbin.*”
-o -name “usr.*”
-exec ln -sf “{}” /etc/apparmor.d/disable/ ;

# Write kernel cmdline options
RUN KERNEL_OPTIONS=”$(echo
init=/sbin/init-ltsp
forcepae
console=tty1
console=ttyS0,9600n8
nvme_core.default_ps_max_latency_us=0
)”
&& sed -i “/^CMDLINE_LINUX_DEFAULT=/ s|=.*|=”$”|”
“/opt/ltsp/amd64/etc/ltsp/update-kernels.conf”

Then we will make the squashed image from our chroot:

# Cleanup caches
RUN rm -rf /opt/ltsp/amd64/var/lib/apt/lists
&& ltsp-chroot apt-get clean

# Build squashed image
RUN ltsp-update-image

Stage 5: Final Stage

In the final stage we will save only our squashed image and kernels with initramfs.

FROM ltsp-base
COPY –from=ltsp-image /opt/ltsp/images /opt/ltsp/images
COPY –from=ltsp-image /etc/nbd-server/conf.d /etc/nbd-server/conf.d
COPY –from=ltsp-image /var/lib/tftpboot /var/lib/tftpboot

Ok, now we have docker image which includes:

  • TFTP-server
  • NBD-server
  • configured bootloader
  • kernel with initramfs
  • squashed rootfs image

OK, now when our docker-image with LTSP-server, kernel, initramfs and squashed rootfs fully prepared we can run the deployment with it.

We can do that as usual, but one more thing is networking.
Unfortunately, we can’t use the standard Kubernetes service for our deployment, because during the boot, our nodes are not part of Kubernetes cluster and they requires ExternalIP, but Kubernetes always enables NAT for ExternalIPs, and there is no way to disable this behavior.

For now I have two ways for avoid this: use hostNetwork: true or use pipework. The second option will also provide you redundancy because, in case of failure, the IP will be moved with the Pod to another node. Unfortunately, pipework is not native and a less secure method.
If you have some better option for that please let me know.

Here is example for deployment with hostNetwork:

apiVersion: extensions/v1beta1
kind: Deployment
metadata:
name: ltsp-server
labels:
app: ltsp-server
spec:
selector:
matchLabels:
name: ltsp-server
replicas: 1
template:
metadata:
labels:
name: ltsp-server
spec:
hostNetwork: true
containers:
– name: tftpd
image: registry.example.org/example/ltsp:latest
command: [ “/usr/sbin/in.tftpd”, “-L”, “-u”, “tftp”, “-a”, “:69”, “-s”, “/var/lib/tftpboot” ]
lifecycle:
postStart:
exec:
command: [“/bin/sh”, “-c”, “cd /var/lib/tftpboot/ltsp/amd64; ln -sf config/lts.conf .” ]
volumeMounts:
– name: config
mountPath: “/var/lib/tftpboot/ltsp/amd64/config”

– name: nbd-server
image: registry.example.org/example/ltsp:latest
command: [ “/bin/nbd-server-wrapper.sh” ]

volumes:
– name: config
configMap:
name: ltsp-config

As you can see it also requires configmap with lts.conf file.
Here is example part from mine:

apiVersion: v1
kind: ConfigMap
metadata:
name: ltsp-config
data:
lts.conf: |
[default]
KEEP_SYSTEM_SERVICES = “ssh ureadahead dbus-org.freedesktop.login1 systemd-logind polkitd cgmanager ufw rpcbind nfs-kernel-server”

PREINIT_00_TIME = “ln -sf /usr/share/zoneinfo/Europe/Prague /etc/localtime”
PREINIT_01_FIX_HOSTNAME = “sed -i ‘/^127.0.0.2/d’ /etc/hosts”
PREINIT_02_DOCKER_OPTIONS = “sed -i ‘s|^ExecStart=.*|ExecStart=/usr/bin/dockerd -H fd:// –storage-driver overlay2 –iptables=false –ip-masq=false –log-driver=json-file –log-opt=max-size=10m –log-opt=max-file=5|’ /etc/systemd/system/docker.service”

FSTAB_01_SSH = “/dev/data/ssh /etc/ssh ext4 nofail,noatime,nodiratime 0 0”
FSTAB_02_JOURNALD = “/dev/data/journal /var/log/journal ext4 nofail,noatime,nodiratime 0 0”
FSTAB_03_DOCKER = “/dev/data/docker /var/lib/docker ext4 nofail,noatime,nodiratime 0 0”

# Each command will stop script execution when fail
RCFILE_01_SSH_SERVER = “cp /rofs/etc/ssh/*_config /etc/ssh; ssh-keygen -A”
RCFILE_02_SSH_CLIENT = “mkdir -p /root/.ssh/; echo ‘ssh-rsa AAAAB3NzaC1yc2EAAAADAQABAAABAQDBSLYRaORL2znr1V4a3rjDn3HDHn2CsvUNK1nv8+CctoICtJOPXl6zQycI9KXNhANfJpc6iQG1ZPZUR74IiNhNIKvOpnNRPyLZ5opm01MVIDIZgi9g0DUks1g5gLV5LKzED8xYKMBmAfXMxh/nsP9KEvxGvTJB3OD+/bBxpliTl5xY3Eu41+VmZqVOz3Yl98+X8cZTgqx2dmsHUk7VKN9OZuCjIZL9MtJCZyOSRbjuo4HFEssotR1mvANyz+BUXkjqv2pEa0I2vGQPk1VDul5TpzGaN3nOfu83URZLJgCrX+8whS1fzMepUYrbEuIWq95esjn0gR6G4J7qlxyguAb9 admin@kubernetes’ >> /root/.ssh/authorized_keys”
RCFILE_03_KERNEL_DEBUG = “sysctl -w kernel.unknown_nmi_panic=1 kernel.softlockup_panic=1; modprobe netconsole netconsole=@/vmbr0,@10.9.0.15/”
RCFILE_04_SYSCTL = “sysctl -w fs.file-max=20000000 fs.nr_open=20000000 net.ipv4.neigh.default.gc_thresh1=80000 net.ipv4.neigh.default.gc_thresh2=90000 net.ipv4.neigh.default.gc_thresh3=100000”
RCFILE_05_FORWARD = “echo 1 > /proc/sys/net/ipv4/ip_forward”
RCFILE_06_MODULES = “modprobe br_netfilter”
RCFILE_07_JOIN_K8S = “kubeadm join –token 2a4576.504356e45fa3d365 10.9.0.20:6443 –discovery-token-ca-cert-hash sha256:e3b0c44298fc1c149afbf4c8996fb92427ae41e4649b934ca495991b7852b855”

  • KEEP_SYSTEM_SERVICES – during the boot, LTSP automatically removes some services, this variable is needed to prevent this behavior.
  • PREINIT_* – commands listed here will be executed before systemd runs (this function was added by the feature_preinit.diff patch)
  • FSTAB_* – entries written here will be added to the /etc/fstab file.
    As you can see, I use the nofail option, that means that if a partition doesn’t exist, it will continue to boot without error.
    If you have fully diskless nodes you can remove the FSTAB settings or configure the remote filesystem there.
  • RCFILE_* – those commands will be written to rc.local file, which will be called by systemd during the boot.
    Here I load the kernel modules and add some sysctl tunes, then call the kubeadm join command, which adds my node to the Kubernetes cluster.

You can get more details on all the variables used from lts.conf manpage.

Now you can configure your DHCP. Basically you should set the next-server and filename options.

I use ISC-DHCP server, and here is an example dhcpd.conf:

shared-network ltsp-netowrk {
subnet 10.9.0.0 netmask 255.255.0.0 {
authoritative;
default-lease-time -1;
max-lease-time -1;

option domain-name “example.org”;
option domain-name-servers 10.9.0.1;
option routers 10.9.0.1;
next-server ltsp-1; # write LTSP-server hostname here

if option architecture = 00:07 {
filename “/ltsp/amd64/grub/x86_64-efi/core.efi”;
} else {
filename “/ltsp/amd64/grub/i386-pc/core.0”;
}

range 10.9.200.0 10.9.250.254;
}

You can start from this, but what about me, I have multiple LTSP-servers and I configure leases statically for each node via the Ansible playbook.

Try to run your first node. If everything was right, you will have a running system there.
The node also will be added to your Kubernetes cluster.

Now you can try to make your own changes.

If you need something more, note that LTSP can be easily changed to meet your needs.
Feel free to look into the source code and you can find many answers there.

Source

Introducing Jetstack Subscription – Jetstack Blog

1/May 2018

By Matt Barker

We are delighted to announce Jetstack Subscription, comprising tried-and-tested Kubernetes Reference Architecture, the highest quality training, and continuous support for organisations adopting Kubernetes.

As a leading Kubernetes company in Europe, Jetstack Subscription has been designed and refined to give organisations the confidence to take Kubernetes to production environments.

If you’re keen to upskill, need expert assistance with your clusters, or want to deploy Kubernetes to best practice, find out how the features of Jetstack Subscription can facilitate your Kubernetes experience:

training

Subscription provides Reference Architecture for Kubernetes. The ready-made blueprints help accelerate adoption and integration of Kubernetes into environments with enterprise requirements, shortcutting many months of engineering effort building and designing these systems from scratch.

Built in association with a number of Jetstack customers, our reference architecture is an open source toolkit that combines best-of-breed open source tools from the Cloud Native Landscape, for Kubernetes cluster lifecycle management. It focuses on best-practice cluster security, management and operation (the ‘day 2’ operations that are often overlooked, in our experience).

Developed from the ground-up to be cloud provider-agnostic, it provides a means for consistent and reliable cluster deployment and management, across clouds and on-premises environments.

Jetstack Subscription entitles you to Reference Architecture implementation, integration and assistance from the creators and maintainers of the open source toolkit, with close visibility and contribution to the roadmap.

With a tried-and-tested Reference Architecture, you will have the confidence to deploy and operate your clusters to best practice.

Jetstack Subscription gives you access to up-to-date and on-demand Kubernetes modules and operational playbooks in order to prepare you for running Kubernetes in production and keep your skills sharp.

Maybe you’re upskilling for a new role, working towards a certification or planning to use Kubernetes in production. Perhaps you’re approaching the software for the first time, or have been using it for a while and want to test your existing knowledge.

Jetstack Subscription gives you on-demand, real-world Kubernetes training, whatever your experience.

Jetstack training courses have been built around the knowledge gained in delivering production-ready Kubernetes to our customers.

We have run dozens of Kubernetes training workshops, over the course of several years, educating more than 1000 engineers. The training materials are regularly refined and updated, and align with the CNCF curricula (CKA and CKAD). We know exactly what you need to up-skill quickly and effectively.

training

What do you get?

  • Training modules covering beginner, intermediate and advanced material for cluster and app ops users.
  • On-demand wargaming scenarios to test how you would respond to Kubernetes production issues, and prepare you for the worst.
  • Operational playbooks offering step-by-step fixes to common production issues.
  • Regularly updated materials to reflect new Kubernetes features, and the latest ecosystem tools.

With Jetstack Subscription, you can feel safe in the knowledge that our experienced team of Operations Engineers are on hand to help. It’s always good to know that someone has your back.

Jetstack Subscription provides you and your production team with ongoing support and assistance. Our engineers can help, regardless of whether you’re gearing up to run Kubernetes in production, you’ve just built your first Kubernetes cluster, or you’ve been running Kubernetes in production for some time.

Our engineers have seen Kubernetes used at every scale, from bootstrapped startups on a budget to the largest of enterprises replatforming across multiple environments. Our skilled team know where the sharp edges are, and through experience with our customers, we have seen all sorts of production issues and cluster breaks.

You will have access to invaluable advice on how to build Kubernetes to best practice when you are starting out, and ongoing assistance if you run into trouble.

With Jetstack Subscription you know your Kubernetes clusters are in good hands.

laptop

Jetstack Subscription launches at KubeCon EU 2018 in Copenhagen. If you’re there, come and find us at stand C07 to talk more about this new offering and how it can help you and your organisation.

Otherwise, visit the Subscription page at the website, and feel free to share your details so one of our team can get back to you.

Source

Announcing Heptio Ark v0.9.0 – Heptio

We are excited to announce the release of Ark v0.9.0! This release brings two major new features: integration with restic to back up almost every type of Kubernetes volume, and initial support for exporting metrics in the Prometheus data format. There is also a critical bug fix to avoid potential backup/restore data corruption, so we encourage you to upgrade.

Volume snapshots with restic

With Ark v0.9.0, it’s now possible to snapshot almost every type of Kubernetes volume (hostPath is not supported). This feature complements Ark’s ability to snapshot disks from AWS, Google, and Azure (as well as any custom plugin integrations, such as PortWorx). You could use native snapshotting for these types of disks and restic snapshots for everything else, or you could use restic for everything. Ark’s restic integration is a good option if your type of PersistentVolume doesn’t currently have a plugin for Ark, or if it doesn’t offer a native snapshot concept, such as emptyDir and NFS.

For more details, including setup instructions, see our restic documentation and our initial annoucement.

Prometheus metrics

We’d like to offer a huge thanks to community contributor Ashish Amarnath for providing the initial support for exposing Prometheus metrics. Ark v0.9.0 includes the following metrics:

  • total # of backup attempts
  • # of successful backups
  • # of failed backups
  • backup duration histogram
  • backup tarball size

All of these metrics are grouped by schedule.

We are working to add additional metrics for backups as well as restores. If you’re interested in discussing what kinds of metrics you’d like us to add, please feel free to share your thoughts on our open issue.

Additional v0.9.0 highlights

Ark now restores any image pull secrets or other secrets that you added to the default service account.

Ark also automatically backs up all cluster roles and cluster role bindings that reference a given service account. If you’re backing up one or more specific namespaces and not including all cluster-scoped resources, this feature ensures your backup isn’t missing any relevant cluster-scoped RBAC resources.

This release includes several other improvements and bug fixes:

  • Ark no longer tries to restore completed jobs, completed pods, or mirror pods
  • Ark no longer backs up terminating resources
  • Ark no longer backs up the same replica set or daemon set twice
  • Ark no longer restores a PV with a reclaim policy of “delete” when there is no associated snapshot
  • Ark works more smoothly with OpenShift
  • We have improved our error handling, especially when backing up pods, their PVCs, and the associated PVs; as well as marking a backup as “failed” when uploading to Google Cloud Storage fails
  • All logging from the Ark server now writes to stdout instead of stderr

See the release notes for full details on all improvements and bug fixes.

What’s next?

We are actively working on designing our next big feature — replication. This will ensure that your backed up Kubernetes resources and your persistent data are available in multiple locations, avoiding single points of failure.

We are also continuing to plot the roadmap to Ark 1.0. We’ll be discussing our plans with the community in the following weeks and encourage you to join the our Google group and Slack channel.

Finally, if you’re interested in contributing, you’ll find several GitHub issues labeled as Good First Issue and Help Wanted. Take a look — we would welcome your participation.

Source

Marketing in a Remote First Startup

First 100 Days as a Marketer in a Remote-First Cloud Services Startup IV

Settled In as Their Marketing Guy

The Organizational Structure

To repeat, Giant Swarm is a remote-first company and with that, has a remote-first culture and organizational structure. This offers a certain kind of flexibility and pace of work that someone fresh off the agency boat has to come to terms with. That doesn’t mean taking massive breaks and getting work done when you want. It means work smart, rest, repeat. And get the job done. It is a style and culture of working that I don’t think would work for everyone.

Flexibility of Work

Working in a remote-first company offers the kind of flexibility owning your own company has without having to worry about the insane cost of insurance or answering the phone on Christmas day. This kind of flexibility gives you time to work on what you need to get done while bettering yourself in any number of different ways.

Here are some examples from seeing the daily AFK on #Slack:

  • Piano lessons
  • Travel to hometown
  • German lessons
  • Daughter’s track and field competition
  • D&D
  • Jazz festival

And then there are your basic TO DO’s and WTFs:

  • Grocery shopping
  • Kid is sick
  • Flooded basement
  • Lost my favorite keychain in Gdańsk, going back

This means when you are in front of the screen hacking away, your mind is clearer than wondering how am I going to get my keychain back or I need to pick up my son from piano lessons and I’m going to catch flack for it.

Pace of Team and Tech

I’ve always believed in move at the pace of client. This means that if the client is slow and they need more time to deliberate over content or a logo or don’t often have time for meetings, you have to keep cool and understand while still getting meaningful work done. You also have the clients who need everything done yesterday and you have to move mountains on a regular basis. The pace at Giant Swarm is both Client and Technology, so it adds a very exciting layer to the mix. The tech is rather new and growing in spades daily. This sets a different pace – it’s on the tech side, which means if you’re a couple of days late with info and updates, you’re the one behind. So content always needs to be fresh.

The Team

Meeting the team takes time. Working remotely, I may not run into my colleague from London or one of the two from Barcelona but maybe 3 times per year. And although Brno is now on my list of places to visit, I can’t just hop up and go for a beer on a Wednesday evening to the Czech Republic. The onboarding process at Giant Swarm consists of 1 on 1’s with everyone from the company. This was something that we needed to set up as new employees and had to get through everyone within the first couple of weeks. Just like any company, you’re going to have your different types of people but when the team represents 17 different countries, you have about 17 different types of people – even if in some regions you know you’d fit right in.

With technology as impressive as is is today, using Google Meet and keeping in close contact on #Slack, GitHub and email allows for very easy cross-departmental communication as well as cross-cultural communication. In conclusion, working remotely with others who thrive in this environment is a team experience like no other, and I think it’ll be adopted even more over the years.

Team building

Giant Swarm does team building gatherings twice a year, and of course they are a blast. But not focusing on all of the super-fun things we do, to be a remote-first company, you have to have close interaction with your colleagues whenever possible and these gatherings allow for that. The schedule is mixed with having fun as well as brainstorming sessions to better our processes and product. A very well organized trip to get everyone together is coordinated internally and the schedule is very full but of course, flexible based on what everyone wants to do or wants to work on. These are very necessary and have kept the team close although we are spread out across Europe.

Day 100

Conclusion: The Marketer at a Remote-First, Tech Startup

After 100 days at Giant Swarm, I have learned first and foremost about the processes and tech we have adopted but also heavily about working in a remote-first company, the kinds of people who thrive in them and the amazing channels that foster seamless communication across team members. But it doesn’t stop here, we are moving into what I call Phase II of our marketing strategy. This is going to include your big rock projects like website redesign, expansion of our reach through press contacts and the overbearing GDPR.

In the meantime, I still need to clean out my closet and get rid of my leather shoes, ties, sport coats and jackets, button-down dress shirts, and pleated khakis – just kidding, I’ve never owned a pair of those. Remote-first working doesn’t need these things and I feel right at home, literally.

Source

Propagating configuration from Terraform to Kubernetes Apps

Feb 13, 2018  By Adam Sandor

I recently encountered an interesting problem while terraforming Kubernetes clusters on Google Cloud. Our Terraform configurations have some important information which is needed by applications running on the cluster. These are either values for which our Terraform resources are the primary source, or values which are outputs from them.

Here are some examples of the types of values we want to propagate from Terraform resources to application Pods running on Kubernetes:

  • Name of the GKE (Google Kubernetes Engine) cluster – specified by Terraform.
  • Endpoint of the Cloud SQL database – generated by Terraform
  • Static Client IP address – generated by GCP (Google Cloud Platform)

These values are all available while Terraform is running but hard or impossible to access from a Pod running on the Kubernetes cluster. Most surprisingly the cluster name is not available in any kind of metadata on Google cloud but it has to be used when submitting custom container metrics to Google Stackdriver.

To propagate these values conveniently to our application Pods we can use the Terraform Kubernetes provider to create ConfigMaps or Secrets (depending on the sensitivity of the information) in Kubernetes. Applications running on the cluster can then have the values injected as environment variables or files.

The Kubernetes provider is quite new and in a general sense it’s questionable whether you should be provisioning Kubernetes objects using Terraform. You can read more on this from Harshal Shah in this post: http://blog.infracloud.io/terraform-helm-kubernetes/. For our use case however using the Kubernetes provider is perfect.

I was worried about the fact that we have to provision the Kubernetes cluster itself (using the Google Cloud provider container cluster resource), and use the credentials this resource outputs to set up the Kubernetes provider. This kind of inter-provider dependency is somewhat undefined in Terraform but it turns out to work perfectly.

Propagating data from Terraform to a Kubernetes application

Here are snippets from the code used to do all this.

Google Cloud provider setup and the Kubernetes cluster resource definition:


1

2

3

4

5

6

7

8

9

10

11

12

13

14

15

16

17

18

19


provider “google” {

region = “europe-west3”

credentials = “itsasecret”

project = “adamsproject”

}

resource “google_container_cluster” “mycluster” {

project = “adamsproject”

name = “mycluster”

zone = “europe-west3-a”

initial_node_count = 1

node_version = “$”

min_master_version = “$”

node_config {

machine_type = “g1-small”

disk_size_gb = 50

}

}


The Kubernetes provider is configured using outputs from the google_container_cluster resource – namely the CA certificate, the client certificate and the client secret key. We have to base64 decode these.


provider “kubernetes” {

host = “$”

client_certificate = “$”

client_key = “$”

cluster_ca_certificate = “$”

}


Once the Kubernetes provider can access our new cluster, this resource definition will create a Secret with our database secrets:


resource “kubernetes_secret” “cloudsql-db-credentials” {

“metadata” {

name = “cloudsql-db-credentials”

}

data {

username = “$”

password = “$”

}

}


We can also create some ConfigMaps to hold other, less sensitive information. Here I’m creating a database connection string to be used by Google CloudSQL Proxy:


resource “kubernetes_config_map” “dbconfig” {

“metadata” {

name = “dbconfig”

}

data = {

dbconnection = “$:$:$”

}

}


I’m not going into the details of how to get this configuration all the way to your application components as that is straightforward once you have ConfigMaps or Secrets created. Take a look at the Kubernetes documentation if you are not familiar with working with ConfigMaps or Secrets.

Summary

Terraform will inevitably become your primary source of truth for many variables in your environment. It will also know about variables that are set by the cloud provider during resource creation, like a random IP address. It’s a very elegant way to use Kubernetes Secrets and ConfigMaps to pass these values to your application components which need them, while the Kubernetes provider in Terraform offers a perfect way to create these objects.

Source

Using RKE to Deploy a Kubernetes Cluster on Exoscale

How to Manage Workloads on Kubernetes with Rancher 2.0 Online Meetup

Learn how to deploy Kubernetes applications in Rancher 2.0, and use the monitoring, logging and pipeline features.

Watch the video

Introduction

One of the biggest challenges with Kubernetes is bringing up a cluster for the
first time. There have been several projects that attempt to address this gap
including kmachine and
minikube. However, both assume
you are starting from a blank slate. What if you have your instances provisioned,
or have another means of provisioning hosts with configuration management?

This is the problem that the people at Rancher are solving with the
Rancher Kubernetes Engine or RKE.
At the core is a YAML based configuration file that is used to define the hosts
and make-up for your Kubernetes cluster. RKE will do the heavy lifting of
installing the required Kubernetes components, and configuring them for your
cluster.

What this tutorial will show you is how to quickly set up a few virtual systems
that can host our Kubernetes cluster, bring up Kubernetes
using RKE, and lastly setup a sample application hosted inside Kubernetes.

NOTE: This example will bring up a bare minimum cluster with a sample
application for experimentation, and in no way should be considered
a production ready deployment.

Prerequisites and Setup

For our virtual cluster, we will be using Exoscale
as they will allow us to get up and running with minimal effort. There are three
binaries that you will need to install to fully utilize this guide. While this
guide is written assuming Linux, the binaries are available for Linux, Windows,
and MacOS.

  1. Exoscale CLI – Required to setup the environment and manage our systems
  2. RKE CLI – Required to provision Kubernetes
  3. kubectl – Required to manage our new Kubernetes cluster

In addition, you will need an Exoscale account
since it will be used to setup the Exoscale CLI.

Configure Exoscale CLI

Once you have your Exoscale account set-up, you need to configure the Exoscale
client. Assuming you are in the same directory containing the program you will run:

$ ./exo config

Hi happy Exoscalian, some configuration is required to use exo.

We now need some very important information, find them there.
<https://portal.exoscale.com/account/profile/api>

[+] API Key [none]: EXO························
[+] Secret Key [none]: ······································
[…]

NOTE: When you go to the API profile page
you will see the API Key and Secret. Be sure to copy and paste both at the prompts.

Provisioning the Kubernetes Environment with the Exoscale CLI

Now that we have configured the Exoscale CLI, we need to prepare the Exoscale
cloud environment. This will require setting up a firewall rule that will be
inherited by the instances that will become the Kubernetes cluster, and an optional
step of creating and adding your ssh public key.

Defining the firewall rules

The firewall or security group we will create must have at least three
ports exposed: 22 for ssh access, 6443 and 10240 for kubectl and rke to bring up
and manage the cluster. Lastly, we need to grant access to the security group so
the instances can interact amongst itself.

The first step to this is to create the firewall or security group:

$ ./exo firewall create rke-k8s -d “RKE k8s SG”
┼──────────┼─────────────────┼──────────────────────────────────────┼
│ NAME │ DESCRIPTION │ ID │
┼──────────┼─────────────────┼──────────────────────────────────────┼
│ rke-k8s │ RKE K8S SG │ 01a3b13f-a312-449c-a4ce-4c0c68bda457 │
┼──────────┼─────────────────┼──────────────────────────────────────┼

The next step is to add the rules (command output omitted):

$ ./exo firewall add rke-k8s -p ALL -s rke-k8s
$ ./exo firewall add rke-k8s -p tcp -P 6443 -c 0.0.0.0/0
$ ./exo firewall add rke-k8s -p tcp -P 10240 -c 0.0.0.0/0
$ ./exo firewall add rke-k8s ssh

You can confirm the results by invoking exo firewall show:

$ ./exo firewall show rke-k8s
┼─────────┼────────────────┼──────────┼──────────┼─────────────┼──────────────────────────────────────┼
│ TYPE │ SOURCE │ PROTOCOL │ PORT │ DESCRIPTION │ ID │
┼─────────┼────────────────┼──────────┼──────────┼─────────────┼──────────────────────────────────────┼
│ INGRESS │ CIDR 0.0.0.0/0 │ tcp │ 22 (ssh) │ │ 40d82512-2196-4d94-bc3e-69b259438c57 │
│ │ CIDR 0.0.0.0/0 │ tcp │ 10240 │ │ 12ceea53-3a0f-44af-8d28-3672307029a5 │
│ │ CIDR 0.0.0.0/0 │ tcp │ 6443 │ │ 18aa83f3-f996-4032-87ef-6a06220ce850 │
│ │ SG │ all │ 0 │ │ 7de233ad-e900-42fb-8d93-05631bcf2a70 │
┼─────────┼────────────────┼──────────┼──────────┼─────────────┼──────────────────────────────────────┼

Optional: Creating and adding an ssh key

One of the nice things about the Exoscale CLI is that you can use it to create
an ssh key for each instance you bring up. However there are times where you will
want a single administrative ssh key for the cluster. You can have the Exoscale
CLI create it or use the CLI to import your own key. To do that, you will use
Exoscale’s sshkey subcommand.

If you have a key you want to use:

$ ./exo sshkey upload [keyname] [ssh-public-key-path]

Or if you’d like to create a unique for this cluster:

$ ./exo sshkey create rke-k8s-key
┼─────────────┼─────────────────────────────────────────────────┼
│ NAME │ FINGERPRINT │
┼─────────────┼─────────────────────────────────────────────────┼
│ rke-k8s-key │ 0d:03:46:c6:b2:72:43:dd:dd:04:bc:8c:df:84:f4:d1 │
┼─────────────┼─────────────────────────────────────────────────┼
—–BEGIN RSA PRIVATE KEY—–
MIIC…
—–END RSA PRIVATE KEY—–

$

Save the contents of the RSA PRIVATE KEY component into a file as
that will be your sole means of accessing the cluster using that key name. In
both cases, we will need to make sure that the ssh-agent daemon is running, and
our key is added to it. If you haven’t done so already, run:

$ ssh-add [path-to-private-ssh-key]

Creating your Exoscale instances

At this point we are ready to create the instances. We will utilize the medium
sized templates as that will provide enough RAM for both Kubernetes and our
sample application to run. The OS Image we will use is Ubuntu-16.04 due to the
version of Docker required by RKE to bring up our cluster. Lastly, we use 10g of
disk space which will be enough to experiment with.

NOTE: If you go with a smaller instance size than medium, you will not
have enough RAM to bootstrap the Kubernetes cluster.

Step 1: Create instance configuration script

To automate the instance configuration, we will use cloud-init.
This is as easy as creating a YAML file to describe our actions, and specifying
the file on the Exoscale command line:

#cloud-config

manage_etc_hosts: true

package_update: true
package_upgrade: true

packages:
– curl

runcmd:
– “curl https://releases.rancher.com/install-docker/17.03.sh| bash”
– “usermod -aG docker ubuntu”
– “mkdir /data”

power_state:
mode: reboot

Copy and paste the block of text above into a new file called cloud-init.yml.

Step 2: Create the instances

Next, we are going to create 4 instances:

$ for i in 1 2 3 4; do
./exo vm create rancher-$i
–cloud-init-file cloud-init.yml
–service-offering medium
–template “Ubuntu 16.04 LTS”
–security-group rke-k8s
–disk 10
> done
Creating private SSH key
Deploying “rancher-1” …………. success!

What to do now?

1. Connect to the machine

> exo ssh rancher-1
ssh -i “/home/cab/.exoscale/instances/85fc654f-5761-4a02-b501-664ae53c671d/id_rsa” [email protected]

2. Put the SSH configuration into “.ssh/config”

> exo ssh rancher-1 –info
Host rancher-1
HostName 185.19.29.207
User ubuntu
IdentityFile /home/cab/.exoscale/instances/85fc654f-5761-4a02-b501-664ae53c671d/id_rsa

Tip of the day:
You’re the sole owner of the private key.
Be cautious with it.

NOTE: If you created or uploaded an SSH Keypair, then you can add the
–keypair <common key> argument where common key is the key name you chose
to upload.

NOTE 2: Save the hostname and IP address. You will need these for the RKE set-up

After waiting several minutes (about 5 to be safe) you will have four brand new
instances configured with docker and ready to go. A sample configuration will
resemble the following when you run ./exo vm list:

┼───────────┼────────────────┼─────────────────┼─────────┼──────────┼──────────────────────────────────────┼
│ NAME │ SECURITY GROUP │ IP ADDRESS │ STATUS │ ZONE │ ID │
┼───────────┼────────────────┼─────────────────┼─────────┼──────────┼──────────────────────────────────────┼
│ rancher-4 │ rke-k8s │ 159.100.240.102 │ Running │ ch-gva-2 │ acb53efb-95d1-48e7-ac26-aaa9b35c305f │
│ rancher-3 │ rke-k8s │ 159.100.240.9 │ Running │ ch-gva-2 │ 6b7707bd-9905-4547-a7d4-3fd3fdd83ac0 │
│ rancher-2 │ rke-k8s │ 185.19.30.203 │ Running │ ch-gva-2 │ c99168a0-46db-4f75-bd0b-68704d1c7f79 │
│ rancher-1 │ rke-k8s │ 185.19.30.83 │ Running │ ch-gva-2 │ 50605a5d-b5b6-481c-bb34-1f7ee9e1bde8 │
┼───────────┼────────────────┼─────────────────┼─────────┼──────────┼──────────────────────────────────────┼

RKE and Kubernetes

The Rancher Kubernetes Engine command is used to bring up, tear down, and
backup the configuration for a Kubernetes cluster. The core consists of
a configuration file that has the name of cluster.yml. While RKE
supports the creation of this configuration file with the command rke config,
it can be tedious to go through the prompts. Instead, we will pre-create
the config file.

The file below is a sample file that can be saved and modified as cluster.yml:

ssh_key_path: [path to ssh private key]
ssh_agent_auth: true

cluster_name: rke-k8s

nodes:
– address: [ip address of rancher-1]
name: rancher-1
user: ubuntu
role:
– controlplane
– etcd
– worker
– address: [ip address of rancher-2]
name: rancher-2
user: ubuntu
role:
– worker
– address: [ip address of rancher-3]
name: rancher-3
user: ubuntu
role:
– worker
– address: [ip address of rancher-4]
name: rancher-4
user: ubuntu
role:
– worker

Things you will need to modify:

  • ssh_key_path: If you uploaded or created a public ssh key, then the path
    should be changed to reflect your private key location. Otherwise, you will
    need to move the ssh_key_path line to be inside each node entry and change
    the path to match the key generated for each instance that was created.
  • address These should be changed to the IP addresses you saved from the
    previous step.
  • cluster_name This should match your firewall/security group name.

Once you have saved your updated cluster.yml, $ ./rke up is all you need to
bring up the Kubernetes cluster. There will be a flurry of status updates as the
docker containers for the various Kubernetes components are downloaded into each
node, installed, and configured.

If everything goes well, then you will see the following when RKE finishes:

$ rke up

INFO[0099] Finished building Kubernetes cluster successfully

Congratulations, you have just brought up a Kubernetes cluster!

Configuring and using kubectl

One thing you will see that RKE created is the Kubernetes configuration file
kube_config_cluster.yml which is used by kubectl to communicate with the cluster.
To make running kubctl easier going forward, you will want to set the environment
variable KUBECONFIG so you don’t need to pass the config parameter each time:

export KUBECONFIG=/path/to/kube_config_cluster.yml

Here are a few sample status commands. The first command will give
you a listing of all registered nodes, their roles as defined from the
cluster.yml file above, and the Kubernetes version each node is running running.

$ ./kubectl get nodes
NAME STATUS ROLES AGE VERSION
159.100.240.102 Ready worker 3m v1.11.1
159.100.240.9 Ready worker 3m v1.11.1
185.19.30.203 Ready worker 3m v1.11.1
185.19.30.83 Ready controlplane,etcd,worker 3m v1.11.1

The second command is used to give you the cluster status.

$ ./kubectl get cs
NAME STATUS MESSAGE ERROR
scheduler Healthy ok
controller-manager Healthy ok
etcd-0 Healthy {“health”: “true”}

NOTE: For more information about RKE and the cluster configuration file, you can visit
Rancher’s documentation page.

Optional: Installing the Kubernetes Dashboard

To make it easier to collect status information on the Kubernetes cluster, we
will install the Kubernetes dashboard. To install the dashboard, you will run:

$ ./kubectl create -f https://raw.githubusercontent.com/kubernetes/dashboard/master/src/deploy/recommended/kubernetes-dashboard.yaml

At this point, the dashboard is installed and running, but the only way to access
it is from inside the Kubernetes cluster. To expose the dashboard port onto your
workstation so that you can interact with it, you will need to proxy the port by
running:

Now you can now visit the dashboard at:
http://localhost:8001.

However, to be able to make full use of the dashboard, you will need to
authenticate your session. This will require a token from a specific
subsystem utilizing a set of secrets that were generated at the time we ran
rke up. The following command will extract the correct token that you can use
to authenticate against for the dashboard:

$ ./kubectl -n kube-system describe secrets
`./kubectl -n kube-system get secrets |awk ‘/clusterrole-aggregation-controller/ ‘`
|awk ‘/token:/ ‘

Copy and paste the long string that is returned into the authentication prompt
on the dashboard webpage, and explore the details of your cluster.

Kubernetes Dashboard Example

Adding Cassandra to Kubernetes

Now for the fun part. We are going to bring up Cassandra.
This will be a simple cluster that will use the local disks for storage. This
will give us something to play with when it comes to installing a service, and
seeing what happens inside Kubernetes.

To install Cassandra, we need to specify a service configuration that will be
exposed by Kubernetes, and an application definition file that specifies things
like networking, storage configuration, number of replicas, etc.

Step 1: Cassandra Service File

First, we will start with the services file:

apiVersion: v1
kind: Service
metadata:
labels:
app: cassandra
name: cassandra
spec:
clusterIP: None
ports:
– port: 9042
selector:
app: cassandra

Copy and save the services file as cassandra-services.yaml, and load it:

./kubectl create -f ./cassandra-service.yml

You should see it load successfully, and you can verify using kubectl:

$ ./kubectl get svc cassandra
NAME TYPE CLUSTER-IP EXTERNAL-IP PORT(S) AGE
cassandra ClusterIP None <none> 9042/TCP 46s

NOTE: For more details on Service configurations, you can read more about it in the
Kubernetes Service Networking Guide.

Cassandra StatefulSet

The StatefulSet
is a type of Kubernetes workload where the application is expected to persist
some kind of state such as our Cassandra example.

We will download the configuration from XXXXX/cassandra-statefulset.yaml,
and apply it:

$ ./kubectl create -f https://XXXX/cassandra-statefulset.yaml
statefulset.apps/cassandra created
storageclass.storage.k8s.io/fast created

You can check the state of the StatefulSet we are loading:

$ ./kubectl get statefulset
NAME DESIRED CURRENT AGE
cassandra 3 3 4m

You can even interact with Cassandra inside its pod such as verifying that
Cassandra is up:

$ ./kubectl exec -it cassandra-0 — nodetool status
Datacenter: DC1-K8Demo
======================
Status=Up/Down
|/ State=Normal/Leaving/Joining/Moving
— Address Load Tokens Owns (effective) Host ID Rack
UN 10.42.2.2 104.55 KiB 32 59.1% ac30ba66-bd59-4c8d-ab7b-525daeb85904 Rack1-K8Demo
UN 10.42.1.3 84.81 KiB 32 75.0% 92469b85-eeae-434f-a27d-aa003531cff7 Rack1-K8Demo
UN 10.42.3.3 70.88 KiB 32 65.9% 218a69d8-52f2-4086-892d-f2c3c56b05ae Rack1-K8Demo

Now suppose we want to scale up the number of replicas from 3, to 4? To do that, you
will run:

$ ./kubectl edit statefulset cassandra

This will open up your default text editor. Scroll down to the replica line,
change the value 3 to 4, save and exit. You should see the following with your
next invocation of kubectl:

$ ./kubectl get statefulset
NAME DESIRED CURRENT AGE
cassandra 4 4 10m

$ ./kubectl exec -it cassandra-0 — nodetool status
Datacenter: DC1-K8Demo
======================
Status=Up/Down
|/ State=Normal/Leaving/Joining/Moving
— Address Load Tokens Owns (effective) Host ID Rack
UN 10.42.2.2 104.55 KiB 32 51.0% ac30ba66-bd59-4c8d-ab7b-525daeb85904 Rack1-K8Demo
UN 10.42.1.3 84.81 KiB 32 56.7% 92469b85-eeae-434f-a27d-aa003531cff7 Rack1-K8Demo
UN 10.42.3.3 70.88 KiB 32 47.2% 218a69d8-52f2-4086-892d-f2c3c56b05ae Rack1-K8Demo
UN 10.42.0.6 65.86 KiB 32 45.2% 275a5bca-94f4-439d-900f-4d614ba331ee Rack1-K8Demo

Looking at the Kubernetes Dashboard

Final Note

There is one final note about cluster scaling and using the StatefulSet workload.
Kubernetes makes it easy to scale your cluster up to account for load, however to
ensure data gets preserved, Kubernetes will keep all data in place when you scale
the number of nodes down. What this means is that you will be responsible for
ensuring proper backups are made and everything is deleted before you can
consider the application cleaned up.

And here are gists with the yaml configurations from this tutorial that might be helpful as well:

Chris Baumbauer

Chris Baumbauer

Software Engineer

github

Chris Baumbauer is a freelance engineer whom has dabbled every piece of the stack from operating systems to mobile and web development with recent projects focused on Kubernetes such as Kompose and Kmachine.

Source

Introducing the Operator Framework: Building Apps on Kubernetes

To help make it easier to build Kubernetes applications, Red Hat and the Kubernetes open source community today share the Operator Framework – an open source toolkit designed to manage Kubernetes native applications, called Operators, in a more effective, automated, and scalable way.

Operators are Kubernetes applications

You may be familiar with Operators from the concept’s introduction in 2016. An Operator is a method of packaging, deploying and managing a Kubernetes application. A Kubernetes application is an application that is both deployed on Kubernetes and managed using the Kubernetes APIs and kubectl tooling. To be able to make the most of Kubernetes, you need a set of cohesive APIs to extend in order to service and manage your applications that run on Kubernetes. You can think of Operators as the runtime that manages this type of application on Kubernetes.

Conceptually, an Operator takes human operational knowledge and encodes it into software that is more easily packaged and shared with consumers. Think of an Operator as an extension of the software vendor’s engineering team that watches over your Kubernetes environment and uses its current state to make decisions in milliseconds. Operators follow a maturity model that ranges from basic functionality to having specific logic for an application. Advanced Operators are designed to handle upgrades seamlessly, react to failures automatically, and not take shortcuts, like skipping a software backup process to save time.

The pieces that are now being launched as the Operator Framework are the culmination of the years of work and experience of our team in building Operators. We’ve seen that Operators’ capabilities differ in sophistication depending on how much intelligence has been added into the implementation logic of the Operator itself. We’ve also learned that the creation of an Operator typically starts by automating an application’s installation and self-service provisioning capabilities, and then evolves to take on more complex automation.

We believe that the new Operator Framework represents the next big step for Kubernetes by using a baseline of leading practices to help lower the application development barrier on Kubernetes. The project delivers a software development kit (SDK) and the ability to manage app installs and updates by using the lifecycle management mechanism, while enabling administrators to exercise Operator capabilities on any Kubernetes cluster.

The Operator Framework: Introducing the SDK, Lifecycle Management, and Metering

The Operator Framework is an open source project that provides developer and runtime Kubernetes tools, enabling you to accelerate the development of an Operator. The Operator Framework includes:

  • Operator SDK: Enables developers to build Operators based on their expertise without requiring knowledge of Kubernetes API complexities.
  • Operator Lifecycle Management: Oversees installation, updates, and management of the lifecycle of all of the Operators (and their associated services) running across a Kubernetes cluster.
  • Operator Metering (joining in the coming months): Enables usage reporting for Operators that provide specialized services.

Operator SDK

The Operator SDK provides the tools to build, test and package Operators. Initially, the SDK facilitates the marriage of an application’s business logic (for example, how to scale, upgrade, or backup) with the Kubernetes API to execute those operations. Over time, the SDK can allow engineers to make applications smarter and have the user experience of cloud services. Leading practices and code patterns that are shared across Operators are included in the SDK to help prevent reinventing the wheel.

Diagram showing a build and test iteration loop with the Operator SDKBuild and test iteration loop with the Operator SDK

Operator Lifecycle Manager

Once built, Operators need to be deployed on a Kubernetes cluster. The Operator Lifecycle Manager is the backplane that facilitates management of operators on a Kubernetes cluster. With it, administrators can control what Operators are available in what namespaces and who can interact with running Operators. They can also manage the overall lifecycle of Operators and their resources, such as triggering updates to both an Operator and its resources or granting a team access to an Operator for their slice of the cluster.

Diagram showing how the lifecycle of multiple applications is managed on a Kubernetes clusterThe lifecycle of multiple applications is managed on a Kubernetes cluster
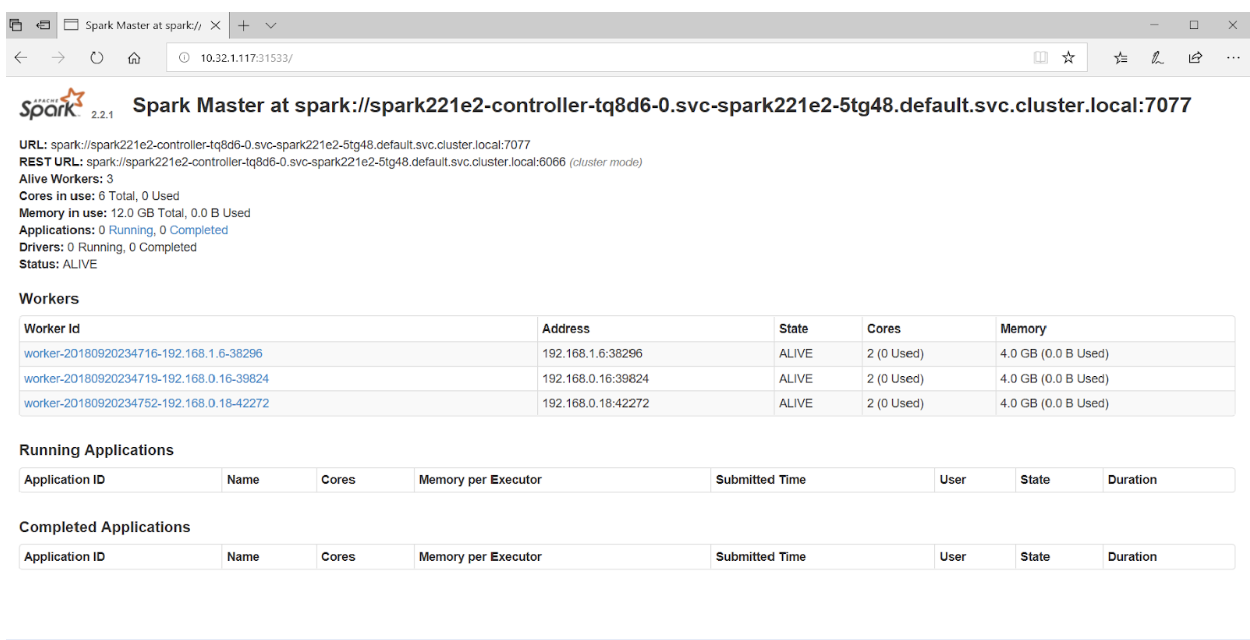
Simple, stateless applications can leverage the Lifecycle Management features of the Operator Framework without writing any code by using a generic Operator (for example, the Helm Operator). However, complex and stateful applications are where an Operator can shine. The cloud-like capabilities that are encoded into the Operator code can provide an advanced user experience, automating such features as updates, backups and scaling.

Operator Metering

In a future version, the Operator Framework will also include the ability to meter application usage – a Kubernetes first, which provides extensions for central IT teams to budget and for software vendors providing commercial software. Operator Metering is designed to tie into the cluster’s CPU and memory reporting, as well as calculate IaaS cost and customized metrics like licensing.

We are actively working on Metering and it will be open-sourced and join the Framework in the coming months.

Operator Framework benefits

If you are a community member, builder, consumer of applications, or a user of Kubernetes overall, the Operator Framework offers a number of benefits.

For builders and the community

Today, there is often a high barrier to entry when it comes to building Kubernetes applications. There are a substantial number of pre-existing dependencies and assumptions, many of which may require experience and technical knowledge. At the same time, application consumers often do not want their services to be siloed across IT footprints with disparate management capabilities (for example, departments with differing tools for auditing, notification, metering, and so on).

The Operator Framework aims to address these points by helping to bring the expertise and knowledge of the Kubernetes community together in a single project that, when used as a standard application package, can make it easier to build applications for Kubernetes. By sharing this Framework with the community, we hope to enable an ecosystem of builders to more easily create their applications on Kubernetes via a common method and also provide a standardized set of tools to build consistent applications.

We believe a proper extension mechanism to Kubernetes shouldn’t be built without the community. To this end, Red Hat has proposed a “platform-dev” Special Interest Group that aligns well with the existing Kubebuilder project from Google and we look forward to working with other industry leaders should this group come to fruition.

“We are working together with Red Hat and the broader Kubernetes community to help enable this ecosystem with an easier way to create and operate their applications on Kubernetes,” said Phillip Wittrock, Software Engineer at Google, Kubernetes community member, and member of the Kubernetes steering committee. “By working together on platform development tools, we strive to make Kubernetes the foundation of choice for container-native apps – no matter where they reside.”

For application consumers and Kubernetes users

For consumers of applications across the hybrid cloud, keeping those applications up to date as new versions become available is of supreme importance, both for security reasons and for managing the applications’ lifecycles and other needs. The Operator Framework helps address these user requirements, aiding in the creation of cloud-native applications that are easier to consume, to keep updated, and to secure.

Get started

Learn more about the Operator Framework at https://github.com/operator-framework. A special thanks to the Kubernetes community for working alongside us. Take a test drive with the code-to-cluster reference example.

If you are at KubeCon 2018 in Europe, join our morning keynote on Thursday, May 3 to learn more about the framework. Can’t attend live? We’ll host an OpenShift Commons briefing on May 23 at 9 AM PT for a deeper dive on all things Operators.

Source

KubeDirector: The easy way to run complex stateful applications on Kubernetes


KubeDirector: The easy way to run complex stateful applications on Kubernetes

Author: Thomas Phelan (BlueData)

KubeDirector is an open source project designed to make it easy to run complex stateful scale-out application clusters on Kubernetes. KubeDirector is built using the custom resource definition (CRD) framework and leverages the native Kubernetes API extensions and design philosophy. This enables transparent integration with Kubernetes user/resource management as well as existing clients and tools.

We recently introduced the KubeDirector project, as part of a broader open source Kubernetes initiative we call BlueK8s. I’m happy to announce that the pre-alpha
code for KubeDirector is now available. And in this blog post, I’ll show how it works.

KubeDirector provides the following capabilities:

  • The ability to run non-cloud native stateful applications on Kubernetes without modifying the code. In other words, it’s not necessary to decompose these existing applications to fit a microservices design pattern.
  • Native support for preserving application-specific configuration and state.
  • An application-agnostic deployment pattern, minimizing the time to onboard new stateful applications to Kubernetes.

KubeDirector enables data scientists familiar with data-intensive distributed applications such as Hadoop, Spark, Cassandra, TensorFlow, Caffe2, etc. to run these applications on Kubernetes – with a minimal learning curve and no need to write GO code. The applications controlled by KubeDirector are defined by some basic metadata and an associated package of configuration artifacts. The application metadata is referred to as a KubeDirectorApp resource.

To understand the components of KubeDirector, clone the repository on GitHub using a command similar to:

git clone http://<userid>@github.com/bluek8s/kubedirector.

The KubeDirectorApp definition for the Spark 2.2.1 application is located
in the file kubedirector/deploy/example_catalog/cr-app-spark221e2.json.

~> cat kubedirector/deploy/example_catalog/cr-app-spark221e2.json
{
“apiVersion”: “kubedirector.bluedata.io/v1alpha1”,
“kind”: “KubeDirectorApp”,
“metadata”: {
“name” : “spark221e2”
},
“spec” : {
“systemctlMounts”: true,
“config”: {
“node_services”: [
{
“service_ids”: [
“ssh”,
“spark”,
“spark_master”,
“spark_worker”
],

The configuration of an application cluster is referred to as a KubeDirectorCluster resource. The
KubeDirectorCluster definition for a sample Spark 2.2.1 cluster is located in the file
kubedirector/deploy/example_clusters/cr-cluster-spark221.e1.yaml.

~> cat kubedirector/deploy/example_clusters/cr-cluster-spark221.e1.yaml
apiVersion: “kubedirector.bluedata.io/v1alpha1”
kind: “KubeDirectorCluster”
metadata:
name: “spark221e2”
spec:
app: spark221e2
roles:
– name: controller
replicas: 1
resources:
requests:
memory: “4Gi”
cpu: “2”
limits:
memory: “4Gi”
cpu: “2”
– name: worker
replicas: 2
resources:
requests:
memory: “4Gi”
cpu: “2”
limits:
memory: “4Gi”
cpu: “2”
– name: jupyter

Running Spark on Kubernetes with KubeDirector

With KubeDirector, it’s easy to run Spark clusters on Kubernetes.

First, verify that Kubernetes (version 1.9 or later) is running, using the command kubectl version

~> kubectl version
Client Version: version.Info
Server Version: version.Info

Deploy the KubeDirector service and the example KubeDirectorApp resource definitions with the commands:

cd kubedirector
make deploy

These will start the KubeDirector pod:

~> kubectl get pods
NAME READY STATUS RESTARTS AGE
kubedirector-58cf59869-qd9hb 1/1 Running 0 1m

List the installed KubeDirector applications with kubectl get KubeDirectorApp

~> kubectl get KubeDirectorApp
NAME AGE
cassandra311 30m
spark211up 30m
spark221e2 30m

Now you can launch a Spark 2.2.1 cluster using the example KubeDirectorCluster file and the
kubectl create -f deploy/example_clusters/cr-cluster-spark211up.yaml command.
Verify that the Spark cluster has been started:

~> kubectl get pods
NAME READY STATUS RESTARTS AGE
kubedirector-58cf59869-djdwl 1/1 Running 0 19m
spark221e2-controller-zbg4d-0 1/1 Running 0 23m
spark221e2-jupyter-2km7q-0 1/1 Running 0 23m
spark221e2-worker-4gzbz-0 1/1 Running 0 23m
spark221e2-worker-4gzbz-1 1/1 Running 0 23m

The running services now include the Spark services:

~> kubectl get service
NAME TYPE CLUSTER-IP EXTERNAL-IP PORT(S) AGE
kubedirector ClusterIP 10.98.234.194 <none> 60000/TCP 1d
kubernetes ClusterIP 10.96.0.1 <none> 443/TCP 1d
svc-spark221e2-5tg48 ClusterIP None <none> 8888/TCP 21s
svc-spark221e2-controller-tq8d6-0 NodePort 10.104.181.123 <none> 22:30534/TCP,8080:31533/TCP,7077:32506/TCP,8081:32099/TCP 20s
svc-spark221e2-jupyter-6989v-0 NodePort 10.105.227.249 <none> 22:30632/TCP,8888:30355/TCP 20s
svc-spark221e2-worker-d9892-0 NodePort 10.107.131.165 <none> 22:30358/TCP,8081:32144/TCP 20s
svc-spark221e2-worker-d9892-1 NodePort 10.110.88.221 <none> 22:30294/TCP,8081:31436/TCP 20s

Pointing the browser at port 31533 connects to the Spark Master UI:

kubedirector

That’s all there is to it!
In fact, in the example above we also deployed a Jupyter notebook along with the Spark cluster.

To start another application (e.g. Cassandra), just specify another KubeDirectorApp file:

kubectl create -f deploy/example_clusters/cr-cluster-cassandra311.yaml

See the running Cassandra cluster:

~> kubectl get pods
NAME READY STATUS RESTARTS AGE
cassandra311-seed-v24r6-0 1/1 Running 0 1m
cassandra311-seed-v24r6-1 1/1 Running 0 1m
cassandra311-worker-rqrhl-0 1/1 Running 0 1m
cassandra311-worker-rqrhl-1 1/1 Running 0 1m
kubedirector-58cf59869-djdwl 1/1 Running 0 1d
spark221e2-controller-tq8d6-0 1/1 Running 0 22m
spark221e2-jupyter-6989v-0 1/1 Running 0 22m
spark221e2-worker-d9892-0 1/1 Running 0 22m
spark221e2-worker-d9892-1 1/1 Running 0 22m

Now you have a Spark cluster (with a Jupyter notebook) and a Cassandra cluster running on Kubernetes.
Use kubectl get service to see the set of services.

~> kubectl get service
NAME TYPE CLUSTER-IP EXTERNAL-IP PORT(S) AGE
kubedirector ClusterIP 10.98.234.194 <none> 60000/TCP 1d
kubernetes ClusterIP 10.96.0.1 <none> 443/TCP 1d
svc-cassandra311-seed-v24r6-0 NodePort 10.96.94.204 <none> 22:31131/TCP,9042:30739/TCP 3m
svc-cassandra311-seed-v24r6-1 NodePort 10.106.144.52 <none> 22:30373/TCP,9042:32662/TCP 3m
svc-cassandra311-vhh29 ClusterIP None <none> 8888/TCP 3m
svc-cassandra311-worker-rqrhl-0 NodePort 10.109.61.194 <none> 22:31832/TCP,9042:31962/TCP 3m
svc-cassandra311-worker-rqrhl-1 NodePort 10.97.147.131 <none> 22:31454/TCP,9042:31170/TCP 3m
svc-spark221e2-5tg48 ClusterIP None <none> 8888/TCP 24m
svc-spark221e2-controller-tq8d6-0 NodePort 10.104.181.123 <none> 22:30534/TCP,8080:31533/TCP,7077:32506/TCP,8081:32099/TCP 24m
svc-spark221e2-jupyter-6989v-0 NodePort 10.105.227.249 <none> 22:30632/TCP,8888:30355/TCP 24m
svc-spark221e2-worker-d9892-0 NodePort 10.107.131.165 <none> 22:30358/TCP,8081:32144/TCP 24m
svc-spark221e2-worker-d9892-1 NodePort 10.110.88.221 <none> 22:30294/TCP,8081:31436/TCP 24m

Get Involved

KubeDirector is a fully open source, Apache v2 licensed, project – the first of multiple open source projects within a broader initiative we call BlueK8s.
The pre-alpha code for KubeDirector has just been released and we would love for you to join the growing community of developers, contributors, and adopters.
Follow @BlueK8s on Twitter and get involved through these channels:

Source

native x509 certificate management for Kubernetes // Jetstack Blog

2/May 2018

By James Munnelly

Those of you who closely follow Jetstack’s open source projects may have already noticed that our
new certificate management tool, cert-manager, has been available for some time now.
In fact, we now have over 1,000 stars on GitHub!

Cert-manager is a general purpose x509 certificate management tool for Kubernetes.
In today’s modern web, securing application traffic is critical.
cert-manager aims to simplify management, issuance and renewal of certificates within your
organisation.

kube-lego, our original Let’s Encrypt certificate provisioning
tool for Kubernetes Ingress resources, has been a great success.
It makes securing traffic between your users and your cluster ingress point simple.
Over time however, the limitations of building a controller solely around Kubernetes Ingresses
became apparent.

By building cert-manager around Kubernetes CustomResourceDefinitions, we have been able to
greatly increase the flexibility of configuration, debugging capabilities and also support a wider
range of CAs than Let’s Encrypt alone.

This post is a high-level overview of how cert-manager works, and will highlight
some of the new features and recent developments in the project.

In the real world of x509 certificates, CAs (Certificate Authorities) are a point of trust, responsible
for issuing identities to various clients in the form of signed and trusted x509 certificates.

Let’s Encrypt introduced the ACME protocol, however, not all CAs support this protocol.

In order to support many different types of certificate authority, we have introduced the concept of
a CA to the Kubernetes API, in the form of ‘Issuers’.

A cert-manager ‘Issuer’ resource represents an entity that is able to sign x509 Certificate
requests.

Today, we support ACME, CA (i.e. a simple signing keypair stored in a Secret resource) and as of
the v0.3.0 release, Hashicorp Vault!

Here’s an example of an issuer resource:

apiVersion: certmanager.k8s.io/v1alpha1
kind: ClusterIssuer
metadata:
name: letsencrypt-staging
spec:
acme:
server: https://acme-staging-v02.api.letsencrypt.org/directory
email: user@example.com
privateKeySecretRef:
name: letsencrypt-private-key
http01: {}

In order to request certificates from these Issuers, we also introduce Certificate resources.
These resources reference a corresponding Issuer resource in order to denote which CA they should
be issued by.

Here’s an example of a certificate resource, using the issuer shown previously:

apiVersion: certmanager.k8s.io/v1alpha1
kind: Certificate
metadata:
name: example-com
spec:
secretName: example-com-tls
dnsNames:
– example.com
– www.example.com
issuerRef:
name: letsencrypt-staging
kind: ClusterIssuer
acme:
config:
– http01:
ingressClass: nginx
domains:
– example.com
– www.example.com

More info on Issuers and Certificates can be found in our documentation.

Over the last few weeks, we have been trialling an alpha release candidate of v0.3,
our upcoming new release.

This release is packed with new features and bug fixes alike, and this section describes
the headline features.

ACMEv2 and wildcard certificates

Let’s Encrypt recently announced v2 of the ACME protocol, which amongst other improvements,
now supports wildcard certificates. This has been a long-awaited and requested feature,
and one that hasn’t been possible until recently.

In order to allow cert-manager users to request and consume wildcard certificates, we have
switched exclusively to use ACMEv2 as part of the v0.3 release.

This allows users to request wildcard certificates just like any other – including full support
for doing so via annotated Ingress resources (just like kube-lego!).

This is a great example of how we can add new and more complex features to cert-manager, whilst
also continuing to support long-standing, legacy behaviour adopted from kube-lego.

If you’d like to get started and give this a try, check out the latest v0.3 alpha release
on our GitHub page. You can request a wildcard certificate just like any other, by specifying
*.domain.com as one of your DNS names. See the ACME DNS validation tutorial for more information
on how to get started with the DNS-01 challenge.

Vault Issuer support

After a lot of hard work, initial support for Hashicorp Vault has been merged into cert-manager!

This is another long requested feature, and a large addition to our set of supported Issuer types.

A special thanks to @vdesjardins, who single handedly and unprompted undertook this work, driving
it through the review process to the very end.

This allows end users to create a ‘Vault’ Issuer, which is paired with a single Vault PKI backend role.

Initially we support both token authentication and Vault’s ‘AppRole’ authentication mechanism
to securely authorize cert-manager against the Vault server.

The addition of the Vault Issuer bolsters our position as a general purpose certificate
manager, and shows the value in providing a single clean abstraction on top of the multitude
of different types of CAs out there.

Read more about creating and using the Vault Issuer at the docs.

New documentation site

Within any project, documentation is tough. It needs to provide a clear onboarding experience
for brand new users, as well as in-depth details for more advanced users. All the while accounting
for the varying skill levels of these users (for example, some may also be brand new to Kubernetes
itself!).

We’ve had some brilliant community contributions with user guides and tutorials explaining how
to get started with cert-manager.

Up until now, we have used markdown stored in GitHub to host our documentation.
This began to cause confusion when we started versioning cert-manager more strictly, and
releasing alpha/beta release candidates.
In order to handle this, and also to make it easier for users to navigate and discover the
various tutorials we do have – we have moved our documentation over to a hosted readthedocs
website.

You can check out the new docs on readthedocs – take note
that we have a ‘version switcher’ in the bottom left as well, if you are looking for info on the
latest 0.3 release.

Each page in the docs also has an “Edit in GitHub” link on the top right, so if you spot a mistake
or if you’ve got an idea for a new tutorial please dive in and submit PRs!

Cert-manager is still young, with much planned in the future! Here are a couple of highlights
from our roadmap:

Defining Policy on Certificates

Right now, any user that is able to create a Certificate resource can request certificates
of any sort from any ClusterIssuer, or Issuer within the same namespace.

We intend to provide mechanisms for administrators to define ‘policies’ for who can obtain
Certificates, and/or how those Certificates must be structured. This might include things such
as minimum and maximum durations, or a limited set of allowed DNS names.

By defining this policy within Kubernetes itself, we benefit from a common level of policy
control between all the different CAs within an organisation.
This will help your organisation audit and manage who can do what.

Advanced resource validation

Kubernetes has recently added support for ValidatingAdmissionWebhooks (as well as their ‘Mutating’ counterparts).

These can be used to provide resource validation (e.g. ensuring that all fields are set to
acceptable values), as well as advanced ‘mutation’ of resources (e.g. applying ‘default values’).

One common problem when configuring these webhooks, is that they require x509 Certificates in order
to be set up and run. This process can be cumbersome, and is exactly the sort of problem cert-manager
has been designed to solve!

In future releases of cert-manager, we will introduce our own Validating webhook in
order to provide fore-warning to developers of invalid configurations. This will involve
a novel ‘bootstrapping’ process in order to allow for ‘self hosted webhooks’ (i.e. webhooks that
power cert-manager, hosted by cert-manager).

Along with this, we will be creating tutorials that explain our ‘recommended deployment practice’
for these kinds of webhooks, and how you can utilise cert-manager to handle all aspects of securing them!

Pluggable/out-of-process Issuers

Some enterprise users of cert-manager have their own CA process, which is novel and bespoke
to their organisation.

It is not always feasible to switch a whole organisation over to a new protocol in a short period,
given so many different business units rely on a x509 Certificate platform.

In order to ease the transition period for these companies, we are exploring the addition
of a ‘gRPC based Issuer’.
This is in a similar vein to CNI (Container Networking Interface) and CRI (Container Runtime Interface).
The goal would be to provide a general purpose gRPC interface that anyone can implement
in order to sign and renew certificates.

Users that implement this interface will then immediately benefit from the additional
policy and renewal features that cert-manager already implements.

Cert-manager is growing quickly, and the community around it bolsters every day.

We’d love to see new members join the community, and believe it’s imperative if we
want the project to survive.

If you want to get involved, take a look over our Issue board on GitHub, or drop into
#cert-manager on the Kubernetes Slack and say hello!

Want to work on community projects like cert-manager for your day job?
Jetstack are hiring Software Engineers, including remote (EU) roles. Check out our careers page
for more info on the roles and how to apply.

Source

Moving the needle on kubeadm in Kubernetes 1.11 – Heptio

Kubernetes 1.11 was released last week — it was a huge accomplishment for everyone involved and the release includes a swath of new functionality. A key focus area for Heptio is making Kubernetes easier to deploy and upgrade, and part of that work includes making improvements to Heptio’s preferred tool for bootstrapping a Kubernetes cluster, kubeadm.

SIG-Cluster-Lifecycle leads the development on kubeadm, and Heptio was heavily involved in this group (which includes contributors such as Lucas Käldström, Leigh Schrandt, Lubomir Ivanov, Peter (XiangPeng) Zhao, Rostislav Georgiev, and Di Xu) to bring about some important improvements in 1.11.

In this post, we cover what kubeadm is, why Heptio recommends kubeadm, and how we are working with the Kubernetes community to move kubeadm forward.

What is kubeadm and when should I use it?

kubeadm is a tool included in every Kubernetes release that helps users set up a best-practice Kubernetes cluster. kubeadm provides support along the entire lifecycle of a Kubernetes cluster including creation, upgrade, and teardown.

Due to the variety of ways in which machines can be provisioned, the scope of kubeadm is intentionally limited to bootstrapping rather than provisioning — it is intended to be a building block, and higher level tools take advantage of kubeadm. kubeadm allows these higher level tools to ensure clusters are conformant and look as much alike as possible. Setting up add-ons such as CNI, the Kubernetes dashboard, and monitoring tools is outside the scope of kubeadm.

Check out the kubeadm repository and docs for more information.

Why does Heptio recommend kubeadm?

kubeadm is the primary deployment tool Heptio recommends for bootstrapping a Kubernetes cluster, based on some key advantages:

  • Ease of use. kubeadm supports creation, upgrade, and teardown, and is a relatively easy tool for new users to adopt.
  • Use on any infrastructure. Heptio customers need to deploy Kubernetes across a wide variety of infrastructure — including bare metal, VMware, AWS, Azure, GCE, and more. It’s important that a cluster created on one platform looks like another created somewhere else. We even created Heptio Sonobuoy to test conformance so you can be sure that clusters were set up correctly and will behave as expected on any infrastructure.
  • Extendable. Heptio customers have unique enterprise requirements. kubeadm provides a phases command that allows you to execute steps individually, so you can customize actions as needed.
  • Production ready. kubeadm rolls out secure Kubernetes clusters — adopting best practices such as enforcing RBAC, using secure communication between the control plane components and between the API server and kubelets, locking down the kubelet API, and more.
  • Community contributions. kubeadm has become one of the most common ways to deploy Kubernetes, and as a result the community has rallied to harden kubeadm and make inroads on every release.

So where does kubeadm fit into a complete deployment solution for Heptio customers? kubeadm is not a one-click-install solution. As stated above, kubeadm is intended to be a building block and part of a larger solution. Heptio is investing significantly in this area to bring a declarative, API-driven model to cluster creation and operations, where clusters are treated as immutable (i.e. upgrades equate to a new deployment versus an in-place upgrade). Heptio plans to leverage and contribute to the upstream work on the Cluster API to make this real. More will be shared in the future.

What’s new in kubeadm in 1.11?

SIG-Cluster-Lifecycle leads the development on kubeadm and is focused on making Kubernetes easier to deploy and operate. Some key improvements the community brought to kubeadm in 1.11 include:

  • A step-by-step guide to build an HA Kubernetes deployment with stacked masters (e.g. etcd members and control plane nodes are co-located). An external etcd cluster is also available as an option.
  • An upgraded API version for the configuration file, v1alpha2. kubeadm will still be able to read v1alpha1 configuration, and will automatically convert the configuration to v1alpha2. This is a necessary step for kubeadm to align with the Cluster API work mentioned above.
  • The first step towards a fully dynamic kubelet configuration — kubelet config allows overrides via config-map for a host of features for a kubelet, but includes a set of defaults that remove manual steps involved when initializing or joining across different host OSs and CRI implementations.
  • Replacement of kube-dns by CoreDNS as the default DNS provider, which is valuable for users that have scaled out deployments. Existing deployments will automatically upgrade to CoreDNS via kubeadm.
  • Better CRI integration (including auto detection for other CRI runtimes than Docker) and support for air-gapped environments.
  • New CLI commands that are helpful for people setting up clusters, including: kubeadm config print-default, kubeadm config migrate, kubeadm config images list, kubeadm config images pull, and kubeadm upgrade node config.
  • Several bug fixes, most notably: a fix for a security issue for etcd by closing the peer port that was previously left insecure, and additional security in the kubelet configuration.

A team of amazing Heptio engineers (including Tim St. Clair, Jason DeTiberus, Chuck Ha, Liz Frost, Ruben Orduz, and Jennifer Rondeau) were key contributors to SIG-Cluster-Lifecycle in bringing out these important additions to kubeadm in 1.11. In particular, Tim St. Clair does an incredible amount of work for this group by grooming and triaging issues and reviewing pull requests. It is important for Heptio to do this work upstream, so everyone in the community can rally around a common Kubernetes bootstrapping method which can provide for semantic consistency across environments.

See a full list of 1.11 kubeadm changes here.

What’s next for kubeadm?

The key focus areas for development moving forward are high availability and general availability (GA) of kubeadm. While users can achieve high availability with kubeadm manually today, the community is focused on bringing native support for things like replicated etcd and multiple, redundant API servers and other control plane components. GA will require some key additions such as getting the config API to v1beta1 (to ensure supported migrations and deprecation guarantees), support for reading multiple YAML documents, HA capabilities (both etcd and masters), and alignment with the Cluster API spec.

Heptio is fully committed to making Kubernetes easier to deploy and operate, and we will make continued investments in kubeadm and other tooling to bring those capabilities to everyone.

Interested in learning how Heptio can help you deploy and operate Kubernetes more efficiently, and take advantage of the innovation in kubeadm and other tools? Check out our Heptio Kubernetes Subscription (HKS) and consulting offerings, or reach out to us directly.

Source