
fdisk
is a tool for partitioning hard drives (HDDs), solid state drives (SSDs), USB thumb drives etc. The best thing about fdisk is that it is installed by default on almost every Linux distribution these days. Fdisk is also very easy to use.
In this article, I will show you how to use fdisk to partition storage devices such as HDDs, SSDs, and USB thumb drives in Linux. So, let’s get started.
In Linux, the block devices or hard drives has unique identifiers such as sda, sdb, sdc etc. Before you start partitioning your hard drive, you must make sure that you’re partitioning the right one. Otherwise, you may lose data in the process.
You can use fdisk to list all the storage/block devices on your Linux computer with the following command:
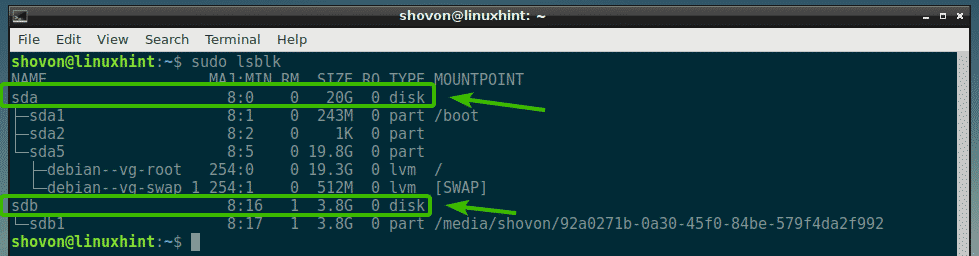
As you can see, I have a hard drive (sda) and a USB thumb drive (sdb) attached to my computer. The lsblk command also lists the partitions. The raw storage device has the TYPE disk. So, make sure you don’t use a partition identifier instead of raw disk identifier.
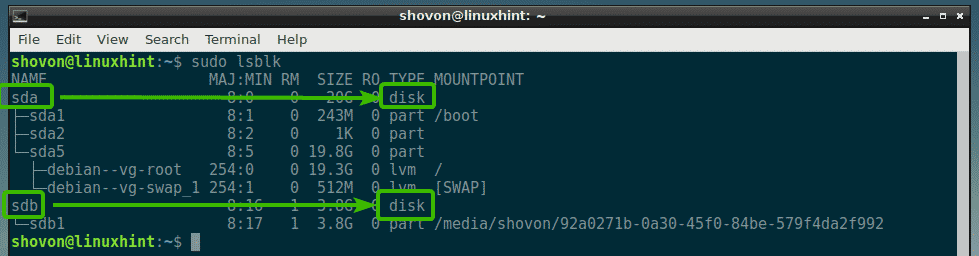
As you can see, the hard drive (sda) is 20GB in size and the USB thumb drive (sdb) is 3.8GB in size.
You can access the device identifier, let’s say sdb, as /dev/sdb.
In the next section, I will show you how to open it with fdisk.
Opening Storage Devices with fdisk:
To open a storage/block device with fdisk, first, you have to make sure that none of its partition is mounted.
Let’s say, you want to open your USB thumb drive /dev/sdb with fdisk. But, it has a single partition /dev/sdb1, which is mounted somewhere on your computer.
To unmount /dev/sdb1, run the following command:

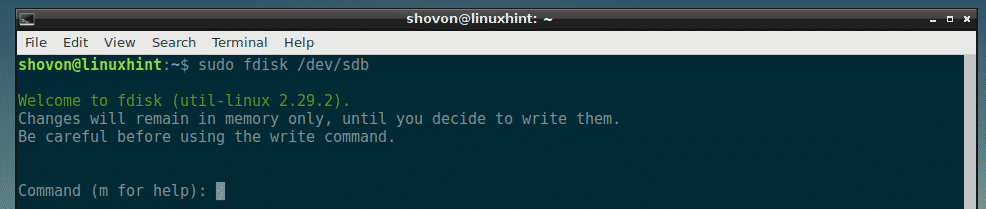
Now, open /dev/sdb with fdisk with the following command:

As you can see, /dev/sdb storage/block device is opened with fdisk.
In the next sections, I will show you how to use the fdisk command line interface to do common partitioning tasks.
Listing Existing Partitions with fdisk:
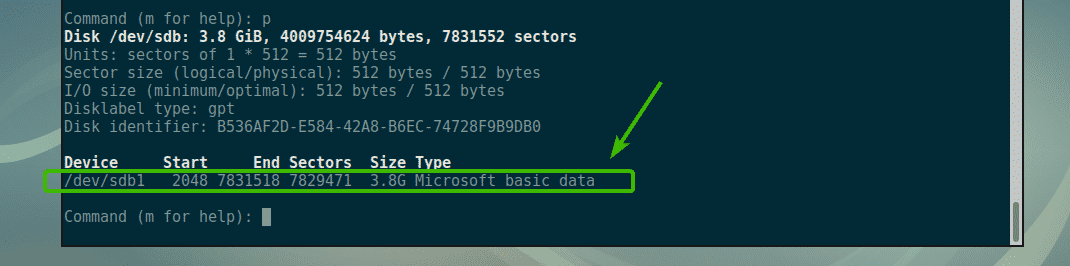
You can press p and then press <Enter> to list all the existing partitions of the storage/block device you opened with fdisk.
As you can see in the screenshot below, I have a single partition.
Creating a New Partition Table with fdisk:
A partition table holds information about the partition of your hard drive, SSD or USB thumb drive. DOS and GPT are the most common types of partition table.
DOS is an old partition table scheme. It is good for small size storage devices such as a USB thumb drive. In a DOS partition table, you can’t create more than 4 primary partitions.
GPT is the new partition table scheme. In GPT, you can have more than 4 primary partitions. It is good for big storage devices.
With fdisk, you can create both DOS and GPT partition table.
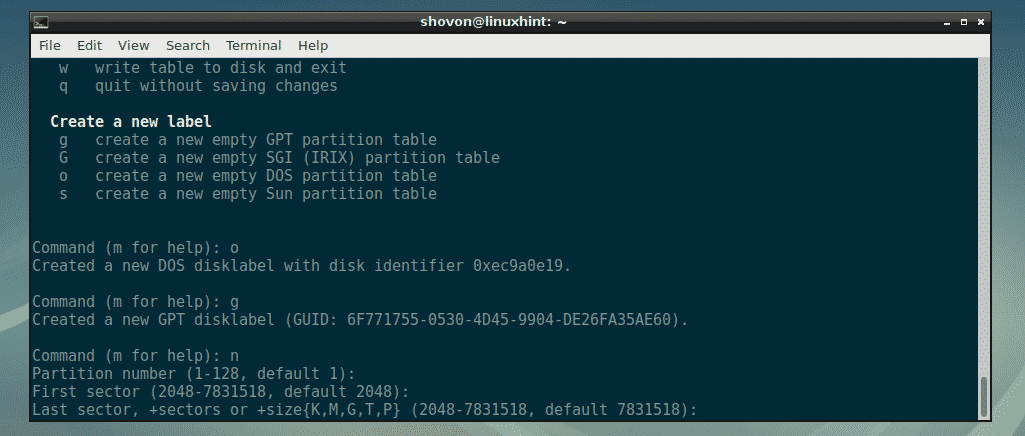
To create a DOS partition table, press o and then press <Enter>.

To create a GPT partition table, press g and then press <Enter>.

Creating and Removing Partitions with fdisk:
To create a new partition with fdisk, press n and then press <Enter>.
Now, enter the partition number and press <Enter>. Usually, the default partition number is okay. So, you can just leave it as it is unless you want to do something very specific.

Now, enter the sector number on your hard drive from which you want the partition to start from. Usually, the default value is alright. So, just press <Enter>.

The last sector number or size is the most important here. Let’s say, you want to create a partition of size 100 MB, you just type in +100M here. For 1GB, you type in +1G here. The same way, for 100KB, +1K. For 2TB, +2T. For 2PT, +2P. Very simple. Don’t type in fractions here, only type in real numbers. Otherwise, you will get an error.
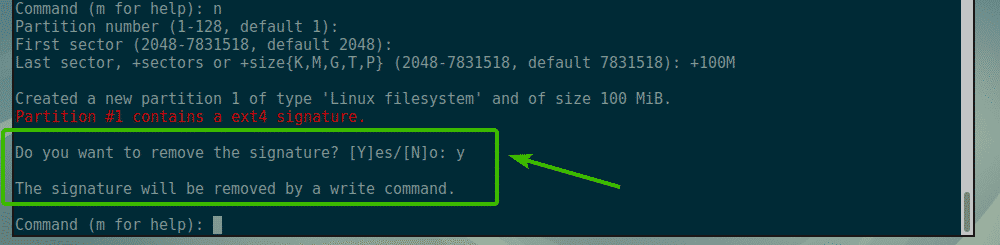
As you can see, I created a 100MB partition. The partition is created.

If you had a partition that started and ended in the same sector before, you may see something like this. Just, press y and then press <Enter> to remove the partition signature.

As you can see, fdisk tells you that when you write the changes, the signature will be removed.
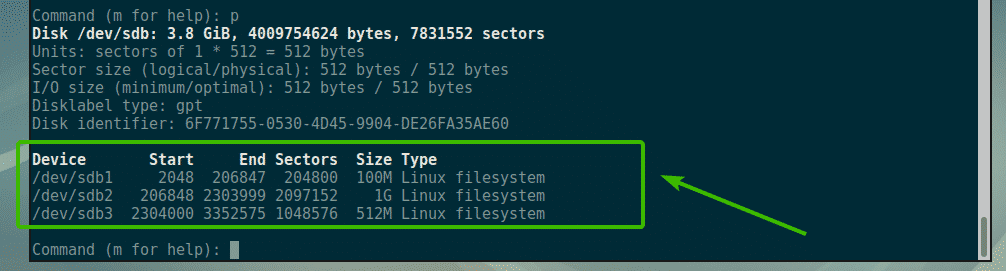
I am going to create another partition of 1GB in size.

I am going to create another 512MB partition just to show you how to remove partitions with fdisk.

Now, if you list the partitions, you should be able to see the partitions that you created. As you can see, the 100MB, 1GB and 512MB partitions that I just created are listed here.
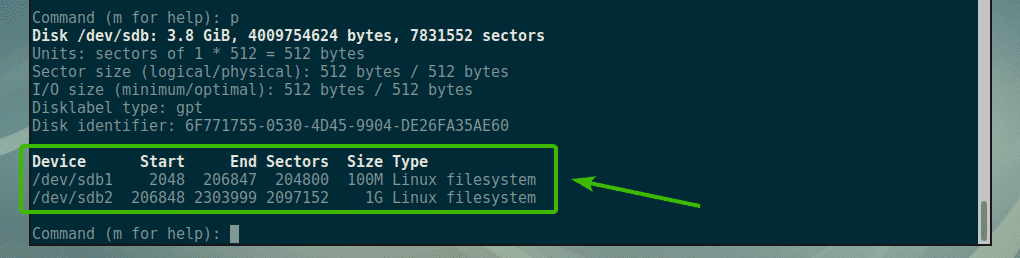
Now, let’s say you want to delete the third partition /dev/sdb3 or the 512MB partition. To do that, press d and then press <Enter>. Now, type in the partition number and press <Enter>. In my case, it is the partition number 3.

As you can see, partition number 3 is deleted.

As you can see, the 512MB partition or the 3rd partition is no more.
To permanently save the changes to the disk, press w and then press <Enter>. The partition table should be saved.

Formatting and Mounting Partitions:
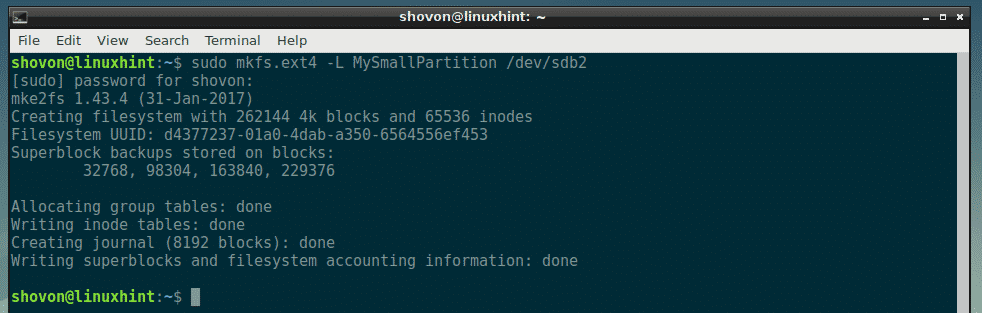
Now that you’ve created some partitions using fdisk, you can format it and start using them. To format the second partition, let’s say /dev/sdb2, to ext4 filesystem, run the following command:
$ sudo mkfs.ext4 -L MySmallPartition /dev/sdb2
NOTE: Here, MySmallPartition is the label for the /dev/sdb2 partition. You can put anything meaningful here that describes what this partition is for.

The partition is formatted to ext4 filesystem.
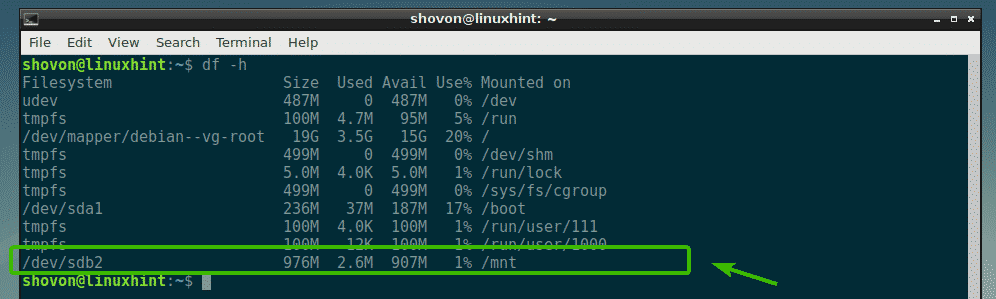
Now that the partition /dev/sdb2 is formatted to ext4, you can use the mount command to mount it on your computer. To mount the partition /dev/sdb2 to /mnt, run the following command:
$ sudo mount /dev/sdb2 /mnt

As you can see, the partition /dev/sdb2 is mounted successfully to /mnt mount point.
So, that’s how you use fdisk in Linux to partition disks in Linux. Thanks for reading this article.