VLC (VideoLAN Client) is an open source and free simple fast and much powerful cross-platform player and framework for playing most of multimedia files like CD, DVD, VCD, Audio CD and other various supported streaming media protocols.
It was written by the VideoLAN project and can be available for all operating platforms such as Windows, Linux, Solaris, OS X, Android, iOS and other supported operating systems.
Recently, VideoLan team announced the major release of VLC 3.0 with some new features, number of improvements and bug fixes.
VLC 3.0 Features
- VLC 3.0 “Vetinari” is a new major update of VLC
- Activates hardware decoding by default, to get 4K and 8K playback!
- It supports 10bits and HDR
- Supports 360 video and 3D audio, up to Ambisonics 3rd order
- Allows audio passthrough for HD audio codecs
- Stream to Chromecast devices, even in formats not supported natively
- Supports browsing of local network drives and NAS
Find out all the changes in VLC 3.0 in the release announcement page.
This is our ongoing Best Linux Players series, in this article, we will show you how to install latest version of VLC 3.0 Media Player in RHEL 7/6, CentOS 7/6 and Fedora 27-22 systems using third party repositories with Yum automated package installer.
Suggested Read: 10 Best Open Source Video Players For Linux in 2015
Install VLC 3.0 Media Player in RHEL/CentOS and Fedora
VLC program doesn’t included in the RHEL/CentOS based operating systems, we need to install it using third party repositories like RPM Fusion and EPEL. With the help of these repositories we can install list of all updated packages automatically using YUM package manager tool.
Suggested Read: Install Latest VLC Media Player in Debian, Ubuntu and Linux Mint
Install RPM Fusion and EPEL Repositories on RHEL/CentOS
First, install Epel and RPM Fusion repository for your RHEL/CentOS based distribution using following commands. Please select and install it according to your Linux supported system versions.
For RHEL/CentOS 7
# yum install https://dl.fedoraproject.org/pub/epel/epel-release-latest-7.noarch.rpm
# yum install https://download1.rpmfusion.org/free/el/rpmfusion-free-release-7.noarch.rpm
For RHEL/CentOS 6
# yum install https://dl.fedoraproject.org/pub/epel/epel-release-latest-6.noarch.rpm
# yum install https://download1.rpmfusion.org/free/el/rpmfusion-free-release-6.noarch.rpm
Installing RPMFusion Repository on Fedora
Under Fedora distributions, the RPMFusion repository comes as pre-installed, if not you can follow below commands install and enable it as shown:
For Fedora 27-22
# dnf install https://download1.rpmfusion.org/free/fedora/rpmfusion-free-release-$(rpm -E %fedora).noarch.rpm
Check the Availability of VLC in RHEL/CentOS/Fedora
Once you’ve all the repositories installed on your system, do the following command to check the availability of VLC player.
# yum info vlc
# dnf info vlc         [On Fedora 26+ releases]
Sample Output :
Last metadata expiration check: 0:32:38 ago on Friday 11 August 2017 12:32:02 PM IST.
Available Packages
Name         : vlc
Version      : 3.0.0
Release      : 0.29.git20170622.fc26
Arch         : i686
Size         : 2.0 M
Source       : vlc-3.0.0-0.29.git20170622.fc26.src.rpm
Repo         : rpmfusion-free
Summary      : The cross-platform open-source multimedia framework, player and server
URL          : http://www.videolan.org
License      : GPLv2+
Description  : VLC media player is a highly portable multimedia player and multimedia framework
             : capable of reading most audio and video formats as well as DVDs, Audio CDs VCDs,
             : and various streaming protocols.
             : It can also be used as a media converter or a server to stream in uni-cast or
             : multi-cast in IPv4 or IPv6 on networks.
Installing VLC Player in RHEL/CentOS/Fedora
As you see the VLC player is available, so install it by running the following command on the terminal.
# yum install vlc
# dnf install vlc       [On Fedora 26+ releases]
Starting VLC Player in RHEL/CentOS/Fedora
Run the following command from the Desktop terminal as normal user to Launch the VLC player. (Note : VLC is not supposed to be run as root user). if you wish, follow this article to run VLC as root user.
$ vlc
VLC Player Preview
See the preview of VLC Player under my CentOS 7 system.
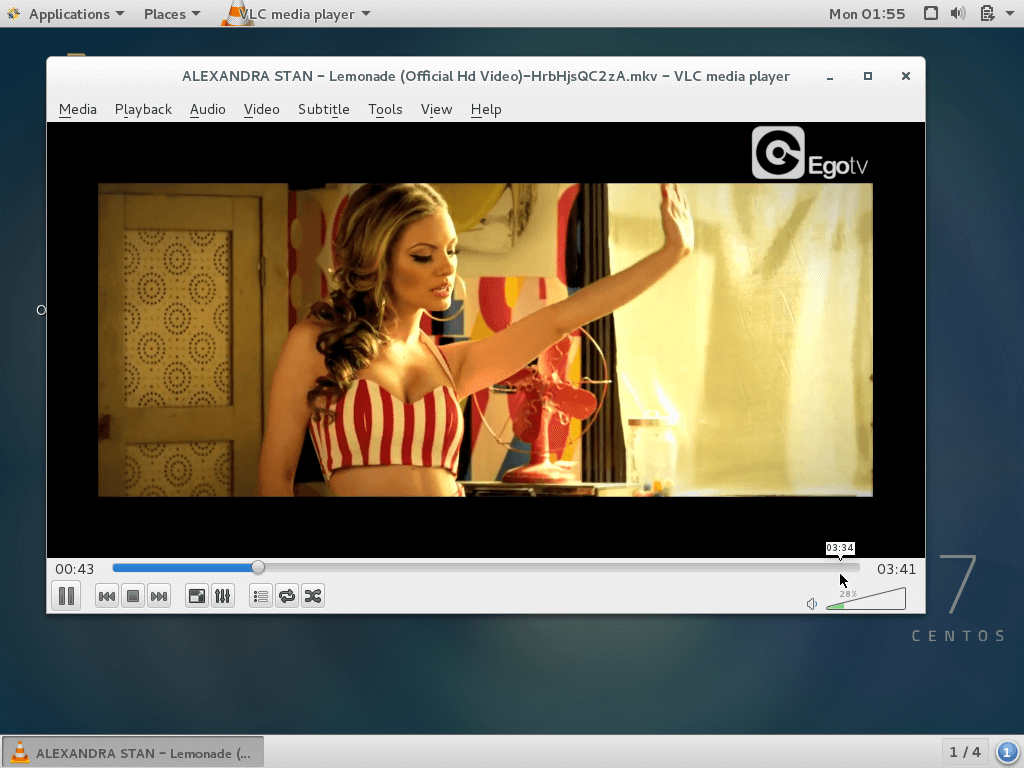
VLC Preview in CentOS 7

VLC Preview in CentOS 7
Updating VLC Player in RHEL/CentOS/Fedora
If you would like to Update or Upgrade VLC player to latest stable version, use the following command.
# yum update vlc
# dnf update vlc      [On Fedora 26+ releases]