At the core of OpenFaaS is a community which is trying to Make Serverless Functions Simple for Docker and Kubernetes. In this blog post I want to show you the new Java template released today which brings Serverless functions to Java developers.

If you’re not familiar with the OpenFaaS CLI, it is used to generate new files with everything you need to start building functions in your favourite programming language.
The new template made available today provides Java 9 using the OpenJDK, Alpine Linux and gradle as a build system. The serverless runtimes for OpenFaaS uses the new accelerated watchdog built out in the OpenFaaS Incubator organisation on GitHub.
Quickstart
First of all, set up OpenFaaS on your laptop or the cloud with Kubernetes or Docker Swarm. Follow the quickstart here
Checklist:
- I have my API Gateway URL
- I’ve installed the faas-cli
- I have Docker installed
- I have a Docker Hub account or similar local Docker registry available
I recommend using Visual Studio Code to edit your Java functions. You can also install the Java Extension Pack from Microsoft.
Generate a Java function
You can pull templates from any supported GitHub repository, this means that teams can build their own templates for golden Linux images needed for compliance in the enterprise.
$ faas-cli template pull
You can list all the templates you’ve downloaded like this:
$ faas-cli new –list
…
java8
…
Tip: Before we get started, sign up for a Docker Hub accout, or log into your own local Docker registry.
Below update username=alexellis2 to your Docker Hub user name or private registry address. Now generate a new Java function using the faas-cli which you should have installed.
export username=alexellis2
mkdir -p blog
cd blog
faas-cli new –lang java8 hello-java –prefix=$username
This generates several files:
- build.gradle – specify any other JAR files or code repositories needed
- settings.gradle – specify any other build settings needed
You then get a function Handler.java and HandlerTest.java file in the ./src folder.
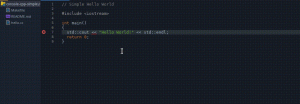
package com.openfaas.function;
import com.openfaas.model.IHandler;
import com.openfaas.model.IResponse;
import com.openfaas.model.IRequest;
import com.openfaas.model.Response;
public class Handler implements com.openfaas.model.IHandler {
public IResponse Handle(IRequest req) {
Response res = new Response();
res.setBody(“Hello, world!”);
return res;
}
}
Contents of ./hello-java/src/main/java/com/openfaas/function/Handler.java
Build and deploy the function
Now use the faas-cli to build the function, you will see gradle kick in and start downloading the dependencies it needs:
faas-cli build -f hello-java.yml
If you are running on Kubernetes, then you may need to pass the –gateway flag with the URL you used for the OpenFaaS portal. You can also set this in the OPENFAAS_URL environmental-variable.
faas-cli deploy -f hello-java.yml –gateway 127.0.0.1:31112
Test the function
You can now test the function via the OpenFaaS UI portal, using Postman, the CLI or even curl.
export OPENFAAS_URL=http://127.0.0.1:31112/
echo -n “” | faas-cli invoke hello-java
Add a third-party dependency
You can now add a third-party dependency such as okhttp which is a popular and easy to use HTTP client. We will create a very rudimentary HTTP proxy which simply fetches the text of any URL passed in via the request.
- Scaffold a new template
$ faas-cli new –lang java8 web-proxy
- Edit build.gradle
At the end of the dependencies { add the following:
implementation ‘com.squareup.okhttp3:okhttp:3.10.0’
implementation ‘com.squareup.okio:okio:1.14.1’
- Edit Handler.java
Paste the following into your Handler.java file, this imports the OKHttpClient into scope.
package com.openfaas.function;
import com.openfaas.model.IHandler;
import com.openfaas.model.IResponse;
import com.openfaas.model.IRequest;
import com.openfaas.model.Response;
import java.io.IOException;
import okhttp3.OkHttpClient;
public class Handler implements IHandler {
public IResponse Handle(IRequest req) {
IResponse res = new Response();
try {
OkHttpClient client = new OkHttpClient();
okhttp3.Request request = new okhttp3.Request.Builder()
.url(req.getBody())
.build();
okhttp3.Response response = client.newCall(request).execute();
String ret = response.body().string();
res.setBody(ret);
} catch(Exception e) {
e.printStackTrace();
res.setBody(e.toString());
}
return res;
}
}
- Package, deploy and test
faas-cli build -f web-proxy.yml
faas-cli push -f web-proxy.yml
faas-cli deploy -f web-proxy.yml
Now test it out with a JSON endpoint returning the position of the International Space Station.
$ echo -n “http://api.open-notify.org/iss-now.json” | faas-cli invoke web-proxy
Parse a JSON request
You can use your preferred JSON library to parse a request in JSON format. This example uses Google’s GSON library and loads a JSON request into a Java POJO.
- Create a function
faas-cli new –lang java8 buildinfo
- Edit build.gradle
Within dependencies add:
implementation ‘com.google.code.gson:gson:2.8.5’
- Edit Handler.java
package com.openfaas.function;
import com.openfaas.model.IHandler;
import com.openfaas.model.IResponse;
import com.openfaas.model.IRequest;
import com.openfaas.model.Response;
import com.google.gson.*;
public class Handler implements com.openfaas.model.IHandler {
public IResponse Handle(IRequest req) {
Response res = new Response();
Gson gson = new Gson();
BuildInfo buildInfo = gson.fromJson(req.getBody(), BuildInfo.class);
res.setBody(“The status of the build is: ” + buildInfo.getStatus());
return res;
}
}
class BuildInfo {
private String status = “”;
public String getStatus() { return this.status; }
}
Build, push and deploy your function.
Now invoke it via the CLI:
$ echo ‘{“status”: “queued”}’ | faas invoke buildinfo
The status of the build is: queued
Donwload and parse JSON from an URL
In this example I will show you how to fetch the manifest file from the OpenFaaS Function Store, we will then deserialize it into an ArrayList and print out the count.
-
Create a function named deserialize
-
Edit build.gradle
Within dependencies add:
implementation ‘com.google.code.gson:gson:2.8.5’
implementation ‘com.squareup.okhttp3:okhttp:3.10.0’
implementation ‘com.squareup.okio:okio:1.14.1’
- Handler.java
package com.openfaas.function;
import com.openfaas.model.IHandler;
import com.openfaas.model.IResponse;
import com.openfaas.model.IRequest;
import com.openfaas.model.Response;
import com.google.gson.*;
import okhttp3.OkHttpClient;
import com.google.gson.reflect.TypeToken;
import java.util.ArrayList;
public class Handler implements com.openfaas.model.IHandler {
public IResponse Handle(IRequest req) {
Response res = new Response();
Gson gson = new Gson();
String url = “https://raw.githubusercontent.com/openfaas/store/master/store.json”;
ArrayList<Function> functions = (ArrayList<Function>) gson.fromJson(downloadFromURL(url), new TypeToken<ArrayList<Function>>(){}.getType());
int size = functions.size();
String functionCount = Integer.toString(size);
res.setBody(functionCount +” function(s) in the OpenFaaS Function Store”);
return res;
}
public String downloadFromURL(String url) {
String ret = “{}”;
try {
OkHttpClient client = new OkHttpClient();
okhttp3.Request request = new okhttp3.Request.Builder()
.url(url)
.build();
okhttp3.Response response = client.newCall(request).execute();
ret = response.body().string();
} catch(Exception e) {
e.printStackTrace();
System.out.println(e.toString());
}
return ret;
}
}
class Function {
public String Name = “”;
}
Here is the output:
$ echo | faas-cli invoke deserialize ; echo
16 function(s) in the OpenFaaS Function Store
Wrapping up
We have now packaged and deployed a Serverless function written in Java. The new OpenFaaS watchdog component keeps your function hot and that ensures the JVM is re-used between invocations. This approach enables high-throughput for your code.
Let us know what you think of the new Java template by tweeting to @openfaas or join the Slack community for one of the special-interest channels like #kubernetes or #templates.
Take it further
If you would like to use some other JDK version, a different base-image for the Linux container or even a different build-tool like Maven, you can fork the templates repository and add your own variant.
Contributions are welcome, so if you have an enhancement that will benefit the community, please feel free to suggest it over on GitHub.
The Java 8 + Gradle 4.8.1 template is available here:
https://github.com/openfaas/templates/tree/master/template/java8