Gerbera is a feature-rich and powerful UPnP (Universal Plug and Play) media server with a pleasant and intuitive web user interface, which allows users to stream digital media (videos, images, audio etc..) through a home network and consume it on different types of UPnP compatible devices from mobile phone to tablets and many more.
Gerbera Features:
- Allows you to browse and playback media via UpnP.
- Supports metadata extraction from mp3, ogg, flac, jpeg, etc. files.
- Highly flexible configuration, allowing you to control the behavior of various features of the server.
- Supports user defined server layout based on extracted metadata.
- Support for ContentDirectoryService container updates.
- Offers exif thumbnail support.
- Supports automatic directory rescans (timed, inotify).
- Offers a nice Web UI with a tree view of the database and the file system, allowing to add/remove/edit/browse media.
- Support for external URLs (create links to internet content and serve them via UPnP to your renderer).
- Supports flexible media format transcoding via plugins / scripts and many more including a number of experimental features.
How to Install Gerbera – UPnP Media Server in Linux
On Ubuntu distribution, there is a PPA created and maintained by Stephen Czetty, from which you can install Gerbera using following commands.
$ sudo add-apt-repository ppa:stephenczetty/gerbera
$ sudo apt update
$ sudo apt install gerbera
On Debian distribution, Gerbera is available in the testing and unstable repositories, which you can enable by adding the lines below in your /etc/apt/sources.list file.
# Testing repository - main, contrib and non-free branches
deb http://http.us.debian.org/debian testing main non-free contrib
deb-src http://http.us.debian.org/debian testing main non-free contrib

# Testing security updates repository
deb http://security.debian.org/ testing/updates main contrib non-free
deb-src http://security.debian.org/ testing/updates main contrib non-free

# Unstable repo main, contrib and non-free branches, no security updates here
deb http://http.us.debian.org/debian unstable main non-free contrib
deb-src http://http.us.debian.org/debian unstable main non-free contrib
Then update your system package sources cache and install gerbera with the following commands.
# apt update
# apt install gerbera
For other Linux distributions like Gentoo, Arch Linux, openSUSE, CentOS, etc. follow Gerbera installation guide.
Once you have installed gerbera, start, enable and view the service status using the following commands.
$ sudo systemctl start gerbera.service
$ sudo systemctl enable gerbera.service
$ sudo systemctl status gerbera.service
Note: If gerbera fails to start on your system, you need to do one of the following.
Check if the log file (/var/log/gerbera) has been created, otherwise create it as shown.
$ sudo touch /var/log/gerbera
$ sudo chown -Rv root:gerbera /var/log/gerbera
$ sudo chmod -Rv 0660 /var/log/gerbera
Secondly, define a network interface that your are currently using as the value of MT_INTERFACE environment variable, the default is “eth0” but if you are using wireless, then set this to something like “wlp1s0”. In Debian/Ubuntu, you can set these settings in /etc/default/gerbera file.
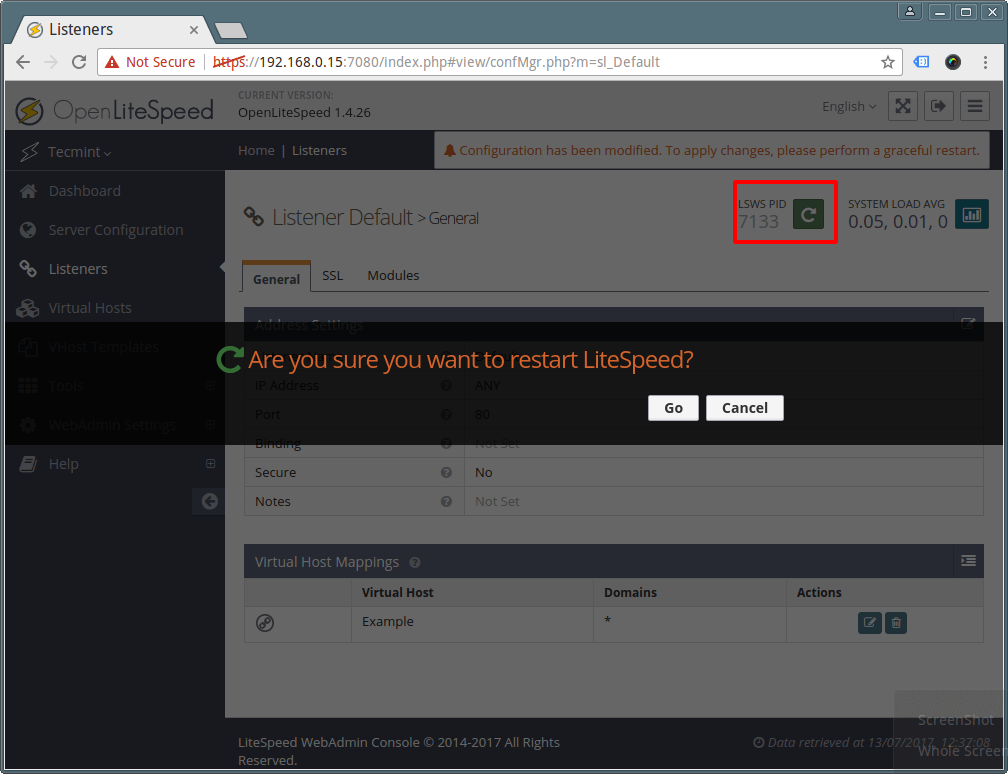
Getting Started with Gerbera Media Server Web UI
Gerbera service listens on port 49152, which you can use to access the web UI via a web browser as shown.
http://domain.com:49152
OR
http://ip-address:49152
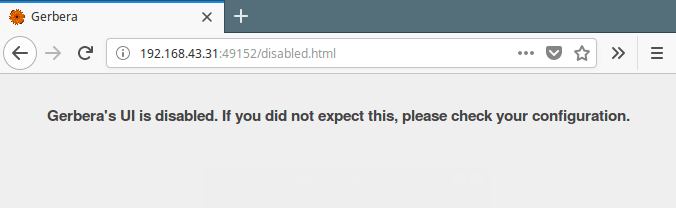
Gerbera UI Error
If you get the error shown in the above screenshot, you need to enable the web UI from the gerbera configuration file.
$ sudo vim /etc/gerbera/config.xml
Change the value enabled=”no” to enabled=”yes” as shown in the following screenshot.
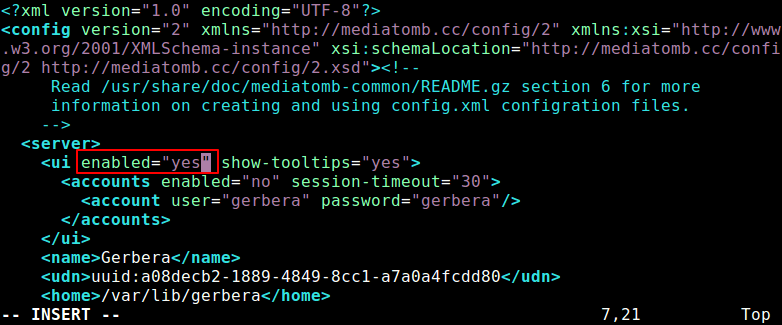
Enable Gerbera UI
After making above changes, close the file and restart the gerbera service.
$ sudo systemctl restart gerbera.service
Now go back to your browser and try to open the UI once more in a new tab, this time around it should load. You will see two tabs:
- Database – shows the files that can be accessed by publicly.
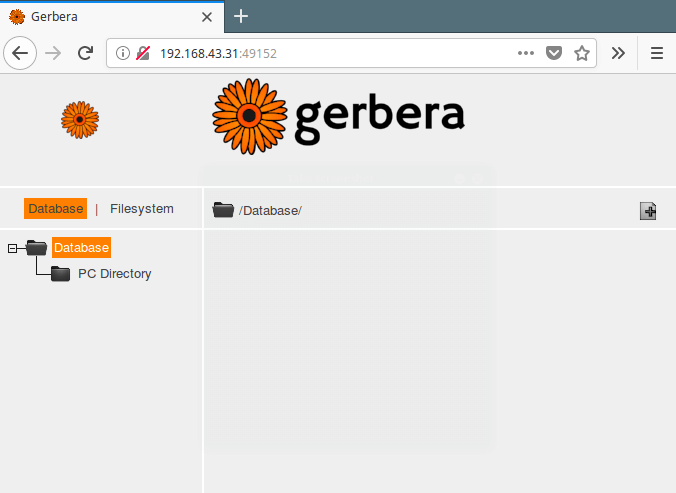
Gerbera Web UI Database
- Filesystem – this is where you can browse files from your system and select them for streaming. To add a file, simply click on the plus
(+)sign.
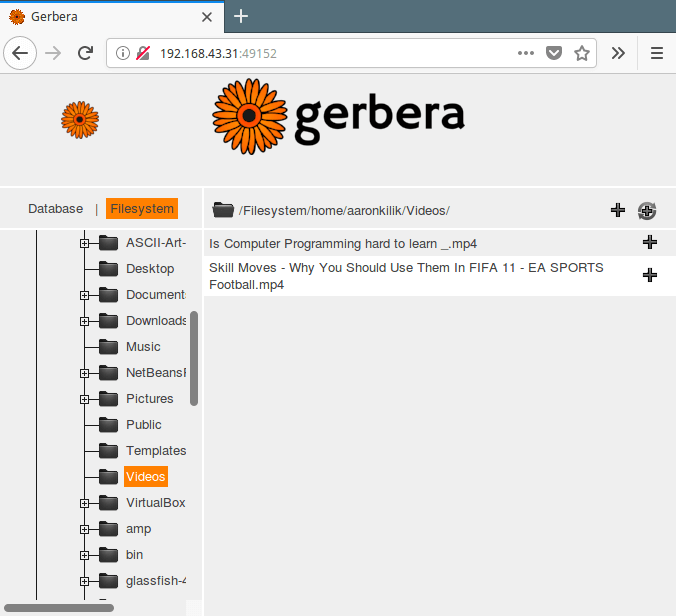
Gerbera File System
After adding files for streaming from the filesystem, the database interface should look like this.
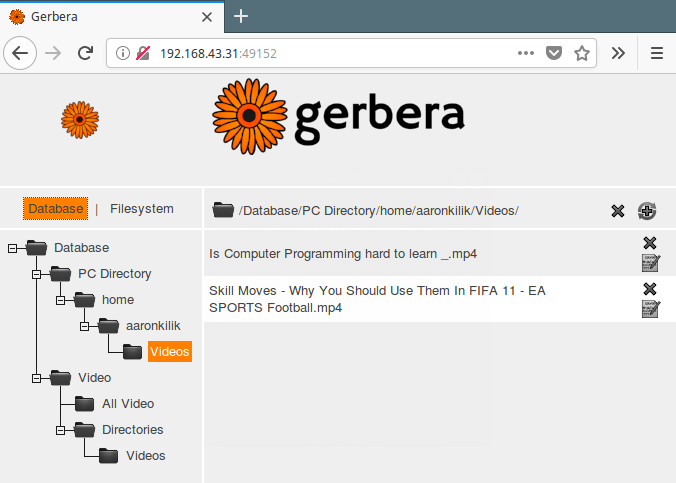
Gerbera Database File System
Stream Media Files Using Gerbera on Your Home Network
At this point you can start streaming media files over your network from the gerbera server. To test it, we will use a mobile phone as a client. Start by installing a compatible upnp application (like BubbleUpnp) on your phone.
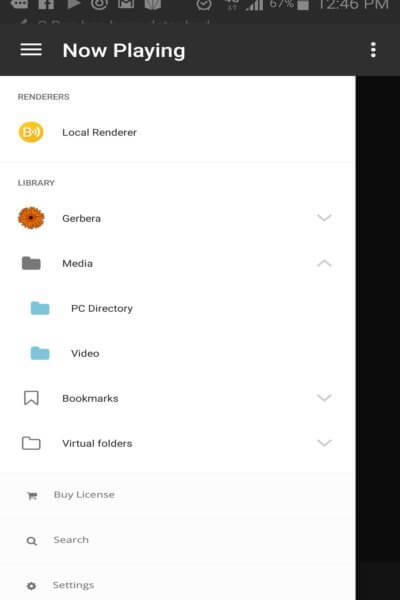
Once installed BubbleUpnp app, open it and on the menu, go to Library and click on Local and Cloud to view available servers, and the gerbera server we created should show in there. Click on it to access added directories and files in them.

Gerbera Media Server
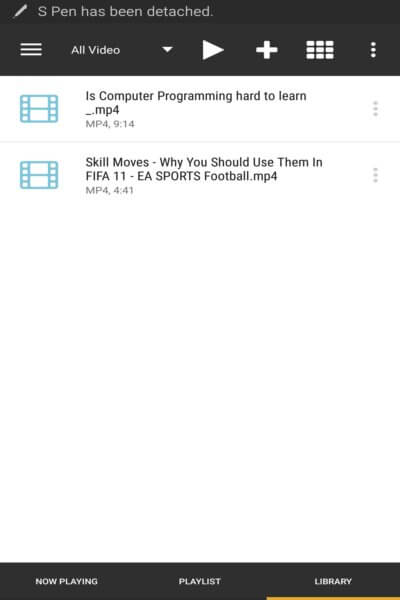
Gerbera Filesystem View
Finally click on a file that you would like to stream.
Stream Files via Gerbera Server
For more information visit, Gerbera Github Repository: https://github.com/gerbera/gerbera.
Gerbera is a feature-rich and powerful Upnp media server, used to stream your digital media through your home network with a nice web user interface. Share your thoughts about it or ask a question via the feedback form.